Horten H.IVb
Czech Master Resin, 1/72 scale
S u m m a r y : |
Catalogue Number: |
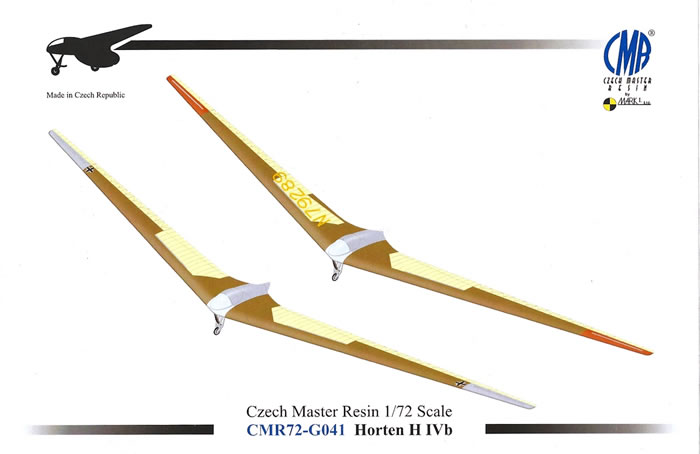
CMR72-G041 Horten H IVb |
Scale: |
1/72 |
Contents & Media: |
Fourteen green and two clear resin parts, with decals for two options. |
Price: |
Available online from Hannants for £13.17, or order through these CMR stockists. |
Review Type: |
First Look. |
Advantages: |
Very good quality, few parts. |
Disadvantages: |
No parts map or numbering (but a minor issue). |
Conclusion: |
This is a good quality, nicely detailed, yet simple kit. Some care with the tubular framework in the cockpit is advisable, but this said, it should still be a simple kit to build.
Highly Recommended. |
Reviewed
by Mark Davies

HyperScale is proudly supported by Squadron.com
Background
The radical Go 229 jet flying-wing often comes to mind when the Horten brothers are mentioned. However, it was designing and building sports gliders that got them noticed by the RLM and set them on the path to designing this radical WW2 jet.
Walter Horten was aged 11, and his brother Reimar just ten, when they began to design and build their own flying models. They started to learn how to fly in 1927, and both had gained their C glider license by 1932. Walter also had his A2 power licence by this time, whilst Reimar was not far behind from getting his. They began work on their first man-carrying glider in 1933 and built this at their home. This was the H.I flying wing; and it won a prize for its original design at the 1934 Rhön Gliding competition. Despite this award, it was prone to yawing and had poor longitudinal control at low speeds.
The brothers scrapped the H.I and began work on the H.II. They fitted it with an 80-hp motor and used it for extensive flight-testing. The Hortens were called up for military service, but they continued to design flying wing gliders. Two more H.II’s were built and entered in the 1937 Rhön competition by the Luftwaffe, but they did not achieve much. However, General Ersnt Udet asked Hanna Reitsch to fly the H.II and give her opinion. She thought that the H.II showed promise, but that it needed to have better lateral and directional control.
The next Horten design, the H.III, was built in small numbers whilst the brothers studied at the Bon Technical High School. At the next Rhön competition in 1938 two H.III’s soared to an altitude of 26,000 feet. However, both were destroyed whilst flying inside a cumulonimbus cloud, and one of the pilots died when struck by his glider after bailing out.
The H.IV was the next design; this brought together all that the brothers had learned to date about flying-wing gliders. It wingspan was the same as the H.III’s, but it had a much higher aspect ratio of 21:1 compared to 10.7:1. The H.IV flew very well, and served to confirm the feasibility of the Hortens’ design ideas.
The Germans studied captured P-51 Mustangs and did wind tunnel tests of their laminar-flow wings. The results led the Hortens’ to explore the benefits of a laminar flow wing for a high performance glider (hardly a priority at the time I would have thought!). They modified the H.IV design to use a laminar flow wing that started with the Mustang’s profile at the root but changed towards the tips. Great care was used to prepare the wing and ensure it had a smooth surface. This included keeping dust off with special covers and all handling required gloves to be worn. Despite all of this care, the H.IVb that resulted did not fly well, having an unpleasant tip stall followed by a spin. The first aircraft crashed due to this after getting into trouble inside a cloud. A reduction in span of almost two metres was tried as a fix; but neither this or other attempts worked satisfactorily. The Hortens then returned to projects of greater use to Germany’s war effort, and which would lead to the Go 229.
Previous 1/72-Scale Horten H.IVb kits
I am not aware of any other Horten H.IVb kits, although CMR released their H.IV kit almost seven years ago (see CMR72-G028).
Overview
The kit comes packaged in CMR’s now standard sturdy top opening box. I think that the box-art looks bland compared to CMR’s usual style; the simplified illustrations appear unfinished to me, but this matters little. The parts and decals are in heat-sealed plastic bags, which in turn are sealed in a further bag with the instructions.
The instructions are simple and effective enough, taking up just A-4 page. At first, I thought the lack of a parts and numbering to be of no consequence given the kit’s simplicity. But on reflection, I think that having a parts map and numbering them in the constructional diagrams would be helpful. It took me several looks to realise that there is a diamond structure made from four lengths of thin resin between the exposed wing rib frames within the cockpit. I think that this would have been far more apparent had the parts been numbered. This however is really a minor matter; most people would realise what is required after some study of the instructions.
The parts count is low due to the glider’s simple lines and the kit’s one-piece wing. Some nice detail is included with the finely cast parts. The quality of the parts appears faultless with no pin-holes evident. They need only some cleaning up here and there, with just a little flash to eliminate. My sample’s wings looked reasonable at first glance, but a closer look revealed some curvature. Long thin casts such as these will have some warping as an unavoidable result of the process used to make them. Fortunately, it is easy to rectify; just tape the wing to a flat surface and heat the resin using hot water or a hair dryer, then cool in cold water.
The Airframe
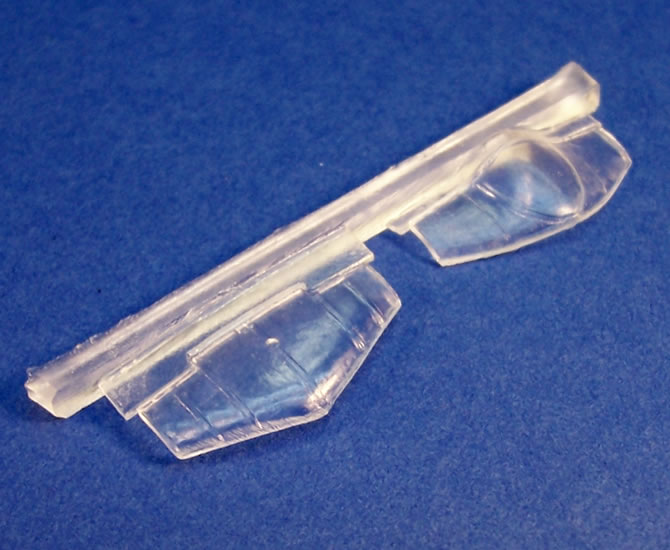
As with the original, the kit’s cockpit detail is simple. A single casting provides the prone pilot’s bench, some tubular framing, a pair of arm rests, and the controls. There are four very fine resin rods that form the diamond structure mentioned earlier. On the real glider this braced the structure between the front of the inboard wing ribs, the front spar and the “nose”. CMR include a photo image of the cockpit with the large access hatch open. With careful study this can be used to guide the layout of the framework. Personally, I would replace the four pieces of resin with plastic rod or stretched sprue as this is the easiest way to ensure these parts are straight. The cockpit glazing is made of clear resin in two parts. These are quite good, but will still benefit from extra light polishing and a dip in Future.
The kit includes the large access hatch as a separate item. I feel this has more to do with engineering a void for the pilot’s bench than as an option for displaying an open cockpit. In the real H.IVb the pilot’s legs were within the streamlined bulbous protrusion beneath the wing’s rear centreline. However, on the kit this are is cast as a solid flat area, as is what would be open structure in the rear of the wing’s centre. This is not a criticism; the detail as provided will be absolutely fine for a closed cockpit. A full cockpit interior would have required a very fragile centre section and led to structural issues as a result of this. I think CMR did the right thing by engineering the kit with a one-piece wing that is optimised for closed cockpit display.
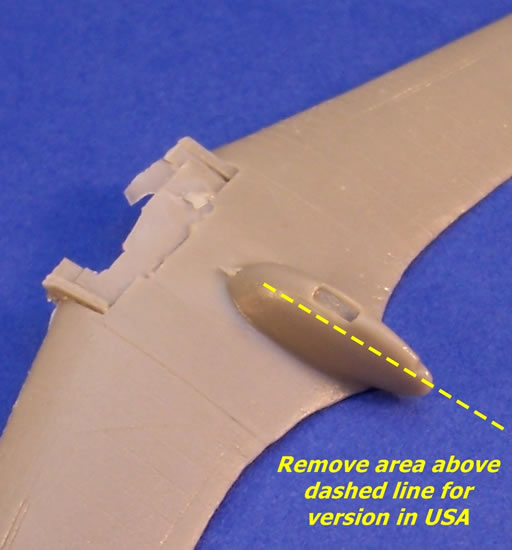
The kit includes two nose wheel options. The real nose leg dropped away leaving the nose skid to retract flush under the centre wing. There is a solid rear skid for the machine in the USA that replaced the small rearward and half-recessed wheel used in Germany. This requires that the recessed wheel well and surrounding area be cut off from the underside bulge and to be replaced by the skid part. All that remains to be added is a small pitot that must be scratch-built.
Overall, assembly of the kit looks to be very simple, but the fitting of the framework that protrudes into the nose area should be done with care.
Colours & Markings
The reverse side of the instructions has a paint and markings guide for the two colour scheme options. These are for the H.IVb during its time at Göttingen, Germany in 1945, and as seen in the USA in 1950. Colour notes and paint names are in English, as is all other text. Based on my previous experience, CMR’s decals are very good quality.
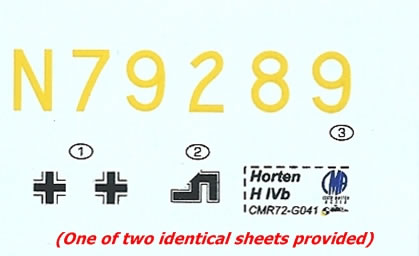
The kit’s has two identical decal sheets that combine to provide enough markings to finish either scheme.
This is a great little kit of an impressive looking glider. The quality of components is excellent and I think it will be an easy build if care is taken with the framing. My little niggle about no parts map or numbering is a minor matter, as I think most would figure things out as I did.
CMR have a huge range of gliders in 1/72-scale, most of which are conventional design. To have some kits of the Horten flying wing gliders is a real plus, as they look quite stunning and are most interesting in my view. I am inclined to think that this kit will find buyers other than regular glider fans for these very reasons.
I highly recommend this kit.
Thanks to CMR by Mark 1 Ltd for the review samples.

Review Text and Blue Background Images Copyright © 2012 by Mark Davies
Page Created 4 September, 2012
Last updated
4 September, 2012
Back to HyperScale Main Page
Back to Reviews Page
|
 Home
| What's New |
Features |
Gallery |
Reviews |
Reference |
Forum |
Search
Home
| What's New |
Features |
Gallery |
Reviews |
Reference |
Forum |
Search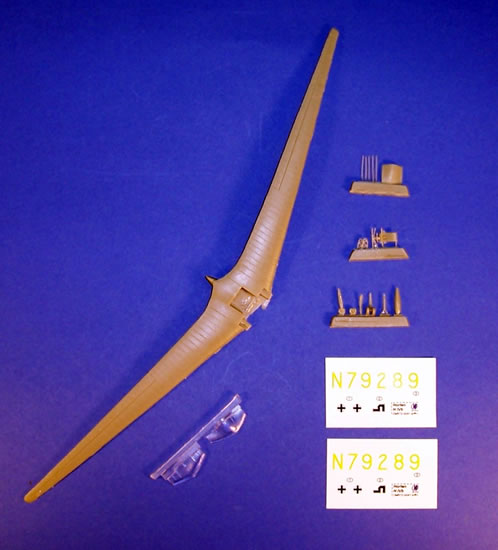
_fs.jpg)
_fs.jpg)
_fs.jpg)
_fs.jpg)
_fs.jpg)
_fs.jpg)
_fs.jpg)