Tamiya's 1/72 Corsairs
An Unexpected Journey: Boyington’s Corsair(s)
by Val “Sea Blue” Bueno
 |
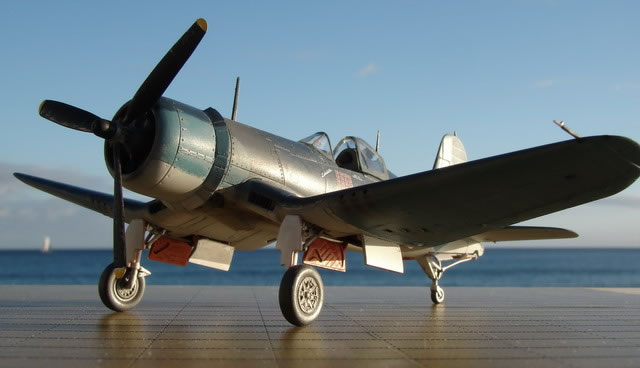
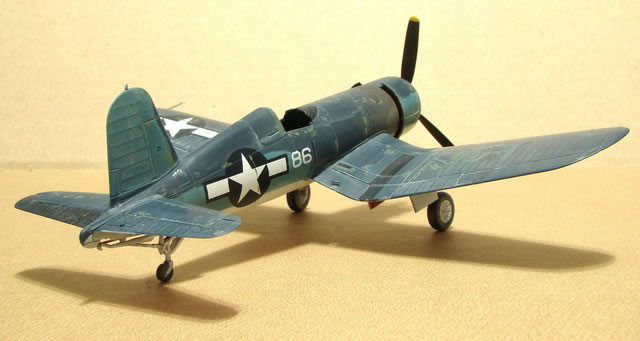
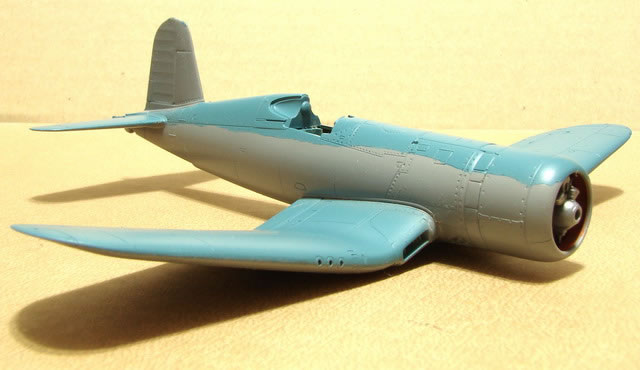
F4U-1 Birdcage Corsair |

Tamiya's 1/72 scale F4U-1 Birdcage Corsair is available online from Squadron
With the announcement of the 1/32nd scale Birdcage Corsair from Tamiya, I figured I’d better get cracking on my long stashed 1/72nd scale Birdcage Corsair. I’d already built the 1/48th scale Corsair as a Mall Model, so it was time to continue the Corsair scale triumvirate.
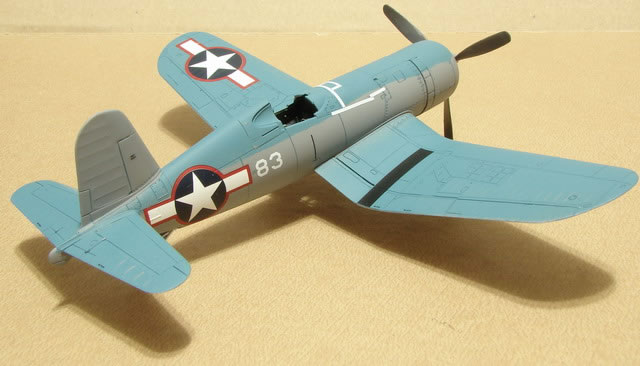
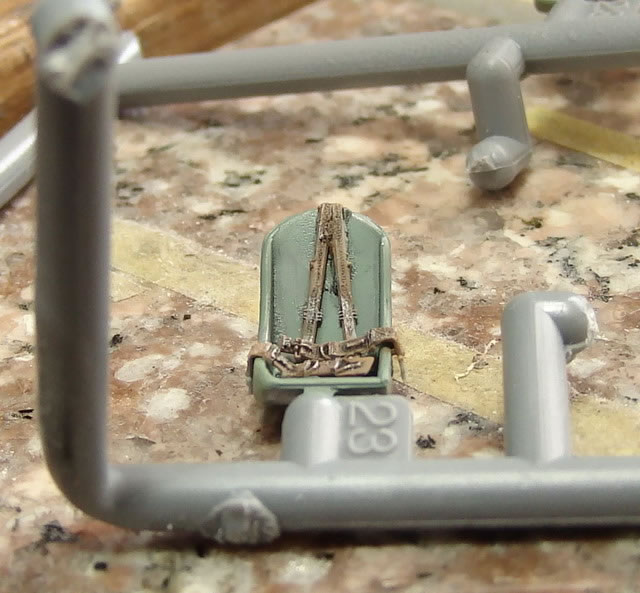
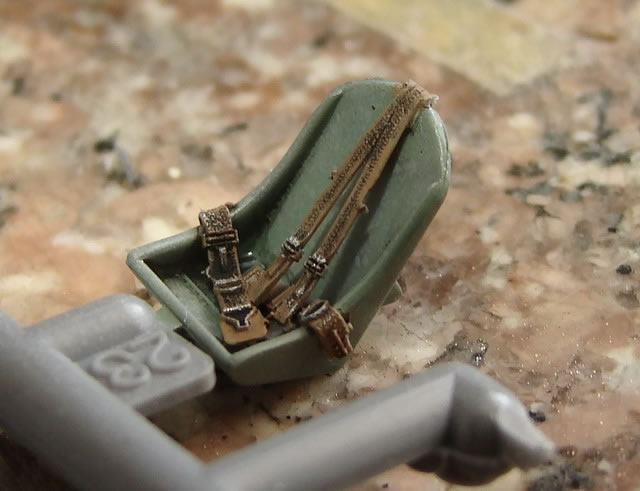
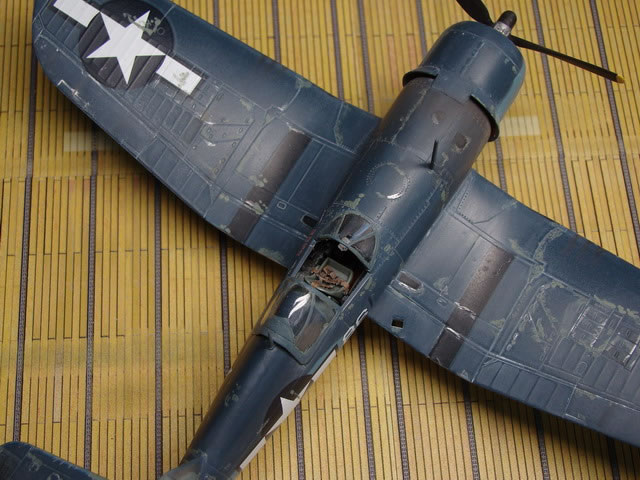
Unlike the 1/48th scale kit, this one doesn’t have folding wings, so it will be a nice quick build. The cockpit was built stock with the only addition being the Fine Molds US Seat belts. These things are TINY! I used regular Tamiya Extra Thin Cement to glue these to the seat and after it had fused with the seat, a little more to make them a bit easier to bend. The interior areas were painted Interior green in the cockpit and salmon in the tailwheel bay and all other interior spaces. This is in line with photos I have seen of recent salvaged and restored Corsairs. The turtle back area and canopy are the main visual differences between the F4U-1 Birdcage Corsair and the later -1A Corsair. I used the parts from the main sprue and made sure they lined up with the fuselage sides. Any gaps would be along the seam between the parts and thus easy to fix.
The wings were glued together and the seams cleaned up. Very easy. Again, the flap part from the main sprue was added to the model. The engine was assembled, painted and added to the front of the assembled fuselage. I rummaged through the box looking for the cowl when I found a little plastic bag with the parts for the birdcage Corsair.
Uh Oh.
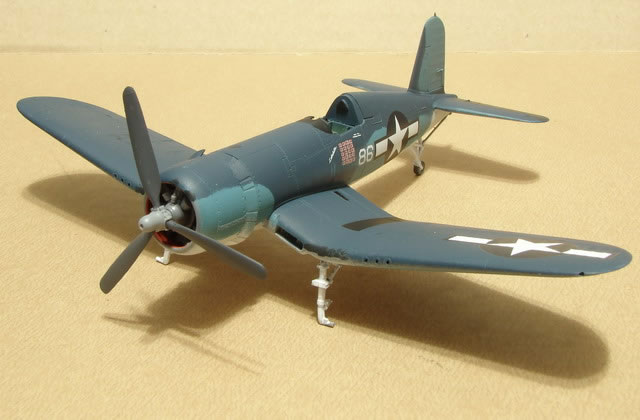
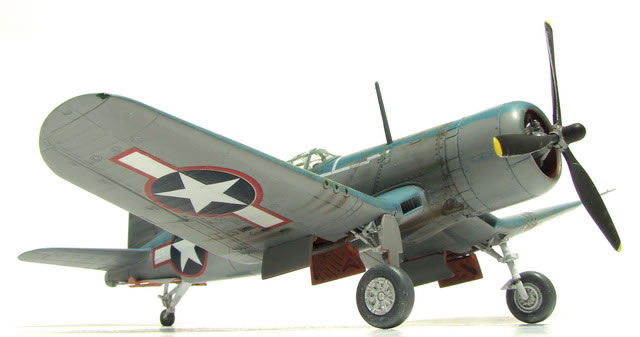
Having inadvertently converted Tamiya’s Birdcage Corsair into a F4U-1A Corsair I started to look through my decal bank for decals of Gregory Boyington’s Lucybelle. No Luck. I pulled out the original F4U-1A release and again no Lucybelle decals. I finally went to HLJ’s site and looked at Tamiya’s Corsair kits and lo and behold, they had released a boxing of the Corsair with Lucybelle markings. Ever since I did Revell’s 1/32nd scale and 1/72nd Corsair in these markings, I’ve wanted Tamiya’s one in 1/72nd scale. So I ordered the kit and went ahead and continued the build and paint of my -1A Corsair.
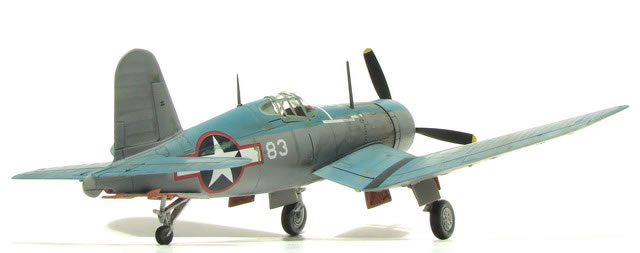
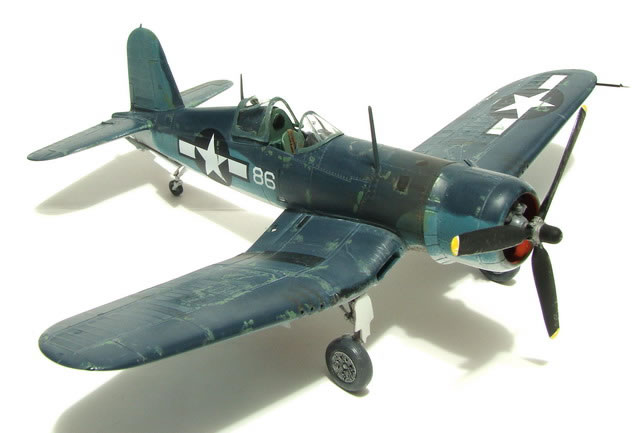
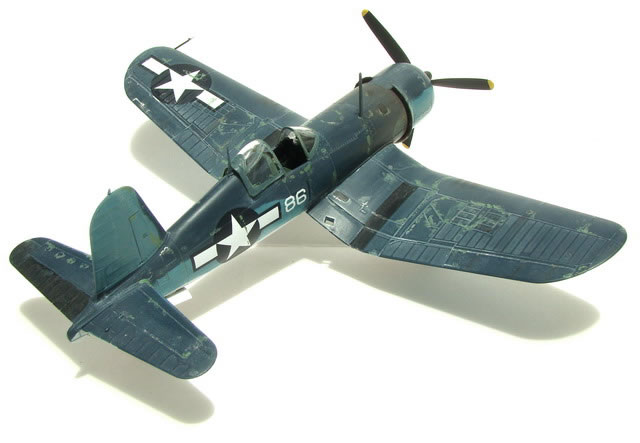
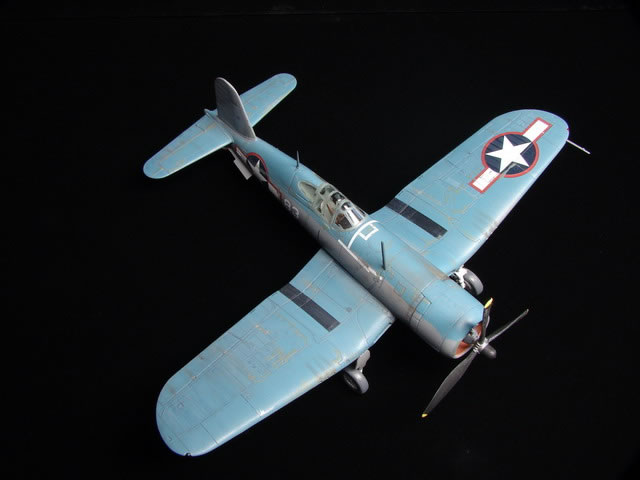
Tamiya spray paints were used throughout. Insignia white for the underside, Intermediate Blue for the sides and fin and Navy Blue for the rest. The not-so-pink-anymore Silly Putty slugs masked off the previously painted areas and once all was cured, the paint was given my usual polishing with 3200 and 4000 grit sanding pads. Now all I have to do is wait for the Lucybelle decals in the Boyington boxing of this kit to arrive.
Let’s Try This Again
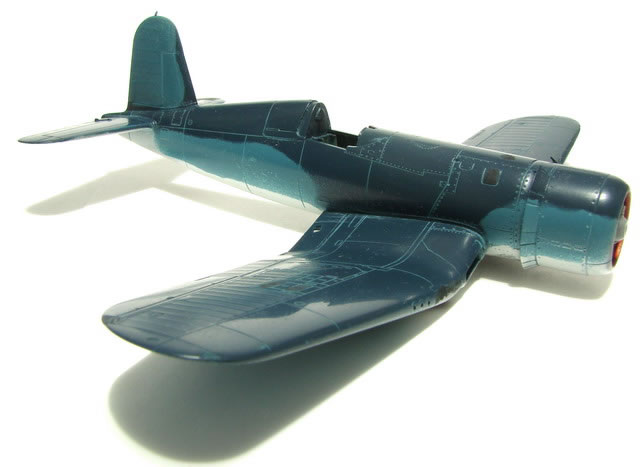
Once the proper F4U-1A kit arrived from HLJ, the first thing I did was attach the correct Birdcage parts to the fuselage and the correct flap to the wing.
You would think that all the lessons learned during the build of the first Corsair would be applied to the second Corsair. You are assuming any learning was going on. Sorry Tenax breath, not so. Because I was rushing and because I was sleepy, I made several building errors while bashing together the second kit, the worst of which was fitting the wings to the fuselage. I used a rubber band to close a gap at the wing root and thus when the rubber band was released; the wingtips were well above the top of the fuselage. I had to break the wingroot join, apply more Tamiya extra thin and place my tool box on top of the model to flatten out the wing dihedral. It worked and the model looked better.
Following upon the heels of the dihedral dilemma, I dropped the cowl with the engine stuck inside. The little modelling gremlins decided to have fun with me and the they caught the flying cowl in mid air then hid it for three days. The cowl is approximately ¾ “in diameter and ¾” tall. How can something this big go missing for three days? Yes, my place is a dirty stinking mess of plastic parts, plastic dust and plastic kits, but still; I should have found the thing in ten minutes. That’s why I think I am infested with modelling gremlins in addition to the now mutated carpet monster. Since I took out the carpet, the carpet monster had to morph into the hardwood floor monster, but that’s another story. I finally wrenched the cowl from the death grip of the modelling gremlins by trading an Airfix kit of a Val dive bomber for the single Tamiya part. I guess that’s the going rate for Tamiya parts versus Airfix parts.
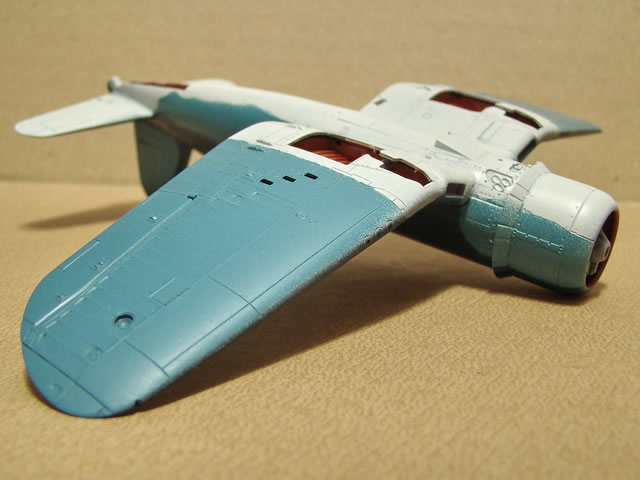
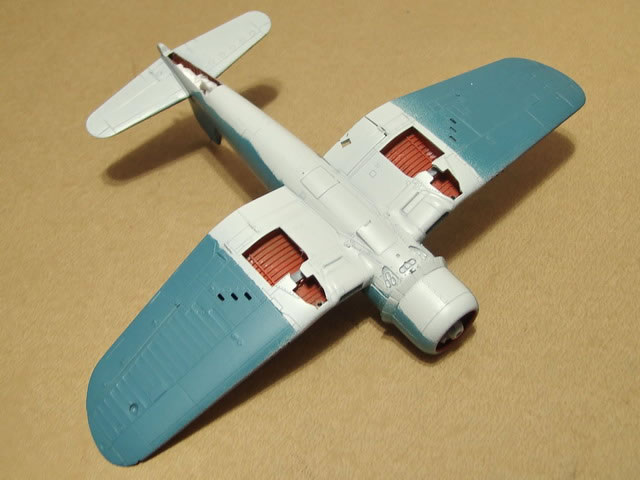
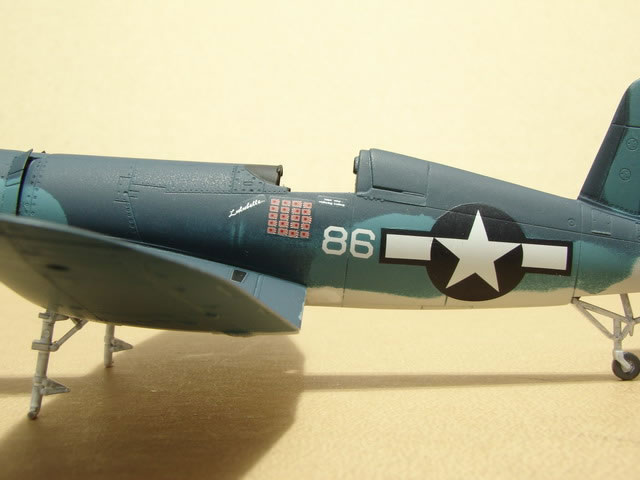
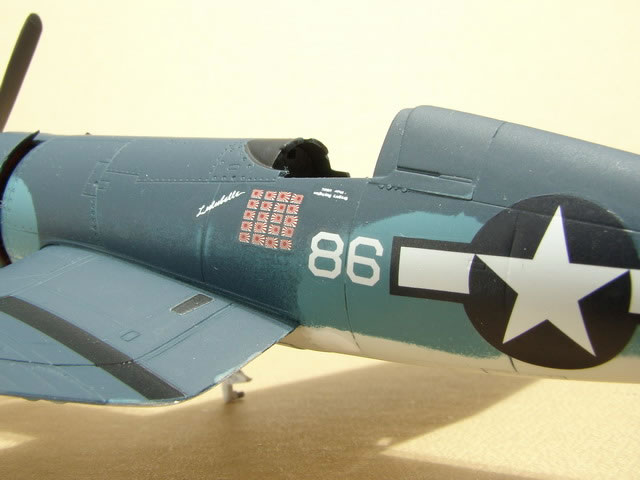
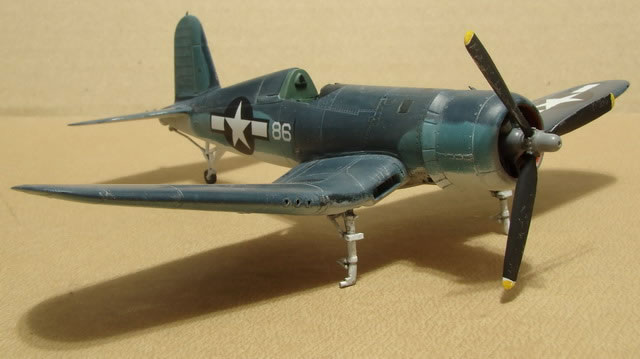
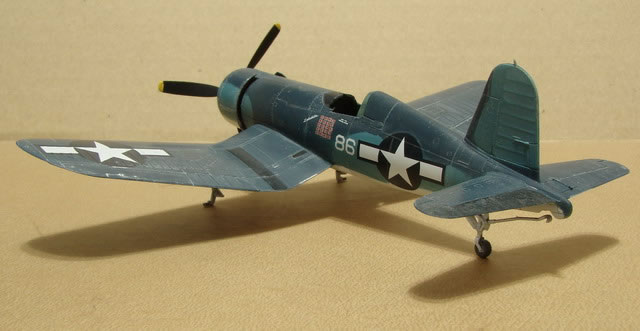
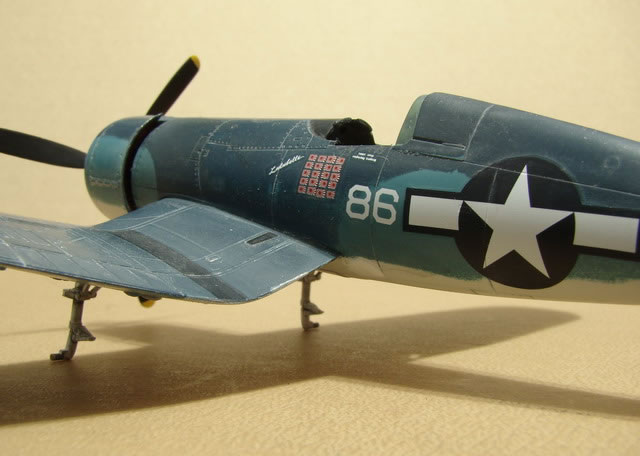
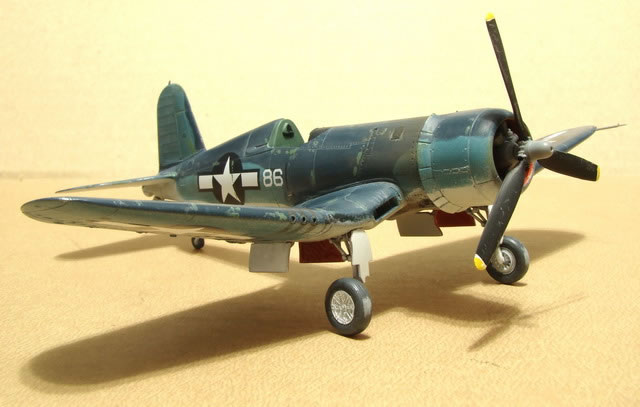
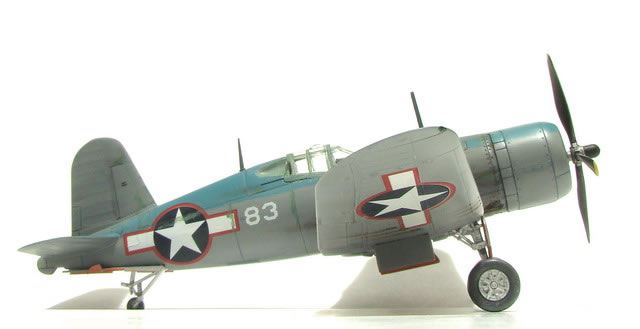
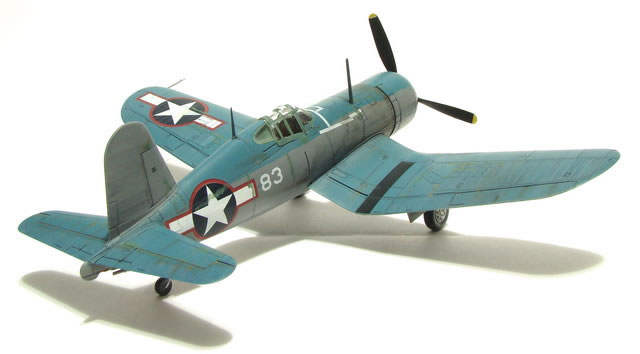
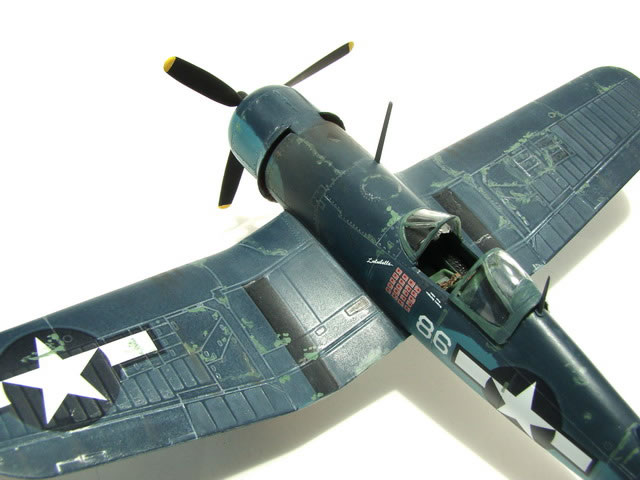
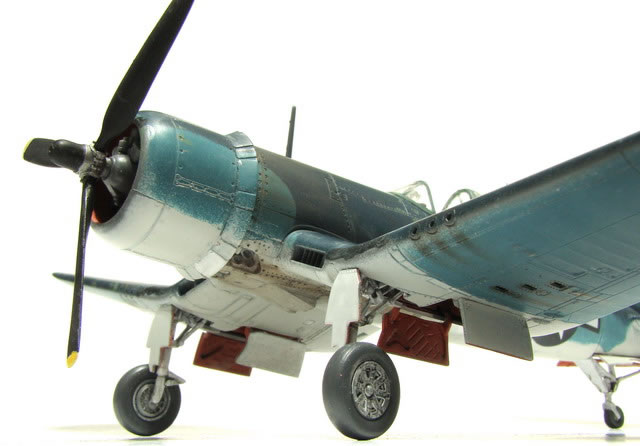
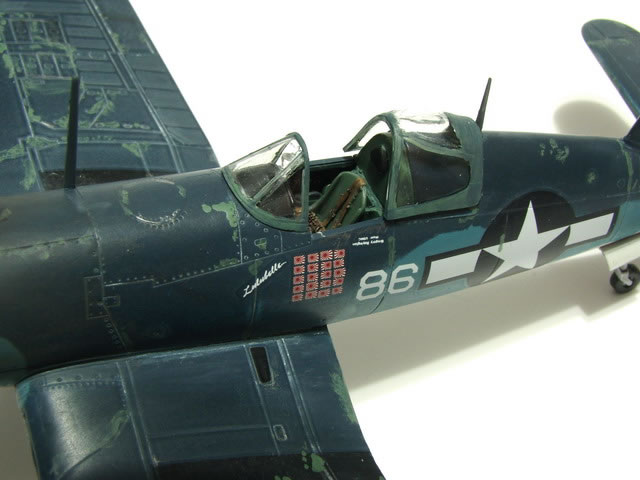
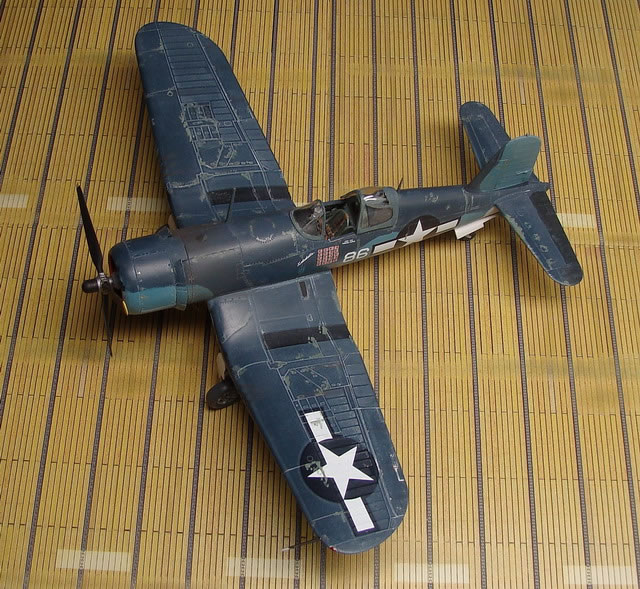
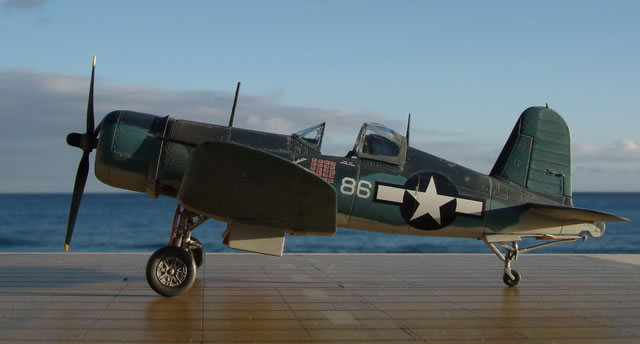
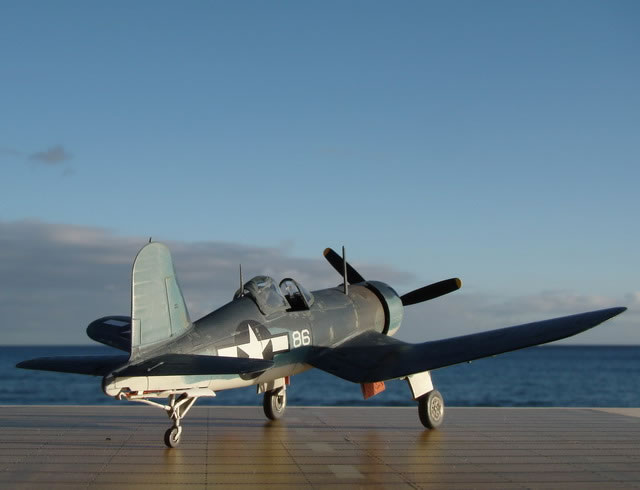
The decals from this kit were applied to the -1A and the Birdcage decals for Boyington’s A/C added to a properly built Birdcage Corsair. The Birdcage was also painted with nothing but Tamiya Spray paints, Intermediate Blue for the overall upper color and Neutral Gray for the lower colors. I think I need to get new pet slugs; these guys are getting a little woozy from all the painting. The gray Silly Putty slugs were used to mask off the two colors while spraying them at 11:00 at night. The paint was polished as usual and decals added.
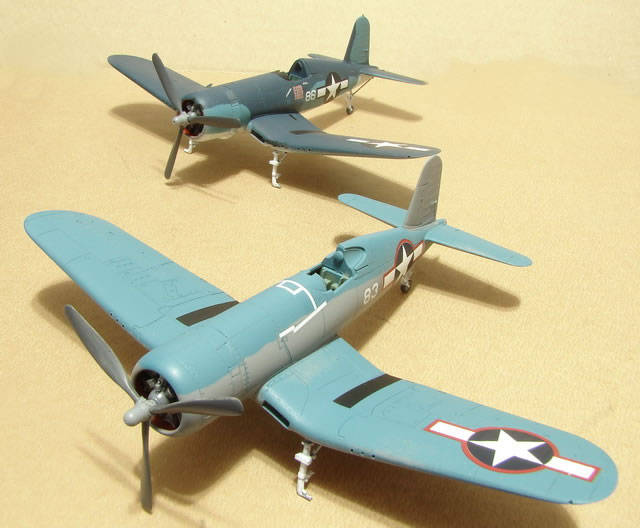
The Lucybelle decals were applied to the -1A kit and the Birdcage decals for Boyington’s aircraft added to the correctly built Birdcage Corsair. The hardest to obtain part of this build was the Tamiya Flat Clear paint. Since the EPA deemed this paint too dangerous to be used in the USA, supplies of this stuff dried up. A search on Amazon’s site listed this item as available and I promptly ordered 10 cans of the stuff. The product was shipped directly from a hobby shop in Gifu, Japan and took two months to arrive on a slow boat from Japan. Once these 10 cans get used up (should only take a year), I know where to buy some more. Now what the hell am I going to do with the 12 cans of Tamiya Satin Clear I picked up?
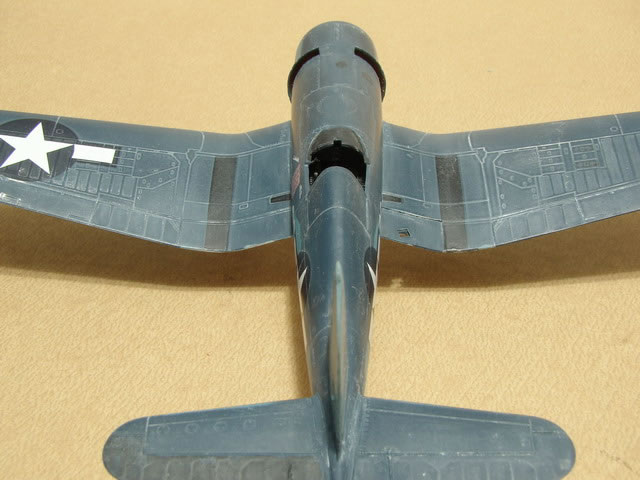
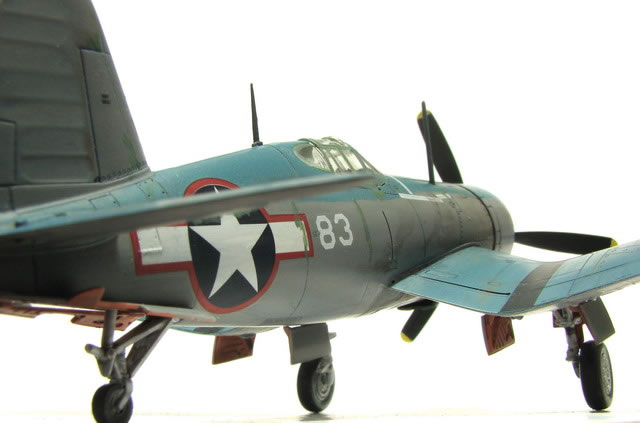
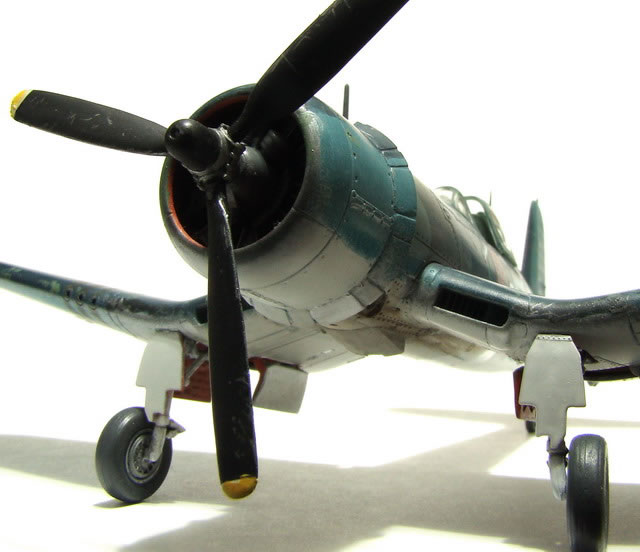
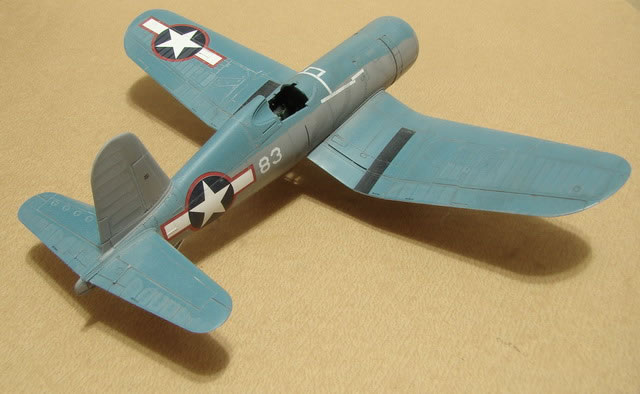
Once clear coated the models were given oil paint washes thinned with non-toxic Duro brand durotine. I used a white wash for Boyington’s tri-color F4U-1A and a dark gray wash for the Birdcage version. Paint chips in Zinc Chromate green were added to the leading edges and gun bay access doors. A Berol silver pencil was used to add a few silver chops of pain to the leading edges of the wings and tail as well as along the walkways and edge of the cockpit. Oil and gasoline spills were added to the forward fuselage. Exhaust stains were added to the underside along with additional oil streaks and stains.
Perusing the many books I have on Corsairs and VMF-214, I noticed that the fuselage behind the cowl got filthy with spilled oil from the engine. Yeeehaaaaw! I may not be able to fling mud on this build, but I sure can fling OIL! Using an oil paint wash, I added as much oil splatter as my heart could handle. The Birdcage Corsair got an extra helping of oil and filth as it has a lighter camo scheme and shows off the filth much better. Now I am satisfied. By the way, I did fling a little mud to the underside of the wings behind the main landing gear. These things did operate off of dirt aprons and PSP runways.
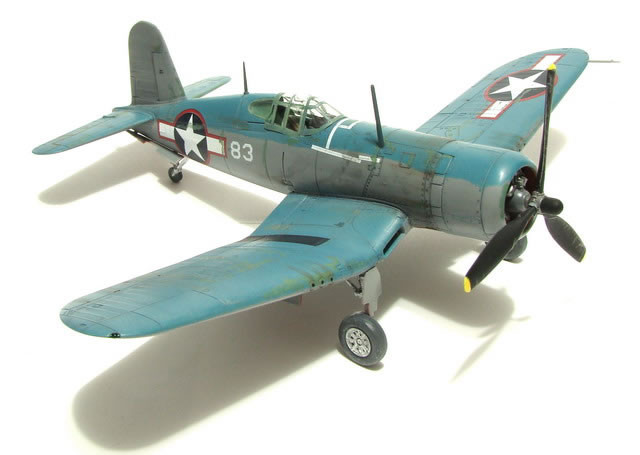
The forward and spine antenna posts were added to the model and strung up with antenna wires. The landing gear legs were added and painted white. The propellers and tires were painted a very dark gray. The canopies were added and that was it. Via a circuitous route, I now had two 1/72 scale models of two of the Corsairs Major Boyington flew in the South Pacific. Now who makes decals for his P-40B he used in the AVG?
Model, Images and Text
Copyright ©
2013 by Valentin E. Bueno
Page Created 19 December, 2013
Last Updated
19 December, 2013
Back to HyperScale Main Page
|
 Home
| What's New | Features | Gallery | Reviews | Reference | Resource Guides | Forum |
Home
| What's New | Features | Gallery | Reviews | Reference | Resource Guides | Forum |