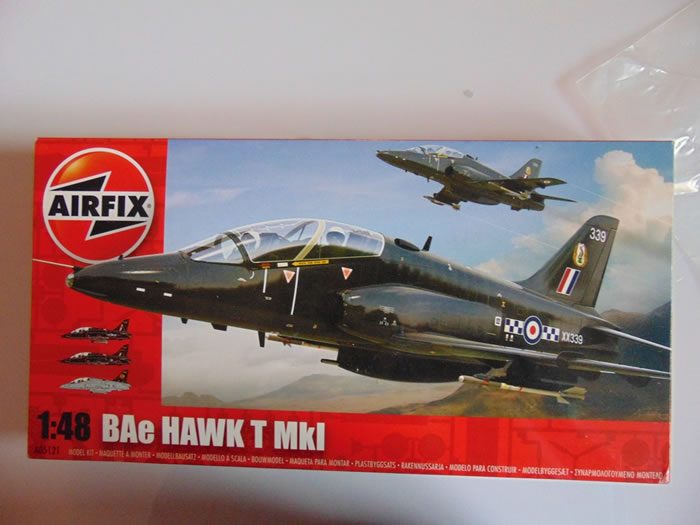
Airfix's 1/48 scale
BAe Hawk T.Mk.IA
by Roger Hardy
 |
BAe Hawk T.Mk.IA |

Airfix's 1/48 Hawk .Mk.1A is available online from Squadron
S
u m m a r y |
| Catalogue Number: |
Airfix Kit No. A05121 -BAe Hawk T.Mk.IA |
| Scale: |
1/48 |
| Contents and Media: |
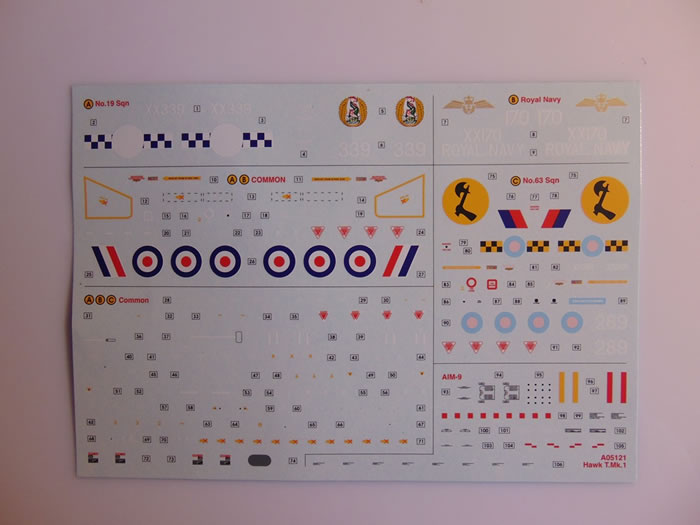
5 sprues light grey plastic parts; one clear; markings for three aircraft. |
| Price: |
£17.99 from Hannants and specialist hobby retailers worldwide
|
| Review Type: |
Build Review |
| Advantages: |
Accurate. Positionable flaps, airbrake, canopy. Three variants. Not over-engineered. |
| Disadvantages: |
This is not ‘New Airfix’. Wheel wells too shallow, intakes blanked off, undercarriage doors too thick. Canopy has MDC moulded into it. Cockpit rather basic. |
| Conclusion: |
To make a really good model requires aftermarket extras but I think that an acceptable model could be built straight from the box. |
 Background Background
For a full history, see http://en.wikipedia.org/wiki/BAE_Systems_Hawk
The Hawk advanced trainer was developed as a replacement for the Folland Gnat. The original intention had been to use the Jaguar as an advanced trainer but the Anglo-French collaborative machine had run out of control and the aircraft was far too large, expensive and complex so Hawker Siddeley (later BAe) decided to develop a suitable replacement as a private venture. The prototype aircraft first flew on 21 August 1974 and the Hawk T1 entered RAF service in late 1976. The first export Hawk 50 flew on 17 May 1976. This variant had been specifically designed for the dual-role of lightweight fighter and advanced trainer; it had a greater weapons capacity than the T.1 and started to exploit the fact that many air forces don’t need supersonic fighters, a subsonic one is good enough. Thus, advanced trainer becomes light fighter and all three variants in this kit are missile-armed.
The Hawk is still in production in the UK and under licence in India by Hindustan Limited with over 900 Hawks sold to 18 operators around the world.
On 22 December 2004, the Ministry of Defence awarded a contract to BAE Systems to develop an advanced model of the Hawk for the RAF and Royal Navy. The Hawk Mk. 128, otherwise designated as Hawk T2, replaces conventional instrumentation with a glass cockpit, to better resemble modern fighter aircraft such as the new mainstay of the RAF, the Eurofighter Typhoon. In October 2006, a £450 million contract was signed for the production of 28 Hawk 128s. The aircraft's maiden flight occurred on 27 July 2005 from BAE Systems' Warton Aerodrome.
ccording to BAE Systems, as of July 2012 they have sold nearly 1000 Hawks so far, with sales continuing to date.
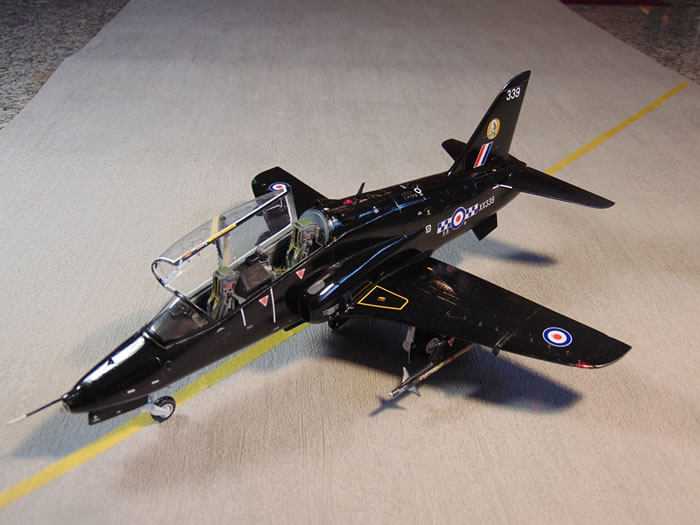
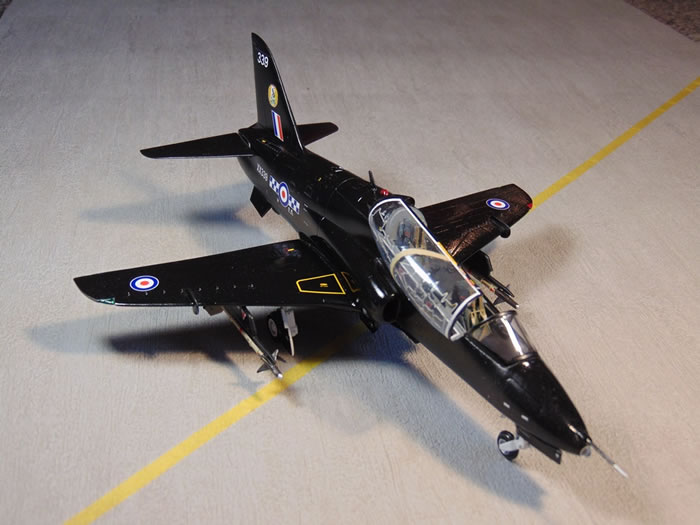
The subject of this kit is the T Mk 1A which is a modified Hawk T1, intended to replace the Hawker Hunter in the RAF's Tactical Weapons Units. A total of 89 aircraft were converted to T Mk 1A standard to carry two underwing AIM-9L Sidewinder air-to-air missiles and a centreline Aden gun pod. This is also the variant used by the RAF's Red Arrows display team; the underbody gun pod is replaced by a fairing used to carry diesel fuel and dye for the display smoke system.
The Kit
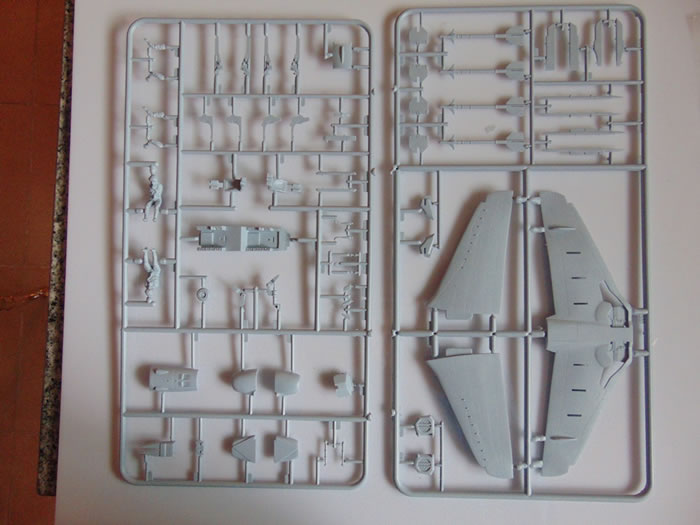
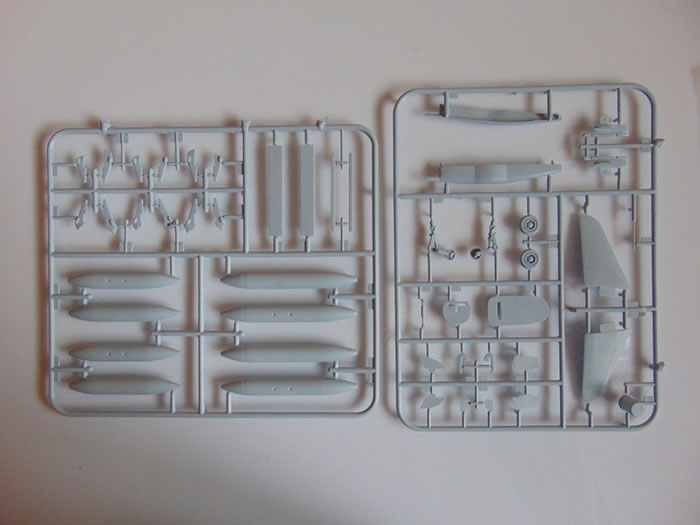
First released (2005) in the Red Arrows boxing (kit number A05111), this release (2010) provides the same five parts trees molded in rather soft light gray styrene plus a single tree of clear parts.
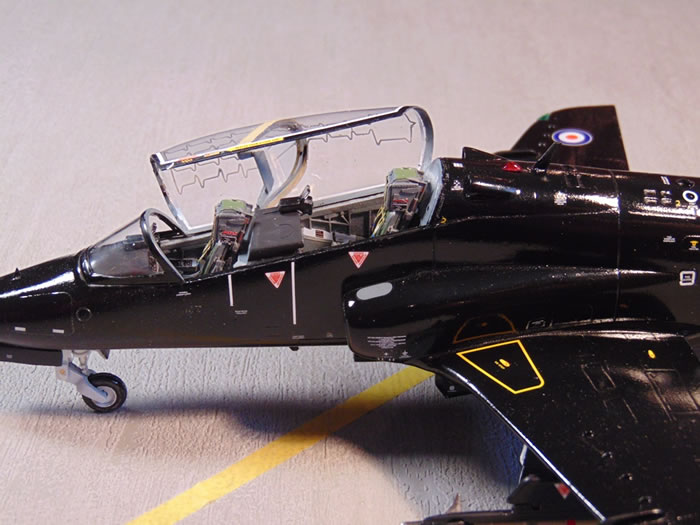
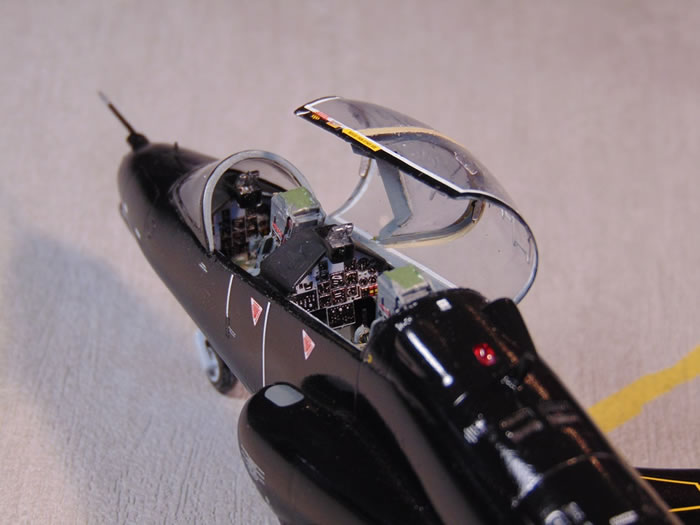
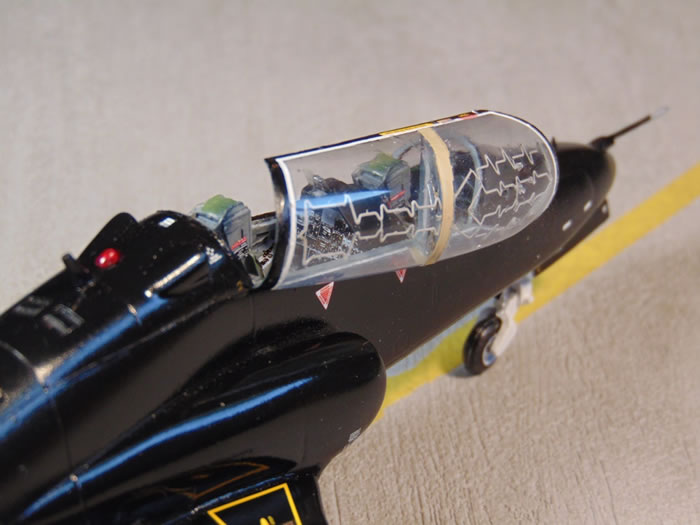
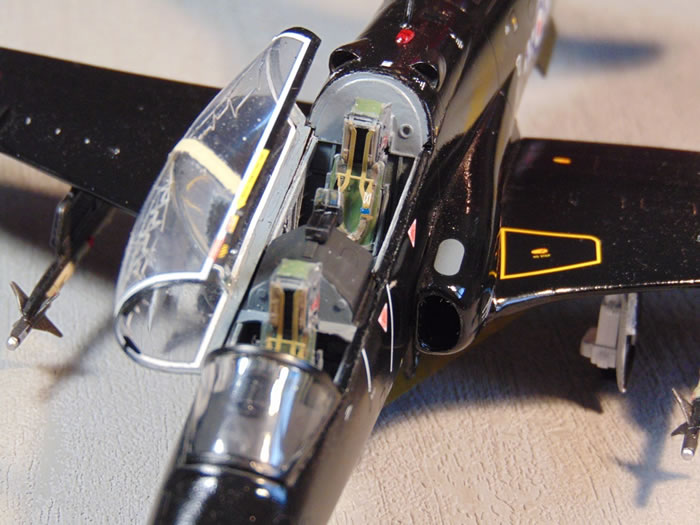
When looking at the contents for the first time I thought that the quality of the moulding (done in India) was pretty good with engraved panel lines and a clean surface finish; the surface finish is slightly rough, giving a matt effect. The plastic is quite soft and easy to work. The ejection seats and cockpit interior look rather basic and the canopy provided has the Miniature Detonation Cord (MDC) moulded into the top and that doesn’t look right at all; a decal would have been much better, as done by Revell at 1/32 scale. It clearly needs a vac-form replacement and that got me thinking more about what the finished model should be all about. The answer is the cockpit, which on the Hawk, is massive, open and deserves to be well-detailed and seen. I wanted to make it as detailed as possible and came across these aftermarket add-ons:
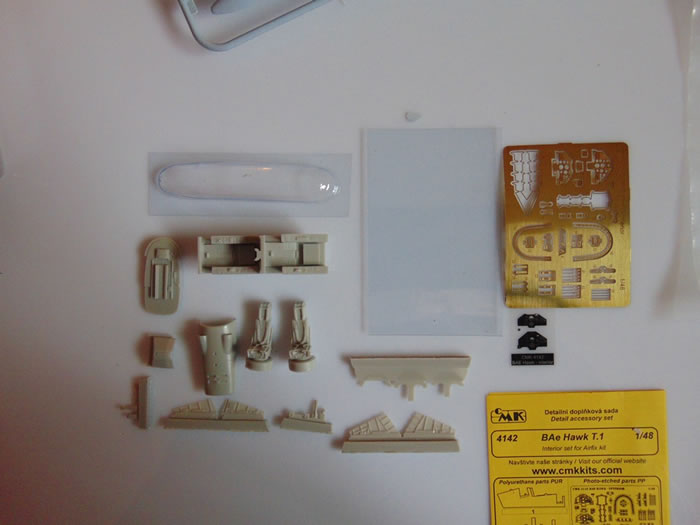
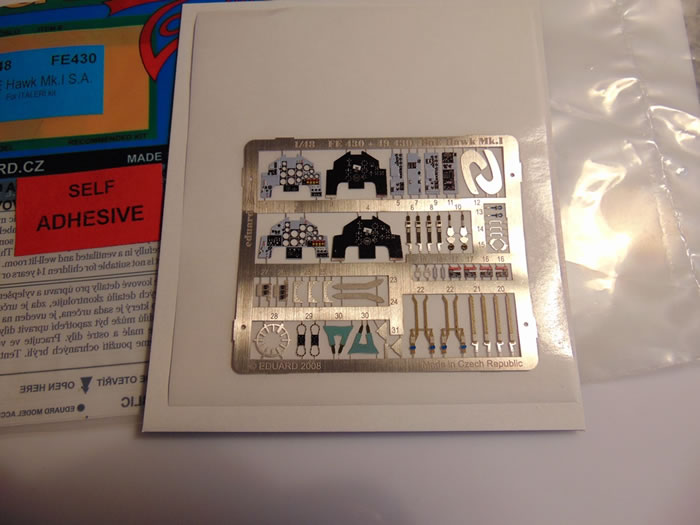
The Eduard set is useful because the CMK resin set has unpainted photo-etch whereas Mr. Ed has wonderful colour-printed instrument panels and belts which just cry out to be used because they are so much better than most modellers could produce. A bit of an additional outlay but I thought it might be worthwhile and I hoped that parts intended for the Italeri offering would fit the Airfix. Airfix provide two nicely-moulded crew members, so if you choose to use these, you need not add harnesses. I don’t put people into my models because I’m not particularly skilled at figure-painting which is another kind of modelling skill.
Incidentally, the kit instrument panels are depicted with a radar scope in the middle of the panel. While one version of the Hawk did get a radar (the single-seater I think), the T Mk 1A did not. The next problem with the kit is that the depth of the main wheel wells is laughably shallow. I've seen some fuss about this in other reviews, but you can cut out the tops of the wells and fuselage and scratch-build some more realistic wheel bays which is what I decided to do. I also think that the undercarriage doors are too thick but, there is another resin set to correct these problems which I decided not to use as the kit was becoming rather expensive and I never agonise too much about the undersides of models. Here it is anyway if you choose to complete the set of after-market add-ons:
Other features are that the ventral speed brake, flaps and canopy are positionable. Hawks are often seen on the ground with flaps down but rarely seen with the airbrakes deployed unless for maintenance.
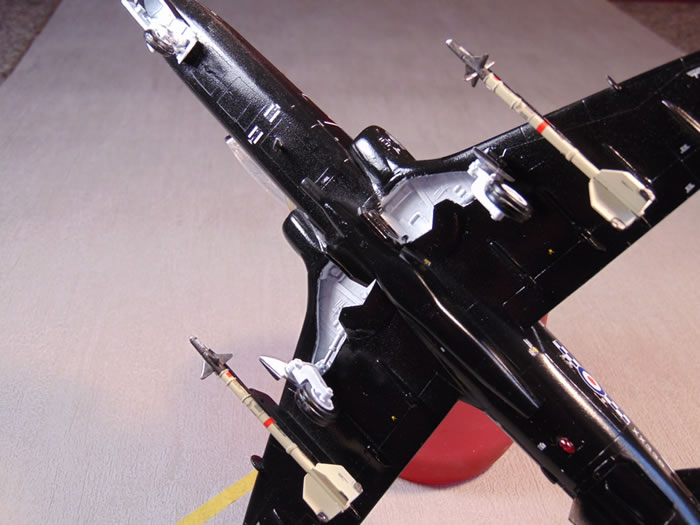
On the external stores list:
-
Smoke Pod (not used in this kit)
-
1 x Gun Pod
-
4 x AIM-9L Sidewinder (only two used)
-
4 x External Fuel Tanks (not used)
The kit provides markings for three RAF/RN examples, two gloss black, one grey:
-
XX336, 19 Sqn, RAF Valley, 2006
-
XX170, NFSF, RNAS Yeovilton, 2007
-
XX289, 63 Sqn, RAF Chivenor, 1990
Decals include all airframe stenciling and stencils for the Sidewinders and look good. Ok, let’s see how it goes together.
Right, the usual first gripe: I know that Airfix is basically paint-maker Humbrol and they want to sell their paints but I prefer to use Tamiya acrylics so it’s necessary to refer to paint-equivalent charts. Here’s one: http://www.ipmsstockholm.org/colorcharts/stuff_eng_colorcharts_humbrol.htm. I’d prefer it if Airfix told us the name of the colours along with their Humbrol paint number.
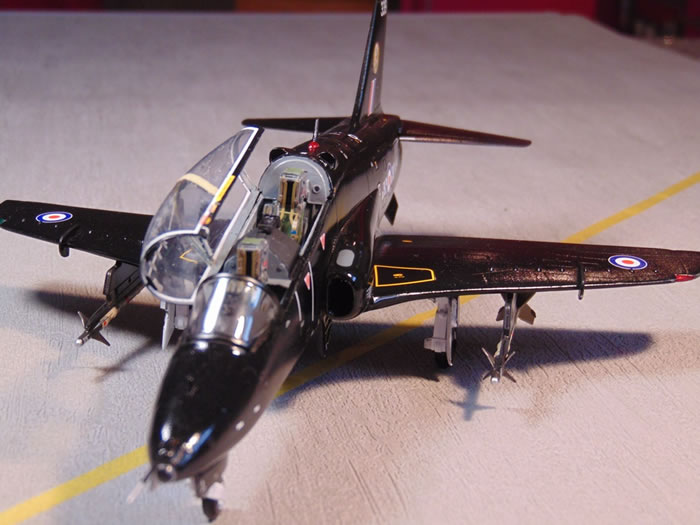
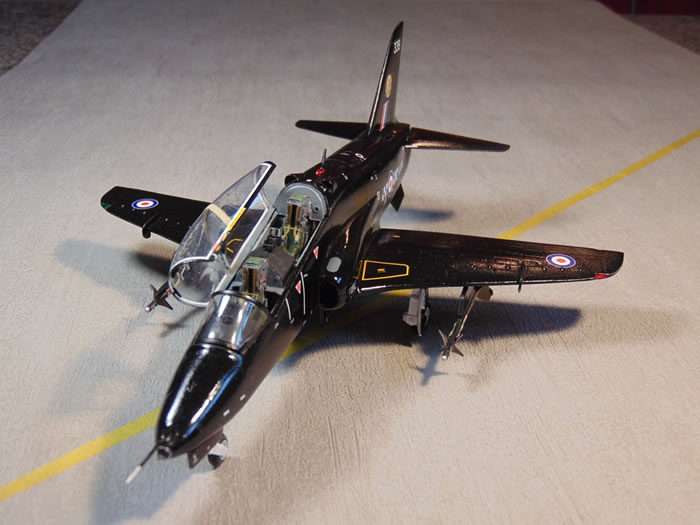
Construction starts by preparing the plastic parts for the resin cockpit and this means scraping off all of the internal sidewall details that Airfix have thoughtfully provided. I trial-fitted the main resin tub and rear bulkhead and saw an immediate problem – how thick should the rear bulkhead be? It has a very deep pouring block on its rear face and there is no indication of how much should be removed. But it more-or-less determines the location of the entire cockpit so it’s important to get it right. More assistance in this area would have been nice, Mr CMK. Because part of the top of the fuselage just aft of the canopy is also provided by CMK and because the rear bulkhead fits onto this, I decided to allow it to locate the entire cockpit which meant that I didn’t need to remove much of the moulding block as the assembly is slightly different from the kit; the resin bulkhead fits onto the fuselage piece whereas the original plastic part fits inside it. It is necessary to remove the fuselage locating pin moulded into the lower fuselage and then entire resin assembly is a precise and snug fit inside the fuselage.
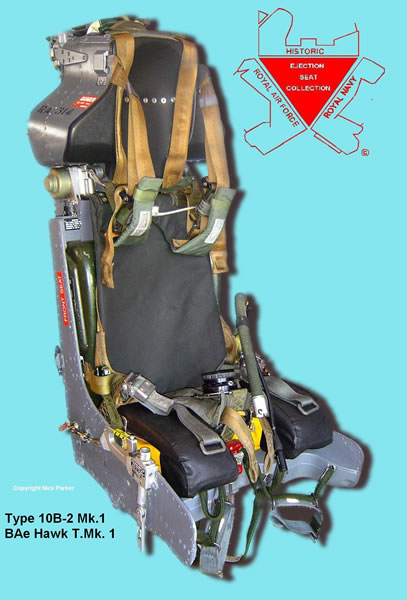
I then started to add the photo-etched parts (having removed the raised detail on the consoles – new throttles to be added later) to make sure that their location was good before painting the remainder of the cockpit interior. Although the Eduard p/e parts are intended for the Italeri kit, they fitted the CMK resin parts with minimum trimming but the self-adhesive aspect needed a lot of help from superglue…probably my mucky fingers! I assembled what I could then inserted the assembly into the fuselage and taped it up. Then I added the sidewalls which are a very precise fit, quite unlike most resin add-ons I’ve used in the past. Even before any painting, the cockpit is starting to look very good. The ejection seats can be done later as they are just popped in. This is what a real one looks like: http://www.martin-baker.com/_images/content/products/ejection-seats/mk10/mk10-2.jpg. The Mk 10 seat did not have pull handles above the head because the introduction of the Mk 2/3 helmet brought in automatic visor lowering on ejection so the face protection of the above-head handles was not required. A nice touch from Airfix is that the decal sheet includes the placards that go either side of the ejection seat headrests (although the Eduard set I used had them as stick-on placards).
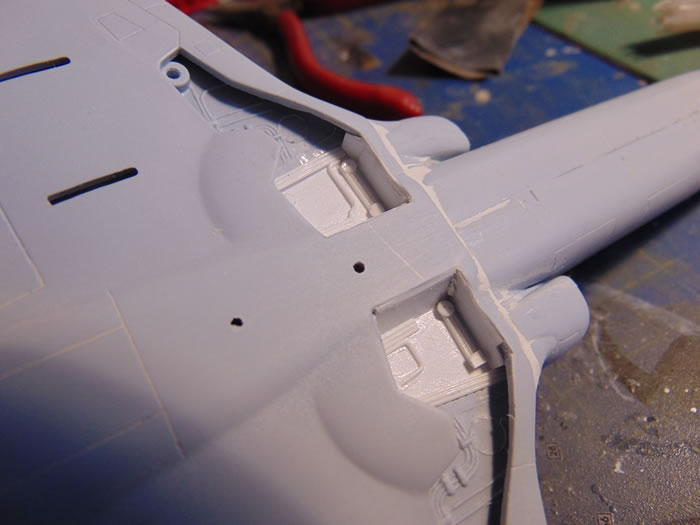
I mulled over whether to do surgery to the main wheel wells and decided to do it. However, it was more complicated than I had expected. Firstly, Idestroyed the internal detail on the existing wheel wells with the razor saw, then found that I had to remove the lower part of the fuselage as well. Then I noticed that the intakes were simply blanked so, while the razor saw was still warm, I thought I’d dig them out as well. That meant that I’d need to put in some rudimentary ducting to hide the front of the wing where it seats into the fuselage. This model was becoming a bit of a challenge! You also need to remove the pins from the insides of the intakes and smooth the internal surfaces which are a bit ropey.
Before sorting out the fuselage and intakes I thought it best to assemble the wing as this holds everything together. Mine was badly distorted and had rather blunt trailing edges. Don’t forget to drill the holes for the pylons and gun pod! You have the choice of cutting out the flaps and using another set provided for flaps down but I was not tempted as I’d already carved this model up enough and I was not convinced that the flaps would be thick enough to fit well; also, it would be necessary to sort out the wing aft section where the flaps are normally nested and I wasn’t sure what profile it should have.
I added the new wheel well top from .015 plastic card cemented to the top of the lower part of the fuselage to give realistic depth and decided to fill in the sidewalls later. I added some pipework from 0.02 Evergreen plastic rod. The wing came next and was a good fit to the fuselage, even with all the carved-away parts. I then closed off the wheel wells with more plastic card. I mixed some Milliput and shaped the inside of the intakes to keep them oval and to hide the front of the wing centre-section. Then, after attaching the intakes, I applied Milliput around the joints that needed some filler: the intakes, wing/fuselage joint and behind the cockpit. I also brushed a little grey primer along the seams.
The airbrake fits well but the flap hinges are all incorrectly numbered in the instructions; the flaps down numbers are for the flaps-up version and vice-versa. As I was planning to do the all-black version, I assembled as much as I could but the holes I drilled for the gun pod turned out to be the holes for the optional stand and I had to guesstimate its correct position. I used the kit wing fences as they fitted better than the p/e parts and looked fine. All it lacked was the undercarriage and transparencies so, ready for masking and painting.
Painting, Markings and Finishing Touches |
Paint was applied with my Testor Aztek A470 airbrush.
One of the reasons I wanted to make this model was to try out Alclad II’s glossy black primer as a final coat. I’ve never had much luck getting a really glossy finish with sprayed acrylics but the Alclad is lacquer and, when used as a primer for the highly reflective paints dries to a really nice shine.
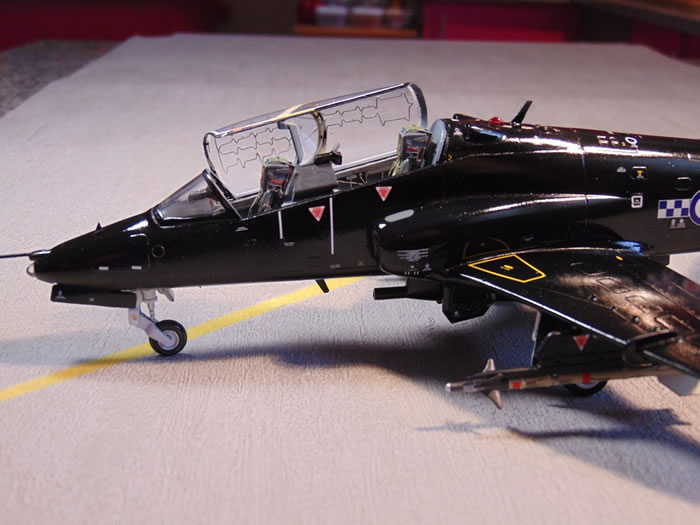
It amazes me how the Powers That Be decide on military aircraft colours. Having gone through every camouflage combination, the world now seems to have accepted that grey national markings with grey squadron markings, grey upper surfaces and grey lower surfaces provides the best way of evading visual detection, at the expense of being excruciatingly tedious, unattractive and boring; I have never been tempted to build anything that grey. But what about trainers? They need to be seen. So, over the decades we’ve seen all-over bright yellow, bright red, raspberry ripple, silver and dayglo, white, silver with yellow stripes…pretty well everything….and yet more recent objective trials showed that all-over gloss black was the best way to be seen! Ho hum. Now, what colour shall we paint our night bombers? I’ll leave you to ponder that one!
I masked the vac-form canopy and painted the internal colours using the kit canopy as a support then sprayed the undercarriage bays white and masked them when dry. The Alclad black went on well with two coats at 15psi and dried to a nice glossy sheen, although it remained very slightly tacky….not so much as to leave fingerprints but enough to pick up dirt from fingertips when handled repeatedly. This was not a problem for me as I had planned to apply an overall gloss varnish at the end to tone in the decals.
Sorting out the vac-form canopy was a pain as it has an additional windscreen halfway along which also has p/e frames and rear-view mirrors, if you choose to use them. I hate vac-form canopies, by the way…nothing sticks to anything…they’re too thin… paint flakes off them…I could go on. I probably will. I used the kit windscreen and wished I could have used the kit canopy but it was really unusable. I had to add the p/e MDC to the canopy so painted them pale grey then positioned them using Micro Kristal Klear as a glue. The canopy looked good but, because it was a skinny vac-form, clearly lacked frame detail plus any form of hinges or latching to the fuselage when closed. Finally, I added the undercarriage, navigation lights and pitot.
The decals are comprehensive and in perfect registerand settled down easily onto the gloss surface. As is usual with Airfix, they are matt which is not appropriate for this gloss aircraft but nothing a coat of gloss varnish can’t sort out at the end. One little gripe is that there are numerous barely visible stenciled instructions but no highly-visible canopy framing. The canopy is such a large feature of the model and this white framing is so difficult to replicate that it would have been a nice touch: I cut some out from spare white decal sheet but they’re a bit too thick. I added a tail navigation light to the bluff back end.
Finally, I sprayed the entire model with Tamiya TS-13 rattle-can gloss varnish which is thin, shiny, dries in minutes and just looks good. I’ve never had any problems with these cans so resort to them when I want to minimize risk as I’ve ruined many a model right at this last stage. This one was fine.
This is not ‘New Airfix’. It was first released in 2005 as a Red Arrow (although this one was released in 2010) so comes after the great Spitfire 22/24/Seafire 47 and Lightnings but is not up to those standards; It came from the same vintage as the 1/72 TSR-2 and falls somewhere between pre-bankruptcy peak and New Airfix but plainly the tooling was done by someone else and corners have been cut.
Consequently, the cockpit is basic, the main undercarriage wheel wells are not really acceptable, the intakes need opening up and the canopy with MDC cord moulded-in needs to be replaced. On the other hand, for a T Mk 1/1A in 1/48 scale, you only have the alternative of Italeri which is probably a better kit but massively over-priced (£27.99)…and you still need a new canopy.
Overall, this model went together well and looks right to me so I am very pleased with the finished result. It required a bit more work than the usual run–of-the-mill kit and if you want to produce a really good model you need the after-market sets to do it justice. However, it probably makes up into a perfectly acceptable model straight-from-the box, albeit not one to satisfy the purist, so on that basis I can recommend it, but with reservations. It’s a lot cheaper than the Italeri version and, at the time of writing, is available from Hannants at a special discounted price which makes me wonder whether someone else is planning on bringing out a better model and they want to clear the stocks. We’ll see.
Model, Images and Text
Copyright ©
2014 by Roger Hardy
Page Created 1 December, 2014
Last Updated
1 December, 2014
Back to HyperScale Main Page
|
 Home
| What's New | Features | Gallery | Reviews | Reference | Resource Guides | Forum |
Home
| What's New | Features | Gallery | Reviews | Reference | Resource Guides | Forum | 