|
de Havilland DH.82a
Tiger Moth
Airfix, 1/72 scale
S u m m a r y : |
Catalogue Number: |
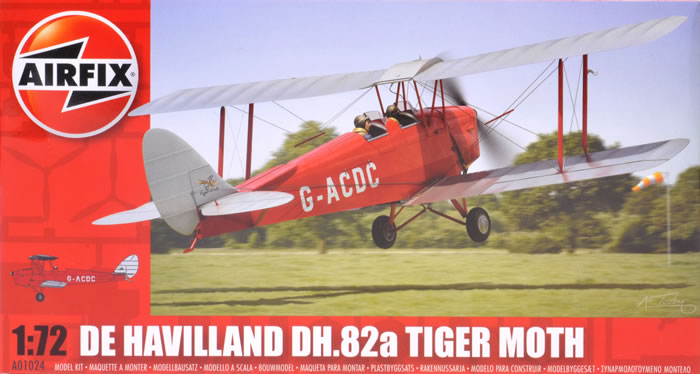
Airfix Kit No. A01024 - de Havilland DH.82a Tiger Moth |
Scale: |
1/72 |
Contents & Media |
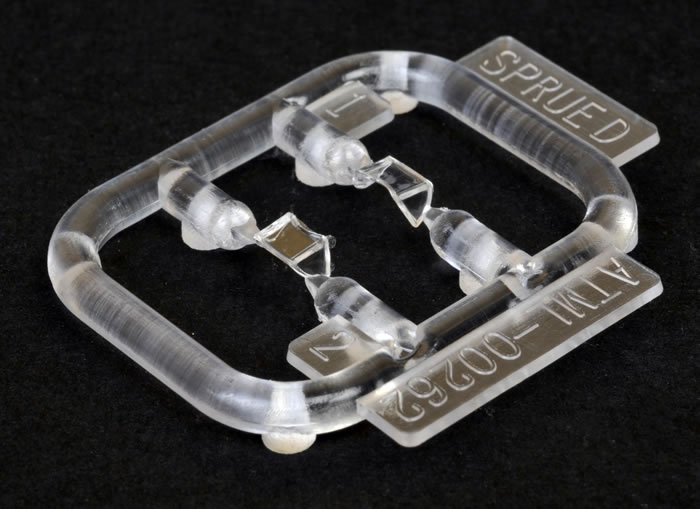
39 grey and two clear styrene parts; with decals for one subject. |
Price: |
Available online from Hannants for GBP £4.99 plus shipping and other stockists worldwide |
Review Type: |
First Look |
Advantages: |
Appears accurate, nice surface detail treatment, bargain price. |
Disadvantages: |
A better-engineered solution to fuselage surgery should have been used to cover the anti-spin strake option. |
Conclusions: |
This is an excellent effort from Airfix and one I rate as being amongst their better 1/72-scale kits. It appears to be generally accurate in outline shape and detail.
The surface detail is very nicely done; whilst the cockpit detail is quite adequate, but will need harnesses added to look its best. I would expect the kit to assemble well, although the need to cut away the rear fuselage decking is a negative, but not overriding feature.
The kit is great value, costing about half its nearest rival’s price whilst generally being a bit superior in appearance and shape, but by comparison only offers one markings option.
This is the best 1/72-scale Tiger Moth kit so far, and a bargain. I recommend it highly. |
Reviewed by Mark Davies

Airfix's 1/72 Hurricane Mk.I Fabric Wing is available online from Squadron.com
Background
The Tiger Moth trainer prototype was derived from the DH.60 de Havilland Gipsy Moth in response to Air Ministry specification 13/31 for an ab-initio training aircraft. The main change to the DH Moth series was necessitated by a desire to improve access to the front cockpit since the training requirement specified that the front seat occupant had to be able to escape easily, especially when wearing a parachute. Access to the front cockpit of the Moth predecessors was restricted by the proximity of the aircraft's fuel tank directly above the front cockpit and the rear cabane struts for the upper wing. The solution adopted was to shift the upper wing forward but sweep the wings back to maintain the centre of lift. Other changes included a strengthened structure, fold-down doors on both sides of the cockpit and a revised exhaust system. It was powered by a de Havilland Gipsy III 120 hp engine and first flew on 26 October 1931 with de Havilland Chief Test Pilot Hubert Broad at the controls.
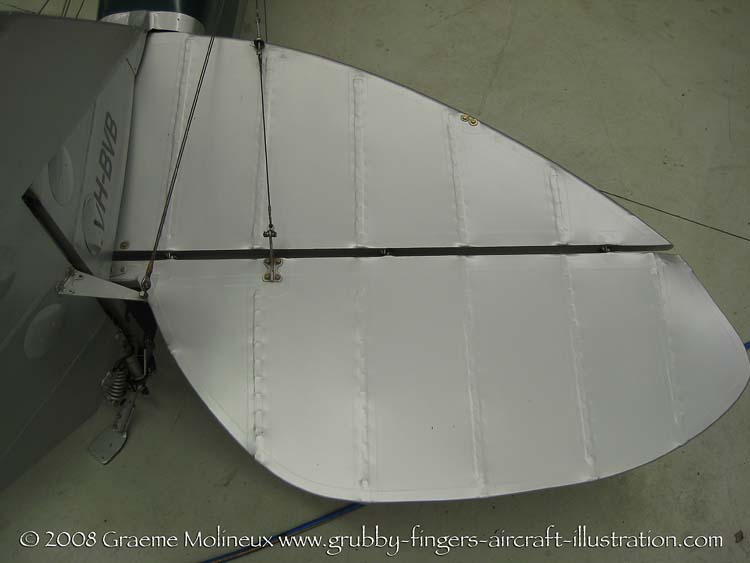
One distinctive characteristic of the Tiger Moth design is its differential aileron control setup. The ailerons (on the lower wing only) on a Tiger Moth are operated by an externally mounted circular bellcrank, which lies flush with the lower wing's fabric undersurface covering. This circular bellcrank is rotated by metal cables and chains from the cockpit's control columns, and has the externally mounted aileron pushrod attached at a point 45° outboard and forward of the bellcrank's centre, when the ailerons are both at their neutral position. This results in an aileron control system operating, with barely any travel down at all on the wing on the outside of the turn, while the aileron on the inside travels a large amount upwards to counteract adverse yaw.
From the outset, the Tiger Moth proved to be an ideal trainer, simple and cheap to own and maintain, although control movements required a positive and sure hand as there was a slowness to control inputs. Some instructors preferred these flight characteristics because of the effect of "weeding" out the inept student pilot.
The RAF ordered 35 dual-control Tiger Moth Is which had the company designation DH.82. A subsequent order was placed for 50 aircraft powered by the de Havilland Gipsy Major I engine (130 hp) which was the DH.82A or to the RAF Tiger Moth II. The Tiger Moth entered service at the RAF Central Flying School in February 1932. By the start of the Second World War, the RAF had 500 of the aircraft in service and large numbers of civilian Tiger Moths were impressed to meet the demand for trainers.
During a British production run of over 7,000 Tiger Moths, a total of 4,005 Tiger Moth IIs were built during the war specifically for the RAF, nearly half being built by Morris Motors Limited at Cowley, Oxford. Approximately 2,000 more were license-built in Canada, Australia, New Zealand, Sweden, Norway and Portugal.
The Tiger Moth remained in service with the RAF until replaced by the de Havilland Chipmunk in 1952, when many of the surplus aircraft entered civil operation. Many other nations used the Tiger Moth in both military and civil applications, and it remains in widespread use as a recreational aircraft in many countries.
Source: Wikipedia
Previous 1/72 scale Tiger Moths
There have been a few Tiger Moth kits in The One True Scale. Airfix released their first in 1957, and unsurprisingly, this had some accuracy issues and simple detail. Aeroclub issued two toolings, the earlier one under their “Aero 72” label, and the second revised moulding branded as Aeroclub*. This was a good although limited-run kit. Pavla* also offers a true limited-run kit that is generally rather good, but is a little expensive. AZ Model has recently released a very nice kit in several different boxings. This uses their new HQ metal-coated moulds and whilst limited run is on the cusp of long-run moulding quality. I have read reviews rating it as the best DH.82 kit to date (written prior to Airfix’s new release), and am inclined to agree.
*Indicates a DH.82c Canadian-built option (or boxing alterative) with enclosed canopy. It should also include different main-wheel position with braked wheels and tail-wheel, and I think a shroud to duct warm air for cockpit heating.
Only the Pavla and AZ Model releases remain in production, and the distribution of these brands is far from universal (especially so in Pavla’s case). This means that there is definitely room in the market for a new, modern, and widely available kit of this historically significant aircraft.
Contents
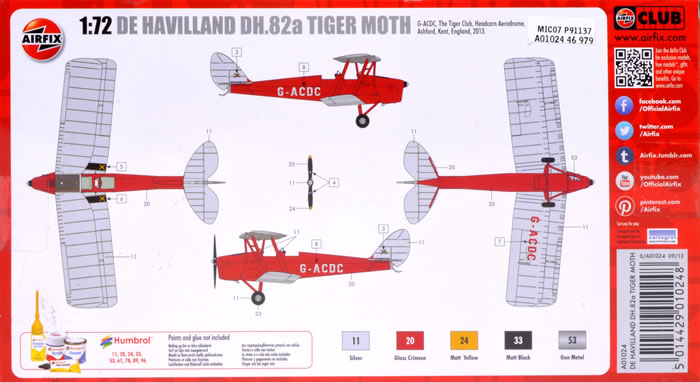
The kit comes in a top-opening box with attractive artwork. The three grey sprues are enclosed in a single heat-sealed plastic bag, with the clear sprue further protected in their own smaller bag; all with acceptably attachment points. The multi-lingual instructions do not have a parts map, and have well-drawn diagrams that are easy to follow, and include a full-page of good rigging diagrams. The painting and markings guide is well done in colour with four views on the box’s rear. Colours are described using generic names where applicable, with paint codes that correspond to the Humbrol range.
The Kit
The first things I think most ask about with each new Airfix release is what the surface detail is like, and how deep the panel lines are? Although in this case there are essentially no panel lines to replicate.
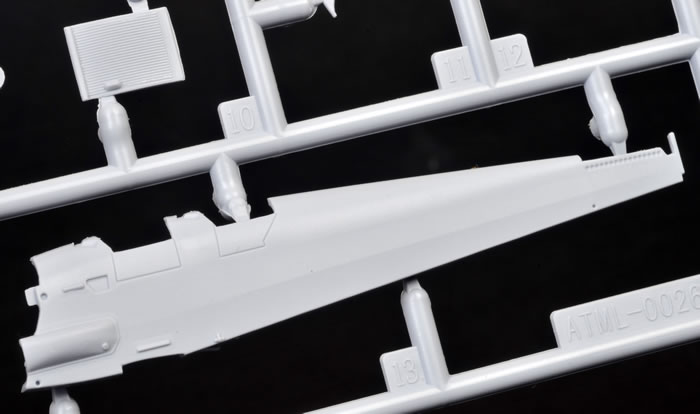
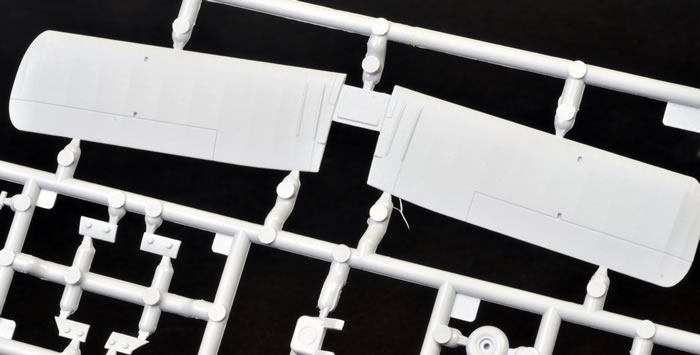
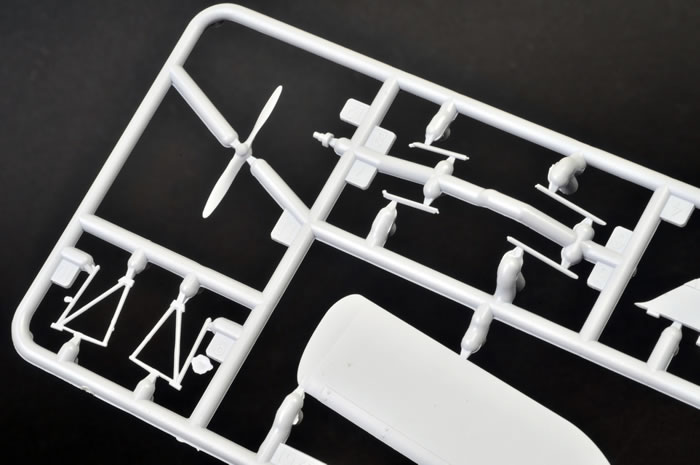
The news is good – There is a delightfully rendered fabric effect on the fuselage and flying surfaces. Other surface detail such as entry-hatch definition, control surface hinge lines, leading-edge slat demarcation, and engine cowl panels are also most acceptable. There are also some very finely moulded and delicate parts such as the pitot integrally moulded with the interplane struts.
Now that we have covered off the surface treatment normal review service can return. But before proceeding I would like to collectively thank the various sites I have linked to for their efforts; the results of which have enabled me to illustrate various points mentioned in my review. I would encourage readers to take a look at the sites these images are posted on, as they will find plenty to interest the Tiger Moth enthusiast.
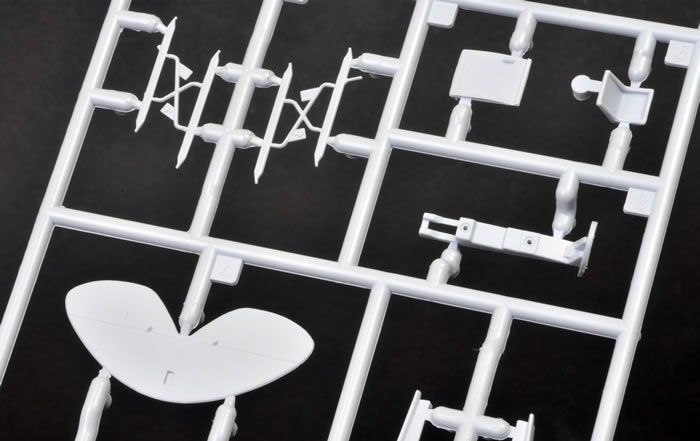
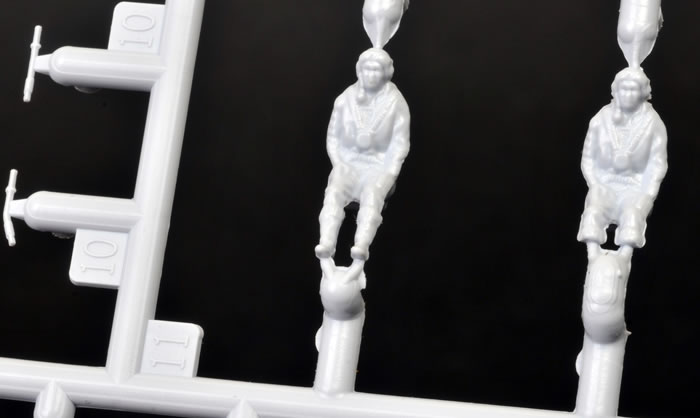
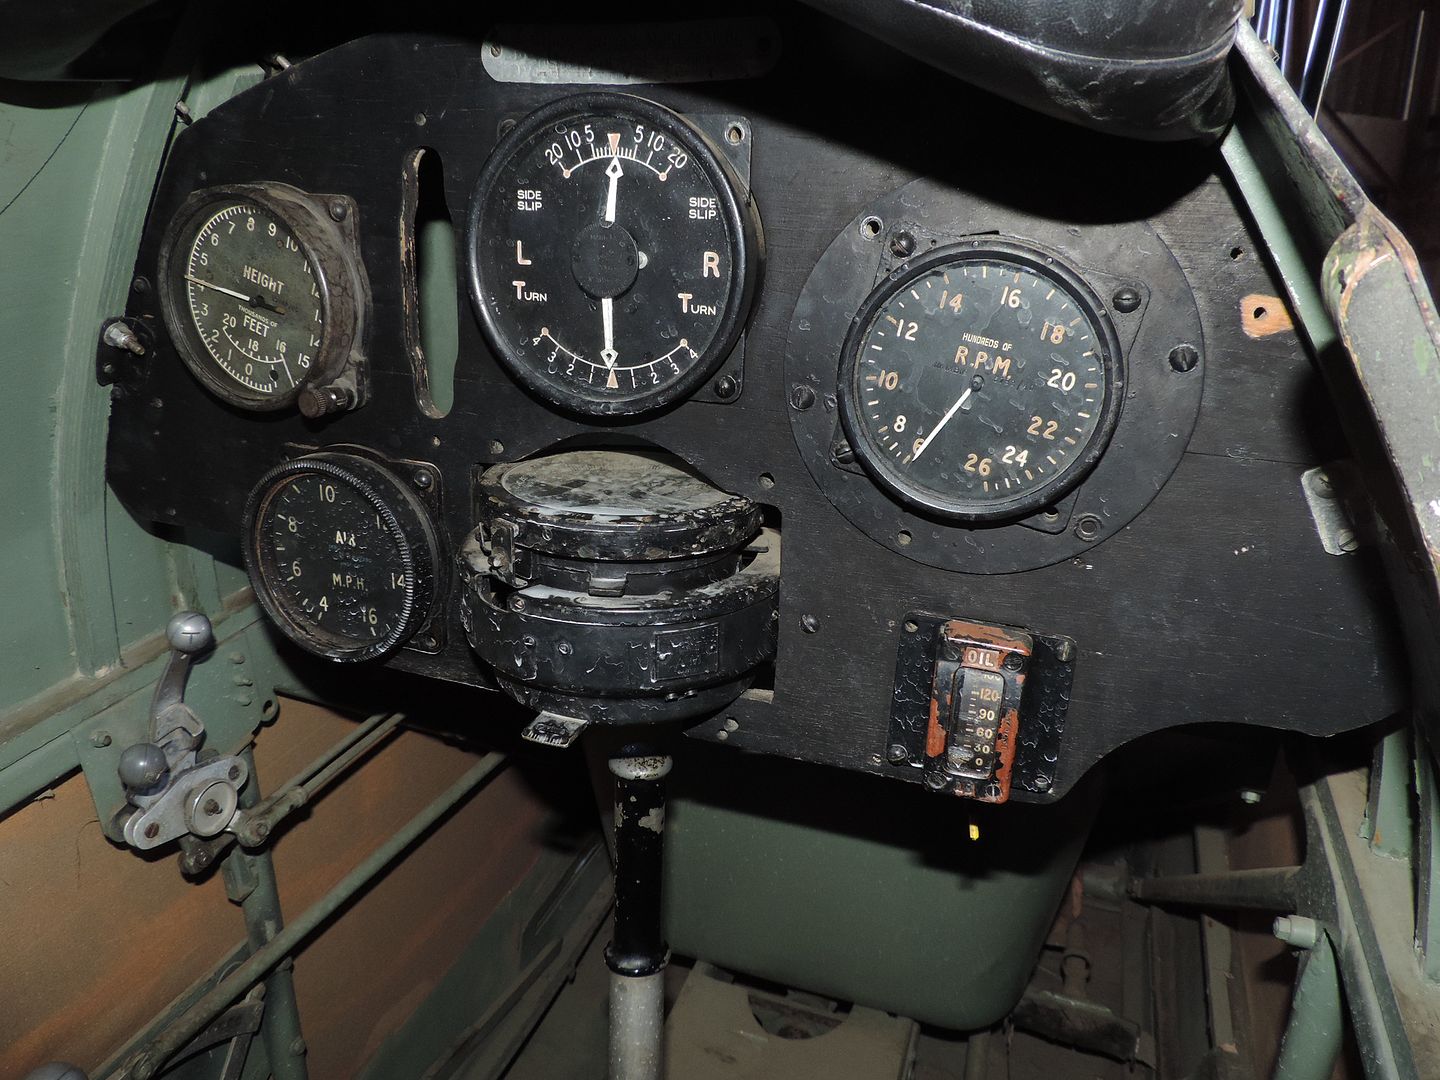
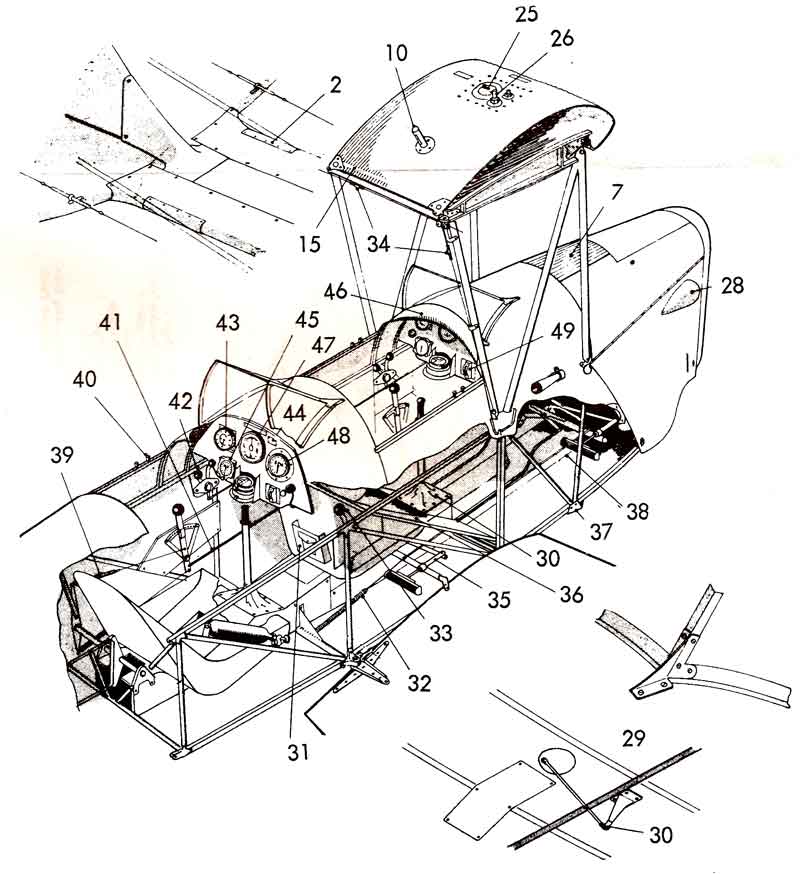
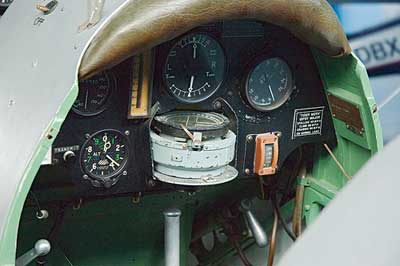
This kit’s cockpit detail is quite adequate for the scale, provided you add some seat harnesses. It consists of nice integrally moulded detail on the inside of the fuselage halves, a rear bulkhead and cockpit floor-cum central structural member to which the seats fit, bucket seats, control columns, whilst instrument panels with decaled faces and prominent compass-repeater binnacles round this area out. The student’s front seat is moulded within the aircraft’s internal structure surrounding it (making it appear “plunge-moulded)”. An aircraft engineer mate of mine, who did his apprenticeship on Tiger Moths, advised me that the seat mounts within a plywood surround that prevents objects like harness belts falling down and fouling the instructor’s rudder pedals. This drawing illustrates this point from a rear-view. The kit also provides separate fold-down entry hatches should you wish to cut out those moulded in place to display them open. Unlike with most kit brands, two pilot figures are also provided.
Before joining the fuselage halves the instructions advise to drill a couple of holes for control wires and remove the upper rear decking completely. This surgery is in order to fit an alternate upper decking incorporating anti-spin strakes fitted to Tiger Moths from September 1942, and retrofitted to some earlier machines. This wartime fit was apparently related to the use of bomb-racks that caused problems with spin-recovery, but many operators consider them unnecessary as bomb racks were generally not fitted. I think it would have been far better to have the strakes moulded with the fuselage and simply have the option of cutting them off and sanding out the scars, rather than the more complex job of removing and replacing a complete chunk of fuselage with two pieces. Alternately, Airfix could have moulded the strakes and “normal” top-decking as alternate plugs to fit in place on top the fuselage. One thing is apparent however, and that is there will be other boxings of this kit for variants without anti-spin strakes fitted.
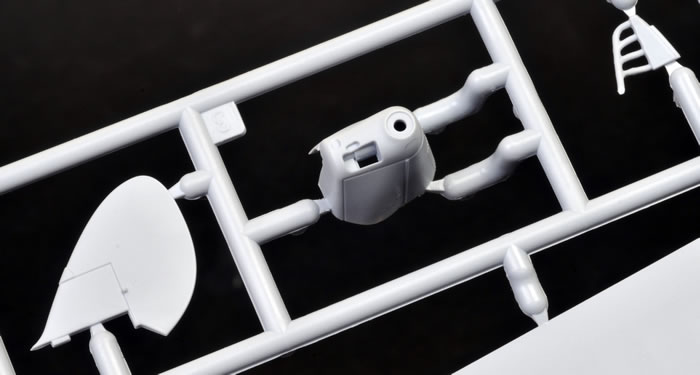
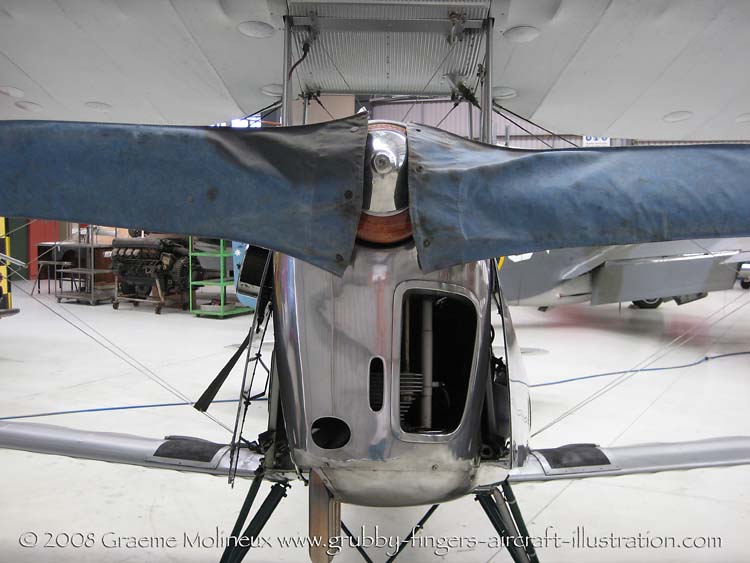
The engine cowling is a nicely done single-piece moulding, with engine cooling inlet convincingly captured and featuring the front of the engine. A small air intake and exhaust pipe are provided as separate items, the latter fitting slotting into the bottom with an interior locating flange.
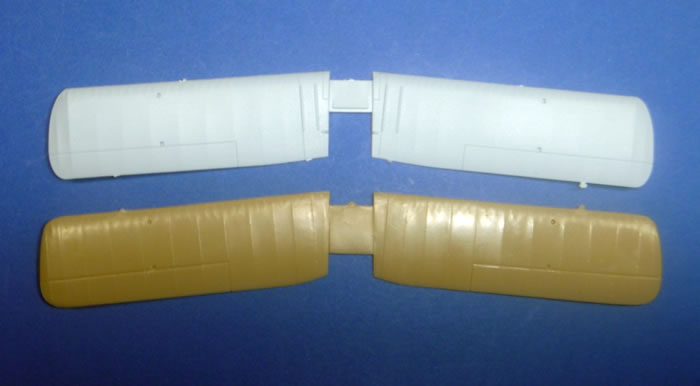
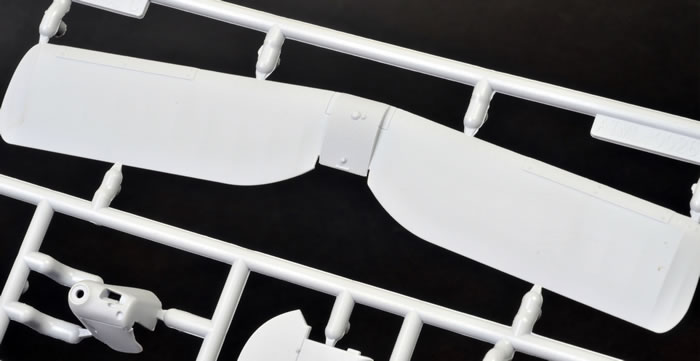
The upper and lower wings are both one-piece mouldings, with a separate fuel tank bottom to fit in the centre of the upper wing between the cabane struts. The cabane struts locate well both in the wing and to the fuselage. The interplane struts are linked by redundant braces that establish the correct stagger angle, and are to be cut away once the upper wing is fitted firmly in position. This is a great system provided real care is taken removing the braces; a PE razor saw or repeated light scoring with a very sharp blade being the order of the day here. I did read on HyperScale “Plane Talking” where the builder found the cabane struts to be too long. However, another poster pointed out that probably the bottom wings had lost some of their dihedral whilst packaged in the box (they should have noticeably more than the top wing), and once this was restored it counteracted the apparently overly long cabane struts. I mention this as it seems all too possible for others to strike this apparent problem when building. The tailplane is a simple flat fit on top of the fuselage and has two bracing struts, followed by the tailfin.
Not much remains to mention; just the propeller, undercarriage and windscreens. The prop is reasonably delicate, and the undercarriage straightforward. The sprues include a tail-skid and tail-wheel, although the former applies to this boxing. This is further evidence that another boxing is planned for release. The windscreens are acceptably thin given moulding limitations, and are nice and clear.
Rear decking surgery aside, this should be an easy build as far as biplane models go.
Accuracy and Comparison to AZ Model
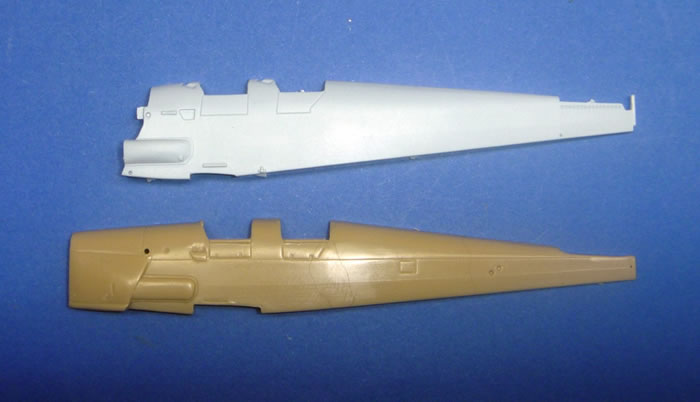
I have disposed of three Pavla Tiger Moth kits I owned, so now I only have the AZ Model kit to compare in the plastic with the new-tool Airfix release. Many would shy away from the Pavla kit anyway I feel, based on its real limited-run nature and comparative price to AZ Model and Airfix.
The AZ kit has nice surface detail, but somehow seems a little simplified when compared to Airfix’s rendition. It does have PE seat harnesses and uses acetate sheet windscreen that must be cut out and folded. It also includes a folded blind-flying hood and three appealing decal options in my RAAF boxing’s case. There are at least six other boxings with different markings to choose from, but AZ costs about double the Airfix kit’s price. Its lack of temporary interplane strut bracing will make it just a little harder to build than the Airfix kit I think.
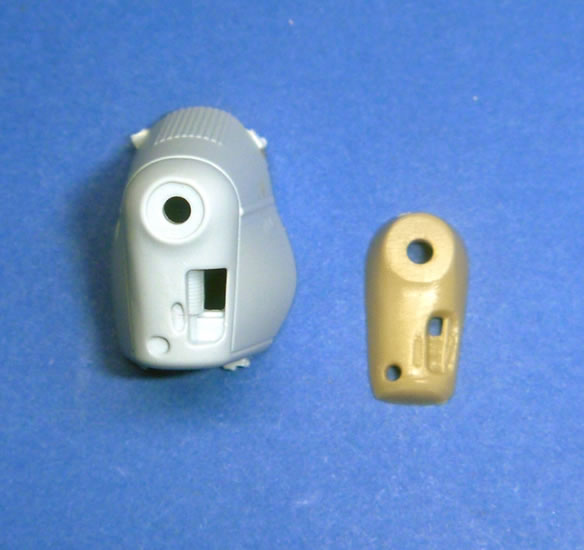
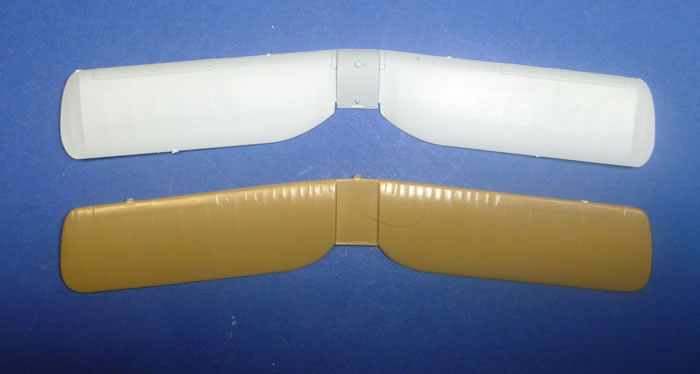
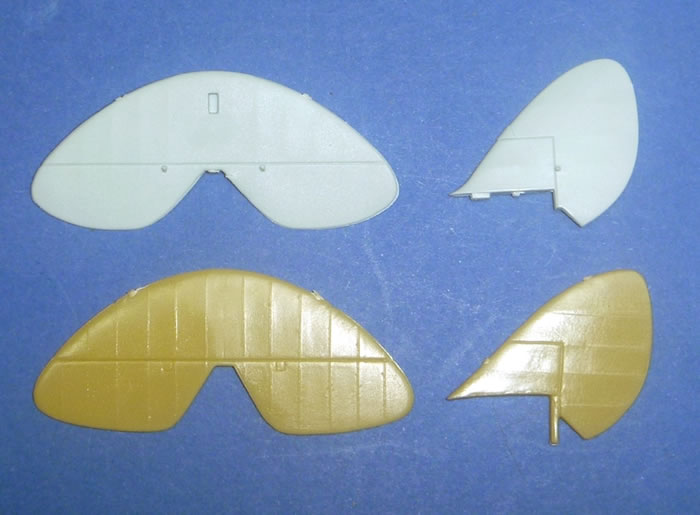
A quick alignment of the two kits’ parts shows many subtle differences. The Airfix parts are grey and the AZ Model ones light-brown in the comparison images accompanying this first look. A quick list of differences, referring to AZ Model compared to Airfix, includes:
-
The front surround to the cockpits is angled for the front and straight for the rear cockpit (whereas Airfix’s is angled for both) – This is hard to check in photos as normally padded coaming is present, something lacking in both kits. My comparison photos exaggerate the angle, but Airfix looks much better in my opinion in the 3-D plastic.
-
Cockpit openings are wider – Airfix looks better here again.
-
Inferior cooling air intake and engine representation – Not a deal-breaker, but Airfix is better here.
-
Wider chord elevators with straighter trailing edges – I think Airfix has the better shape, but AZ seems closer to the correct chord width.
-
Fractionally tall and more pointed tip to rudder – I have seen variations in this feature (see here, here and here) perhaps due to restoration interpretations. As it happens, I think both brands are a little too curved on the top leading edge of the fin.
-
No compass-repeater binnacles on instrument panels – Not necessarily a modern feature, but should be present on 1930s to 1950s military variants at least.
-
Student’s front seat is not encapsulated within an angled panel as it should be.
My real problem in assessing shapes was a lack of in-flight plan views when it came to the shape of the flying surfaces, although none of the differences are major anyway. I think variation in rudder shape may come down to differences in restorations. I do feel Airfix has the better fuselage and upper wing; AZ Model’s fuselage appearing to be a bit undernourished, and the wing cut out too sharply curved. Other small shape variations aside, Airfix has slightly better detail overall (except for a lack of seat harnesses), will be just a little easier to build, and is more readily available. At half the price Airfix can be forgiven its single decal option.
The AZ Model kit will build into a nice model that looks like a Tiger Moth, and it offers wide range of nice decal options across eh various boxings. But given a choice, I would buy the Airfix kit plus an Xtradecal sheet for about the same money in preference.
Colours & Markings
The kit has only one simple markings option for a red and silver machine; G-ADC, the Tiger Club, Headcorn Aerodrome, Ashford, Kent, England in 2013. The few decals on the small sheets look to be fine.
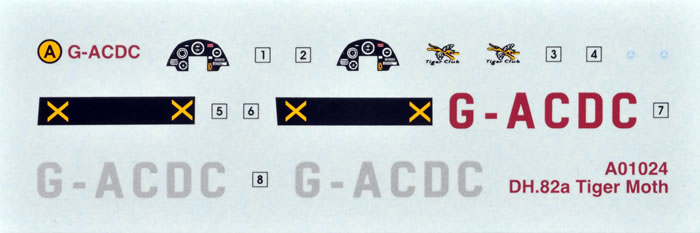
This seems a rather run of the mill livery; although Airfix also offer another boxing of this kit with RAF markings (A01025).
Even so, thank goodness Xtradecal has released an after-market decal sheet (plus two more announced) to coincide with this Airfix Tiger Moth release - See here on today’s “What’s New” for a first look at this sheet.
This is an excellent effort from Airfix, and one I rate as being amongst their better 1/72-scale kits. It appears to be generally accurate in outline shape and detail.
The surface detail is very nicely done; whilst the cockpit detail is quite adequate, but will need harnesses added to look its best. The interplane strut engineering aids building; I would expect the kit to assemble well as far as biplanes go. However, I do not like having to perform surgery on the rear fuselage decking to incorporate the anti-spin strakes. I think it would have been better to mould these in place and simply remove them and sand smooth for versions without them fitted.
The kit is great value, costing about half its nearest rival’s price whilst generally being superior in appearance and shape, but by comparison has, only one markings option in keeping with it Series-1 status. It matters little however, as Xtradecal and others have come to the rescue with aftermarket decals.
This is the best 1/72-scale Tiger Moth kit so far, and a bargain. I recommend it highly.
Airfix kits are readily available worldwide.
Purchased online from Hannants
Review Text
and Comparison Images Copyright © 2014 by Mark Davies
Other Images Copyright © 2014 by Brett Green
Page Created 17 April, 2014
Last updated
19 April, 2014
Back to HyperScale Main Page
Back to Reviews Page

|
 Home
| What's New |
Features |
Gallery |
Reviews |
Reference |
Forum |
Home
| What's New |
Features |
Gallery |
Reviews |
Reference |
Forum |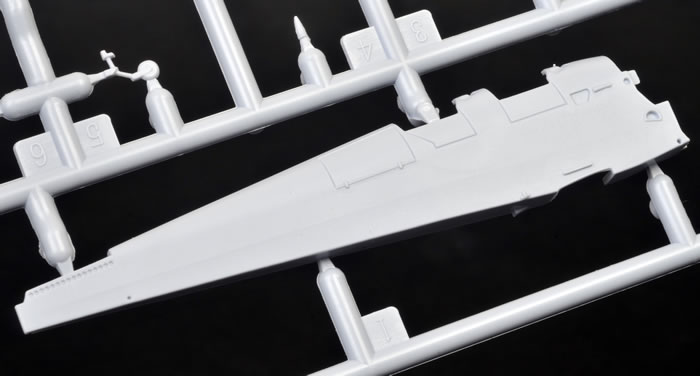
%20EBDT%202007%20(4).jpg)
%20EBDT%202009%20(1).JPG)
%20EBDT%202007%20(7).jpg)
%20Berk%202009%20(1).JPG)