Revell / Hasegawa 1/72 scale
Heinkel He 111 H-6
by Roger Hardy

Hasegawa's 1/72 scale B-47E Stratojet is available online from Squadron
S
u m m a r y |
| Catalogue Number: |
Revell Kit No. 80-04377 (Hasegawa 00551) - Heinkel He 111 H-6 plus Eduard Canopy Masks |
| Scale: |
1/72 |
| Contents and Media: |
Injection moulded. 157 parts. |
| Price: |
£15.83 plus shipping from Hannants
and specialist hobby retailers worldwide |
Background
 The He111 was the German bomber that was built in greatest numbers during World War II. The He111 was the German bomber that was built in greatest numbers during World War II.
It was derived from a commercial aircraft dating back to 1936 and early versions were used against the Republicans during the Spanish Civil War.
By the end of summer 1939 the first He111 H-1 had left the Heinkel works in Oranienburg and in October 1939 they were in action. The He111 squadrons were used primarily during the Battle of Britain and suffered heavy losses.
The aircraft was, in truth, already approaching obsolescence, was limited in range and under-powered compared to the newer Junkers Ju88.
Over 1600 H-6 variants were built, making it was the most numerous He111 after the H-16. Equipped with more powerful armament from the outset it was designed for used as a torpedo bomber against shipping targets. However it could also carry two heavy bombs of 1000 kg each on external racks under the fuselage.
By the time production ended in 1945 a total of 6508 of these aircraft had been built in different versions.
The Kit
Skill level: 4
Scale: 1:72
Length: 230 mm
Wingspan: 314 mm
Parts: 157
Decal options:
-
5./KG 26 "Lion Wing", Grosseto, Italy (Dec 1942) (I chose this one)
-
5./KG 4 "General Wever", Russia (Winter 1942/1943)
-
9./KG 4 "General Wever" on Pathfinder & Marker Missions for IV. Fliegerkorps, Hungary (Summer 1944)
-
Personal Aircraft of Oberstleutnant Kuhlmey, Commander of "Gefechtsverband Kuhlmey", Part of Schlachtgeschwader 2, Immola, Finland
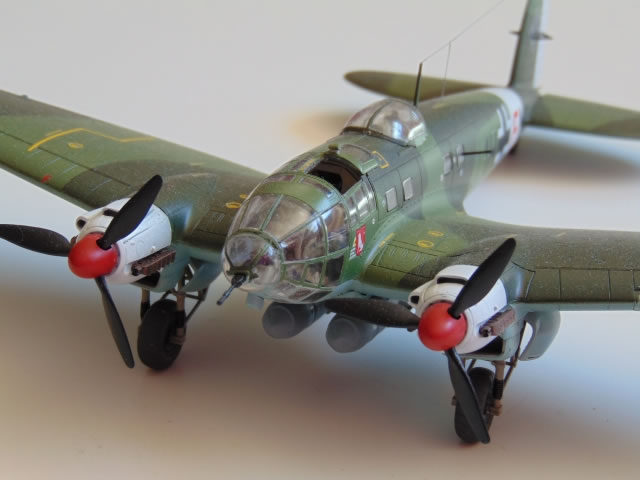
The good news is that this is the Hasegawa kit, reboxed by Revell at a fraction of the price. That being the case, it is easily the best He111 available in 1/72 scale. I wanted to build it in order to try out the Eduard canopy masks, this aircraft having masses of glazing. Normally I mask canopies myself using Kabuki tape, cut with a scalpel but this one was simply too complicated.
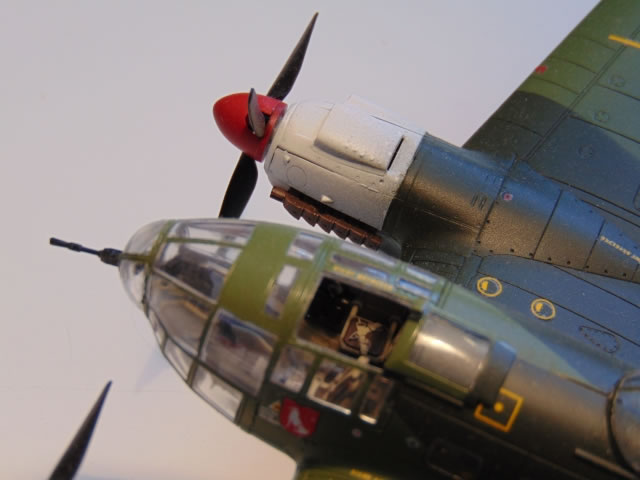
The build was relatively straight-forward and I more-or-less followed the instructions. The parts breakdown is such that it makes spraying easy as most of the guns and glazing can be added at final assembly and the side windows are inserted from the outside, not the inside. The propellers are also pushed into place after spraying, using those little rubbery retainers that Hasegawa pioneered. I wish everyone did. A lot of thought has gone into this model. All of the standard grey styrene parts are subtly engraved and the clear parts are very clear indeed. Quality oozes from every part.
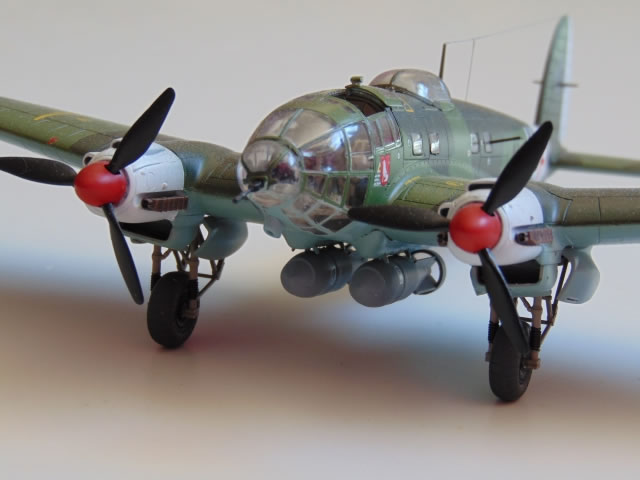
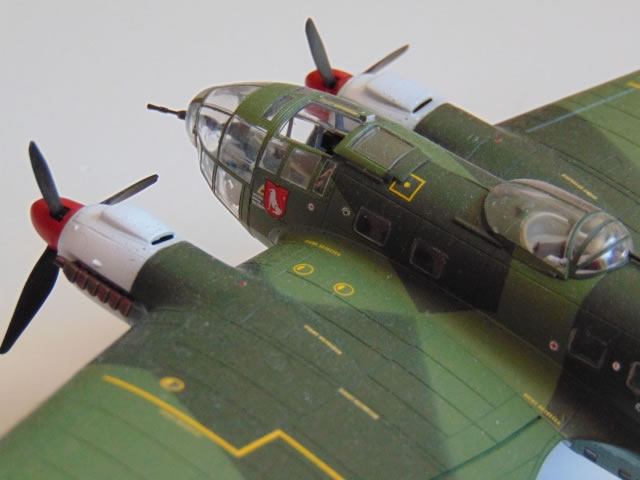
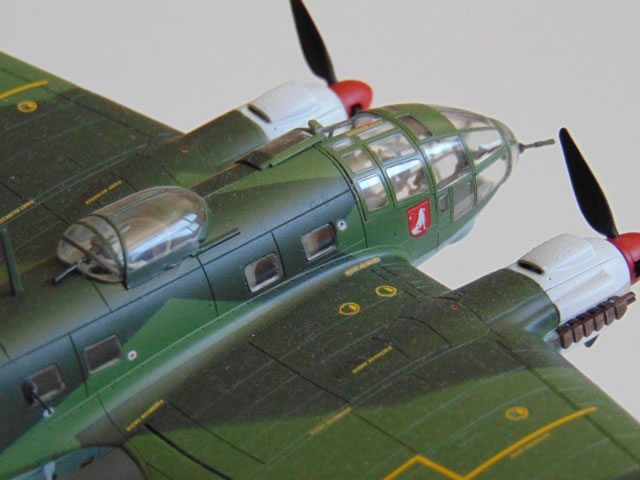
Assembly starts with the cockpit and bomb bay, in this aircraft, the bombs were carried vertically although this version would not have used this as it carried larger bombs externally on racks monted on the bomb doors. The internal bomb bay can be seen through the side windows, however, so needs a little attention. The cockpit interior is, of course, incredibly visible as the entire nose is glazed. The detail is good and I only needed to add pre-painted Eduard seat belts to the pilot and navigator’s seats. There are nice little rudder pedals and an instrument panel mounted from the upper glazing. The access hatch on the top of the canopy can be posed open and it has the small periscope that enabled the pilot to see what was shooting him down.
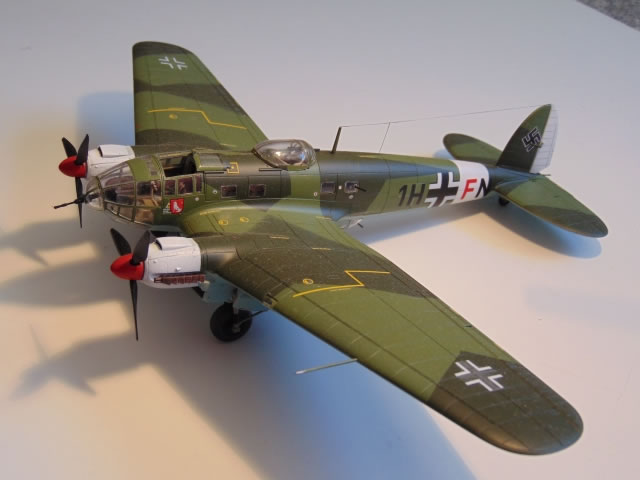
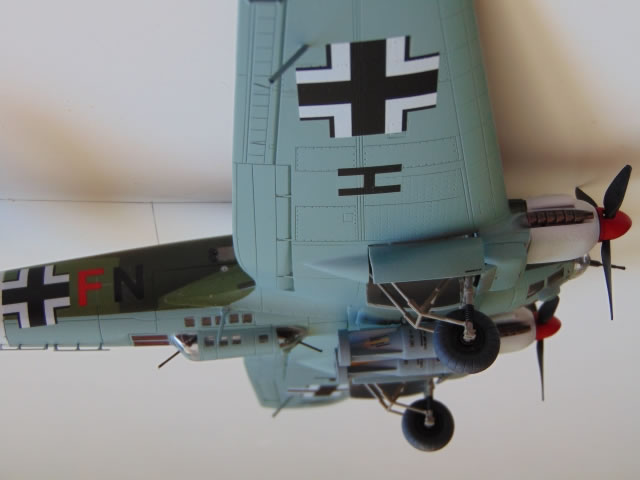
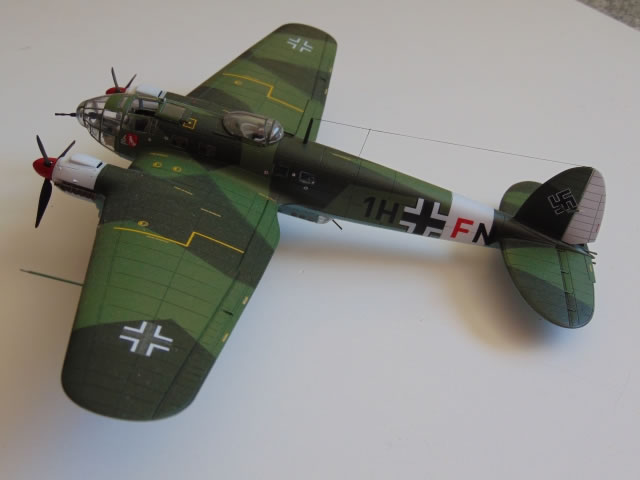
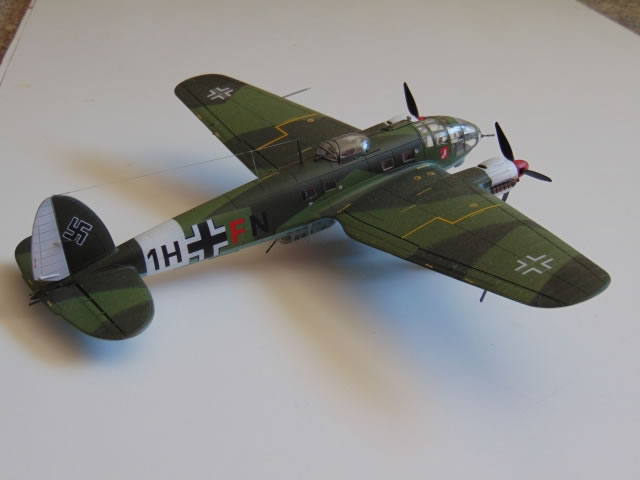
Interior aside, there’s not a lot else to say about the build because it went together so easily and well. I do not recall having to use any filler anywhere. The camouflage scheme I chose was the first option and the colours are RLM 70/71 and 65. I like the splinter schemes because they were hard-edged and are really easy to mask.
The Eduard Canopy Masks
I had never used these before and was puzzled when I opened up the little envelope. There was just a small square of yellow Kabuki sticky paper. When I looked closer, I could see that all of the glass panels were there, already cut, but not marked in any way. In other words you cannot see them. The instructions show the layout of the invisible parts on the sheet, however. I wondered how best to get them off the sheet and onto the model. I tried bending the sheet but that didn’t work. In the end I found that the best way was to use a new scalpel blade (I use a Swann Morton scalpel) and insert the tip under the edge of each component. Sure enough, they can then be released from the backing paper and stick to the scalpel bade. They can then be transferred to the model and placed in position. Kabuki tape is flexible and you can move them around a little before committing to the final position. Getting all of the glazing masks in position was actually easier than I had expected but time-consuming; I think it took me about three hours but I didn’t lose any and they all went where they were intended to go, thanks to the clear instructions. Follow Mr Eduard’s sequence and you cannot go wrong.
I use the Aztek A470 air brush at 15-20psi with turquoise 0.5mm high flow nozzle.
I sprayed the model using Tamiya paints thinned with Tamiya thinners (I tend not to add water as it slows the drying of Acrylic paint) and waited until it was dry. Then comes the worst bit….removing the masking. You just know that, no matter how careful you’ve been, some of that treacherous thin paint will have seeped where it shouldn’t seep and mess up your beautiful paint job. You just know it, don’t you? Well, in this case, I have to report that Mr Eduard’s canopy masks did not allow the slightest seepage. The rest of the airframe, masked by me, was a basket case but that’s my modelling skills for you. The bottom line is that these Eduard canopy masks work bloody well. I immediately ordered a few more for those big ugly bombers with lots of windows although I will still do my own masking for the simpler cockpits of fighters. As an aside, if you do get seepage on masked glazing the best way to get rid of it (assuming acrylic paint; I never use enamel) is to use a wet toothpick and just massage it away without harming the glazing.
Back to the kit, I’ve got slightly out of sequence. I removed the airframe masking, repaired the paint job where necessary, applied the decals (fine, no problems), then sprayed the whole thing with Tamiya flat clear rattle-can varnish to tone everything together. Then the canopy glazing could be removed and the final bits and pieces added. I added the aerial wire using haberdashers elastic thread which is my Discovery Of The Year.
The kit is faultless (I wish I could say the same for my finished model) but all credit is due to Hasegawa for engineering it so well and to Revell for negotiating the use of the moulds.
Better still, it’s as cheap as chips.
The Eduard canopy masks work well and I recommend them strongly for complex masking jobs.
This is easily the best He111 kit in 1/72 and is therefore a must for modellers of Luftwaffe aircraft in this scale.
Recommended!
Model, Images and Text
Copyright ©
2015 by Roger Hardy
Page Created 14 April, 2015
Last Updated
14 April, 2015
Back to HyperScale Main Page
|
 Home
| What's New | Features | Gallery | Reviews | Reference | Resource Guides | Forum |
Home
| What's New | Features | Gallery | Reviews | Reference | Resource Guides | Forum |