Toko's 1/72 scale
LaGG-3 11th series
by Jumpei Temma
 |
LaGG-3 11th series |

Eduard's 1/48 scale MiG-21PF is available online from Squadron for only USD$31.99
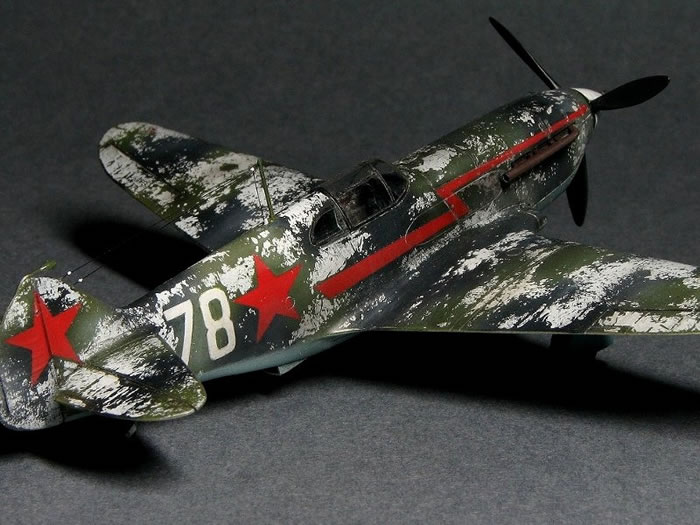
Recently, a weathering method of silicone barrier is popularized in AFV modeling. I built TOKO's LaGG-3 - now it is sold in Roden brand – and applied winter camouflage using this method.
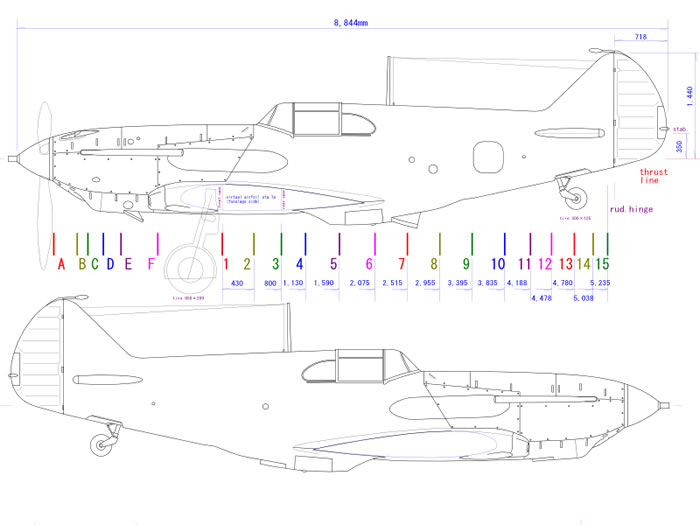
I made original drawings as usual. I've got official election & maintenance manuals of LaGG-3 and La-5. They contain ordinate tables of fuselage frames and airfoil, the general three view of LaGG-3. These data are fully applied to my drawings.
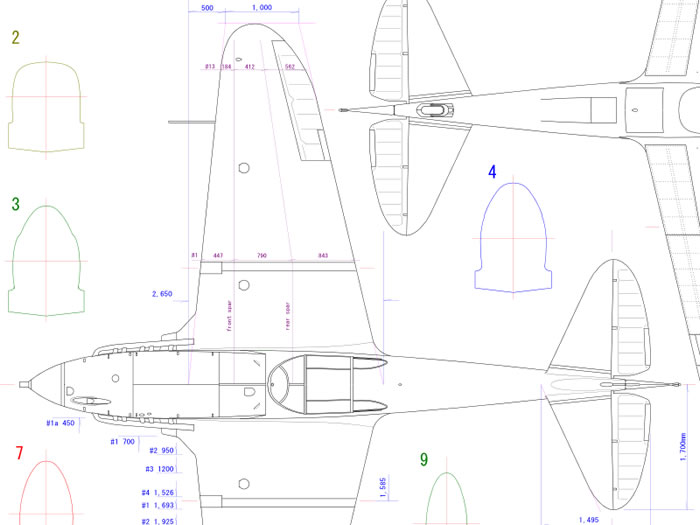
The full size drawings are here:
http://www.geocities.jp/yoyuso/lagg3/lagg3e.html#drawings
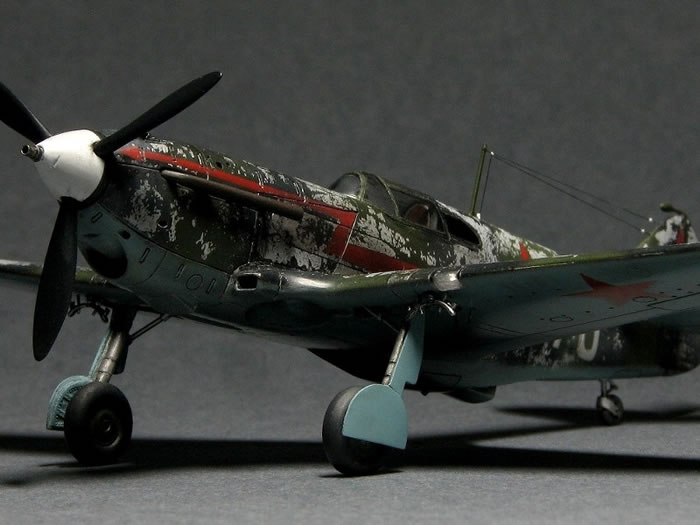
Unfortunately, this kit has some problem points. The kit upper engine cowl is too narrow to include a Klimov M-105 engine. The demarcation line of the filet and upper wing root is not correct, so the broken line appears at incorrect position. There is the step between the lower wing and lower cowl. The cross section shape of the canopy is not so good.
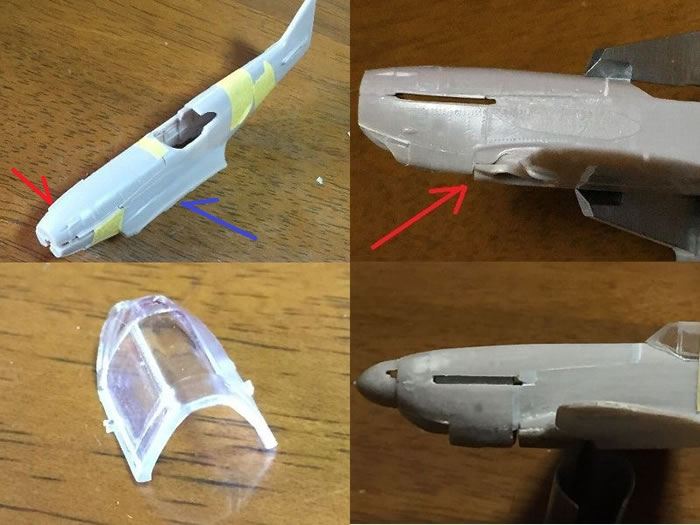
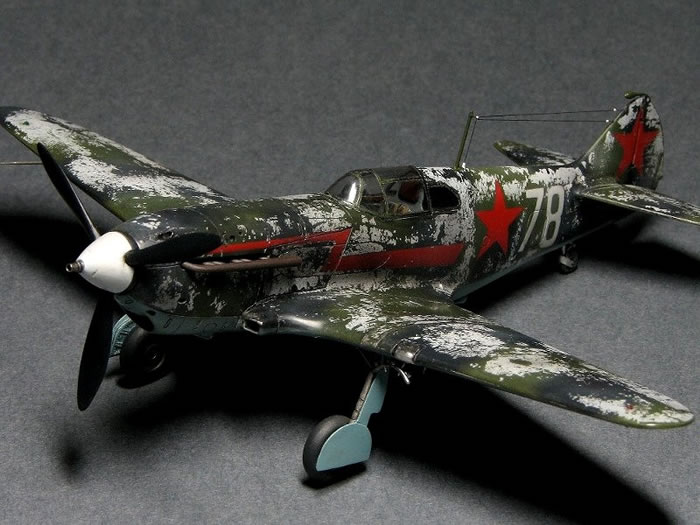
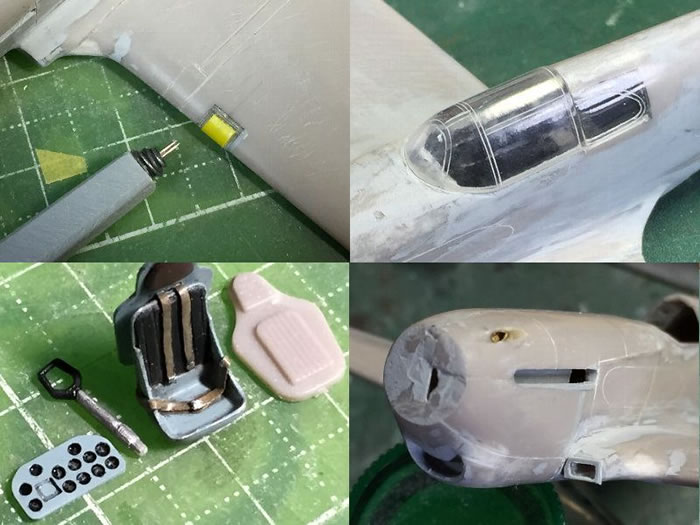
The canopy was scratch-built with heat pressed clear styrene sheet. The kit filet was cut out and glued to the upper wing. The rear quarter window was replaced with kit canopy. The upper cowl was cut and widened with a plastic sheet shim (blue arrow). The nose was a little extended (pink arrow). Panel lines were engraved with machine cut templates.
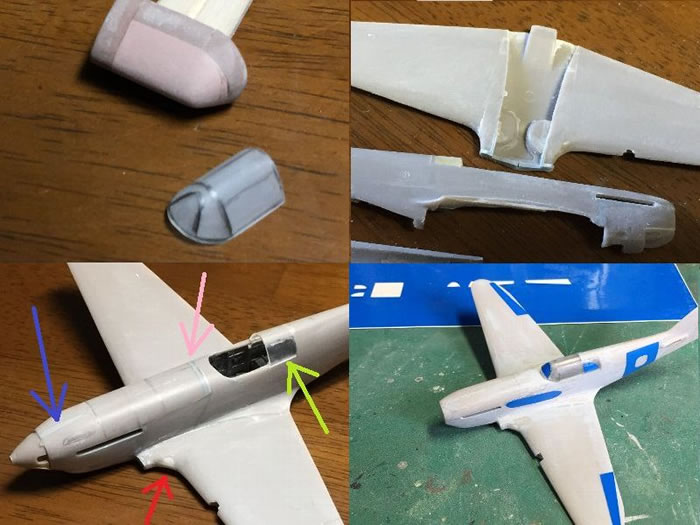
The landing light and the canopy frames were engraved with a hand-made double needle. The pilot seat and instrument panel were scratch-built.
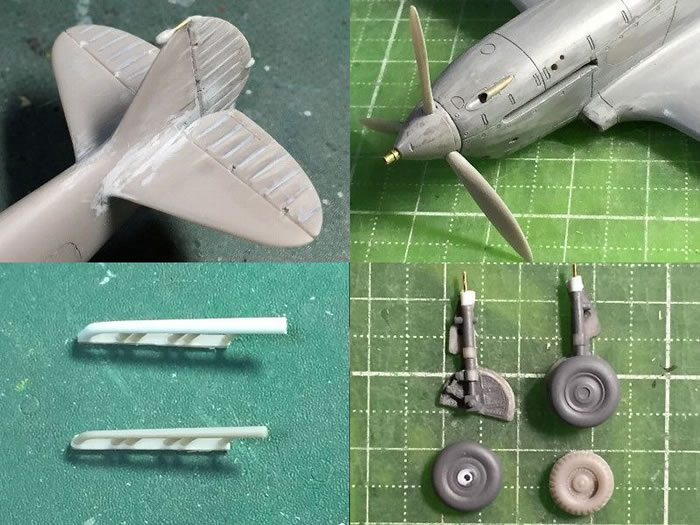
Rib tapes of control surfaces were depicted with surfacer. The kit exhaust pipe was replaced with plastic rod. The kit main wheel is a little small. It was from Airfix Defiant. Some early model equipped smooth tread tire.
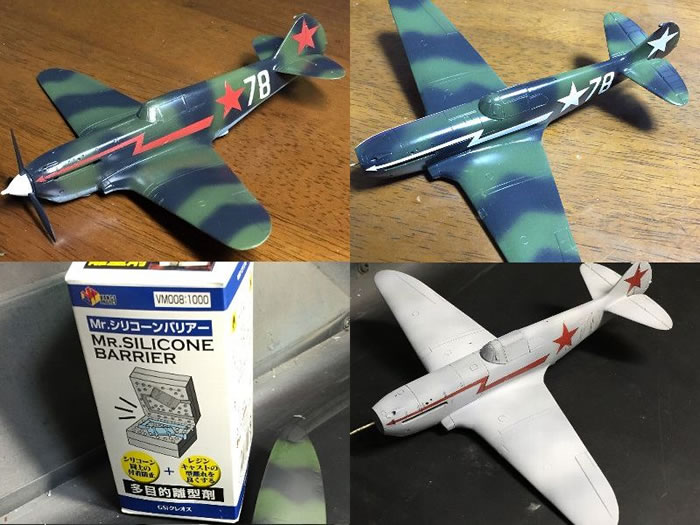
At first, Black and Green camouflage scheme and markings were painted with Mr. Color Lacquer Paint. And the surface was gross coated with Mr. Color Clear Paint. Then, markings were masked with masking sheet. Mr. Silicone Barrier was sprayed on the model by an airbrush without dilution. After dried, White Tamiya Acrylic Paint was thinly over sprayed.
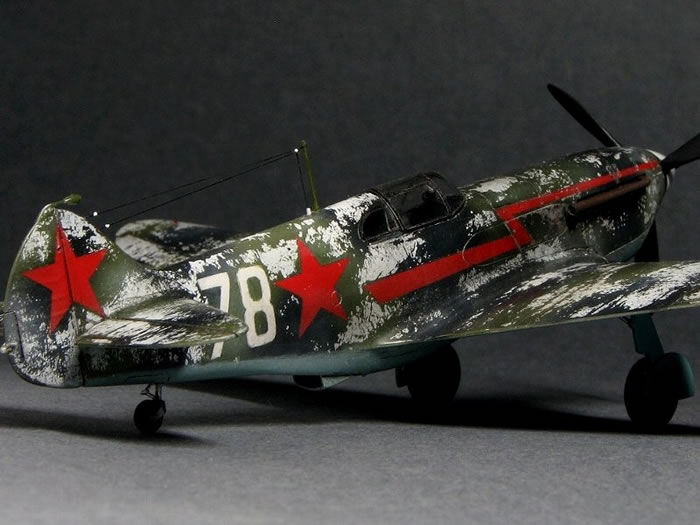
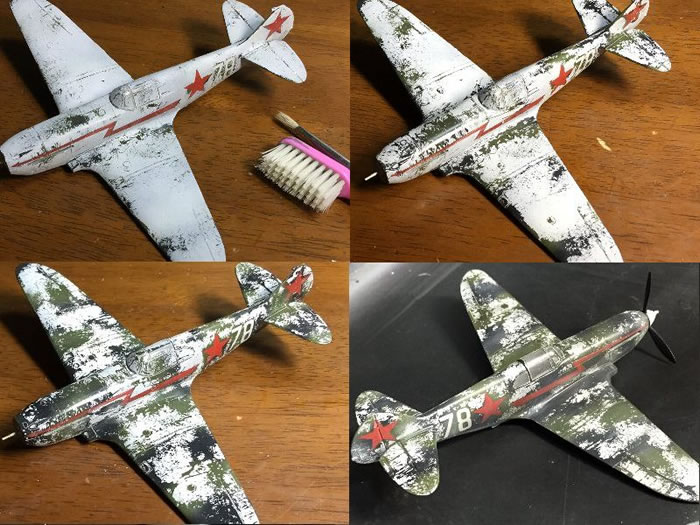
White paint was peeled off by tooth brush or oil paint brush with water. The gloss coat of under surface makes peeling off works easy. Some panel edges were peeled off by tweezers or metal spatula. After peeling off, Mr. Color Flat Clear was over sprayed for coating.
Completion
Markings represented Capt. Mironov's 11th series aircraft of the 609th IAP in early 1942. I referred the “sovietwarplanes.com” for marking research.
I think the impact of this silicone barrier weathering method is dramatic and eye-catching. Meanwhile the weathering work is unexpectedly easy. In this case, I represented as hard washed-out winter scheme, but clean winter scheme might be good with this method as well. And more, this method might be widely applicable, for example, flaking camouflage paint of Japanese late ww2 aircraft.
Model, Images and Text
Copyright ©
2016 by Jumpei Temma
Page Created 16 November, 2016
Last Updated
16 November, 2016
Back to HyperScale Main Page
|
 Home
| What's New | Features | Gallery | Reviews | Reference | Resource Guides | Forum |
Home
| What's New | Features | Gallery | Reviews | Reference | Resource Guides | Forum |