Revell's 1/72 scale
Tornado IDS
by Fernando Rolandelli
 |
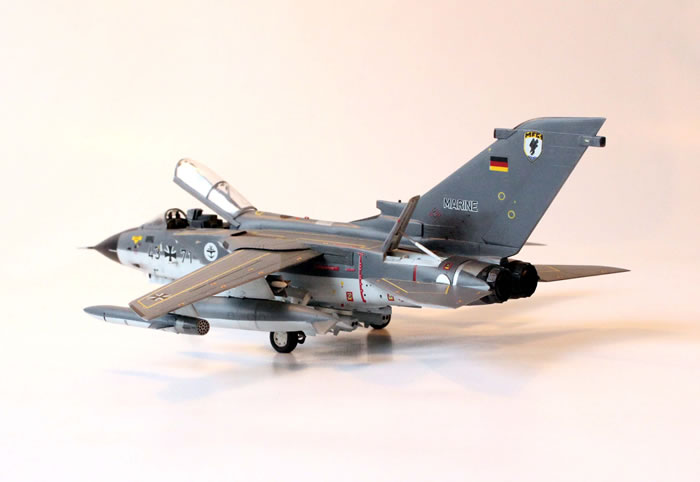
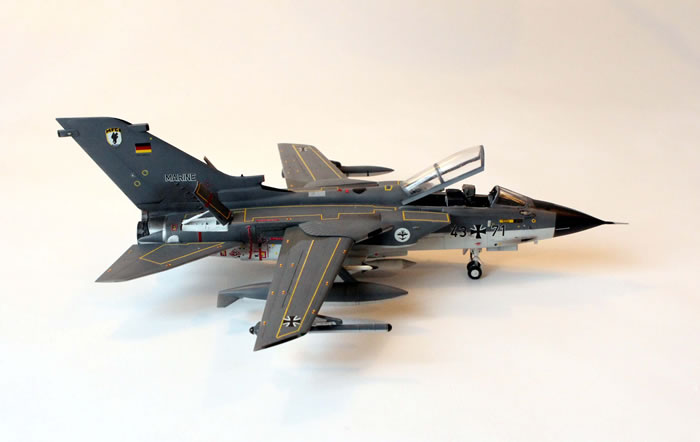
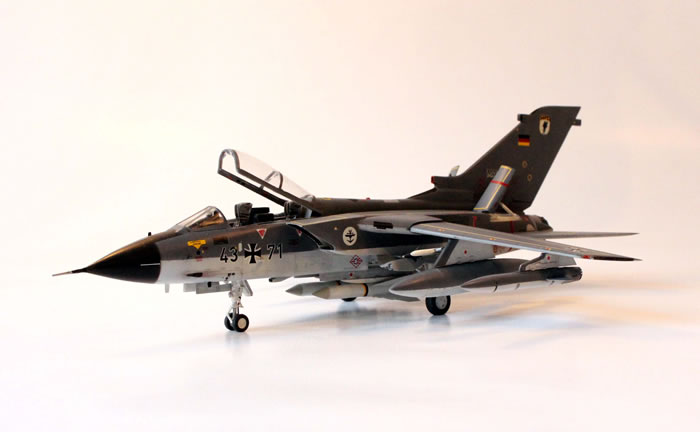
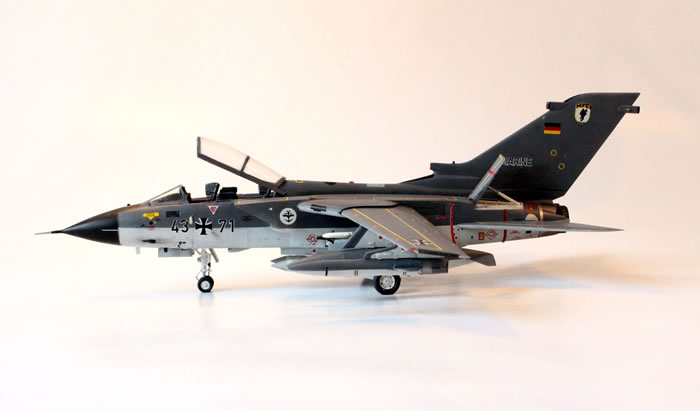
Panavia 200 Tornado IDS
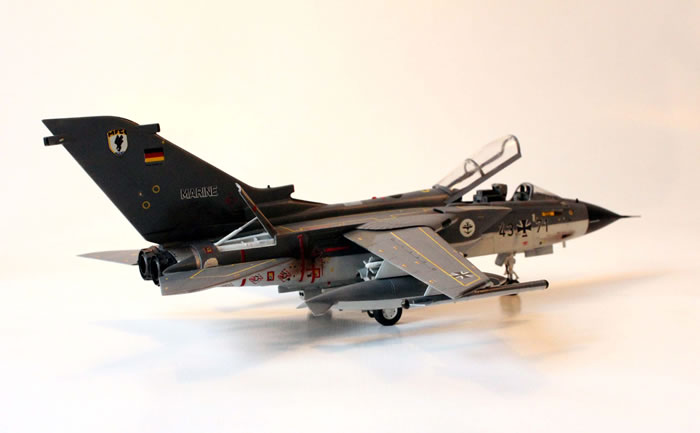
Marineflieger Geschwader 1
Jagel 1984
|

Revell's 1/72 scale F-4F Phantom II is available online from Squadron for only $19.96!
Background
The Bundesmarine decided to create its own air division due to the frustrating experiences in WW2. Activated in 1957 in the Jagel air base (now known as Schleswig AB, it was in heavy use in WWII and after; nowadays home of the AKG 51), MFG 1 crest (a tumbling sea eagle) derives from that of KG.30. Having at first mixed aircraft wings equipped mainly with Gannets and Sea Hawks, the main step forward was made with the acquisition of the F-104G. Not that the service liked the aircraft; they had repeatedly demanded to be equipped with something more substantial, like the F-4 Phantom. Their wishes were only granted when Tornadoes were allocated to it; MFG 1 receiving its first ones in 1982. The unit was integrated to MFG 2 in 1993, and deployed overseas a couple of times. It was in turn dissolved in 2003, many of its Tornadoes going to AKG 51.
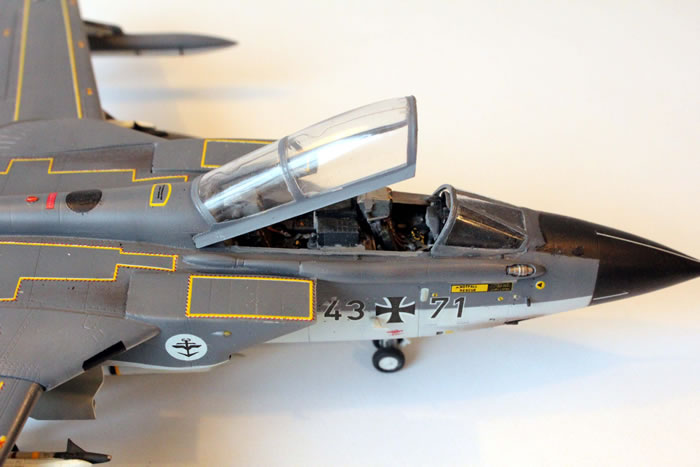
A Batch 3 (a total of 164 machines, 18 going to Germany) Block 6 machine, “4371” was built in March, 1981 under the number IDS 183, MBB 71. The Modeldecal sheet has a picture of her while participating in the 1984 Mildehall Air Fête. As of 2014, it is listed as still active; if so, it might be in AKG 51, like sister ship “4373” is.
The Kit
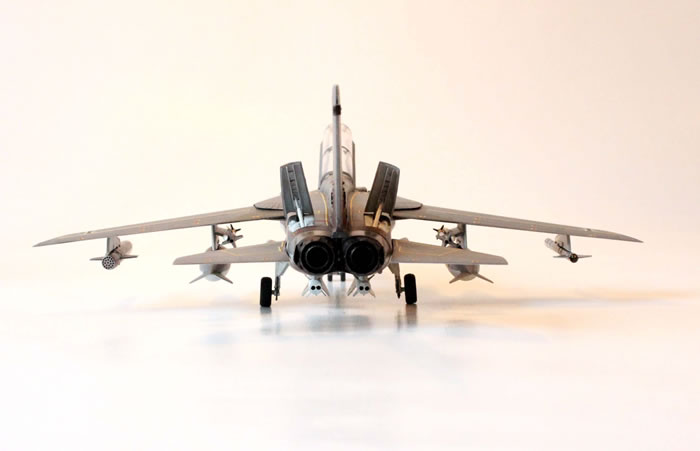
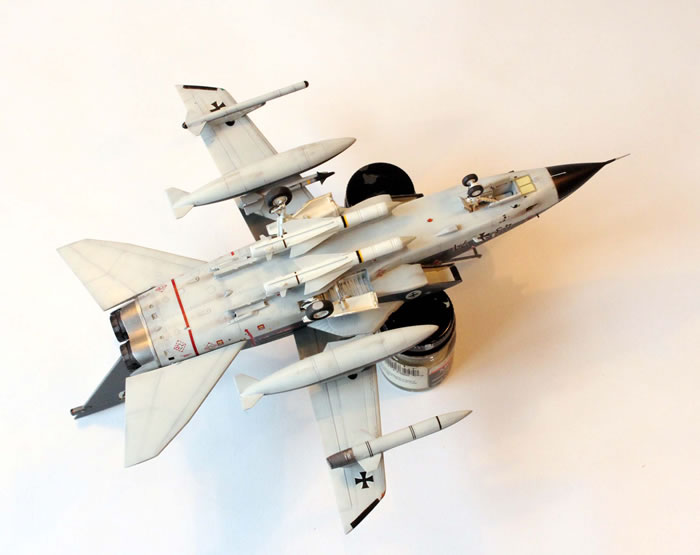
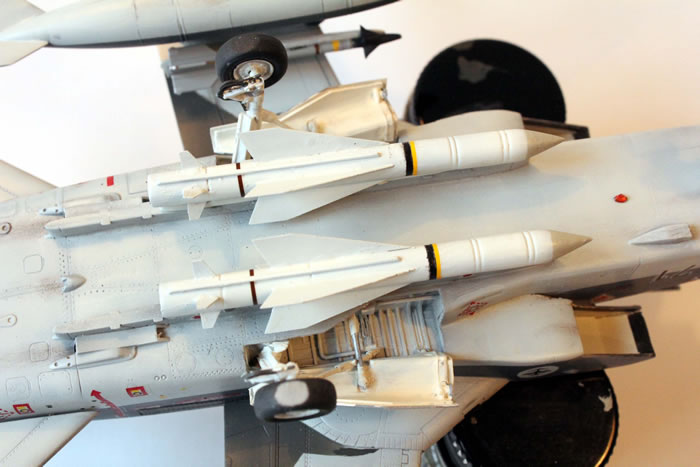
After having built a couple of Revell Tornadoes, I can safely say that I have not yet got the grip of them. They are small kits designed to a budget, which means a tradeoff. They sport an accurate shape, good surface detail, a simplified but workable cockpit and seats, no attempt at an intake trunking and some gimmicks like swinging wings (with pylons and all!) and movable elevators. Armament, in the case of German IDS machines, is rather sparse (actually no armament at all, being limited to a couple of –badly shaped- AIM-9L and a MBB/Aeritalia recce pod); the opposite is true in the RAF boxings; but it may be considered adequate in the ECR ones, like this one (two AGM-88s). Moreover, the boxings usually available depict machines in cheesy anniversary, Tiger Meet or retirement schemes; the policy of the company holds that they are more attractive. Some boxings do include markings for an operative machine, hidden deep in the decal sheet.
In this build I chose to depict the early MFG machine described. I resorted to a Modeldecal sheet, and to some Kormoran missiles, which were the main antiship armament, coming from an antique Airfix weapons set. Further backdating included scratchbuilding the Cerberus ECM pod, as the kit comes with the Cerberus III, which is markedly different. I decided against using an Aires resin interior, having had a less than satisfactory previous experience; as often happens, stand-alone resin seats proved too large (Aires) or small (Pavla). A very nice and old (copperish) Eduard PE set was tossed in instead.
The cockpit went first.
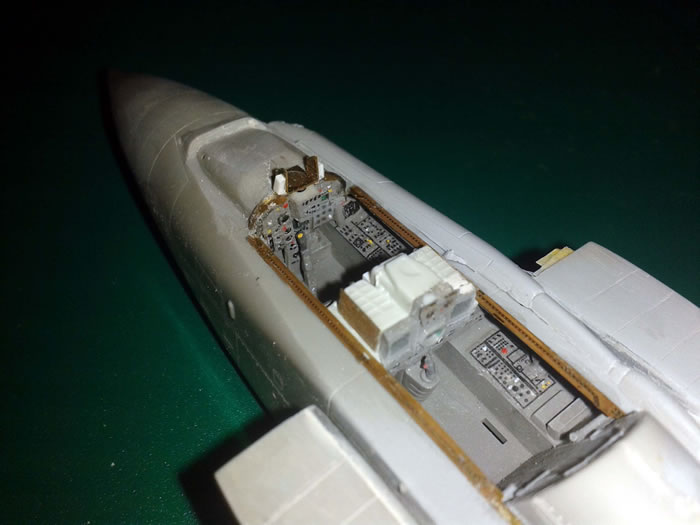
I added some detail to the consoles, painted them FS36231 and used the kit’s decals on them, reinforced by some colour dots. The PE set provided partial instrument panels which as usual were a chore to fit. Seats were added as a last step; they were detailed with harnesses from the set and some scratch built details.
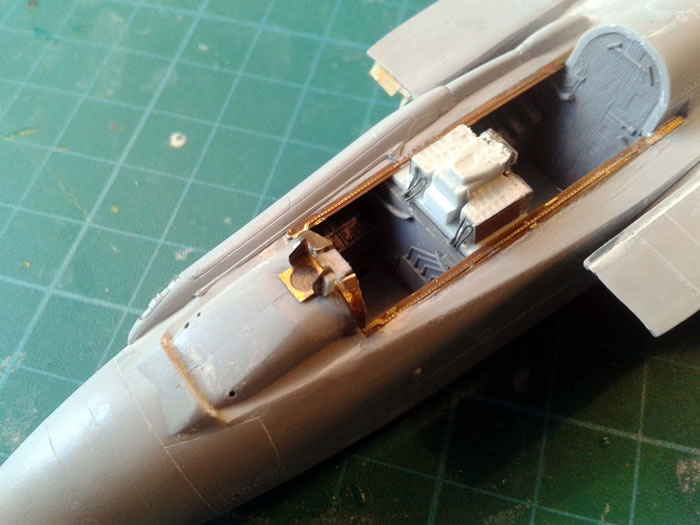
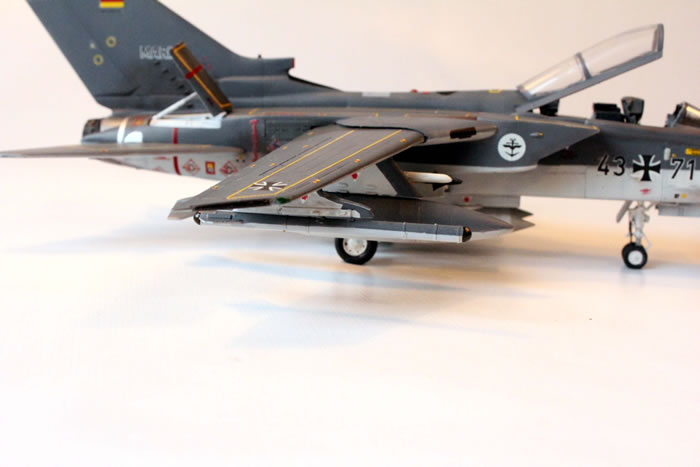
I set aside the swinging apparatus, gluing the wings in the full forward position. That simplified everything, but did not ensure a lock-on symmetric dihedral; only put it in the ballpark. Pylons were added as a last step. The ailerons: I also dropped the moving system; replaced the main lugs and added small ones forward to help final assembly. The landing gear is very feeble, each leg composed of three parts, which gives plenty of opportunities for compounded error. I tried to minimize the risk by gluing first the roots and measuring the sit; it proved only partially successful, both the well and the stub detaching a couple of times (with the well falling inside the fuselage and being restored in position with some difficulty).
The intakes gave a lot of trouble, and I had to glue, detach and glue them again a couple of times until satisfied. Belly pylons have to be coerced against the fuselage to stay flush.
Once everything was together, puttying and sanding was not a big deal.
The rear area was a good fit and was added after painting; this simplified masking but it is an unnecessary risk.
Armament
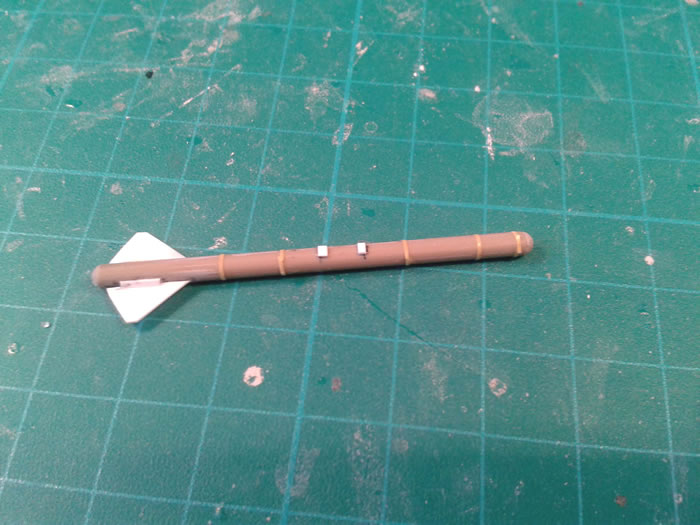
Kormoran 1s, the primary antiship armament of these early Tornadoes, were sourced from an old Airfix NATO weapons set. The set is most interesting, but the design of the pieces, in mixed plastic and PE (most of the wings in many of the missiles), is a bit flawed.
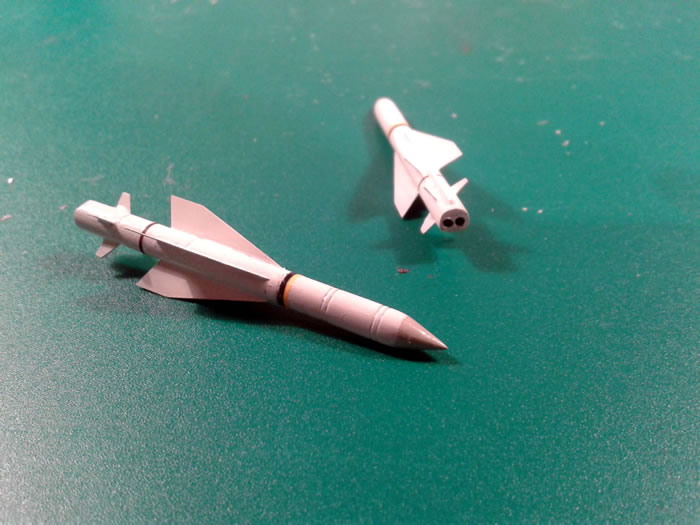
The PE wings are a chore to glue, lacking any positive means of fitting. The ones in the set are Kormoran 2s, and they were backdated to the early “1” version. It must be said that the modern substitutes, those in the Eduard set, though easier to build, well detailed and finely cast; it however annoyingly comes with only ONE “1” and ONE “2”.
Anyway, both sets leave you in the wild regarding the launcher; fortunately, I saw it is the same (or very similar) to the one used on AGM-88s, present in the ECR boxings. The AIM-9Ls included are unusable, a common occurrence; therefore, I used a couple in an old Hasegawa weapons set; they are not that visible, buried in the inside of the inner pylons.
The BOZ 101 chaff dispenser was detailed with the exhaust plate from the PE set; the kit comes with a flat surface totally unrealistic (even a decal would have helped).
The Cerberus ECM pod was scratchtbuilt, the kit coming with the Cerberus III which has a very different shape.
Painting
Norm 76 scheme is simplicity itself: RAL7012 Basaltgrau over RAL7035 Lichtgrau. I limit myself to acrylics whenever I can, so I used Xtracrylixs FS36118 and 36495. Wing gloves were painted 36081. Metal parts were painted with Alclad mixes.
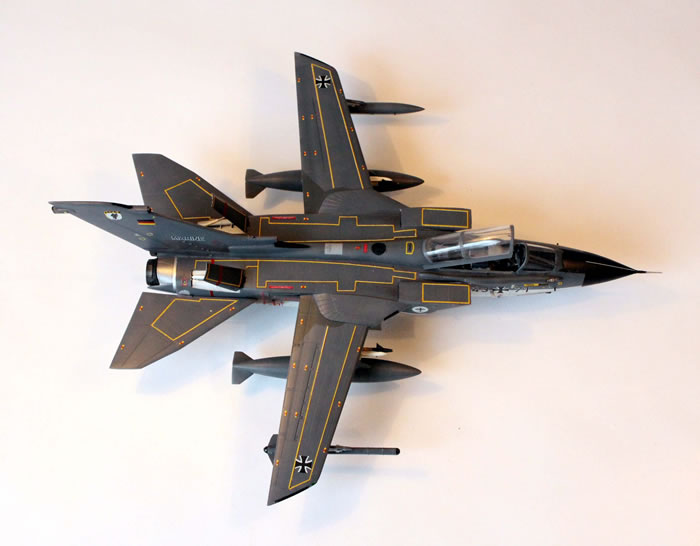
Black dielectric surfaces were painted freehand with a felt tip marker. Intakes, wheel and airbrake wells were painted in either White or Lichtgrau. Kormorans were painted White (practice rounds are Dark Green, which would have provided an interesting contrast); a mix of decals and painting was made for the stripping.
Decals and Weathering
Decals went without a hitch; even the fearsome looking walkways (previous experiences having been less than happy). They all look like a bit oversized for the kit, being probably designed for the earlier Airfix/Monogram/Esci/Italeri kits. They are of the “milky glue” variety, but the glue goes clear when set, and you can easily clean the residue (do that!) before the final clear topcoats.
German aircraft of the era looked invariably pristine, so I went light on weathering, trusting in the preshading and uneven painting done previously. I used some pastels to mimick the usual staining in the fin due to the action of the thrust reversers, the guns and other selected staining.
Again, it was a bittersweet experience.
I am still missing something when building Revell Tornadoes; the kit is not a pig, but it is not easy either, and in the end you miss some of the fun. It has to be assembled with a lot of care. It has some bad points, due undoubtedly to the fact that they are budget kits.
The only accuracy problem comes in the nose/pitot base, which is far too thick; other than that, it looks spot on.
There are a lot of attractive schemes, and the finished model will look the part; if only they would build easier and quicker, they would be quite a lot more enjoyable experience.
References
- “Panavia Tornado”, Krzysztof Barcz, Kagero Topshots 111010;
- “Panavia Tornado”, Bill Gunston, Ian Allan Publications;
- “Tornado. Der Kampfflugzeug der NATO”, Alfred Krüger, Waffen-Arsenal;
- “Tornado”, Michael J. Gething, Warbirds Illustrated n° 42, Arms and Armour Press;
- “Panavia Tornado GR.Mk 1”, Roger Chesneau, Aeroguide n° 24, Linewrights;
- “Panavia Tornado IDS”, Randy Evans, Airdata 2, SAM Publications.
- “Marineflieger Geschwader 2”, Andreas Klein, Air Doc Publications.
Model, Images and Text
Copyright ©
2016 by Fernando Rolandelli
Page Created 11 January, 2016
Last Updated
11 January, 2016
Back to HyperScale Main Page
|
 Home
| What's New | Features | Gallery | Reviews | Reference | Resource Guides | Forum |
Home
| What's New | Features | Gallery | Reviews | Reference | Resource Guides | Forum |