Academy's 1/48 scale
MiG-29 Fulcrum A
by Jon Bryon
|
|
MiG-29 Fulcrum A |

Academy's 1/48 MiG-29A is available online from Squadron.com for only $25.99!
Summary
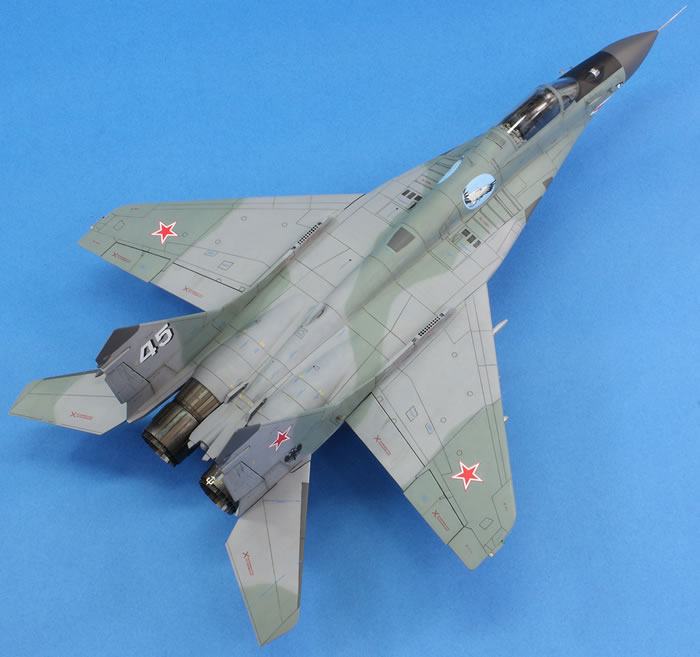
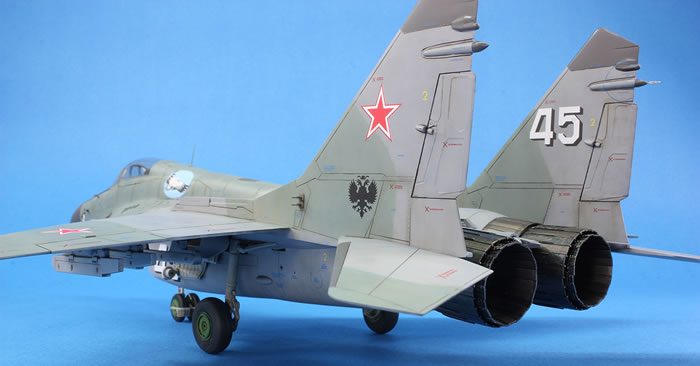
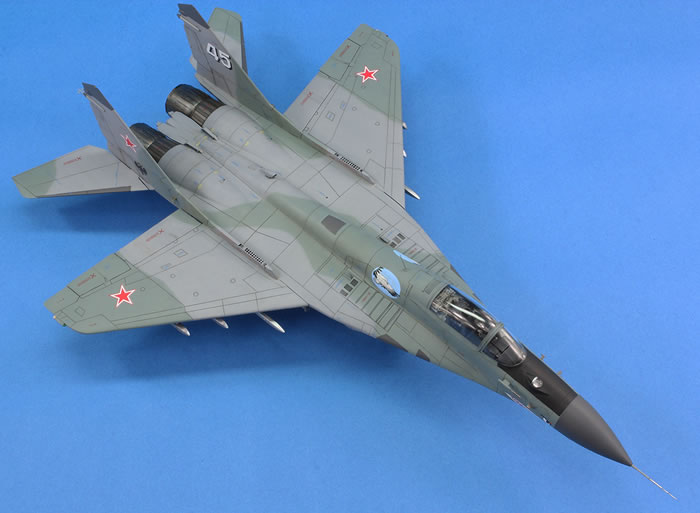
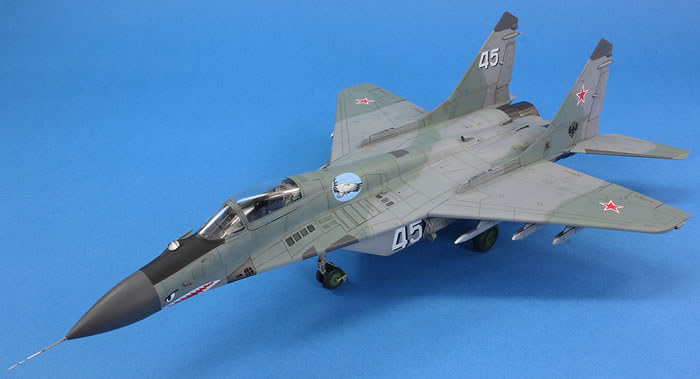
Academy 1/48 Mikoyan MiG-29A ‘Fulcrum-A’ Russian Air Force, 120 IAP, Russia 1993.
Accessories Used:
Aires resin cockpit,
Aires resin exhausts,
Quickboost resin IR sensor,
Quickboost resin sensing units,
Quickboost resin nose,
Master metal pitot,
DANModels photo-etched RSBN antennae,
Eduard Brassin resin wheels,
Begemot stencil decals and CAM decals
Background
In 2017 there is no good reason to be building this kit. It wasn’t very good when it was released in 1993, and nearly 25 years later it has been eclipsed by the Great Wall Hobby kits.
So why did I build it in 2017? Because over the years I’d sunk a lot of money into various aftermarket products and because I bought it in 2005 during a particularly low point in my life when, amongst a number of other issues, I was recovering from my second bout of glandular fever, and as part of my convalescence made a welcome trip to The Aviation Hobby Shop (probably now London’s best model shop for aircraft) just near Heathrow Airport and bought this kit.
In short, I built it because I’m stubborn and nostalgic.
When I bought this kit, I was aware of two main shortcomings: a hopeless cockpit and weak decals. The former I ‘remedied’ by getting Aires’ resin and photo-etch cockpit, and the latter by a set of CAM Decals for the MiG-29 which, at the time, was pretty much all there was available. As time passed the list of required aftermarket grew: the engines are awful, and Aires make a very nice replacement set; Quickboost fix the opaque plastic IR sensor and the misshapen nose; and Begemot would provide the stencils that were missing. Once all this lot had been purchased, the Eduard Brassin resin wheels were a good value purchase, as was the Quickboost resin ‘sensing units’ set and the Master pitot in turned brass with PE. That’s a lot of aftermarket – probably more than in any other kit I’ve built or got. All told, it ended up a lot more expensive than just getting a GWH MiG-29; but then again, when I bought most of this lot, I didn’t know the GWH would ever exist…
The Academy kit is clunky, typified by the chunky flap hinges on the wings. The surface detail is crude and doesn’t seem accurate. I was aware of all this when I bought it; when initially reviewed in the modelling press in the early 1990s, the kit had a reputation for over-complicated engineering and poor fit. This all, sadly, is true.
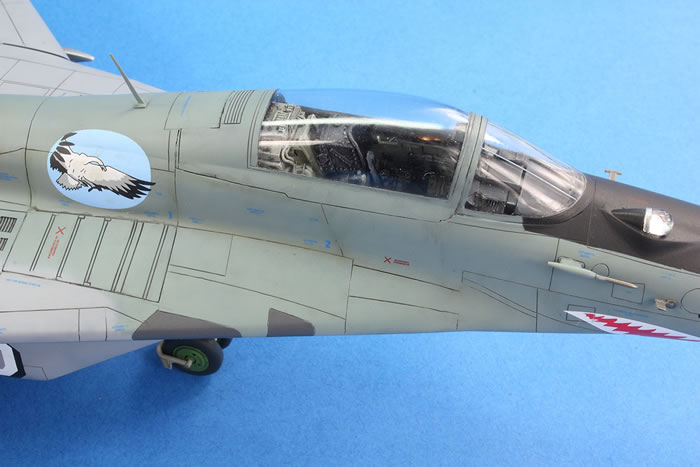
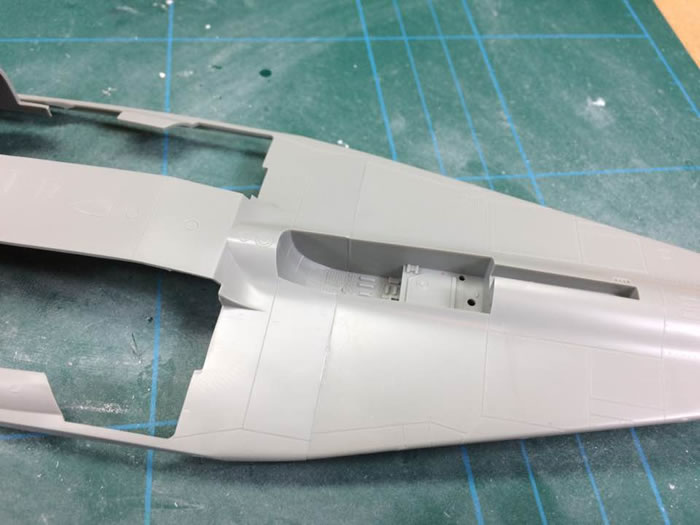
Initially I dealt with the cockpit. The resin needs a fair amount ground away with a motor tool, but has many other weaknesses. Most of the kit plastic needs to be cut away, which I did, and then found that the main tub fitted surprisingly well. The cockpit coaming, however, was another matter, and floated in the area cut away and didn’t touch the kit plastic anywhere. This is the most major fail of the Aires set. Minor failings are that the instructions are hopeless; some of the finer detail was missing (clearly from a poor quality mould); there is nowhere to locate the PE instrument panel; and the acetate film for said panel is printed backwards. I only discovered this after painting the ‘back’ (which should have been the front) white. This was not operator error.
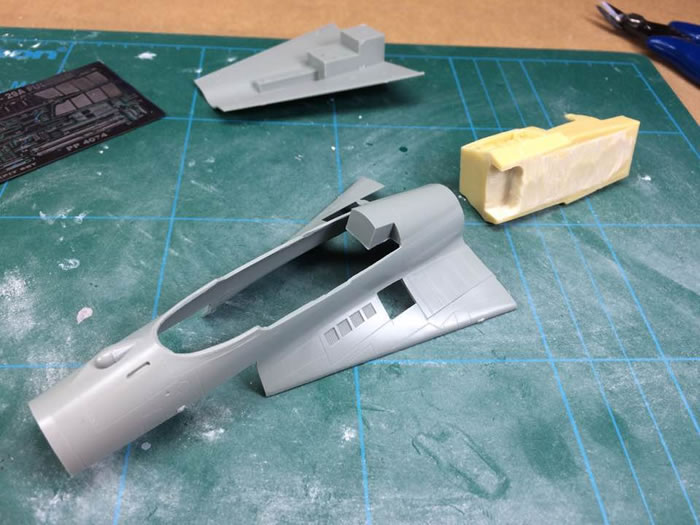
The kit plastic cut away ready to receive the resin cockpit. Note the solid IR sensor, which has yet to be removed, and the recessed area for the three rods IFF aerials, which needed to be filled on my model. There is also a panel removed ready to receive a PE grille from the Aires set.
In the end the cockpit was cobbled together and fitted in the front upper fuselage. In general, it is very nice. There was quite a lot of it (like the avionics bay) that I did not use as I did not want to open any panels or the canopy. The coaming ended up being nestled in a bed of Milliput in order to locate it within the fuselage.
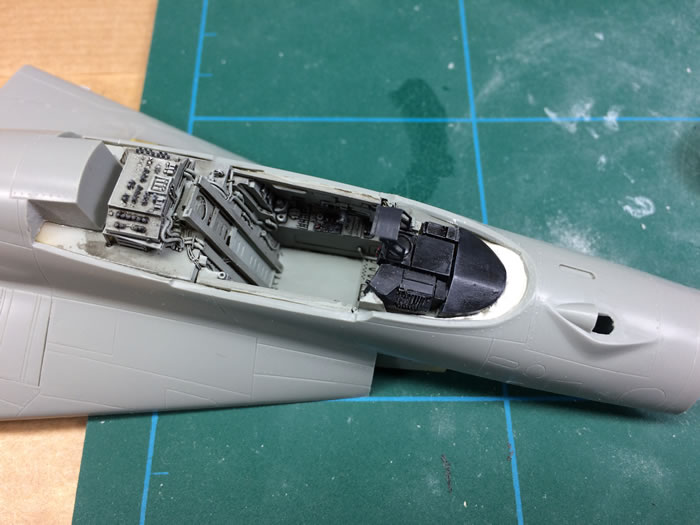
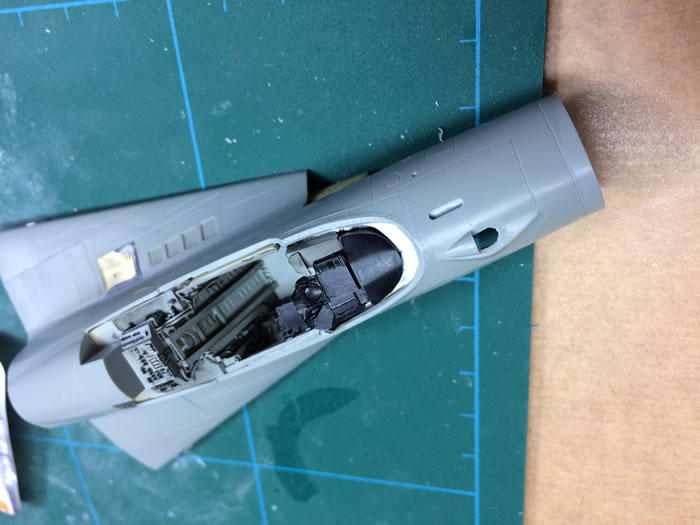
The cockpit coaming placed in a ‘bed’ of Milliput in order to locate it. Note that the IR sensor has been removed for the clear resin Quickboost part.
The biggest challenge with this kit, however, was always going to be the assembly of the fuselage. My advice would be to ignore the instructions. The front and rear lower fuselage parts go together quite well:
Fit of the front to rear lower fuselage pieces is actually pretty good…
…as is the fit of the intakes to the lower fuselage.
After that though, it all goes downhill.
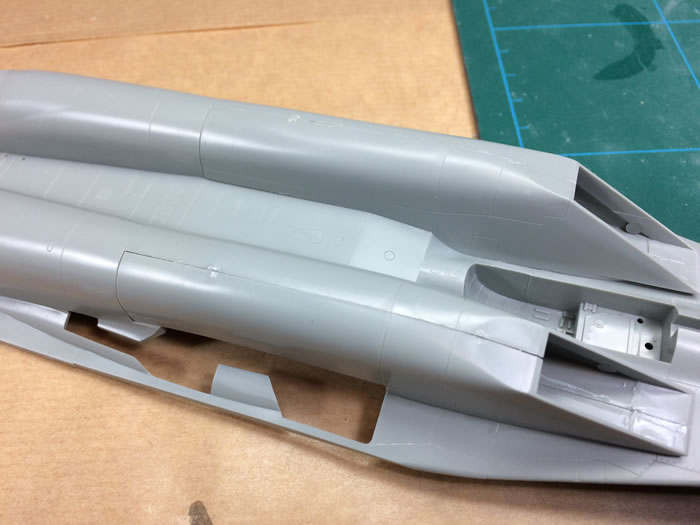
The intakes can then be attached next, and actually join to the lower fuselage pretty well. The intake halves themselves are a poor fit to one another and required a lot of CA and sanding to eliminate the seams.
Next I attached the upper front and rear fuselage pieces using Tamiya Extra Thin and a lot of pegs and a clamp. This is required to spread the front upper fuselage sufficiently. The joints are poor all round here and there is a significant mismatch in shape between the front and rear pieces that required plenty of CA and careful rescribing to rectify.
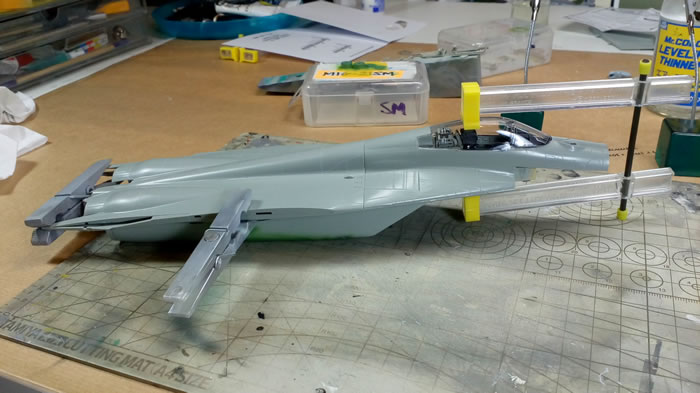
Attaching the upper fuselage pieces to the lower.
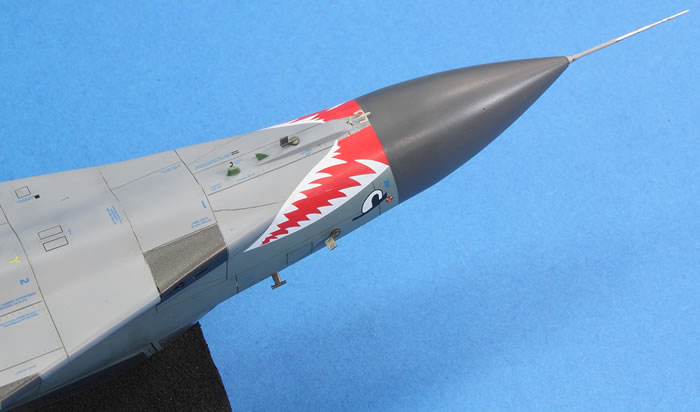
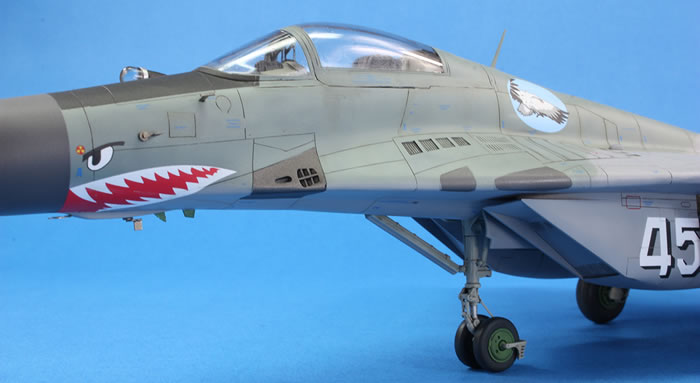
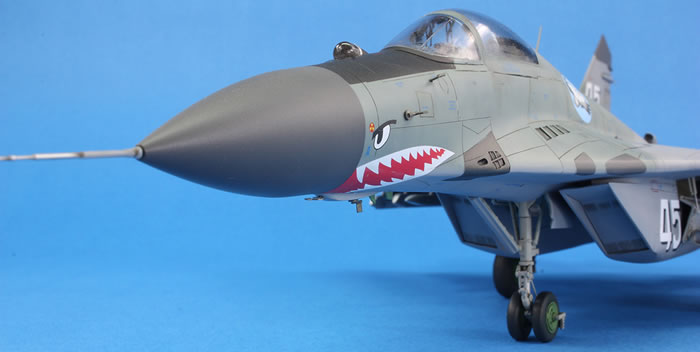
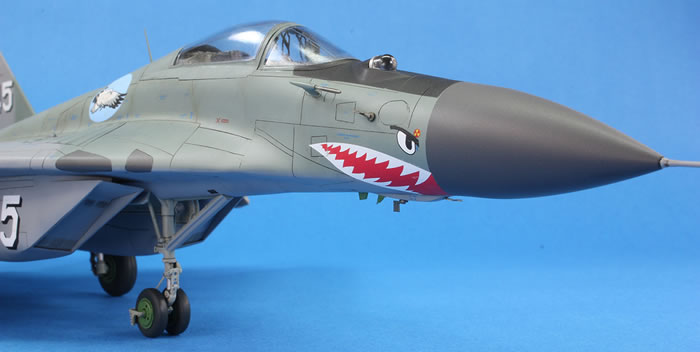
The front lower underfuselage panels are separate and a very poor fit. Again, lots of patience, CA and nasty rescribing to fix. Similarly, the Quickboost resin nose (which is a huge improvement on the shape of the kit nose) required a lot work despite simply replacing the kit part:

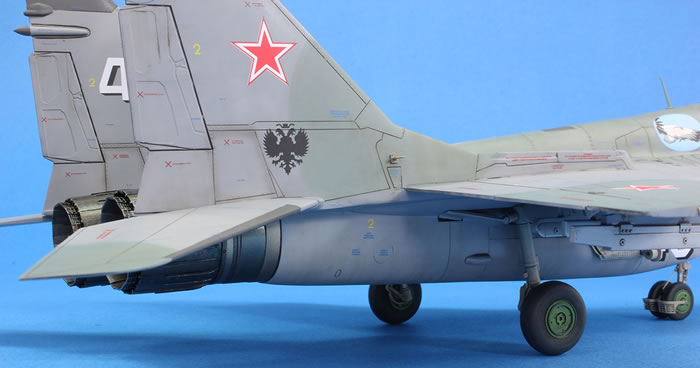
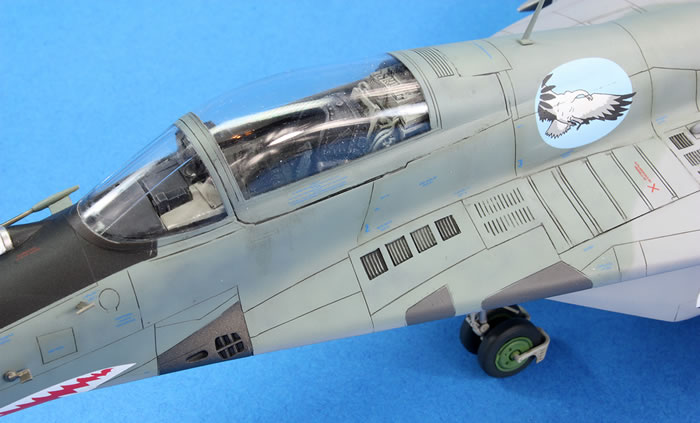
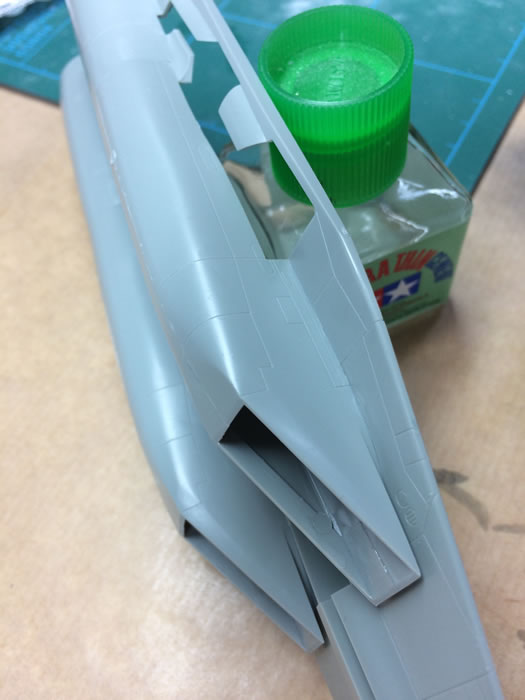
The canopy, on the other hand, which I fitted unusually early, was a great fit, especially the windscreen. The wings were okay, but the tails were such a poor fit they need to be fitted and faired in prior to painting. Usually I would prefer to paint these separately as the perpendicular surfaces on the inner tails can easily lead to rough paint, but I had no choice this time. I used a good amount of CA and plastic card to fill the gaps in the area where the tailplanes would later attach.
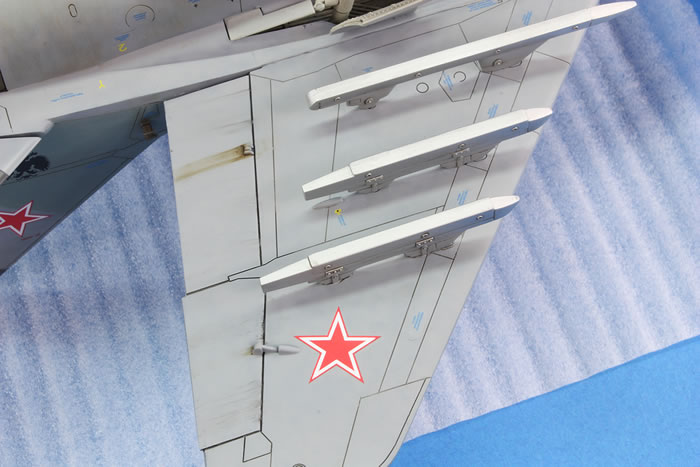
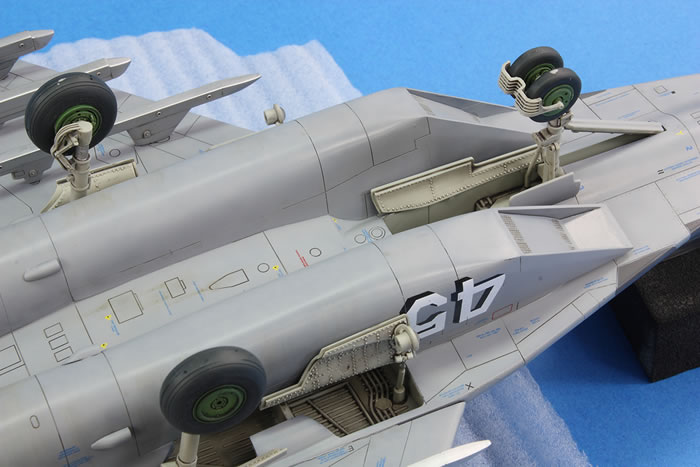
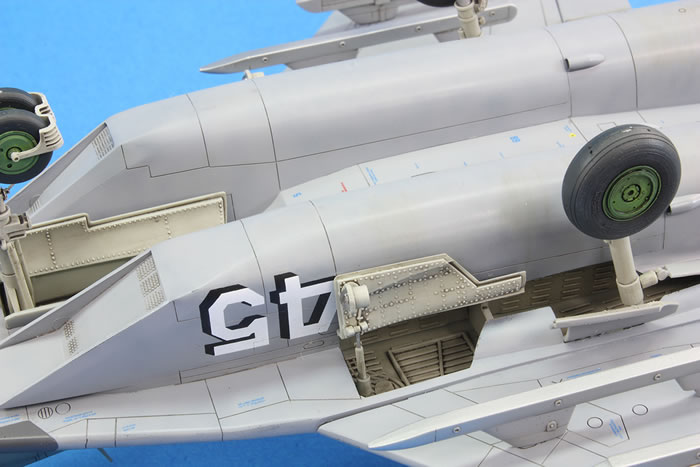
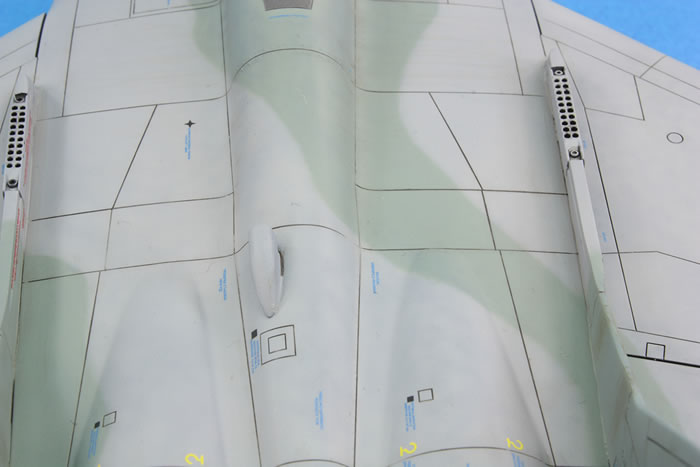
The list of kit shortcomings is quite long: the undercarriage doors are the wrong shape and a poor fit. The nose gear landing light is in opaque plastic, and so I replaced it with a clear part from my spares box. The tail mounted pitots are called out incorrectly in the instructions – on the starboard side it should be on the outer surface, not the inner surface. The large intake on the upper rear fuselage is completely the wrong shape and very crudely moulded. I hollowed it out a little and tried to reshape it a bit. The wingtip lights are also the wrong shape, but I left these alone. I am pretty sure the pylons aren’t right either.
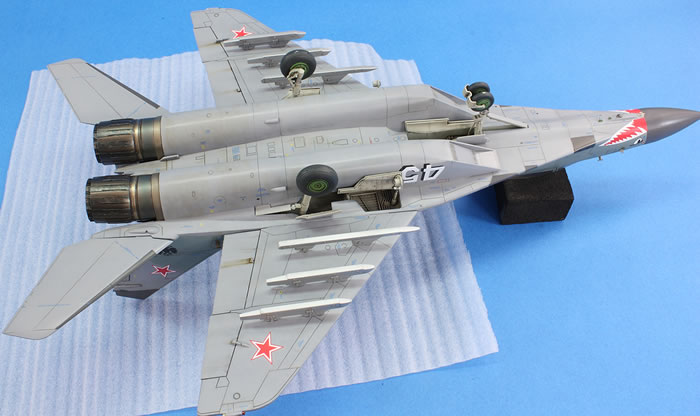
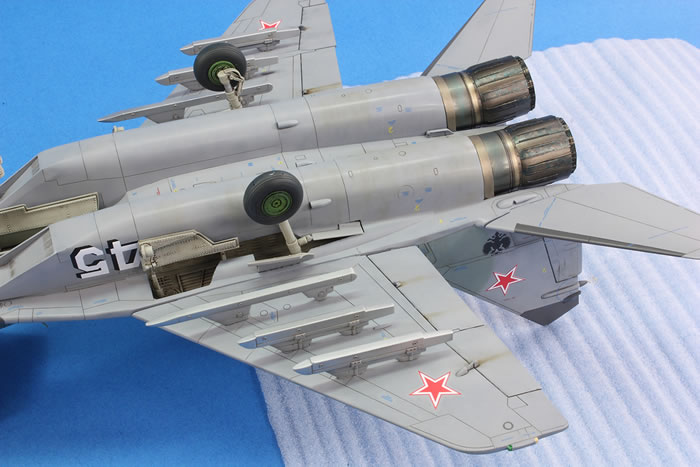
The undercarriage is also quite basic; the nose gear leg in particular is oversimplified. I left it alone, but I did shorten each of the main gear legs by 2mm to improve the sit of the model. Fortunately these parts fitted quite positively at the end of construction (unlike the doors). The Eduard Brassin wheels and hubs are extremely nice. Eduard provide about four different nose wheel hubs and I found no guidance on which to use. I had intended building White 47 from the CAMDecals set and found a photo from 2006 on russianplanes.net that allowed me to select the correct ones. I didn’t bother with a lot of the PE parts Eduard provide for the undercarriage.
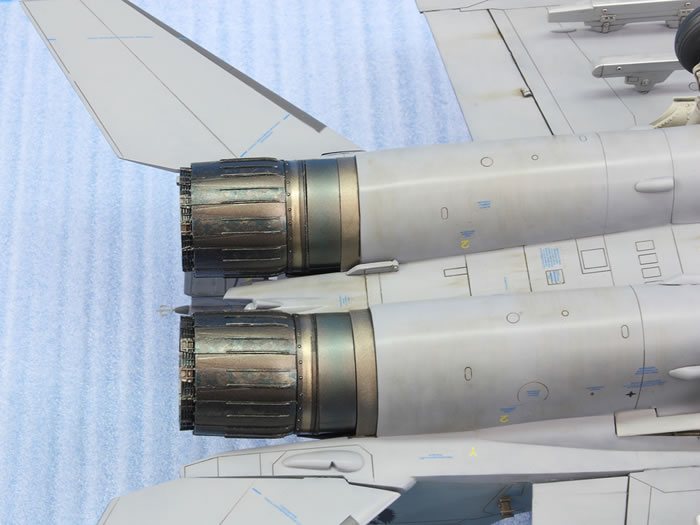
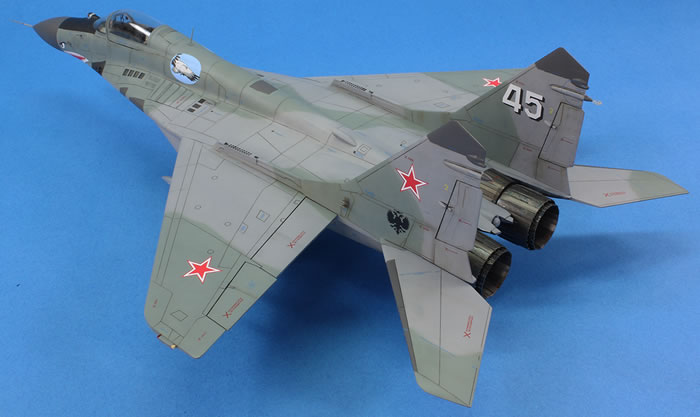
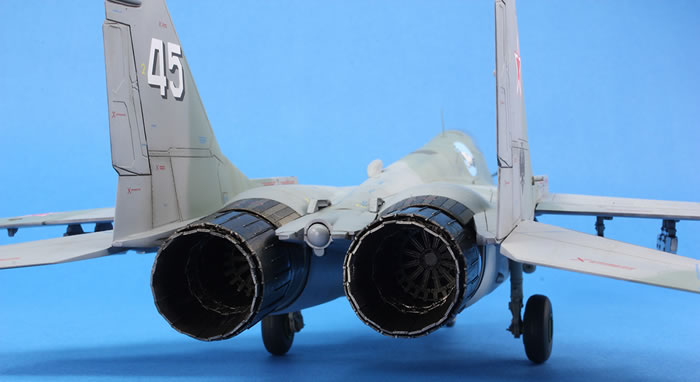
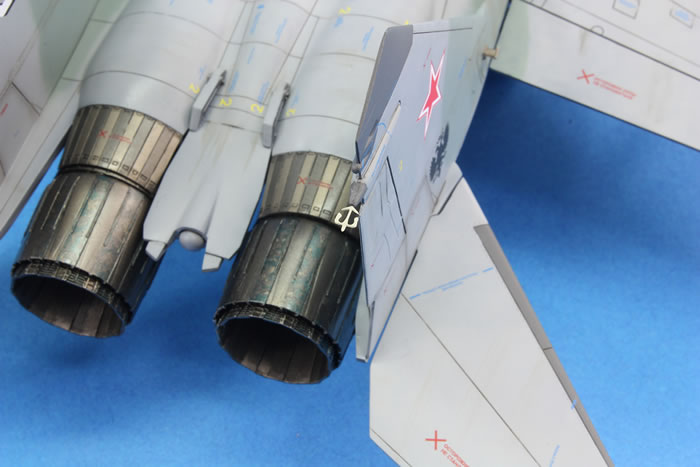
The Aires exhausts fitted very nicely.
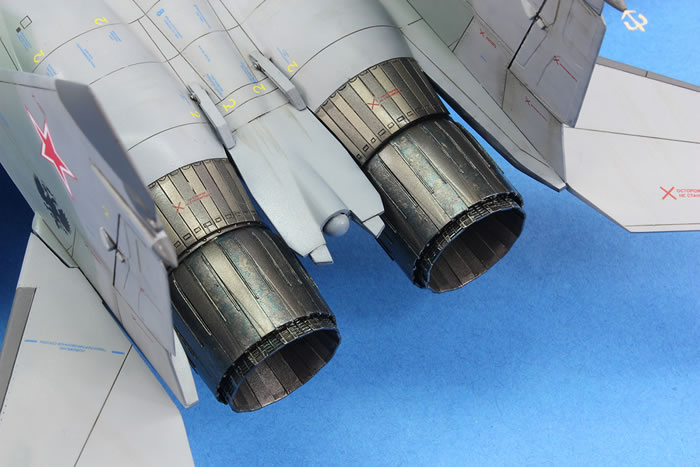
I found some good close up images of the exhausts on MiG-29s in the late 1980s and early 1980s and attempted to replicate the distinctive patterning on various parts; I did not particularly succeed, but they look satisfyingly busy.
Painting, Markings and Finishing Touches |
Painting
I decided to prime using black for the first time, and sprayed the whole model with a generous coat of black Mr Finishing Surfacer 1500 through an Iwata RG-3L. I was nervous that the various perpendicular joins at the tail and between the intakes would cause some grittiness in the paint, but I did not experience any of this.
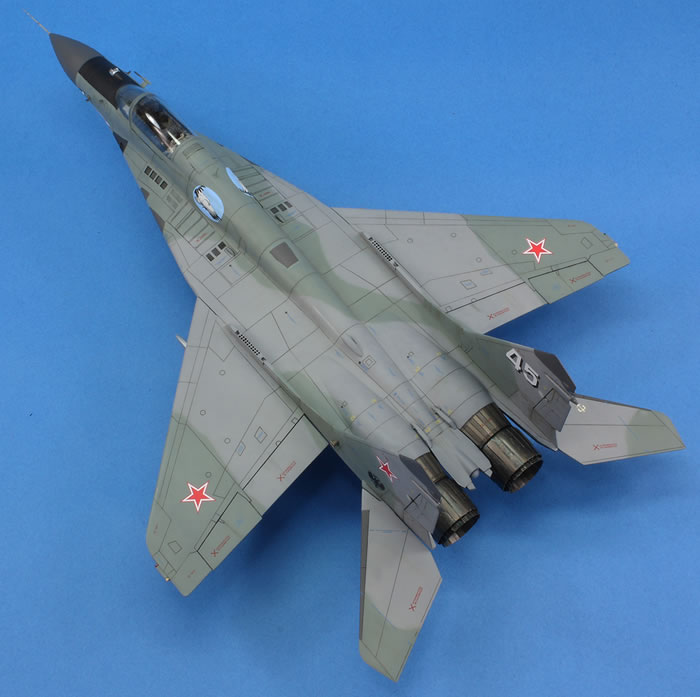
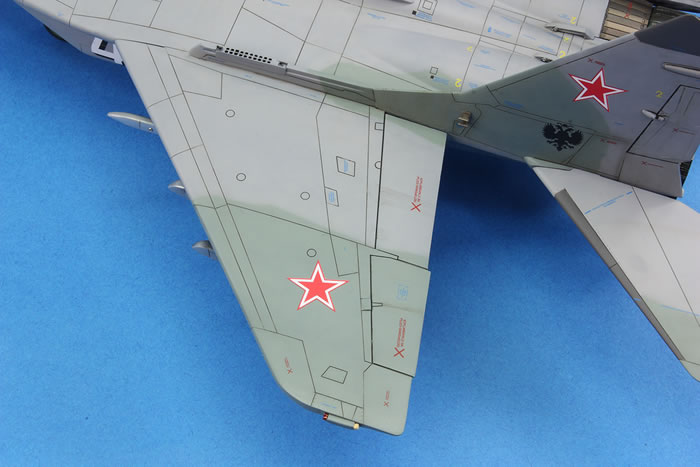
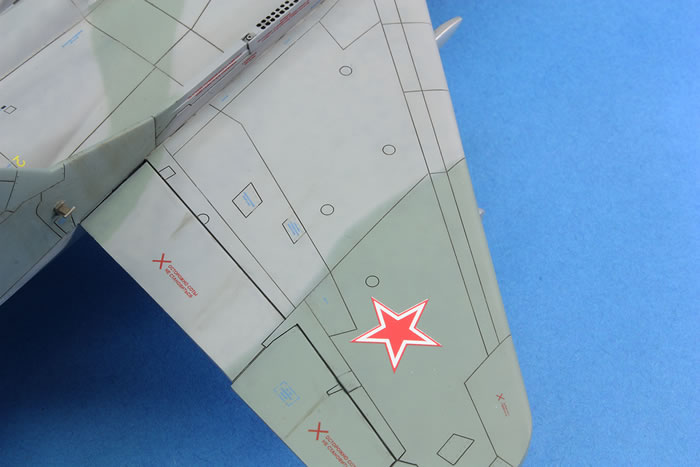
In a fit of impulsiveness I decided to paint the colour scheme freehand. CAM Decals got the camouflage scheme wrong: it should be a single shade of grey all over with a green pattern on the upper surfaces. I used Akan’s lacquer acrylics for these two shades and thinned them about 50% with Mr Levelling Thinner. This paint sprayed extremely well and I was very pleased with the opacity and the fineness of the line I could achieve between the colours. I sprayed these paints on with an Iwata Custom Micron using the black-basing method and thoroughly enjoyed it. I found it a very satisfying way to paint.

Once dry, a wet coat of highly thinned Mr Color GX100 clear was sprayed over the model. This requires care as it softens the underlying paint, and it takes a while to dry, but it gives a very good gloss very quickly.
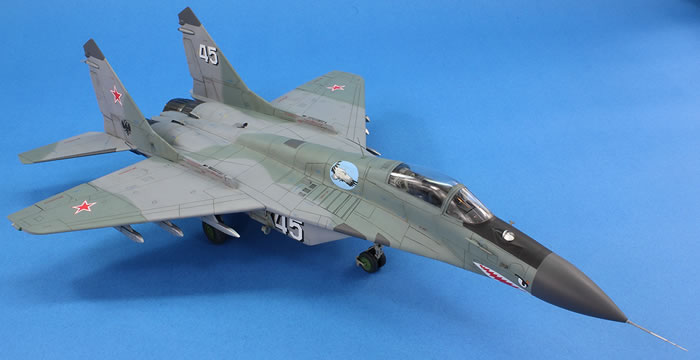
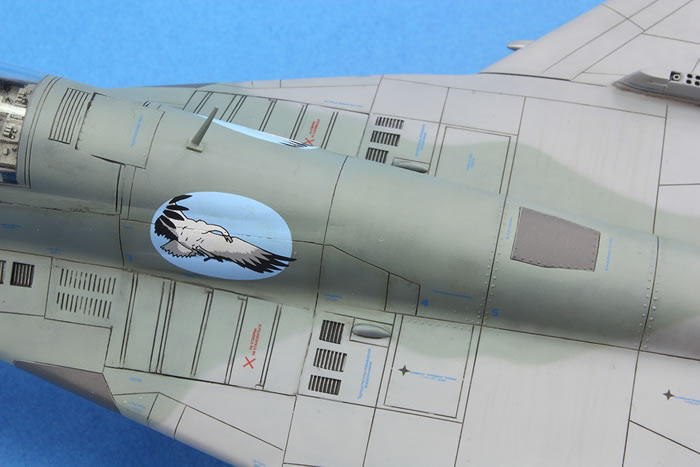
I started decalling with the Begemot stencils. These are very complete and the research seems extremely thorough. Unfortunately they are let down by inadequate instructions which seem to be outright wrong in various places, call out more decals that are supplied for several items, and for a few of the lower-numbered stencils the decal film did not completely cover the stencil, resulting in some of the printing disappearing when the decal was removed from the backing paper. The decals themselves performed superbly, each placed in a little puddle of Mr Setter and left alone to dry. The CAM Decals are printed by Microscale, which always seems to work well for me, but there were registration problems with the red stars, which are very visible on the model. Some of the items shattered – it’s a good thing two sets of the sharkmouth markings are provided! The stencils they supply are also worthless as they are very crude. Subsequent to finishing the model I have found a photo of White 45 on scalemodels.ru that indicates that the flying bird on the port side should be the graphic of a MiG-29 and an F-15, which CAM Decals reserved for White 47.
Weathering
For weathering I painted various streaks using AK Interactive’s engine grime and streaking grime. I leave these a short while and then manipulate them using a dry, soft brush, removing nearly all evidence of the streak. For stronger streaks, like from the flaps, I simply manipulate the paint less to leave a stronger streak.
The final finish is Ammo’s satin varnish, which I find extremely flat. This is an awful paint to spray – tip dry is instant – but it’s the best varnish I’ve found for making decal film disappear. It takes a good day to dry properly as well.
Finishing Touches
Master’s nose pitot comes with very fine PE strakes. I spent ages thinking about how to attach these, and then discovered they don’t fit to the contours of the Quickboost nose at all. I decided to abandon attaching these.

The aerial fit under the nose is completely different to what Academy supply. I made these up from bits of PE and plastic. The three rods IFF aerials in front of the windscreen were not on White 45, so this area was filled. White 45 did have the RSBN antennae, shaped like a little bow and arrow, under the nose and at the rear top of the starboard tail fin. I could not find these anywhere, except on a DAN Models PE set that also included chocks and a boarding ladder. This ended up costing me £10 on Ebay, and considering I only used the two aerials and nothing else, makes this the least good value aftermarket product I’ve ever bought.
In summary, the model has ended up being fairly workmanlike. The nose pitot is not faired in properly and is missing its strakes; there is a slightly visible seam on the starboard wing root that I noticed whilst applying the matt coat; the rescribing around the nose area is not very good; and although it fits well, I could have seated the canopy far better.
It’s a crude kit that’s produced a fairly crude model.
My advice: if you want a MiG-29, get the GWH kit. I’ve heard it takes some effort to get together, but however much effort that may be, it will still be less than required for the Academy kit, and cheaper in the long run, too.
To see more model build articles like this, please visit my website: www.jonbryon.com/model_index.html
Text and Images Copyright ©
2017 by Jon Bryon
Page Created 9 October, 2017
Last Updated
9 October, 2017
Back to
HyperScale Main Page

|
 Home
| What's New |
Features |
Gallery |
Reviews |
Reference |
Forum |
Search
Home
| What's New |
Features |
Gallery |
Reviews |
Reference |
Forum |
Search