Supermarine Walrus Mk.I
Airfix, 1/48 scale
S
u m m a r y |
| Catalogue Number: |
Airfix Kit No. A09183 - Supermarine Walrus Mk.I |
| Scale: |
1/48 |
| Contents and Media: |
See details below. |
| Price: |
£36.99 EU Price (£30.83 Export Price) plus shipping available online from Hannants
and model retailers worldwide and online |
| Review Type: |
FirstLook |
| Advantages: |
Excellent detail, approach and buildability. |
| Disadvantages: |
Rigging! |
| Recommendation: |
Airfix has created a seriously nice kit here that drips in detail and just looks correct. No nasty trench-like panel lines, and just a finesse that is readily expected from a modern-tooled kit. |
Reviewed by
James Hatch

Revell's 1/72 Do 17 Z-10 will be available online from Squadron.com
The Supermarine Walrus (originally known as the Supermarine Seagull V) was a British single-engine amphibious biplane reconnaissance aircraft designed by R. J. Mitchell, and first flown in 1933. It was operated by the Fleet Air Arm (FAA) and also served with the Royal Air Force (RAF), Royal Australian Air Force (RAAF), Royal New Zealand Navy (RNZN) and Royal New Zealand Air Force (RNZAF). It was the first British squadron-service aircraft to incorporate in one airframe a fully retractable main undercarriage, completely enclosed crew accommodation and all-metal fuselage.
Designed for use as a fleet spotter to be catapult launched from cruisers or battleships, the Walrus was later employed in a variety of other roles, most notably as a rescue aircraft for downed aircrew. It continued in service throughout the Second World War. The single-step hull was constructed from aluminium alloy, with stainless-steel forgings for the catapult spools and mountings. Metal construction was used because experience had shown that wooden structures deteriorated rapidly under tropical conditions. The wings, which were slightly swept back, had stainless–steel spars and wooden ribs and were covered in fabric. The lower wings were set in the shoulder position with a stabilising float mounted under each one. The horizontal tail-surfaces were positioned high on the tail-fin and braced on either side by N struts. The wings could be folded on ship, giving a stowage width of 17 feet 6 inches.
The single 620hp Pegasus II M2 radial engine was housed at the rear of a nacelle mounted on four struts above the lower wing and braced by four shorter struts to the centre-section of the upper wing. This powered a four-bladed wooden propeller in pusher configuration. Although the aircraft typically flew with one pilot, there were positions for two. The left-hand position was the main one, with the instrument panel and a fixed seat, while the right-hand seat could be folded away to allow access to the nose gun-position via a crawl-way. An unusual feature was that the control column was not a fixed fitting in the usual way, but could be unplugged from either of two sockets at floor level. It became a habit for only one column to be in use; and when control was passed from the pilot to co-pilot or vice versa, the control column would simply be unplugged and handed over. Behind the cockpit, there was a small cabin with work stations for the navigator and radio operator. Armament usually consisted of two .303 Vickers K machine guns, one in each of the open positions in the nose and rear fuselage; with provision for carrying bombs or depth charges mounted beneath the lower wings. Like other flying boats, the Walrus carried marine equipment for use on the water, including an anchor, towing and mooring cables, drogues and a boat-hook.
Edit courtesy of Wikipedia
The Kit
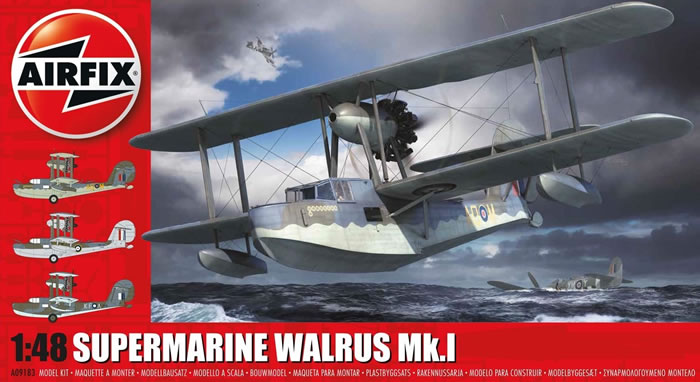
Airfix can’t be accused of putting their wares in flimsy boxes (take note, Revell), and this kit is packaged into a reasonable sized box that isn’t insubstantial in construction. It certainly takes effort to prise the lid from the parts tray.
The box art on new Airfix releases certainly captures the atmosphere of the kits I remember from the 70s, but these are digital creations and do look great on the hobby shop shelf. The sides of the box contain CAD images of the finished model, as well as profiles of the three schemes that are possible with the kit decals.
Inside the box there are five frames of light grey plastic, and a single frame of clear parts. Whilst the clear parts are individually bagged, the others aren’t, being packed into a single clear sleeve. Whilst my sample kit wasn’t at all damaged, I would like to see manufacturers bag frames separately to avoid possibility of damage.
In the bottom of the box is quite a substantial instruction manual (that I’ll look at later), with a colour scheme chart sat within, plus a single decal sheet.
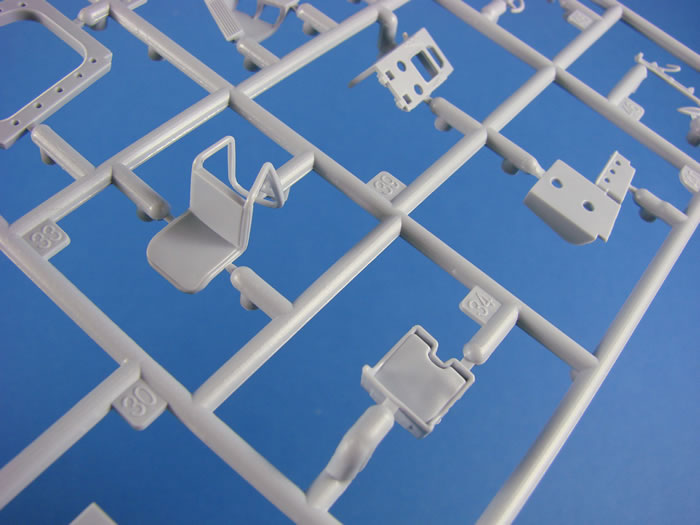
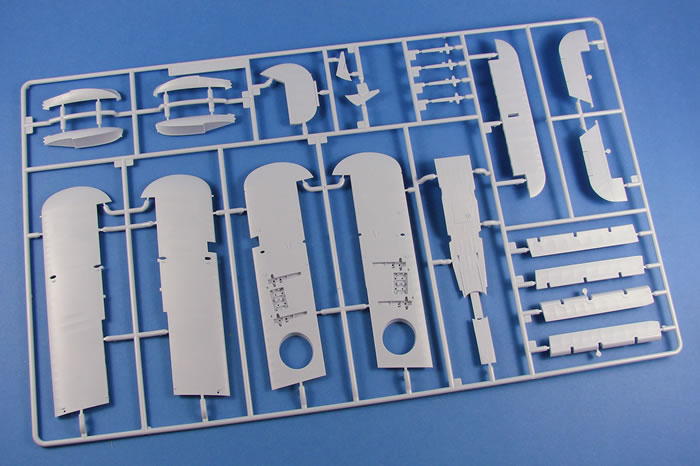
Sprue A
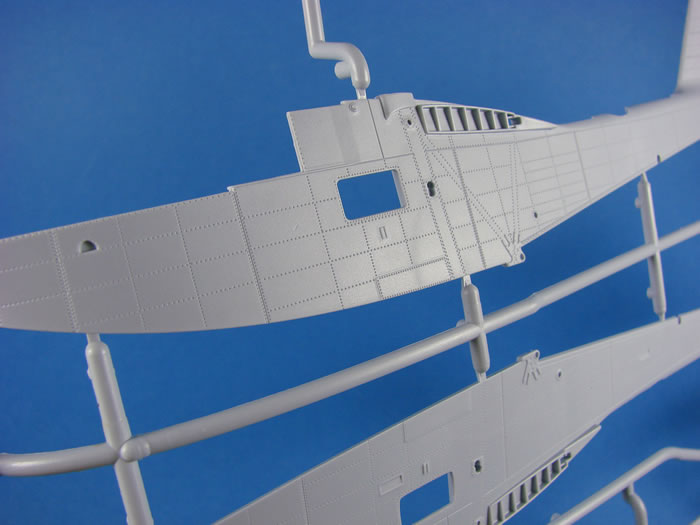
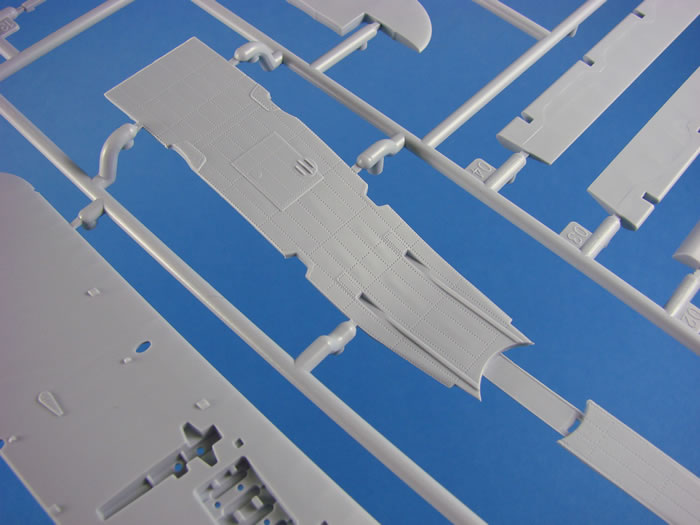
The main players here are the hull sides (not fuselage as this is a flying boat, folks!), and a separate hull bottom. I know that some newly-tooled Airfix kits over the last years have suffered from panel lines that are way too trench-like, but this kit, as with many others of recent, most certainly don’t have that issue. Surface detail is superbly rendered with fine panel line and rivet detail. There is most certainly a lot of finesse when it comes to recreating the individual details, such as foot holds, wing root connection, radius arm and catapult spool locations. Those rivets I already mentioned also are very fine in their depiction. Note also that the upper, forward deck is separate, as is the upper rear deck, incorporating the upper MG ring hatch area. It can also be seen that the fin isn’t full height, with the top part being a separate entity that is fitted after the stabiliser is attached. Sensible engineering.
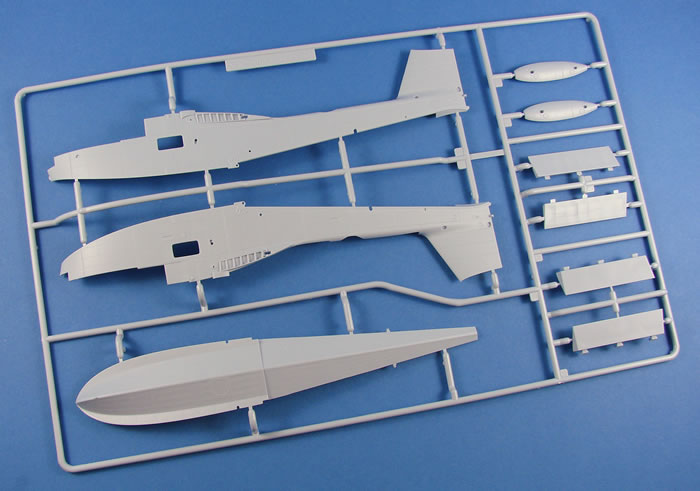
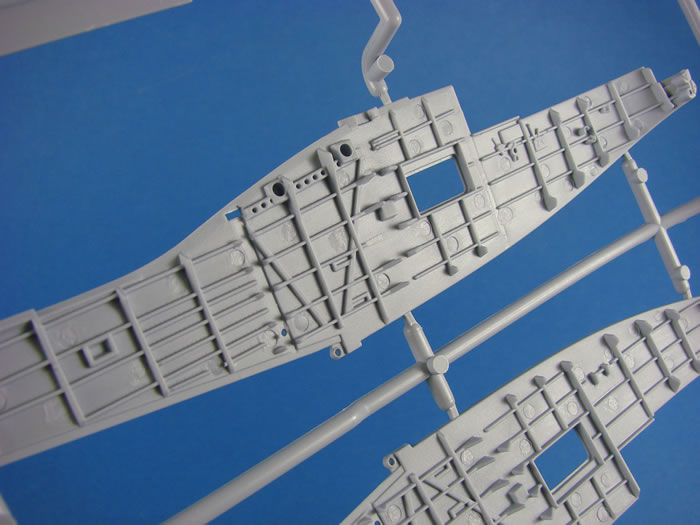
Inside the fuselage, the various frames and other constructional elements are fully reproduced. You will see that there are a large number of ejector pin marks within here too. To do full justice to the sheer level of detail that this kit supplies, you will need to eradicate these marks. These are either just below the surrounding surface, or just above them. A little filler and/or a fibreglass pen can be used to remove these from view. If any panels seem troublesome, then a small piece of plasticard can be used to plate over the mark. A similar frequency of pin marks lay in the lower hull too, but I feel many of these won’t be seen as other parts obscure them.
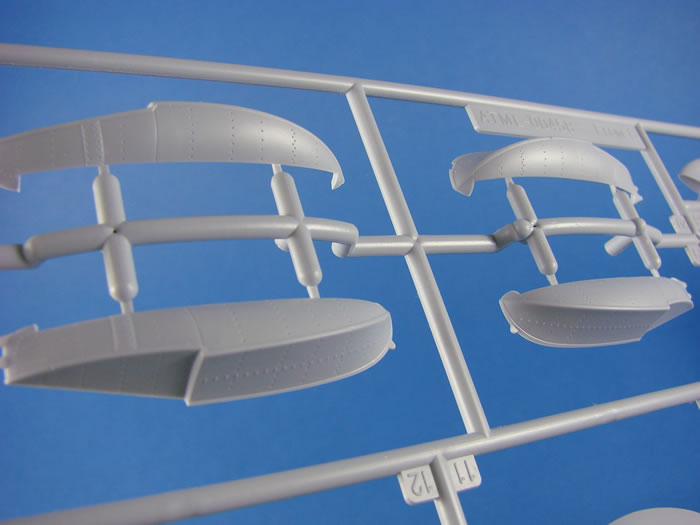
Other parts on this frame include the top sections of the wingtip floats and also alternative folding flap parts for the lower wing. These options are for flaps raised (to facilitate folding wings) or for neutral positioning. A very nicely rendered fabric and rib effect is to be seen on these parts.
Sprue B
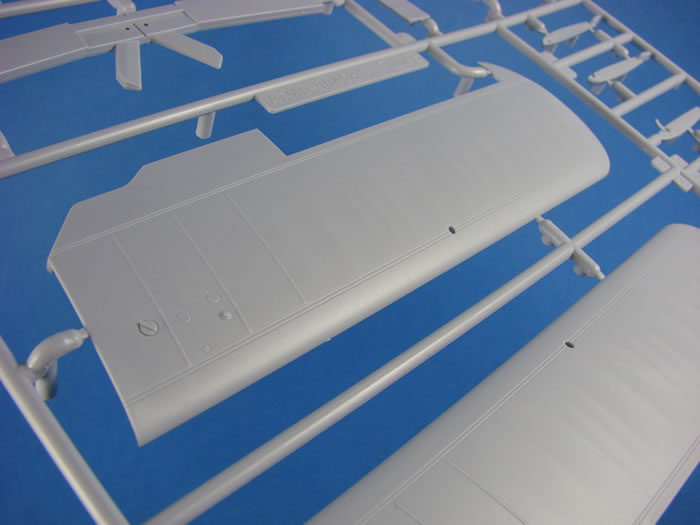
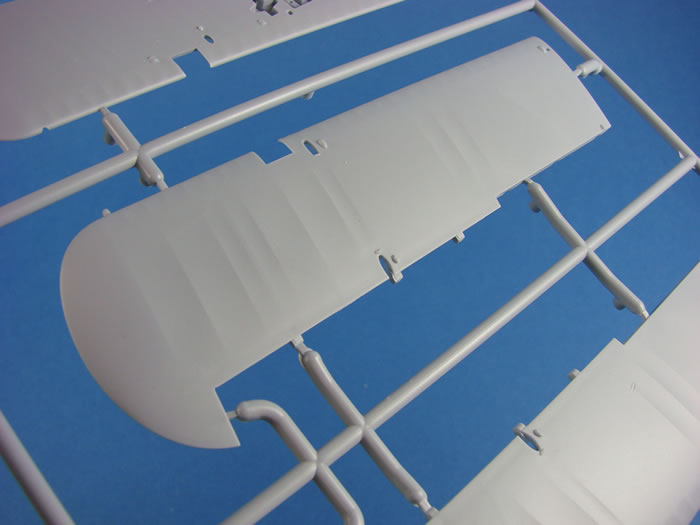
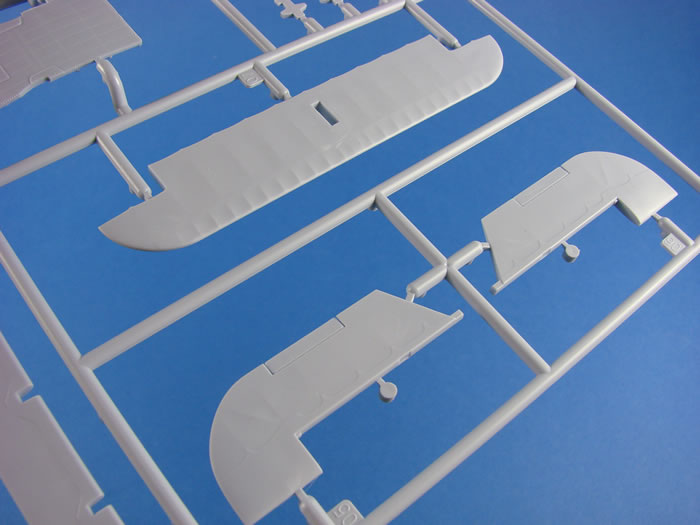
Here you will find the upper wings, split into traditional upper and lower panels, and with separate ailerons. Surface detail is first-rate, with very fine panel lines and a believable and authentic-looking rib and fabric representation.
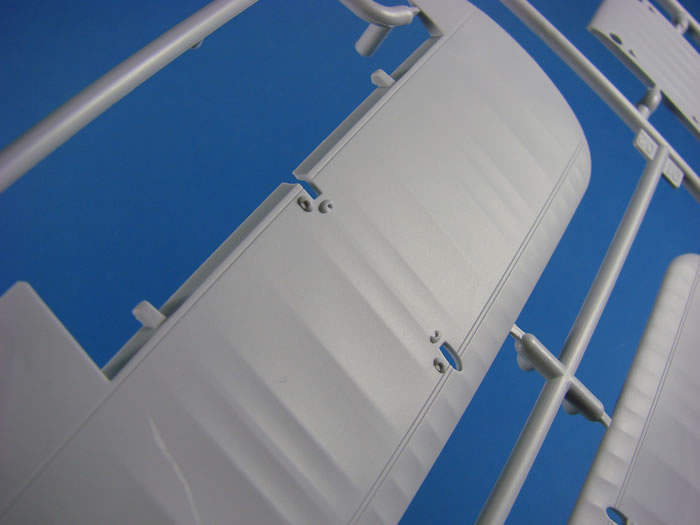
This looks properly pitched and not at all contrived. Rigging points are present and will just need drilling a little deeper with a micro drill bit. Strut positions are also very positive and should provide for an easy build.
Turning the wings over reveals some engineering designed to give you alternative finishing options. Airfix has designed the Walrus to be displayed with the wings either folded or unfolded. Here you can see the tracks within the wings into which the wing positioning arms will fit. If you want to pose them folded, then you will need to clear a little plastic out from the entry point for those arms. Likewise, you will also need to remove a little plastic, depending on how you pose the arms, when it comes to the two-part centre wing section. Those arms are also provided on this sprue, along with the various end rib options for this. Note also the upper, forward hull, complete with interior detailing, and the lid which fits to this if you wish to pose that crew position as closed.
Sprue C
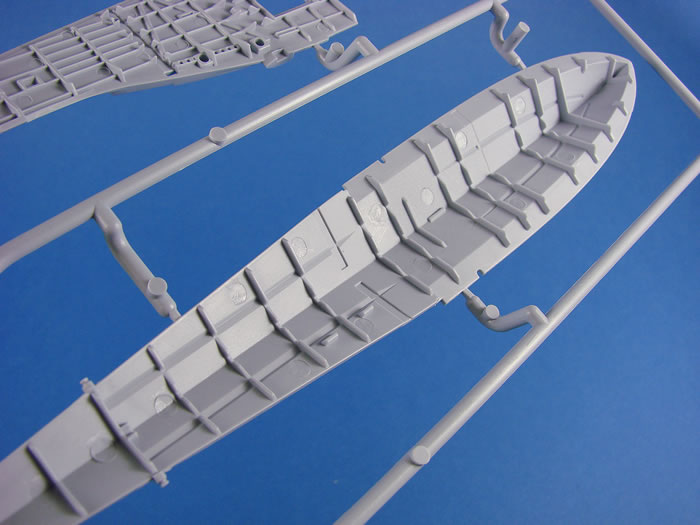
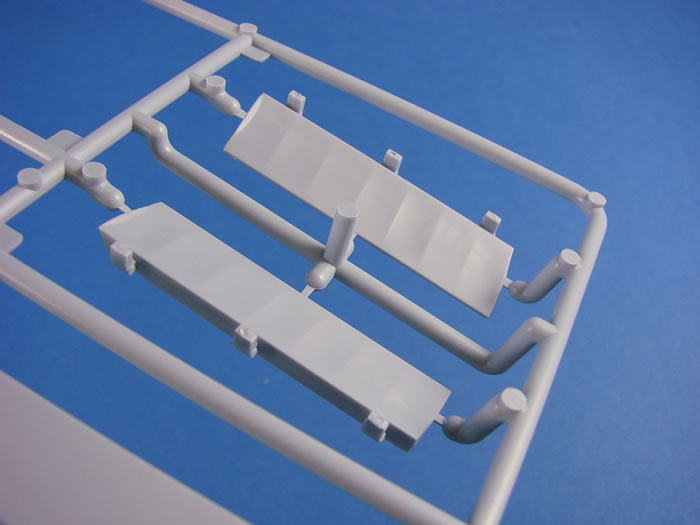
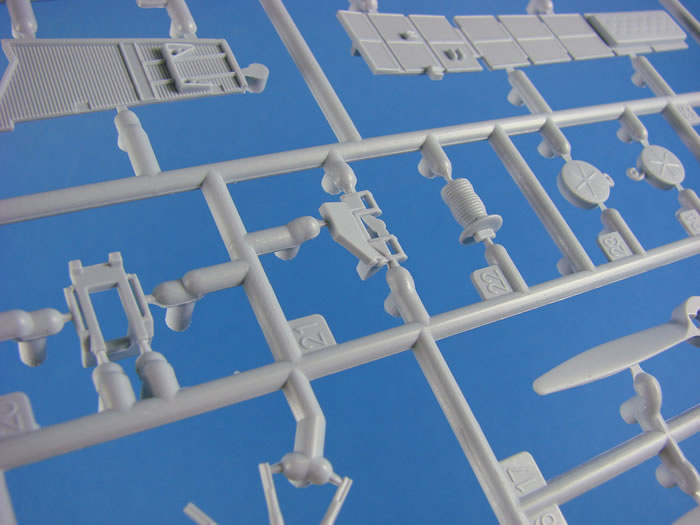
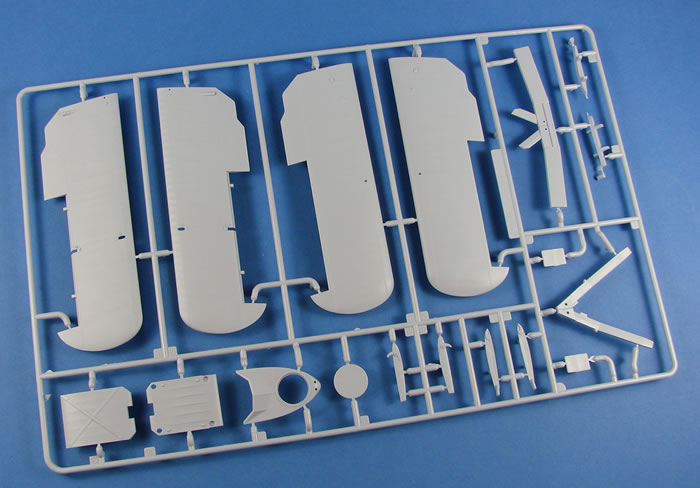
The most obvious parts are those for the lower wings, again moulded as upper and lower panels, and exhibiting the same finesse and detail rendering as the upper wings. Of course, there are differences here, namely the separate folding flap adjacent to the aileron, and also the main gear wells. Whilst these are simple, circular openings on the lower panels, the inside of the upper panel contains the well ceiling details. Should you wish to add underwing bombs, then the locations are moulded here for you to fit the various racks for the internal and external bomb loads. If you don’t wish to fit them, then blanking plates are supplied for that purpose.
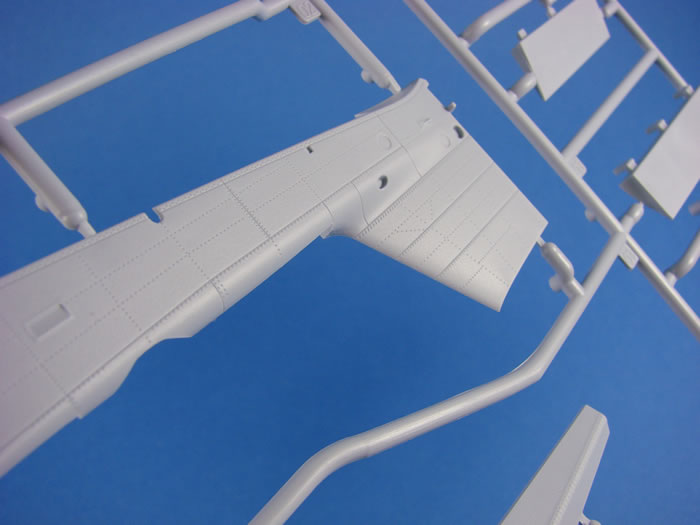
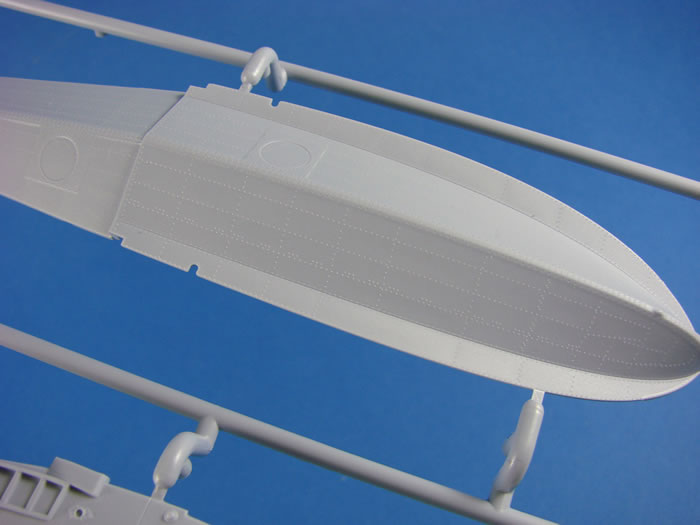
Airfix’s approach to the wing top floats is superb. On Frame A, we saw the upper panels for these. Here you will find the left and right halves. All of these fit together either along the lower hull ridge, or coinciding with panel lines. As I said before…smart engineering. A single-piece stabiliser is also to be found here, and this simply plugs into the location on the fuselage fin. Elevators are separate parts, and channels are moulded into the stabiliser underside, for you to locate the strut. The top of the fin is also moulded here, and strangely, as a two-part item. Can’t fathom the rationale there. Of the same authentic style as the elevators and ailerons is the single-piece rudder, with integral trim tab.
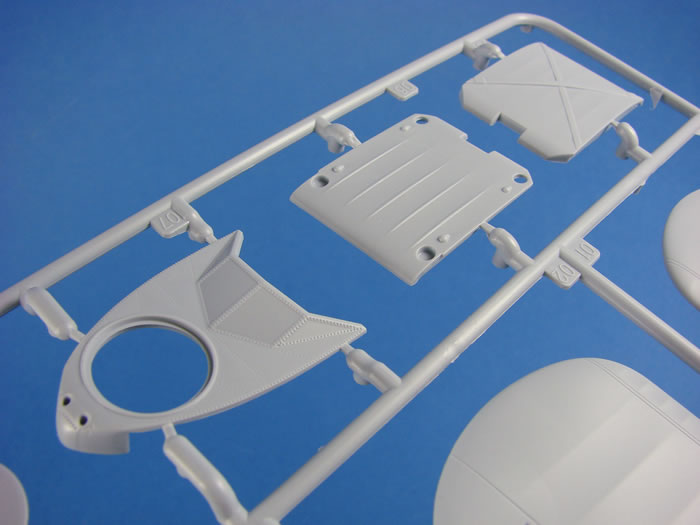
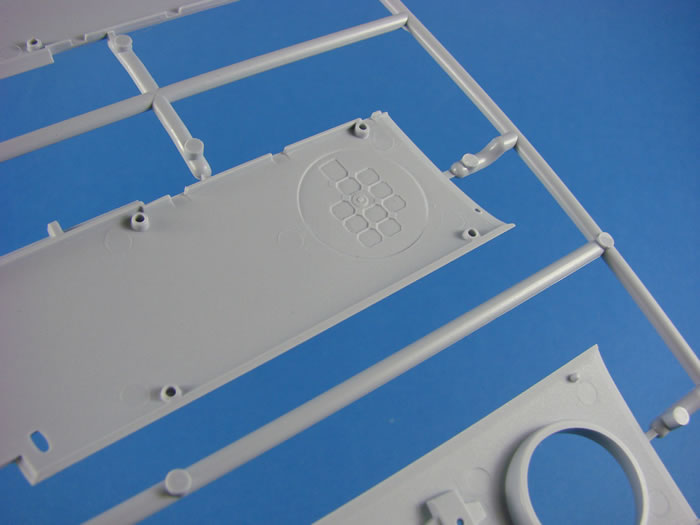
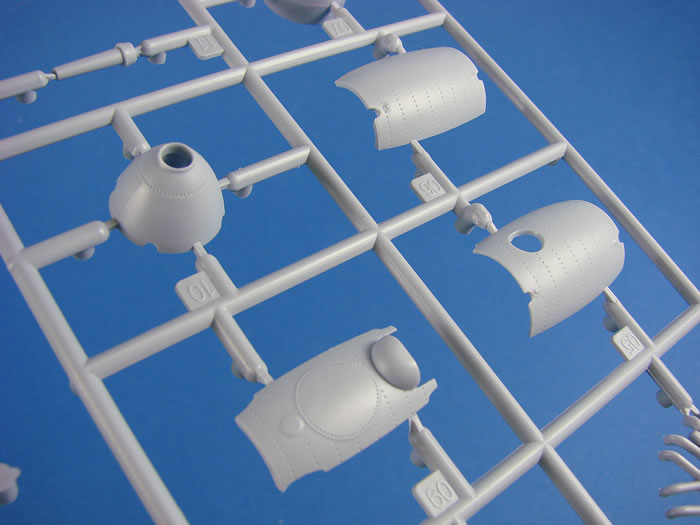
Whilst the hull exterior detail is quite exceptional, on the rear, upper hull part moulded here, you will find a small degree of stressed skin oil-can effect that we fell in love with on their 1/24 Hawker Typhoon kit. You will need to fit the hatch ring into position on this, followed by removal of the spacer that holds the front and rear sections of this piece together. This is well-illustrated in the manual. Again, this part is thoroughly detailed on the underside, and there are some ejector pin marks, but I really wouldn’t bother about the removal of these. Lastly, the single-piece ailerons can be found here too.
Sprue D
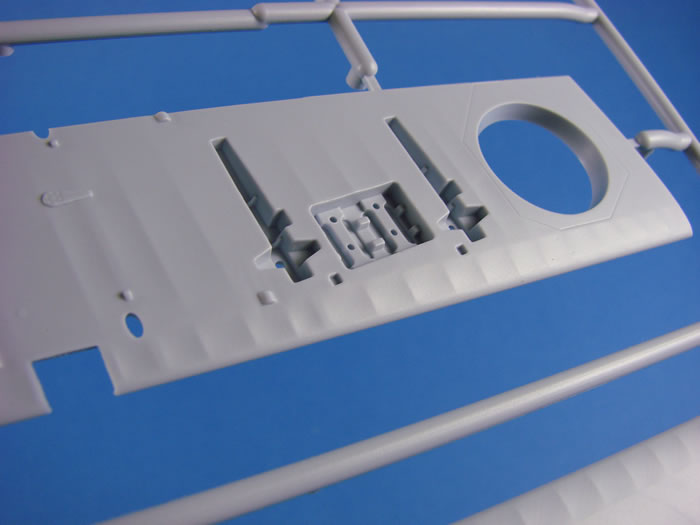
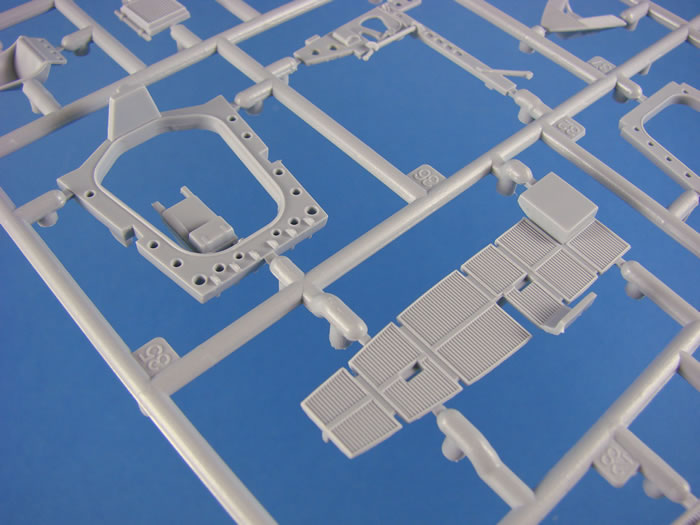
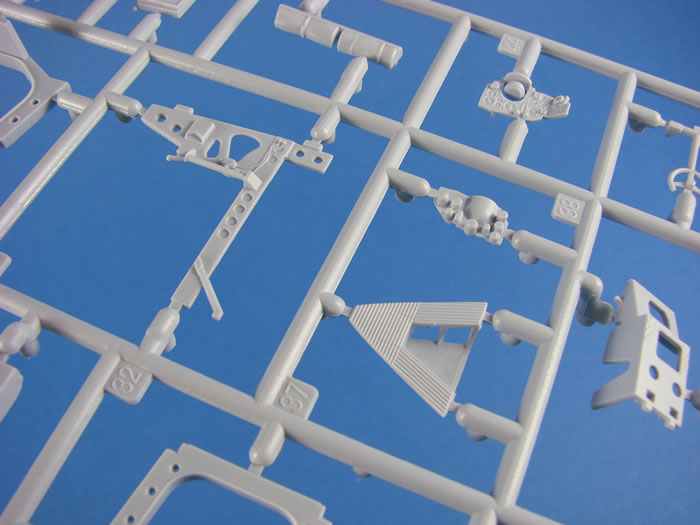
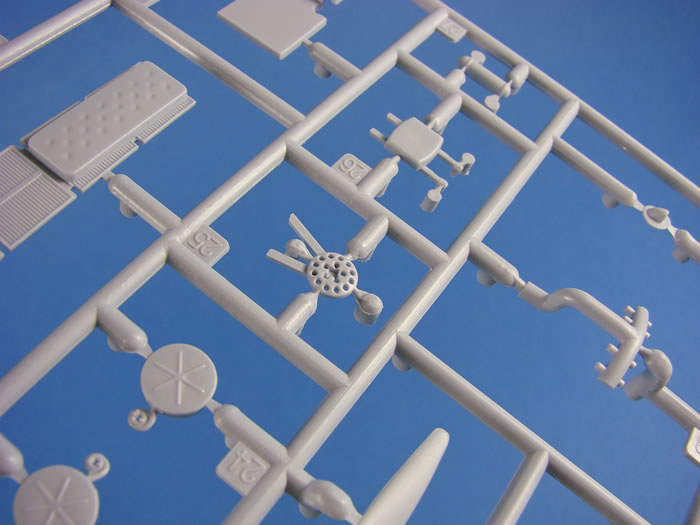
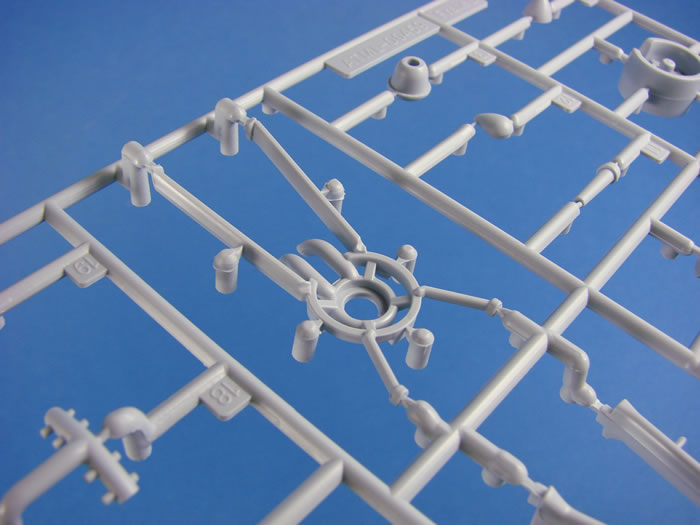
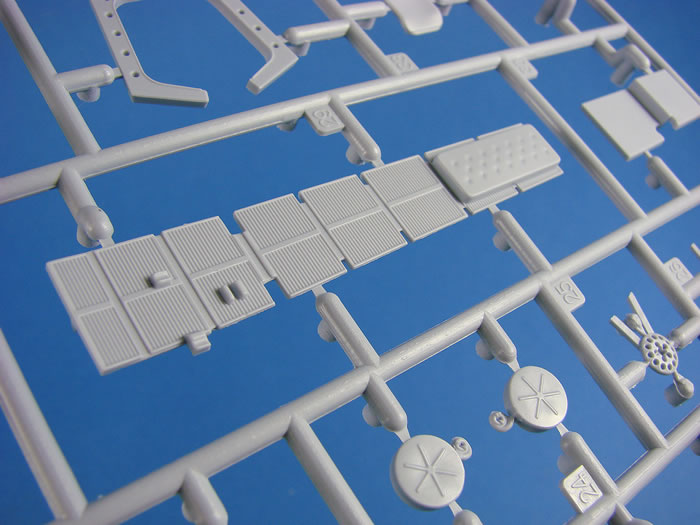
You will find a large number of internal parts on this frame. Airfix really did go to town in this area and seemed to fit everything but the kitchen sink (I’m sure if there was a kitchen sink though, they would still have included it!). More or less everything is included here, such as the detailed duckboards, bulkhead frames with lightening holes, seats, tables, instruments, fully detailed pilot/co-pilot position, radio operator compartment, rear upper cupola hatch/gunner position, forward observer/gunner position, and also a padded section on the floor which I assume would be used for either a bed or area for rescued/downed aircrew. Other identifiable internal details include rope winch, anchor, fire extinguisher, instrument panel, compass, drogue case, and what I assume is a rolled up, deflated life raft in the very rear fuselage section. They really have pretty much nailed this. I have the 1/32 HpH kit too, and that is detail heavy, but this kit does an immense job in comparison, especially for 1/48.
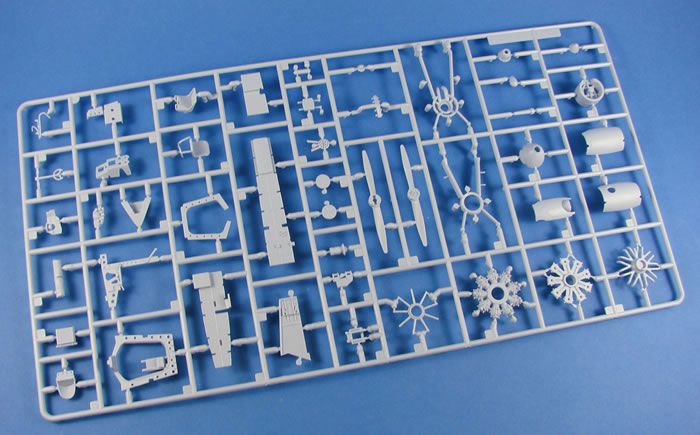
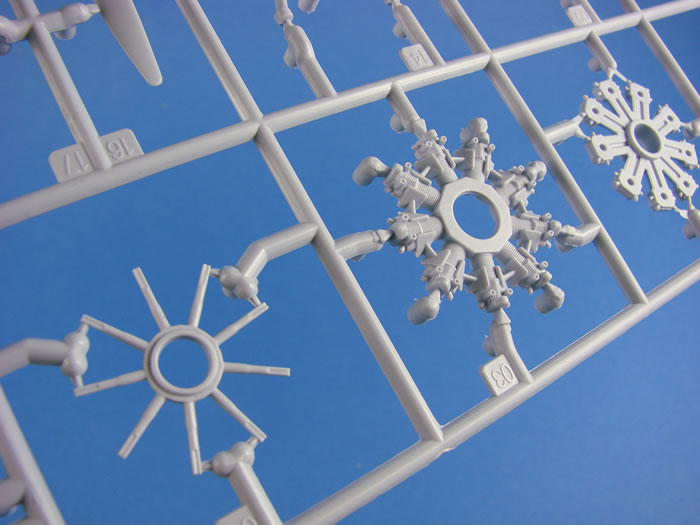
The rest of this frame is taken up with the engine, nacelle, strut mounts etc. The upper and lower struts for both front and rear position, are moulded as single-piece units and look incredibly sturdy. There are three main parts to the engine pod and one of the connecting strut parts contains the engines exhaust system. Detail is excellent, with the engine itself being moulded with very fine cooling fins, and the pod being detailed with the finest of rivets. Two two-blade props are included which of course plug on onto the other to create a 4-blade unit.
To prevent ejector pin marks on many of these fine parts, a series of ejector tags are moulded in various locations, which will all need to be snipped off and cleaned up, of course, but it’s sure better than having to fill indentations with putty.
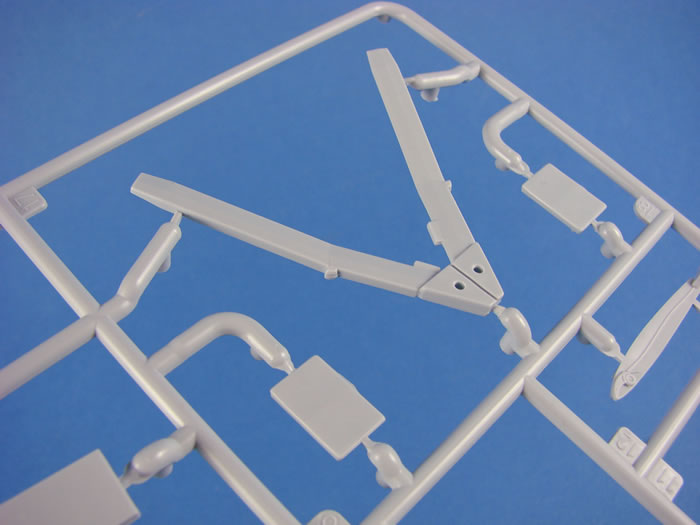
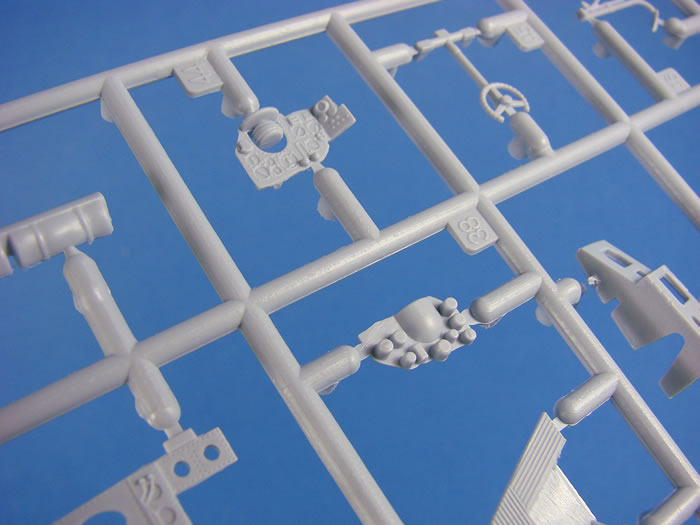
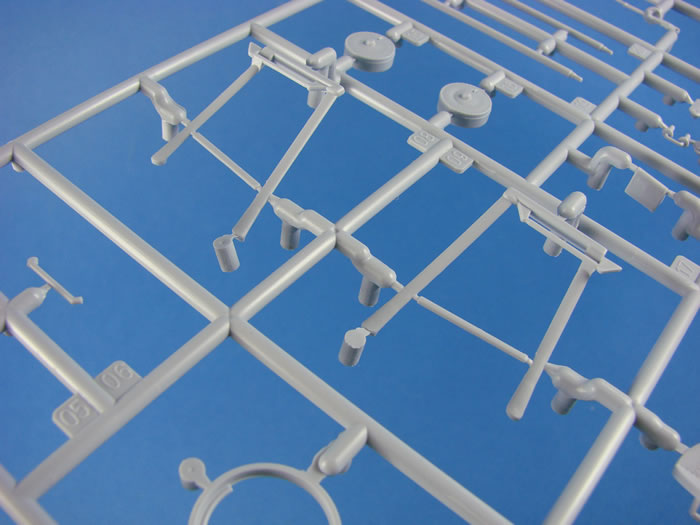
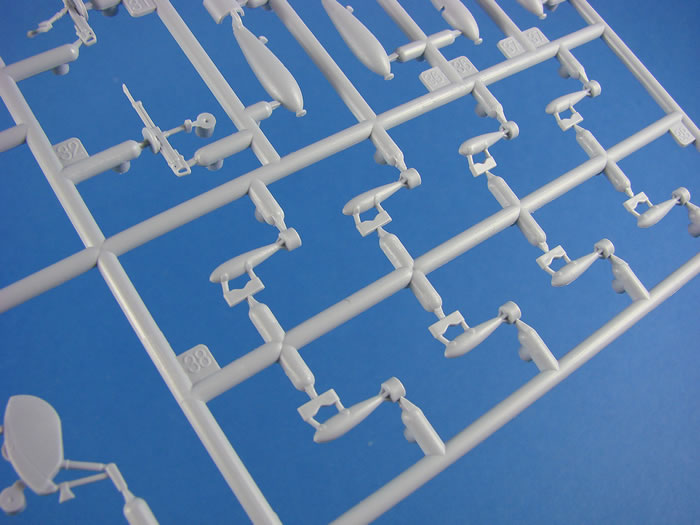
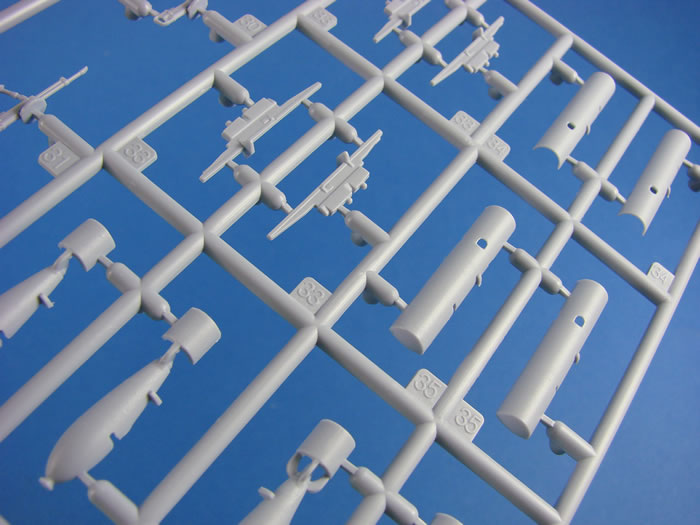
Sprues E
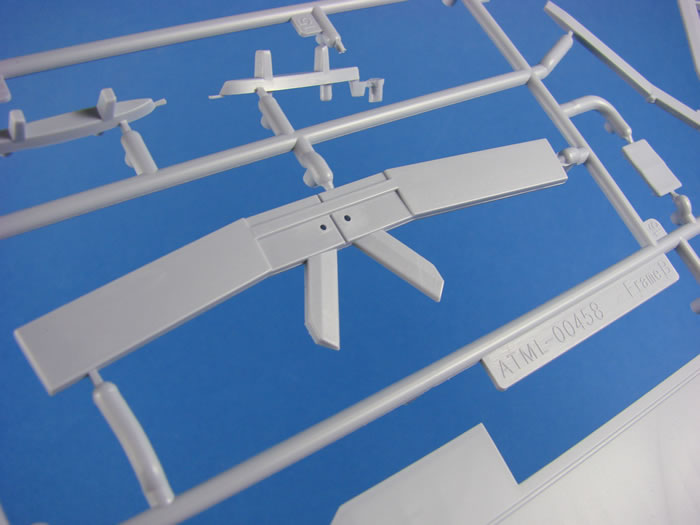
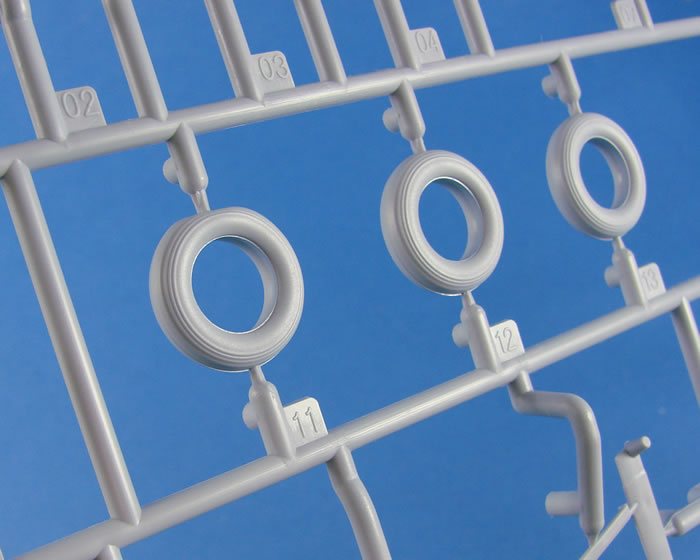
This is a whole mish-mash of different parts, such as the wing and stabiliser struts, bombs, undercarriage struts, two wheel options (weighted and un-weighted), wheel hubs, cupola ring, cupola hatch (folded/open option), tail wheel etc.
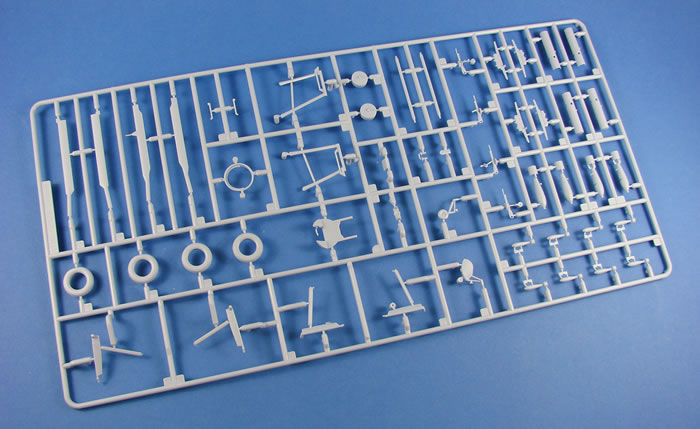
One note here is that the stabiliser struts are moulded with a spacer that is designed to help achieve the correct spread of the struts, and is supposed to be removed after the part is fitter. I don’t think this is really necessary as the locating points on the airframe are more than suitable, plus you may want to add these after painting anyway.
Sprue F
The last frame contains the clear parts. Most noticeable is that there are two canopy options. One of these provides for a fully closed cockpit canopy, and the second is moulded whereby the upper glazing is slid backwards, and the port side window is separate and can be posed. A closed option is available for the rear, upper cupola, moulded as a single part. For the open option, a glazed part is moulded here, and this will be fitted to the grey part moulded on Frame E. Other parts here are for side windows, leading edge wing light etc.
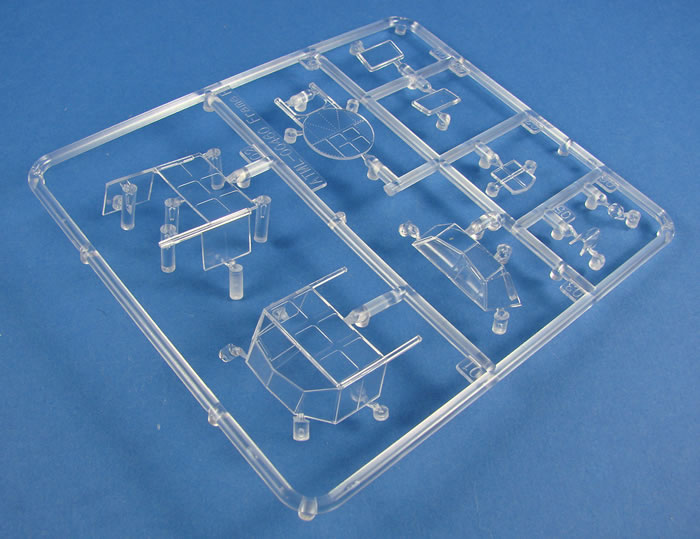
Moulding is beautifully clear, with reasonably thin parts and defined framing lines that will make masking this a fairly easy job. Eduard already has a set of masks available, as well as a swathe of other goodies for this release
Decals
A small decal sheet is included, and I’m not sure of its origin, although I can probably guess at Cartograf. The decals are printed with a mat finish to them. I do admit that I prefer glossy decals, but these do look nicely printed, with solid/authentic colour, minimal carrier film and perfect register.
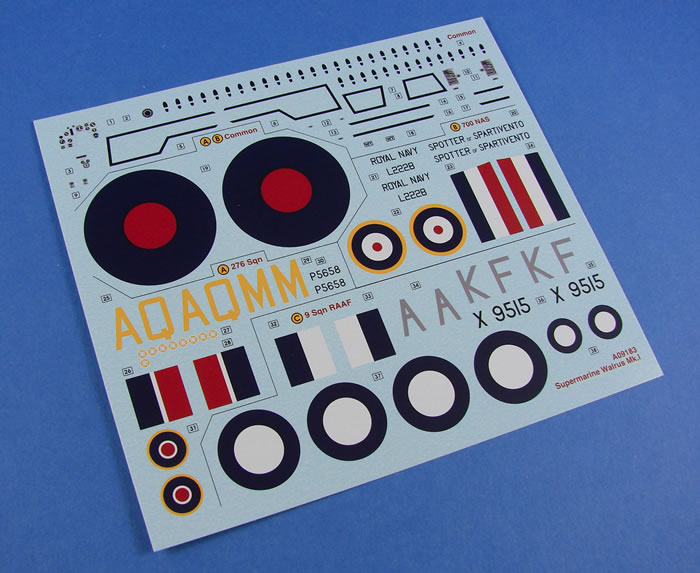
Cockpit instrument decals are also supplied, as are a full set of stencils.
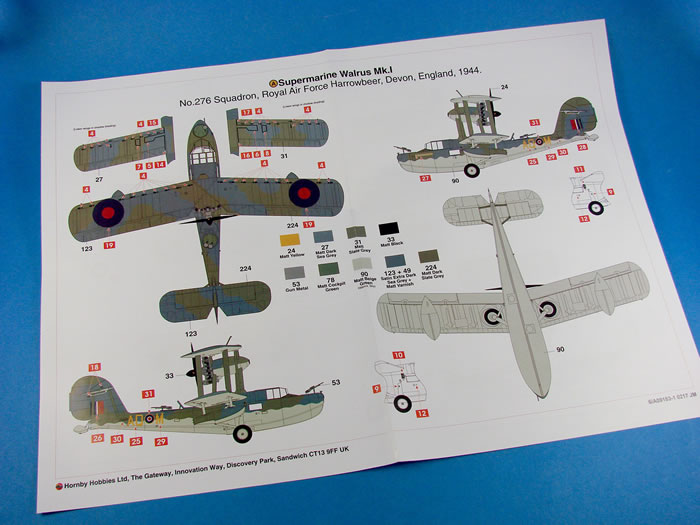
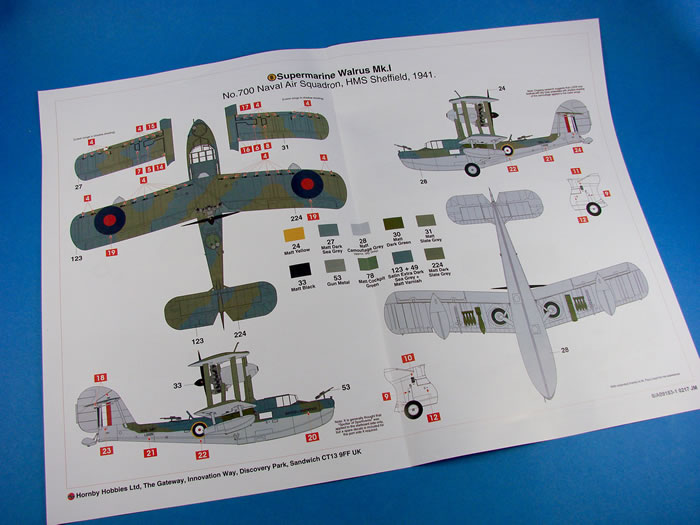
The schemes available in this release are:
-
Walrus Mk.I, No.276 Squadron, Royal Air Force Harrowbeer, Devon, England, 1944
-
Walrus Mk.I, No.700 Naval Air Squadron, HMS Sheffield, 1941
-
Walrus Mk.I, Royal Australian Air Force, Australia and New Guinea, early 1943
Instructions
A 24-page manual is included, breaking down the Walrus into 108 constructional stages. Illustrations are in greyscale, but with newly assembled parts being coloured with red ink. A small use of other colour is included which signifies parts that need modifying for various options etc. Illustrations are very clear to follow, and the modeller should have no issues with following them. Humbrol colours are noted throughout with reference to paint colour.
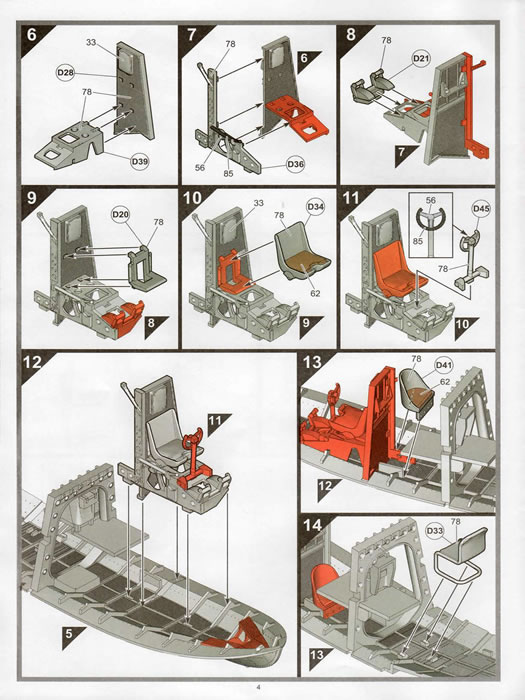
The colour schemes are printed on separate, glossy sheets, with one side containing illustration for rigging the model.
I’m rarely ever tempted away from my preferred 1/32 scale, but the Walrus is one that will always break that rule for me. Airfix has created a seriously nice kit here that drips in detail and just looks correct. No nasty trench-like panel lines, and just a finesse that is readily expected from a modern-tooled kit. This one really ticks all the boxes for me.
All I can say now is that I hope the forthcoming Bristol Blenheim is every bit as good. If so, that’s another scale-breaker!
My sincere thanks to Model Kits for Less for the review sample. To enquire about this release, head over to their FaceBook page: https://www.facebook.com/groups/271077163071577/
.
Review Text and Images Copyright © 2017 by James Hatch
Page Created 24 October, 2017
Last updated
24 October, 2017
Back to HyperScale Main Page
Back to Reviews Page |
 Home
| What's New |
Features |
Gallery |
Reviews |
Reference |
Forum |
Home
| What's New |
Features |
Gallery |
Reviews |
Reference |
Forum |