Mitsubishi J2M3 Raiden
Zoukei-Mura Super Wing Series
1/32 scale
S
u m m a r y |
| Catalogue Number: |
Zoukei-Mura Super Wing Series No.5 - Mitsubishi J2M3 Raiden |
| Scale: |
1/32 |
| Contents and Media: |
See details below. |
| Price: |
£79.95 plus shipping available online from BlackMike Models |
| Review Type: |
FirstLook |
| Advantages: |
Excellent detail; accurate outline. |
| Disadvantages: |
Some quirky details; non-weighted wheels. |
| Recommendation: |
This is most certainly the best J2M3 in any scale, and most certainly in 1/32. . |
Reviewed by
James Hatch

Revell's 1/72 Do 17 Z-10 will be available online from Squadron.com
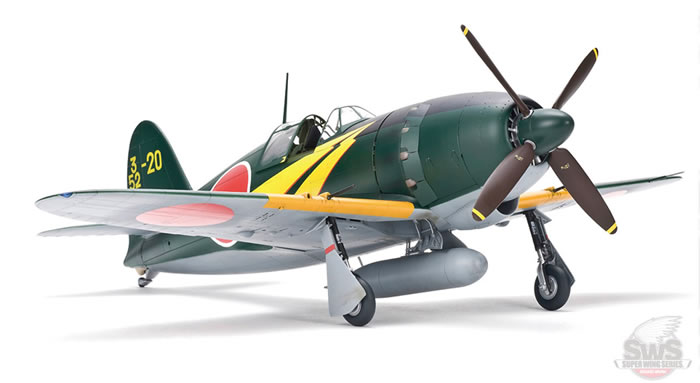
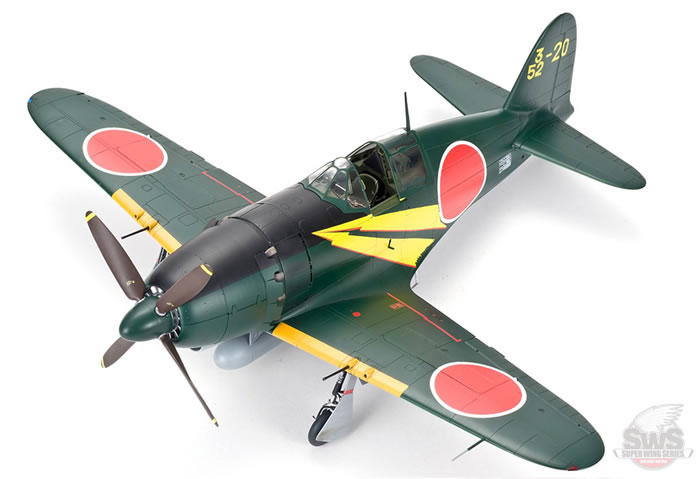
The Mitsubishi J2M Raiden ("Thunderbolt") was a single-engine land-based fighter aircraft used by the Imperial Japanese Navy Air Service in World War II. The Allied reporting name was "Jack". The J2M was designed by Jiro Horikoshi, creator of the A6M Zero, to meet the 14-Shi (14th year of the Showa reign, or 1939) official specification. It was to be a strictly local-defence interceptor, intended to counter the threat of high-altitude bomber raids, and thus relied on speed, climb performance, and armament at the expense of manoeuvrability. The J2M was a sleek, but stubby craft with its oversized Mitsubishi Kasei engine buried behind a long cowling, cooled by an intake fan and connected to the propeller with an extension shaft. The first few produced J2M2s were delivered to the development units in December 1942 but severe problems were encountered with the engines. Trials and improvements took almost a year and the first batch of the serial built J2M2 Model 11 was delivered to 381st K?k?tai in December 1943. Parallel with the J2M2, production of the J2M3 Raiden Model 21 started. The first J2M3s appeared in October 1943 but deliveries to combat units started at the beginning of February 1944.
The Raiden made its combat debut in June 1944 during the Battle of the Philippine Sea. Several J2Ms operated from Guam and Saipan and a small number of aircraft were deployed to the Philippines. Later, some J2Ms were based in Chosen airfields, Genzan (Wonsan), Ranan (Nanam), Funei (Nuren), Rashin (Najin) and Konan under Genzan Ku, for defence of these areas and fighting against Soviet Naval Aviation units.
Primarily designed to defend against the Boeing B-29 Superfortress, the type was handicapped at high altitude by the lack of a turbocharger. However, its four-cannon armament supplied effective firepower and the use of dive and zoom tactics allowed it to score occasionally. Insufficient numbers and the American switch to night bombing in March 1945 limited its effectiveness.*
* Edit Courtesy of Wikipedia
The Kit
As you probably already knew, unless you live in a cave, this kit isn’t a new release. In fact, this kit first hit the market in 2013, having been demoed at Scale Model World, Telford, in November 2012. I was then one of the ZM team who wore their voices out in showing the test-shot to many, many hundreds of people over that weekend, prior to its release a few months later. Despite this, I never actually reviewed this one, having skipped to the later Ho 229. I’m also going to take advantage of the fact that it’s possible that numerous looks at this kit may have prematurely died when Photobucket started to ransom its members and cut off external-linking.
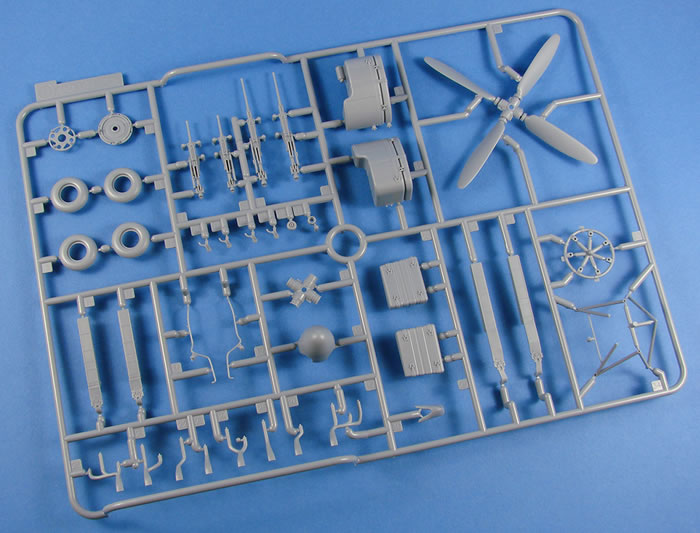
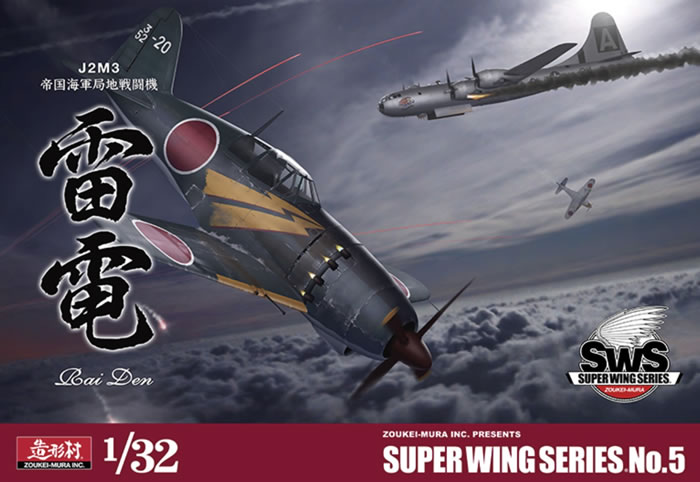
Zoukei-mura’s J2M3 kit comes in a fairly sizeable and attractive box with a pretty atmospheric painting of a J2M3 diving back into night-time cloud cover after a strike on a B-29 Superfortress. Probably one of the most evocative contemporary images of the Raiden that I’ve seen. Congratulations to ZM for using that image. The box sides show various images of the test shot that is oh so familiar to this writer. That lid is also pretty airtight and takes some effort to remove. Inside, we have NINE sprues, moulded in light grey plastic, and TWO in clear. All sprues are separately bagged to prevent scuff damage, and to complete building materials, a single set of vinyl masks is included. ZM kits don’t contain photo-etch parts as standard, with the idea being that the model can be built perfectly well without such extras. Lastly, a single decal sheet is included, as well as ZM’s instruction manual with its historical and informative instructional content. Two plastic sprues are very fragile, and these are the parts which include the canopy glass and separate frames. To protect these further, the lower inside of the box has its own cardboard wrap that separates these from the rest of the parts. Looking at those parts, that was an essential move.
Sometimes, I write reviews by looking at each individual sprue, but as this one is quite complex, I’ll look at each area in turn, and the features/options available to the modeller.
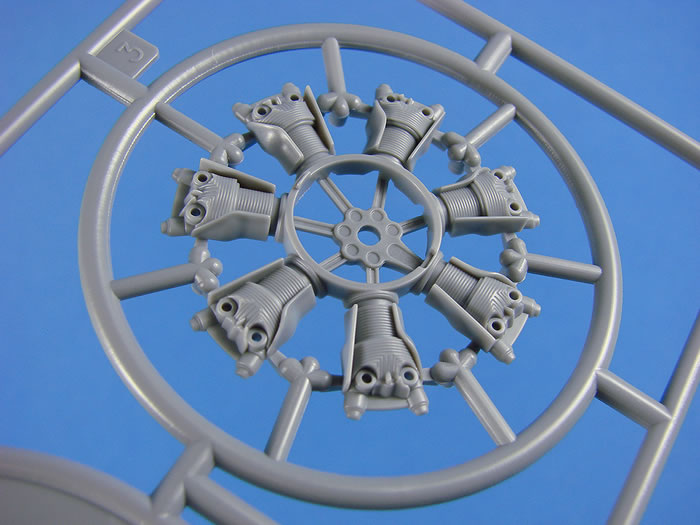
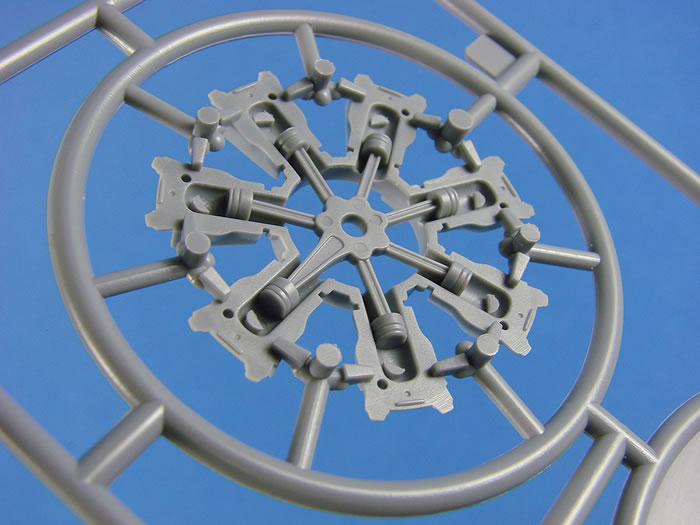
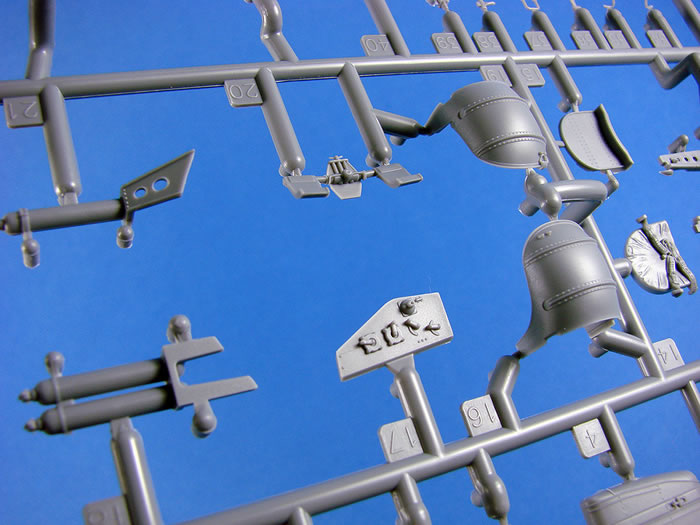
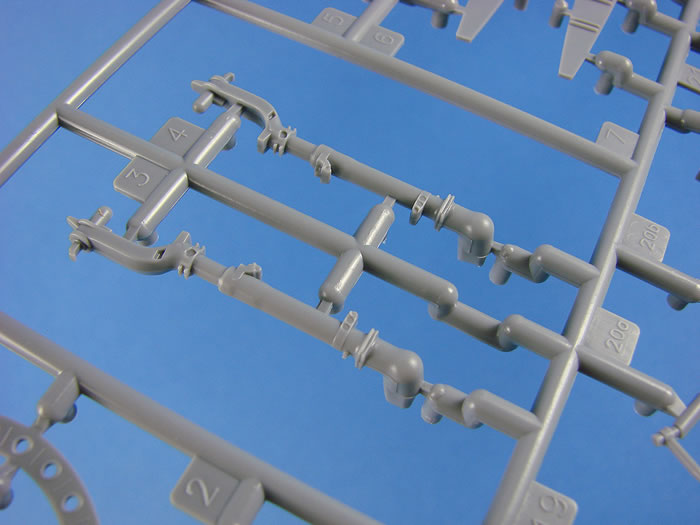
Engine
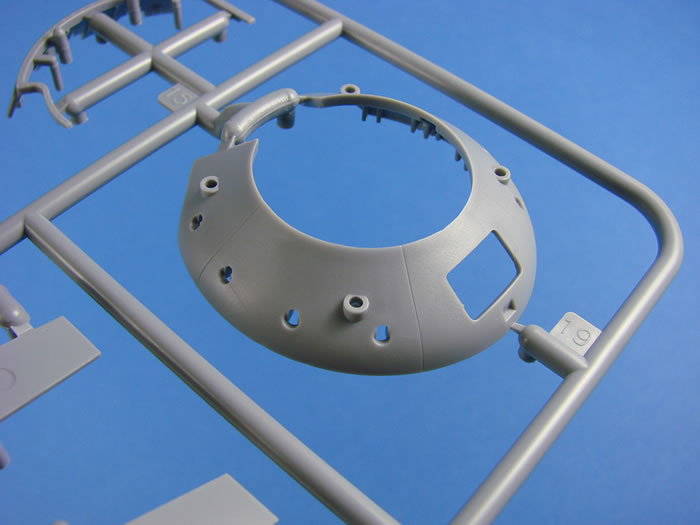
Construction starts in this area, with quite a remarkable representation of the Mitsubishi MK4R-A Kasei 23a 14-cylinder two-row radial engine that was the beast at the heart of this rather clunky looking aircraft. Both rows of cylinders are separate, with each row being supplied as halves. In line with ZM’s quirky design policies. The inside of these parts has the pistons within. Of course, you won’t see this when assembled, but it’s a nice touch nonetheless. Pushrod rings, intake pipe and collector ring are also separate parts that will need careful alignment in order to progress to later stages. As the engine was sat further back in the nose, presumably to facilitate a correct centre of gravity and the semi-streamlined cowl, an extender shaft had to be fitted to the engine, and this is represented here, along with its housing.
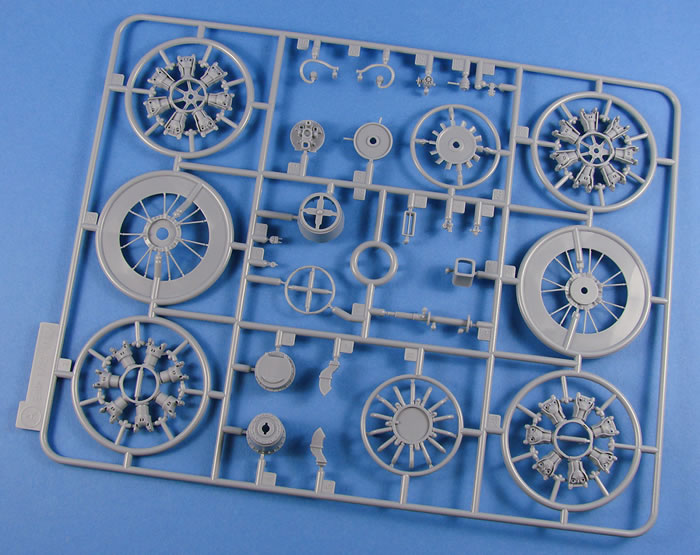
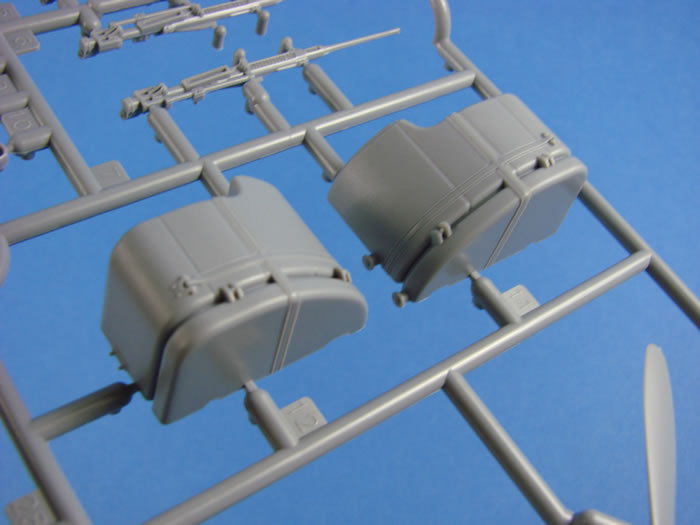
ZM has made some extensive and clever use of slide-moulding in this kit, with all of the eight separate exhaust pipes having hollow ends, saving you from having to work on these yourself. With these parts in place, you can start to fit the engine mount and the rather large mount cover, plus ancillary features, such as the carburettor, water injection pump, mixture adjustment valve and fuel injection pump, to name a few. Another real bonus with the tooling of this kit is the single piece main mounting bracket for the engine. Whereas other companies may tool a number of brackets to build this item (the new Revell 1/32 Fw 190A/F series, as an example), ZM has included this as a single part, meaning you won’t have any tricky alignment problems that multipart assemblies can introduce.
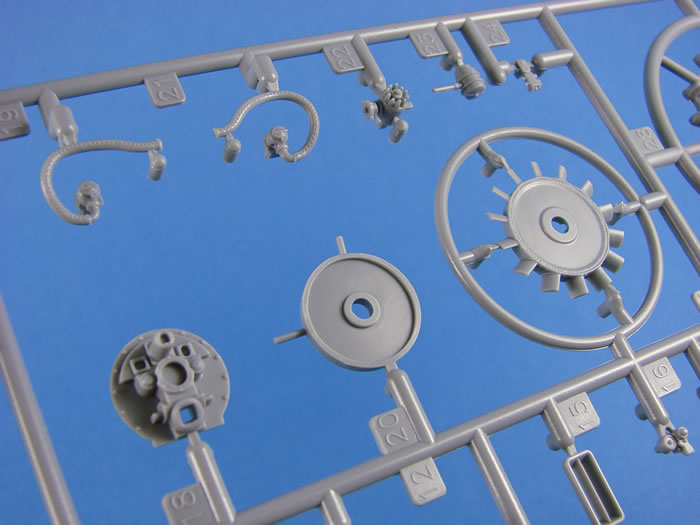
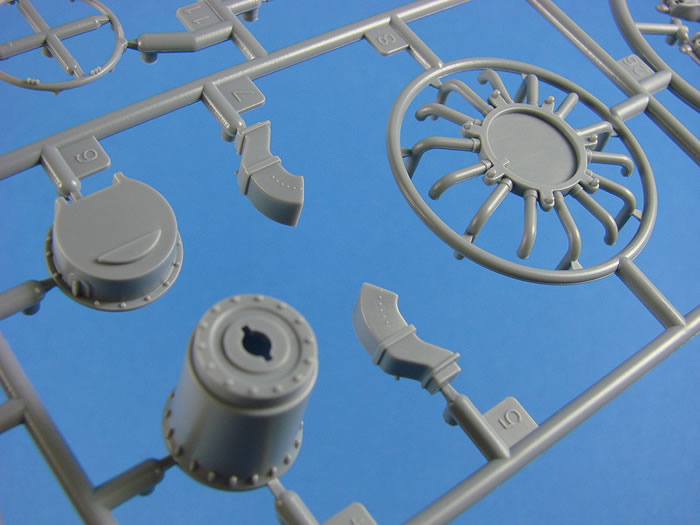
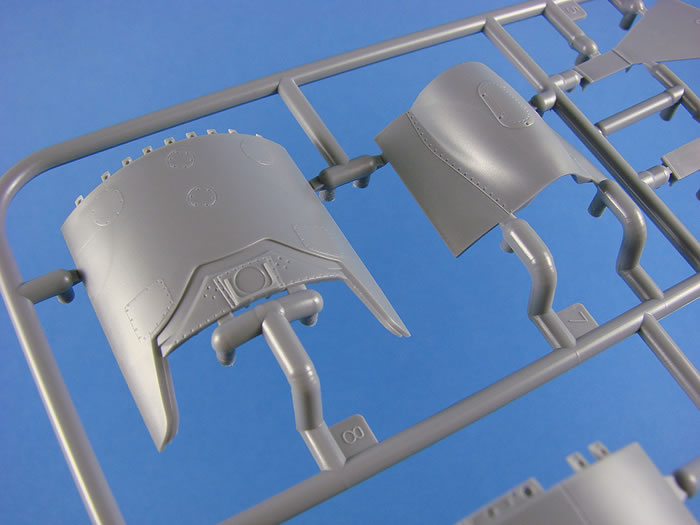
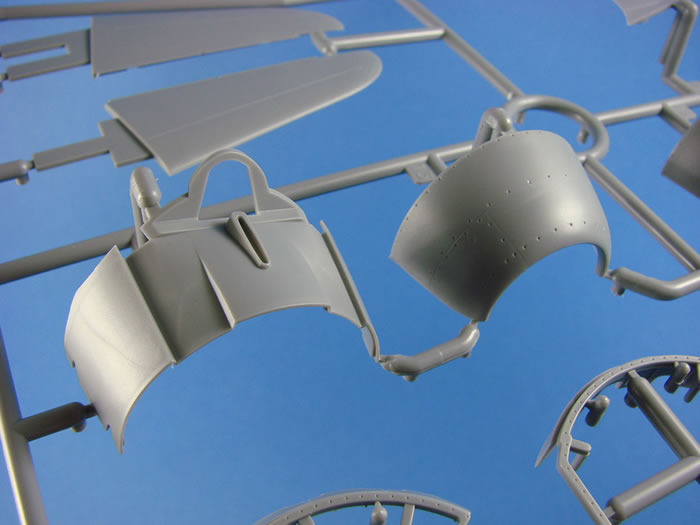
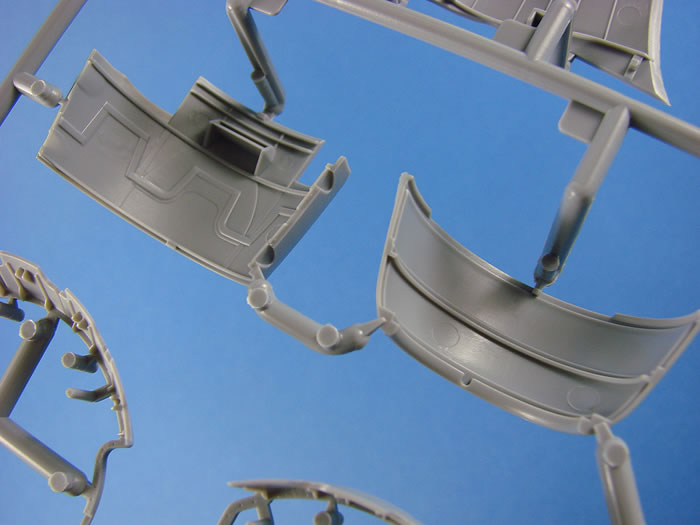
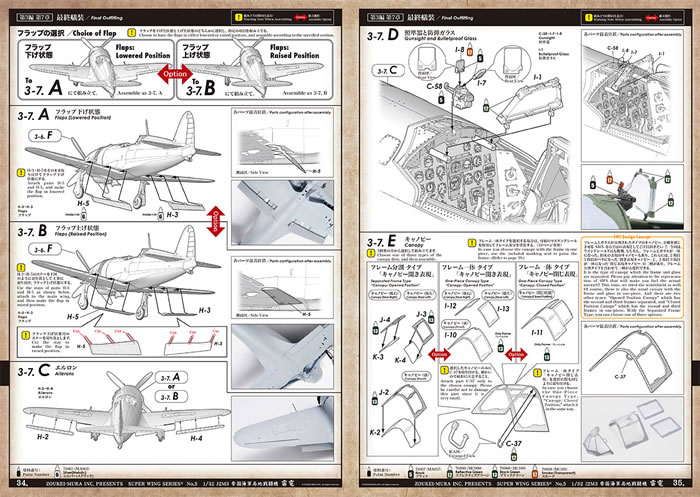
Parts are supplied to pose the cowl flaps open, as default. If you want to keep these closed, you will need to trim plastic from the actuator arms, as shown in the manual. The flaps themselves are moulded in both open and closed positions. Cowls can be left off the model, so you can display the engine. These have simplistic rivet divots on the outside, and no real representative internal detail.
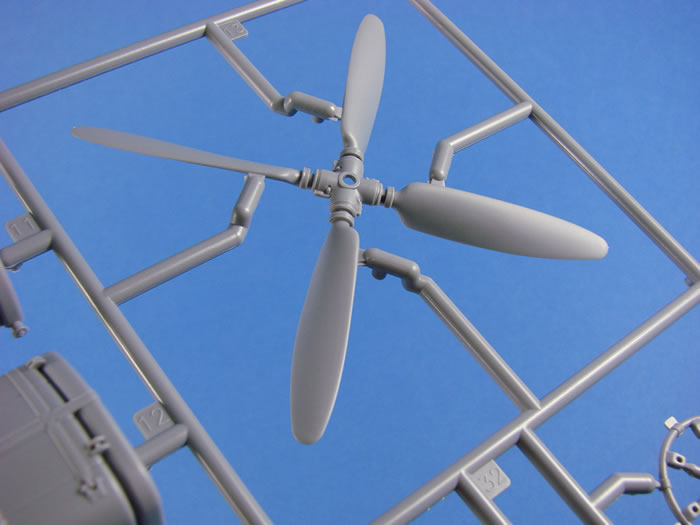
The four-bladed propeller also has some nice hidden detail within the spinner, in the shape of the main fastening nut and the prop pitch counterweights. A nice touch if you plan to pose this with the spinner removed.
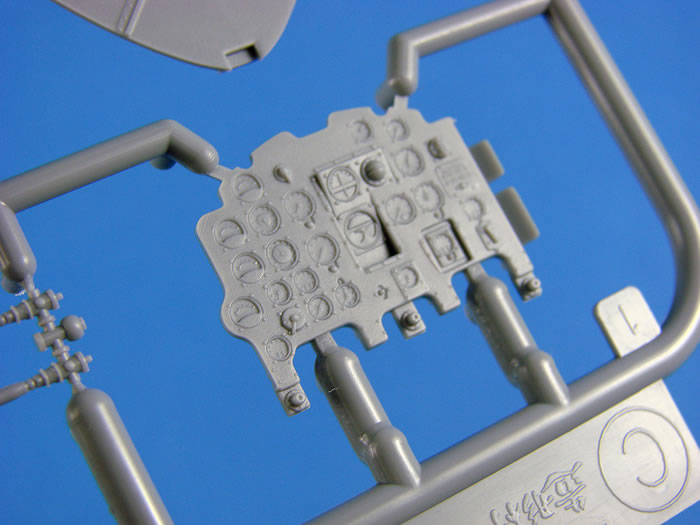
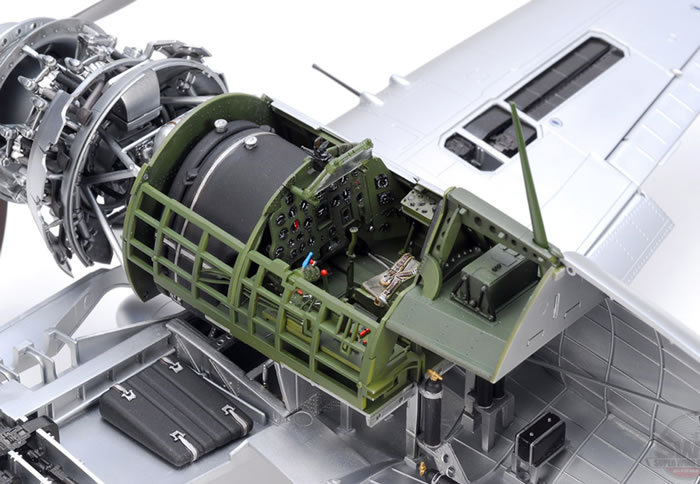
Cockpit
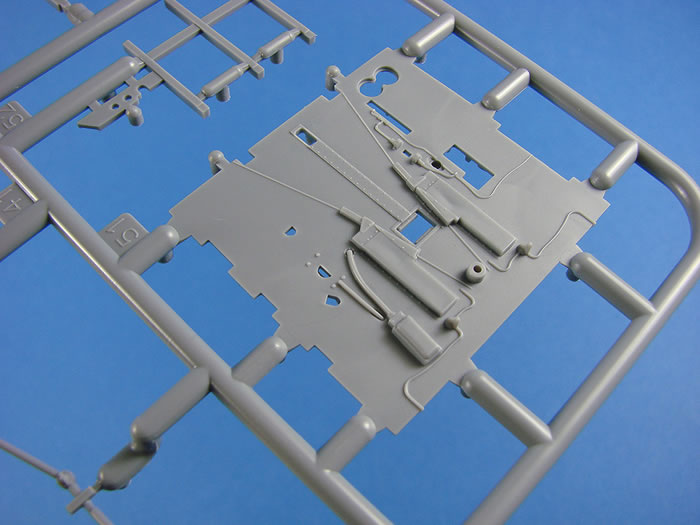
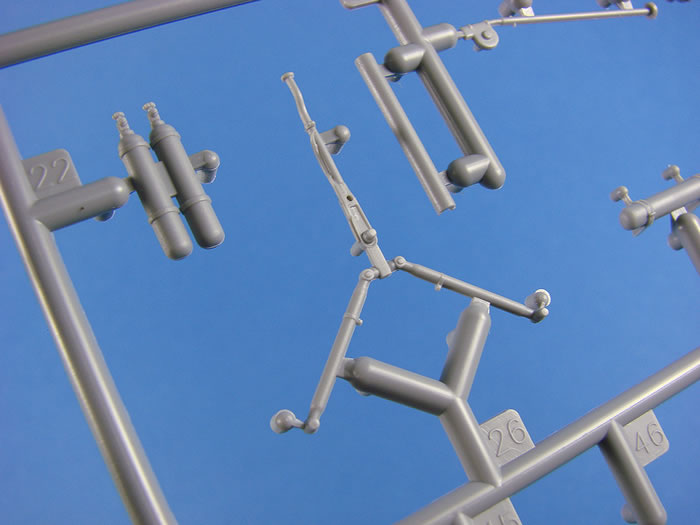
This really is an event with this kit, and also highlights just how spacious the cockpit of the Raiden was. This seems to have even more room than its American namesake, the Thunderbolt. The width of the cockpit floor is impressive! As with the engine, there is plenty of detail here that you also won’t see, unless you start to build this as a cutaway model, such as the underfloor bulkhead, linkages, valves, CO2 and oxygen bottles, and the control stick linkages that are moulded onto the stick part itself.
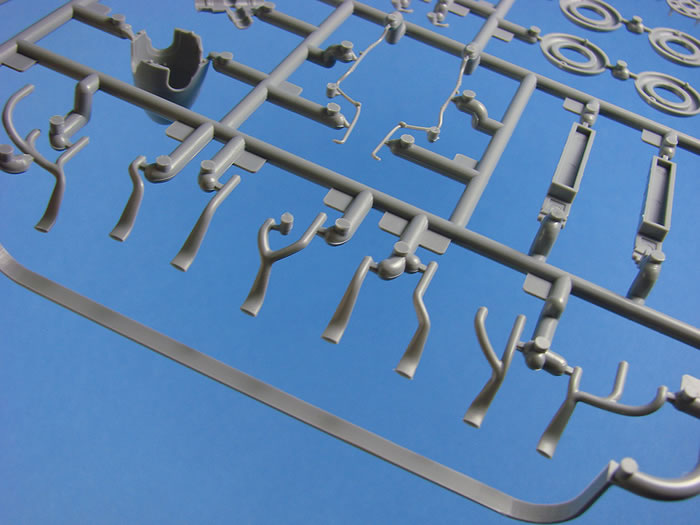
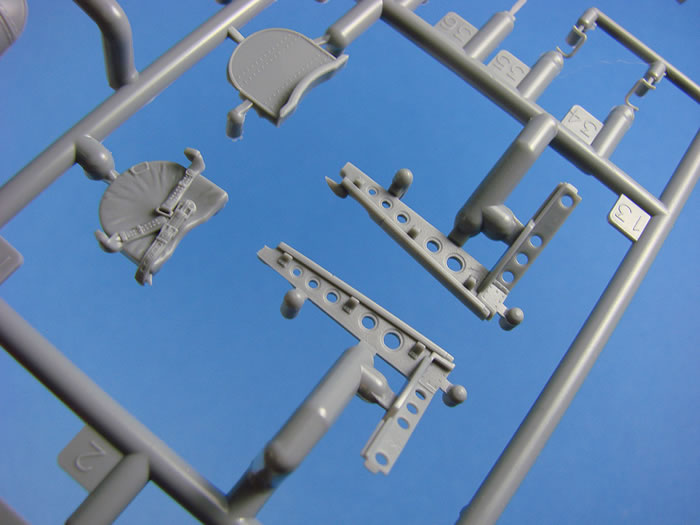
As for the office itself, two versions of the seat are offered, as they did in the later Ho 229. These are for a plain seat, and one moulded with belts in place. Before you think that the latter option is probably terrible, I can tell you it isn’t. It’s actually quite neat, and I used that option on my Ho 229 that I built for Military Illustrated Modeller. The cockpit is built around a solid and detailed floor, highly detailed sidewall frames, a rear bulkhead, and an instrument panel bulkhead. Other parts to cram into this area include a multipart seat adjustment shaft/leaver/support, rudder pedal bar, head rest, oil pump lever, oil pump, landing gear lever, instrument consoles, oxygen bottles, and various avionics panels that fit to the sidewall frames. In all, a very comprehensive effort. Two instrument panel options are given. One of these is the standard grey plastic one with moulded dial detail (yuck!) and the other is a clear panel with bare lenses. I would opt for the latter, and punch out the individual decals for the instruments, from the sheet supplied. A far better option.
In order to maintain the finesse of the parts without pesky ejector pin marks, a series of small ejection points are moulded externally to some parts, and you’ll need to clip these off and clean up any remains. This is same tried and tested system that is now seen on brands such as WNW, and indeed ZM put it to good use on the Ho 229 release, with its numerous tubular frames.
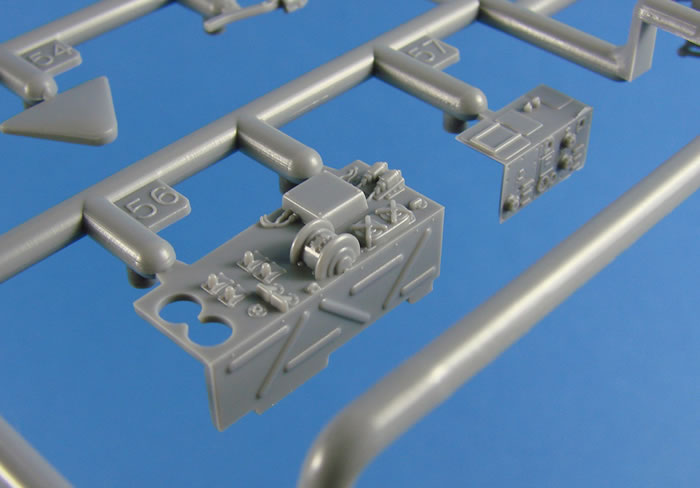
With the tub complete, a forward firewall will fit to the cockpit, complete with a fuel tank and an oil tank. The completed engine assembly will eventually mount to this firewall. Another cockpit assembly area concerns the radio turtle deck behind the pilot. This includes the radio itself, rear bulkhead, roll bar and even the antenna which does appear to require installation as this stage. When I mentioned the clever use of slide-moulding, the radio set is an example of this, with the unit being moulded as two parts, and the joints being hidden around the edges of the unit. The moulding here allows for two faces to be moulded with full detail, at right angles to each other.
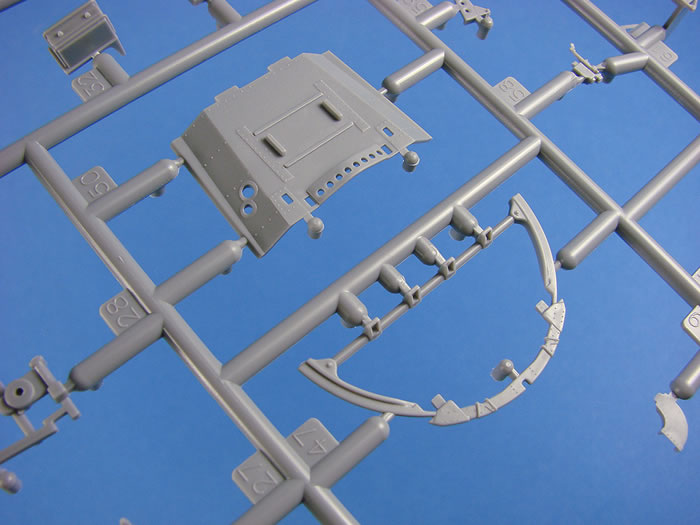
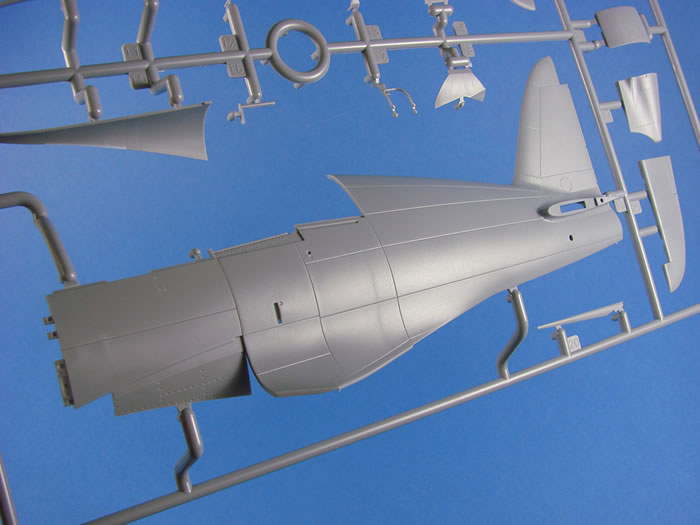
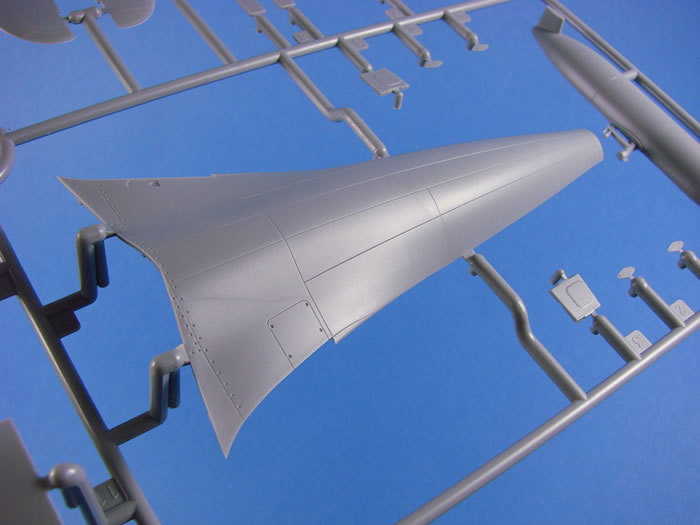
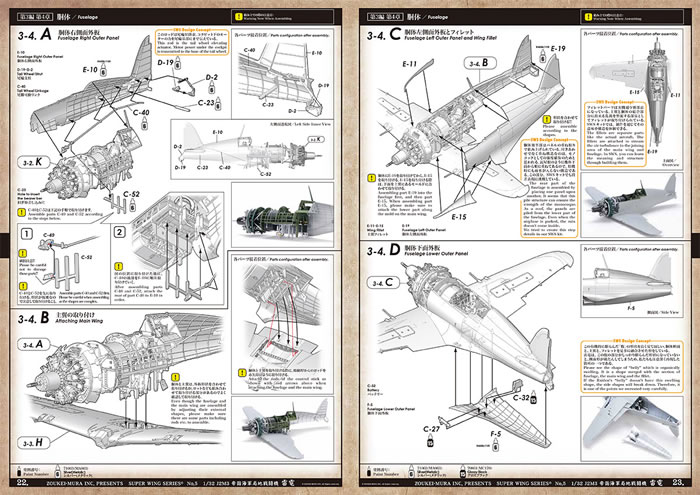
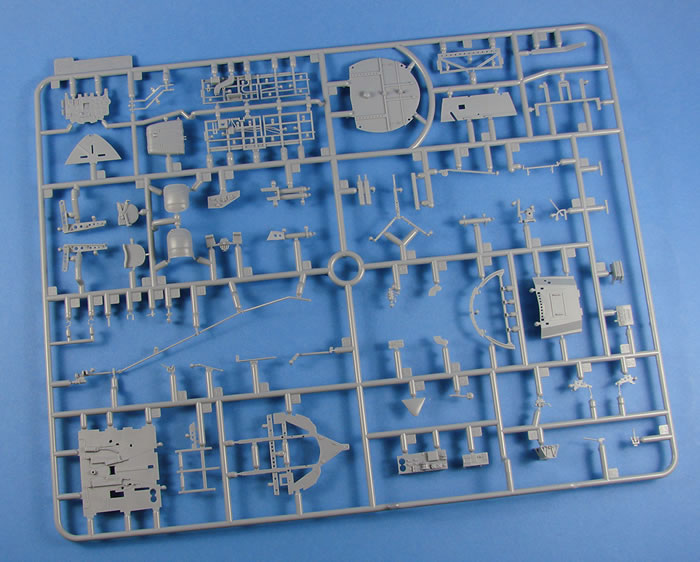
Fuselage Interior and Exterior Detail
Behind the cockpit, there is a vast area of emptiness that has been detailed with internal fuselage constructional elements, such as the tail wheel linkage. I’m a little bit at a loss here as to why ZM didn’t also include the elevator and rudder pushrods too. It makes sense if they are going to include the one supplied. Still, there’s plenty of scope to do that if you wish to go that route. There are a few ejector pin marks inside the rear fuselage, and these look easy to remove, if you are that way inclined.
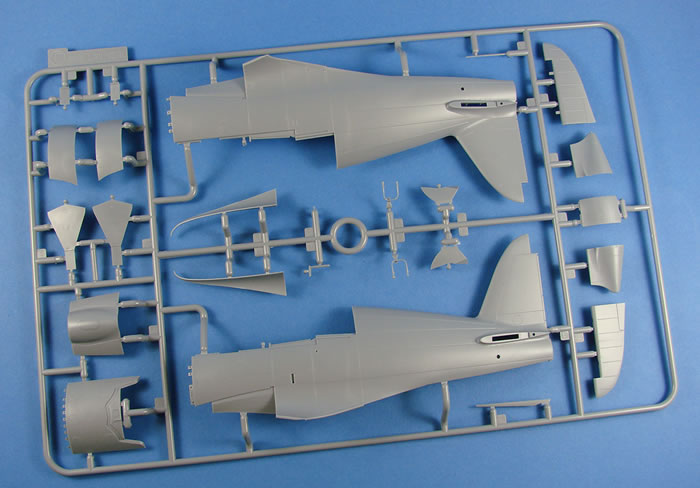
With the fuselage assembled and the cockpit installed, there is a whole raft of detail underneath the cockpit floor, and this corresponds with detail that is fitted within the wing section. ZM has moulded the forward wing fillets as separate parts. Whilst I found this problematic on their Ta 152 kit, completed models of the Raiden show this to be a better fit. There are slots on the wing to allow correct placement of these parts.
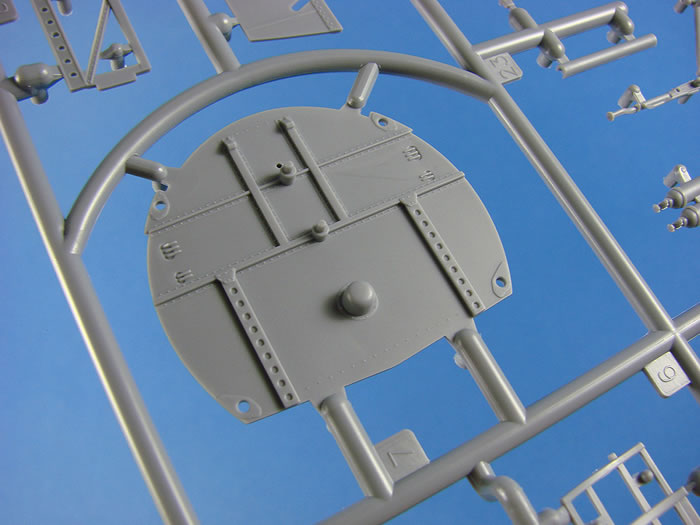
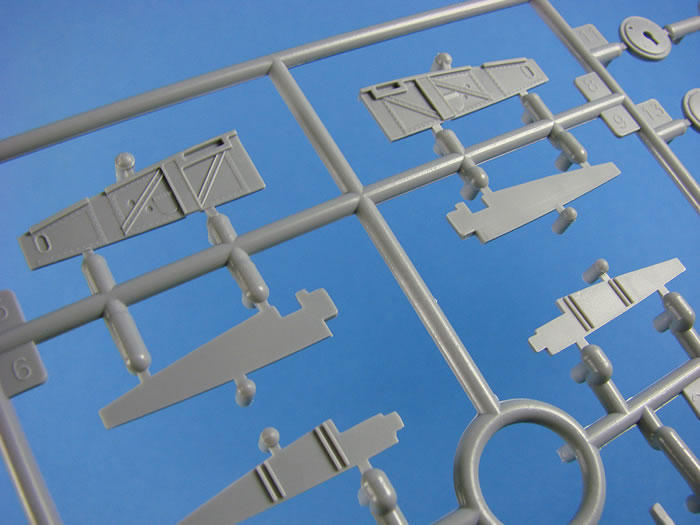
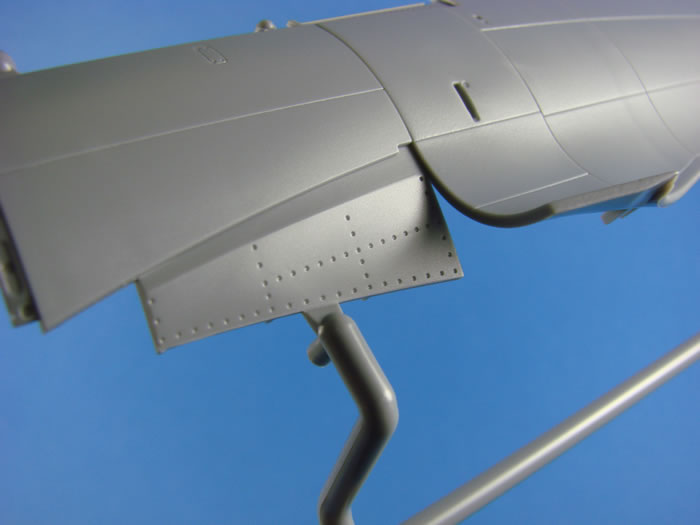
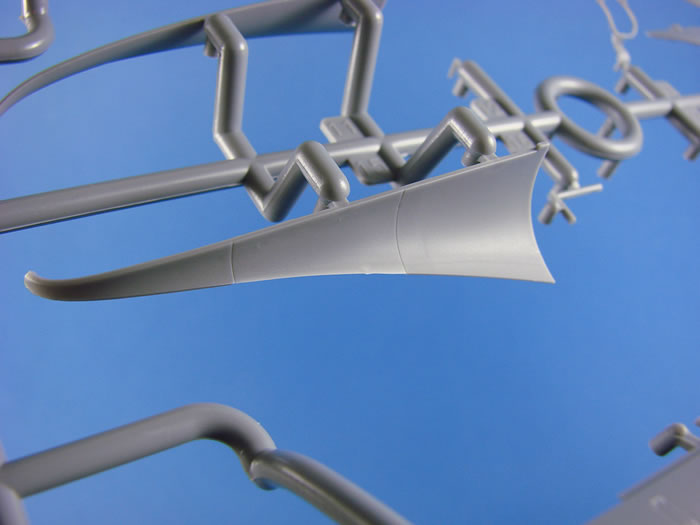
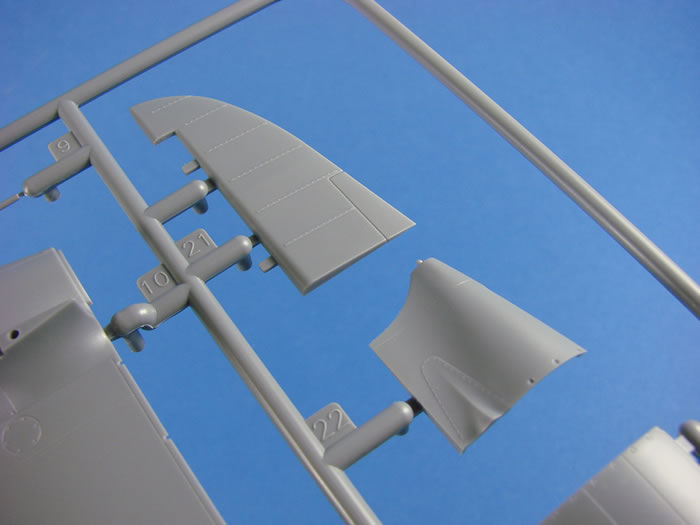
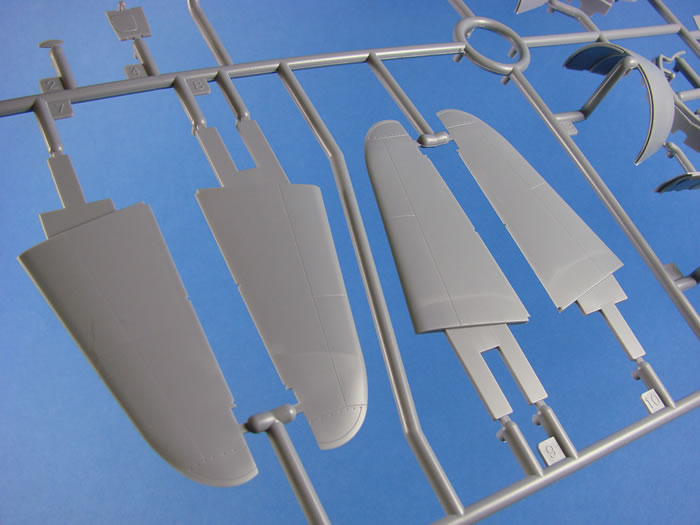
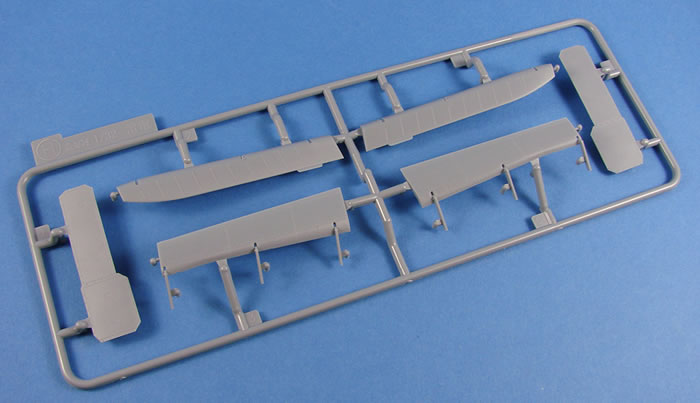
Externally, the fuselage is quite sparse, apart from neat panel line and port access detail, a ‘la Hasegawa’s style. I quite like a riveted surface and would look at adding this detail with a flush rivet tool. Japanese aircraft were known for their flaking paint, and of course, this would also centre around rivet lines, so these are a must for me. MDC’s flush rivet tool is perfect for this. The rudder is moulded separately to the fuselage, as are the elevators to the stabilisers. With a little bit of work, they could be made poseable too, by removing the square plug that they would fit together with. Please note that the lower, rear fuselage is also separate to the main fuselage, much in the same way that Airfix did their 1/24 Typhoon kit. This joins along a panel line, and from the finished thing, this appears to work very well. Internally, that lower part has the same internal, constructional details as the main parts.
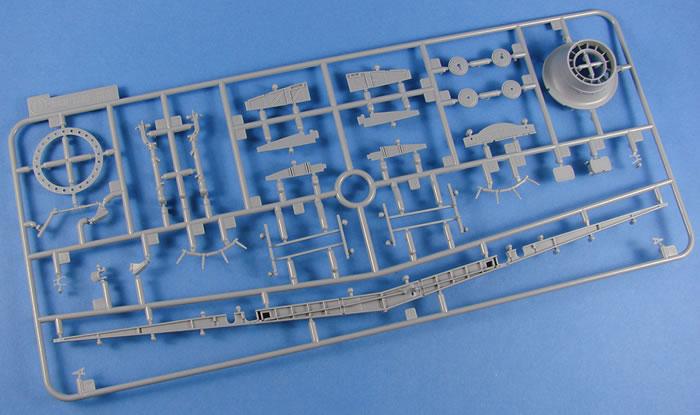
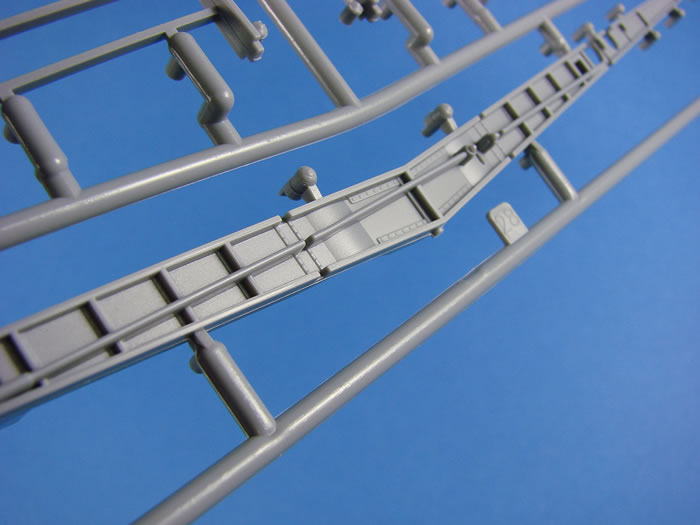
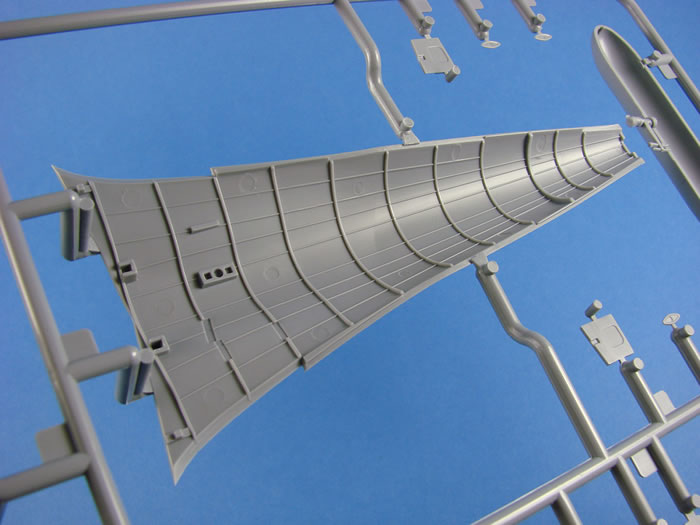
Wings
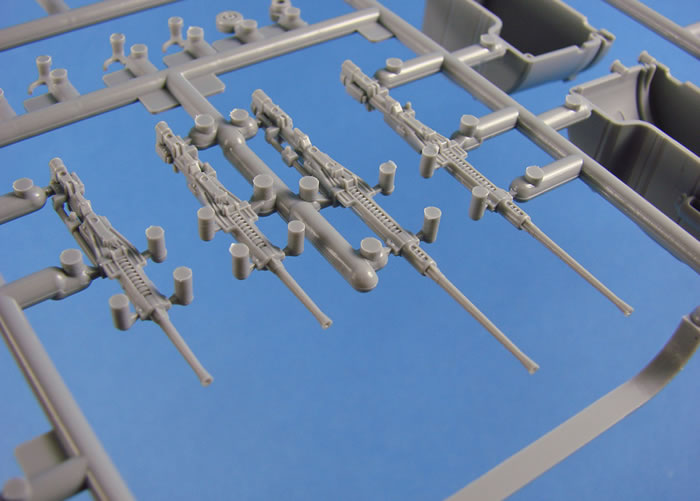
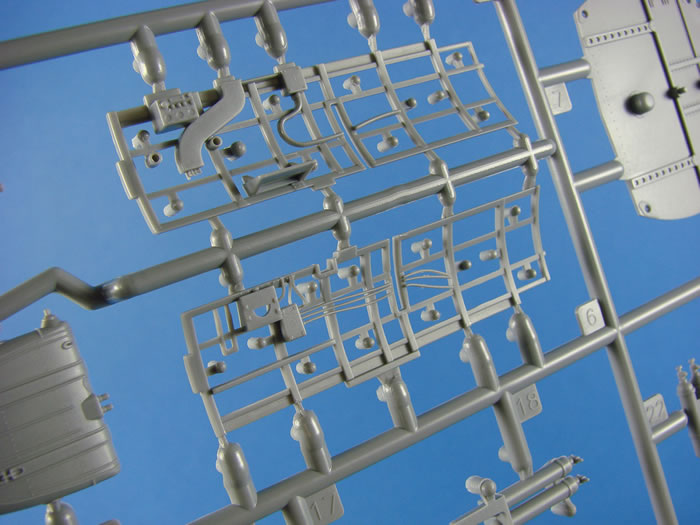
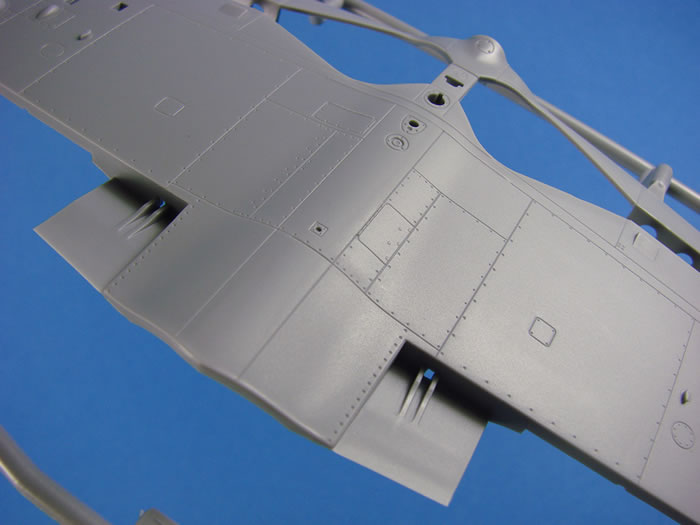
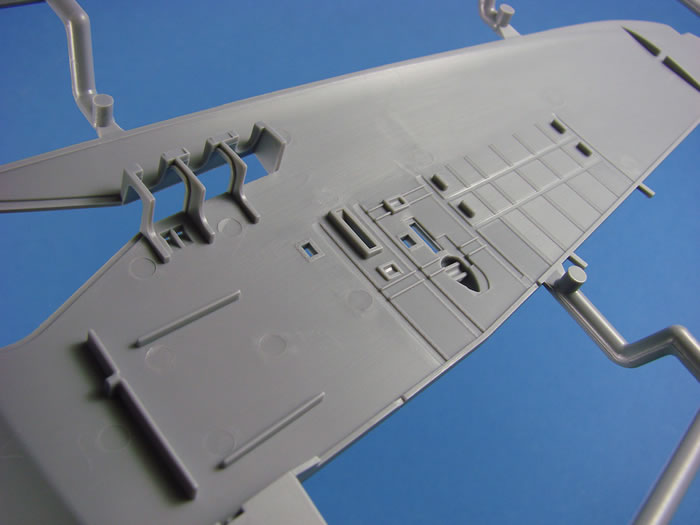
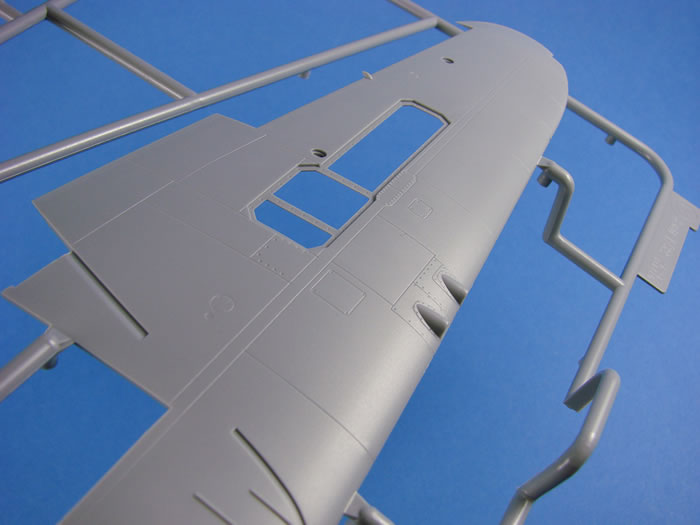
There are only two main wing parts; full span single piece upper and single piece lower panels. Ailerons are separate parts, and the gun bays are moulded with the panels off, allowing you to pose them and display the detail within. Work begins by gluing in a full span main spar into the lower wing part, followed by a small series of ribs that form the lower part of the cockpit tub. More linkage detail is to be fitted, as well as port and starboard wing fuel tanks. Again, you’ll not see the latter unless you cut panels away. The weapons bays are formed around more spar and rib details, along with some beautifully moulded Type 99 20mm machine guns. These have nicely detailed recoil springs etc and it wojld be a shame to close those bays up and ignore this detail. Of course, the guns also have their ammunition magazines and feed belts.
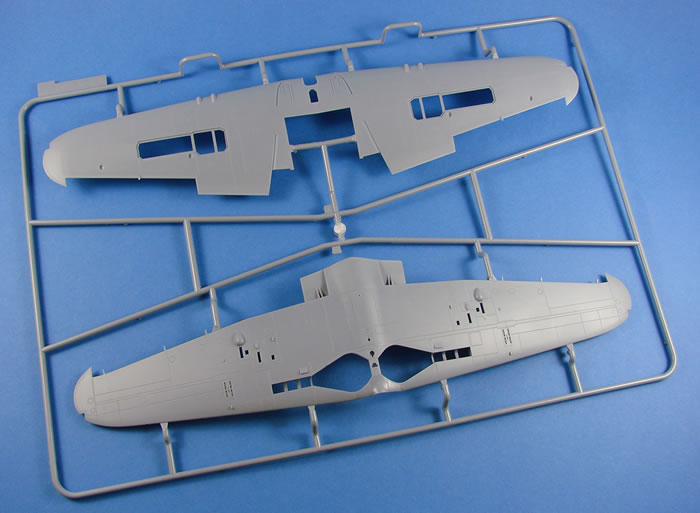
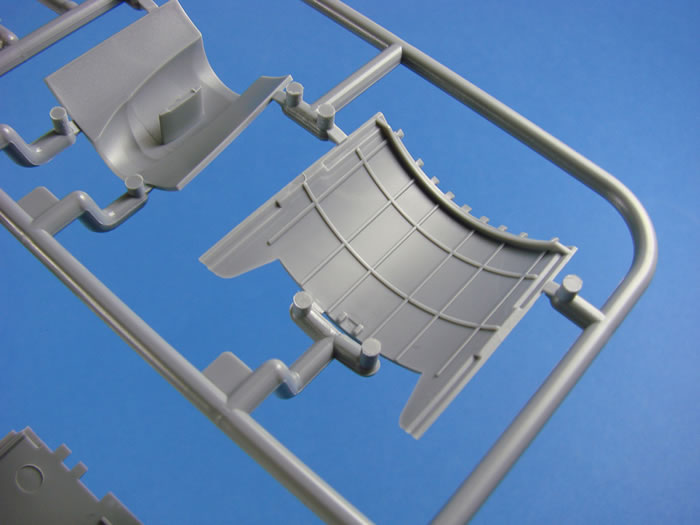
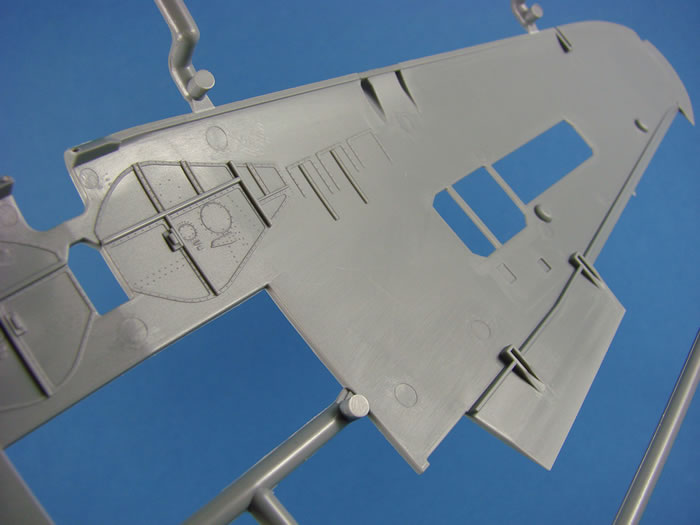
Multipart wheel well walls help to create this area, along with a very nicely detailed gear bay roof that is moulded onto the underside of the top, full span wing panel. Before you can finally glue the upper and lower panels though, the oil cooler needs to be installed. Wing external detail is commensurate with the fuselage styling, and again will benefit from some work with a riveting tool.
You will be able to pose the landing flaps too. They are moulded with a series of plugs that are suitable for the default down position, and you will need to snip them off for raised. The instructions have this the wrong way around, so beware. A correction sheet is included, but as this kit is now 4yrs old, I’m surprised ZM hasn’t corrected the manual itself.
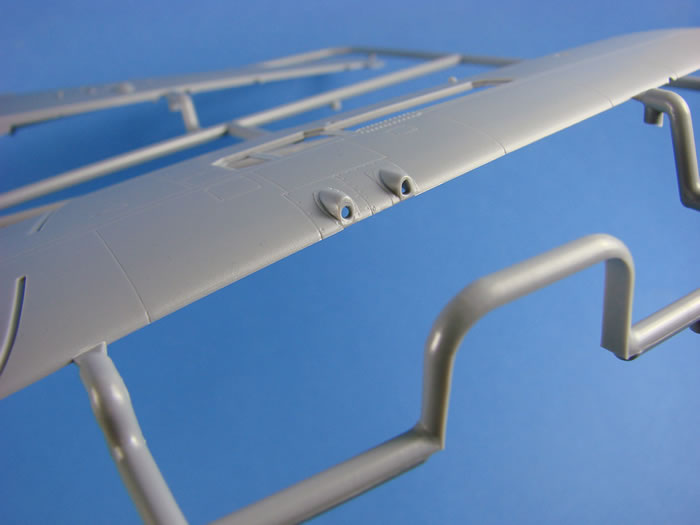
A very nifty bit of slide-moulding has been used to mould the machine gun ports into the upper wing panel. This negates having to use a separate leading edge insert for this purpose.
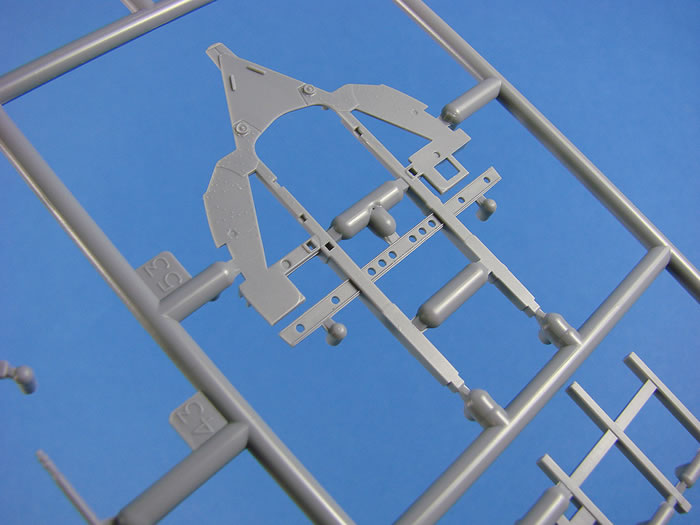
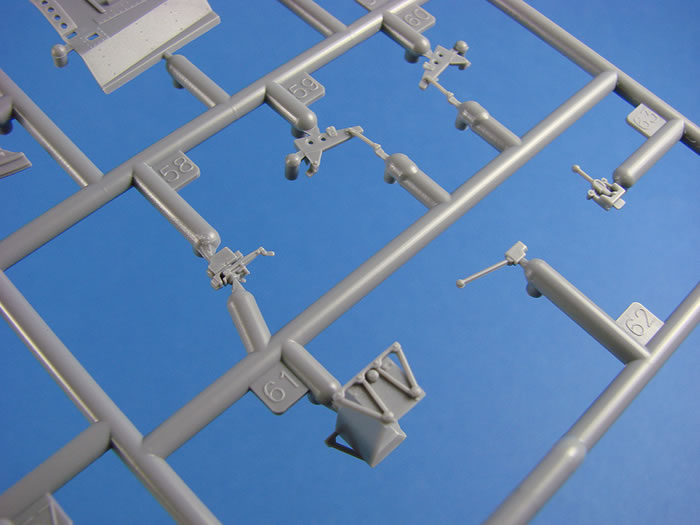
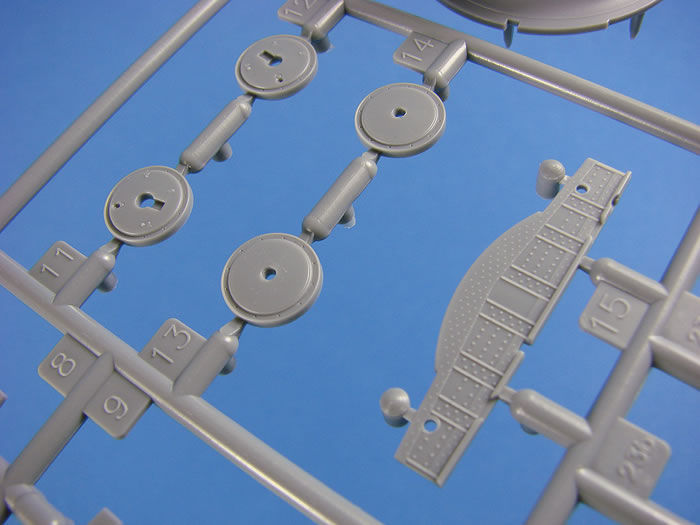
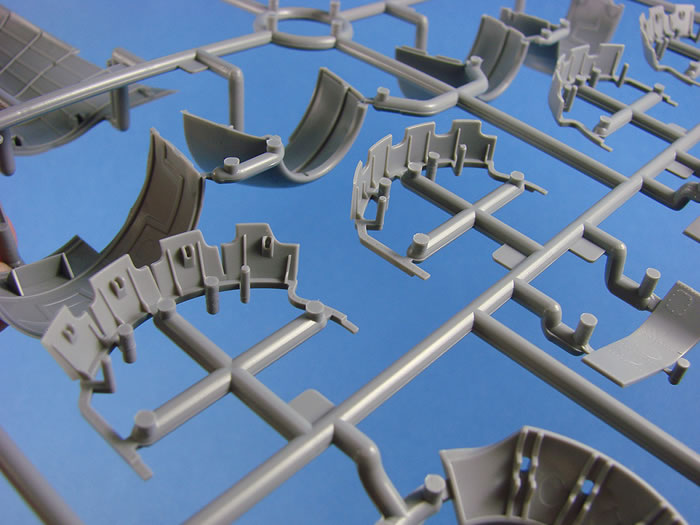
Undercarriage
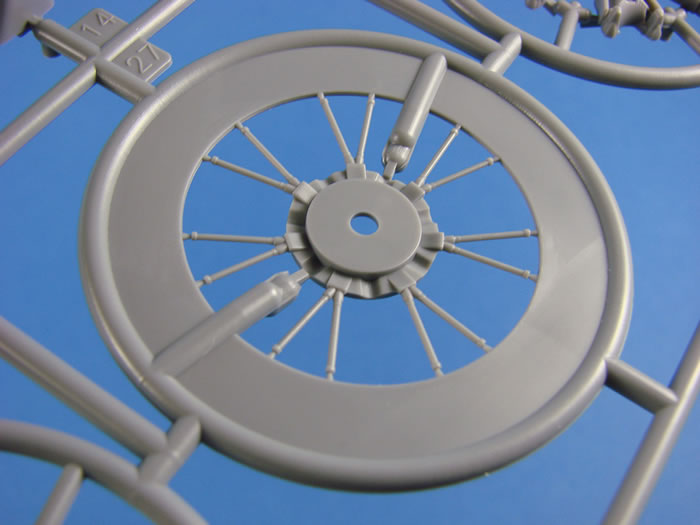
No provision is made for a model with a retracted gear, so if this is what you want, you will need to do some work. I think the one thing that annoys me here is that the wheels aren’t weighted. Not a problem really, but if you wanted them weighted, you’d need to fork out more money for their own resin wheel set. Wheels are moulded as halves, complete with separate hubs.
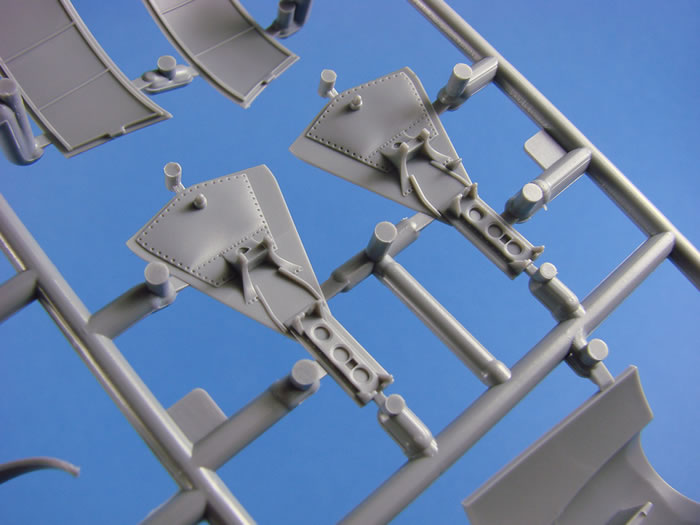
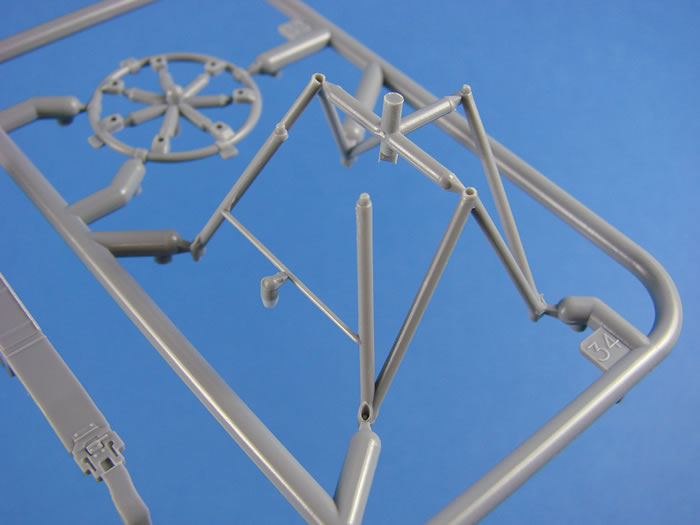
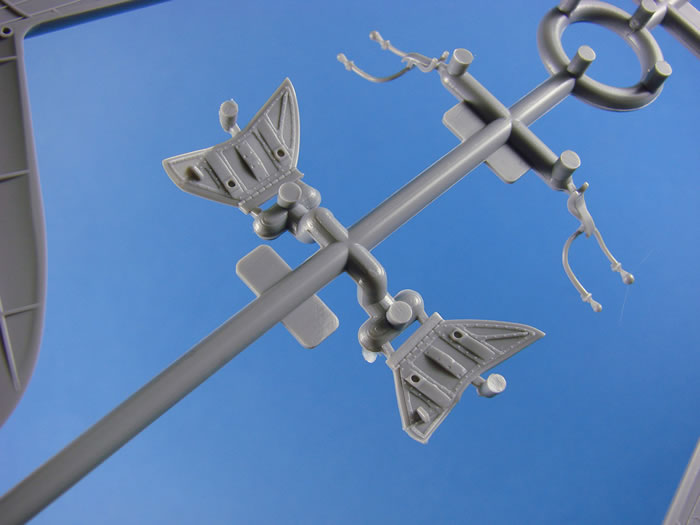
The struts are crisply moulded as single pieces, with a two-part oleo scissor to attach. Brake cables are also supplied, and the undercarriage doors are superbly detailed. Wheel door actuators are supplied for the inboard doors, with clean and positive placements provided for these.
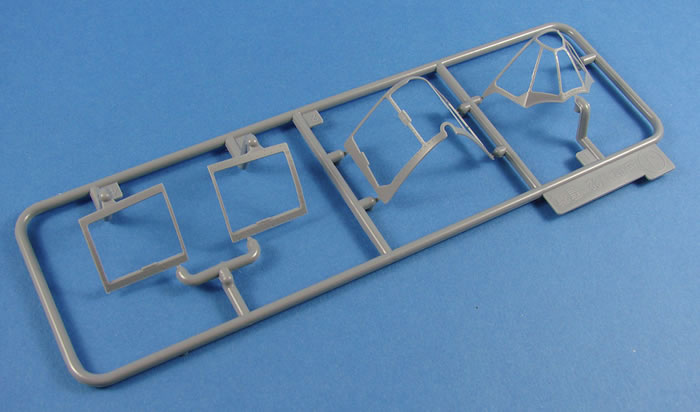
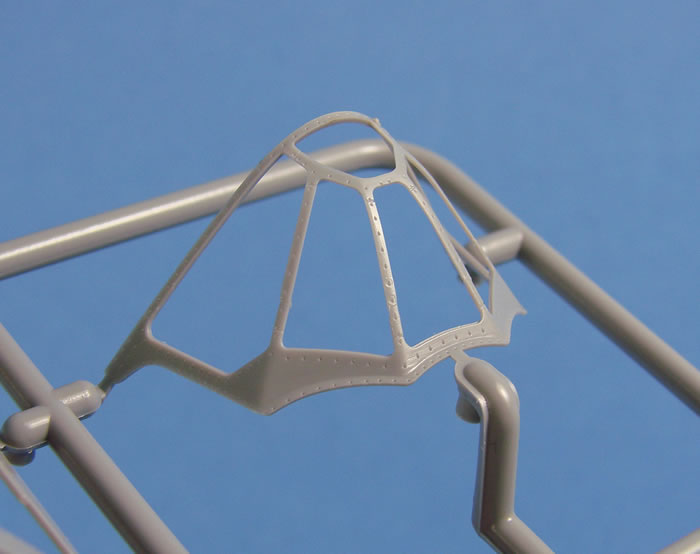
Canopy
Two options are provided here. A standard set of clear parts are included, whereby you mask the panels as per usual, and then paint. The other contains the glass and separate frames, which are incredibly fragile.
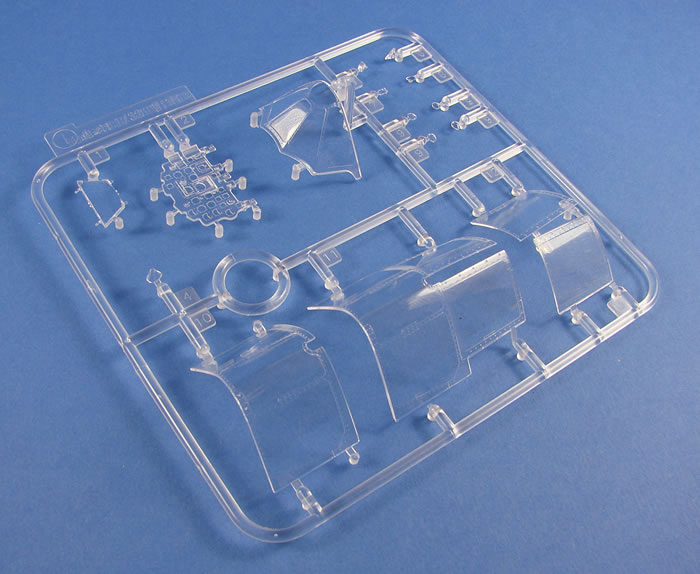
This is quite an attractive proposition, but I still feel you would need to mask the canopy as normal, as it’s pretty common to fit the glass before you paint the airframe. I’ll have to work out how I approach this.
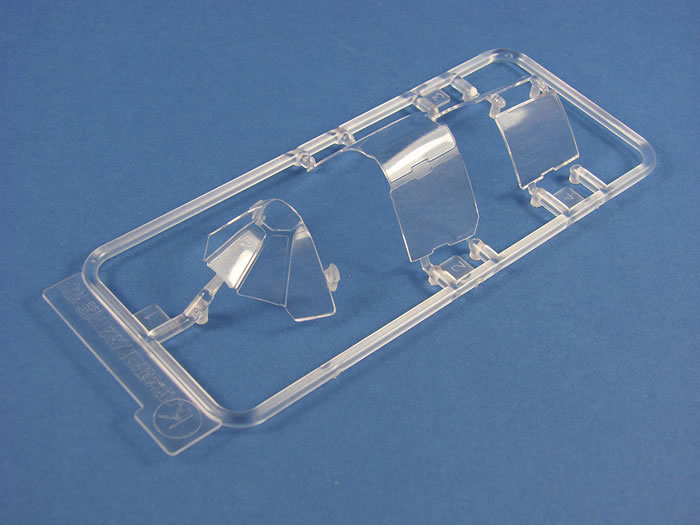
If you want to pose the canopy in a closed position, then the standard canopy parts supply a single piece hood and rear canopy for this purpose.

This option isn’t available in the separate glass/frame style.
Masks
A single sheet of green vinyl is supplied, with sharply cut masks for the canopy only (traditional style), and not the wheel hubs. That’s a shame. My experience of this masking material from other ZM kits is that you really need to make sure it’s firmly applied as it can lift in places.
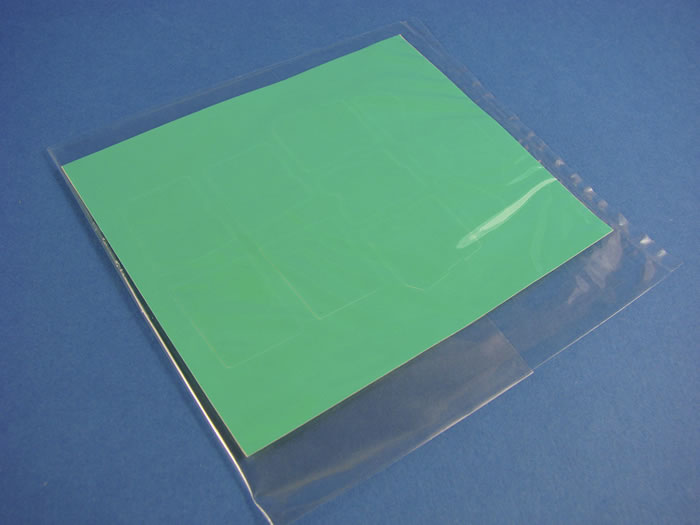
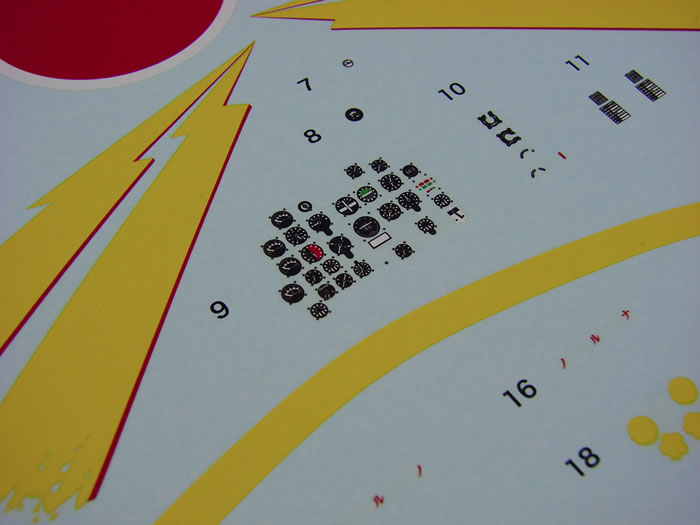
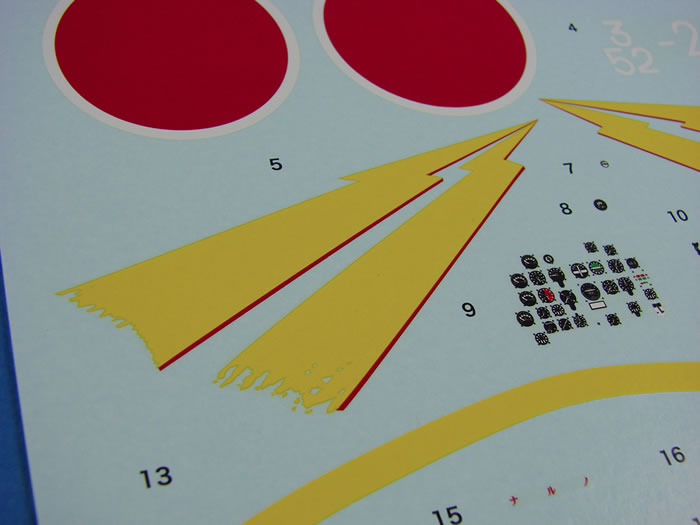
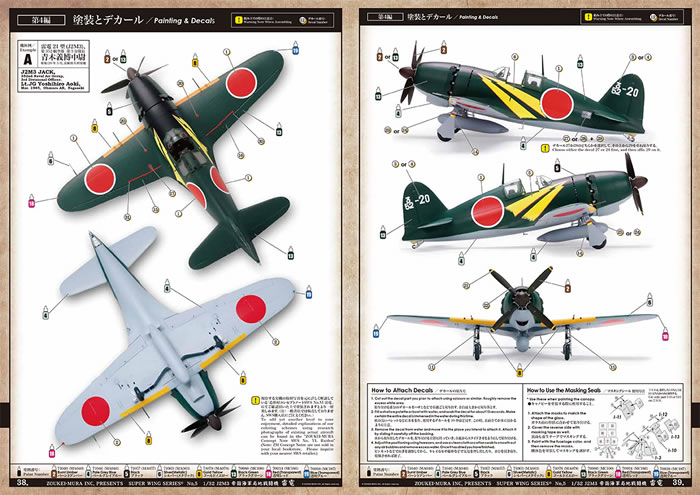
Decals
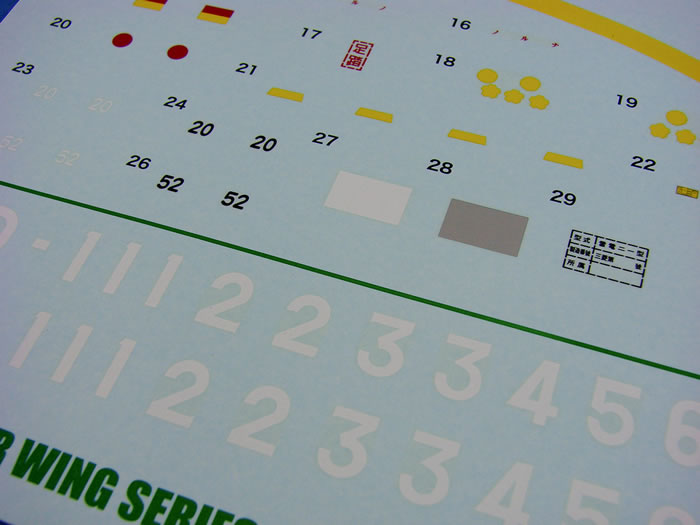
All decals for the two schemes are printed on a single sheet. These seem to either be in-house, or from somewhere in Japan maybe. They certainly aren’t Cartograf. I find ZM’s decals to be a little disappointing in that they have poorly defined details and are fairly thick. That applies here too, although they aren’t unusable. Maybe think of doing the markings with aftermarket decals or masks.
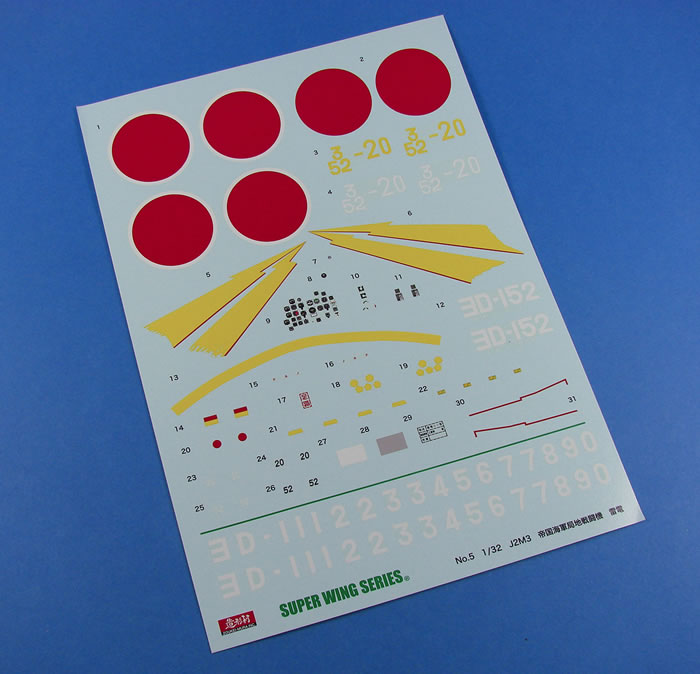
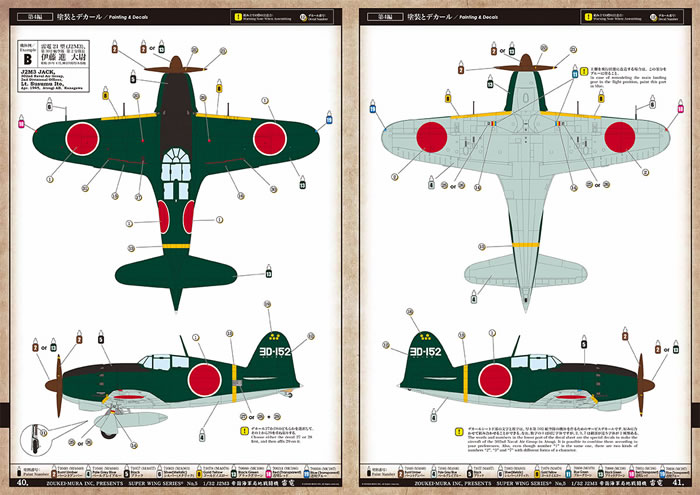
Stencil and instrument details are also included here. The two schemes on offer are the same as those in the Hasegawa kit, so nothing original in the slightest. Thankfully, separate numbers are included to change the serial for one of the options. These two schemes are:
-
J2M3 Jack, 352nd Naval Air Group, 3rd Divisional Officer Lt. JG Yoshihiro Aoki, March 1945, Ohmura AB, Nagasaki
-
J2M3 Jack, 302nd Naval Air Group, 2nd Divisional Officer Lt. Susumo Ito, April 1945, Atsugi AB, Kanagawa
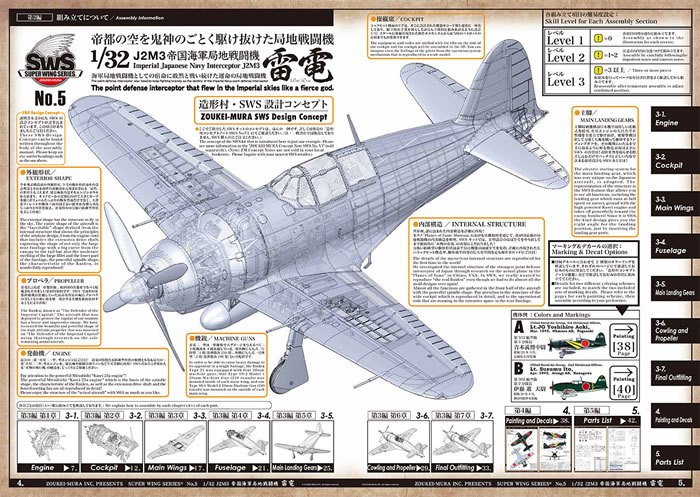
Instruction Manual
ZM has their own style of manual, in the same way that WNW has their specific approach. For ZM, it’s all about educating the modeller as to the internals of the aircraft, and the design. A history of the J2M3 is included, followed by a treatise on the Raiden, along with a sort of X-ray of the aircraft. Each chapter deals with a specific constructional section of the model, with more SWS explanations throughout, along with some superb illustration that should make assembly straightforward. Colour references are made throughout for both Gunze and Vallejo paints.
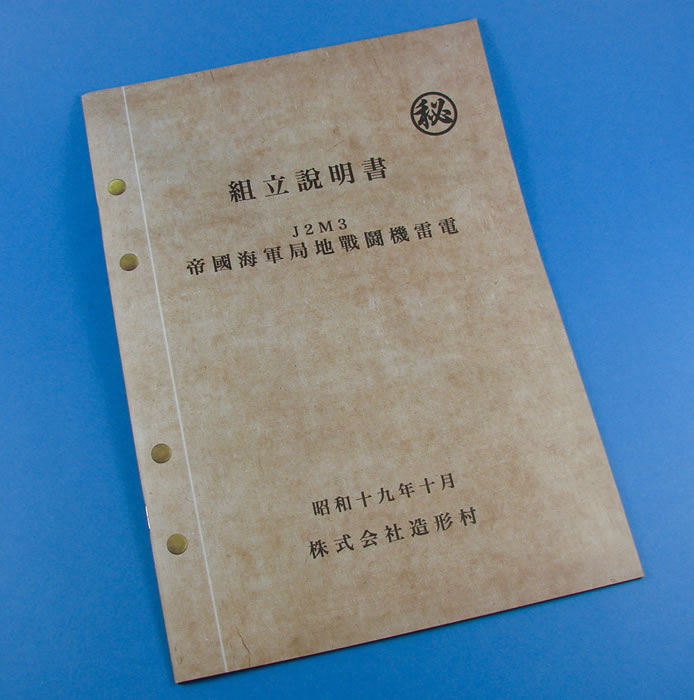
The last pages are taken over with the two schemes, printed in colour. These are rather dark and murky in places, but easy to overcome. Decal placements suffer a little from the gloom too, so use any references you have. A parts plan is also included.
Has this kit withstood the last 4 years in terms of approach? Yes, without a doubt.
This is most certainly the best J2M3 in any scale, and most certainly in 1/32. Some details are quirky, but that’s the name of the game when it comes to Zoukei-mura’s SWS approach. I think that the engineering approach to this is sensible, and a little novel in places. This certainly isn’t a perfect kit, but can you name one that is?
I’m a little disappointed about the lack of weighted wheels, especially for a premium product, and the rather substandard decals. However, this is still a gem of a kit, and one I’d been chasing down for a little while now.
I really can’t wait to crack this one open and commit some glue and paint.
My sincere thanks to Duncan at BlackMike Models for getting this out to me so quickly. To purchase, head over to their website.
Review Text and Images Copyright © 2017 by James Hatch
Page Created 26 September, 2017
Last updated
26 September, 2017
Back to HyperScale Main Page
Back to Reviews Page |
 Home
| What's New |
Features |
Gallery |
Reviews |
Reference |
Forum |
Home
| What's New |
Features |
Gallery |
Reviews |
Reference |
Forum |