Tamiya's 1/48 scale
P-47D Thunderbolt
by Mick Drover
|
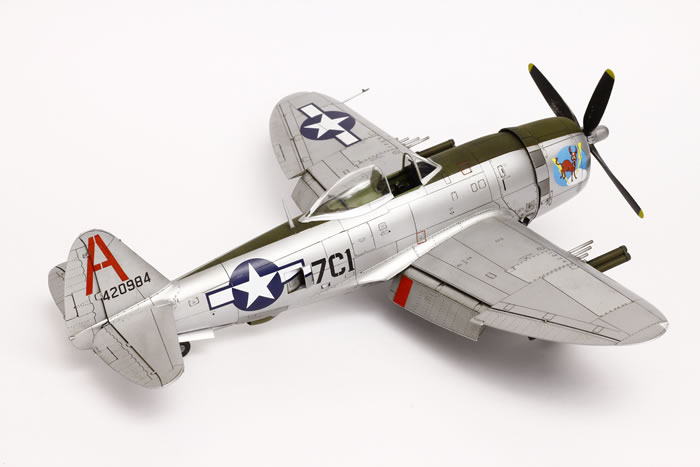
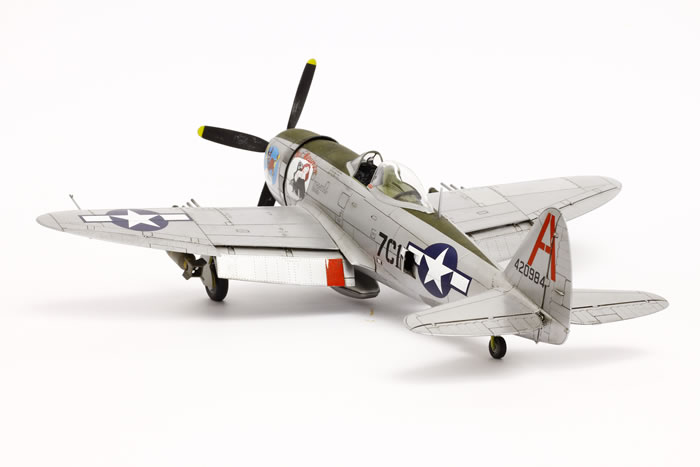
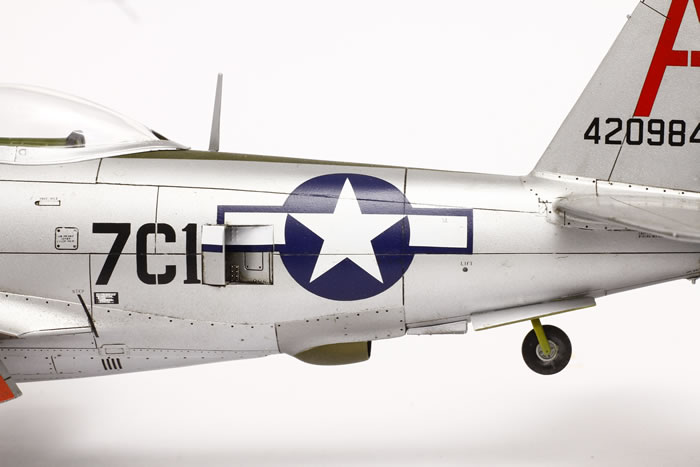
Republic P-47D-30-RE Thunderbolt Bubbletop
flown by Lieutenant Jack Reams of the 347th FG, 350th FG
|

Hobby Boss's 1/48 F4U-7 Corsair is available online from Squadron.com
First of all I'd like to thank Brett for sending me these decals to review. I reviewed them for Hyperscale while I was recovering from some major surgery. It was great to receive them as the review writing kept my mind active during an otherwise sedentary period. I owe a very generous and overdue thank-you to him.
I did the review for these decals last year and you can read about them in the article I wrote here. I was extremely impressed with the quality of the decals, so much so that I sourced a kit with the intent of building it straight away.
Selecting the markings to adorn the aircraft with was quite straight forward. My son and the pilot of the aircraft share the same name so that was quite easy.
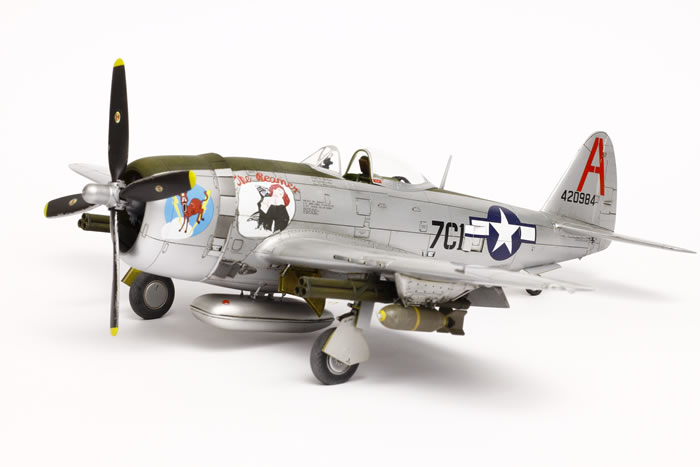
So with kit, decals and some after market accessories in hand I set about building the model as "The Reamer" flown by Lt Jack H. Reams of the 347FS, 350FG USAAF during their deployment in Italy during 1944 and 1945.
The build of the Tamiya P-47 is nothing short of viceless.
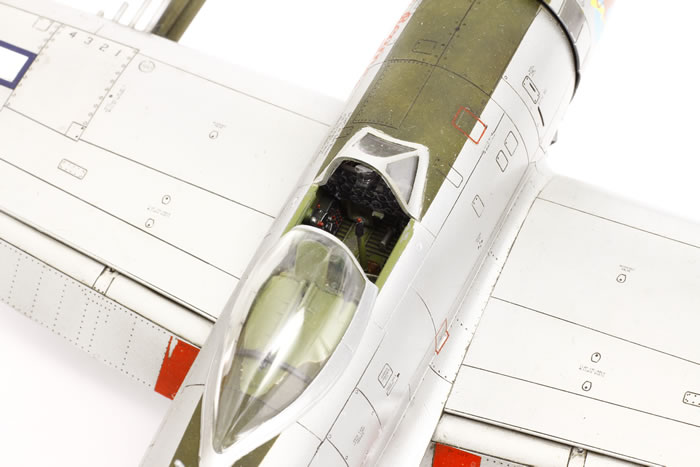
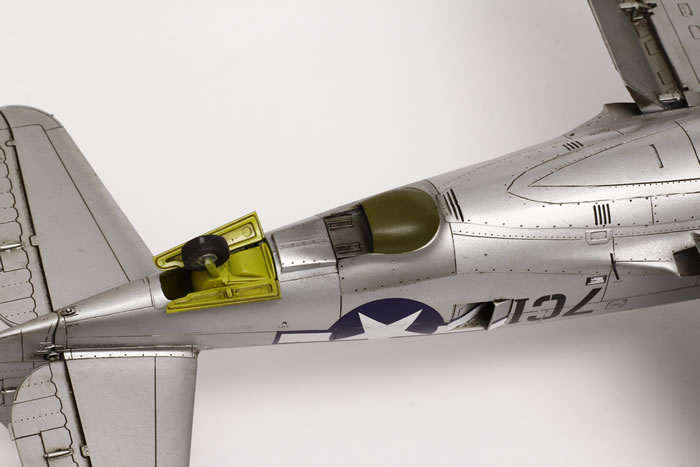
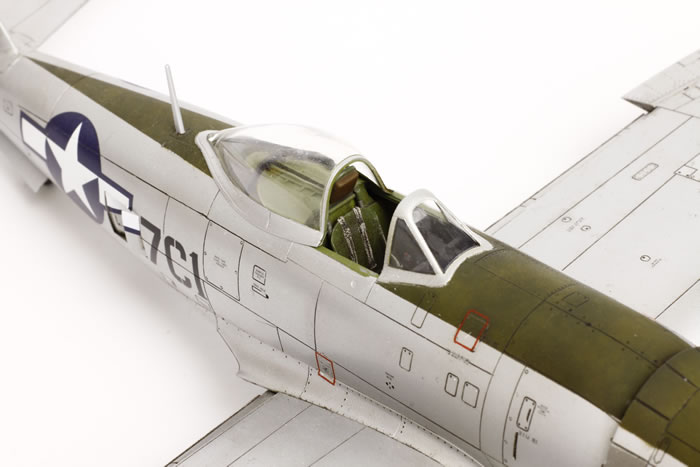
I followed the instruction build order which quickly presented me with complete cockpit tub and engine ready to be mated to the fuselage halves. The zinc chromate paint used in the cockpit is by Mr Color with all of the details picked out using Vallejo acrylics.
The instrument decal is from the kit placed on a gloss black instrument panel followed by lashings of Mirosol to settle it onto the raised detail. The resulting looks fantastic.
After the cockpit was done I soon had a complete airframe ready for paint which in any build is always the fun part.
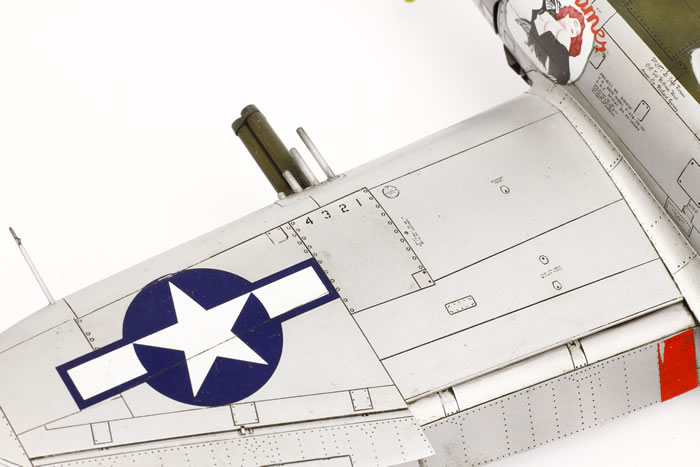
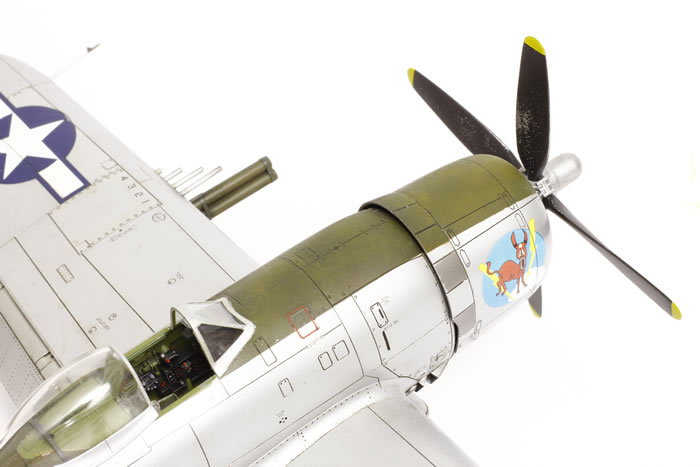
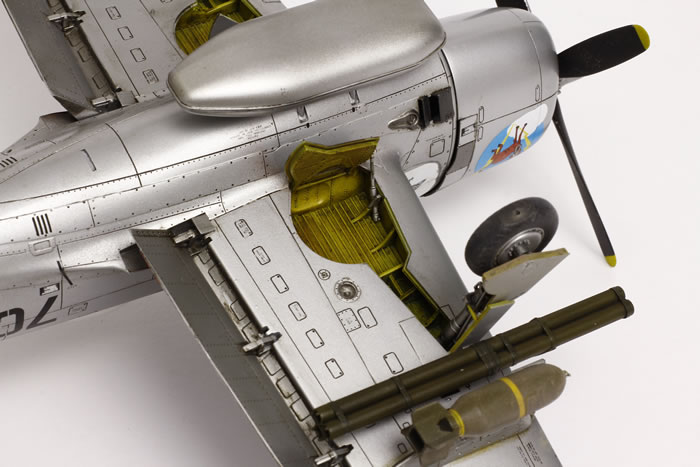
I was trepidatious about how I would tackle the metallic paint scheme. Friends suggested the Alclad route which I took but was soon disappointed with. the Alclad proved to be very fragile with handling and considering the entire airframe had been painted this was it was a forgiving finish. I striped he Alcald paint and decided on using the tired and tested method of using Tamiya AS-12 Bare Metal Silver. I decanted the can into a storage jar and then set about applying the paint through my trusty Harder and Steenbeck airbrush. I did opt for Alclad polished aluminium on the gun bay access panels. The glare shield is Tamiya olive drab with some distempering using a lightened version of the same colour. The yellow chromate in the wheel bays is from one of the Mr Color sets.
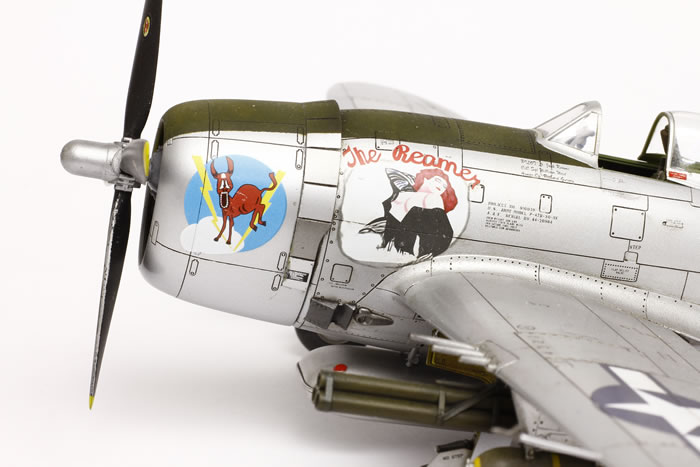
My clear coat of choice at the moment is Tamiya X-22 thinned with lacquer thinner. I applied two coats to ensure the paint was sealed and then went about applying the Lifelike Decals. These were then sealed with another two coats of the X-22. Oils and panel line washes ensued. For the final coat I chose Mr Color 181 Semi Gloss Super Clear as I didn't want a dead flat oxidised look on the model. The Semi Gloss gives a nice satin finish. Over the Olive Drab glare shield I used Tamiya XF-86 Flat Clear. Perhaps due to the thinning ratio of the flat clear I ended up with some chalkiness. I managed to fix this by misting on some neat lacquer thinner. By doing this it eliminated the chalky appearance.
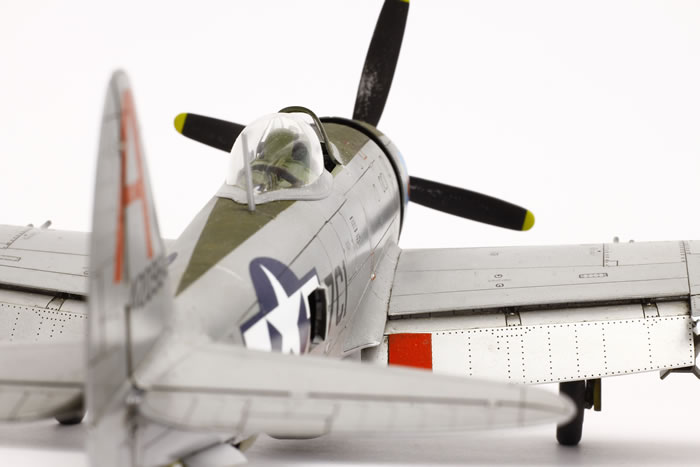
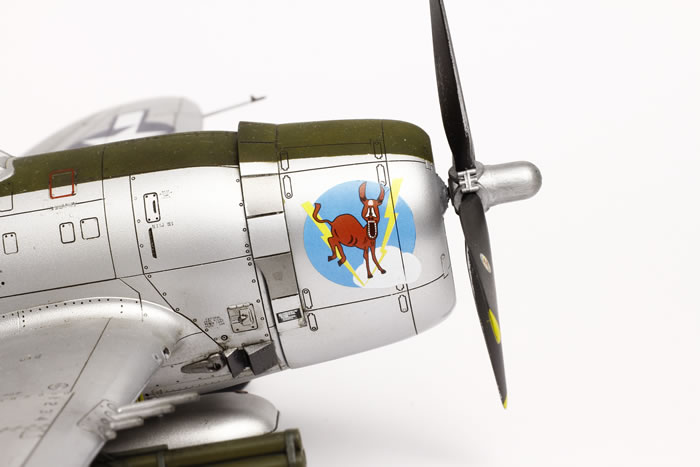
The prop received the paint chipping treatment with trusty Tamiya AS-12 used as the metal followed by AK Interactive light chipping fluid and finally a ‘not quite black’ applied over the lot. Some water and a medium brush and the worn leading edges of the prop began to show themselves.
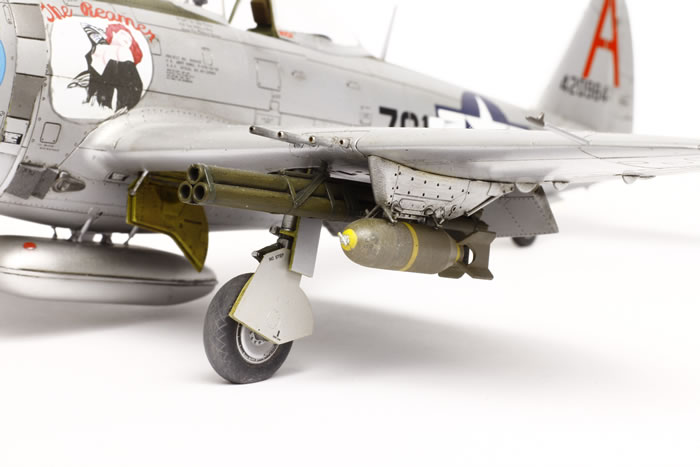
I’ve added a few embellishments to the kit by way of aftermarket items. The Master .50 calibre gun barrels replace the kit parts and the kit radial engine has been replaced by a Quickboost item that I’ve wired up with ignition leads. Eduard Super Fabric seats have been added to the otherwise featureless seat. I’ve also replaced the lower main gear doors with Quickboost items too as I managed to use the wrong type of lacquer to strip some paint from them. Let’s just say the plastic Tamiya gear doors didn’t like the lacquer being so hot.
Rick Peck who was involved for the research of this particular aircraft contacted me through my Facebook page and provided some excellent photos of the aircraft. Photos of aircraft from the same FS/FG show the smaller P-51? drop tank on the centreline along with the bazooka tubes being loaded on the outer pylons where the 500 lb bombs were loaded. I’ve taken some liberty with the load out as I wanted something that was a bit more ‘aggressive’ when it came to ground attack. So with artistic license in hand I opted for the flat belly tank, bazooka tubes and 500 lb bombs. I think it looks pretty tough in this configuration.
The decals performed really well with tap water and Microset. Where decals sat over the top of raised detail I offered up some Microsol to the decal and it conformed well. I’ve since been told by the folks at Lifelike that warm water after application also helps the decals settle over raised details.
Acknowledgements and Summary |
I must also thank Nagao San at Lifelike decals who I’ve been in contact since I’ve finished the model. His enthusiastic passion is remarkable and he’s very keen to see how his products are used. So if you've used them be sure to send pictures of the final product to him. Thank-you Nagao San!
And as I already mentioned a thank you to Rick Peck for the photos and the good folks over at the 350th Fighter Group Facebook group. If you do the Facebook think and you're interested in checking them out, then head here.
And you can visit my site here: www.themodellingrepublic.com
Summary
Tamiya 1/48 P-47D with Lifelike Decals
-
Tamiya 1/48 Republic P-47D Thunderbolt "Bubbletop"; item 61090
-
Lifelike Decals 1/48 Republic P-47D Thunderbolt Part 9; item 48-049
-
Master 1/48 P-47 Thunderbolt .50 Browning M2 barrels; item AM-48-002
-
Quickboost 1/48 P-47D Thunderbolt Engine; item QB 48 005
-
Quickboost 1/48 P-47D Undercarriage Covers; item QB 48 086
-
Eduard 1/48 P-47M Canopy mask; item EX166
-
Eduard 1/48 Seatbelts USAAF WWII SUPERFABRIC; item 49082
Text and Images Copyright ©
2018 by Mick Drover
Page Created 4 October, 2018
Last Updated
4 October, 2018
Back to
HyperScale Main Page

|
 Home
| What's New |
Features |
Gallery |
Reviews |
Reference |
Forum |
Search
Home
| What's New |
Features |
Gallery |
Reviews |
Reference |
Forum |
Search