Airfix 1/48 scale
Curtiss Hawk H81-A2
by Jumpei Temma
 |
Curtiss Hawk H81-A2 |

Airfix's 1/72 scale Junkers Ju 87 B-1 Stuka is available online from Squadron for only USD$11.99
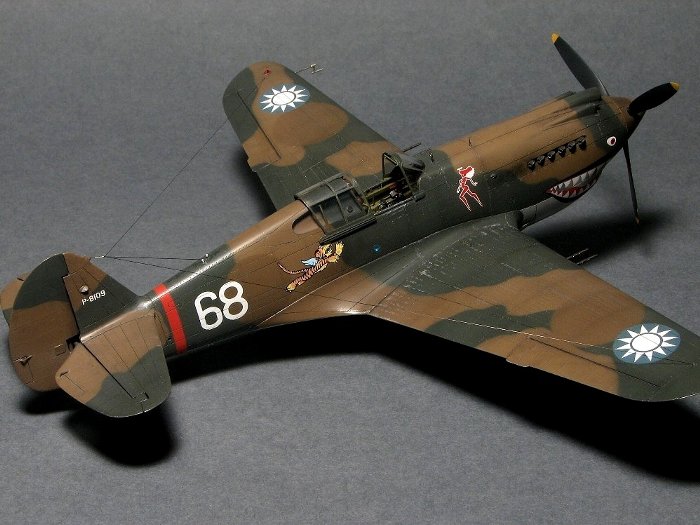
Here is my Airfix's new tool 1/48 Curtiss Hawk H81-A2 of Flying Tigers flown by Charles Older. Prior to construction, as usual, I made original drawings using Curtiss factory drawings and official election and maintenance manuals.

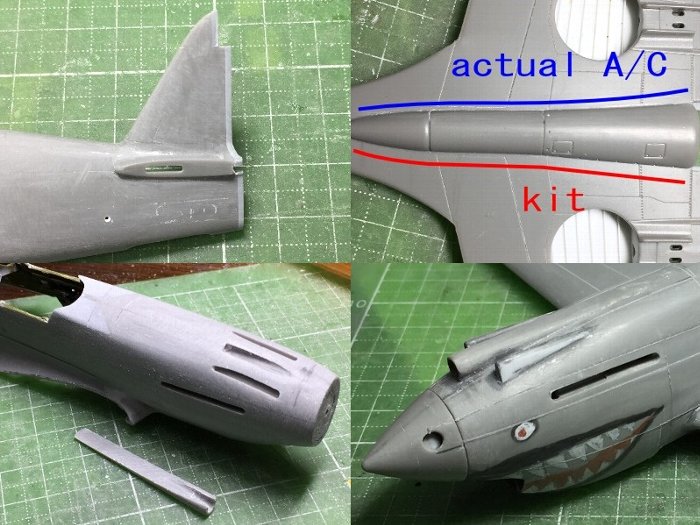
During the drawing process, I noticed that the kit nose was 1mm (0.04") long and the kit tail was 1mm short. Finally, I identified that the total length of P-40B is 381.3 inches. After the drawing was completed, I illustrated color profiles using side view drawing data.
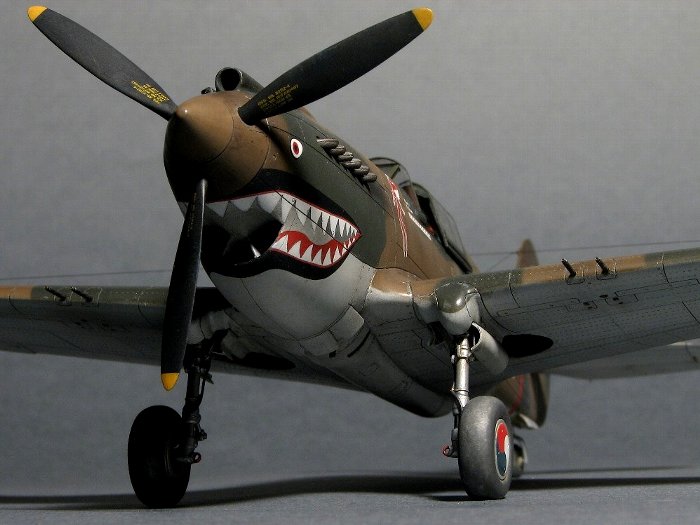
Nose
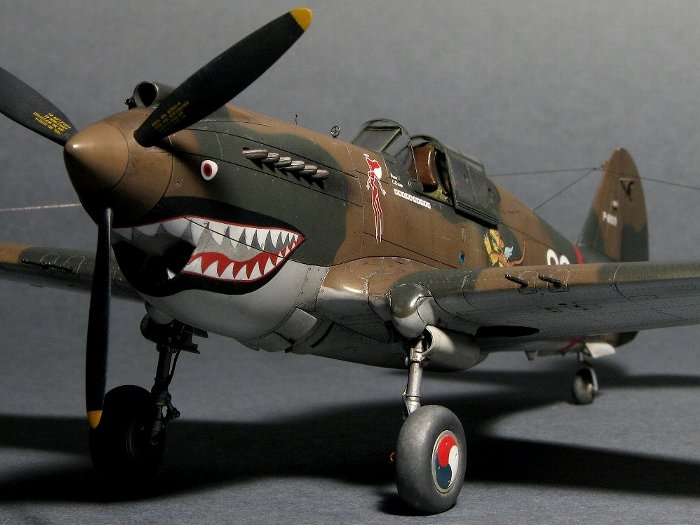
First of all, I cut the kit nose to shorten its length. At the same time, I corrected the cross-sectional shape of the radiator cowl slightly smaller. The cut cowl part was bent outward at the red arrow point and bent inward at the blue arrow.

The gluing part (shown in black) was cut off. Then the cut cowl part was glued on the fuselage. The lip of the radiator intake (black) was cut by 1mm (0.04"). The exhaust slit was corrected to curve so that the front end goes down. And the dent was made at both ends of the intake.
Interior
The sidewall of the cockpit was from Aires' resin set.
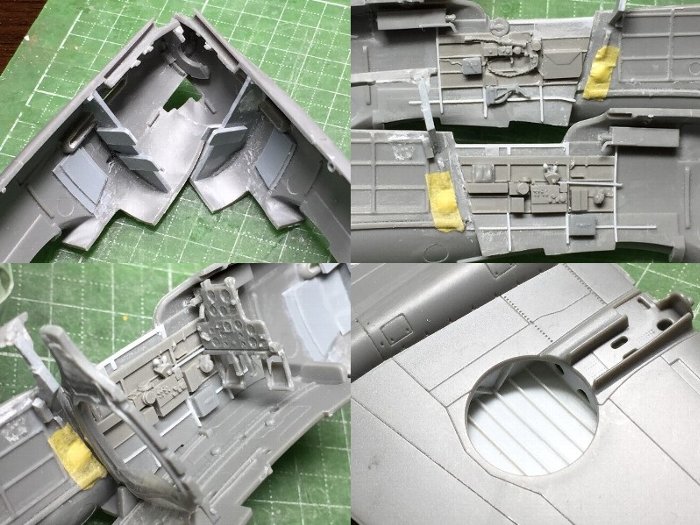
Unfortunately, this resin sidewall was not so accurate. I added some parts from Hasegawa P-40. The instrument panel was from the kit.
Fuselage
The trailing edge of the fin and fuselage was extended by 1mm (0.04"). The lower fuselage fairing was corrected. The nose top intake was replaced with sprue. The corner of the upper fuselage at the front of the canopy was corrected to be an angular shape. And the thin kit gun fairing was thickened with plastic sheet (white).
Canopy
The rear window was replaced by heat formed transparent styrene sheet (Tamiya 0.4mm Clear Pla-Plate). The wood mold was made of chemical wood.
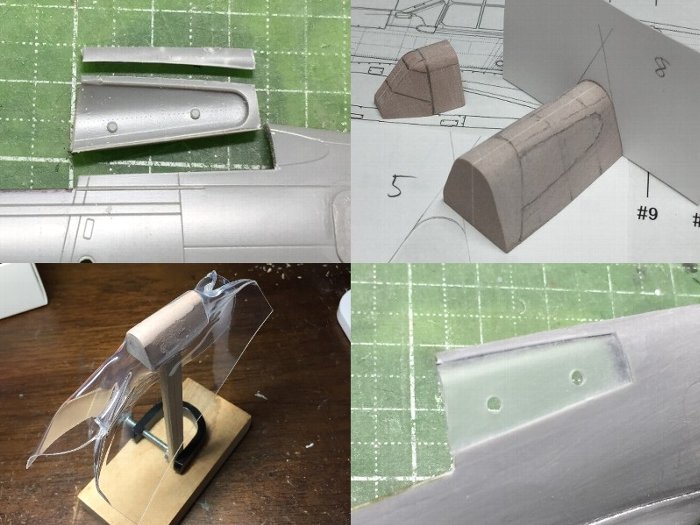
The windscreen and slide hood were heat formed transparent styrene sheet as well. Note that the front edge of the side window (shown in blue) is flat to the fuselage side. But the rear edge (red) is overhanged to the fuselage side.
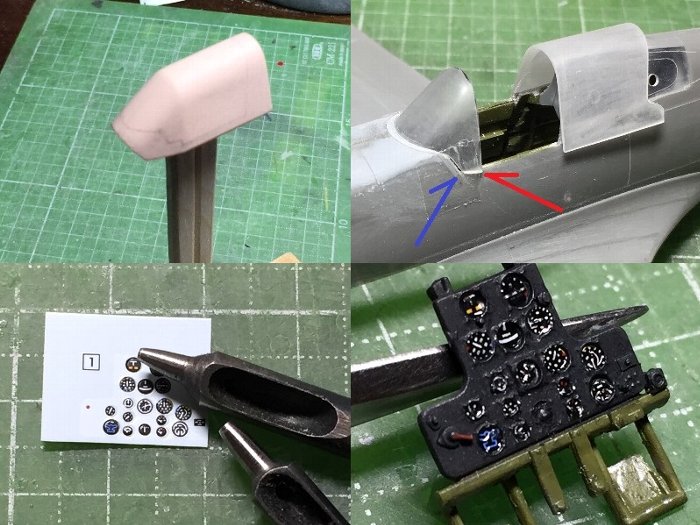
The inside of the windscreen was polished with rubbing compound. After the windscreen was glued on the fuselage, frames were engraved. Then the outside surface was polished. The fuselage panel inside the rear window was cut out and painted.
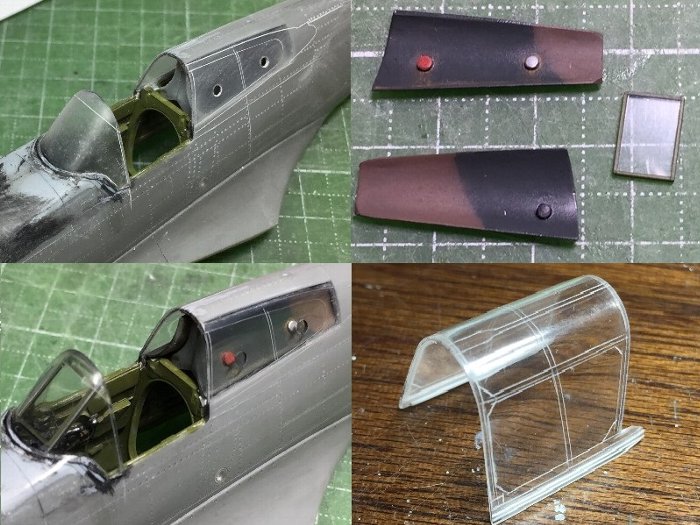
The slide hood was also heat formed, cut out, engraved and polished.
Details
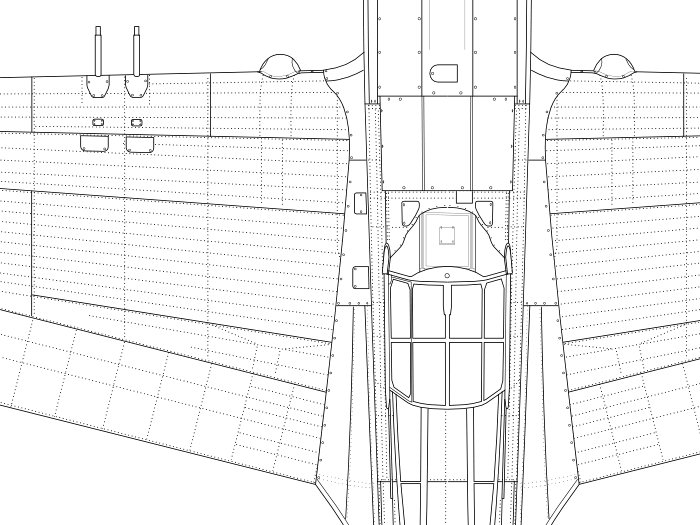
Rivet lines were engraved with beading tools. Well, correct lines had already been clarified in my own drawings. The cowl flaps were made of plastic sheet.
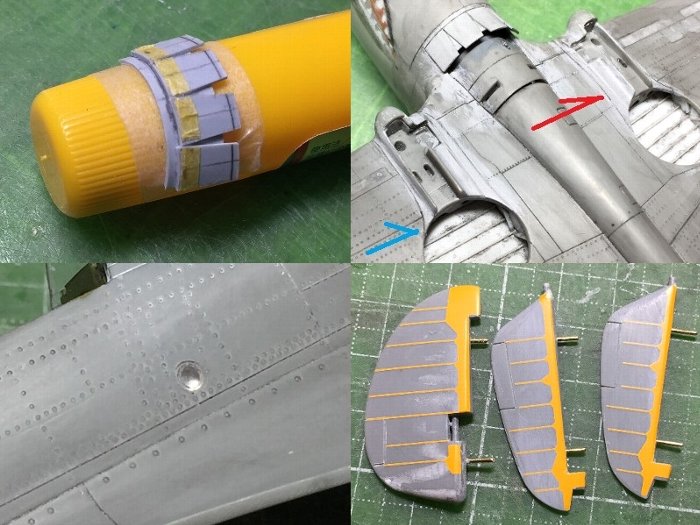
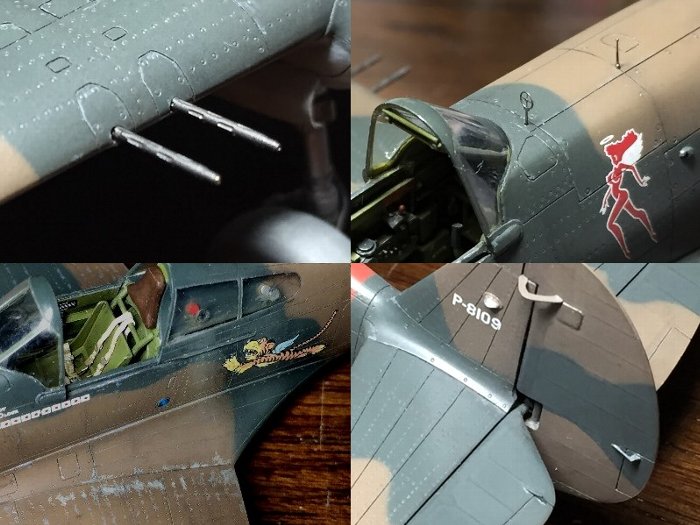
The planer shape of the landing gear fairing was corrected (red and blue arrow). The fuselage side navigation light was made of clear sprue. Aluminum sheet was glued behind. Rib Tapes of each control surface were depicted with custom made dry decals (yellow).
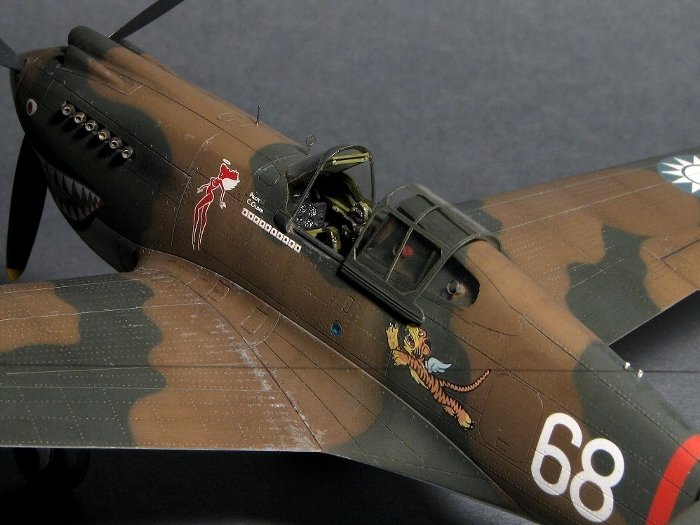
I always use Mr.Color paints. All of camouflage and basic parts of markings were painted. The shark mouth was masked and painted as well.
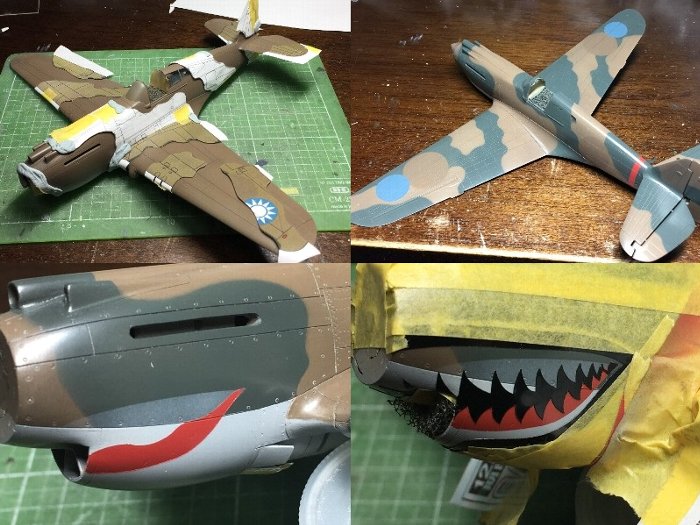
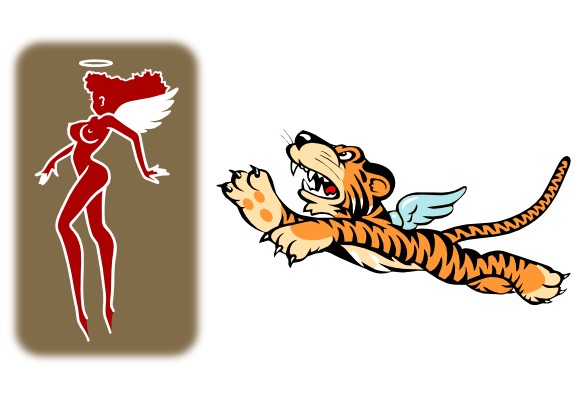
Masking sheets were cut by a home-use cutting machine using my color profile illustration data. Details of markings such as the angel, score marks, shark's eye, aircraft number, serial number and white portion of national insignia were depicted with custom made dry decals.
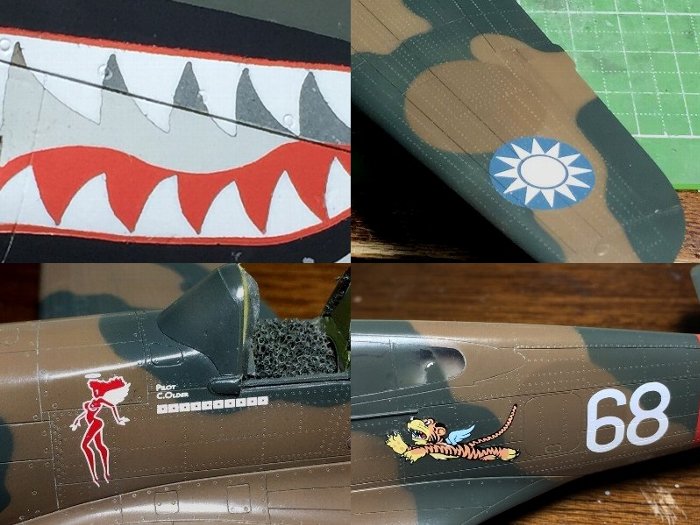
Only the mascot of tiger was from CMK's decal sheet.
Finishing Work
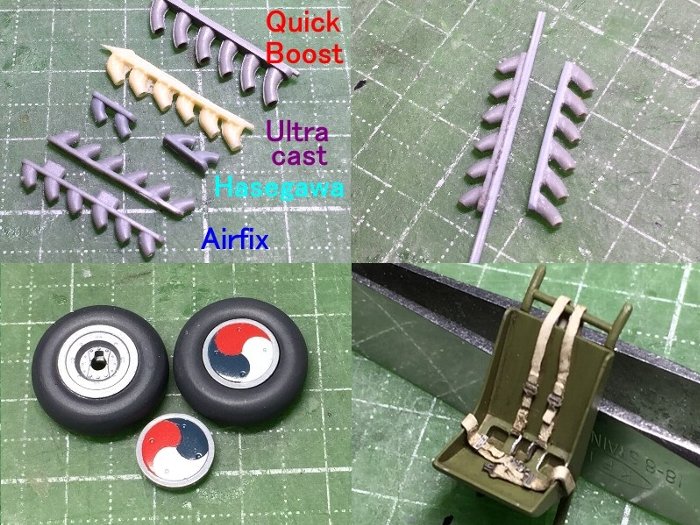
The propeller blades were from Tamiya P-47 Razorback. The cuffs were sanded away. The main landing gear was from Hasegawa P-40. The oleo was replaced with metal tube, and brass rod was inserted through the shaft for the reinforcement. The small gear cover and tail gear leg were made of metal.
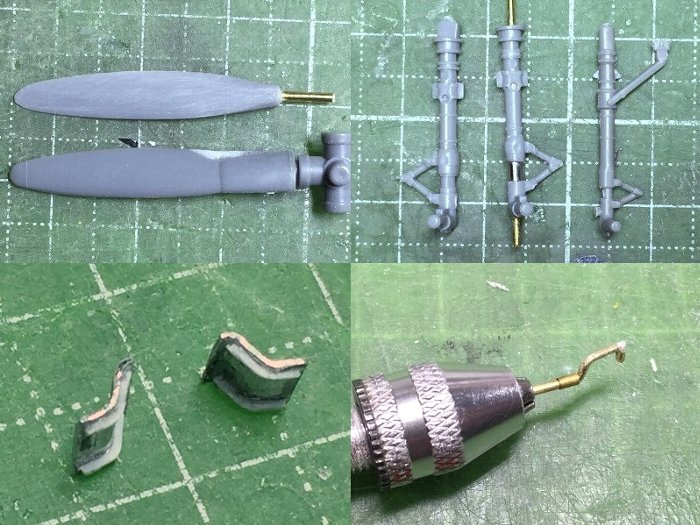
I had collected a couple of aftermarket exhaust parts. But finally I found the kit exhaust part was the best. I extended the base of the exhaust pipe and added some details. The tire and wheel were from Hasegawa P-40. The pilot seat was from the kit and the harness was made of lead sheet and Aires's photo etched parts. But I don't know correct details of the seat and harness of H81-A2 for the RAF.
The wing gun, nose gun tube and ring gun sight were from the Master Model. Finally, the model was heavily weathered. The weathering wash was applied with Tamiya Weathering Master and soapy water.
Next, Tamiya enamel color XF-57 Buff was airbrushed especially around the fuselage fuel cap and then Buff was partially wiped away by brush with Tamiya enamel thinner.
Camouflage paint on the wing root was scratched with metal spatula so as to reveal silver underpaint.
Finally my model and drawings were completed. The slide hood was not glued on the fuselage. So I can enjoy both close and open position. I was satisfied with the dimentionally accurate nose cowl decorated with shark teeth, and above all, the cute and sexy angel depicted by custom made dry decals.
Full size three view drawing of P-36 and P-40B, E, F, K, N and the further article are here.
http://www.geocities.jp/yoyuso/p40b/p40be-1.html
Model, Images and Text
Copyright ©
2018 by Jumpei Temma
Page Created 21 June, 2018
Last Updated
21 June, 2018
Back to HyperScale Main Page
|
 Home
| What's New | Features | Gallery | Reviews | Reference | Resource Guides | Forum |
Home
| What's New | Features | Gallery | Reviews | Reference | Resource Guides | Forum |