Junkers D.1
Wingnut Wings, 1/32 scale
S
u m m a r y |
| Catalogue Number: |
Wingnut Wings Kit No. 32065 - Junkers D.1 |
| Scale: |
1/32 |
| Contents and Media: |
124 injection moulded plastic parts; 11 photo-etched metal detail parts; Cartograf decals with markings for 5 colour schemes. |
| Price: |
USD$79.00 plus shipping from Wingnut Wings website |
| Review Type: |
FirstLook |
| Advantages: |
Detail is everything you’ve already come to expect from Wingnut Wings, and nowhere at all does this disappoint. |
| Disadvantages: |
|
| Recommendation: |
This is an important type, directly linked to the future development of the metal monoplane fighter of WW2, and it is captured here splendidly. |
Reviewed by
James Hatch

Revell's 1/32 scale Me 262 B-1/U1 Nightfighter will be available online from Squadron.com
Background
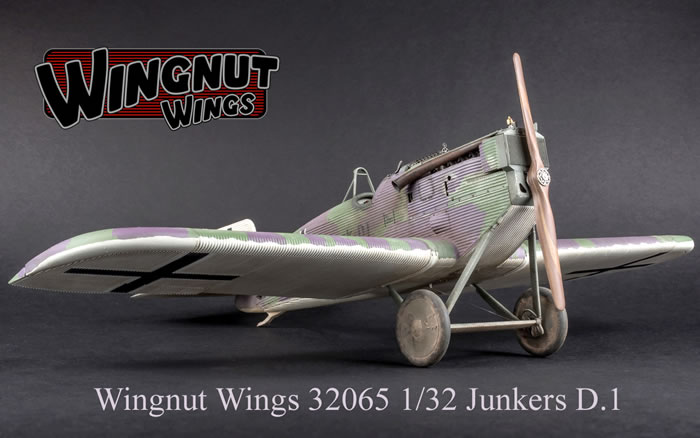
The Junkers D.I (factory designation J 9) was a monoplane fighter aircraft produced in Germany late in World War I, significant for becoming the first all-metal fighter to enter service. The prototype, a private venture by Junkers designated the J 7, first flew on 17 September 1917, going through nearly a half-dozen detail changes in its design during its tests. When it was demonstrated to the Idflieg early the following year it proved impressive enough to result in an order for three additional aircraft for trials. However, the changes made by Junkers were significant enough for the firm to re-designate the next example the J 9, which was supplied to the Idflieg instead of the three J 7s ordered.
During tests, the J 9 lacked the manoeuvrability necessary for a front-line fighter, but was judged fit for a naval fighter, and a batch of 12 was ordered. These were supplied to a naval unit by September 1918, which then redeployed to the Eastern Front after the Armistice. One example survives and is on display in the Musée de l'Air et de l'Espace, at the Paris–Le Bourget Airport, 11km north of Paris, France. Several replicas have been built, including one on display at the Luftwaffenmuseum Berlin-Gatow. Powered by a 180/200h Daimler-Mercedes D.IIIa/aü, and armed with two Spandau LMG08/15 guns, the D.1 First flew in 1918, only 41 were built before the Armistice.
Extract from Wikipedia
The Kit
It seems such a long time since the last Wingnut Wings release, but it was only 5 months ago when the Sopwith Dolphin was put on sale in time for Christmas. Prior to that in 2017, we had the amazing Stahltaub, and Green Tail Trilogy (triple Albatros D.V) release, and exactly a year ago, the quintet of Sopwith Camel kits. We’re certainly in no position to whinge and moan! A few months ago, WNW announced that they were to release the Junkers D.1 and having seen images of the test shot from the Nuremberg show, WNW’s General Manager, Richard Alexander, said that a limited number would initially be available for sale at Scale Models Expo, Upper Hutt, New Zealand. Thankfully, a few were set aside for review samples, and today we have one here to paw over and investigate.
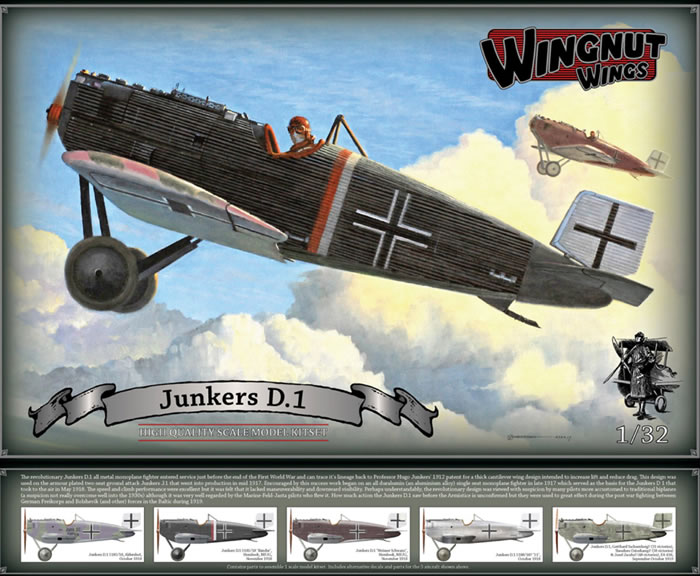
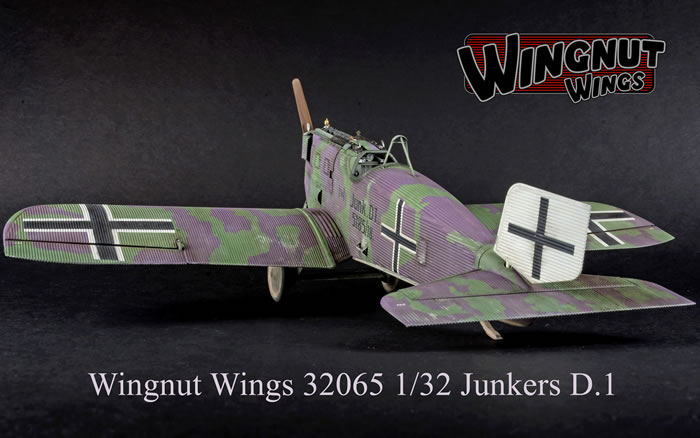
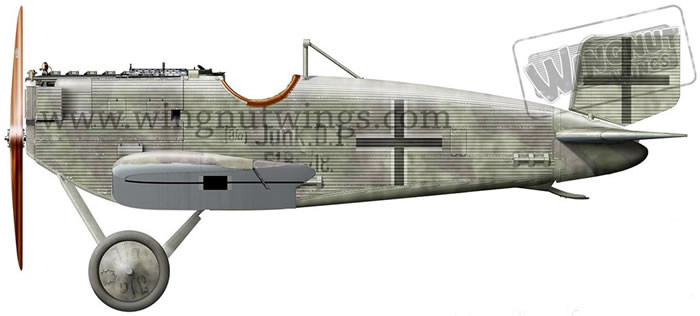
The Junkers D.1 is packed into probably the smaller of the kit release boxes such as we saw for the SE.5a etc. and is again adorned with some rather nice and atmospheric artwork, courtesy of Steve Anderson, again edged with an attractive silver frame. This image shows a pretty much full-on side profile of the diminutive looking all-metal fighter aircraft. This particular angle does lend itself to ask where the upper wing is! This was probably as close to state of the art for the time, being a monoplane with ailerons and no wing-warping system…which would have been pretty difficult on a corrugated metal and steel tube wing. Profiles of all FIVE schemes are shown on the box sides.
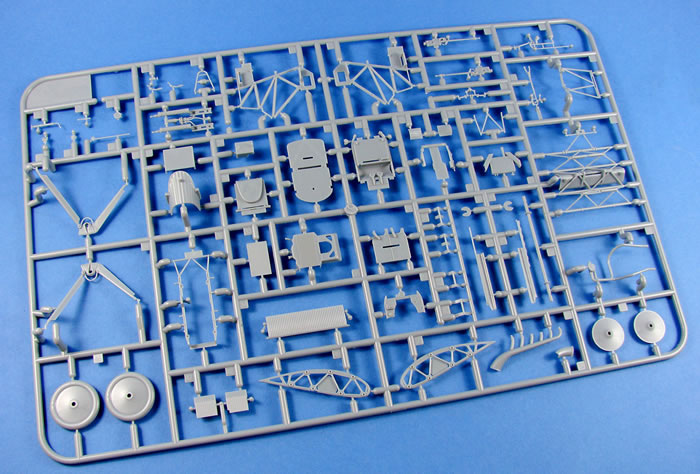
Inside the box, four light grey sprues are supplied in separate clear bags. No clear sprue this time! A single photo-etch fret is packed along with the Cartograf-printed decal sheet. The package is completed with the addition of a 24-page A4 instruction manual. Wingnut Wings spiel for this kit reads as follows:
124 injection moulded plastic parts
-
High quality (extra thin) Cartograf decals with markings for 5 colour schemes
-
Optional fuselage spine corrugations, foot steps, propellers, Daimler-Mercedes 180hp D.IIIa & 200hp D.IIIau engine details and “wings removed” diorama display option
-
Authentically reproduced corrugated Duralumin surface details, lapped panels & hatches and raised rivets
-
11 photo-etched metal detail parts
-
No interplane struts and (almost) no rigging makes this model the perfect introduction to First World War aircraft modelling.
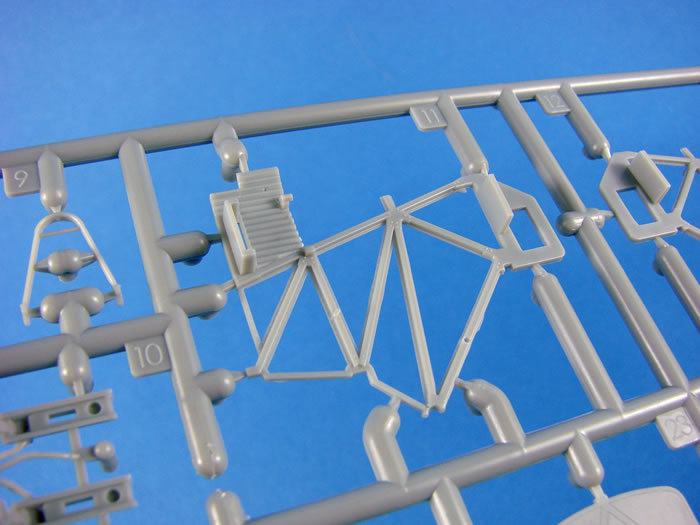
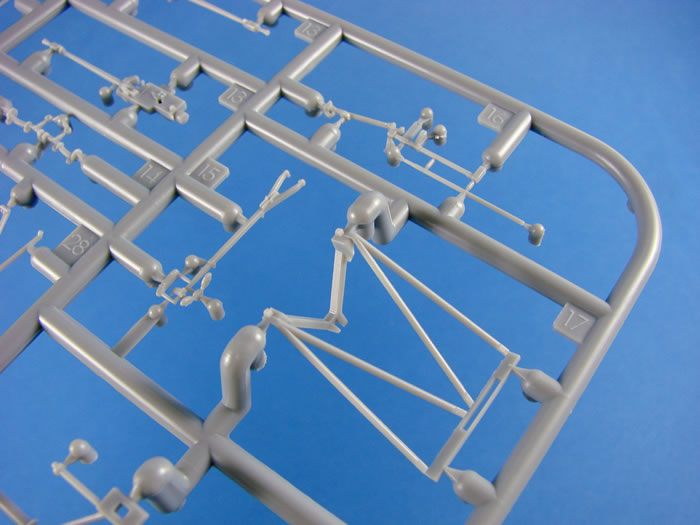
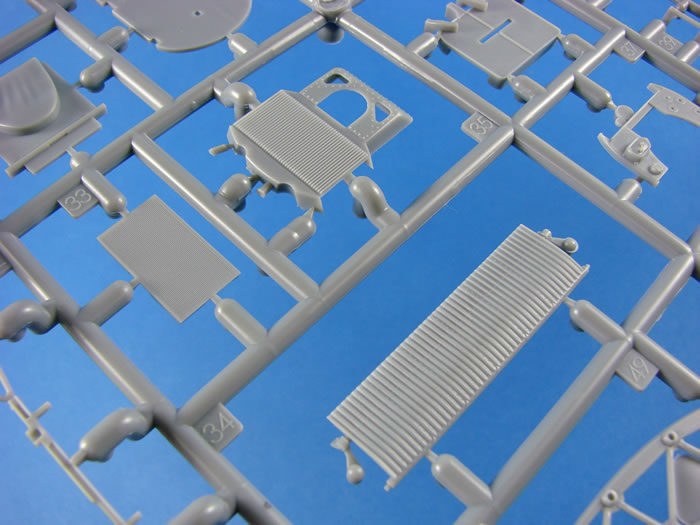
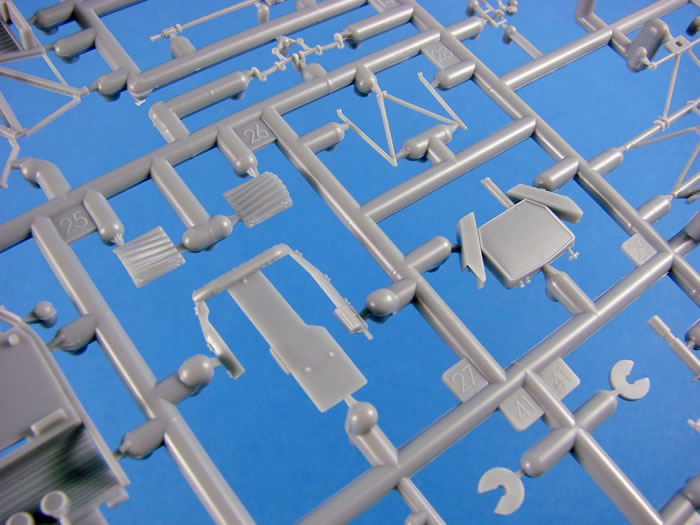
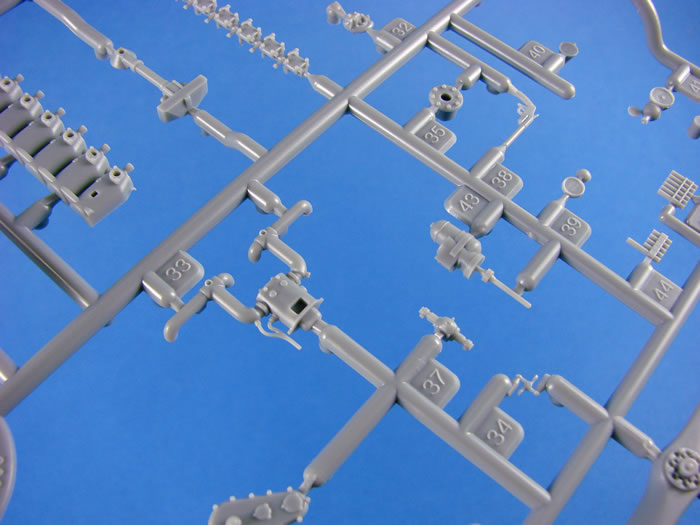
Sprue A
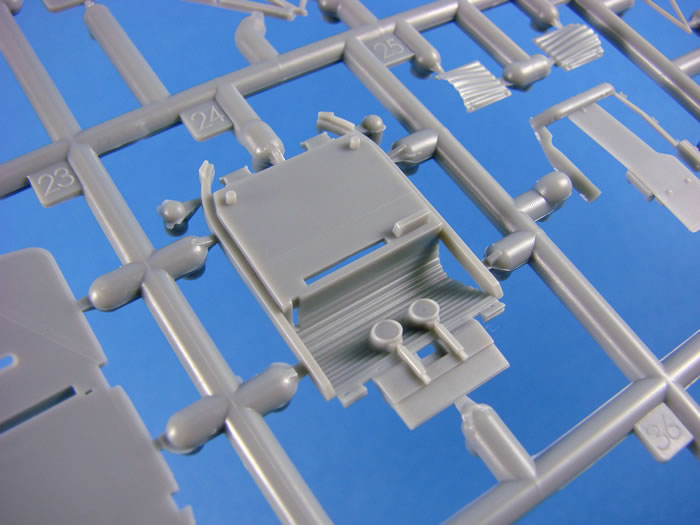
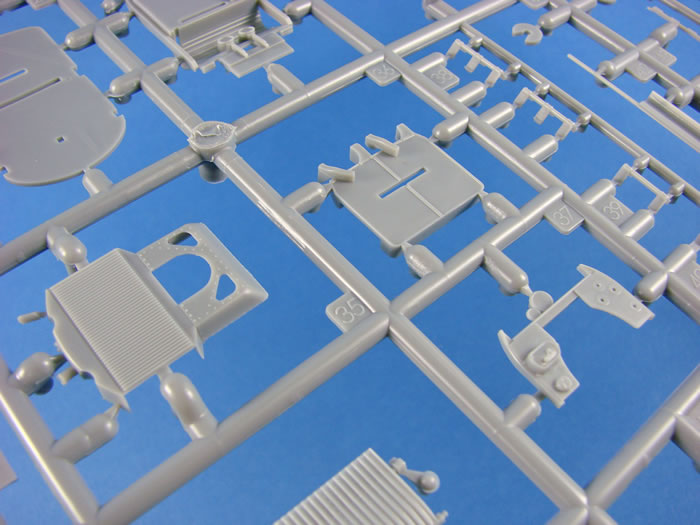
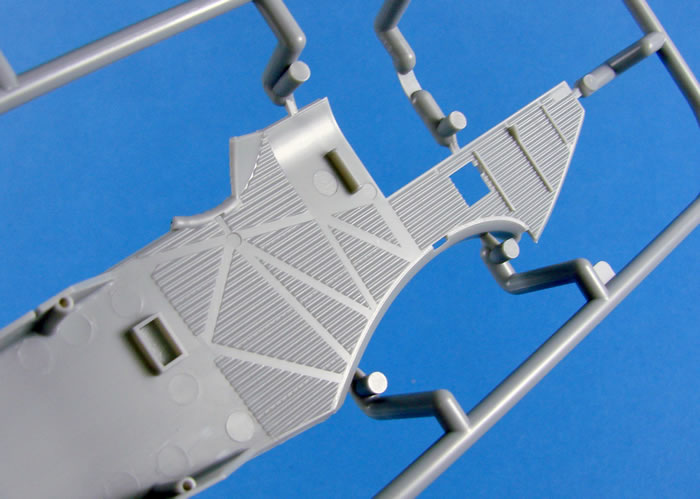
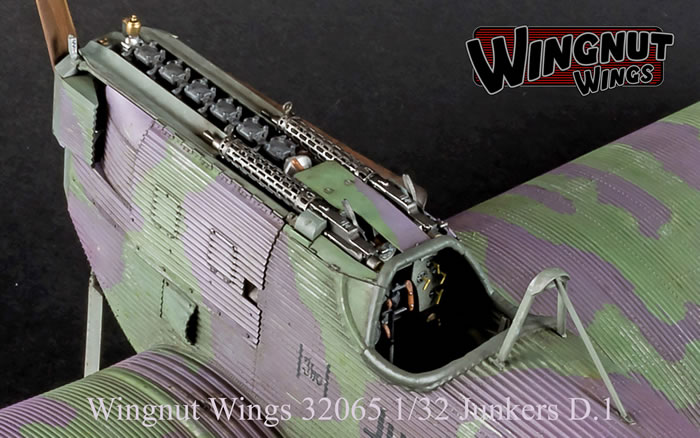
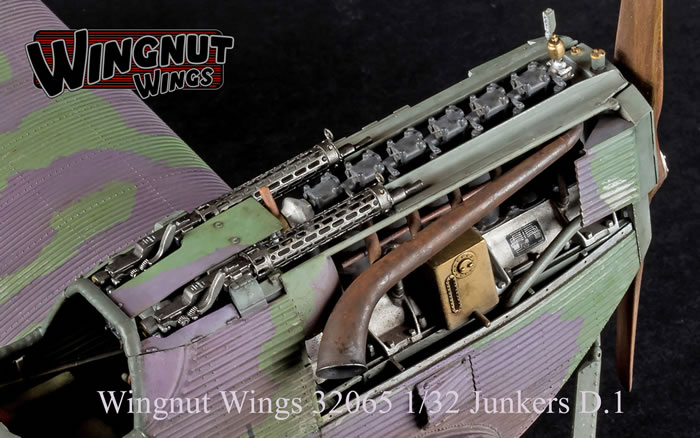
As is the norm with Wingnuts kits, this sprue contains the majority of detail parts, with the exception of the engine itself. If you’re technically minded, then this particular model will really provide you with some stimuli. As with Hawker fighter aircraft of a generation further on, the Junkers D.1 is built around a tubular steel centre-section which incorporates the cockpit and engine bearer supports, plus connections onto which the main wing panels would secure (the wings on the D.1 were detachable). Work starts, predictably, on that cockpit, with a centre section that is built upon a central arrangement of sheet metal and various angled tubes. This part is moulded as a single piece in what can only be described as superb engineering on the part of WNW. Onto this fits a firewall with corrugated details and fuel gauges. This also incorporates the ammunition magazines and empty belt box. With this section complete, it is then fitted to a lower fuselage that includes the lower cowl section before the rudder pedal and control column unit are installed.
Our pilot is then to be sandwiched in between the square-section cockpit side frames, with more corrugated detail and places for a grease pump, fuel tank pressurising pump and spark advance lever to be fitted. These details, as with the frames, are superb. Although the frames are square, look alongside the edges and you’ll see a fine lip with raised riveting. Very impressive. The little things mean a lot.
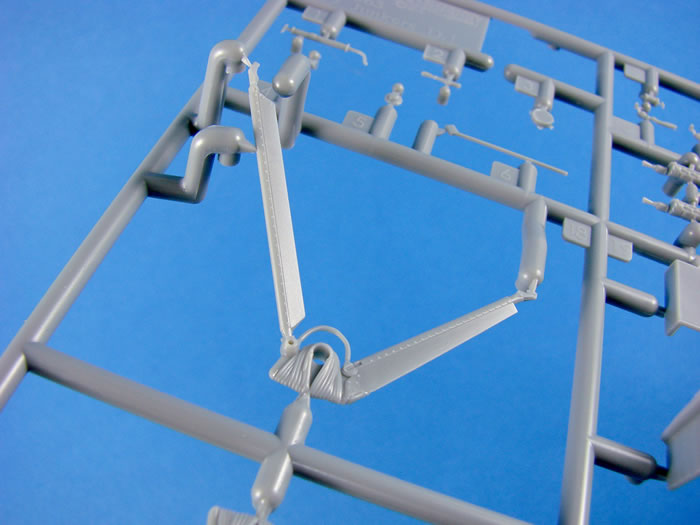
In some attempt to lighten things overall, the rear bulkhead onto which the pilot’s seat installs, appears to have a fabric covering, with a very faint ripple detected in the surface texture. The seat itself is moulded in two parts, with the lower seat cushion having the mounting framework attached. A small tag in the rear seat locates into the bulkhead, providing a 100% sure system of installation. This is now installed into the cockpit, along with a set of nicely etched PE seatbelts. You’ll notice that the instrument board in the D.1 is a very simple affair and is moulded as a single piece. Unlike other WNW kits though, there are some small PE switches to install to this. Small holes exist to insert these into, but I would recommend drilling them out a little more with a micro drill bit. With this installed, the actual engine bearers are now added to the burgeoning assembly.
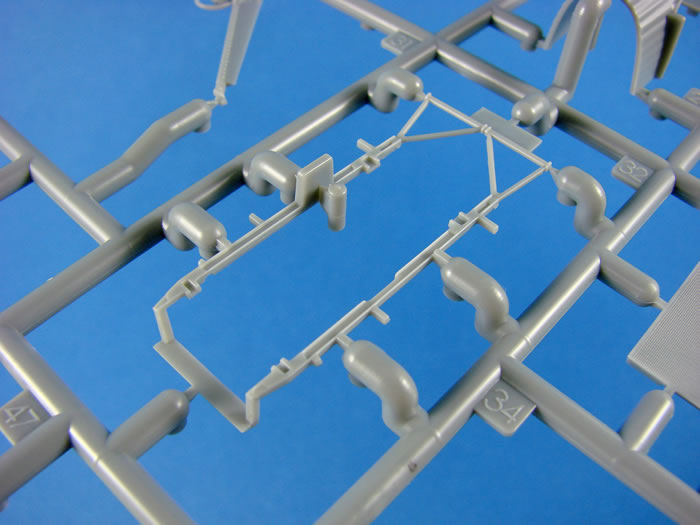
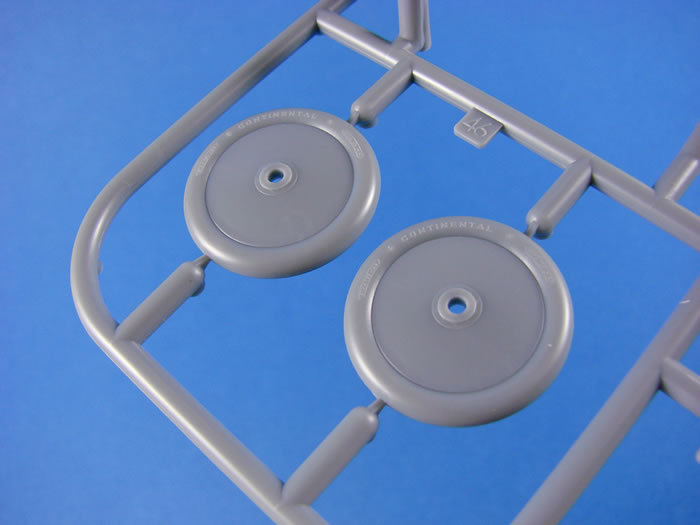
This sprue also contains a few other key items for the airframe. These include the undercarriage v-struts with superb elastic bungee cord details, axle with a separate corrugated under-sheet, and wheels with separate outer hubs and their delicately tooled CONTINENTAL text.
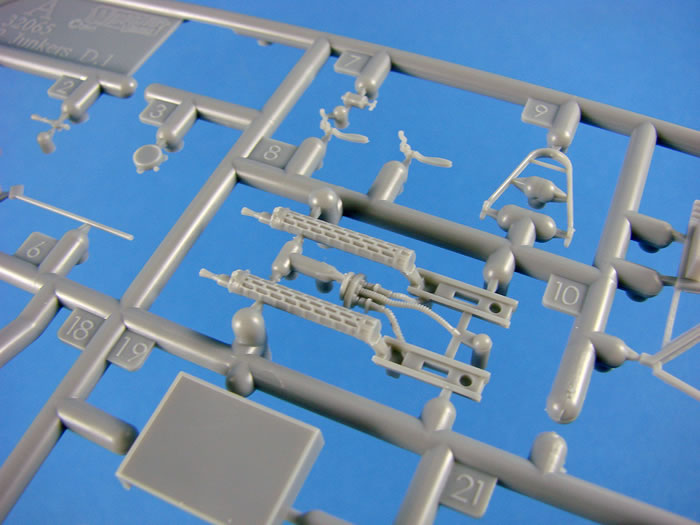
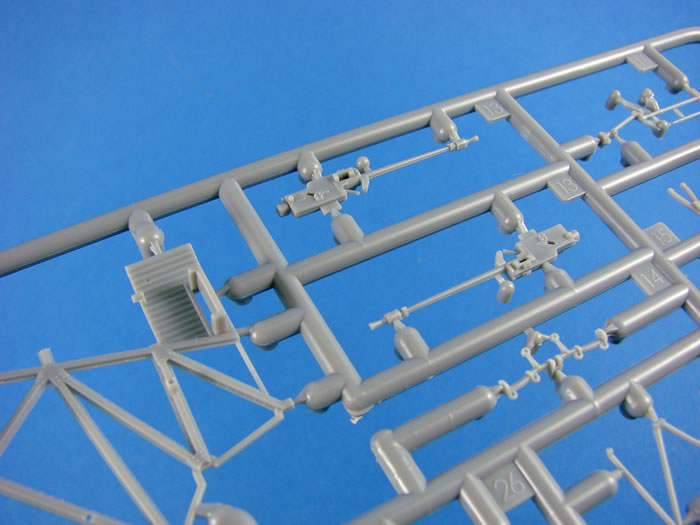
Of particular note here is the LMG08/15 Spandau assembly. Yes…assembly. These aren’t provided as individual guns, but instead they are moulded with their respective breech mounting blocks and just the solid cooling jackets in situ. Various other bits of interconnecting plumbing are included. To use the standard detail version, you must snip the inner barrel from the breech block and install to the aforementioned assembly. If you want to use the high detail option, then you fit the PE cooling jackets to the moulded guns and instead remove the solid cooling jacket from the all-in-one assembly.
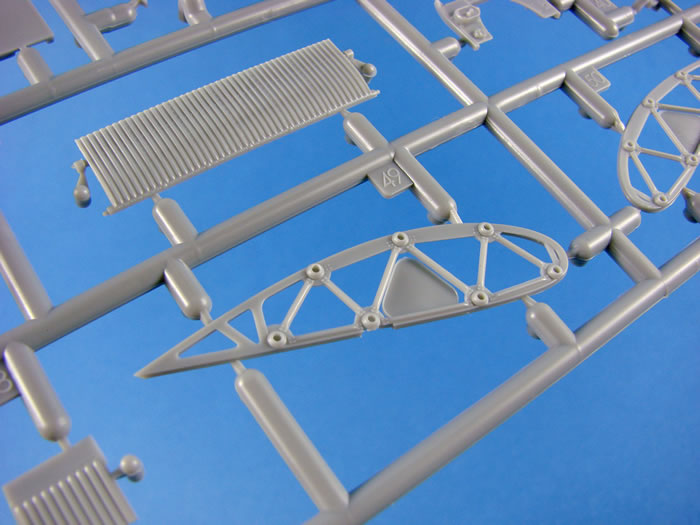
This model can be built with the wings removed, in case you want to create a workshop diorama etc. In order to do this, tube and frame wing ribs are moulded here, and these will insert to the wing root once the upper corrugated inboard wing panels are installed.
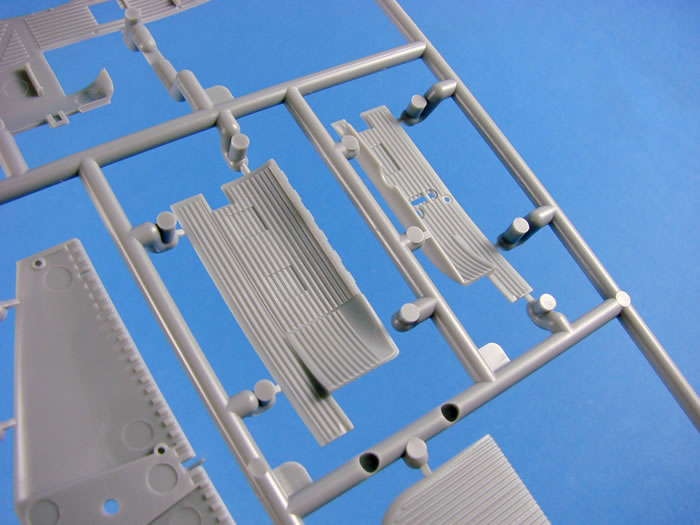
Sprue B
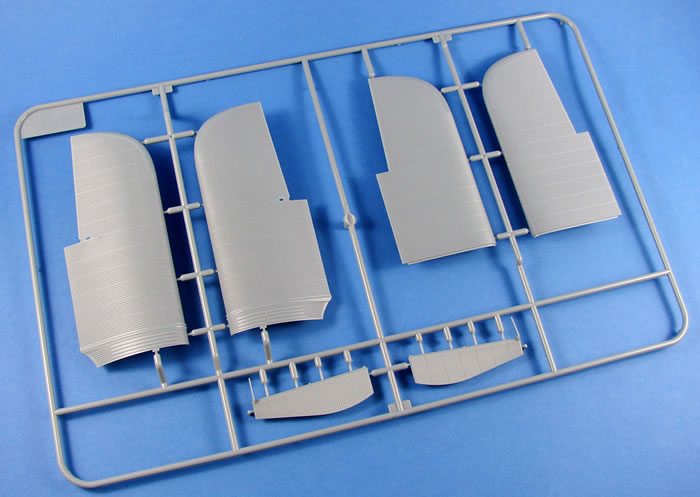
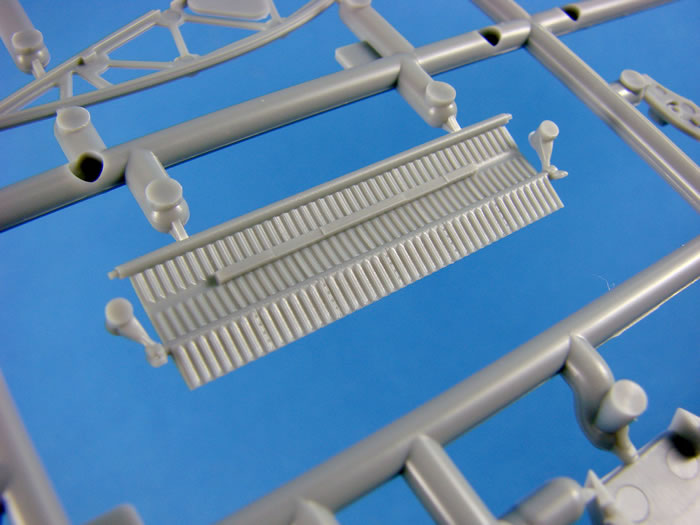
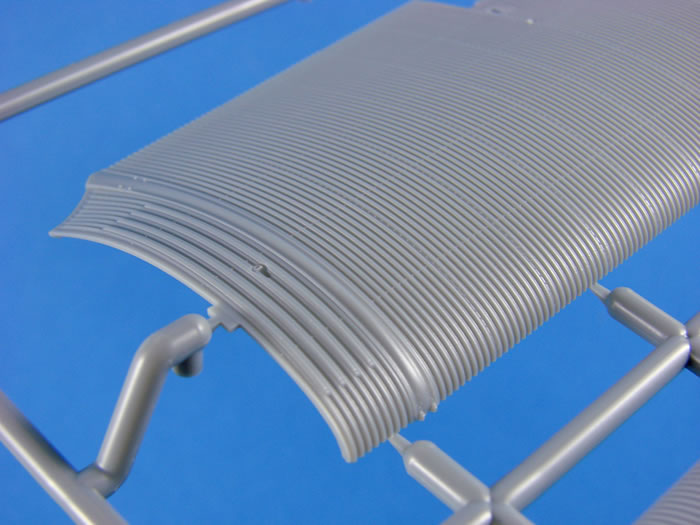
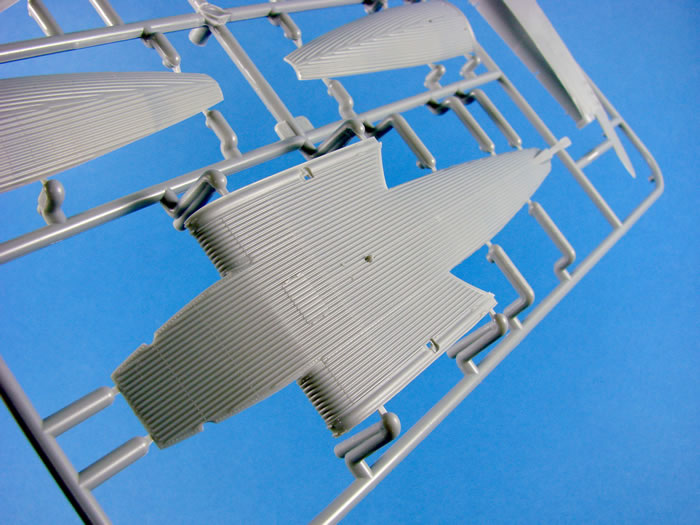
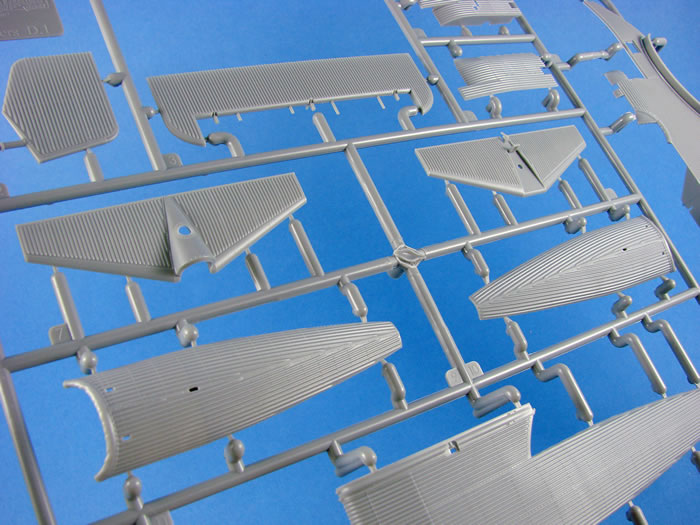
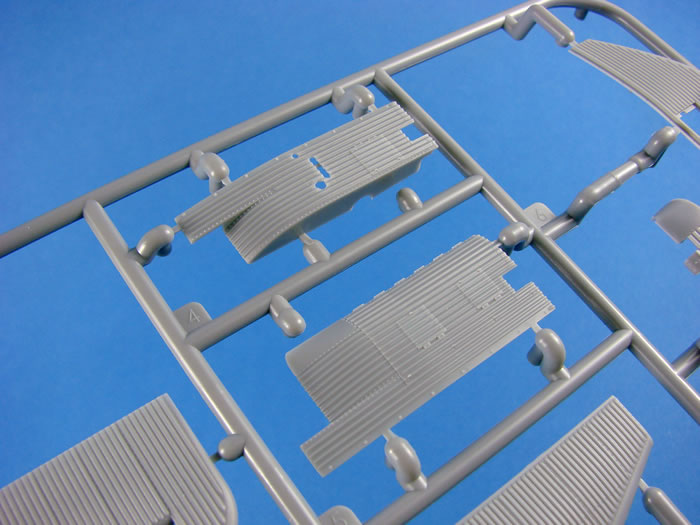
The very essence of the D.1 can now be seen as we take a first look at that corrugated external skin. This sprue contains the upper and lower wing panels, and the separate ailerons. You’ll see just how deep the wing chord is when you look at these parts. So as to eliminate any compression between the upper and lower panels, stiffening ribs are moulded within the wing and these line up on each panel so cement can be run along them, ensuring a rock solid final assembly. Externally, WNW really has nailed that corrugated detail, but then again, they had plenty of practice with the J.1 which formed one of their first four releases. Rivet lines can be seen running every few corrugations, lining up with what would be the internal rib construction. Each upper panel has a hole into which the aileron actuator rods will disappear.
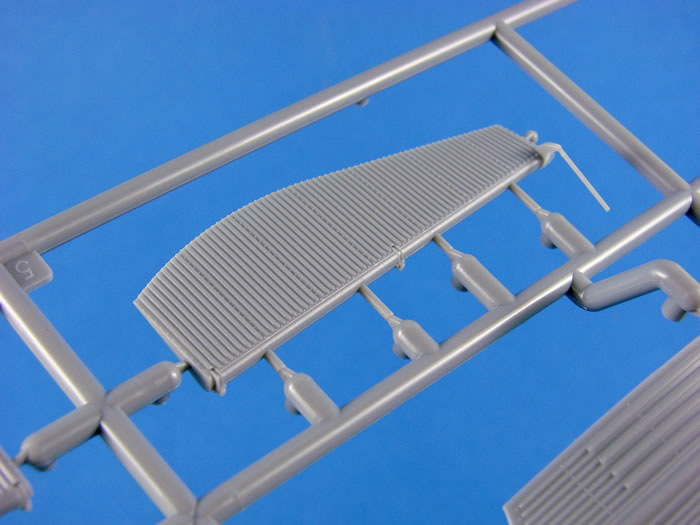
Those ailerons are moulded as single pieces, along with their actuator rods. Care will most definitely be needed here so as not to break them off.
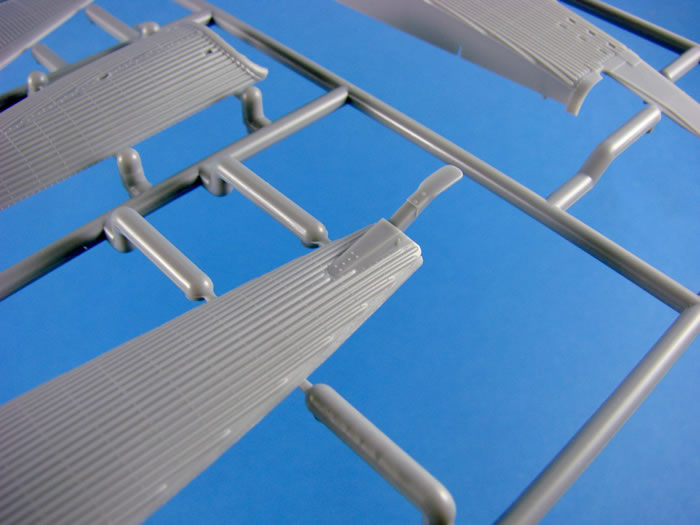
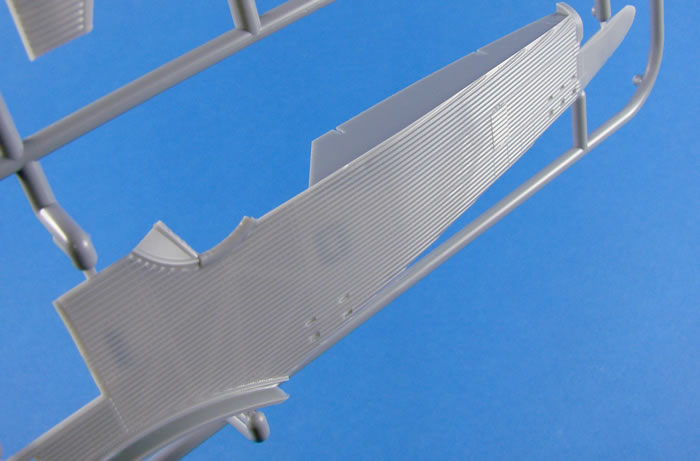
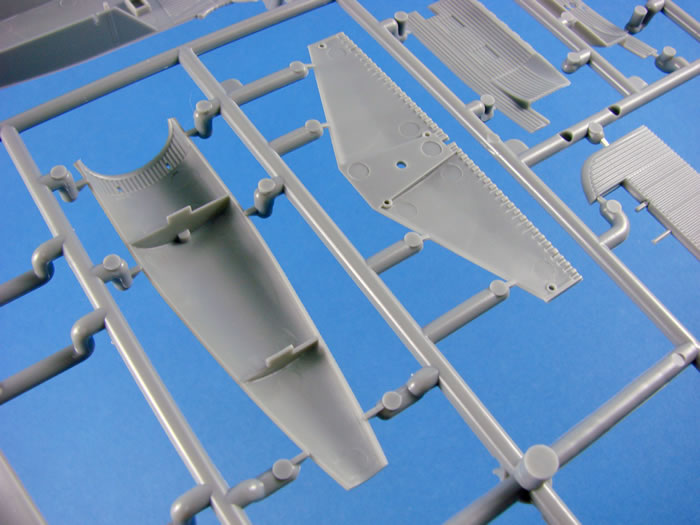
Sprue D
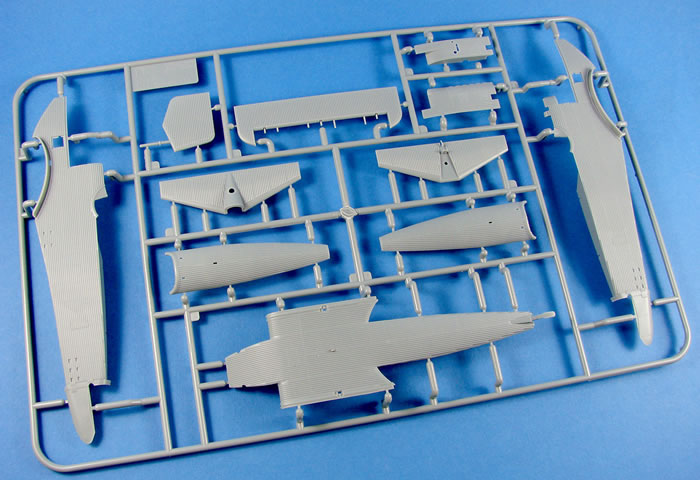
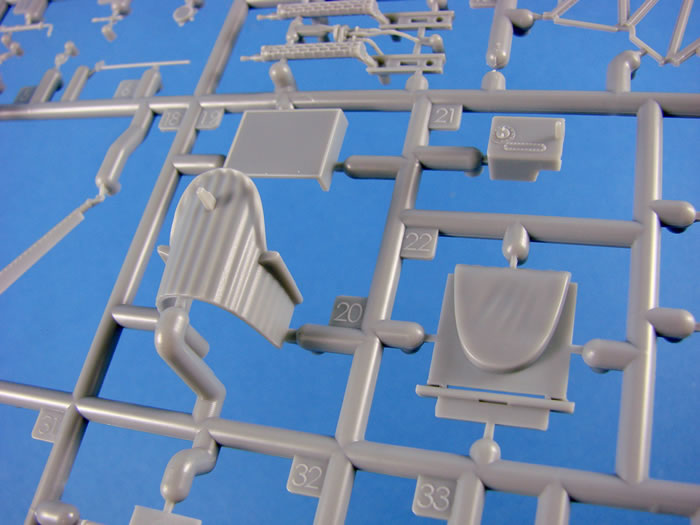
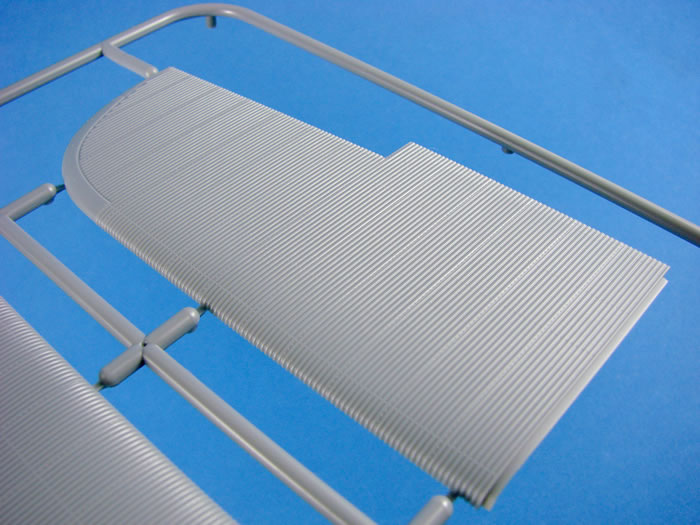
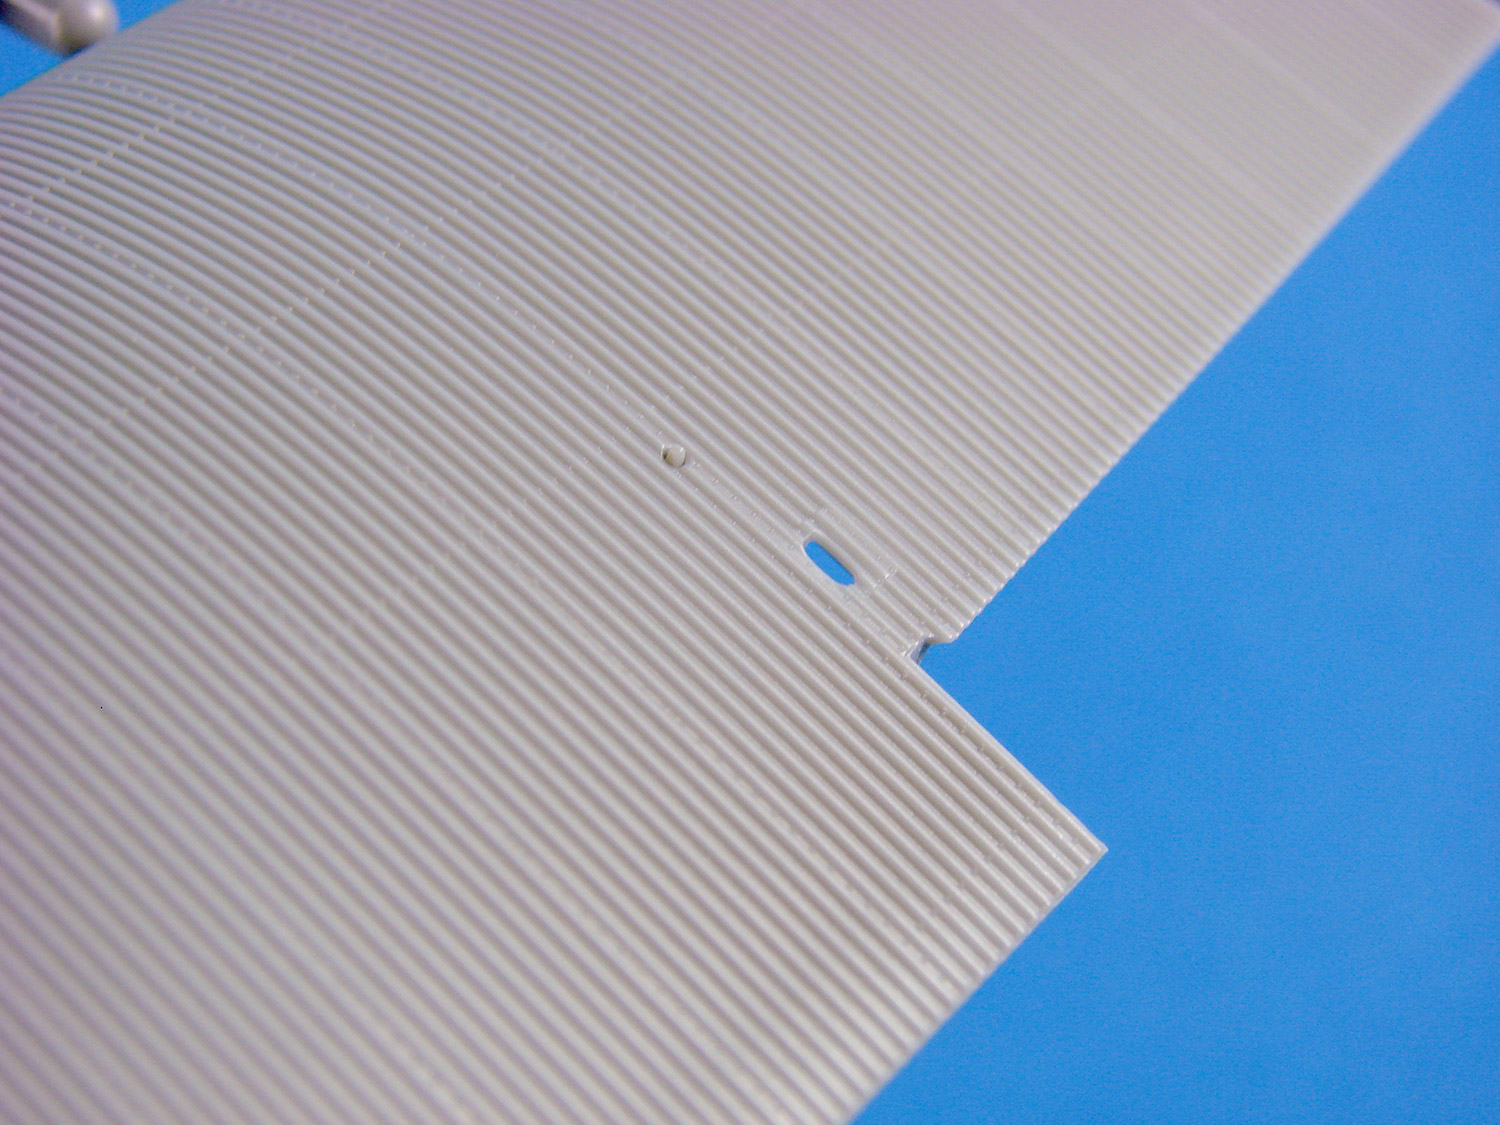
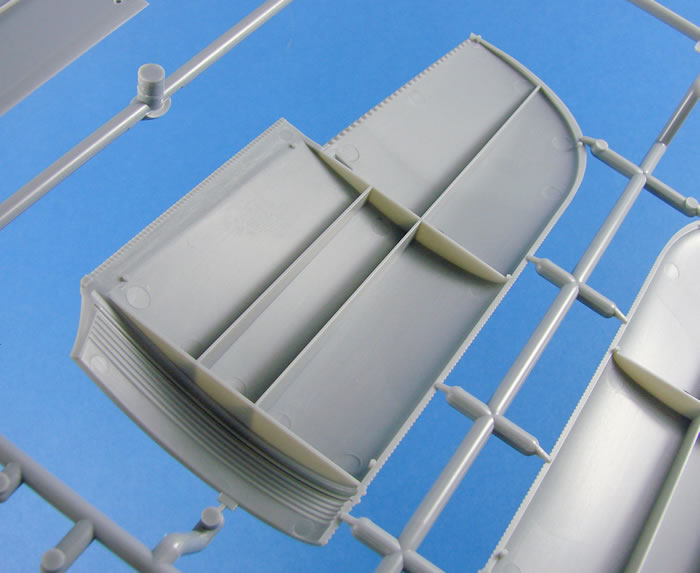
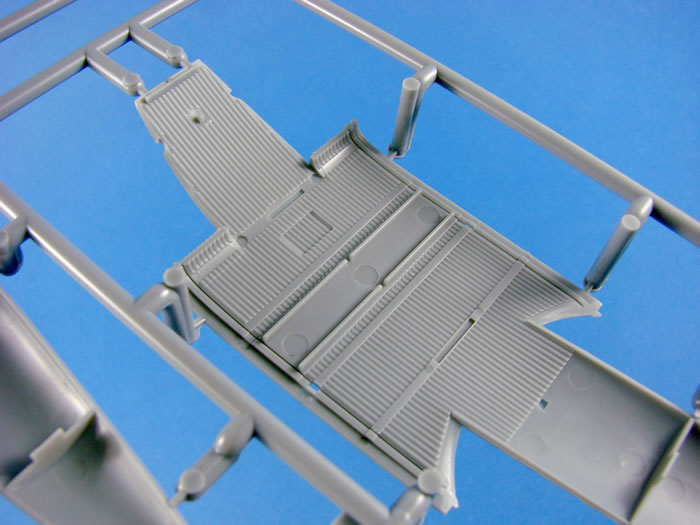
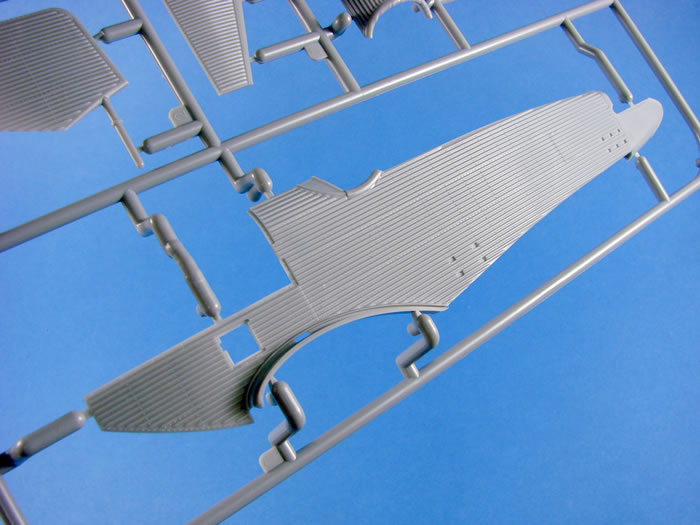
Here we have all the remaining main airframe components, such as the lower fuselage with integral tailskid, fuselage sides, optional detail fuselage spines, engine cowls, full span stabiliser, full span elevator, and single piece rudder. Details on the lower fuselage are exquisite, with nicely pinched corrugated wing root details and positive rear v-strut undercarriage mounting points. Due to the nature of the open cockpit, it goes without saying that WNW has had to extend the corrugated details into the interior of the fuselage, and this can be seen here. The ejector pin marks in the non-corrugated band will be covered over with the lower inside tubular and corrugated frame part onto which the cockpit is built. Another nice touch designed to make our lives a little easier.
I must admit that I find this rather dumpy-looking fighter quick attractive, and those lines are clearly seen with the fuselage halves, moulded with the wing root fairing. Only the very rear of the fuselage isn’t corrugated, with a small amount of flat plate metal seen here. Locating positions for the lifting handles are clearly seen. One of the schemes needs a small section of plastic removing from the forward cockpit coaming area. This is clearly defined and will be an easy task to perform. As previously stated, the engine cowls are separate parts and have corrugated details both inside and outside. Within the fuselage halves, the corrugations continue with smooth lines into which the cockpit side frames will sit, along with those lipped and riveted edges. Corrugations extend into the engine bay, of course.
Note that this fuselage has a separate spine. This is because there are two slightly different corrugation patterns. I had to look twice to notice, and I’m sure most of us wouldn’t have missed it had WNW not included the option. That goes to show their level of research. These parts are designed to properly locate to the fuselage via tabs that plug into the false spine that runs along the top of the fuselage halves.
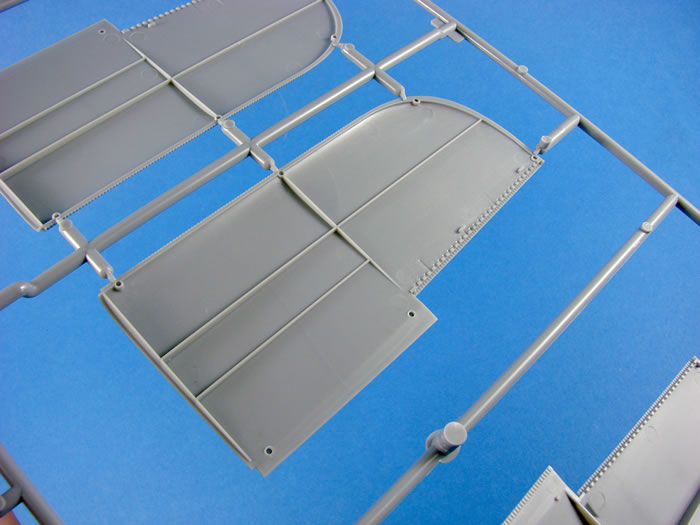
The stabiliser is provided as a full span part that is moulded as upper and lower panels and although corrugated, has a smooth leading edge that will make the seam easy to remove As for the elevator, this is also moulded full span and as a single piece. The trailing edge on this is superbly thin with a slightly kinked lip where the plated would be riveted together. You can just about feel this on the part. The same effect can be felt on the rudder, which is moulded with an integral rudder post.
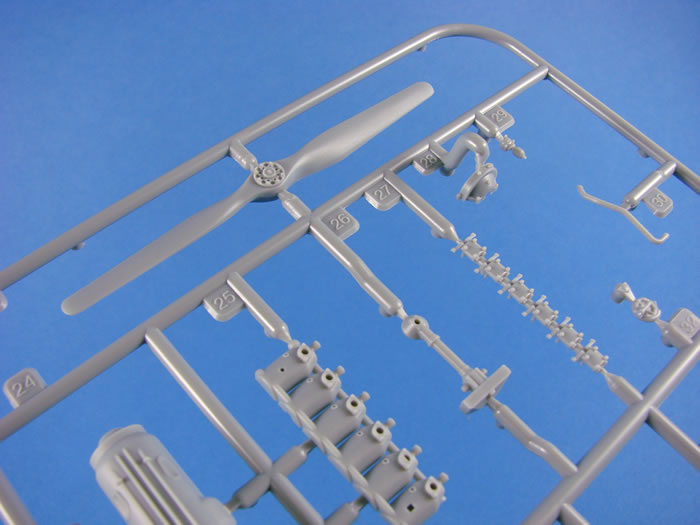
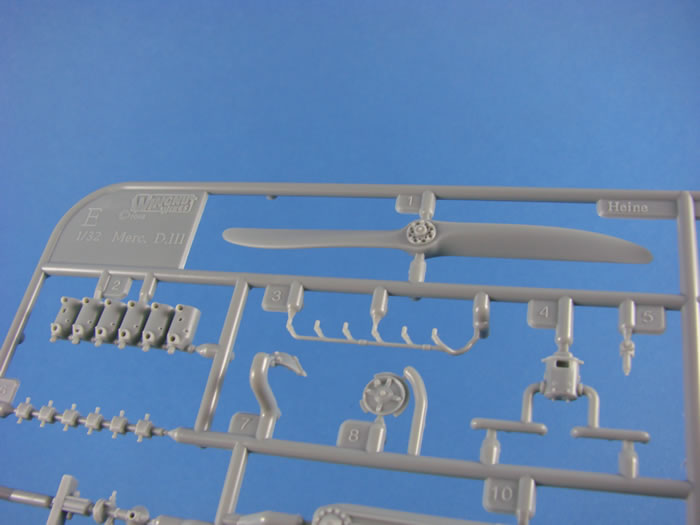
Sprue E
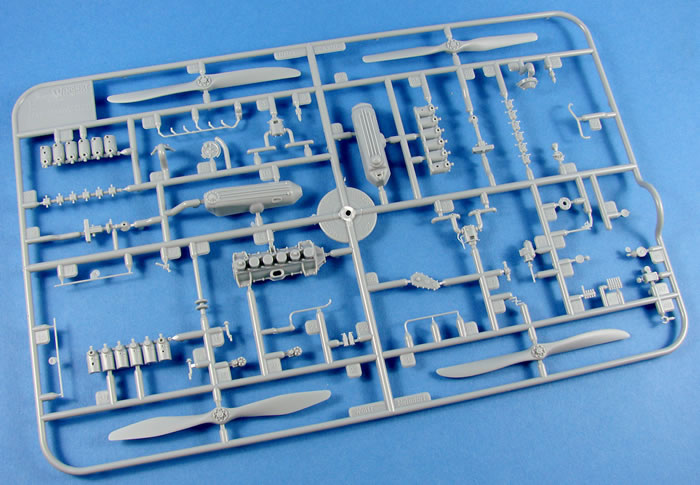
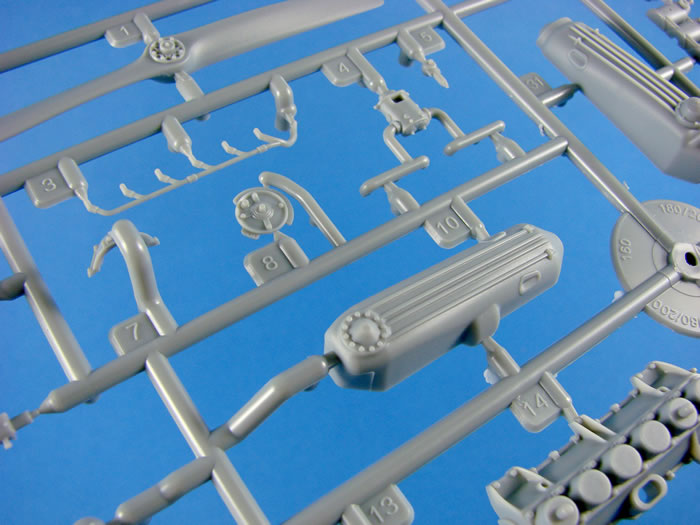
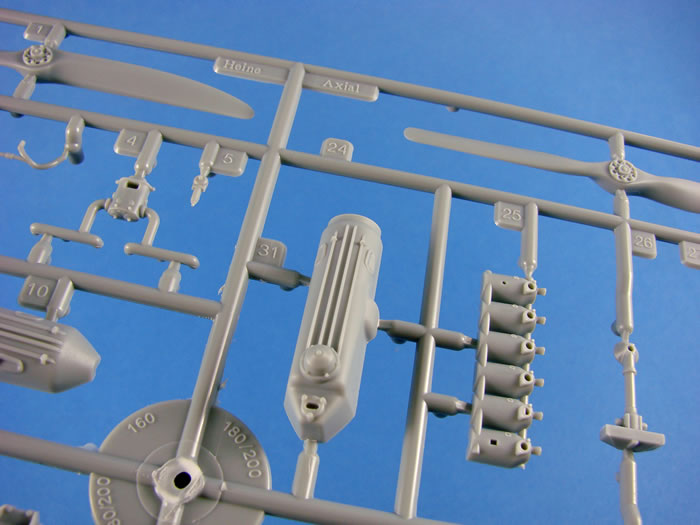
Depending on your scheme, this model can be fitted with either a 180hp Daimler-Mercedes D.IIIa or 200hp D.IIIaü. Apart from a little extra water piping and some over-compression red bands on the cylinders, there is no difference between the two engines. As I always say, the engine is a model in itself, but with this one, ensure you use the correct parts as there aren’t any shaded out on the instructions, and I know there is only one sump option to be used here, for example. Details are again superb, from those detailed crankcase parts, to the cylinders, rocker heads, magneto and ignition conduits. The only thing you might consider adding are the ignition leads, and perhaps even the excellent Taurus spark plugs. I have to say that not much else is really needed as Wingnut Wings standalone engine is just a work of art.
Photo Etch

Eleven parts are included as PE here, and supplied on a single, bare brass fret. These parts concern the seatbelts, MG cooling jackets and sight reticules (for the high detail option), plus instrument board switches. Production is of a very high standard with thin tags holding the parts in place.
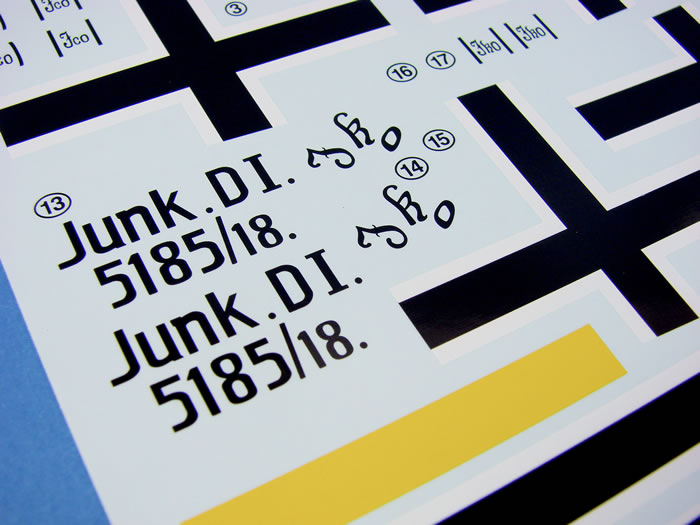
Decals
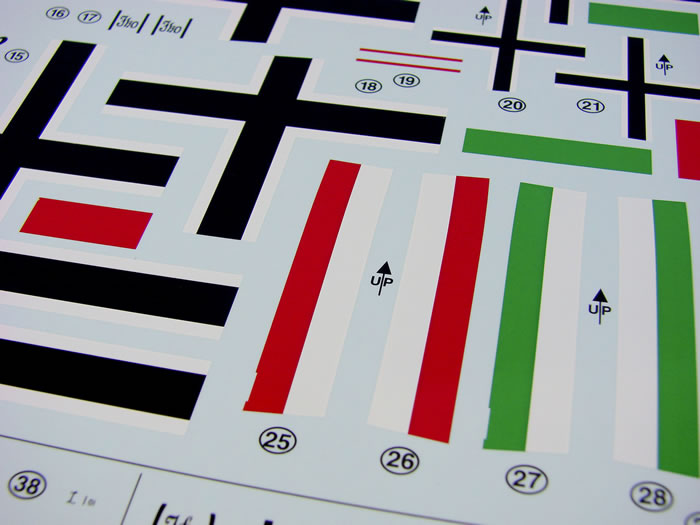
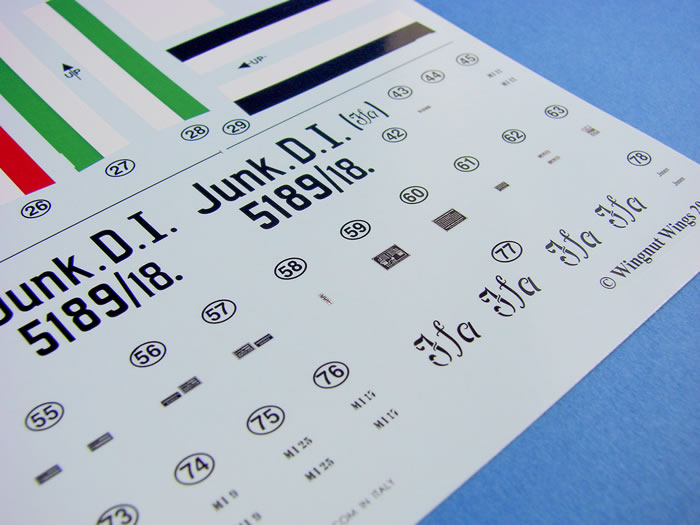
A single sheet is supplied with this release, printed by Cartograf. WNW claims that the decals are extra thin is for a reason. Remember, you need to get these to settle into the corrugated skin of this fighter. That thinness is a necessity. Decals supplied here are for the national markings (split for the ailerons), various colour bands and serials. The lower section of this sheet contains the various stencils and instrument decals. Printing really is very thin, and carrier film is at a bare minimum. Colour density is excellent, and registration is perfect.
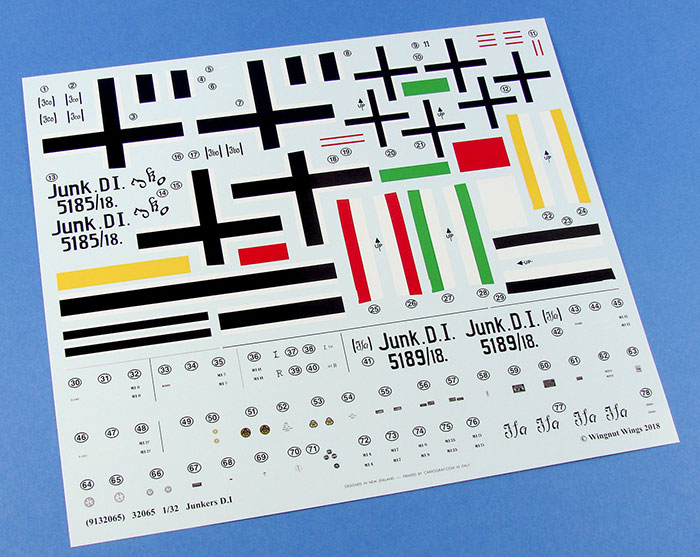
The five schemes in this release are:
-
Junkers D.1, 5185/18, Adlershof, October 1918
-
Junkers D.1, 5185/18, “Bänder”. Hombeek, Marine-Feld-Jagdgeschwader, November 1918
-
Junkers D.1, 5184/18?. “Weißer Schwanz”, Hombeek, Marine-Feld-Jagdgeschwader, November 1918
-
Junkers D.1, 5188/18?, “11”, October 1918
-
Junkers D.1, Gotthard Sachsenberg (31 victories), Theodore Osterkamp (38 victories) & Josef Jacobs (48 victories), FA 416, September – October 1919
Instruction Manual
A 24-page A4 manual is included and is every bit as good as we have come to expect. After a decent history on the type (a part of which briefly introduced this article), followed by a paint chart (Tamiya, Hymbrol and FS codes) and parts map. Construction is via by means of line drawing type illustrations, with good use of shading and coloured ink to denote part/assembly placement, and the drawings are clearly annotated throughout with colour reference and other codes. Some colour assembly illustration is supplied (cockpit, engine etc.) and a number of period photos litter the manual. You will note that some rigging is required, but only in the cockpit area for cables etc. This model is simplicity itself when it comes to this.
The last pages of the manual are given over to the five schemes, ably and superbly illustrated by Ronny Bar, with colour reference details and historical notes given. Scheme colour details and decal placement are clear to follow. More period illustrations are supplied too.
Well, I’m seriously impressed with this release and it really is good to see it finally in a real scale. Details are commensurate with what we have come to expect from WNW, and you’ll certainly not be disappointed, despite the relatively low parts count.
This is an important type, directly linked to the future development of the metal monoplane fighter of WW2, and it is captured here splendidly. I really do hope we seen plenty of these being built. This is also one of WNW’s cheaper releases, and I have a feeling that it’ll sell rather well.
Review Text and Images Copyright © 2018 by James Hatch
Page Created
12 April, 2018
Last updated
12 April, 2018
Back to HyperScale Main Page
Back to Reviews Page |
 Home
| What's New |
Features |
Gallery |
Reviews |
Reference |
Forum |
Home
| What's New |
Features |
Gallery |
Reviews |
Reference |
Forum |