A Simple and Versatile Biplane Assembly Fixture
by Jack Mathews

Hobby Boss' 1/72 P-61A Black Widow is available online from Squadron.com
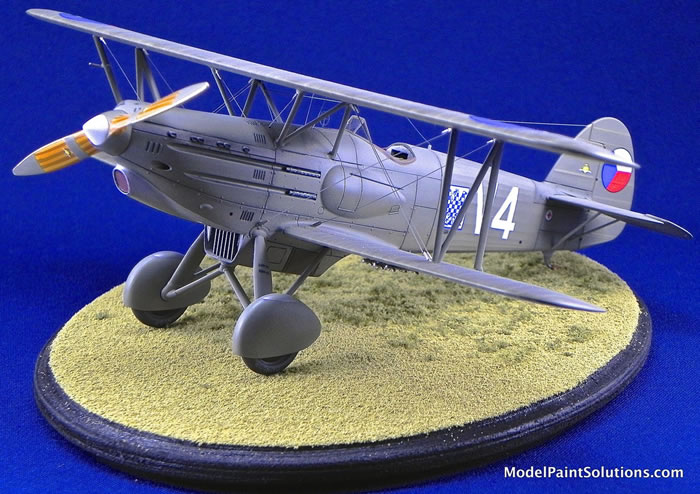
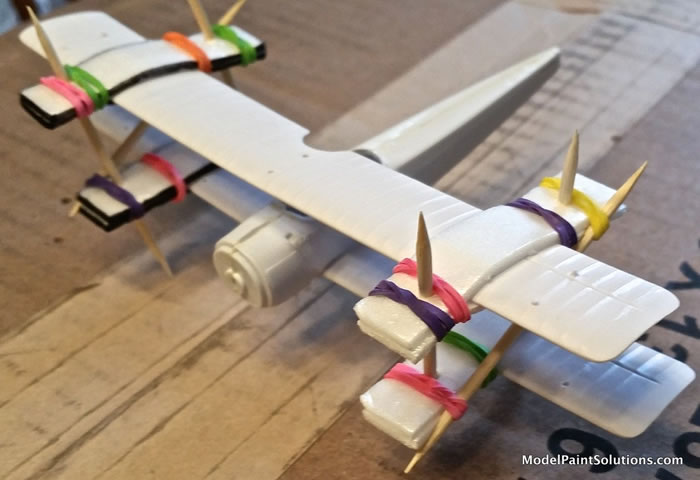
This jig is simple to make from common, inexpensive 70072components and can be used to assemble biplane models from 1/72 to 1/32.
“Everything should be made as simple as possible but not simpler”.
-Albert Einstein
The quote is appropriate for this biplane assembly fixture; it’s simple, but it has a subtle feature that cannot be ignored.
The fixture holds the top wing relative to the bottom wing and allows adjustment for accurate positioning of the wings, dry fitting the struts, holding the struts in position as they are glued, and rigging.
The position of the wings in the fixture is adjustable and once it is correct the rubber bands can be closed in on the edges of the wings to hold them in place. The toothpicks are parallel so that the position of the wings, up and down, is adjustable. Here is the subtle feature mentioned earlier; the foam strips grip the toothpicks because of a shearing force between them. The edges of the strips are not aligned; they are offset so that the rubber bands create a shearing force between the foam strips. The shearing force is resisted by the toothpicks so that even when the holes enlarge with wear, the strips still grip the toothpicks.
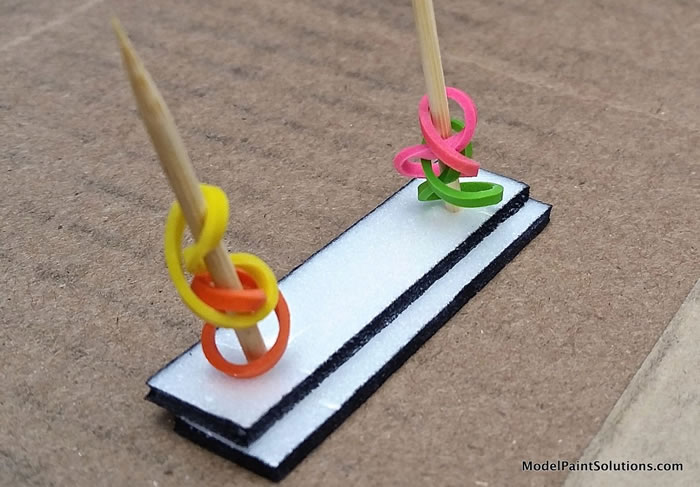
The materials are as available as the nearest strip mall: thin Styrofoam (like that from a take-out clam shell container), rubber bands (like those used to hold the end of a braid together), and toothpicks.
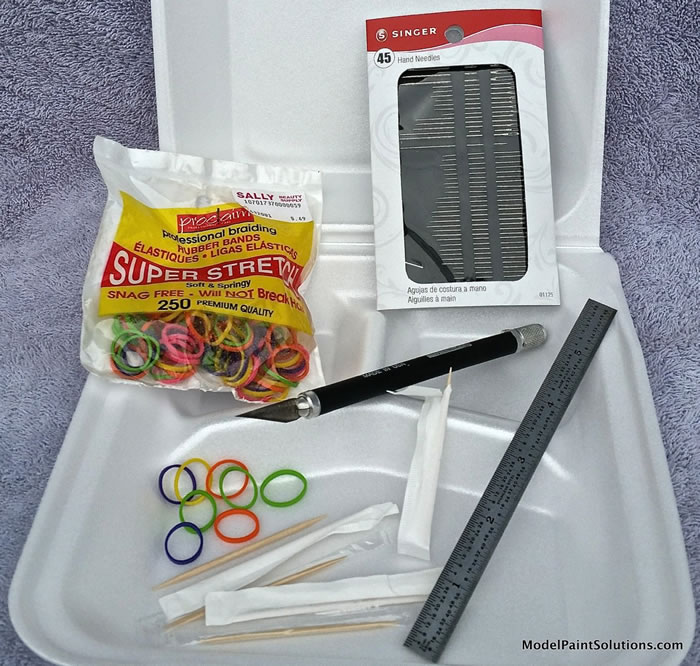
Tools required are also simple: a blade. I also use a metal scale as a template to make strips that are a good width for the rubber bands I use and pins (or needles) to hold the strips still while piercing with toothpicks; helpful but not absolutely necessary.
To Build the Fixture:
Stack 4 strips as shown in the pictures; the edges are staggered. The edges of the strips in the picture are blackened to make the offset of the edges clearer, it’s not necessary. Pinning them in place helps.
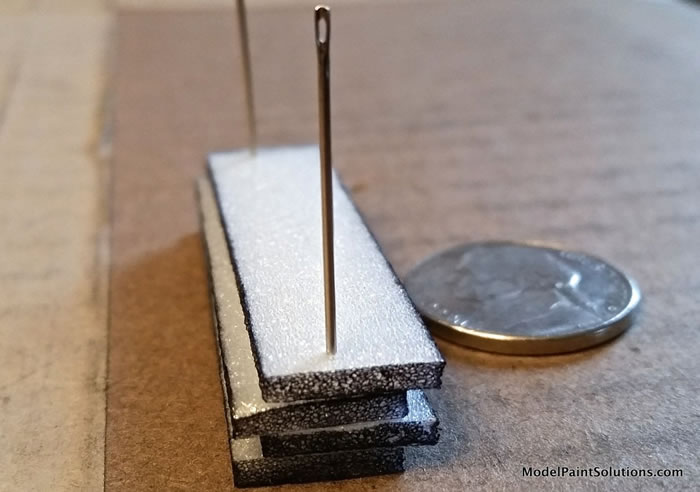
Push the toothpicks straight through the strips. In these pictures the strips are on a cardboard box; the toothpicks can go through the box as well. A pilot hole made with a large needle makes it easier to push the toothpick through.
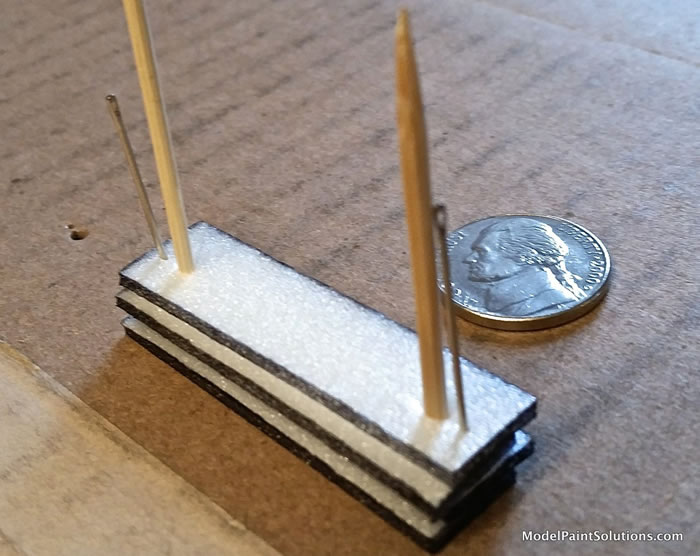
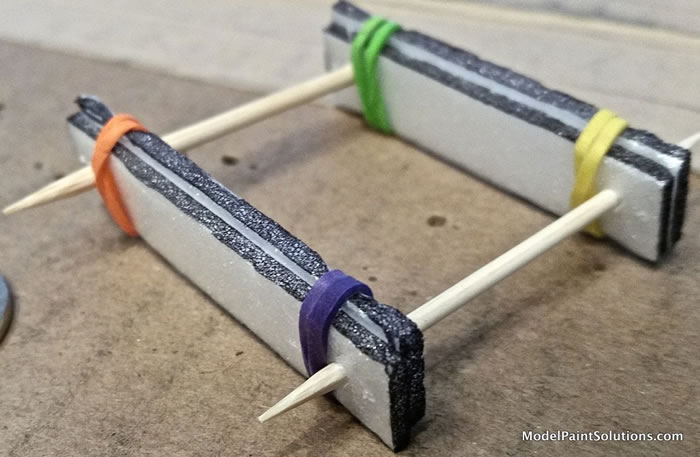
Pull off the top 2 strips, keeping track of their position. Put 2 rubber bands, twisted double, around each toothpick.
Return the top 2 strips to the toothpicks making sure they are in the same position. Move the rubber bands onto the strips, just inside the toothpicks. At this point the same shearing force that grips the toothpicks has moved the strips from being square with the toothpicks to being at an angle to them; the shift also decreases the grip of the strips on the toothpicks. This can be dealt with later.
Put 4 more rubber bands on the strips, twisted double, just outside the toothpicks.
Repeat the process, making the other fixture required.
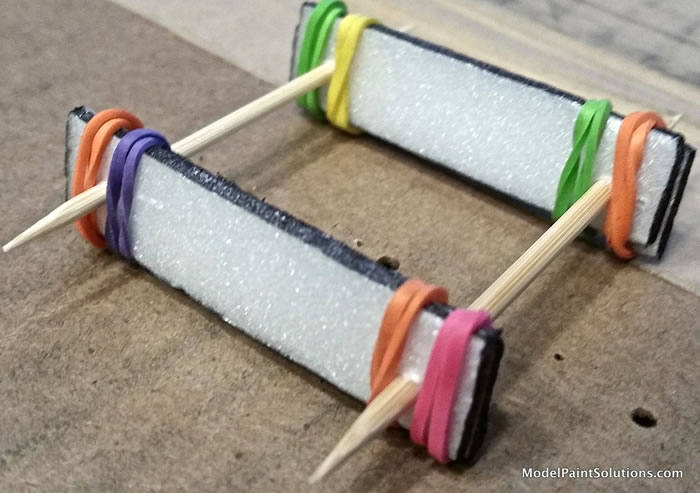
If one of the fixtures is rotated, front to back, the top wing can be used to pull the toothpicks back to square with the strips when the fixture is mounted on the biplane.
Put the cross bracing toothpick under the rubber bands on the outside of the toothpicks. Move the rubber bands holding the cross bracing toothpick toward each other until the angle between the toothpicks and the strips is the same as the angle between the model wings and struts. Close is good enough, there is a lot of room for adjustment in this fixture.
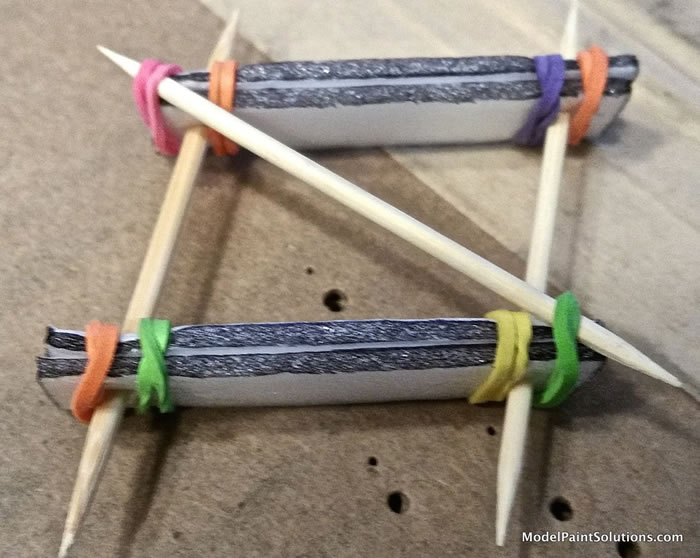
To use the fixture, put the bottom wing through the bottom strips, the top wing through the top strips, and adjust whatever it takes to put the top wing where you want it. Compare it to a drawing. Test fit the struts. When you are satisfied with everything’s location, move the inside rubber bands close to the edges of the wings. Look at it again to make sure everything is still where you want it.
Jack Matthews
Member: IPMS-Seattle, Northwest Scale Modelers
For more on this review visit Modelpaintsolutions.com.
Text and images copyright © Jack Mathews for Model Paint Solutions, 2019.
Text and Images Copyright © 2019 by Jack Mathews for Model Paint Solutions
Page Created 10 July, 2019
Last updated
19 July, 2019
Back to HyperScale Main Page
Back to Reviews Page

|
 Home
| What's New |
Features |
Gallery |
Reviews |
Reference |
Forum |
Search
Home
| What's New |
Features |
Gallery |
Reviews |
Reference |
Forum |
Search