Airfix 1/48 DH.82 Tiger Moth Review
& Eduard Color Photo-Etch Review
by John Miller

Airfix 1/48 DH.82 Tiger Moth Build
by Alex Hooper

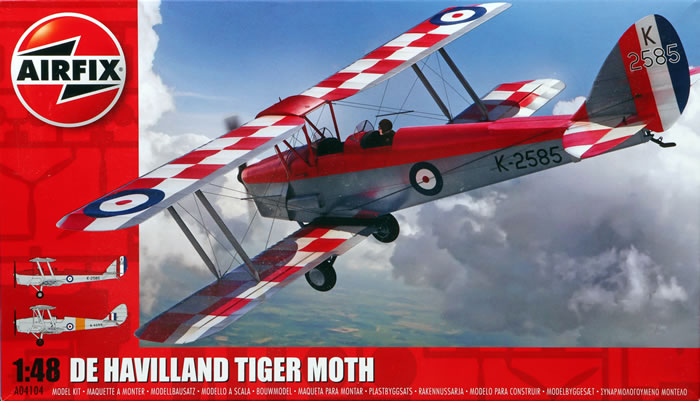
Airfix 1/48 DH.82 Tiger Moth (kit# A04101): Review
Eduard Color Photo-Etch (#49-1073): Review
Airfix 1/48 DH.82 Tiger Moth: Build by Alex Hooper
Scale: 1/48
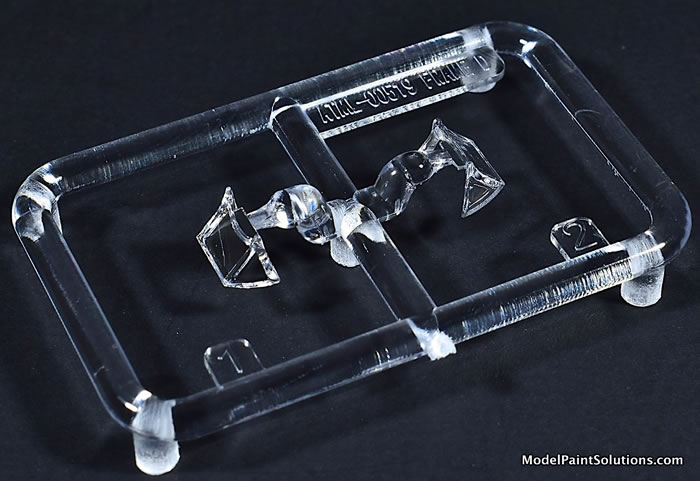
Contents and Media: 57 parts in light blue-grey styrene, 2 in clear, and one decal sheet with markings for 2 airframes.
Price and Availability: £15.82 Plus Shipping from Hannants and model retailers worldwide and online.
The de Havilland DH.82 Tiger Moth is a 1930s British biplane designed by Geoffrey de Havilland and built by the de Havilland Aircraft Company. It was operated by the Royal Air Force (RAF) and many other operators as a primary trainer aircraft. In addition to the type's principal use for ab-initio training, the Second World War saw RAF Tiger Moths operating in other capacities, including maritime surveillance and defensive anti-invasion preparations; some aircraft were even outfitted to function as armed light bombers.
The Tiger Moth remained in service with the RAF until succeeded by the de Havilland Chipmunk during the early 1950s. Many military surplus Tiger Moths subsequently entered into civil operation and many nations have used the Tiger Moth in both military and civil applications. Moreover the type remains in widespread use as a recreational aircraft in several countries. It is still occasionally used as a primary trainer, particularly for those pilots wanting to gain experience before moving on to other tail wheel aircraft. Various companies that offer trial lesson experiences still employ Tiger Moths. The de Havilland Moth Club, founded in 1975, is now an owners' association offering mutual club and technical support.
by John Miller
In the lidded box we've come to expect from this manufacturer is one bag containing three light blue-grey sprues, one small clear sprue, and decals. Those familiar with the new Airfix will quickly recognize the characteristic surface details and inscribed panel lines, which are nicely rendered, scale appropriate, and a bit oversimplified. The sprues are devoid of flash and the sprue gates are both small and well placed.
Construction starts with the tandem cockpits and the details provided on the inner fuselage halves are quite nice as are the seats and decal-enhanced instrument panels. For those who want a bit more, The Eduard Color PE goes a long way to dressing up what is already a nicely detailed assembly (see below).
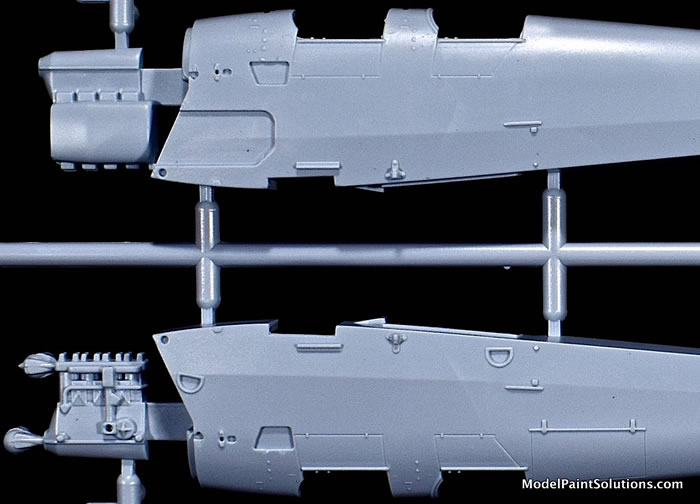
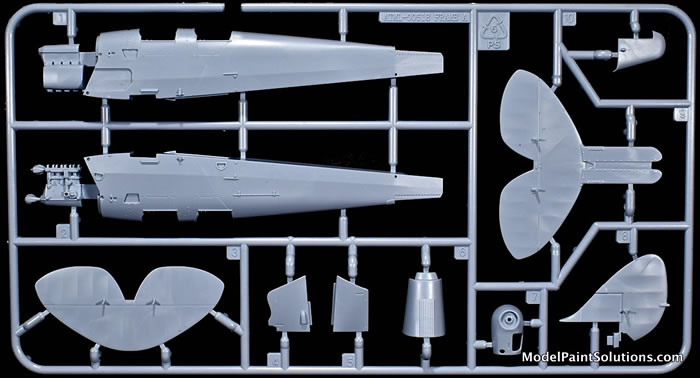
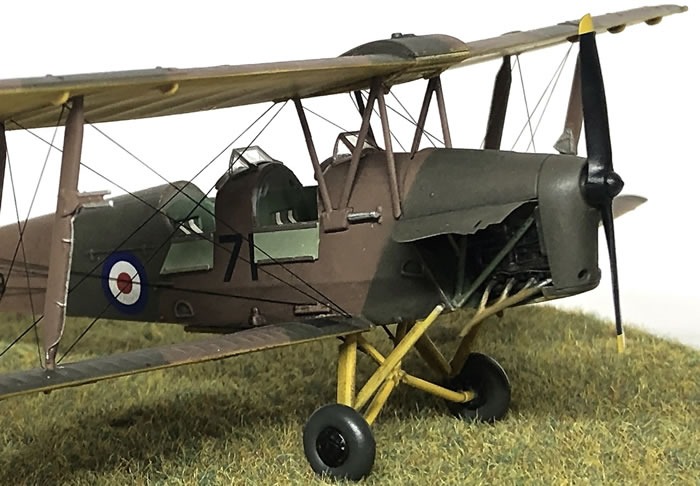
For those who want to show off their work, instructions for removing the the small cockpit access panels on the starboard side of the fuselage are provided as are replacement panels that are molded to be posed open: nice. With the cockpits trapped between the fuselage halves the builder is instructed to assemble the nose comprised of an upper, center piece and left and right cowls. The starboard cowl can be posed open to show the nicely detailed de Havilland Gipsy III.
The next step, addition of the horizontal stabilizer/elevator piece is preceded by removal of a good portion of the upper, rear dorsal fuselage. A jig is provided that fits on top of the assembled fuselage and clearly shows the area that has to be removed in order for the dorsal strakes of the stabilizers to lay flush when assembled. This looks to be pretty minor surgery made easier by the inclusion of the jig. Addition of the one-piece vertical stabilizer/rudder (not poseable) completes the empennage.
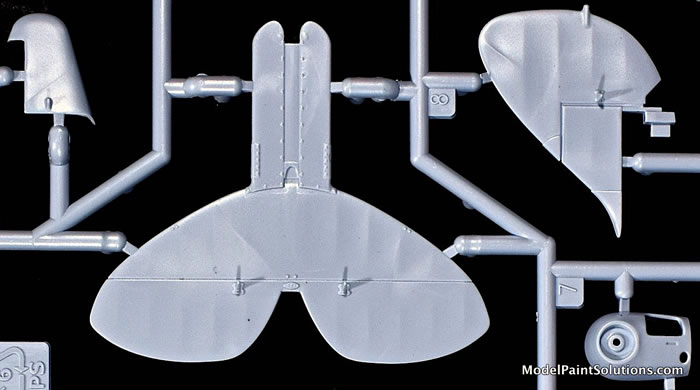
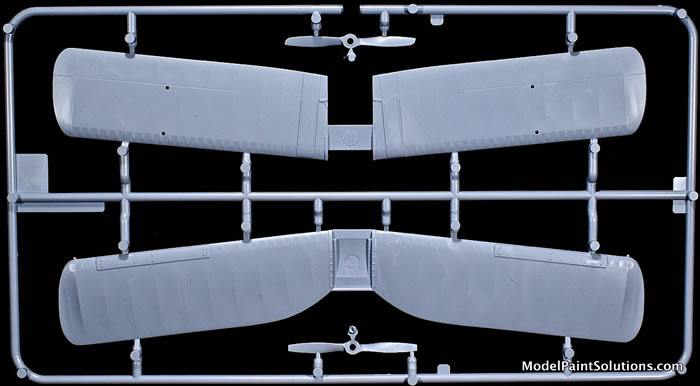
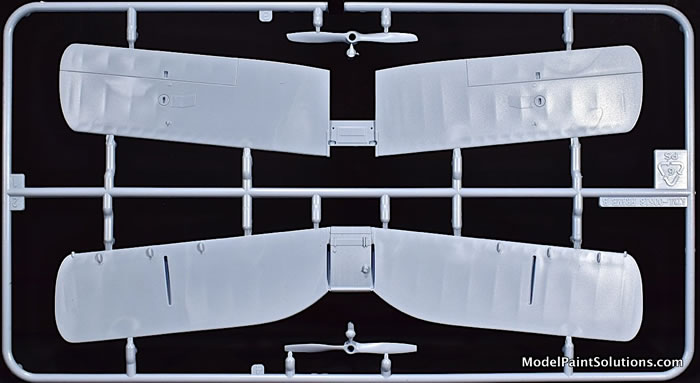
Both the upper and lower wings are single piece and full-span: nice. The cloth-covered wings have a nicely rendered ribbing that will look great under paint and decals. The bottom wing slots into the fuselage wing box a la Lego-style while the upper wing is held in place by single-piece interplane and cabane struts. My compliments to Airfix; this is a beautifully simple assembly making it great for someone new to world of model biplanes.
In addition to the straightforward wing assembly, a very comprehensive series of pictures showing both wing rigging and control cable routing is provided making this step a little easier.
The decals, by Airfix, are crisply printed with good registration and color density.

Markings are provided for two airframes as follows:
-
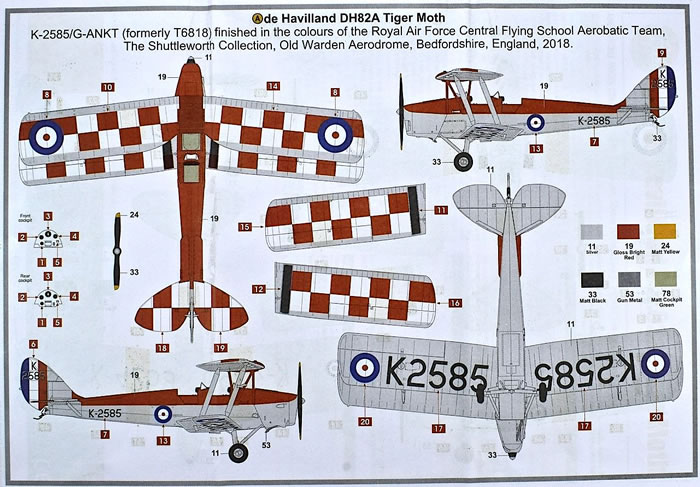
De Havilland DH.82A Tiger Moth, K-2585/G-ANKT, RAF Central Flying School Aerobatic Team, The Shuttleworth Collection, 2018.
-
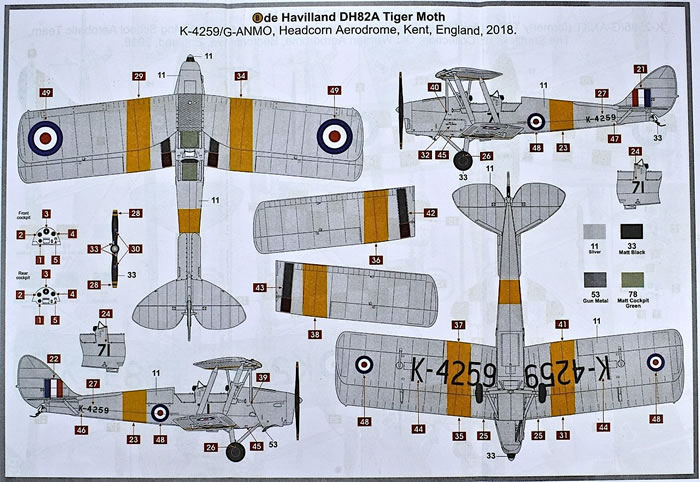
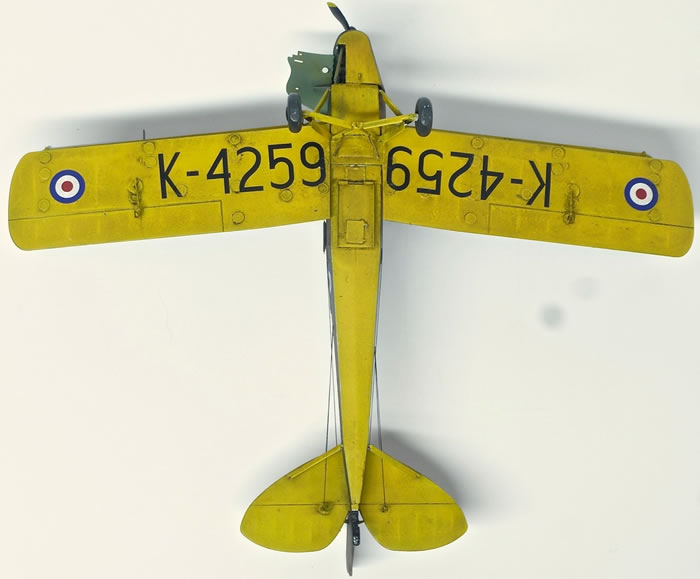
De Havilland DH.82A Tiger Moth, K-4259/G-ANMO, Headcorn Aerodrom, Kent, England, 2018.
As with all the recent offerings from Airfix, this kit features simple engineering, a low parts count, and quality decals. I see no hidden issues beyond a lot of easy building fun, especially for a biplane model! Highly recommended!
--John
Eduard Color PE Detail Set Review by John Miller |
Eduard Color PE Detail Set (#49-1073) for the Airfix Tiger Moth:
by John Miller
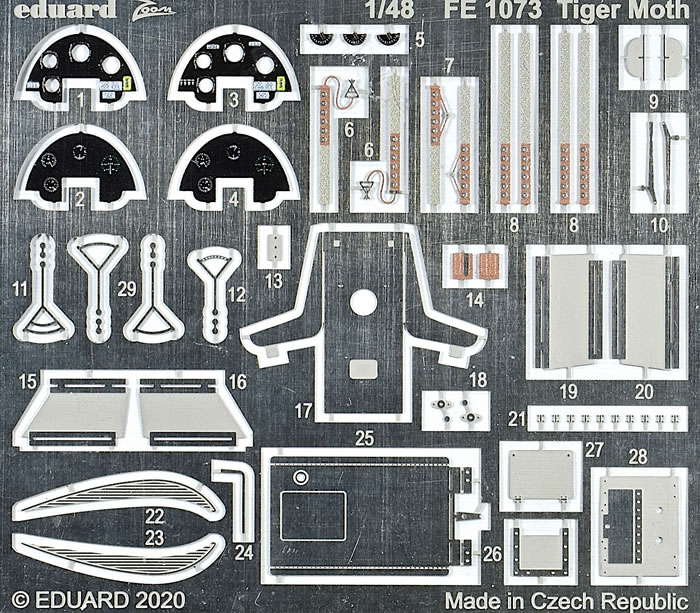
In the plastic, end-opening, bag commonly used by this manufacturer is one color and one brass fret. The color fret deals with mostly cockpit details such as the rear seat, harnesses, throttles, etc. As will all of Eduards color photo-etch, the colors are crisply applied and the detail is ample. Since the Tiger Moth is an open-cockpit biplane, this set will add a lot to the easily seen pilots' office.
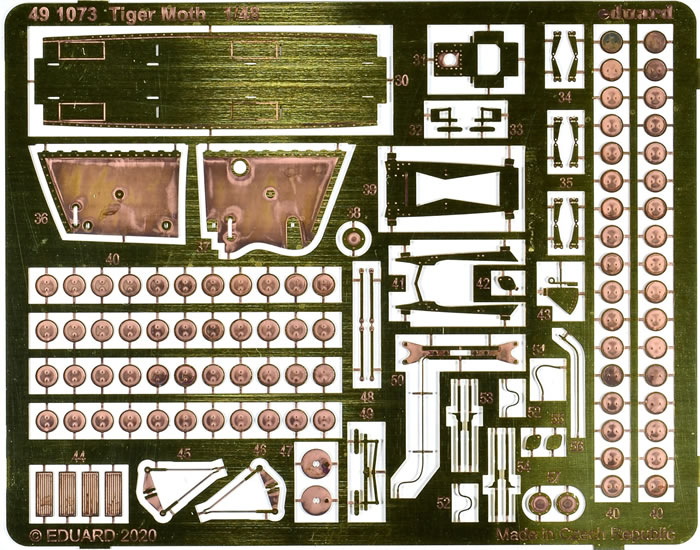
The brass fret provides a new cockpit floorboard as well as very nicely detailed rudder pedals, seat brackets, and elevator and rudder horns. In addition, left and right, poseable nose cowls are provided as are a multitude of inspection hole covers that will add a lot to the overall airframe detail. See Alex Hoopers build for pics of how well the inspection hole covers dress up the wings and empennage.
Building the Airfix 1/48 Tiger Moth |
Model, Pictures, and Text by Alex Hooper
This was meant to be a straightforward, fun build in between bigger projects (Tamiya 1/48 Swordfish and Airfix Walrus; work in progress). That being the case there were historical liberties taken throughout.
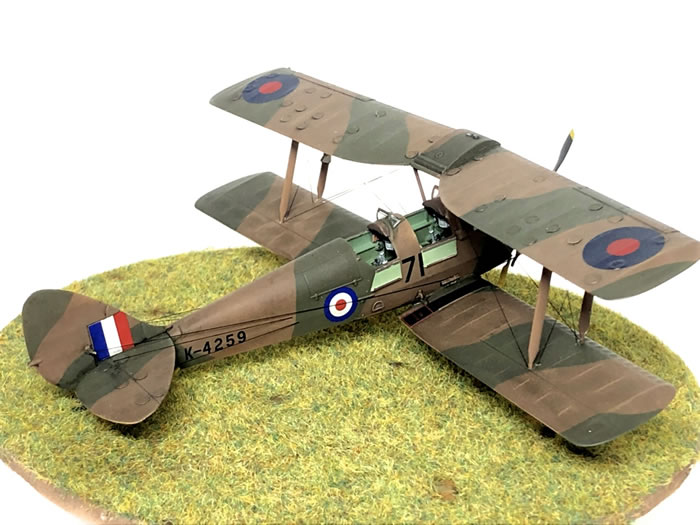
I didn't fancy the restoration/civilian schemes provided in the box so decided to base this on an RAF trainer, circa 1939, rather than a specific documented plane. Hence the scheme might not be 100% correct. I had fun though, and prefer a camouflage scheme to silver dope.
Fit is generally good, not quite Tamiya but up with the best Airfix. Generally there was a decent level of detail OOB but the PE does make a difference at this scale. The PE is very good and you can tell it’s a newish production: detail was good and the gates were very thin making it easier than older Eduard to extricate parts. The only parts I didn’t use were the cockpit floor as the PE arrived after I’d started the kit. I’m not 100% convinced by all the inspection hatches as I think they are slightly out of scale from a thickness perspective.
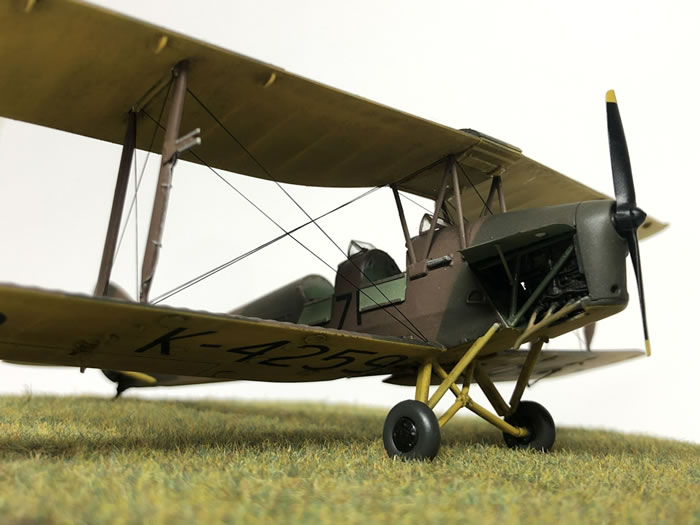
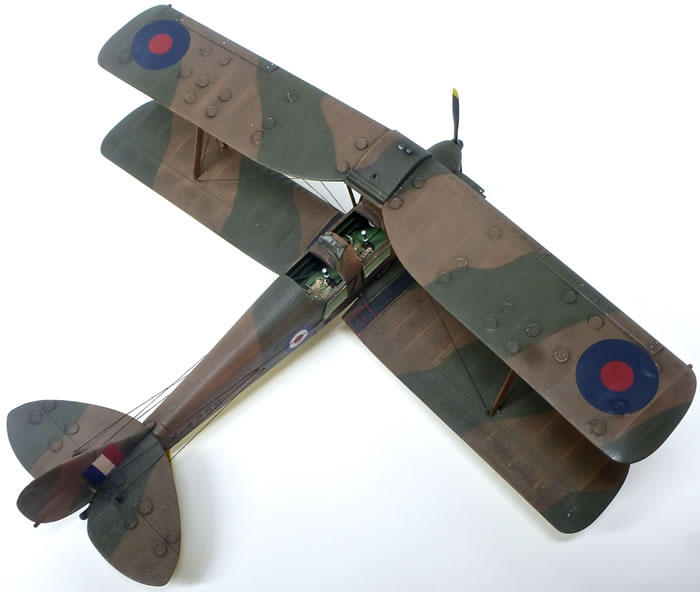
Cockpit instruments, seatbelts and controls are nice and needed versus oob and are relatively visible in the final build. Control horns and aileron control rods add some nice detail to the wings and empennage. Likewise the pitot tubes and airspeed Indicator help break up the Interplane struts. The kit’s engine bay was lacking in detail and the PE didn’t add much so I filled it out with some wires, tubes and PE from the spares box to add some busyness based on lots of available web images. Given you can have the cowling open it seems a shame this wasn’t more detailed. The cowlings themselves really add to the kit- giving a scale thickness that would have been lacking in plastic, plus when painted, the metal just looks better. A bit of careful rolling was required as the cowlings have a compound curve but worth it.
Along with most people building biplanes I like to build fuselage and both wings separately. Airfix makes this quite straightforward. Having painted, decalled, weathered, and gloss coated the three parts, you can just slot in the bottom wing first then you can just drop the upper wing (with struts already attached) onto the lower wing, while the cabane struts simply slip down onto the locating indentations on the fuselage. I then added the landing gear and Matt-coated everything before rigging it.
The two things I added last were the open starboard cowling (too great a risk of knocking it) and the prop. There isn't a large mating surface between cowling and top engine cover so I also scrounged a sliver of sprue from the PE sheet to make a strut ( as the real aircraft have too) Overall it felt like a kit you could throw together in an hour or two, or spend a couple of weeks on if so inclined. Some nice detail and well thought out build. Obviously serious modellers can make the kit really pop but I could see this making a really nice parent/child side by
side build.
Decals, Primer and Paints |
The kit was primed with Tamiya Superfine Grey and pre shaded with Black.
Camouflage Colors: Tamiya XF81 / XF52.
Undersides: Xtracrylix RAF Trainer Yellow.
Internal Color: Tamiya XF71.
Engine and Exhaust: Vallejo Metal Colour--Burnt Iron.
Clear coats:
Gloss: Future
Matte: Windsor & Newton Galeria Matt
Decals:
Mix of kit and the spares box to get the upper wing type B roundels.
Weathering:
Acrylic Dark Dirt Clay Wash from Ultimate Modelling Products
Tamiya Weathering Pigments
Rigging:
Infini Aero Thread--Medium Gauge.
I enjoyed it enough that I'm planning to buy a couple more in the future; this time leaving out a lot of the internal detail and building them in the aerobatics livery for a hanging mobile of an aerobatics display for my son. But that will have to be in 2021 at this rate.
Best,
Alex
For more on this review visit Modelpaintsolutions.com.
Text and images copyright © 2020 by Model Paint Solutions.
Text and Images Copyright © 2020 by Model Paint Solutions
Page Created 11 September, 2020
Last updated
11 September, 2020
Back to HyperScale Main Page
Back to Reviews Page

|
 Home
| What's New |
Features |
Gallery |
Reviews |
Reference |
Forum |
Search
Home
| What's New |
Features |
Gallery |
Reviews |
Reference |
Forum |
Search