AMT 1/24 scale
1953 Chevrolet Corvette
by Brad Huskinson

Description: AMT 1/24 scale 1953 Chevrolet Corvette
Kit No. AMT T310
Note: This is the first year of the Corvette in which 300 were hand built.
A close friend of my wife’s and mine gave me the kit for my birthday. She told me she bought this kit, because her older brother was given a 1954 Corvette for his high school graduation present in 1966 by their parents. I told her I would love to build it for her to give to her brother for his birthday. She liked that idea!
All the pretty normal stuff; parts were removed with sprue cutters and cleaned up with sandpaper and sanding sticks. I used both Tamiya Thin and CA glues depending on whether or not the parts have been painted. This was one of my most challenging builds to date.
The kit is very old. The molds were obviously quite worn, requiring lots of sanding, fitting, and more sanding. It also needed some serious body putty to fill the poor fit of several body parts where there wasn’t a seam on the 1:1 car. In particular, the lower front and rear body pan and the finned taillight assembly required some work for proper fit.
All parts were sprayed with various primers. The body was sprayed with Gravity Light Grey lacquer primer and virtually all of the remaining parts were sprayed with either Mission primer or Mr. Hobby 1500. Generally I diluted all paints about 50/50 or close. I am spraying at about 15-18 psi using a Harder & Steenbeck Infinity 2 in 1 exclusively for this build. Virtually every part was airbrushed, as I really don’t like brush painting.
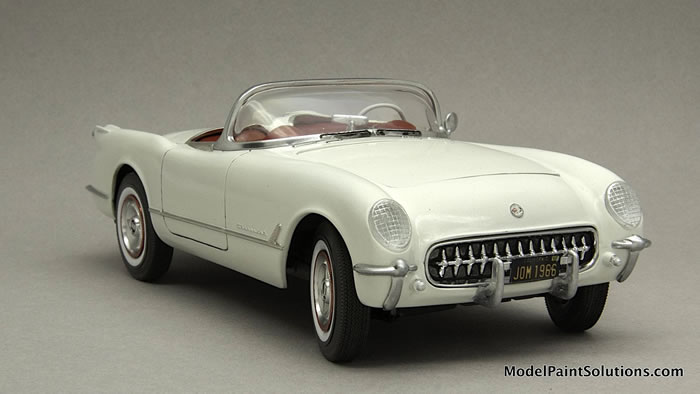
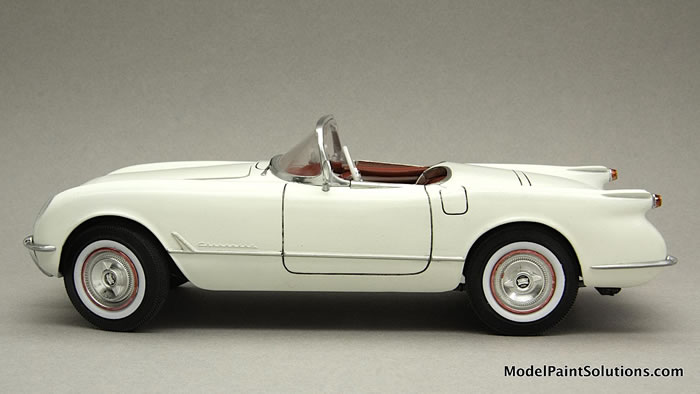
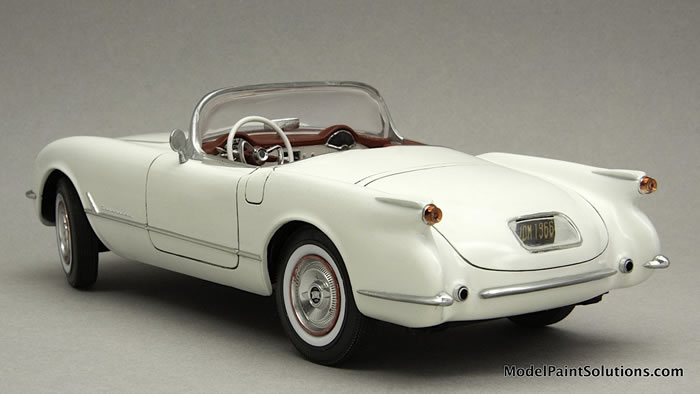
The body was painted with MCW Polo White lacquer. Then three very light coats of Mission Model Paints Semi-Gloss clear diluted to 30/70 (Clear:thinner). All other parts were painted with a combo of Mission, Tamiya and Testors Metalizer paints.
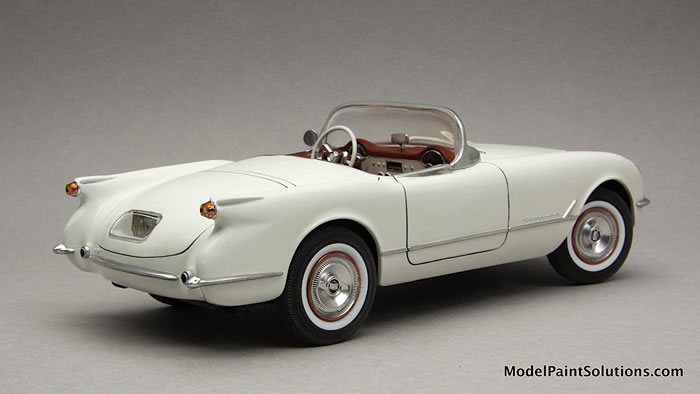
The interior was painted with a mix of Tamiya X-7 red and a few drops of XF-8 flat blue. I used white embossing powder to recreate the carpet texture and airbrushed it with the same paint mixture as the seats and door panels. The shift lever in the kit was horribly out of scale so I made one from a straight pin that had a white ball on the end. I put the pin in my Dremel and sanded the ball down to match the original shifter shape. I made a direction signal the same way.
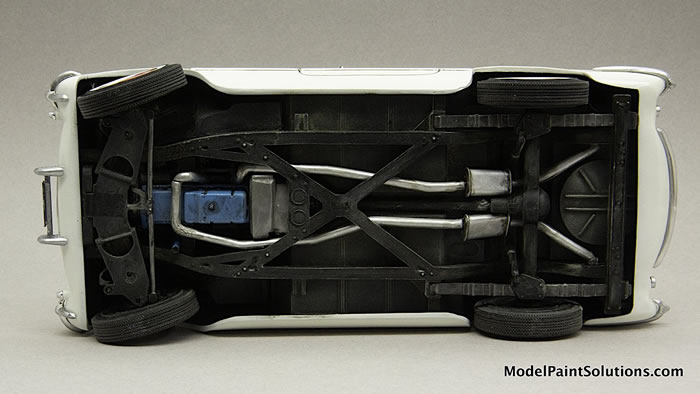
The engine was painted Splash Miami Blue to match the original cars engine. I wired the distributor and detailed the engine with several different washes to show some use. The hood was another trouble area. The kit hinge didn’t allow the hood to open very far, so I made my own from some aluminum tubing and brass rod.

All chrome parts were stripped of their too-shiny chrome and airbrushed with Molotow Chrome and sealed with SpazStix clear after letting the Molotow cure for 5 days or more; it’s very susceptible to finger printing.
The kit exhaust ports were chrome buttons with an indentation representing the exhaust pipe. Very cheesy looking. Instead I drilled ports in the body and used two sizes of aluminum tubing to recreate the trim and protruding exhaust pipe. This feature alone added so much reality to car!
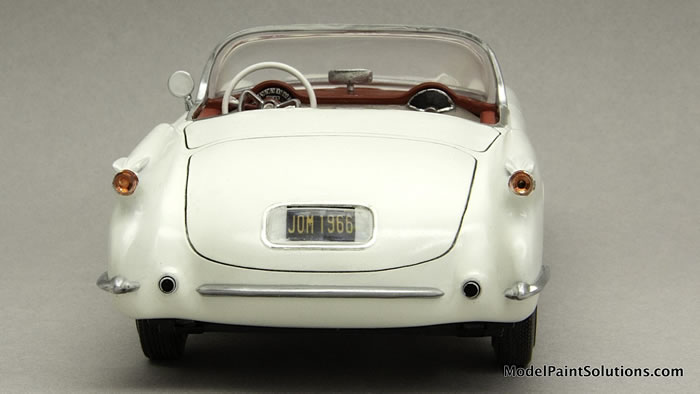
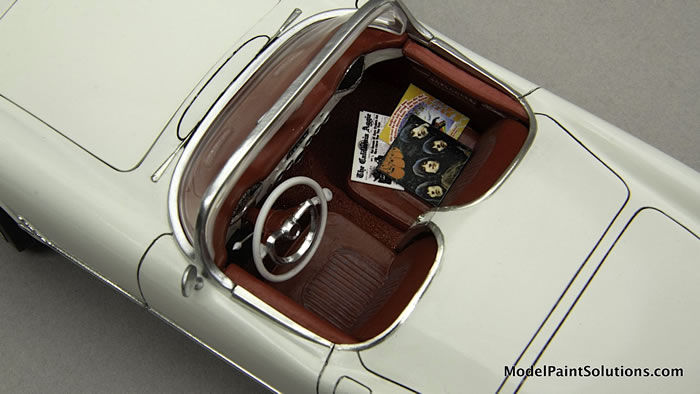
One of the final steps was to install the windshield and sideview mirror. When I took it out of the plastic bag, the windshield had deep indents from the kit tires rubbing against them for the life of the kit. Fortunately John Miller saved the day and somehow sanded and polished the windshield to perfection. Since sideview mirrors are the easiest item to knock off the model, I drilled a hole in the car body and the base of the mirror and used a short stub of straight pin to secure it. And then, to personalize the car for my friend’s brother, I printed a couple of Beatles album covers and the front page of his college newspaper at UC Davis. I also made date appropriate license plates.
I found a nice set of aftermarket decals for the gauges and body markings. Micro Set and Micro Sol were used to apply the decals. All of the body and interior surround trim was Bare Metal Foiled.
I decided to slightly pose the front wheels as opposed to the standard straight ahead look. It was a good call.
Throughout the build I thought there wasn’t any way possible that this would turn out so that I, let alone my friends brother, would be happy with it. But it did.
I’m as pleased with it, as is its new owner, and if it weren’t now residing in Kansas City, I would surely enter it in a few contests!
For more on this review visit Modelpaintsolutions.com.
Text & Images Copyright © 2020 by Brad Huskinson
Page Created 18 September, 2020
Last updated
21 September, 2020
Back to HyperScale Main Page
Back to Reviews Page

|
 Home
| What's New |
Features |
Gallery |
Reviews |
Reference |
Forum |
Search
Home
| What's New |
Features |
Gallery |
Reviews |
Reference |
Forum |
Search