|
Eduard's 1/48
scale
Avia B.534 III serie.
by Roger Fabrocini
|
 |
|
Avia B.534 III serie. |

Eduard's 1/48 scale Avia B.534 III serie.
is available online from Squadron
I have finished my trio of Czechoslovak builds with the
Eduard 1:48 Avia B-534 series III, kit #8191, thus satisfying my need to
model subjects related to my mother’s heritage. I can now guiltlessly
model subjects not adorned with the blue, white and red roundel of the
Czech Republic.
I found it fitting that Eduard would produce a model of the most famous
and successful Czechoslovak developed fighter plane of the 1930s, though
I must confess to being ignorant of the B-534’s existence till it was
announced. The Czech Republic is home to many “short run” kit
manufacturers. Eduard started as one, but has since evolved into a
modern, mainstream manufacturer some say rivaling the “big guns” of
Japan for accuracy, detail and engineering of their kits. Thus at first
I was surprised during the build by some detail and engineering issues I
encountered, but having time to reflect I feel it may come down to a
difference of modeling philosophies between the companies.
A fine, accurate and detailed model can be built from
the Eduard kits. They are beautifully packaged, most now containing a
P.E. fret, Kabuki (I.E. Tamiya) tape masks, excellent performing decals,
and thorough, color printed instructions. It seems though as if they
want you to be more involved creatively in the process, to enjoy the
journey, so to speak.
Details
Though I did enhance some details and add a few bits
here and there this kit was built mostly out of the box.
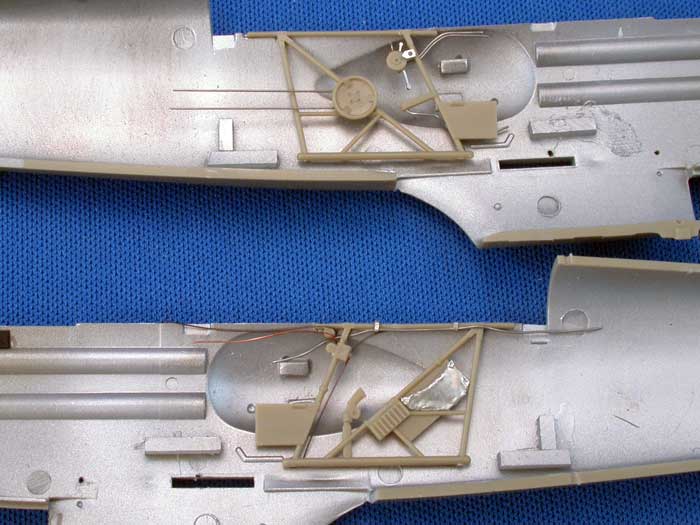
There were many things to address before joining the fuselage halves.
Eduard does a good job in the radiator area supplying P.E. screens for
the radiator and oil cooler and internal bracing. I did extend the
cockpit flooring forward to cover the top of the radiator gondola
completely.
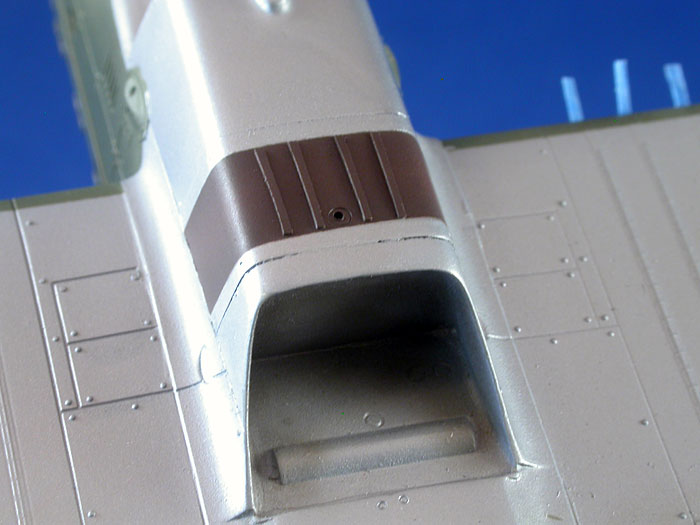
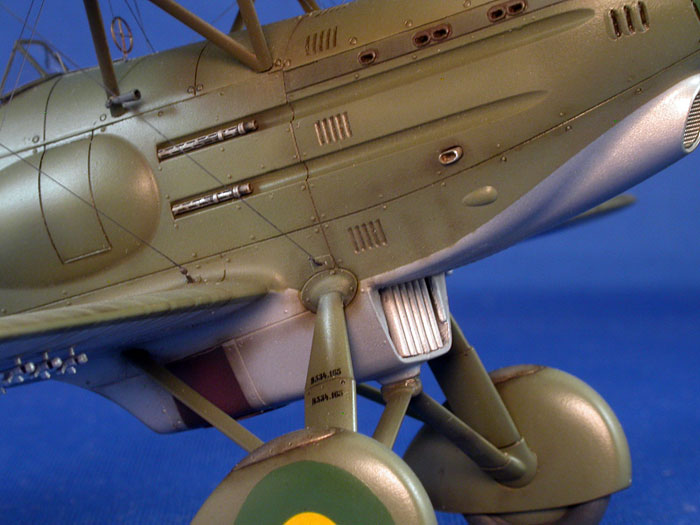
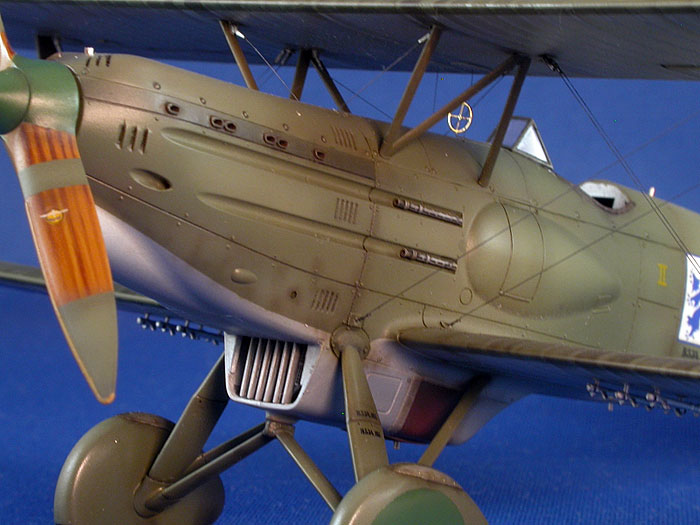
Next was dealing with my first bit of detail disappointment. The engine
exhaust stubs are molded shallow and closed in the fuselage. I at first
was going to drill them out and replace them with formed aluminum
tubing, but instead settled on just drilling out the openings.
My references showed another exhaust pipe (for what, I
don’t know) on the lower, forward fuselage, which Eduard missed, that I
did replicate with a piece of aluminum tubing. First I drilled the tube
out to get the desired thinness, then formed the tube into an oval using
piers. Some refining of the shape was done with sanding sticks on the
outside of the tube. The corresponding hole was drilled into the
fuselage and the tube inserted at the end of the build. There are four
other areas that received stainless steel tubes replicating drains and
or breather pipes.
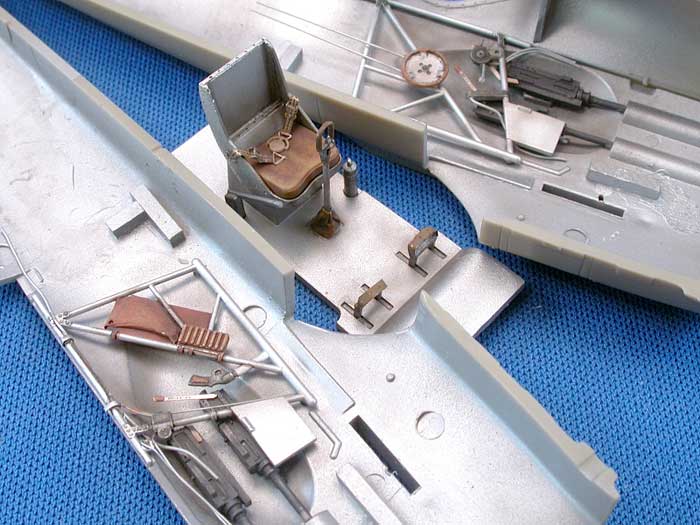
The interior is comprised of plastic and kit supplied photo etched
parts. I added bits of wire and solder to the cockpit framing, detailed
the seat with strips of Eduard P.E. rivet detail, replaced the rudder
pedal straps with strips of lead foil and replaced the machine gun
breeches with resin ones from a CMK Spitfire armament set. (A completely
superfluous addition, they can’t be seen with the naked eye.) I also
added a framing cross brace under the instrument panel. Lap belts are
from the kit supplied P.E. set, shoulder harness was fabricated from
lead foil and old Model Technologies P.E. buckles.
Click the
thumbnails below to view larger images:
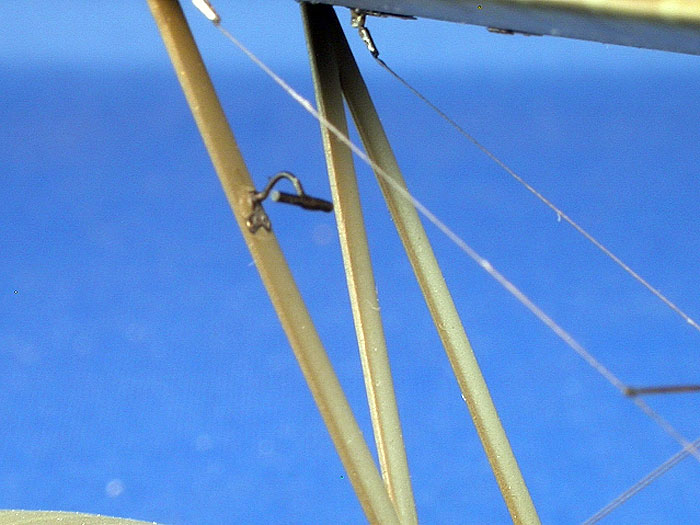
I enhanced the detail at the place where the bracing
wires enter the fuselage by drilling out the holes, inserting Eduard
turnbuckles and gluing P.E. grommets around the holes.
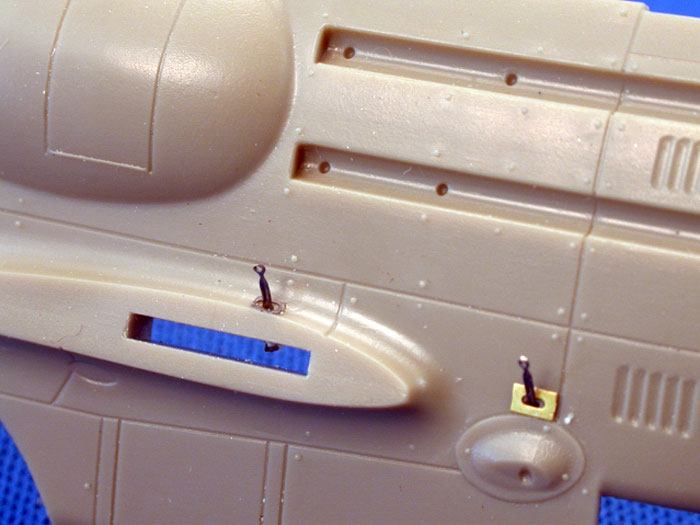
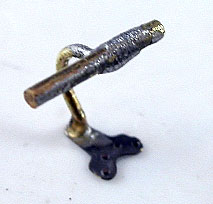
Eduard’s P.E. pitot tube looks nothing like the original
so I built my own out of brass wire and a P.E. mounting plate.
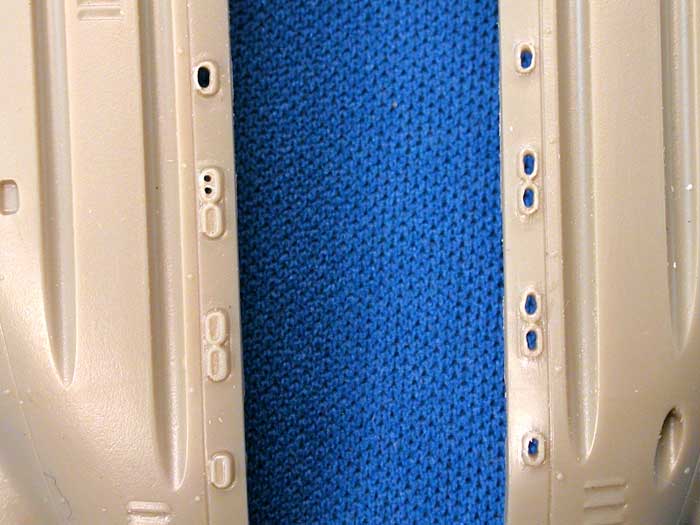
I found the molding of the many louvers on the fuselage to be soft so I
enhanced them by deepening them with a #15 scalpel blade. I also
enhanced the fuselage rivets by embossing a circle around them with a
beading tool.
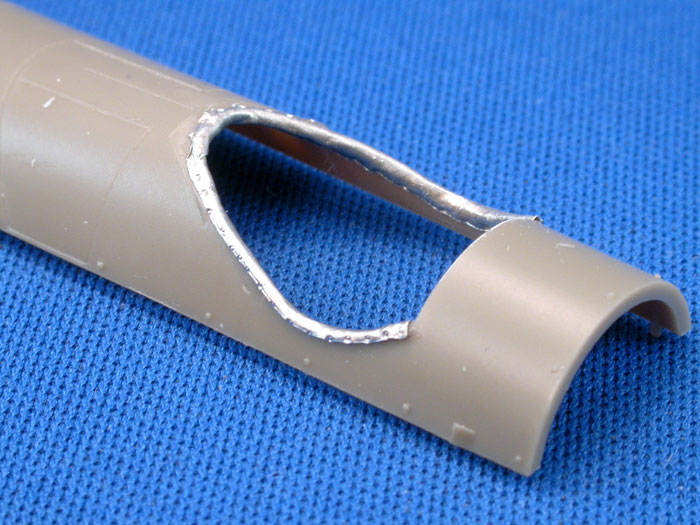
The last bit of detail enhancement involved the cockpit leather combing.
I formed foil around the cockpit opening and trimmed it to shape, glued
it in place then embossed fastener detail with my beading tool.
Sub-Assembly Construction
I built the model in three sub assemblies, fuselage/tail
surfaces/lower wings, landing gear and upper wing/cabane struts, painted
and finished them, then joined them together, my normal practice for
bi-planes. Eduard encloses a diagram in the instructions showing the
proper amount of dihedral for the lower wing. Ignore this information at
your own peril. I thought all was well having placed the fuselage
assembly in my alignment jig and checking it’s relationship with the
upper wing/cabane strut assembly. Come time for final assembly I found
my inter plane struts to be almost a 1/8” short. My solution was to add
strut stock to the bottom of the struts then test fit them until I
obtained the proper alignment. It was touch and go there for awhile (I
would touch the model and think of making it GO into the wall.), but
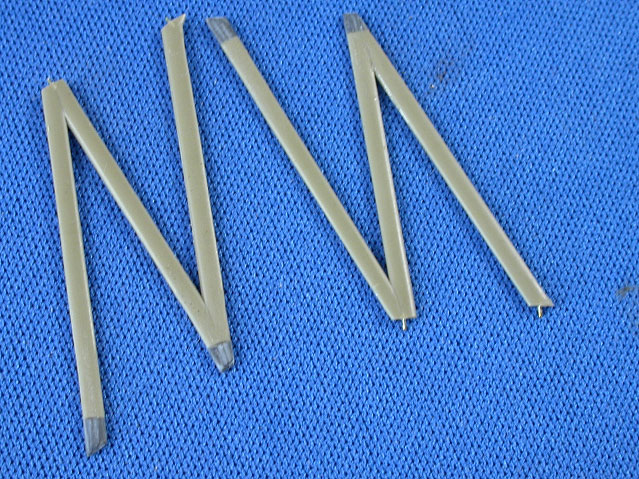
finally it worked out ok. One of the small engineering grips I have with
Eduard is their shallow attachment nubs on the ends of their struts.
Come on guys, give us something a little more substantial next time.
Though the struts are very thin I was able to insert .012” brass wire
barbs into their ends, helping with alignment and attachment.
The assembly of the landing gear itself is sturdy, but it’s attachment
to the fuselage is not. Again wire inserts will help.
Rigging
I actually enjoy the challenge of rigging biplanes, but
Eduard is trying their best to make it less of a challenge with their
P.E. Turnbuckles.
I use .002” Dia-Riki monofilament. It’s clear, but I pull it through the
felt tip of an enamel paint marker. I use Floquil’s weathered black. I
first attached all the rigging to the kit supplied upper wing
turnbuckles before attaching the wing to the fuselage assembly. Eduard
offers little help in locating the holes in the fuselage for the aileron
cables and cabane strut’s rigging. I really had to search through my
references to get them right, which in the end I don’t feel I
accomplished anyway.
Click the
thumbnails below to view larger images:
After all the rigging was glued to their lower
attachment points I use a heated brass rod to tighten them. I heat the
rod with a butane soldering torch. Check that the rod is not too hot
before bringing it close to your model. You don’t want to burn through
the rigging or damage your model. The rod does make it easier to get
into tight spots, like for the cabane struts.
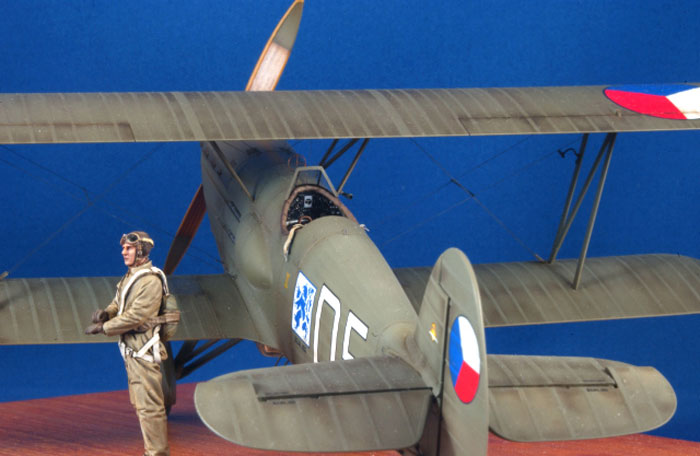
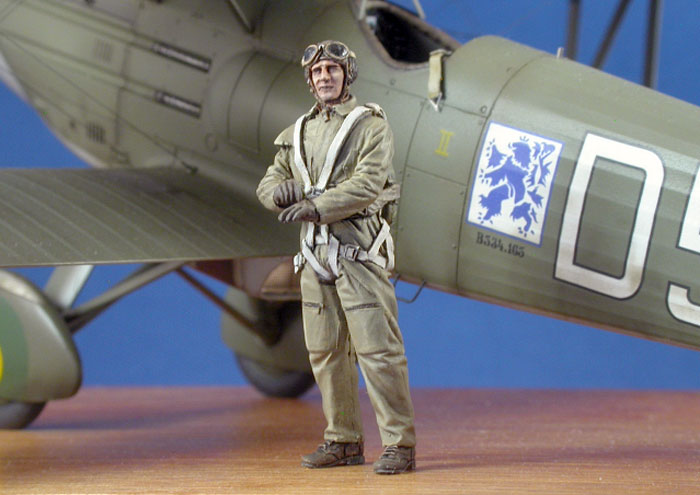
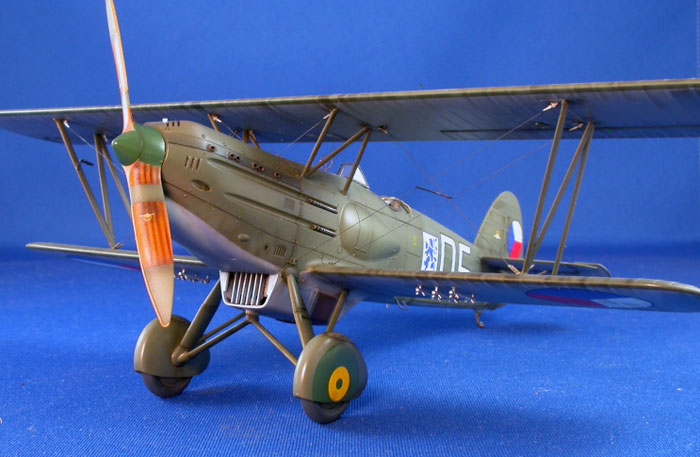
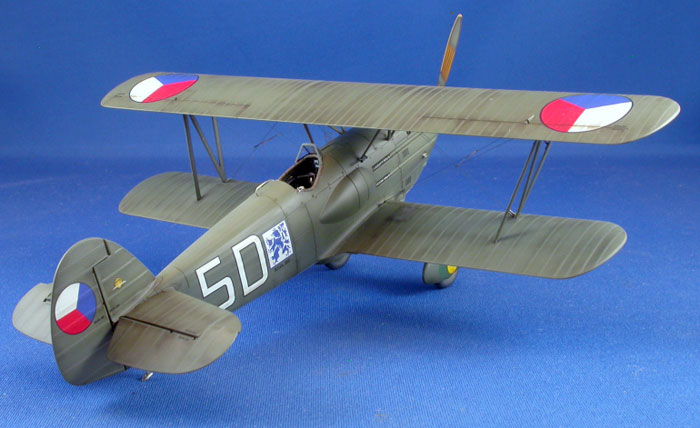
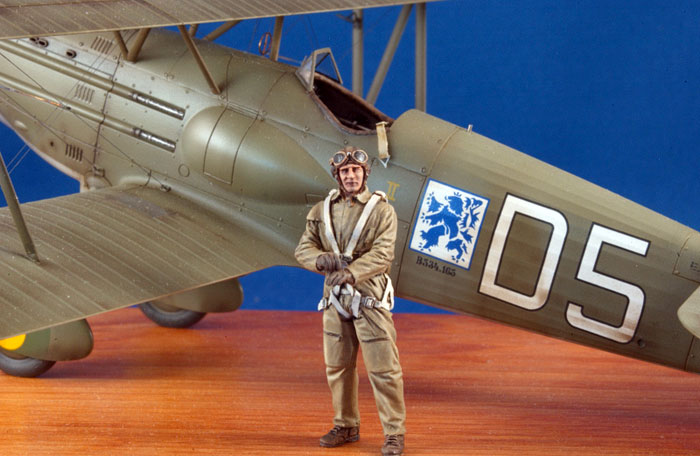
Of the four kit marking choices I choose B-534.165 of
the No.4 Air Regiment, 34th Fighter Flight, from August, 1937. As I’ve
stated the decals performed flawlessly.
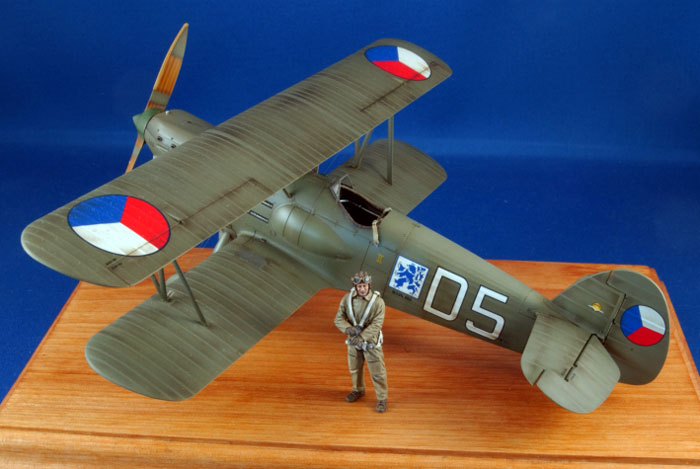
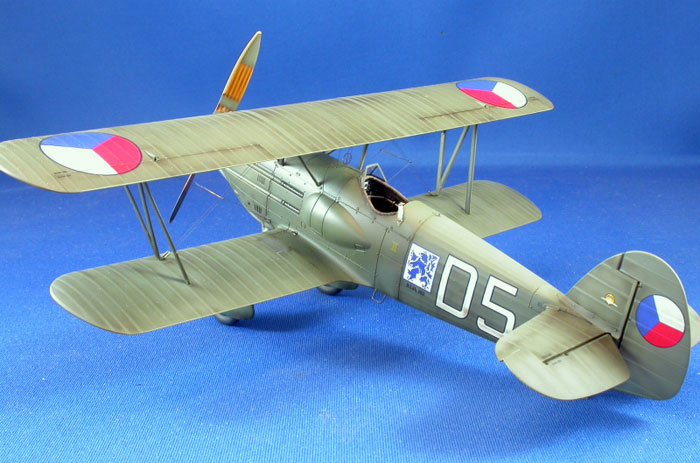
B-534-165 was finished in Khaki Green upper surfaces with Silver Doped
lower surfaces. I found the Czechoslovak Khaki to be as enigmatic a
color as it’s Polish Air Force counter part. Reference #1 has a photo of
an original piece of B-534-225 showing a very light olive green color.
Reference #2 states the Czechoslovak Khaki as being more Green the
Brown. Eduard’s instructions suggests Gunze Aqueous H80 Khaki.
 I used it
as a starting point, though at this point I can’t tell you what I added
to obtain the final shade. Sorry. I used Alclad Semi-Gloss Aluminum for
the lower surfaces. The Khaki wraps around the leading edges of the
wings and completely around the horizontal stabilizers. The Eduard
supplied Kabuki tape masks make the job utterly painless. I used it
as a starting point, though at this point I can’t tell you what I added
to obtain the final shade. Sorry. I used Alclad Semi-Gloss Aluminum for
the lower surfaces. The Khaki wraps around the leading edges of the
wings and completely around the horizontal stabilizers. The Eduard
supplied Kabuki tape masks make the job utterly painless.
I did not over coat the lower surfaces, leaving them in Semi-Gloss, but
I did lightly over spray the lower wing Roundels with Testor’s
Semi-Gloss Clear Lacquer.
For the upper surfaces I masked and sprayed
the fabric covered areas of the airframe in Mr. Color clear flat. the
metal covered areas also received a coat of Testor’s Semi-Gloss Clear
Lacquer.
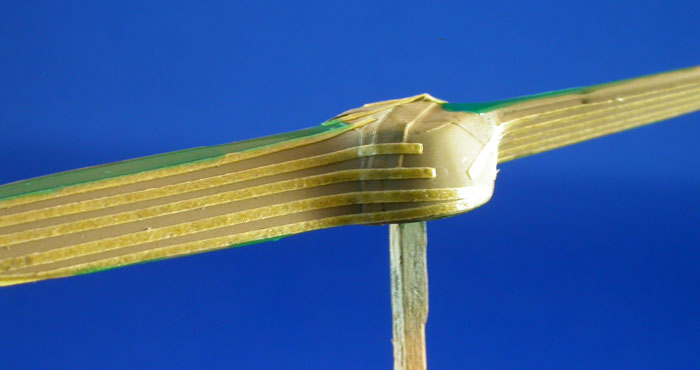
Painting the Prop
A visual focal point of this B-534 is the propeller so I
worked hard to get it right. It has a very distinct laminated wood
pattern, Khaki colored cloth coverings and brass tip guards.
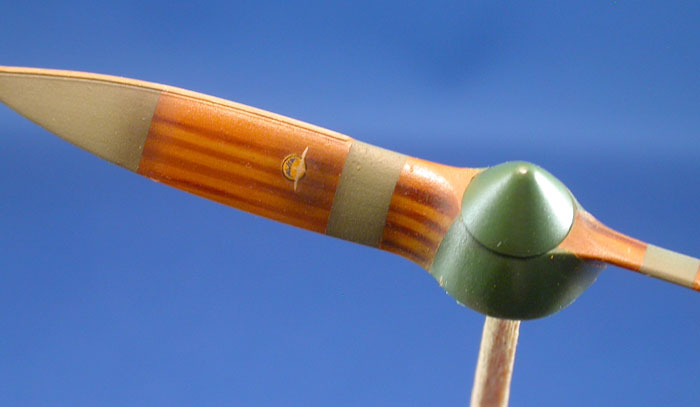
I started by Priming the prop then spraying it with Floquil Foundation.
To achieve the lamented wood effect I masked the areas to remain light
wood colored and sprayed on a very thin coat of Floquil Roof Brown. When
dry I removed the masks and brushed on a thinned coat of Burnt Umber
artist oils. I let this dry for about an hour or so then taking a DRY,
stiff, flat brush I start to remove some of the oil paint with brush
strokes going from spinner to propeller tip. The masks created the
laminate demarcations, the artist oils create the wood grain. When dry I
seal it with a mix of Tamiya clear Orange and clear Yellow.
When this dries I masked and sprayed the Khaki areas. The Brass tip
guards are hand painted with Vallejo acrylics. The final touch was to
post shade with some heavily thinned Tamiya Red-Brown/Black mix.
Click the
thumbnails below to view larger images:
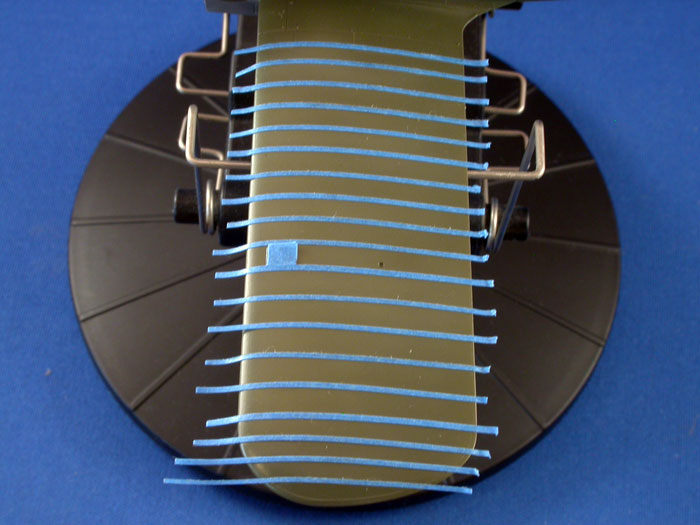
Weathering and Pilot
I tried to keep the weathering light. To enhance the rib
detail I masked all the ribs using cut strips of Scotch 3M masking tape
then sprayed my Post shade mix in random patterns.
Though the pilot figure is from a Jaguar set of German fighter pilots,
beautifully sculptured by Mike Good, he seems to wear the same kit worn
by Czechoslovak pilots from the ‘30s, so I used him.
I hope that all my comments have not given you the wrong
impression. I think the Eduard Avia B-534 kit, and all of Eduard’s
latest releases, can be finished to the same high standards as anything
produced by any other model company and I thoroughly enjoyed the
process. I may have to prove it by starting their series IV kit.
As always, thanks for the indulgence.
-
Photo Hobby Manual, Avia
B-534, Czechoslovakian fighter 1933-45
Published by CMK ISBN 80-903-778-0-7
-
Avia B-534, by Ing. Jiri
Vrany
MBI Publishing ISBN 80-901263-6-7
-
HT Model Special, AVIA
B-34, B-534 a Bk-534, Slovak Pilots, 1939-1944
HT Model magazine ISSN 1335-3667
Click the
thumbnails below to view larger images:
Model,
Images & Text Copyright © 2007 by
Roger Fabrocini
Page Created 17 September, 2007
Last Updated
31 December, 2007
Back to
HyperScale Main Page |
 Home
| What's New |
Features |
Gallery |
Reviews |
Reference |
Forum |
Home
| What's New |
Features |
Gallery |
Reviews |
Reference |
Forum |