|
Tamiya's 1/48
Mitsubishi G4M Type 11
Dressing Betty
by
Michael Novosad
|
 |
|
Mitsubishi Isshikirikko Type 11
(Betty) |

Tamiya's 1/48
scale G4M Betty is available online from
Squadron
Tamiya's 1/48 scale Mitsubishi Betty kit is a large model when
completed, and represents a historically significant aircraft from World
War II. I recall reading that before the war Luftwaffe officials toured
the plant where the Betty’s were being built, and commented to their
Japanese hosts they could not believe the Betty fuselage was for a twin
engine bomber.
The early models of this aircraft were not equipped with armor
plating for crew protection, or self-sealing fuel tanks, perhaps due to
the Japanese military contempt for their enemies. The military
specification called for an aircraft with a high speed and great range.
To meet those requirements certain sacrifices were necessary. The
criteria was later changed when better Allied aircraft and skilled air
crews came onto the scene. The early Betty was soon called the “Flying
Cigarette Lighter” for its propensity to burn when struck with
incendiary ammunition.
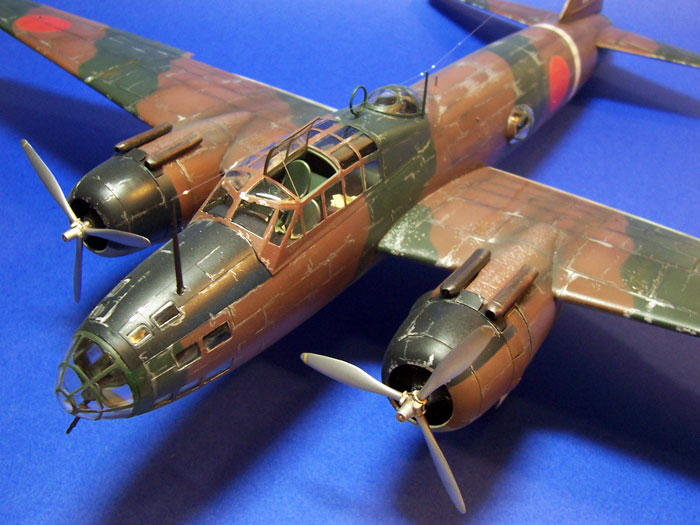
The aircraft that I decided to build was instrumental in the sinking of
the British warships Repulse and Prince of Wales in the opening days of
the Pacific conflict. I liked the looks of the two-tone color
camouflage, plus the poor quality of Japanese paint would offer a
weathering challenge. This article is more about painting rather than
building.
One of the first things that I did was the research. This task resulted
in a checklist of sorts for the features and details that I wanted to
include in the build. I also created a separate checklist for the
painting of the model starting with the interiors, and culminating in
the exterior painting phases. I listed the paints and mixes, along with
thinner information, and used a checklist format to track my progress.
Next, I traced the outlines of the wings, stabilizers and fuselage
halves on white paper, and created the camouflage patterns. Each color
was noted on the stencils to avoid confusion later. Complicated? Not
really. Necessary? You bet!
Tamiya paints were used throughout this build, with the only exception
being Testor's Model Master Non-Buffing Aluminum for certain exposed
metal parts, including propellers and weapons. I used 91% isopropyl
alcohol to thin the Tamiya paints. The Model lMaster went on straight
from the bottle.
Cockpit Assembly
The interior compartments were assembled per the kit instructions. A
base coat of Tamiya Deep Green, XF-26 was applied to all surfaces. Next,
Tamiya XF-22, RLM-2 was misted over the surfaces. allowing the deep
green to be just barely covered in the recessed areas. This, in my
opinion, creates “shadows” and scale depth to the components. After a 24
hour drying time an oil wash was applied to add further depth and to
blend the colors even more. A very light dry-brushing with Rub-n-Buff
Silver was applied to the various high points of the metal surfaces.
Seat cushions were painted with Tamiya Deep Brown, and then dry-brushed
with Model Master Leather. Photo-etched seat belts were then added to
the crew seating.
Clear Parts
The clear parts were first dipped in Future floor wax and allowed to
dry for 48 hours. Tamiya tape was used to mask the clear portions. The
clear parts were fixed in place using Krystal Kleer applied with a round
tooth pick. I left the clear nose and tail cones off for now, but closed
off the opening with tape and paper toweling to protect the interior
surfaces from paint over-spray.
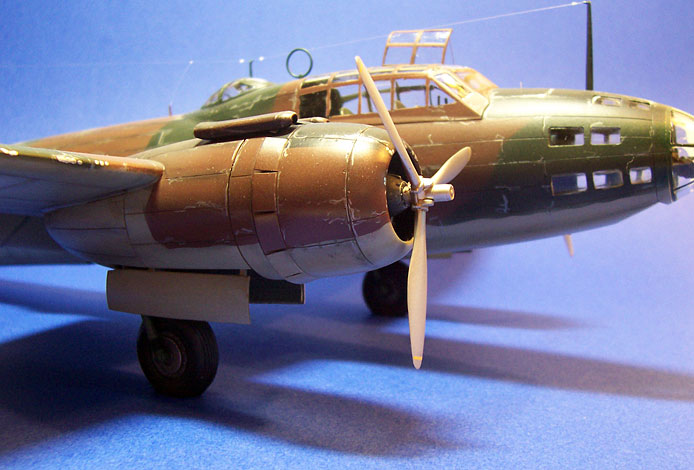
Engines Assembly
The engine parts were first airbrushed with Tamiya Flat Black, and
when dry were dry-brushed with Rub-n-Buff Silver. After a 24 hour drying
time an oil wash was applied. Ignition wires were added by using fine
copper wire.
Fuselage Assembly
Care must be taken when assembling the two fuselage halves: the top
and bottom seams are quite long and must be properly aligned to avoid
filling and sanding. Some rescribing is required to restore various
panels line lost during the assembly. The bomb bay can be configured
with a closed set of doors, or with the configuration of the torpedo
attack aircraft the closed doors include a center portion that must be
removed.
After repeated scribing the center portion of the doors can be
removed, and the weapons bay can be completed. Care must be taken when
fixing this part in place to avoid steps between the parts, which would
of course require filling and sanding.
Wing Assembly
The wings and engine nacelles are comprised of eight parts per wing.
The interiors of the engine nacelles were painted earlier and assembled
per the kit construction. The only deviation here was the addition of
rear bulkheads in each engine nacelle to eliminate the unfinished areas.
Wings were assembled less the flaps which would be painted and installed
later.
I planned to install the flaps in a dropped configuration and wanted to
paint the normally concealed surfaces with a bare metal finish. I also
added lightening holes in the ends of the flaps for added realism, plus
this allowed me to insert tooth picks in the flaps to be used as holding
tools during the process.
The wing-tip navigation lights were cut out by scribing with a sharp #11
blade. These lenses would be replaced later in the build.
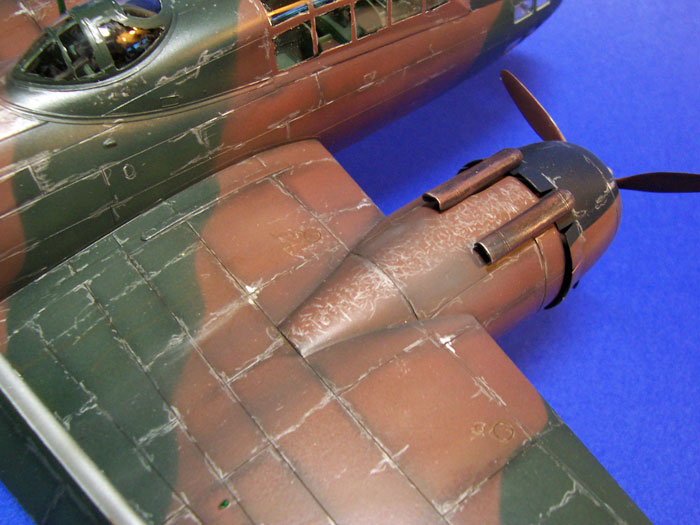
Weapons
The kit comes with a full compliment of hand-held machine guns and
cannon, plus a load of bombs and a torpedo. Since I was modeling a
torpedo attack aircraft the bombs were relegated to the parts box. The
machine guns and cannon were first painted Tamiya Flat black, and when
dry I tried something a bit different (for me at least). I used a soft
graphite pencil and by sanding the graphite created a fine dust. Using
an old paint brush I dry-brushed each hand-held weapon with the graphite
dust. The graphite created a shiny metallic surface which what I was
after. I believe that Jack Stutting offered this idea to me some time
ago, and this was my first opportunity to apply this technique. Thanks,
Jack!
The torpedo components were painted unassembled. The fins, propellers
and warhead were painted flat black, whereas the body was painted Model
Master Non-Buffing Aluminum. After everything was dry the various parts
were assembled.
Painting
First, the entire assembled model was primed with PlastiKote, white
sandable primer. All panel lines were preshaded with Tamiya flat black.
There are lots of panel lines and this task was quite time-consuming. I
applied flat white in the area of the fuselage band, and when dry masked
this band with Tamiya masking tape. The aircraft undersides were first
airbrushed with Tamiya Medium Grey XF-54, then a mottled application of
IJN Grey XF-12 was applied in a very random manner. Once this had dried
for 24 hours a thin wash of burnt umber and sienna was applied over the
undersides to blend the acrylic paints. After this had cured for another
24 hours the undersides were masked completely.
I applied all the masks to the topside of the model to assure the proper
alignment. I first removed the brown mask and applied the red-brown
paint. The first application of this color was thinned with a few drops
of flat white. The next application was further thinned with flat white
and applied to the center area of the various panels. Next, this final
mixture was reduced with thinner at a ratio of about 1:20 (paint to
thinner) and applied to the brown areas to blend the first two
applications.
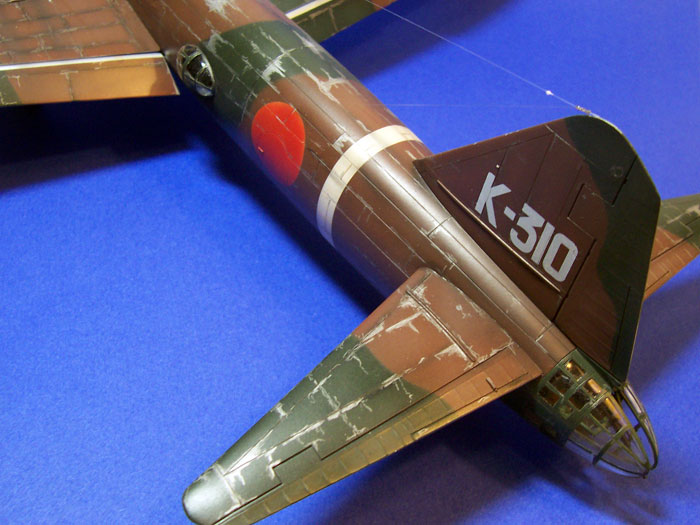
After the red-brown had dried for 24 hours the masking was reapplied to
cover this first color and the green masks were removed. The IJN green
was applied in a similar manner, being cut with flat white. All masking
was removed from the topsides. National markings were then airbrushed
onto the wings and fuselage. See below.
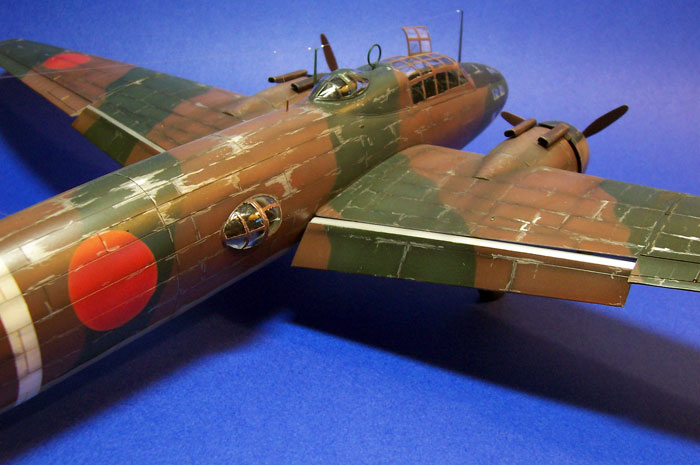
Tamiya Deck Tan XF-55 was thinned with 91% isopropyl alcohol at a ratio
of 1:20 (paint to thinner) and random streaking was applied across the
wings from front to rear. The fabric surfaces were also sprayed with
this thin mixture to lighten those surfaces. This results in a very
subtle affect.
Chalk pastels were applied to the panel lines with a paint brush. I
wanted to keep this affect rather subtle so I scrubbed the dark grey
pastel stick with the paint brush bristles and rubbed the panels
parallel to the lines. A small amount of pastel dust was distributed in
the panel line and along the edges of the recess.
Exhaust staining was done first by airbrushing highly thinned deck tan
and light grey near the outlets of the four exhausts, then a similarly
thinned flat black was airbrushed from the exhausts backwards. This
effort requires several sweeps of the airbrush to properly build up the
staining. Once completed the exhaust stains are subtle, but noticeable.
Decaling and Weathering
The only decals used in this build were the tail aircraft numbers.
The white fuselage band and all Hinomarus were painted using Tamiya tape
or Frisket masks. A base coat of flat white was used below all Himomarus,
then a mixture of red, yellow and brown was airbrushed over the white
base.
Once the model had been completely painted and allowed to thoroughly
cure I began the weathering process. Using a Prismatic silver pencil I
began to add scratches and scuff marks at several of the panel junctures
and areas where ground crews may walk while servicing the aircraft. This
was a very time-consuming process. The silver pencil was sharpened
frequently.
The last step was to use a silver paint marker with a fine point to add
“new” paint chips. This was carefully not over done. The silver marker
was also used to apply the silver base to the wing navigation lights
located on the top of the wings.
Problems and Solutions
1. Light grey paint and masking tape.
The first problem I faced was self-inflicted (I should have known
better!!). In the past I have always sealed the lighter paints with
Future before applying the masking. In this build I decided to
forego that protection. When the drafting tape was removed the light
grey undersides exhibited a light etching (for want of a better
term). I reapplied the IJN Grey in a random manner, and most of the
etching seemed to disappear. I do not know what it is, but the
lighter colors (in my experience enamels and acrylics seem to react
in the same manner) are affected by the masking tape, both lo-tack
drafting and Tamiya.
2. Wing Flaps Installation
The flaps were dry-fitted during the build process and seemed to
match up quite closely, but I took care not to insert the three
flap-mounted tabs fully into the respective wing slots as the fit
appeared to be tight, and I wanted to paint the flap separately from the
wings. During the final assembly the tabs proved to be quite tight, and
even with trimming the fit took some effort. I managed to break all
three tabs on one side and resorted to applying liquid cement with a
Touch-n-Flow applicator and left the model upside down while the cement
cured.
As always it should go without saying, but the Tamiya kits for me are
always a joy to build and paint. The fit is normally quite good, and the
details are adequate for my tastes.
References
Mitsubishi Type 1 Rikko “Betty” units of WW II-Osprey Combat Aircraft
#22.
Click on the thumbnails
below to view larger images:
Model, Images and Text Copyright © 2007
by Michael Novosad IPMS Number 36721
Page Created 31 July, 2007
Last Updated
01 January, 2008
Back to
HyperScale Main Page
|
 Home
| What's New |
Features |
Gallery |
Reviews |
Reference |
Forum |
Home
| What's New |
Features |
Gallery |
Reviews |
Reference |
Forum |


