|
Confessions of a lapsed
modeloholic
Fell Off the Wagon
by Dick Powers
|
 |
|
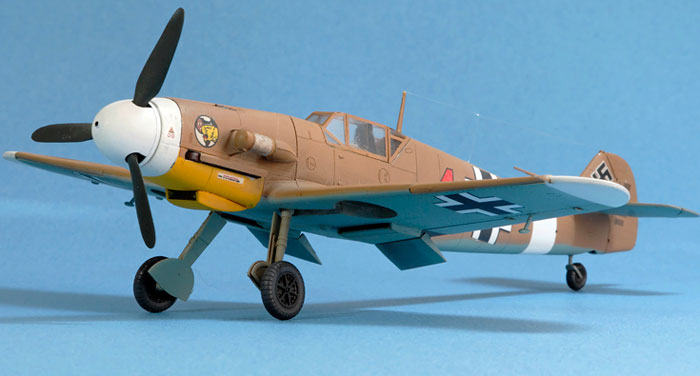
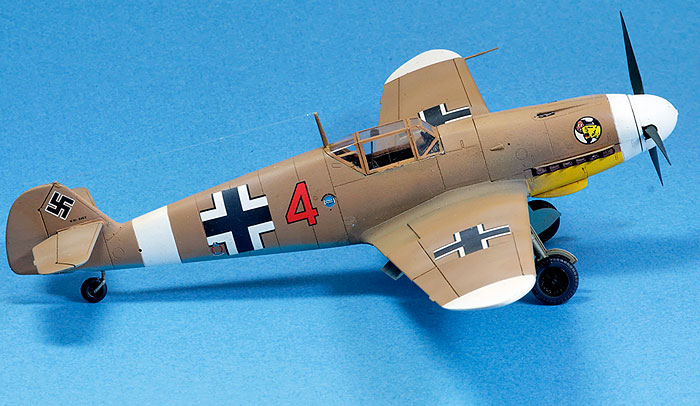
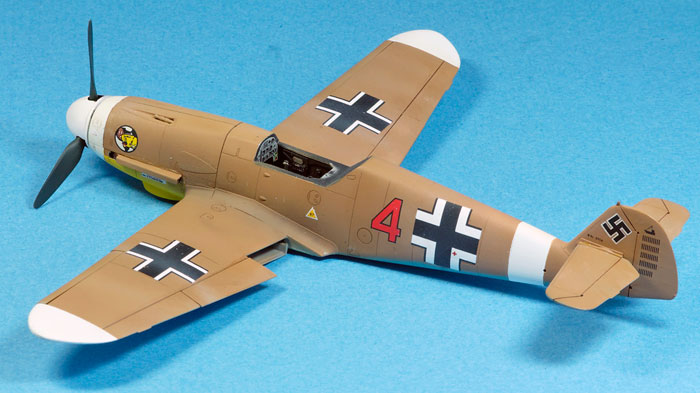
Messerschmitt Bf 109 F-4/Trop |

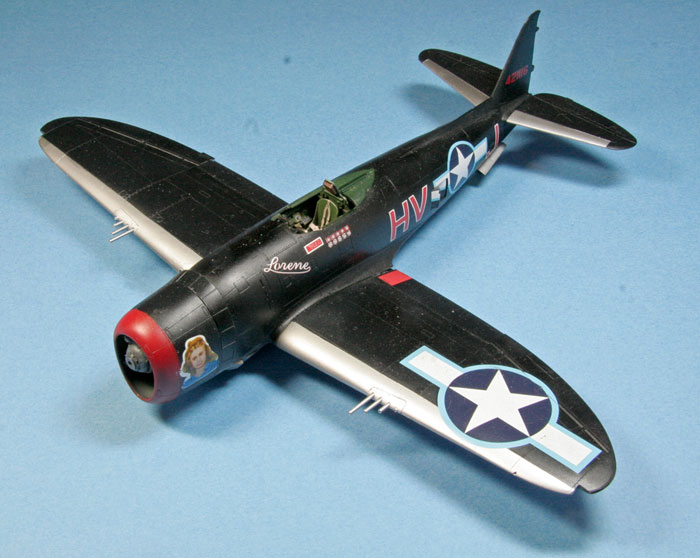
Tamiya's 1/48 scale P-47M Thunderbolt is available from
Squadron.com
For 33 years I have been a recovering modeler. In
all that time I have NEVER touched styrene models, decals, RLM
camouflage paint or an airbrush. There were times, though, where I got
itchy palms…an urge to glue, fill, paint and curse. I resisted.
Back in the 70’s – last century- I was co-editor of “Phantom Flyer”,
McDonnell’s model club monthly. Those were simpler days; Airfix, Frog or
Monogram. Humbrohl enamels in tins, Aftermarket decals? ABT, and later
Microscale. Resin? Stuff you use to repair a Corvette – or a canoe.
Aftermarket detailing? Buy a 79-cent 1/72 scale Airfix TBF. Use the
wheels on a P-47 and throw the TBF away. Fill and sand till no surface
detail is apparent. Gaggles of 1/72 Airfix and Frog 109’s. One friend
who would build anything as long as it was painted black. References?
Profile publications, Air Enthusiast, Aero Publishers, Aircam. An IPMS
argument as to whether or not 109Ks had cowl gun bulges.
My modeling recovery was prompted by agreeing (along with another
modeler) to build a collection of McDonnell-Douglas plastic models for a
company display. Trust me: having to build models you don’t want to
(like a DC-9 and other commercial airplanes) on someone else’s schedule
can ruin a hobby. I was happily cured.
Then a couple of years ago I found HyperScale.
Interesting. Lots of things have changed. Look at those 109s. I always
liked 109s. Built them bunches at a time. Maybe I should get back in.
Figuring the entry cost, no; I am recovering.
Then while paging through an old book I come across a 30-year old set of
Microscale AVG decals. A complete 1/72 decal sheet(#72-10) in its
original plastic envelope. Another book has a part-used ABT Me 110 decal
set. Probably for a Monogram 1/72 kit.
The clincher, I confess, was Eduard’s 1/48th FW 190 A-8. The 190 has
also long been one of my favorites. I ordered one. Not to build, of
course, but to feel and smell. After all, I am a recovering modeler.
I open the box. Photo-etched metal, good decals, tiny parts and lots of
them. But I’m not going to build it – I am a recovering modeler. Maybe
I’ll just see how the fuselage halves fit. Recessed panel lines. Nice
cockpit, PE instrument panel. I was hooked. Off the wagon. I gotta build
it.
Okay, it’s been too long. I’ll get a practice model rather than bollix
up the 190. So I go to the local model shop and get an air compressor,
airbrush (my old Binks Wren B probably wouldn’t work anyhow), putty,
glue, X-Acto knives, drills, saws, paints (acrylics, lacquers, enamels –
very confusing) and look for a starter kit. I hate to think about how
much this first model costs. Of course most of this bill will be
amortized over all the models I build from now on. Unless I find that I
hate building. That will make for one EXPENSIVE model.
I see a Tamiya 1/48th P-47M. Nice. 56th Fighter Group. I have lots of
56th information. I like radial engines. Black HV-coded airplane
pictured on the box. I remember the black jugs from 30 years ago. OK,
I’ll start here. Order an aftermarket PE detail set and decals. I forgot
how many things you worry about; what color scheme – decals – flaps up
or down – canopy open or closed – did 56th FG have black or purple –
intercooler doors open or closed -did the natural metal/black dividing
line on the wing and stabilizer upper surface fall on a panel line –
what treads on the tires ?
BIG MISTAKE. Tamiya’s 47 is no less complicated that Eduard’s 190. I
complicate the project by picking a black finish over natural metal. (I
forgot one basic concept of modeling – stay away from natural metal
finishes.) The PE set has parts I can’t even SEE much less install.
Seems as if anything less than 1mm is useless. Of course I am clumsy and
have little hand-eye coordination. The cockpit turns out OK, but in the
construction process I don’t pay attention to the instructions and
several critical parts are omitted and can’t be installed without
deconstruction. I use CA glue on the fuselage halves which gradually
gives way under the stresses applied in the remaining construction.
Remembering why I always stayed away from natural metal finish – silver
paint goes everywhere. And flat black – shows every flaw, every dust
speck. All you have to do is look at it and it scratches. A semi-gloss
clear coat helps a little, but it still looks…not so good…not like the
web photos. Built, painted, decaled, nearly finished. But I’m not happy
with the results. I’ll come back to it later. I need a confidence boost.
A kit with fewer fiddly parts and a simple color scheme.
Click the thumbnails below to view larger
images:
[../../photogallery/photo00020553/real.htm]
So I go to my closet which seems to be suddenly
populated by 1/48th scale 109’s – just like the good old days. (Big
difference the old 109s were 1/72nd scale with smaller boxes and
cheaper: a LOT cheaper). I select the Hasegawa 109F-4/Trop. I always
liked the F model. Clean lines. And the desert color scheme 78 over 79
with white accents was most attractive. The Hasegawa has good reviews.
The kit parts seem uncomplicated. Maybe a little aftermarket PE upgrade
– and aftermarket decals. (After all these years I can’t bring myself to
build with box decals.)
Trials and
Tribulations...
|
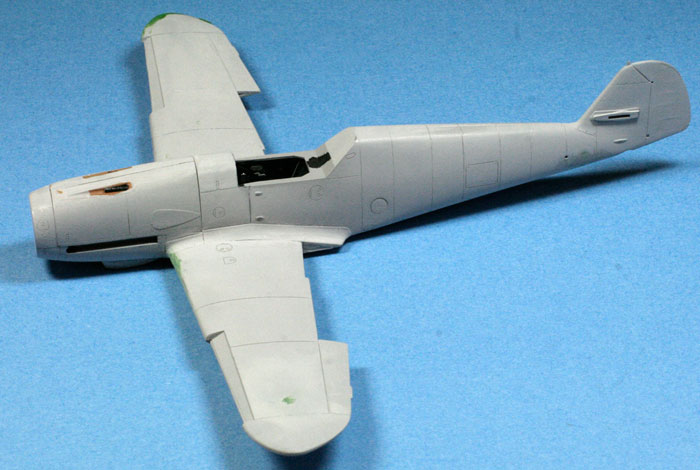
So I build.
No marathon modeling sessions because I am a recovering modeler. I can
quit any time I want. Slowly. A week for the cockpit. An evening getting
the two-piece cowl to fit. Another evening attaching the wings to
fuselage, trying to get the dihedral right. Some putty and sanding. Be
careful about the recessed panel lines, particularly around the cowl
where the parts all come together. Prime. Sand. Fill. Sand some more.
Prime again.
 Start
to paint. New worries: pre-shading or post shading? Weathering or no
weathering? I decide that desert 109s did not show a lot of weathering,
so I spray an even coat of 78 and then lightly overspray with very thin
white, followed by very, very thin black around the wing roots. Then
post-shade the control surfaces with thinned oil paint. Trying to
remember DON’T HURRY. S – L – O –W. Start
to paint. New worries: pre-shading or post shading? Weathering or no
weathering? I decide that desert 109s did not show a lot of weathering,
so I spray an even coat of 78 and then lightly overspray with very thin
white, followed by very, very thin black around the wing roots. Then
post-shade the control surfaces with thinned oil paint. Trying to
remember DON’T HURRY. S – L – O –W.
Mask. Start big and work to the small.
Finally, after a half-dozen painting sessions I get
to the point where I fix one fault and create another. Time to declare
the paint job finished. Not completely satisfied with the paint job, but
with decals and flat finish it’s passable. At least no fingerprints. I
forgot how unpleasant the 109 canopies were ( and are) to mask and
paint. Luckily the kit has two sets of canopies, although one is for a G
model. Except for the windscreen with the lower triangular light, I have
two of everything just in case. I use them all. Paint. Remove the tape.
ARGGH! Luckily I am using acrylics (see? I’m learning). Take thinner and
a cotton swab and remove the paint. Try again. After three tries I give
up. It’s good enough.
When I glue the landing gear and wheels, I break
off one wheel. Eventually using words generally reserved for my wife’s
quilting projects the wheel is reattached. Off center. Can’t be easily
corrected. The 109 sits one wing low. So I’ll photograph it only at
angles where this doesn’t show.
While trying to attach the gunsight to the
instrument panel, I drop it inside the cockpit. It hasn’t been seen or
heard from since. Luckily the kit has another on the second clear sprue.
The final touch, adding the antenna wire. While
attempting this I manage to break off the tail wheel and remove some of
the rudder kill marking decal. ARGHHH!!! Then, while admiring my
handywork, I drop the 109. Upside down, bearking the antenna. While
fixing the I finally put a CA fingerprint on the side. Total calendar
time to complete about 6 weeks, not including the 33 years since my last
model.
Eventually, I’ll finish the jug and post the pics. Of course I’ll
probably find an excuse to do another 109. Like Gerhard Stamp’s JG 300
yellow 17, which is in another Hasegawa box on my shelf with Eagle
Edition decals, spinner and battery cover. Then a Hungarian 109 – maybe
an RSI 109 – of course a JG54 109 – a Slovak 109 – a JG 1 G-6/AS 109
with overall hellblau finish.
So now I’ll start (or continue) P-47s – 8th AF, 9th AF. Just no natural
metal.
Photography
The 109 photos were taken with A Canon Rebel xT
(Model 350 to the rest of the world), using a 26-135mm lens at 135mm and
aperture priority set to F22 & ISO 100 sensitivity.
I set the camera on a tripod and used the delayed
shutter release to minimize camera shaking. The background is blue
poster paper. Light was a combination of natural room light with two
desk style Ott-Lights which have daylight color.
I shot RAW images and converted to JPG using DXO
Optic Pro software for sharpening and distortion correction.
Photoshop was used to improve color balance and
contrast.
This is fun, combining photography with modeling.
Additional Modeling Notes
The models are both 1/48 scale.
I used Eduard photoetch and Eagle Strike decals for
both.
The P-47 was painted with Tamiya – black with a
little blue, lightened with a touch of white on the uppers. The
undersides were painted with three shades of Alclad II. Nothing like
starting with the most difficult. I tried Tamiya’s suggested upper
color, but it looked too light for my taste, particularly when I
cokpared it to photos of the original 56th black airplanes. I think I’ll
strip the decals, and repaint the P-47, with an M-model I’m stuck with
56th FG colors. Although except for the cockpit details and engine
magnetos, who'd know if it was repainted as a D-25? There’s some
modeler’s creed that prevents me from doing that.
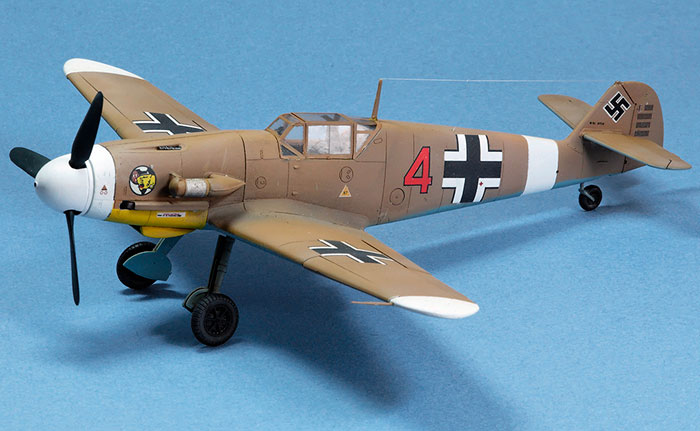
The 109 was painted with Polly Scale. When I selected which decals to
use, I wanted desert camouflage; white nose, wingtips and fuselage band.
I didn’t want a complete yellow nose. I also wanted an aircraft from
I/JG 27 with unit badge – viola! Red 4 of Hans-Arnold Stahlschmitt.
I’m now working on a Hasegawa P-51D, from the 357th Fighter Group. B6-O
“Old Flak Joe”. Lots of great photos in the Eagle Publications “At War
With the Yoxford Boys” from a couple of years ago. Better in some ways
than JG 300.
Click the thumbnails below to view larger
images:
[../../photogallery/photo00023258/real.htm]
Model, Images and Text
Copyright © 2007 by Dick Powers
Page Created 08 October, 2007
Last Updated
24 December, 2007
Back to
HyperScale Main Page |
 Home
| What's New |
Features |
Gallery |
Reviews |
Reference |
Forum |
Home
| What's New |
Features |
Gallery |
Reviews |
Reference |
Forum |