|
Aki's 1/72 scale
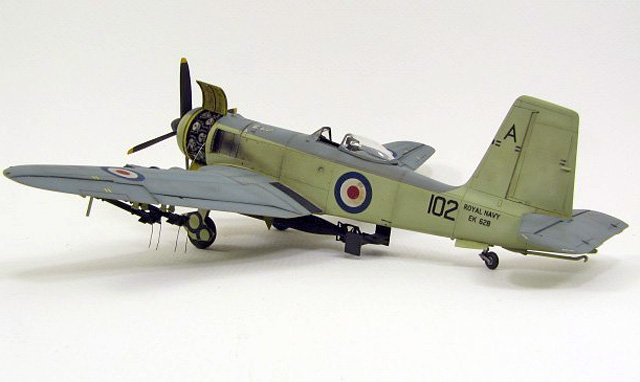
Blackburn Firebrand TF.Mk.5
by
Mike Moore
|
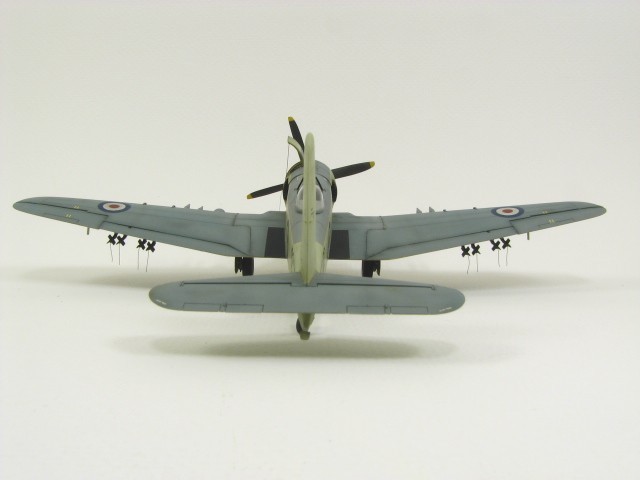
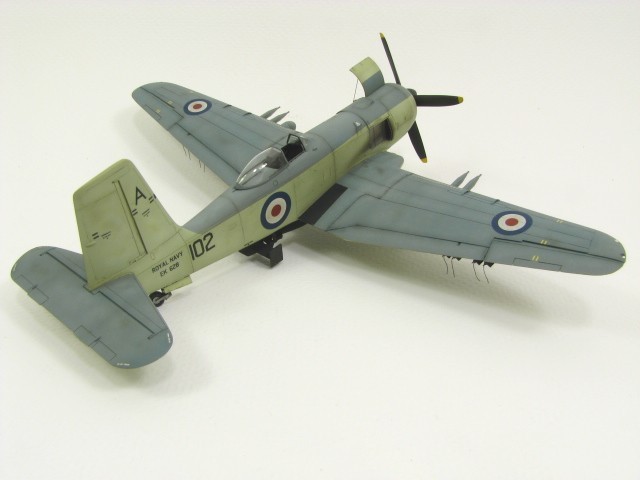
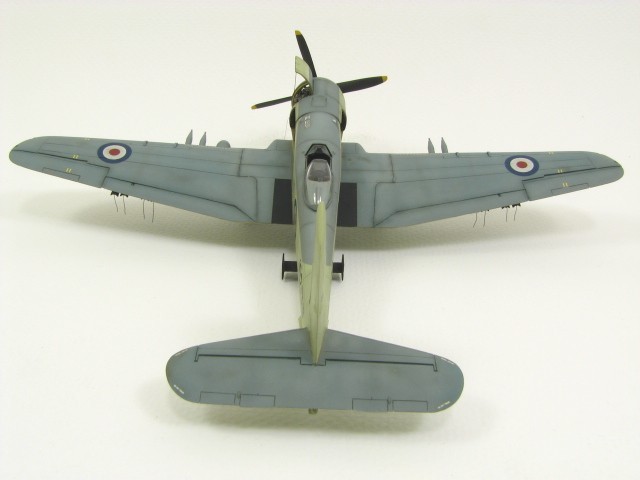
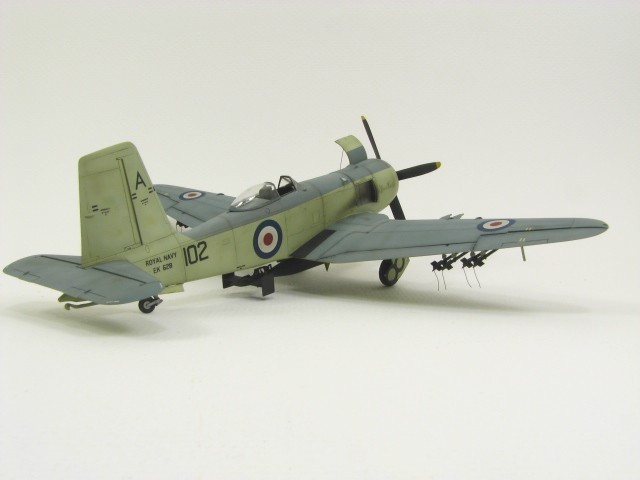
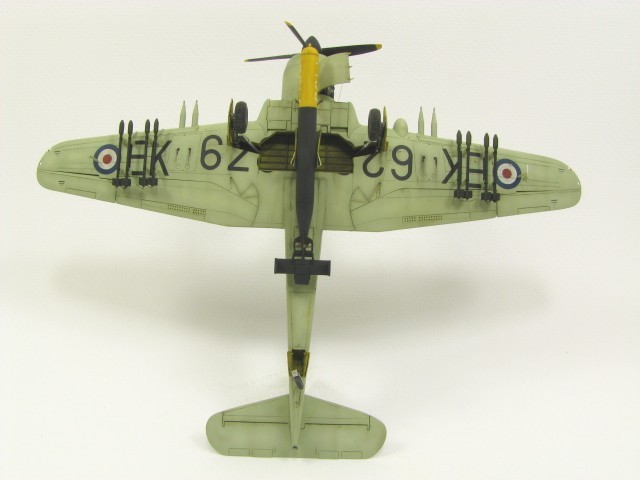
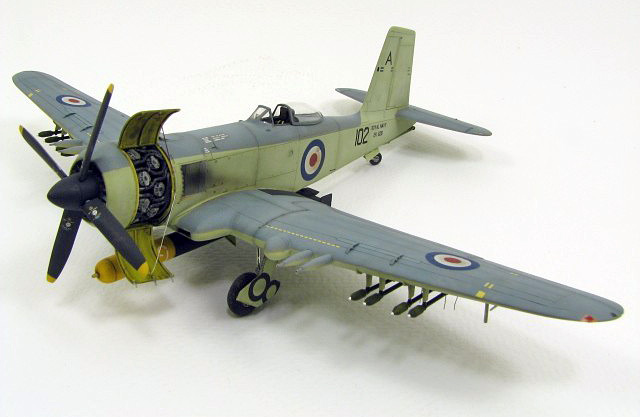
Blackburn Firebrand TF.Mk.5 |

HyperScale is proudly supported by Squadron.com
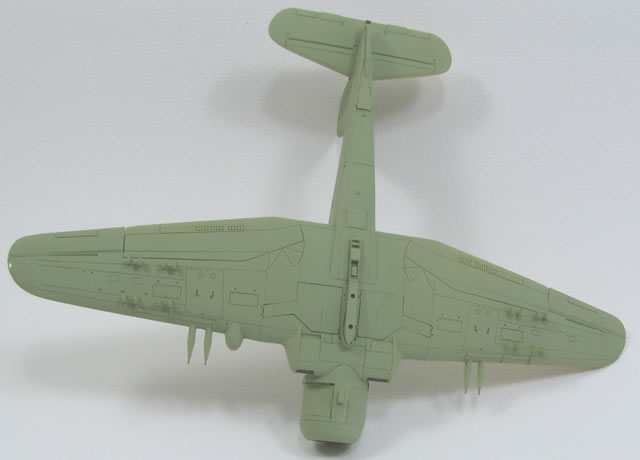
Let me say first that the reviews you may have seen touting the engineering and quality of this kit are, in my opinion, true.
I struggled with the price tag, I really did. $80 US for a 1/72 scale kit of a single engine prop plane seems exorbitant to say the least. But I obviously gave in and ordered one.
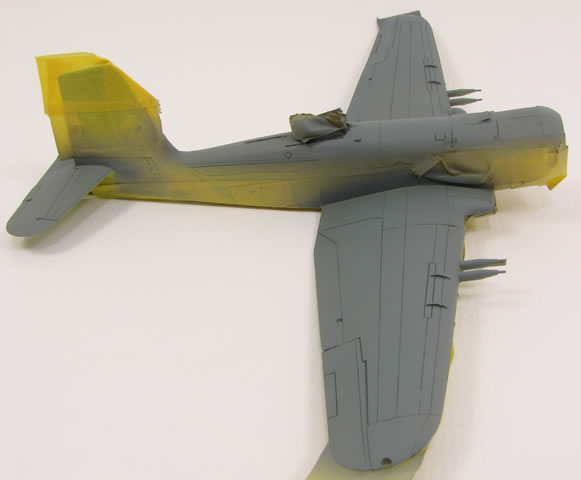
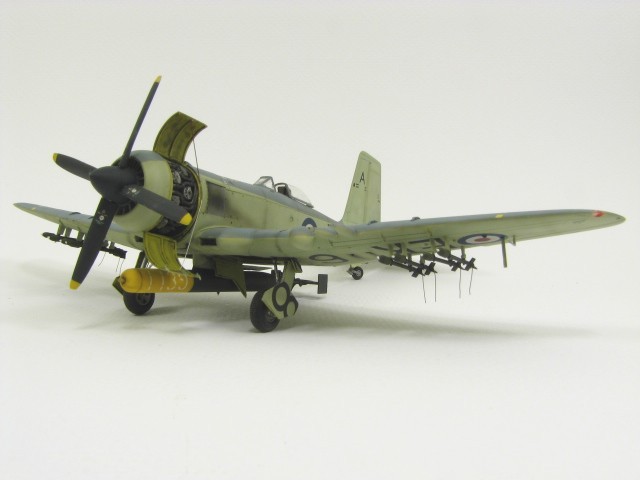
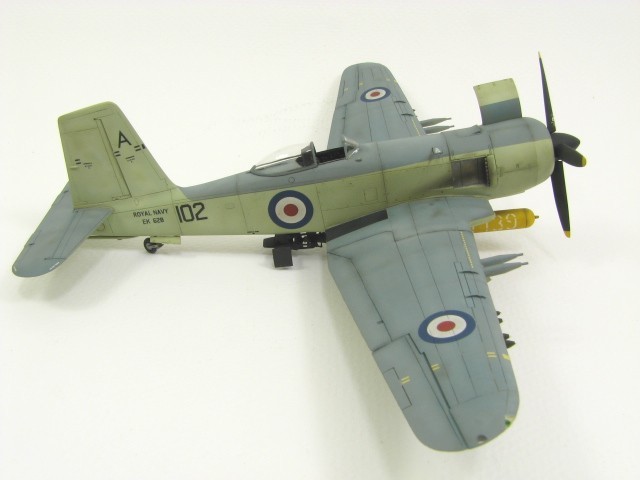
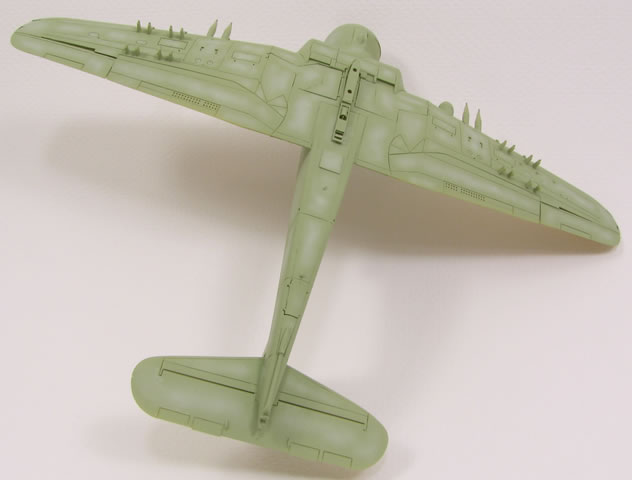
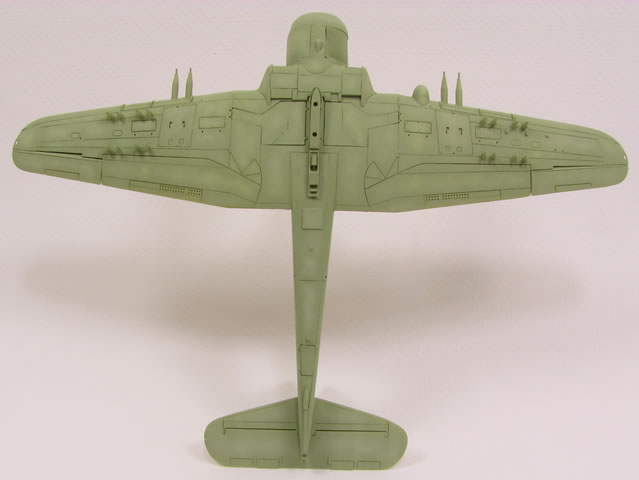
All I can say is that 1) I really hope my Wife never finds out how much I spent on it; and 2) in my opinion, it really is worth every penny. The castings need to be seen to be believed. If it weren’t for some of the finer details, like the perforated canopy rails or the engine and manifolds, you could be forgiven for thinking this was an injection molded styrene kit in the box. The fit is near perfect, and the end result is pretty stunning. If you are looking for a good first all resin kit (that would be me), look no farther. Just be careful of the trailing edges of the wings, if you don’t handle them carefully you may just cut yourself.
After staring at the kit on the shelf for a few weeks, intimidated by it’s quality, and not wanting to fail it, I finally dug in and started. (As a friend put it, “don’t worry, it’s only money”) While I can’t say my build was completely trouble free, I can say that the vast majority of the problems were entirely my own, the fixes were simple, and I don’t see much that can be improved upon. For instance, I can’t really blame AKI for my losing the tail gear doors!
I built the kit largely out of the box. To be honest, there just isn’t much to be added. This was all I could think of:
-
Added brake lines to the main gear with tin wire, secured with strips of Tamiya tape
-
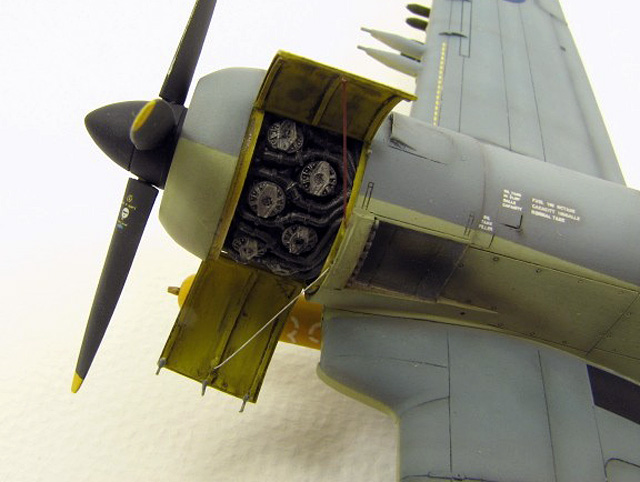
Added ribs to the open cowling panels, and cowling latches with strip stock
-
Added the upper cowling panel support from steel wire and the lower panel retaining cord with invisible thread
-
Added ignition wires to the rockets with strands of wire
-
Stole a set of seat harnesses from a Special Hobby Sea Fury
-
Replaced the tail gear doors with sheet stock (only because I managed to loose the kit parts)
-
Replaced the gun barrels with hypo tubing (again, only because I managed to knock the end off one of the barrels and couldn’t find it to glue it back on)
As I, and other reviewers, have mentioned, the fit is spectacular. This kit honestly goes together as well as a Tamiya kit. The large locating plugs serve to lock the fuselage halves and the wings into very good alignment. A little bit of test fitting and perhaps sanding will result in a near perfect fit of the wings to the fuselage (I hurried a bit too much here and had to sand a small step out where the aft edge of the wings fit to the fuselage).

I used thin Cyano to glue the fuselage together; and because the wings had a touch of warp, 5-minute epoxy to glue them together so I had some time to get clamps set up. The wings were secured to the fuselage with thick super glue to give just a bit of working time to get the wings positioned right, but then grab instantly with accelerator.
As good as it is, there are a few things to look out for and/or keep in mind:
-
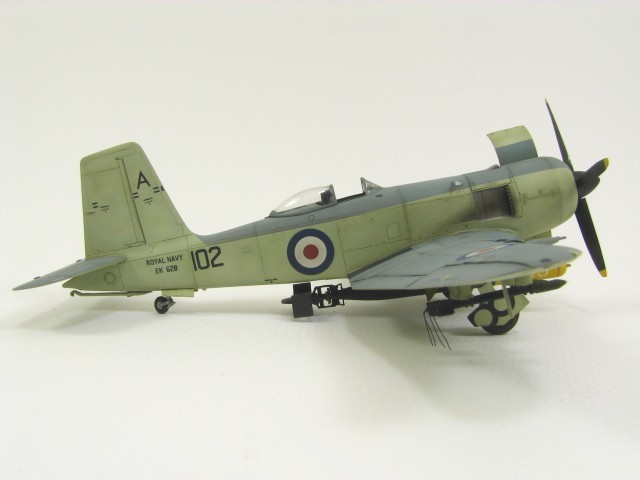
Be careful the torpedo fins don’t get twisted. They are quite delicate, and it is easy to have them end up with a bit of a twist, which will make it hard to get the torpedo mounted to the airframe in alignment (go ahead, ask me how I know).
-
The horizontal tail planes on my kit were a touch on the loose side. If I had used 5-minute epoxy I would have had more time to make sure they were perfectly aligned. The way they fit to the tail, if the fit is loose there is a possibility for them to exhibit roll, pitch and yaw…a contest bummer for sure! Mine show just a degree or two of yaw to the left, which is why my model is missing the yellow dashes on the tail planes…they highlighted the misalignment.
-
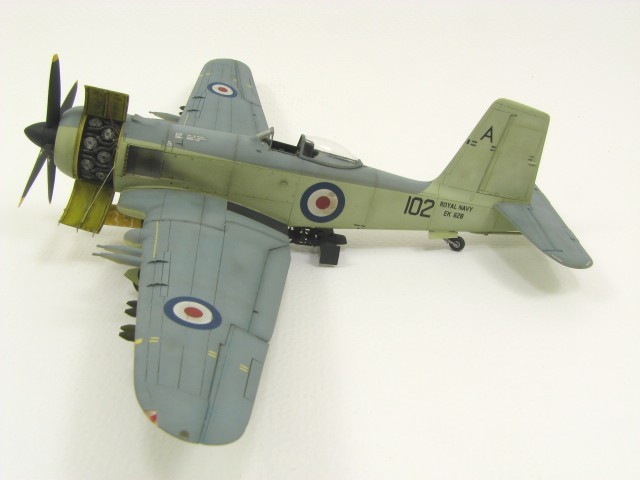
The cowling panels are cast in clear resin and make checking for good fit difficult. If I were to build another one of these, I would prime the cowling panel before trying to fit it.
-
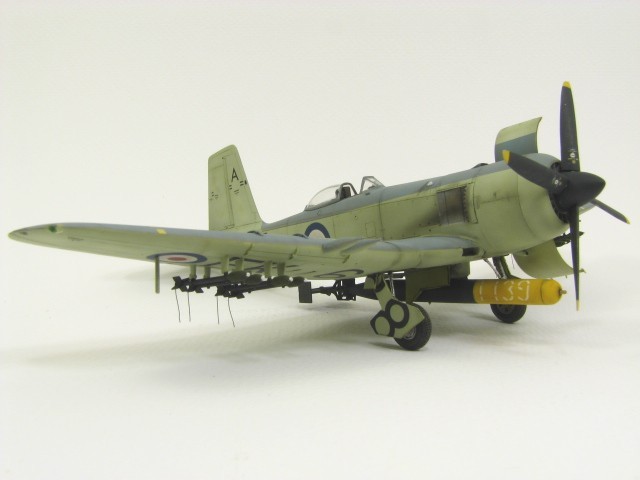
Use the main landing gear doors as masks for the gear bays. Brett called this one out in his review as well. Paint and weather the bays and then lay the gear doors in place. They fit incredibly well (you could do a gear up, in flight model with NO trouble) and I secured them in place with a small blob of blue tack. The real benefit is being able to apply the under wing serial decals with out cutting them. I learned this on a Tempest Mk V last year where the serials came all in one piece and I had the gear doors separate. I went through three sets of decals before I got them cut in the right places to get the right bits on the gear doors. If you apply the decals with the doors in place, all you have to do is use a sharp blade to cut the decals after they are dry.
-
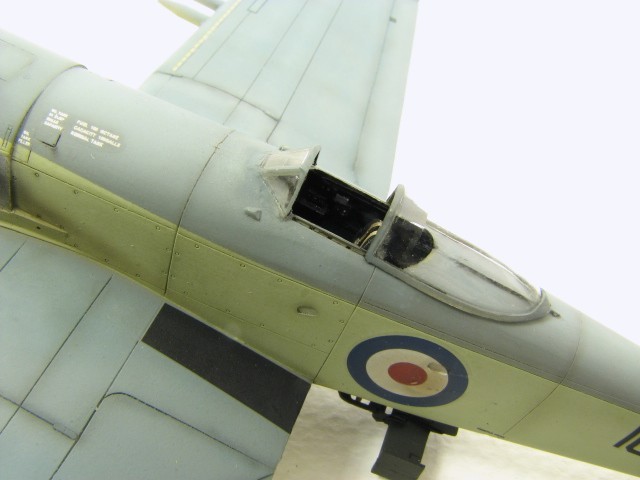
I had some trouble with the windscreen. I dipped it and the canopy in Future before masking and both looked perfect, but when I removed the Tamiya tape I masked the windscreen with, there was some really annoying pitting. After multiple coats of brush applied Future, it looks pretty good now, but a close look reveals some waviness. Thankfully nothing like that happened with the canopy.
Other than that, if you are used to resin kits, get to work. If you aren’t, take a deep breath and get ready to commit super glue or epoxy to resin.
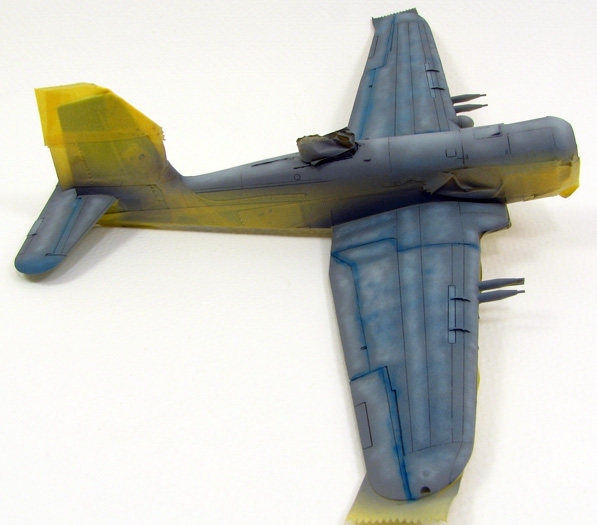
Aside from Alclad on the engine and landing gear, all the paint is Tamiya, thinned with either Gunze Mr. Color Thinner, or 70% Isopropyl Alcohol. I’ve come to mix the paint very thin. I add about 7 drops of paint to my airbrush’s half full 1/3 oz paint cup. I have to build up coverage, but I don’t have any trouble with clogging, and the finish is very thin and smooth. The Gunze thinner gives me a really smooth almost semi gloss finish, while the alcohol dries faster with just a bit more grain to the finish.
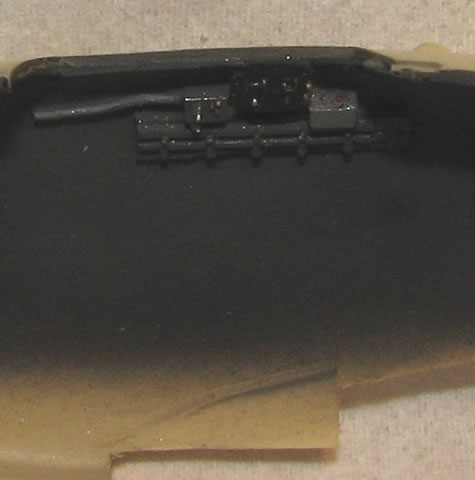
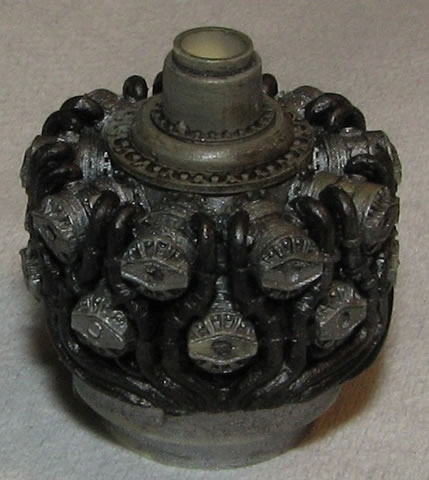
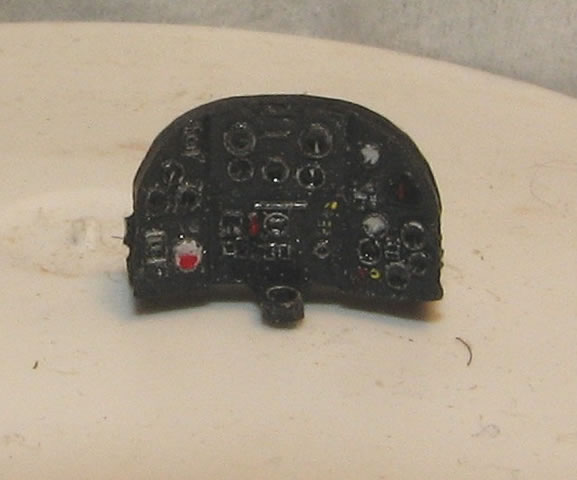
I sprayed the cockpit with a basecoat of flat black and then sprayed Nato Black at a pretty steep angle down onto the raised detail in an effort to get some shadows and contrast. To be honest, I’m not sure that with the small cockpit opening, and predominantly dark color it was worth the effort of two coats. The rest or the detail was picked out with various colors including silver, grey, red and yellow. I did my best (which isn’t great) to drybrush the instrument panel with silver to highlight the instrument bezels and tried to pick out the instrument detail with white and then added a drop or two of Future to the instruments for the glass. It’s not perfect, but in this scale, I’m happy with the result. The engine cylinders got a basecoat of Alclad Steel while the crankcase was sprayed gray. The manifolds were sprayed with Model Master Burnt Iron Metalizer. Then the whole mess got a very liberal wash with oils.
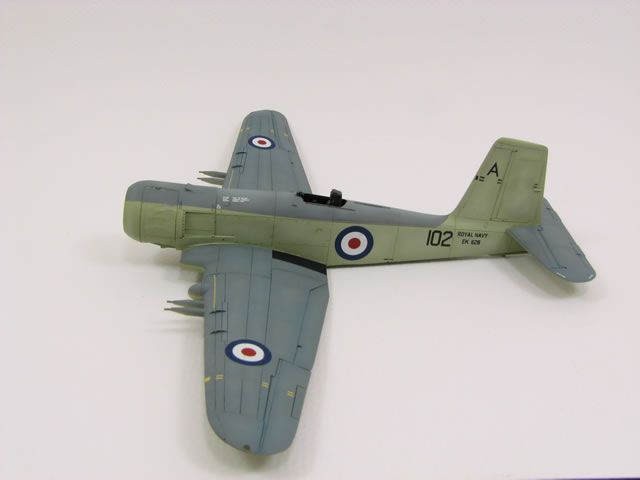
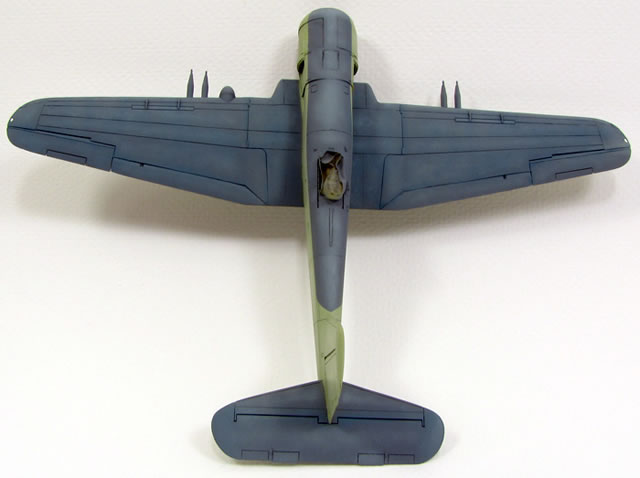
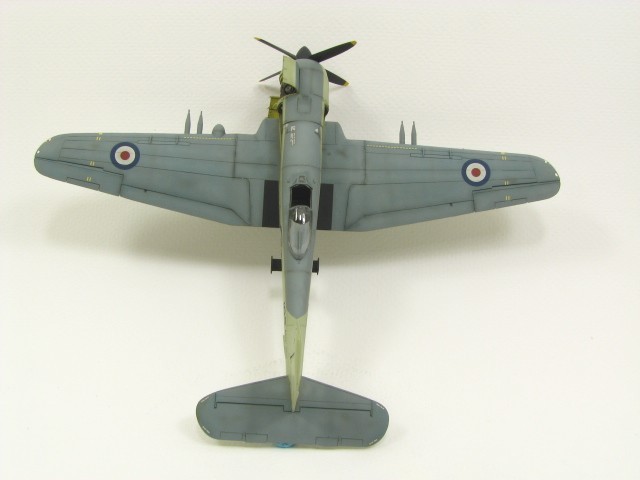
For the exterior paintwork I added some white to the Sky on the undersides, and mixed a batch of Extra Dark Sea Gray for the uppers. Although I’m happy with the final product, I’m pretty sure the EDSG came out too light. Both colors were post-shaded, or faded, with lightened mixes of the base shades; and in the case of the upper surfaces, I also added some blue to the mix for some more variation. I then blended everything back together with a very thin mix of the original base shade misted on until the fading looked just a little overdone as I find a flat coat really knocks the overall effect down.
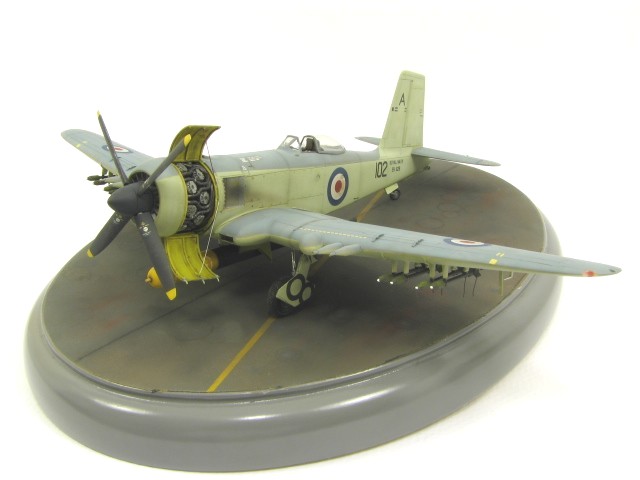
After a gloss coat of Future, I started decaling. Based on the early reviews, I didn’t expect any problems. But I wonder if the second batch of kits didn’t get some different decals. The decals in my kit conformed pretty well, but the carrier film is quite thick and even after trying to feather it out some with future and flat coats, and even some paint, it is still visible on some of the decals. Not in a huge way, but it is a touch annoying. I would consider cutting decals like the dashes on the wings and tail into individual segments. Keeping them aligned will be more challenging, but at least the carrier film wouldn’t be a problem. I also trimmed a lot of the carrier film away from the under wing serial decals, as well as separating the “E’s”, making it that much easier to maneuver them around the rocket stubs.
A flat coat following the decals got the kit ready for more weathering. I started with a very thin mix of Tamiya Flat Black and Red Brown mixed with the alcohol so it dries almost instantly. This mix is VERY thin, less than one drop of each color and I built up the effects very slowly. A visible streak is probably the result of 15-20 passes with the airbrush. I used this mix to highlight (or lowlight) the control surface joints, the wing folds, some select panel lines, and some streaking and staining. I also used it as the first part of the exhaust staining, with some plain flat black on top and a bit of clear yellow on the natural metal to replicate heat staining. The last of the weathering was just a bit of artist’s oils for fluid leaks and stains. I didn’t want to go overboard as I figured the planes just weren’t in service that long or used that hard.
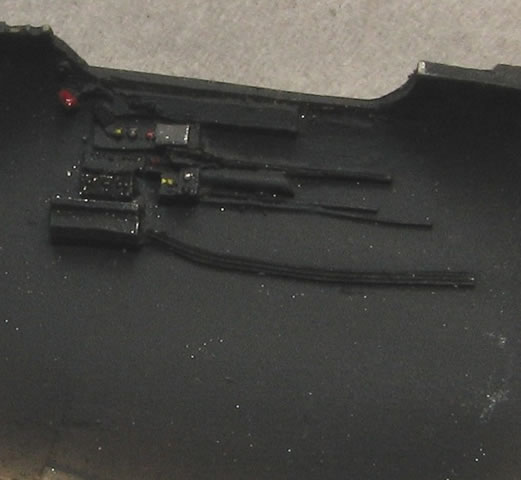
The final bits of construction were pretty straightforward. Before gluing the gear doors to the landing gear legs, I ran brake lines with fine tin wire. I had no references showing how they were plumbed, but I was just going for a little “gizmology”. Putting the landing gear together and mounting it proved very easy, although I did use epoxy to set the landing gear so I had some time to make alignment adjustments. When the tail gear doors went missing I was extremely grateful that the rear fuselage is very slab sided, making the missing doors a matter of about ½ hour to cobble together from sheet and strip stock. The rockets are very cleverly engineered with a small pin on the forward mounting shackle and a concave surface on the aft end, which makes them simple to mount and align. I also added ignition wires and left them hanging loose.
The only remaining challenge was mounting the torpedo. Like others, I discovered that when mounted per the instructions, the fins of the torpedo drag the ground. My first fix attempt was to simply push the nose of the torpedo down, but when I got the aft end up what looked high enough, the nose was so low the whole thing looked like it was being launched. After a couple more tries to get it mounted I finally cut the rear locating pin away and used 5-minute epoxy to secure it. I made sure the torpedo was straight and square by laying the model in the box top upside down with a piece of foam core board on the landing gear. This gave me a nice reference to judge the torpedo’s alignment by and I only had to hold the thing steady while the epoxy cured. Five Minutes rarely lasts as long as when you are waiting for epoxy to cure!
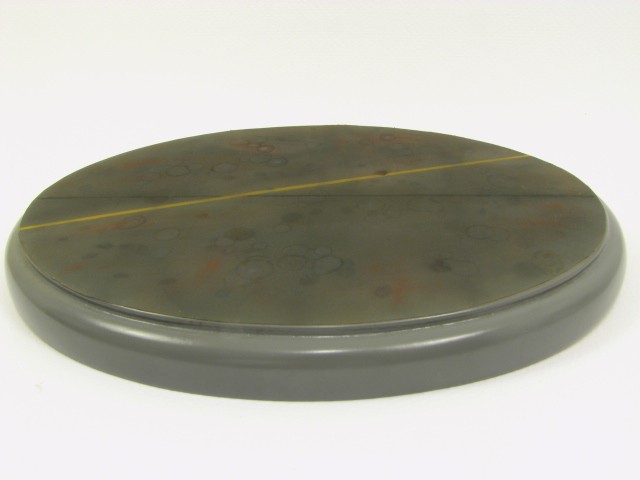
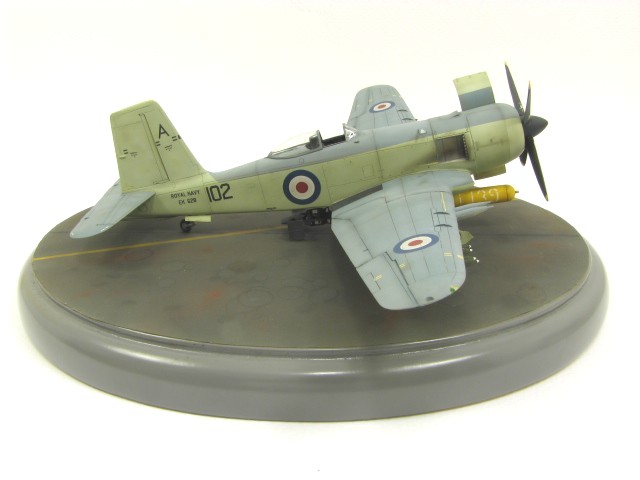
I also like to make a simple base for my models. They don’t usually take long to do compared to what they add to the model, and they give it just a bit of context on a shelf or a contest table. This one is a $4 basswood oval from a craft store sanded with 220 grit sandpaper and then primed with Rustoleum spray can primer and then finish coated with some satin finish gray spray paint. The carrier deck was simulated with 2000 grit wet/dry sandpaper. The stripe was masked and sprayed with Tamiya flat yellow and the rest of the deck was sprayed with splotchy coats of various blacks, grays and browns. Oil and fluid stains were done with artist’s oils and rust stains are weathering pigments.
After it is all said and done, this was a great kit. I had a blast building it and I can heartily recommend it.
If Aki were open to suggestions, I can only come up with two. First, cast the cowling panels in the same resin as the rest of the kit; I don’t think many willing to pay for the kit will leave the clear panels to view the engine through, and it would make it much easier to check for a good fit. Second, the one omission that bugs me is the complete lack of retracting gear for the inner main gear doors. There must have been some, but I couldn’t find any photo’s to guide me in scratch building them, and maybe that was Aki’s dilemma as well.
I also want to thank a few folks for their help and encouragement. First to Brett for suggesting I submit an article, and Phil Hale for banging me over the head to actually do it. Thanks also to Roger Fabrocini for painting and fiscal advice, and to Tony Bell for helping me figure out how to set up my camera so I could actually get decent pictures of the model. And thanks to the guys in Chattanooga for looking at all the stuff I drag to our meetings; along with outlets like HyperScale, they provide all the inspiration one could need to keep building and improving.
Model and
Text and Images Copyright © 2008 by Mike Moore
Page Created 2 April, 2008
Last Updated
2 April, 2008
Back to HyperScale
Main Page |
 Home
| What's New |
Features |
Gallery |
Reviews |
Reference |
Forum |
Search
Home
| What's New |
Features |
Gallery |
Reviews |
Reference |
Forum |
Search