|
Eduard's 1/48 scale
Messerschmitt Bf 110 C
by
Ron Petrosky
|
Messerschmitt Bf 110 C |

Eduard's 1/48 scale Bf 110 C is available online from Squadron.com
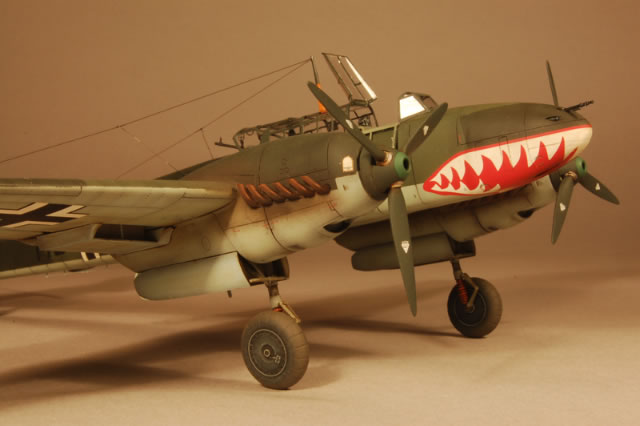
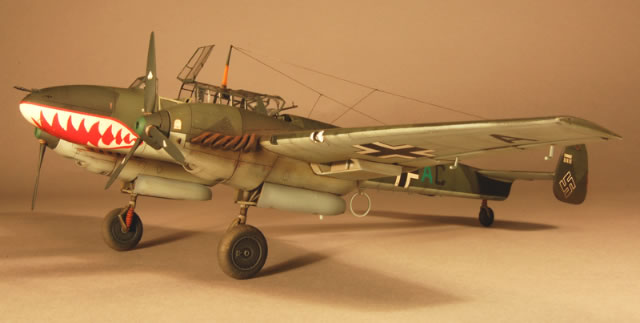
This is the Eduard Messerschmitt Bf 110 C in 1/48 scale.
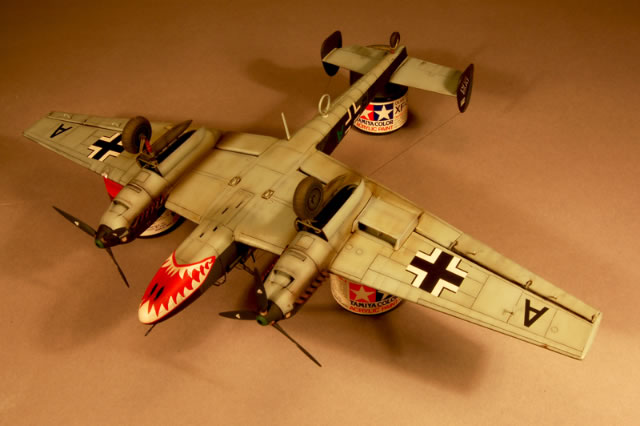
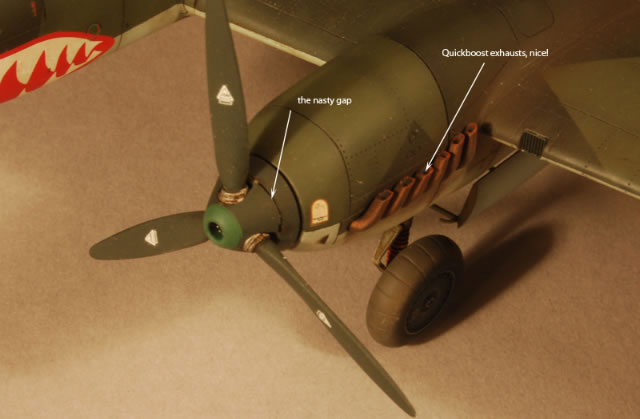
This is my second Eduard Bf 110 and this is the “C” version built pretty much out-of-the box with the exception of the Quickboost exhausts (Semi-hollow, very nice and much easier to install than the kit’s parts but needing a bit of sanding of the base to get it into the exhaust slot on the cowl). The markings I used are the “Battle-of-Britain” markings for a ZG76 machine. The famous and striking Hai-Maul (Shark mouth) markings are synonymous with the 110, like the P-40, and a default inclusion in any collection of 110s IMHO. I believe Jamie Haggo built this version (beautiful!) some time ago and was featured as a gallery article.
 Whatever my skills, they failed me somewhat with this build compared with my previous build of Eduard’s Bf 110E but I learned some things to avoid in future builds of the same kit (one of these days those Sicilian/North African schemes in my 110 Royal Kit will get me!). My hope is that by pointing out my screw-ups you may avoid making some of them yourself. I am also hoping that you might also have some suggestions as to alternatives methods to fix or avoid these problems in the future. One thing I did learn is to write down notes on your build process on the instructions of each kit if you know you are going to build another. If you screw up you’ll have some notes on products/techniques to avoid and if things turn out well you’ll be able to repeat that process. I do this for the brands and colors of finishing products I use on a build as well as the sequence of weathering etc. so I can match this if I need to complete subassemblies separately or repair goofs. Whatever my skills, they failed me somewhat with this build compared with my previous build of Eduard’s Bf 110E but I learned some things to avoid in future builds of the same kit (one of these days those Sicilian/North African schemes in my 110 Royal Kit will get me!). My hope is that by pointing out my screw-ups you may avoid making some of them yourself. I am also hoping that you might also have some suggestions as to alternatives methods to fix or avoid these problems in the future. One thing I did learn is to write down notes on your build process on the instructions of each kit if you know you are going to build another. If you screw up you’ll have some notes on products/techniques to avoid and if things turn out well you’ll be able to repeat that process. I do this for the brands and colors of finishing products I use on a build as well as the sequence of weathering etc. so I can match this if I need to complete subassemblies separately or repair goofs.
First off, I attached both halves of the spinners with what I thought was a minimum of liquid cement and then sanded them to blend their shapes together and minimize the gap between them. I proceeded to paint them to the overall finish thinking that I would just have to slip a single edged razor blade between the halves and they would pop apart. WRONG. I must have used too much glue and it took quite a bit of doing with the result you see. I tried to sand the mating edges smooth (there’s not much leeway as the prop has to clear the spinner openings) but the resulting gap is worse than the stock gap! On the “E” I did the same sanding and marked the alignment on the inside then popped the two halves apart cleaned them up a little and painted them separately (much better result).
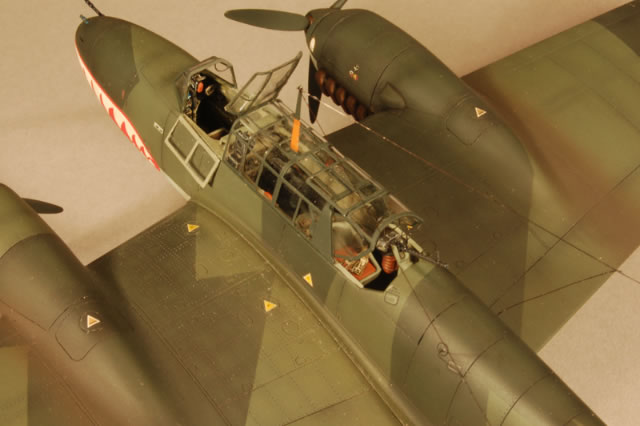
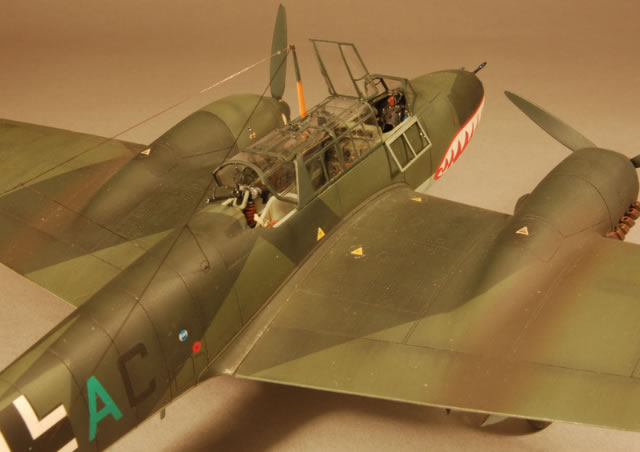
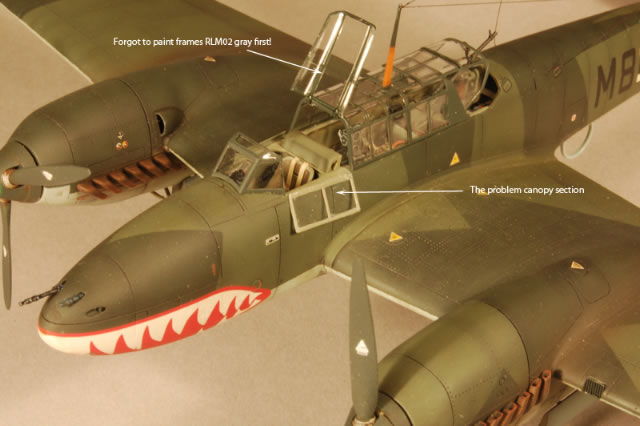
The most frustrating part of this particular build was the folded down pilot’s side canopy sections, especially the port side. First, I used 3M Photo Mount sprayed on the back of the etched frame part as the adhesive to attach it to the clear part (should have used white glue). I used a bit too much Photo Mount then used a cotton bud (Q-Tip) soaked in Goo-be-Gone to wipe off the excess that squeezed out. WRONG!, all kinds of hairy cotton filaments hung on to the frame and window. I had to take the two pieces apart which ruined the paint job on the parts, clouded the clearness of the future dipped panel and nearly destroyed the photo-etched frame. After polishing, reassembly, and repainting I used strong white glue, liquid cement, and instant glue in as many attempts to attach the panel to the port fuselage side, none of which held and each of which took its toll on the fuse side, clear plastic and photo-etched frame which I eventually tossed. At about this time the model came very close to being in the wall as opposed to hanging from it! I have not yet broken any golf clubs or fishing rods over frustrations during those activities and I pressed on with this as well but it was a close thing (letting a huge Brown Trout get away without the chance to photograph him was also a close thing for my tackle once!) The only model in my remaining memory that I destroyed in a rage of frustration was an A Model Yak 28. If you have built one you know why.
The final folding canopy section you see is about half the thickness of the original, attached with pins of stretched sprue and looks pretty funky. Next time I’ll make up a thin plastic sheet or scrap photo-etched faux hinge that will attach to the top of the cockpit sill and capture the edge of the foldable section of the canopy. I may also try using the provided etched window frame as the outside frame (the kit instructions have you use it for the inside, exposed part of the piece) and bending the slight overhang to form a lip that can be attached to the sill rather than the fuselage side. These turned out really clean on my Bf 110E but for the life of me I cannot remember how I did that one.
I also forgot to paint the main canopy frames RLM 02 before spraying the Black Green so the RLM 02 inside frames of the folded sections look somewhat out of place.
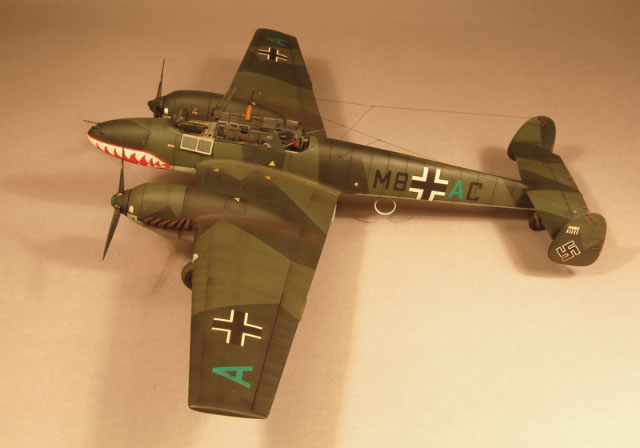
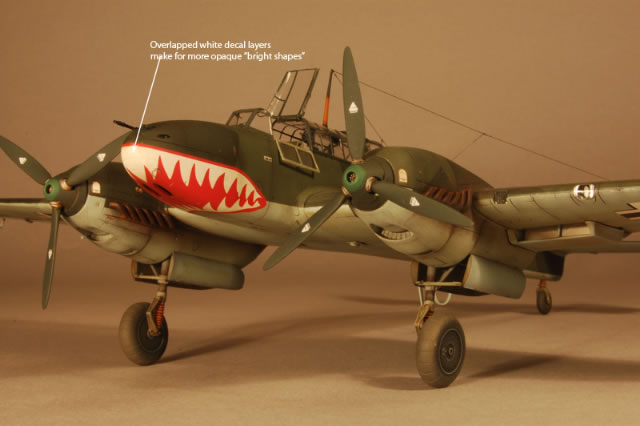
The last major goof was committed during the application of the shark mouth decals. Eduard gives you some extra white decal to fill in gaps in the white due to the imperfect join of the mouth shapes along the centerline. Problem is that the dark background of the upper camouflage causes the overlapping of the translucent white decal look more opaque, thus “whiter” than the single layers. It’s not too obvious but it really bugs me.
Other than repainting all the white by hand or developing a mask to spray that whole area white before applying the decals I don’t know what I could have done to get around this.
Anyway, It’s done, I don’t think it looks a disaster and I learned from the experience. I estimate these errors as someplace between Marylyn Monroe’s beauty mark and Freddy Kruger’s grotesque scars. Some builds go that way to keep us humble I guess. Thanks for reading and looking. Comments and suggestions welcome.
Luftwaffe Camouflage 1935-1940, Alain Fleuret, Kookaburra Technical Publications Pty Ltd., Melbourne, © 1981
The Modeller’s Luftwaffe Painting Guide, J.R. Smith, G.G, Pentland and R.P. Lutz, Kookaburra Technical Publications Pty Ltd., Melbourne, © 1979
Messerschmitt Bf 110 Vol.1, Marek J. Murawski, Wydanie pierwsze, Lublin © 2005
Model, Movie, Images and
Text Copyright © 2008 by Ron Petrosky
Page Created 3 September, 2008
Last Updated 3 September, 2008
Back to HyperScale
Main Page

|
 Home
| What's New |
Features |
Gallery |
Reviews |
Reference |
Forum |
Search
Home
| What's New |
Features |
Gallery |
Reviews |
Reference |
Forum |
Search