|
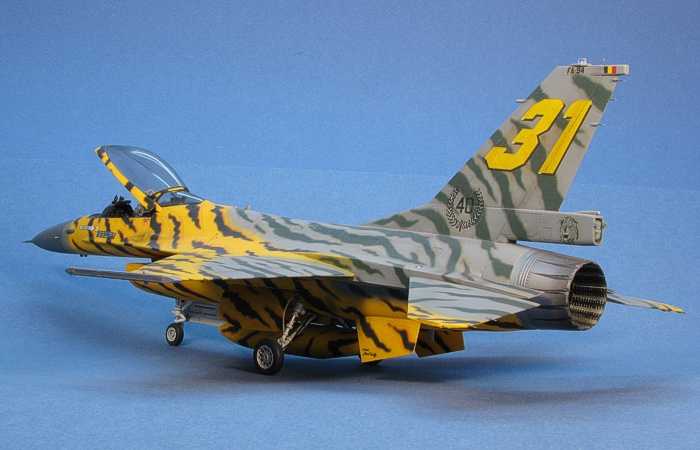
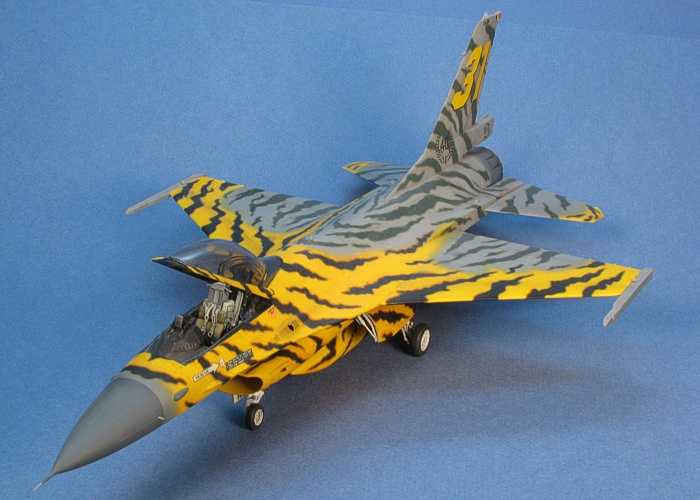
Hasegawa's 1/48 scale
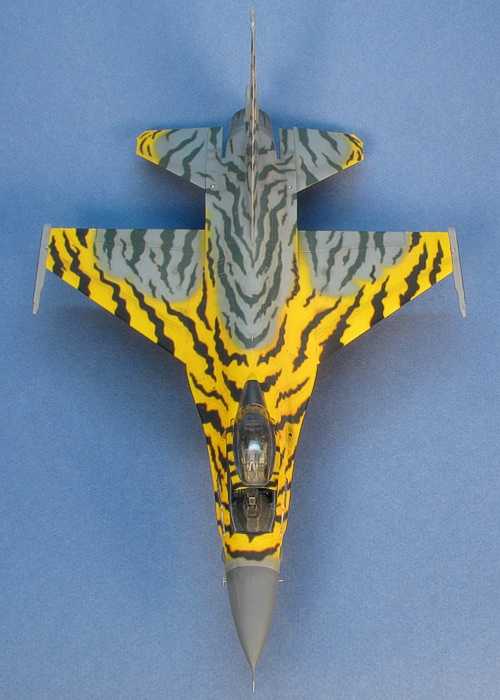
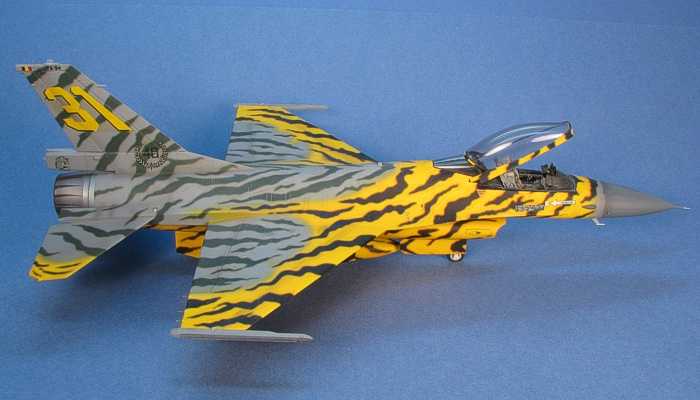
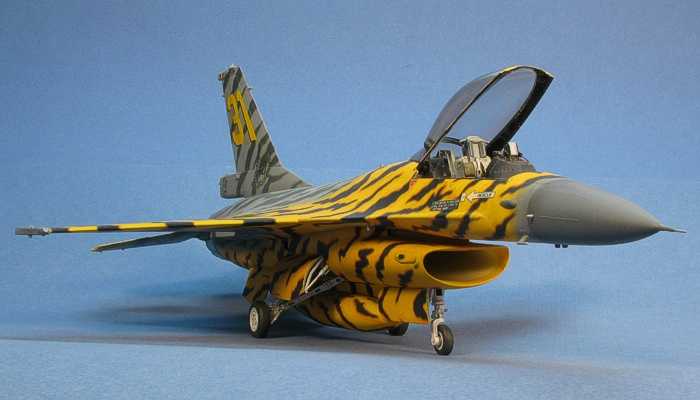
Belgian Tiger F-16
by David W. Aungst
|
Belgian
"Tiger Meet" F-16 |

Hasegawa's 1/48 scale F-16CG is available online from Squadron.com
Every modeler has a few projects that they have always want to do but can't quite
motivate themselves. This model is one of those projects for me.
I fell in love with the markings of this aircraft from the very first time I saw a
picture of the aircraft back in 1991. Of all the "Tiger Meet" marking schemes I
have seen this is the classiest in my opinion. But the airbrush work to accomplish the
markings was just too complex to consider.
Then, in 1992, I ran across decals for this aircraft produced by Daco and immediately
bought two sets (in case I messed up a decal, I wanted a replacement!).
The decals included all the tiger stripes for the entire airframe, printed in a style
that gave them the appropriate feathered edges. I could finally consider building the
model without the abusive airbrush work. I still hedged on it for six years before finally
deciding to "take the plunge" in 1998.
Anyone who has built the Hasegawa 1/48th scale F-16's can attest to the fact that they
are very simple kits. They build easily. Having already built an out-of-the-box Hasegawa
F-16 before, I decided to incorporate a significant number of after market details and
scratch-built enhancements into this project. The following lists all the changes I made
to the stock kit.
-
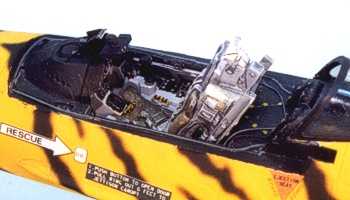
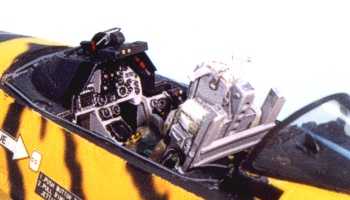
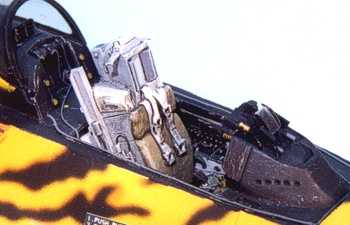
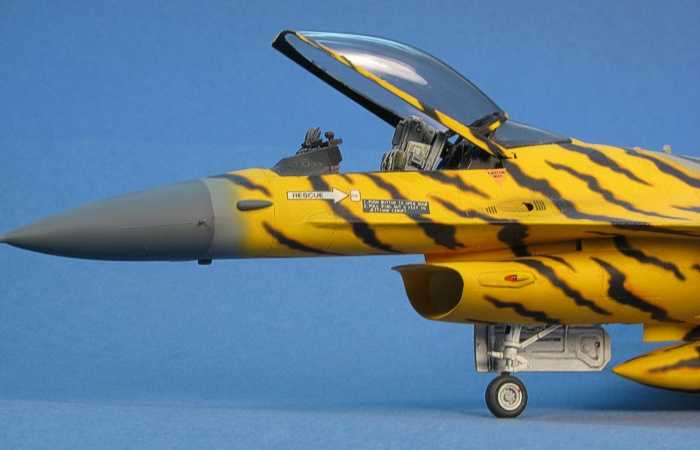
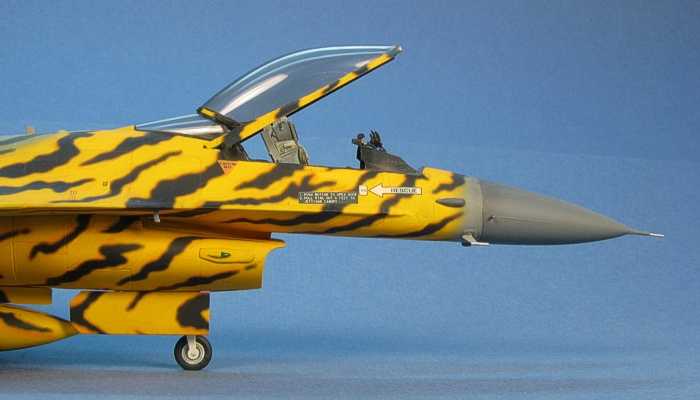
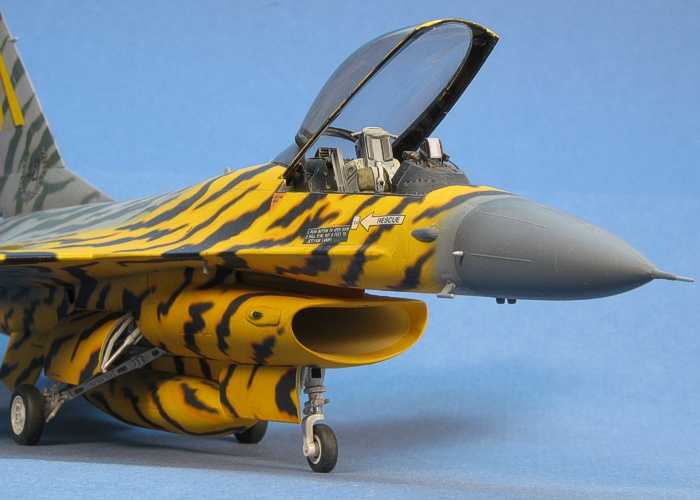
My building this kit pre-dates when Black Box created their F-16 resin cockpits, so I used the Verlinden F-16 Super Cockpit update set (stock#4387) in the kit. This set, used in its entirety, guts the kit cockpit and replaces it with resin and photo etched details. I incorporated the following details into the cockpit using both scratch-built items and items from the Verlinden set.
* Resin ACES II Ejection Seat
* Resin Control and Throttle Grips
* Etched Metal Cockpit Side Walls
* Resin Cockpit Air Conditioning Vents
* Oxygen Hose Constructed of a Spring Slipped Over a Copper Wire
* Etched Metal Rudder Pedals
* Etched Metal Cockpit Sill Details
* Etched Metal HUD
* Resin Canopy Actuator Motor
* Etched Metal Canopy Interior Details
-
I incorporated the Seamless Suckers F-16 Engine Intake (stock #SS-02) into the kit,
giving the model a complete intake duct all the way back to an engine face.
-
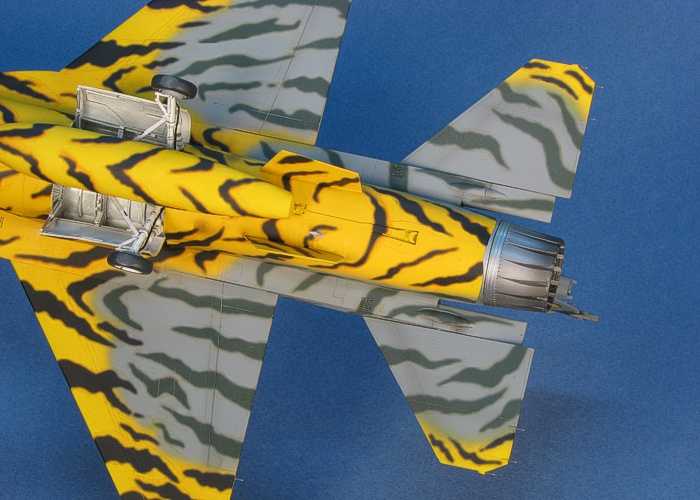
I incorporated the High Flight F-16 P&W Engine Exhaust and Afterburner (stock#4802)
into the kit, giving the model a detailed interior to the engine exhaust.
-
I scratch built the navigation lights on the wing tips and the tail top using clear
sprue.
-
I added the static discharge "whiskers" to the trailing edges of the wings and
tail using .010" brass wire.
-
I added hydraulic lines on the landing gear legs.
-
I sanded down the kit landing gear tires to create flat spots and simulate aircraft
weight on the tires.
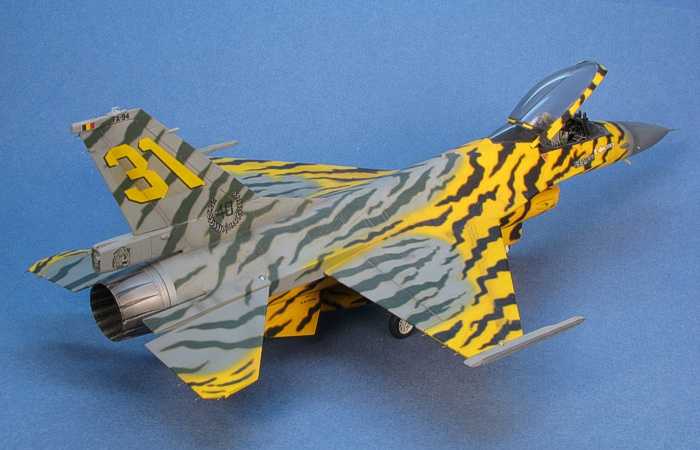
Paint
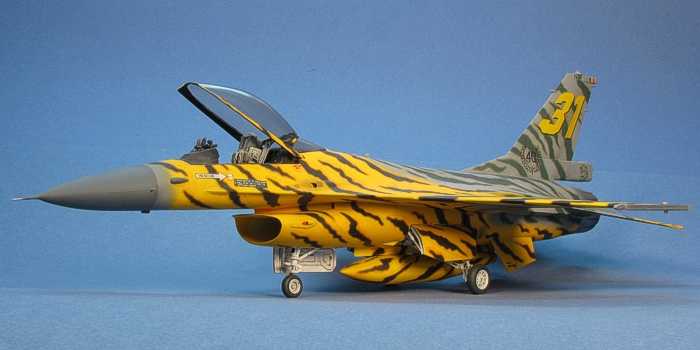
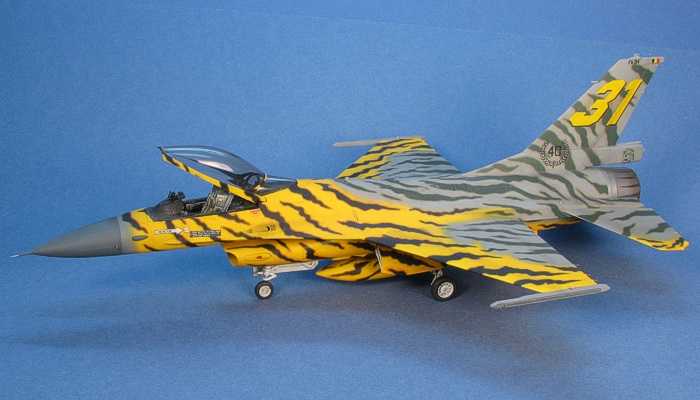
 I used Testors Model Master enamel paints exclusively for this project. The aircraft is
finished in overall Neutral Gray (F.S.36270) with the forward portions of the airframe
painted in Insignia Yellow (F.S.33538). In retrospect, after applying the decals, the
yellow needed to be a slightly lighter shade. Perhaps cutting the Insignia Yellow with 25%
white would have been better. By doing this, the orange/yellow shadowing on the black
stripes would have been more prominent. The model still looks good, and the orange/yellow
shadowing of the black stripes is visible. It is just subtler than what I have seen in
pictures of the real aircraft. I used Testors Model Master enamel paints exclusively for this project. The aircraft is
finished in overall Neutral Gray (F.S.36270) with the forward portions of the airframe
painted in Insignia Yellow (F.S.33538). In retrospect, after applying the decals, the
yellow needed to be a slightly lighter shade. Perhaps cutting the Insignia Yellow with 25%
white would have been better. By doing this, the orange/yellow shadowing on the black
stripes would have been more prominent. The model still looks good, and the orange/yellow
shadowing of the black stripes is visible. It is just subtler than what I have seen in
pictures of the real aircraft.
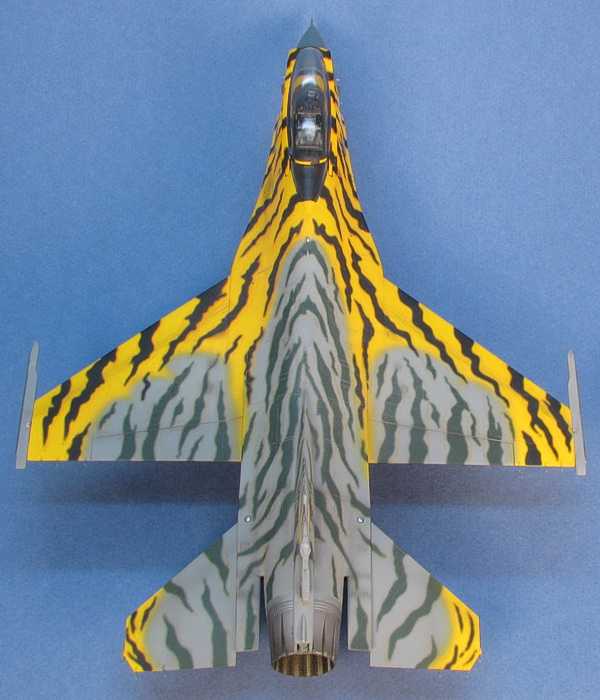
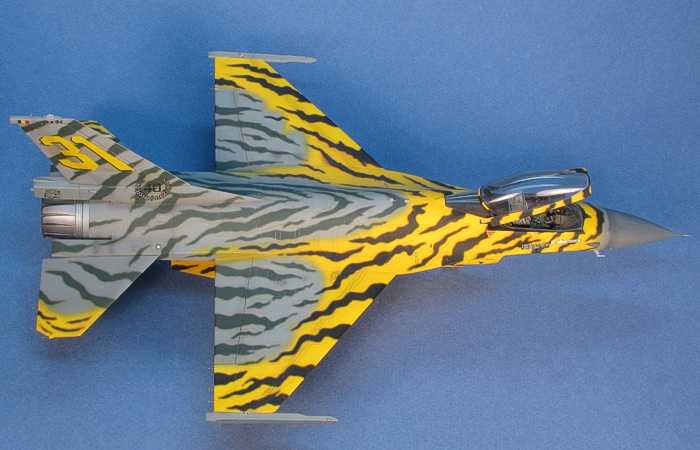
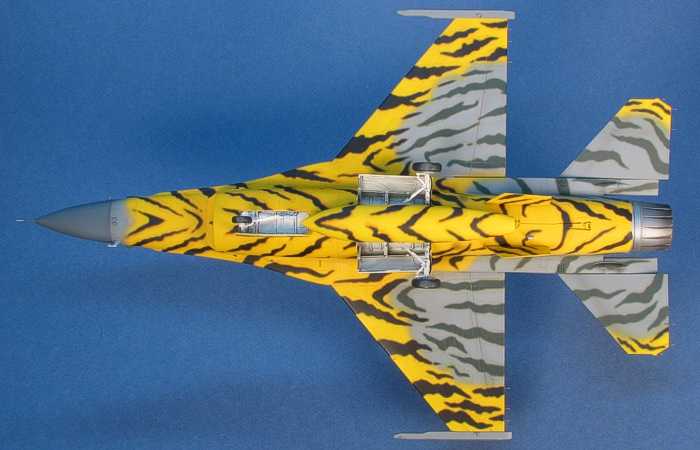
Decals
All the "plastic surgery" mentioned above was a drop in the bucket compared
to the chore of applying the decals to this model. The Daco decal set includes 212
separate decals that are the tiger stripes. To the credit of Daco, they provide full size
(1/48th scale) drawings to assist the modeler in the placement of the decals. But, this
still meant it was necessary to study the diagrams carefully before applying any decals
and hope that I did not misplace one of the decals as all the ones around it would be
effected. I did actually misplace a few, but not enough to cause too major of a problem.

|
Project Statistics |
|
Completion Date: |
21 May, 1999 |
|
Total Building Time: |
80.1 |
Research: |
1.6 |
Construction: |
10.3 |
Painting: |
25.0 |
Decals / Markings: |
29.3* |
Extra Detailing / Conversion: |
13.9 |
| * This
includes the application of 212 individual tiger stripe decals and the massive effort to
attempt to fix as much of the decal silvering as I could. |
The biggest headache with the decals (if you can imagine a bigger one) was that they
were not reacting to setting solutions. I normally use Solv-a-Set. This is one of the
stronger solutions on the market, and it barely touched these Daco decals. Decal silvering
was occurring all over the place. At the advise of a friend, I tried another brand called
Champ that "eats decals for breakfast", according to my friend. This worked
marginally better, but I still got a rather large amount of silvering. I ultimately had to
just say "oh well" and finish the model. A close look in the proper lighting
shows the silvering, but the busy markings distract you enough to allow this to go pretty
well unnoticed.

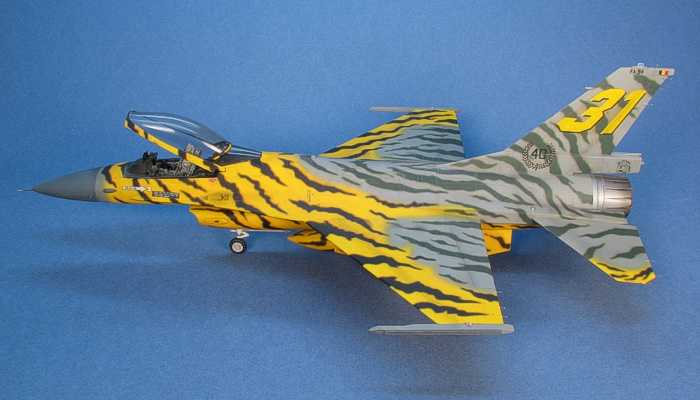
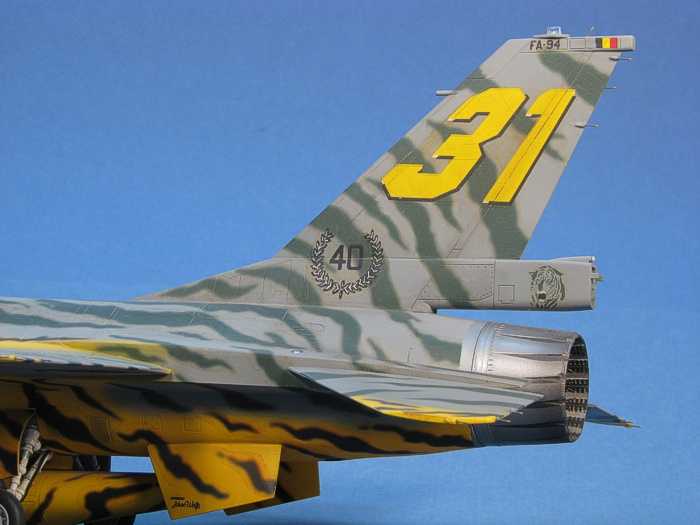
As
complete as the decals are, I did find one omission. The mouths on the tiger heads (on the
sides of the parachute housing under the rudder) were missing their teeth. The decals
provided a dark spot to represent the darkness of the open tiger's mouth, but the light
gray teeth around this spot either were forgotten as a color to print on the decals or
just plain missed when designing the decals. I added the teeth to these markings by
applying the tiger heads, then masking and painting light gray blobs for their mouths.
With this done, when I applied the dark spot decals for the mouths, the light gray formed
the teeth around the edges of the mouths.
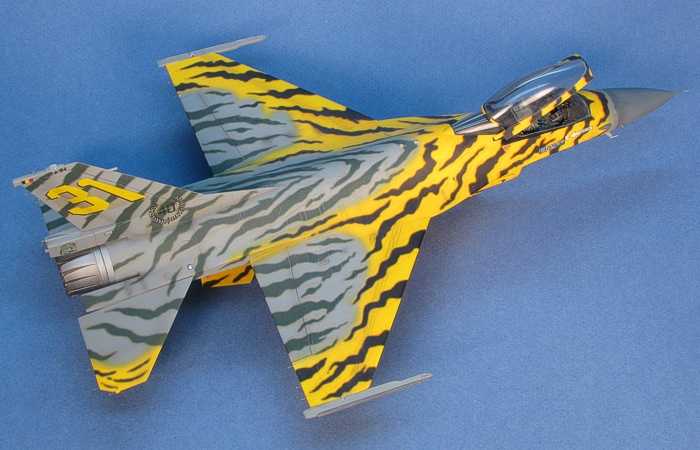
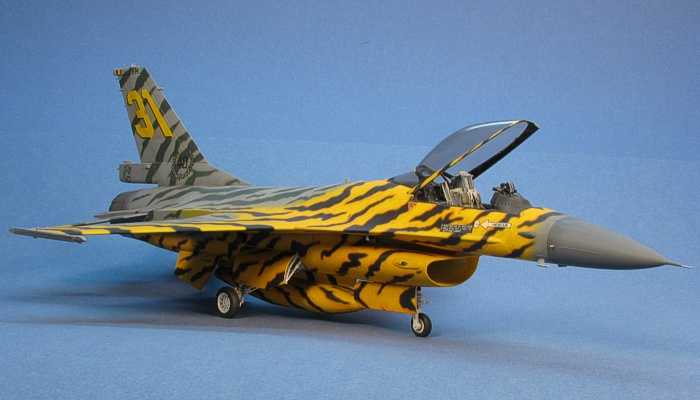
I used a combination of thinned down enamel paint washes and airbrush shading to
weather the airframe. As the aircraft was a "show bird", I tried to keep it
light and relatively clean. I completed the weathering with a final dry brushing of silver
to pop out the surface details.
This is a striking aircraft, painted up in all its tiger-striped glory. While Hasegawa's F-16 kits build up quite easily (even with various after-market updates), the real challenge to this project was in the painting and finishing. The model makes a great addition to my display shelves in the living room. With all the tedious work required to apply and position a couple hundred tiger stripe decals, I would not be in any hurry to build another model of this aircraft.
As a followup to the issues I had on the decals, I spoke with Daco and found out that the problems were fixed in a later release of the decal set. Apparently, I had a first release issue of the decals. A few years later, Daco re-released this sheet. This second release printing will now work with most all decal setting solutions and the missing teeth for the tiger on the para-brake housing are now included in the decals.
Models, Description and Images Copyright © 1999 by David Aungst
Page Created 24 July, 1999
Last Updated
16 April, 2009
Back to HyperScale
Main Page |
 Home
| What's New |
Features |
Gallery |
Reviews |
Reference |
Forum |
Search
Home
| What's New |
Features |
Gallery |
Reviews |
Reference |
Forum |
Search