21st Century Toys' 1/32 scale
F-4U-1A Corsair
by Rafe Morrissey
|
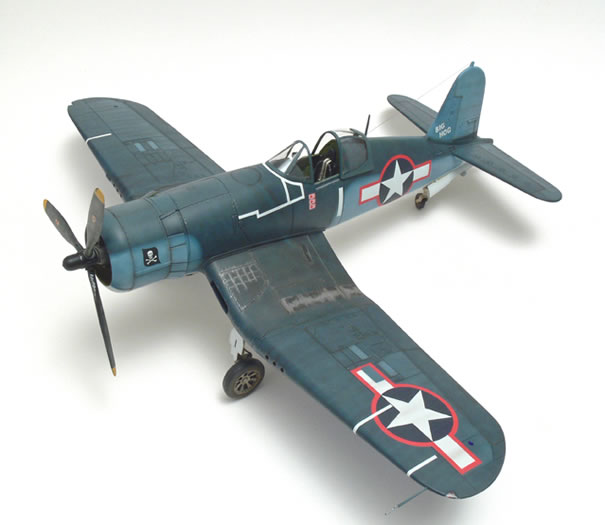
Chance-Vought F4U-1A Corsair |

HyperScale is proudly supported by Squadron
In Search of a Perfect 1/32 Corsair
As a die hard fan of the F4U Corsair, I have longed for a state of the art large scale kit of the “U bird.” While the old Revell kit will always have a special place in my heart, it only provides the basis for an extensive detailing project that only the most dedicated Corsair aficionado would happily attempt. I eagerly anticipated the release of the Trumpeter kit only to find that a mix of detail problems and molding defects required about as much work as the Revell kit demands. Finally, I was pleased to see that 21st Century Toys (21st Century Toys) announced a 1/32 scale kit. Could the third time be the charm?

Well, sadly, no.
Though the kit has many admirable features and HyperScale regular Roy Sutherland is to be commended for getting it to market, its genesis as a toy creates a number of complications that again require a good deal of effort. At this point, however, I decided to plunge ahead fearing I might never get a big scale Corsair on my shelf. I’ll walk you through the steps I took to get the 21 CT kit to a level I felt happy with and will also point out some issues to look out for with the other kits.
Beginnings
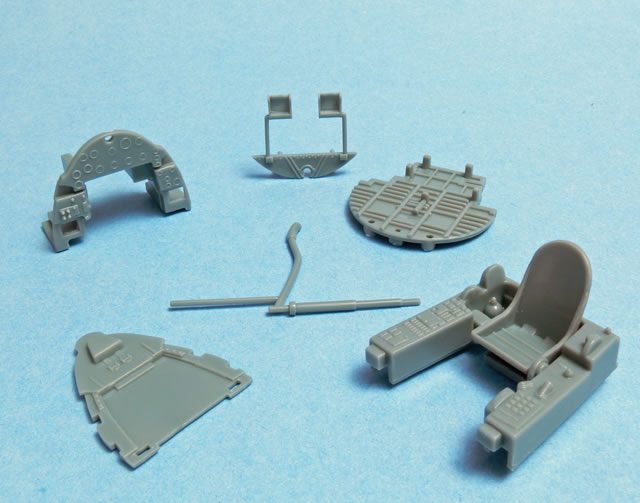
With most kits, the first place to start is the interior and the 21st Century Toys kit is no exception. Fortunately, the cockpit is one of the major highlights in the kit. The Revell kit interior is entirely inaccurate and the Trumpeter kit includes a floor that was not present in the early Corsairs up thought the -1D model.

The 21 CT kit interior is somewhat lacking in detail, however, what is provided is fairly accurate as presented. The kit parts have a strong resemblance to the Tamiya 1/48 scale kit in layout which is a pretty good place to start. I was trying to get the kit built to use in cover photos for our new Master Class title on figure painting, so I focused on a minimal number of detail additions to improve the appearance of the cockpit. I added the prominent foot rails which run from the dash under the seat. I also scratch built a new trim wheel, cockpit vent and a few knobs and switches for the console and bulkhead.
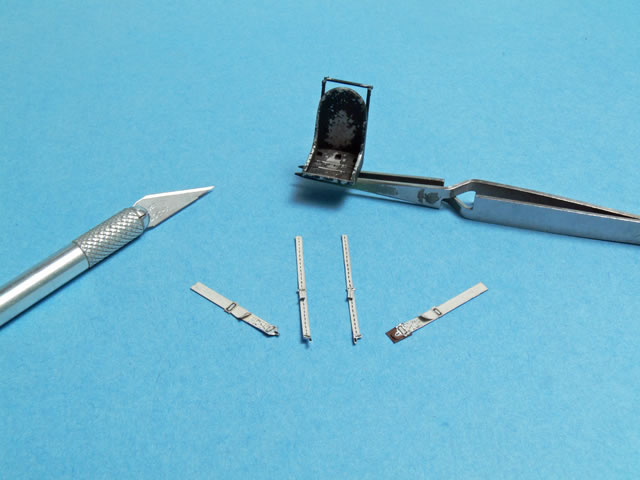
The kit seat isn’t too bad, but I added a plate with lightening holes to the seat pan and simulated the seat frame with styrene rod and sheet. I made up some tape seatbelts using the method described in my earlier article which can be found here:
http://www.hyperscale.com/2007/features/maskingtapeseatbeltsrf_1.htm

Finally, only the upper portion of the oxygen tank on the sidewall is represented, so I cut the nose off of an old Revell 1/32nd scale Huey rocket and shaped it to create the bottom portion of the tank. A Quickboost gun sight finished things off.
Diversions
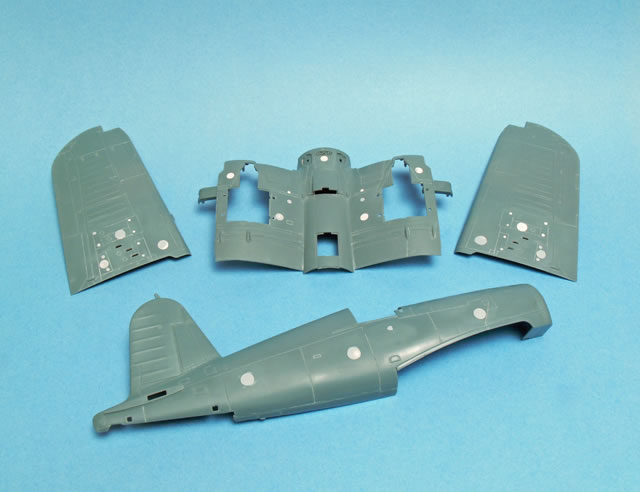
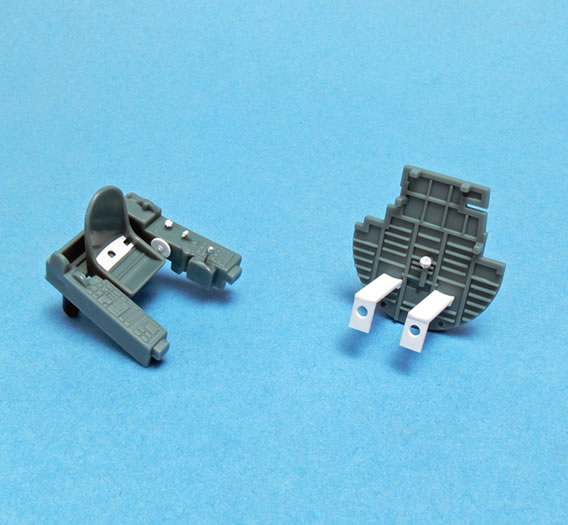
Having sorted out the interior to my satisfaction, I turned to dealing with the major downside of the 21st Century Toys kit, the holes. The kit was intended to be screwed together and there are numerous sizeable holes on most of the major parts. Plugs are provided to fill them but they are made from a softer plastic and I was concerned that they would not provide a firm backing for filler. Taking a page from Brett Green’s playbook, I opted to use epoxy putty, in this case Apoxie Sculpt. It is also necessary to fill many of the holes for the operating features such as positionable gear doors. I used superglue, styrene strip and epoxy putty in various combinations to accomplish this task. I also elected to build a -1A version which added some work.

The kit is optimized to produce the -1D version that was fitted with 4 rockets per wing. This created an additional 16 holes to fill, some of which bisect panel lines. A little patience and elbow grease will carry the day but it is a far cry from knocking together a Tamiya kit!
Details
Model building is all about the details and the kit has plenty of good and bad points to deal with. On the plus side, the gear doors have nice detail on the inner surfaces and the wheel bays are closed in (unlike Revell) and do not have the ejector pin issues found in the Trumpeter kit. On the other hand, the ribbing on the inner surface of the gear wells is inconsistent, so I added strips of styrene to enhance them. The plastic in the 21st Century Toys kit is a bit different than most models in that it is much more resistant to solvent cements. I was concerned that it might behave like resin in this regard, but repeated applications of Tamiya Extra Thin cement had the desired effect. I do recommend reinforcing the major structural assemblies with superglue, however.
One major issue with the kit is the shape of the doors that cover the front of the gear struts. They are completely devoid of reality, so I fashioned replacements from styrene card using the Revell doors as a template. The strut lengths are different, so the new doors are a bit smaller than the Revell parts. In the interest of time, I did not alter the shape of the wheel well opening to match the new doors but it would be necessary to do so to be entirely accurate.
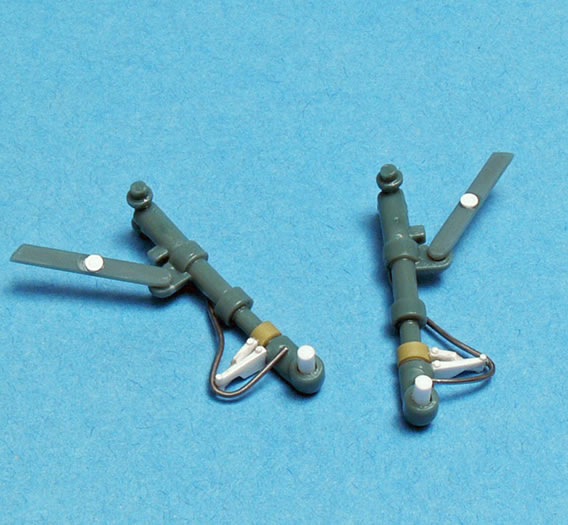
The kit landing gear struts are very oversimplified. I spruced them up a bit by adding scratch built torque links, brake lines and other details but ran out of time to add all of the additional retraction strut detail and springs that are really needed. This is a tough area on all three 32nd scale kits, so be prepared and have references handy.

The kit wheels are a bit off. I’m not a caliper guy, so I’m not sure of the wheel hubs are too large or the tires are too small but it is one or the other. On the plus side, the hub detail is fairly nice and the tires have circumferential tread which is not available anywhere else in this scale. I elected to use the kit wheels but there are plenty of options for aftermarket wheels if you can’t live with what is in the kit.
The tail hook is a bit flimsy and since they were left off many land based Corsairs to save weight, I deleted it. I did add the tie back hook to the tail strut but this is another area that could be detailed far more extensively than I had time for.
The power plant is a mixed bag. On one hand the kit engine is much better than what Revell provided. On the other hand, the Revell engine is poor beyond description. The Trumpeter kit has a very nice engine but it is a kit in itself. I stuck with the kit provided engine which looked acceptable after painting and weathering. I had hoped to add some wiring to the cylinders but again time ran short. The major problem with the kit engine is the oversimplified magneto covers but they don’t look too bad in the closed cowling.
The propeller is another issue. The shape of the blades does not correspond to either the -1A or -1D (which were different by the way). As I mentioned earlier, I chose to do the -1A, so a replacement prop was needed. Unfortunately, the aftermarket was of no help. The Revell kit has the right blades but the hub detail is very soft. The hub detail in the Hasegawa F6F Hellcat kit is much nicer but the blades are of the later -1D variety, so I combined the Hasegawa hub with the Revell blades with a bit of added detail to get an accurate -1A prop.
With the detail work described above, the model was ready to paint. I employed the techniques found in my previous article on painting which can be found here: http://www.hyperscale.com/2009/features/realisticmodelpaintingrm_1.htm
I also relied heavily on Brett Green’s excellent Osprey book on building the Corsair, and I heartily recommend it. The panel lines are a bit overstated and the separation line between the horizontal stabilizers and the elevators is incomplete but look OK under paint.
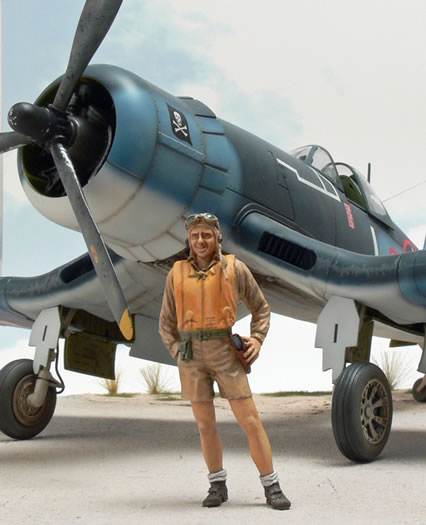
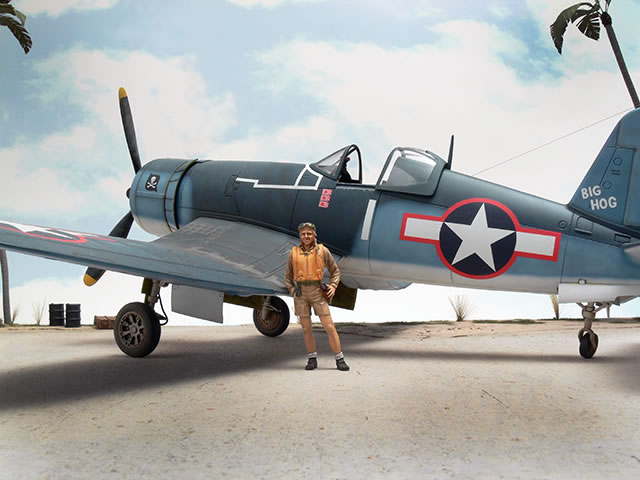
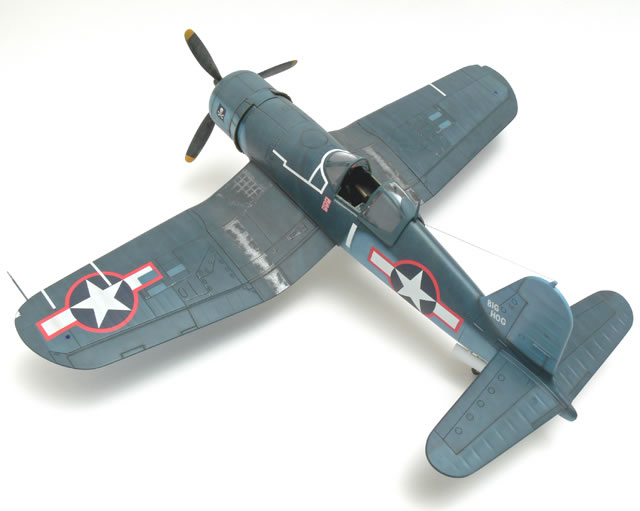
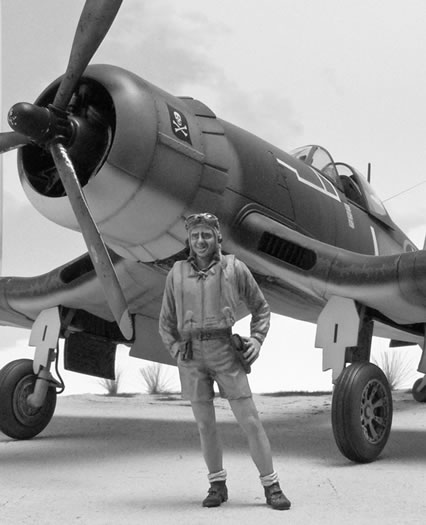
The finished model is an attractive complement to the new WWII USMC aviator. I only wish I had been able to finish the model in time to use the pictures on the DVD cover. There is a lot more work I would have done if I knew I wasn’t going to make the deadline.
Hopefully, the information in this article will be helpful to anyone seeking to tackle a big scale Corsair until a better option comes along. I’m still not sure what the best way to go is at this point. Next time I might try to kit bash the 21st Century Toys kit with the Revell. Any way you slice it, it’s a labor of love.
Model,
Text Copyright © 2008 by Rafe Morrissey
Page Created 22 October, 2009
Last Updated
22 October, 2009
Back to HyperScale
Main Page

|
 Home
| What's New |
Features |
Gallery |
Reviews |
Reference |
Forum |
Search
Home
| What's New |
Features |
Gallery |
Reviews |
Reference |
Forum |
Search