|
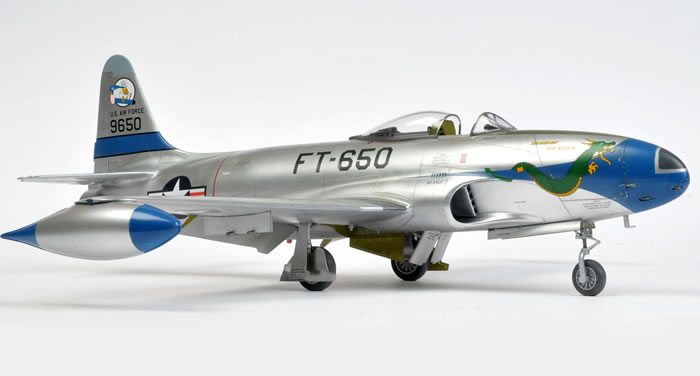
Czech Models' 1/32 scale
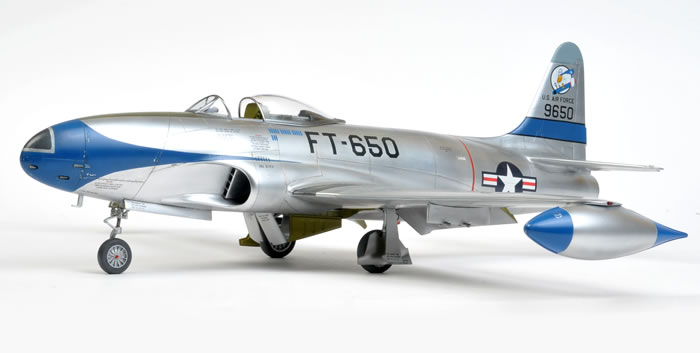
F-80C Shooting Star
by Mike Prince
|
F-80C Shooting Star |

Czech Model's 1/32 scale F-80C is available online from Squadron.com
Background
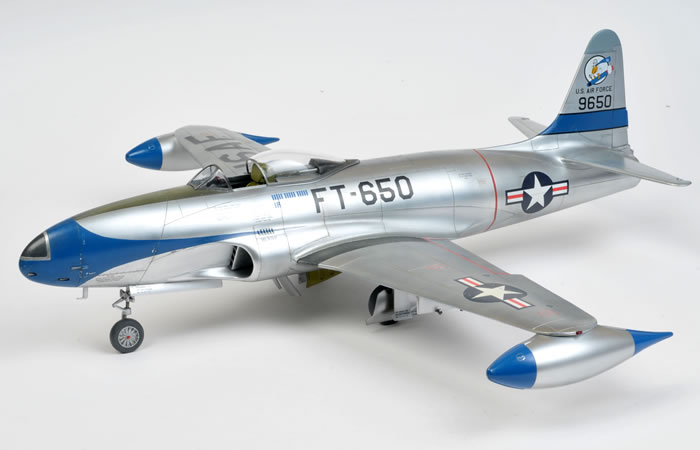
The F-80 was the USAF’s first operational jet fighter, with two YP-80As deployed to Britain and two to the Mediterranean theatre of operations in the last months of WWII. The two aircraft deployed to Britain failed to achieve operational status, though the latter two aircraft undertook several operational sorties as part of an in-service evaluation program. However, after this fairly inauspicious start, the definitive F-80C version went on to perform sterling service during the Korean War, initially in the fighter then ground attack roles.
The F-80C was built in greater numbers than any other variant.
Whilst their early sorties were air superiority missions, the vast majority were focussed on ground support, particularly after the arrival of F-86 Sabres able to take on the Russian flown MiG15s on a more equal footing. Despite this, it’s worth noting that the first ever jet vs jet combat victory was achieved by an F-80.
The Kit
The Czech model kit of the F-80 is the first, and only, injection moulded kit of this aircraft in this scale. You can find a detailed review of the kit in its box by following this link.
Its overall shape is very good, the fit is excellent, while the surface features finely engraved panel lines. There are a few criticisms as well; the nose wheel is backward, the cockpit and wheel wells are somewhat lacking in detail (though the PE instrument panel is excellent) and, without a little work, the windscreen is too far forward. However, all are easily fixed and can result in a magnificent kit. While a blow by blow description of building this kit isn’t necessary, it’s worth pointing out a few tips and corrections identified along the way.
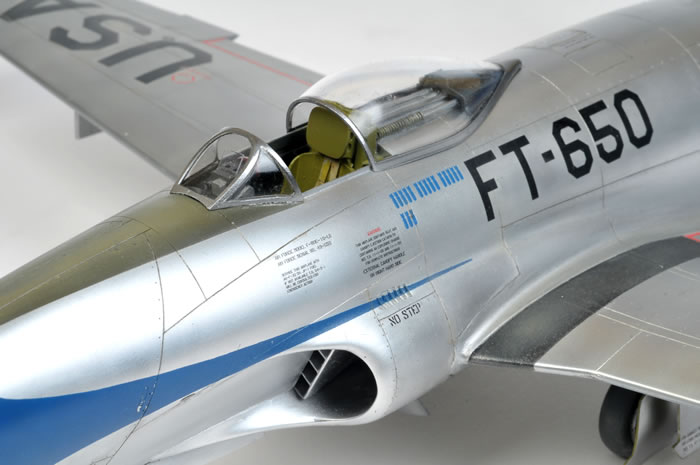
Cockpit
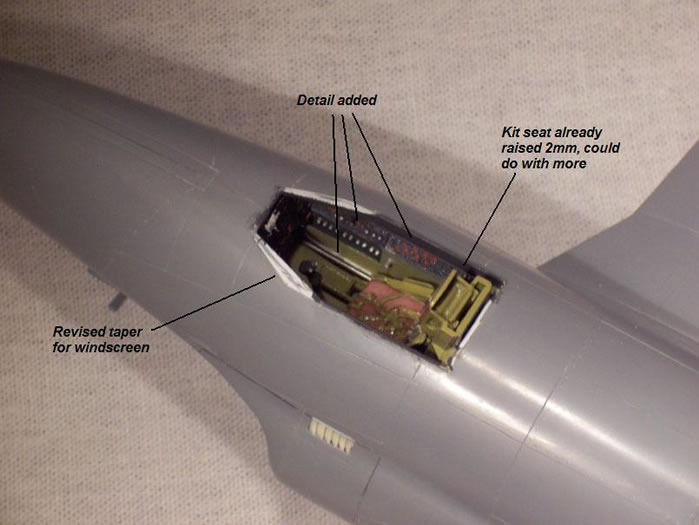
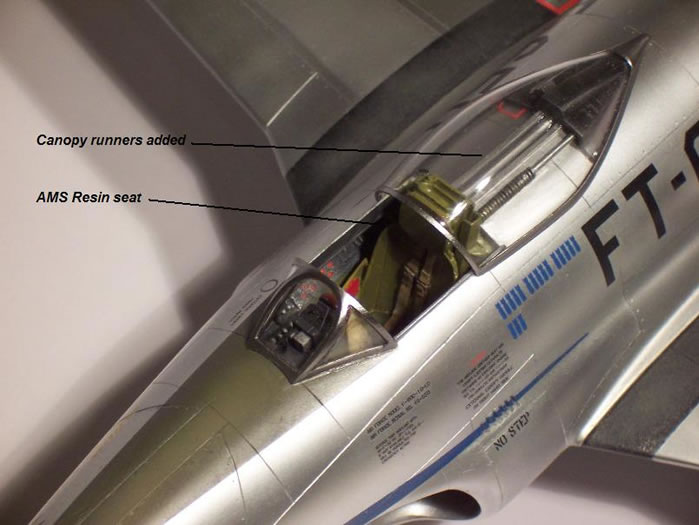
The kit includes a magnificent pre-painted PE set for the instrument panel. Instrument details are on a separate acetate sheet which shows through the holes in the panel. However, the instrument panel sits within a fairly simple cockpit tub that is rather lacking in detail. This was easily detailed from photographs by adding some switches from wire, (drill a series of small holes, feed wire through and glue from behind, then trim very short when all holes have been filled), as well as canopy runners inside the coaming. The resin seat is well detailed but appears to be for a T-33 rather than an F-80, though I could be wrong.
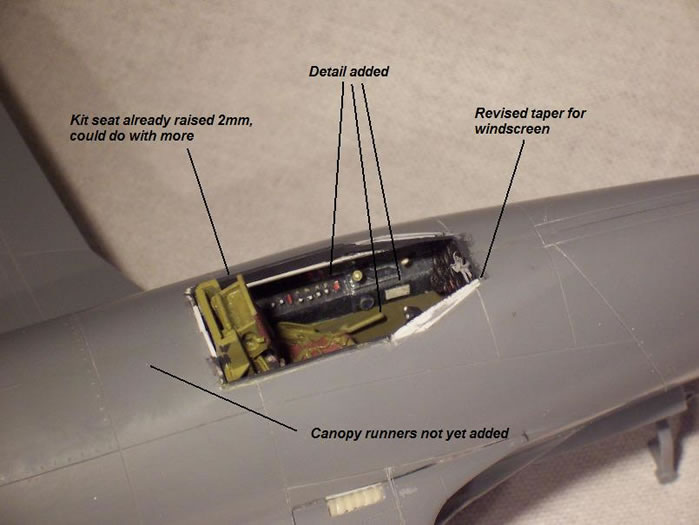
More importantly, the seat is a bit short so the headrest looks far too low once fitted unless the seat is raised about 3mm. Use trial and error before adding the footrests to the bottom of the seat. I actually chose to correct both these problems by using an after-market resin seat from AMS Resin. AMS Resin make a magnificent cockpit set for those so inclined – but I was too far gone to use the full set. Canopy tracks and an actuating ram were also added to the fuselage top just behind the seat.
Windscreen Position
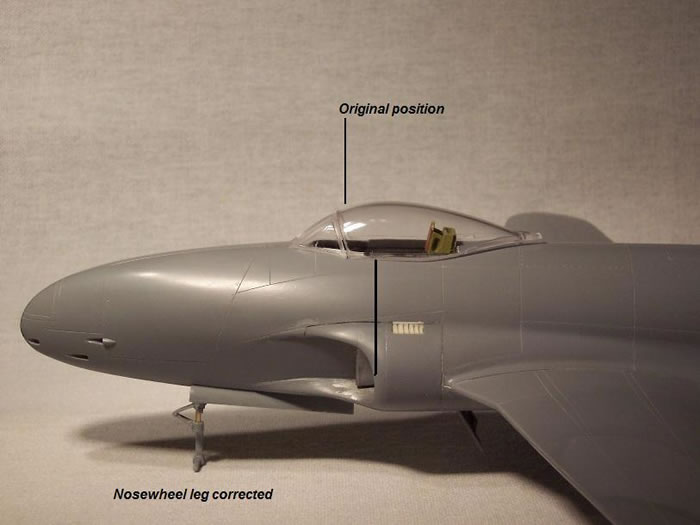
In looking at several side-on photos, something looked out of place in the nose area. After much consideration, I noted that photos and drawings show the rear edge of the windscreen to be about level with the rear-most part of the air intake opening. However, as moulded, the kit forces the windscreen to be placed further forward. The fore and aft position of the actual cockpit opening appears about right, but the tapered sides near the front of the opening flare outward to full cockpit width in too short a distance, forcing the windscreen to be incorrectly positioned further forward. I therefore corrected this by adding wedges of scrap plastic beneath the sides of the windscreen, allowing it to be positioned further aft.
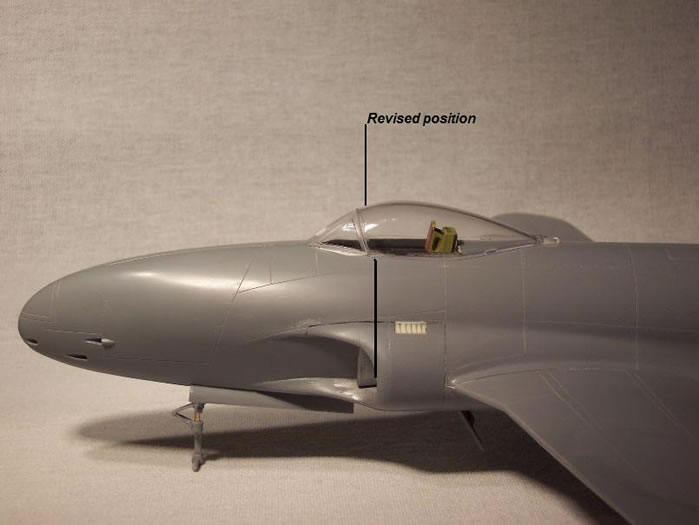
The accompanying pictures explain this much better than trying to describe the solution. In the final stages of construction I moved the gun sight back by the same amount. However, if you disagree, please ignore the advice.
Undercarriage and Wheel Wells
If only one change is to be made to the kit, it’s to reverse the nose wheel leg. The leg should be on the starboard / right hand side of the wheel with the wheel facing to port. I did this by removing the compression strut, drilling lengthways through the remaining sections of the leg, and inserting a brass rod to both correct the error and improve its strength. The rod goes right through into the fuselage. For the remainder, I shortened the main legs slightly by pushing them further into the wings, and detailed the wells from plastic sheet and sprue off-cuts, plus aluminium and copper wire.
The kit includes both injection moulded wheels and two very good but differing sets of resin wheels containing differing hub and tread patterns. I used the injection moulded items.
Air Intakes
This is the one area of the kit where fit proved to be a little challenging. I found the fit could be improved by scraping the insides of the mating surfaces where the lower edge of each intake fairing meets the lower fuselage in order to make them thinner. Further, I found that super-gluing only the upper edge to the fuselage, then gluing the lower edge later, worked better than trying to do all of it at once.
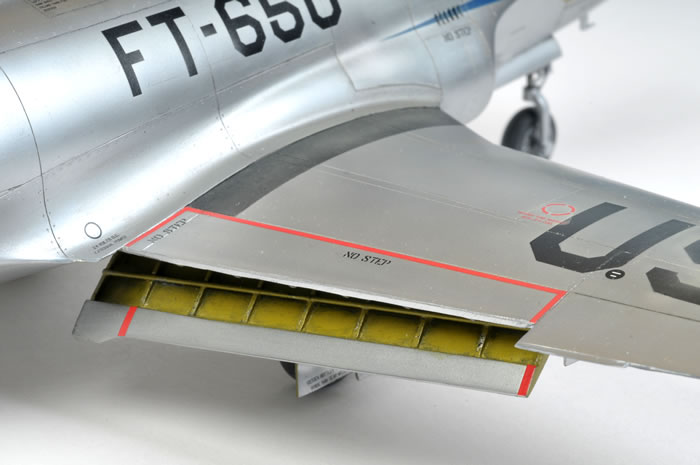
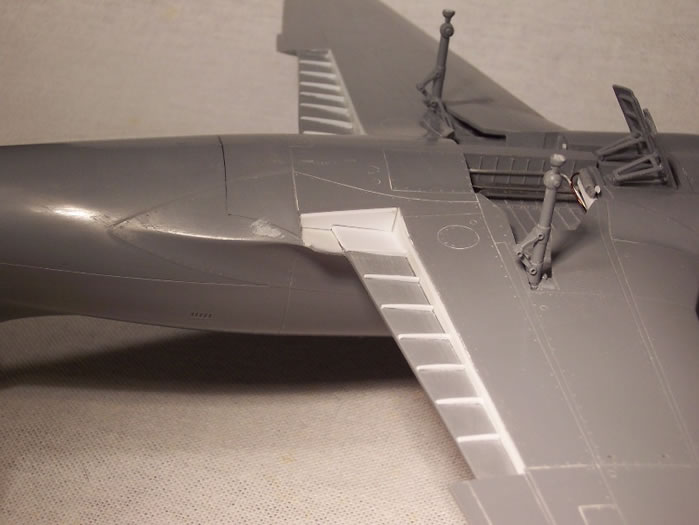
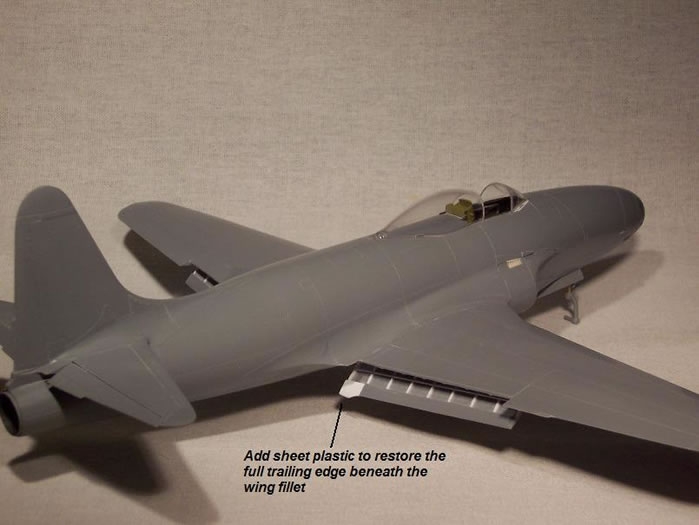
Flaps
As an aside to correcting these relatively minor flaws in the kit, as usual, I found it difficult resist making things harder than they need to be. In this case, it was to drop the flaps. The flaps were cut out then the insides of the wings scraped, filed and sanded smooth.
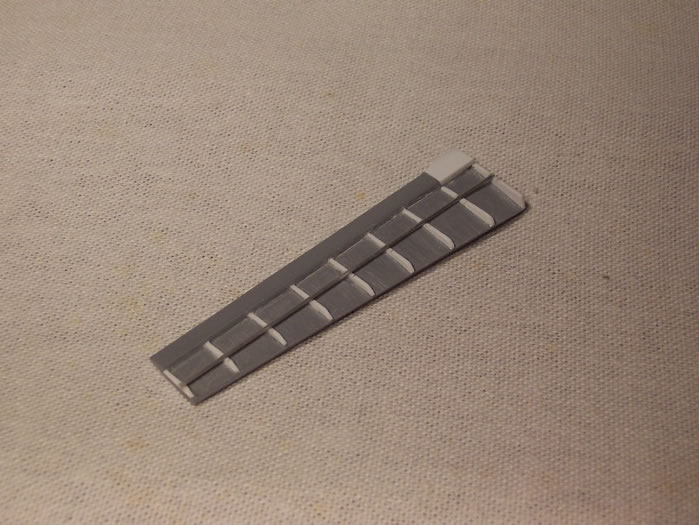
Unwanted openings were filled using sheet plastic. Simple ribs were added then shaped once the glue dried, then a razor saw used to cut a groove in these ribs to accept one longeron (running from end to end).
A length of aluminium rod was glued into the groove to complete the internal structure.
Other Changes
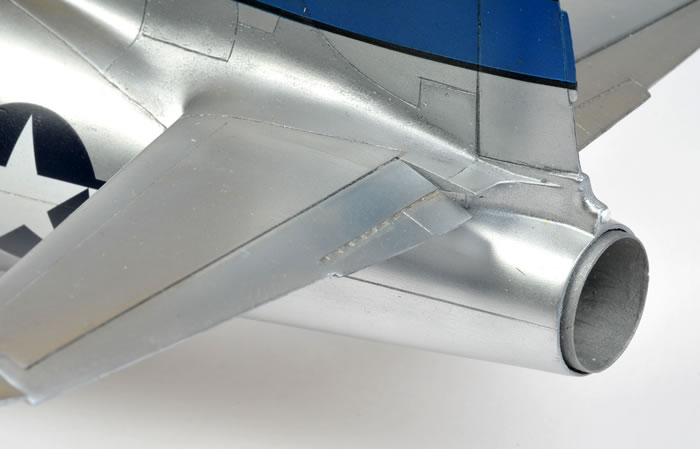
Other small changes included a bit of filing to the mounting lug for the jet pipe so that it sticks out the back a bit as well as adding some length to its rather short inner end.
Sway braces for the pylons came from the spares box.
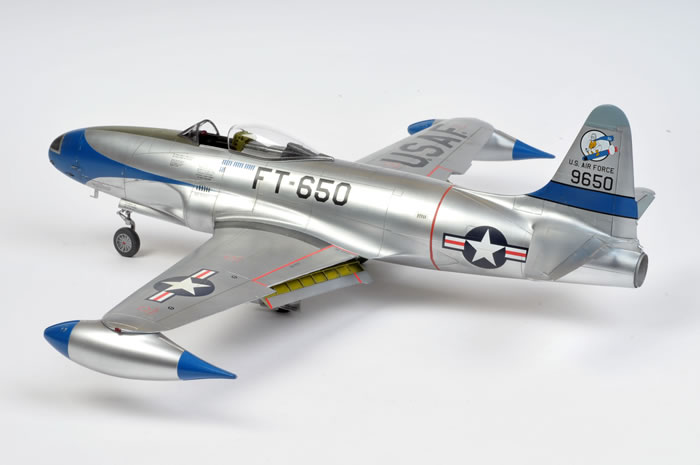
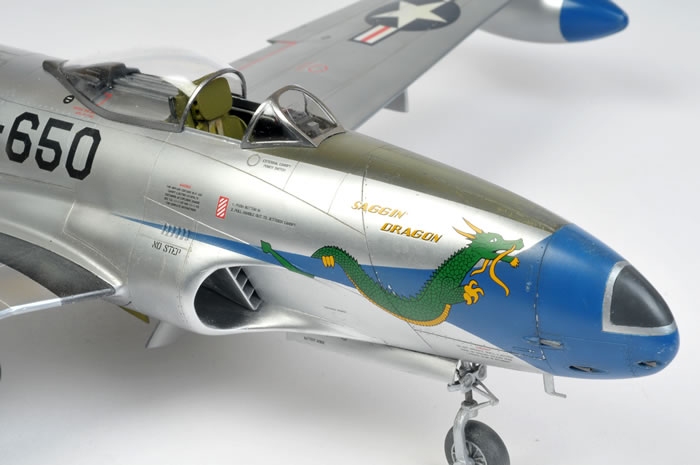
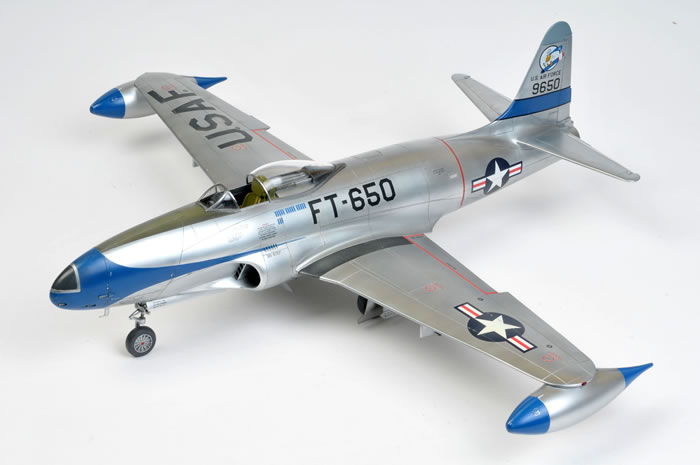
 The model was finished in Alclad II using both Polished Aluminium and Aluminium, the latter in selected areas only. This resulted in a very shiny finish with a high contrast between the two, with both shine and contrast reduced significantly under a thin coat of Testor's Metalizer Sealer. This was then buffed with Micromesh polishing pads. The model was finished in Alclad II using both Polished Aluminium and Aluminium, the latter in selected areas only. This resulted in a very shiny finish with a high contrast between the two, with both shine and contrast reduced significantly under a thin coat of Testor's Metalizer Sealer. This was then buffed with Micromesh polishing pads.
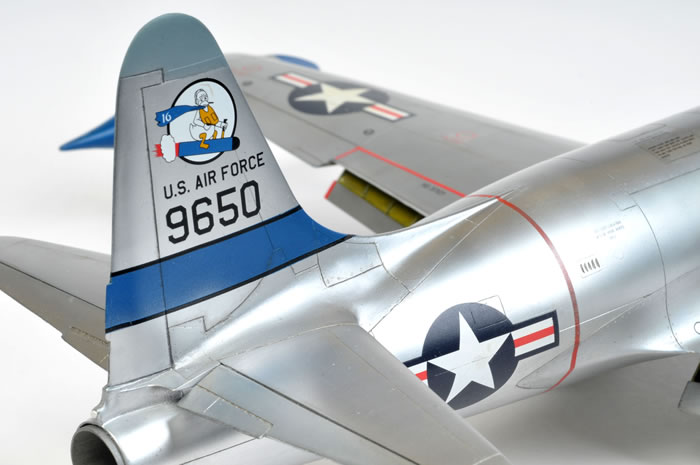
The kit markings are excellent in both registry and colour density, responded well to Microset and, when over-coated with a second coat of Metalizer Sealer, the carrier film disappeared completely. To avoid problems trying to match the blue of the nose marking decals I masked and painted all areas of blue rather than using the intended combination of decals and paint. However, I found that a 1:1 mix of Humbrol 14 (French Blue) and 15 (Glossy Sea Blue) was an almost exact match, so perhaps all my masking to do this was unnecessary.
Panel lines were subtly highlighted with a pencil, a little chipping undertaken with a scalpel, then the airframe given a very light and uneven overcoat with a light brown / grey mix to replicate dirt and dust and tone down the markings.
Finally, clear epoxy glue (Araldite Clear) was used to replicate the landing light lenses.
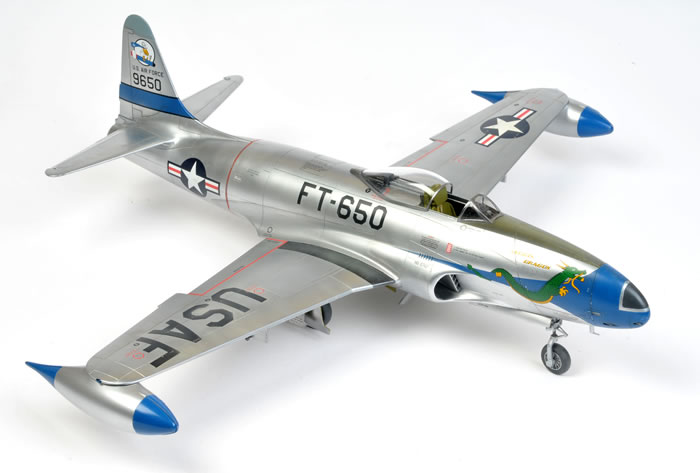
In my opinion, with a little work to correct a few errors, this can be made into a great kit of a significant aircraft that, in this scale, is big enough to be admired but small enough to sit on a shelf. As a bonus, my wife likes the dragon so chose the colour scheme (peace in our time).
Am I looking forward to a T-33 one day?
Absolutely.
Model,
Text and Construction Images Copyright © 2009 by Mike Prince
Images of Completed Model Copyright © 2009 by Brett Green
Page Created 29 September, 2009
Last Updated
29 September, 2009
Back to HyperScale
Main Page |
 Home
| What's New |
Features |
Gallery |
Reviews |
Reference |
Forum |
Search
Home
| What's New |
Features |
Gallery |
Reviews |
Reference |
Forum |
Search