|
Tamiya's 1/48 scale
Focke-Wulf Fw 190 A-8/R2
by Marty Sanford
|
Focke-Wulf Fw 190 A-8 |

Tamiya's 1/48 scale Fw 190 A-8 is available online from Squadron.com
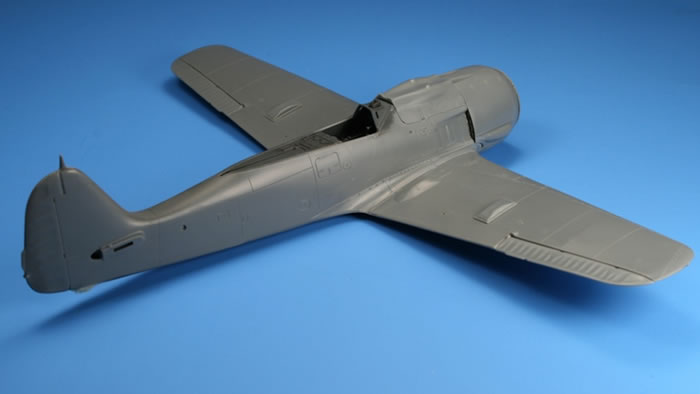
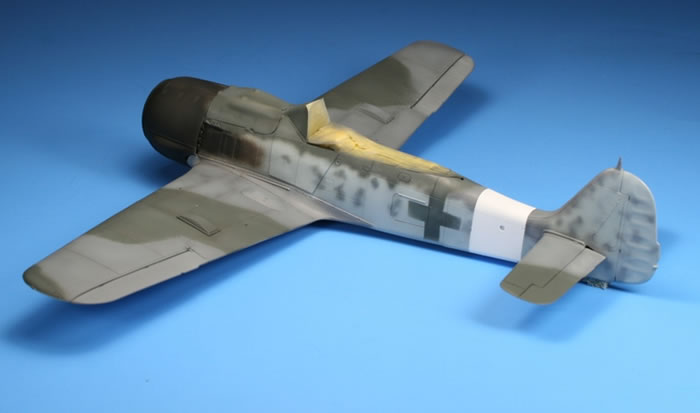
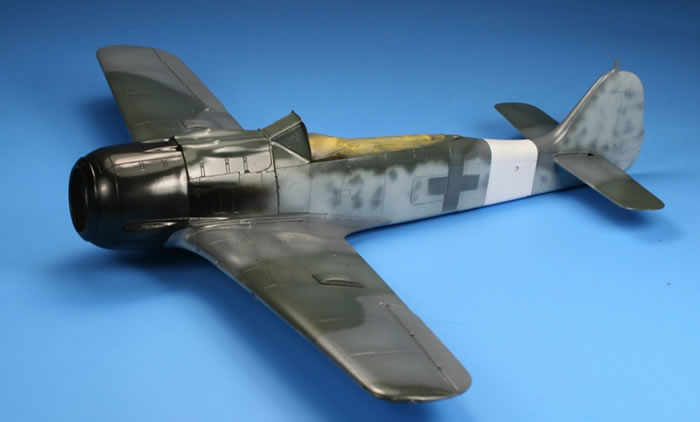
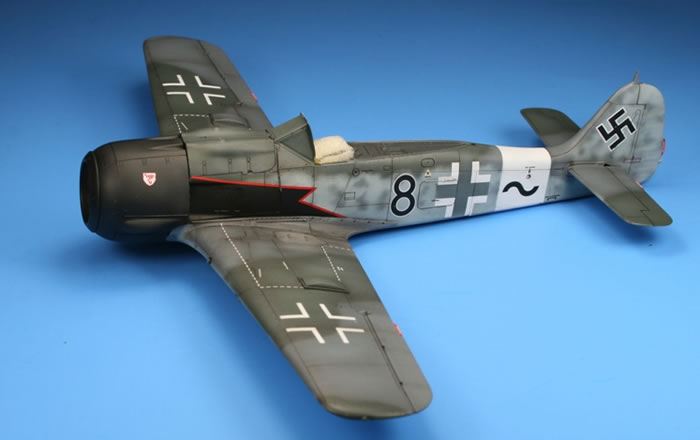
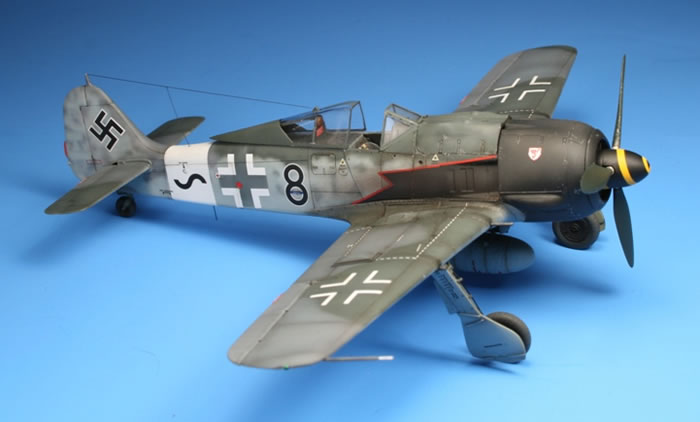
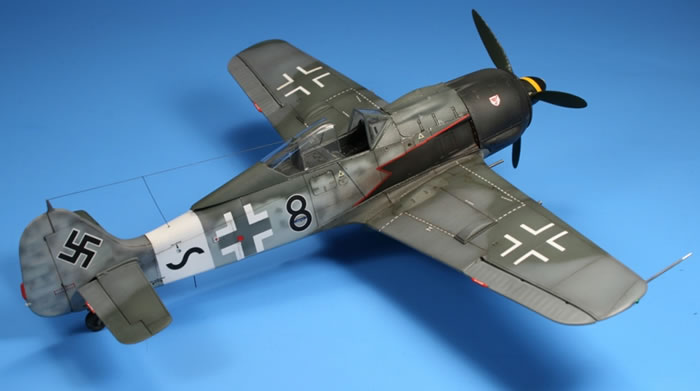
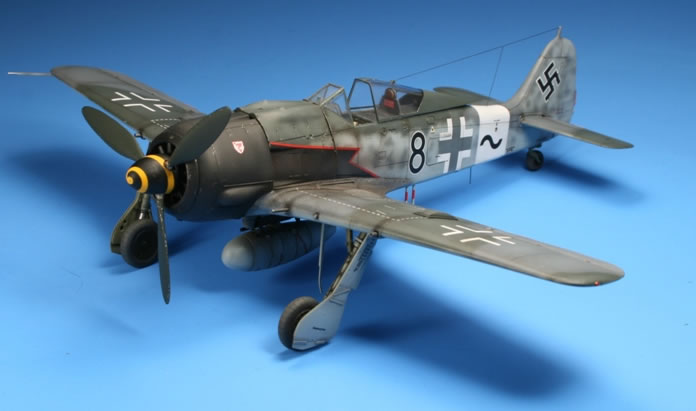
This is the Tamiya 1/48 Fw 190A-8, kit #61095. Prior to this build, Luftwaffe paint schemes had eluded me. I have wanted to build a Luftwaffe aircraft for some time, but every time I’d tried previously, I came up against the challenge of painting WWII German camouflage, particularly mottling. I should mention that all the spray work on the model in this article was done with my trusty Paasche H single action airbrush, with the H1 tip. Many have told me that they only mottle with a double action airbrush, and I think I can see why.
I owe a lot to a large variety of individuals who gave me advice and cheered me on through this process. I studied the work of a large number of prominent Luftwaffe “experten” – in print, on video (such as the Master Class Video hosted by Floyd Werner ) and on the web, particularly contributors to HyperScale. I solicited advice specifically from Roy Sutherland, Ron Petrosky, Michael Scott, Anthony Manzoli, Larry Meidinger and Mark Rezac, who all coached me through the task of learning how to mottle. Independently, these modelers help keep me on track when I was befuddled, especially with mottling.
Aftermarket
Aftermarket products used in this project:
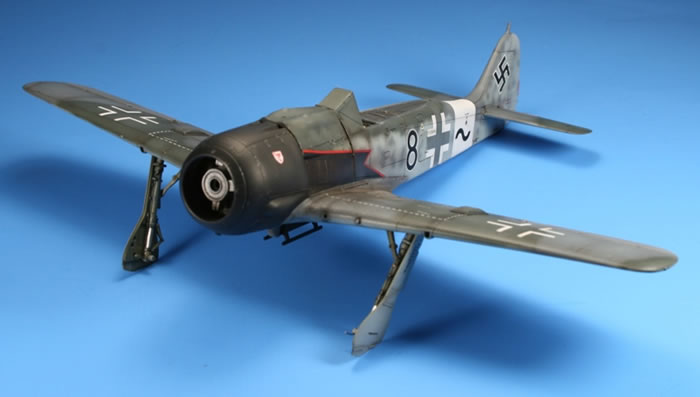
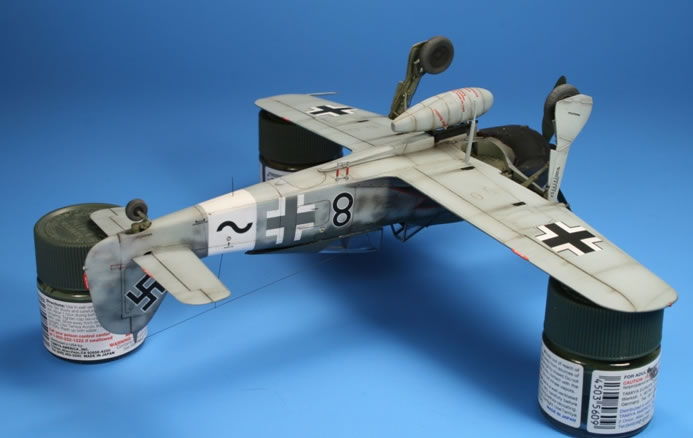
I obtained a set of resin late Focke-Wulf wheels from Roy Sutherland of Cooper Details fame. These were a “one off” product that Roy had produced for an IPMS-USA National Convention (I can’t remember which one), which I committed to this project. They have a slightly larger diameter and better detail on the wheel hub than the Tamiya kit examples have.
Other Modifications
-
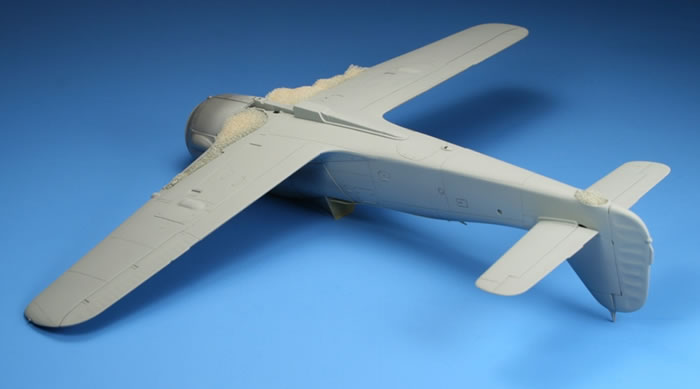
The landing gear legs were lengthened by inserting a plastic shim inside the landing gear leg locating recess.
-
Brake lines were added to the landing gear strut from wire stock
-
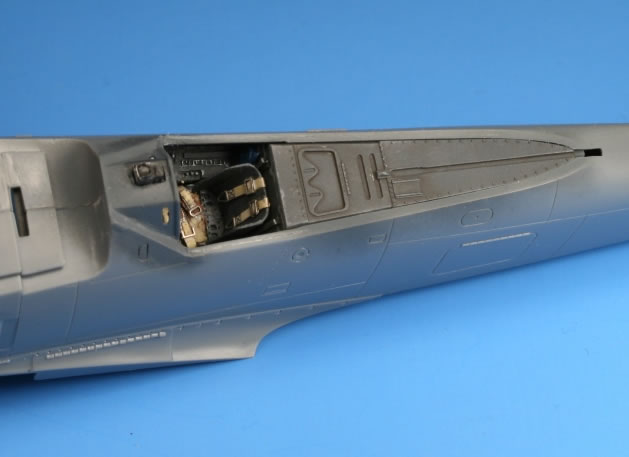
Inboard Cannon barrels were made from steel hypodermic tubing, cut off with a Dremel tool
-
The cowl guns and underside DF Loop were omitted, per kit instructions
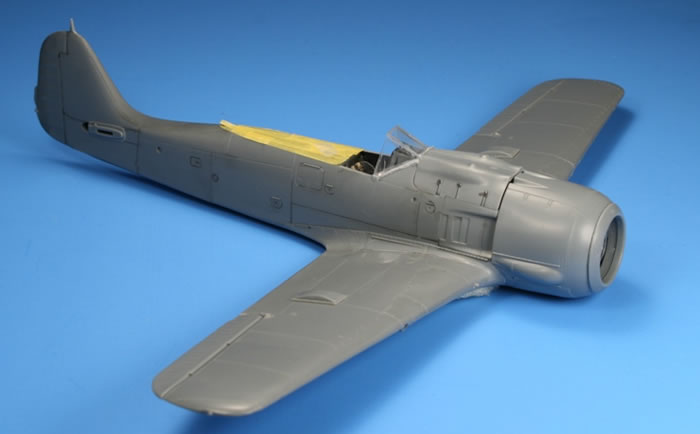
Assembly followed conventional practices, meaning I mostly followed the instructions.
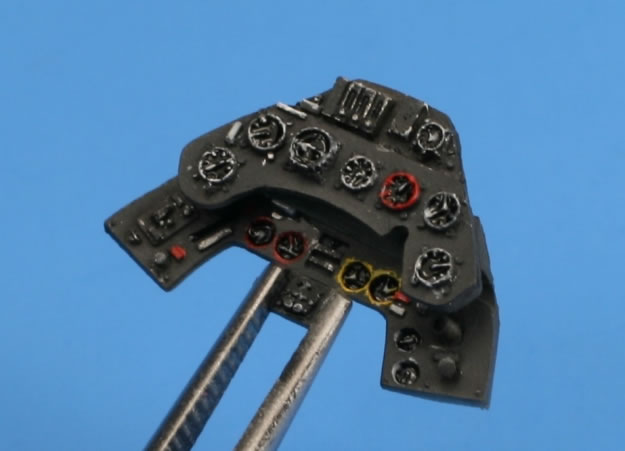
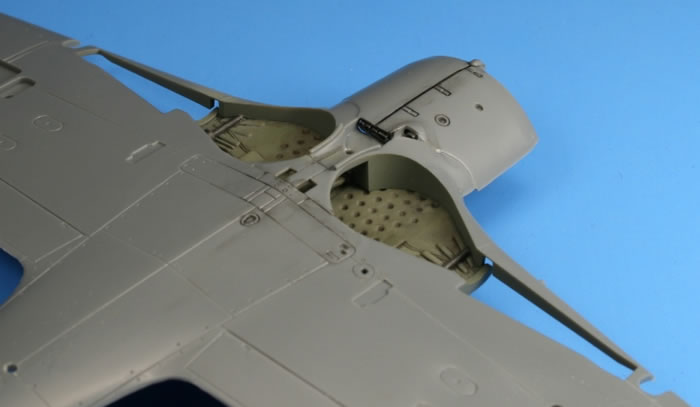
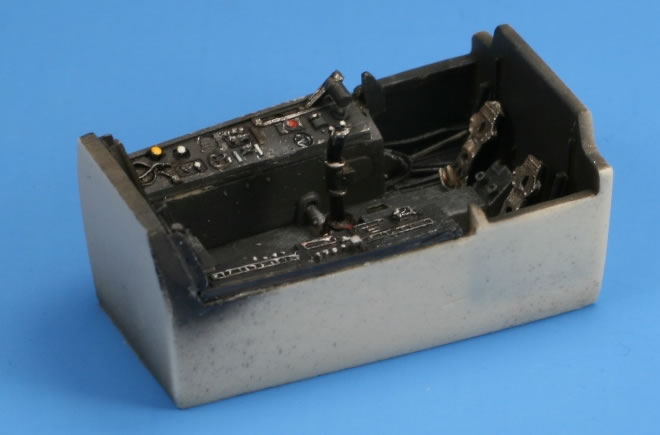
The Cooper Details resin cockpit tub fit very well into the Tamiya fuselage. In fact it was a far better fit than the Eduard PE interior, so I saved the Eduard interior parts for a future project. The Cooper Details Instrument panel was sprayed with an RLM 66 mix, the dials received a coat of gloss black, and the dials and bezels received a touch of color with a toothpick. Each dial then received a drop of Future to simulate glass. Some clear acetate stock was cut out and inserted on top of the kit gunsight.
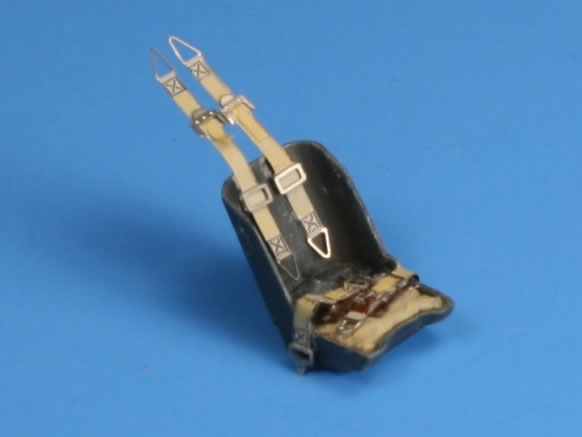
I did use the color PE seat belts on this build however. The external fuselage armor from the Eduard set was used, as I liked it better than the Tamiya paper / film armor.
 Paint Paint
The model was painted with my Paasche H single action airbrush as mentioned, with the H1 (smallest) tip. I do look forward to buying a double action airbrush someday, but for now that’s what I have. I found it was a challenge to get a small spray pattern, but I got fair results by thinning the paint well and adjusting the size the pattern at the tip and by getting the tip of the brush in close to the model.
About 90% of the exterior colors were mixed from Tamiya acrylics. Here are the Tamiya mixes that I used, obtained partly from discussion on this website and various kit instructions:
RLM 02 XF-22: 2
XF-49: 1
XF-2: 1
RLM 76 XF-2: 7
XF-66: 2
XF-23: 1
RLM 75 XF-24: 5
XF-50: 1
RLM 74 XF-24: 3
XF-27: 2
RLM 70 XF-27: 1
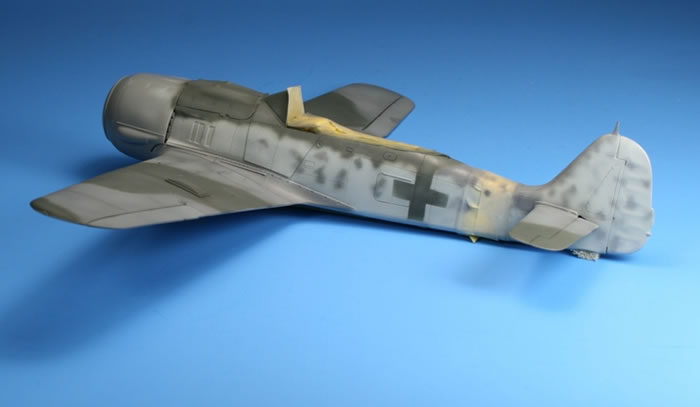
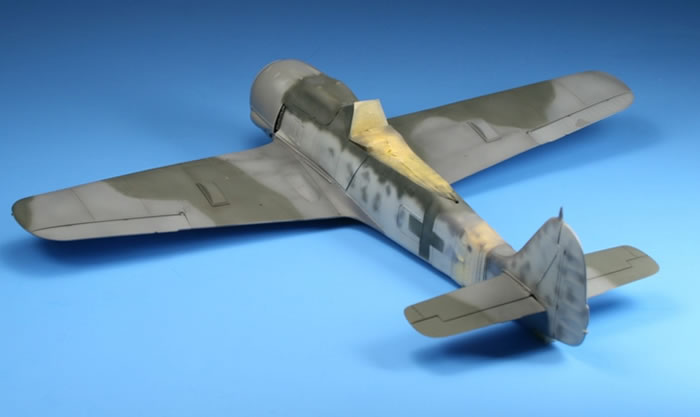
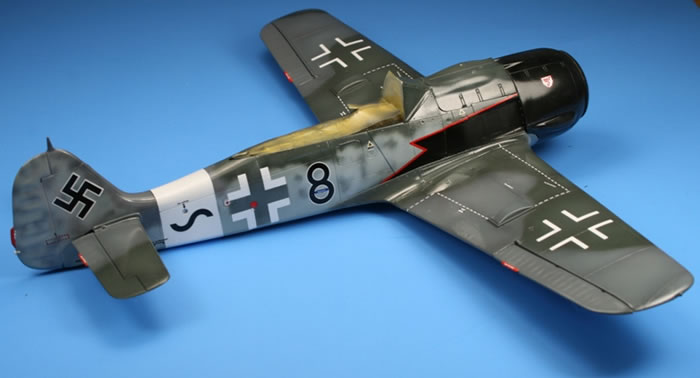
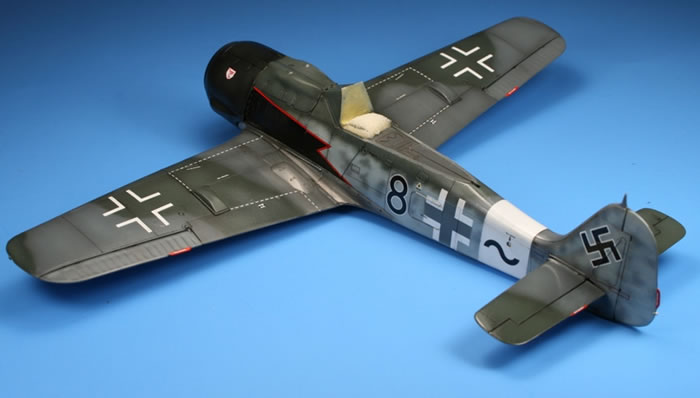
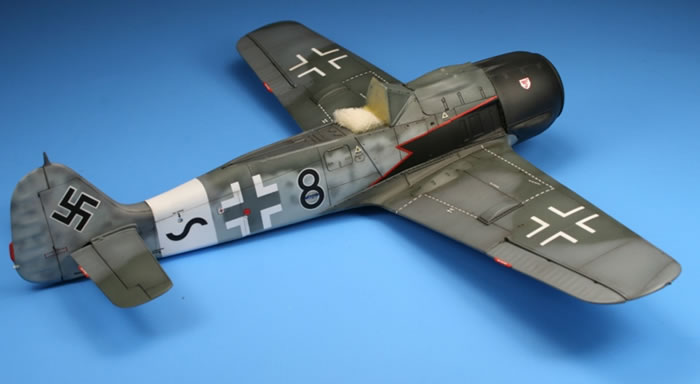
The JG3 White fuselage band was sprayed Tamiya XF-2 Flat White, allowed to dry and then masked with Tamiya Tape.

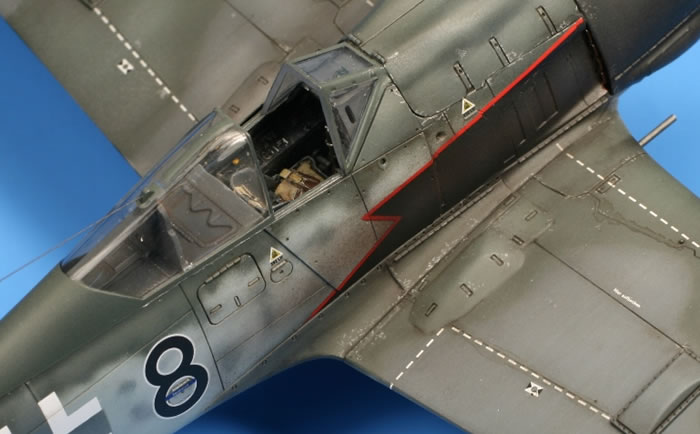
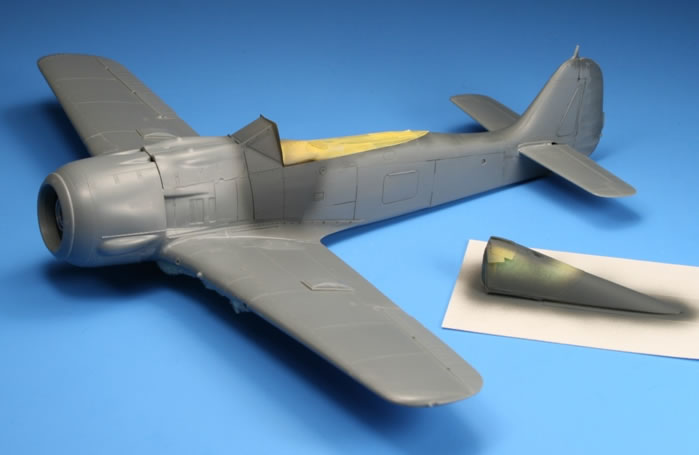
Each camouflage color was first sprayed in a base color, followed by a darker tone of the same color on panel lines and around raised areas and into recesses. This post shade technique was completed by spraying a lightened version of the camouflage over those areas in the center of panels and on the tops of high points on the surface of the model. This technique helps to provide a first layer of weathering.
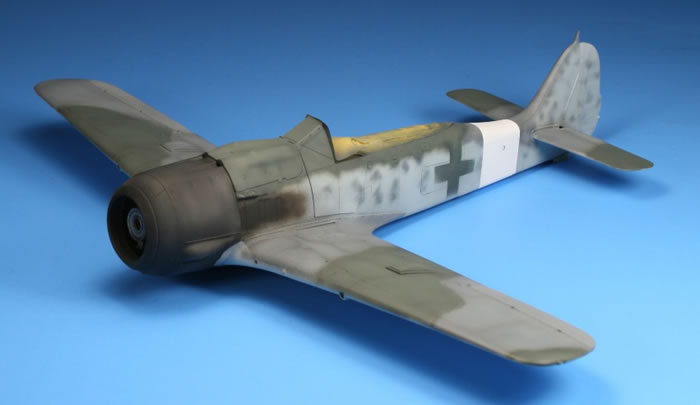
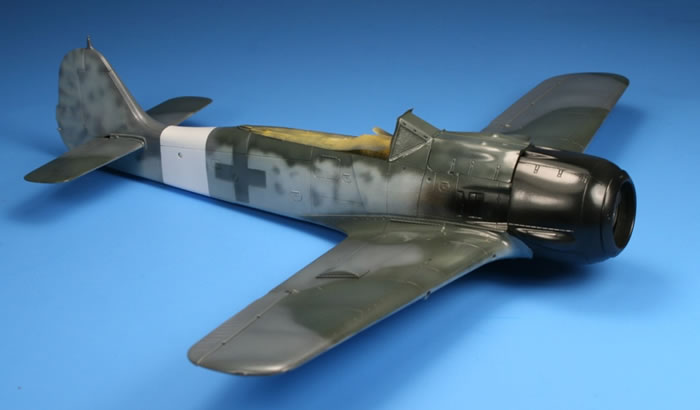
The limitations of spraying the camouflage mottles on the fuselage in acrylics with a single action airbrush became readily apparent (and at times somewhat frustrating), resulting for me or in either spattering or spider legs. While I know many modelers state that they have mottled successfully with acrylic paint, I found that either the limitations of my brush, temperature, humidity or maybe just my skill level, was not resulting in a satisfactory outcome for me. On the advice of a number of experienced Luftwaffe modelers (thanks, guys), I made the decision to switch to Testor’s Model Master enamels (RLM 75 & 74) for spraying the mottles on the fuselage sides, thinned with Testor’s airbrush thinner.
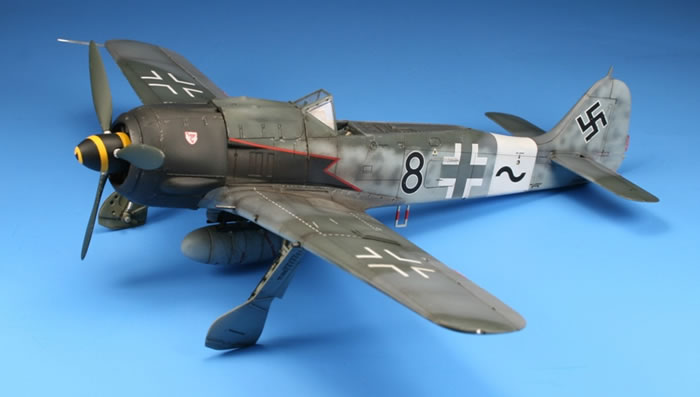
I found that the color match was very close, and that I was able to get a tighter spray pattern with my Paashe H with the thinned enamels. I then sprayed a highly thinned Model Master RLM 76 mixture over the fuselage mottling, which toned down but did not cover the mottle patterns. This served to also reduce the color contrast between the 75/74 mottles and the 76 fuselage side, and tended to blend these colors. I sprayed the cowl in an off black with brown & gray tones, and applied a little black gray enamel paint for the grime at the exhaust and over the louvred fuselage exhaust area. So far, so good!
It was then time to apply a Gloss surface to the model. I have recently become a huge fan of Tamiya lacquer spray gloss, TS-13, right from the rattle can. I first wiped the model with a tac rag, and then shot several light coats of TS-13 on the model (outside the house, in my driveway). In about three coats, a smooth, tight glossy finish was achieved, which was ready to accept decals in about 30 minutes.
Decals
The Tamiya kit decals were used for the stencils, walkways, JG3 insignia, the Black 8 and the Gruppe winkel. I also used the kit’s Black and Red bordered pattern decal over the exhaust, but I trimmed the carrier film away and cut away a rectangle in the decal where the exhaust louvers are. This was later tied in with black paint, with some careful airbrush work.
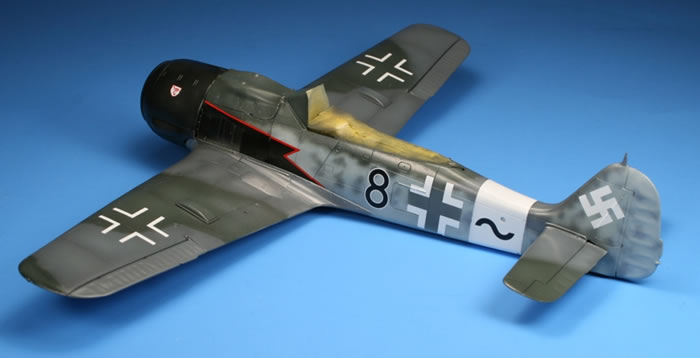
National insignia and the yellow spinner spiral came from an old Aeromaster decals sheet. Once all decals were applied, set and dry, I shot them with another coat of Tamiya TS-17 Gloss. This helps a lot to make clear carrier film disappear. I have a hunch this it changes the way light refracts through the clear coats and on the clear carrier, but I can’t prove it scientifically, but I do this all the time now with decals.
Finish sequence
A wash of Turpenoid and Brown / Black oil paint was applied over the gloss surface, making sure the recessed areas received an appropriate amount of wash mixture, wiping away the excess. When the wash had dried, the model was sprayed with Testors Model Master Flat Coat, thinned slightly with the corresponding Testors Model Master lacquer thinner from the same line. Gun smoke staining was achieved with pastel chalks, as was a final exhaust grime on the sides and under the cowl. Judicious use of a silver prismacolor pencil was employed for paint chipping, with an effort to be somewhat more restrained than when chipping a Japanese aircraft!
Detail assembly & paints
- Guns – the outboard 30mm cannon barrels from the kit were used, with the inboard cannon barrels from steel tube as indicated earlier.
- Aerial Wire – monofilament nylon thread was used, painted with Testors Model Master Gunmetal. The “wire” was attached with super glue, then a drop of accelerator. The slack in the vertical lead to the fuselage was tightened by waving a blown-out match near it.
- Final parts, The Cooper Details convention wheels, kit pitot, step, underwing antennae were glued on the model and weathered.
Ailerons and Elevators were drybrushed with a lighter shade of the camouflage colors to make them “stand out” from the surface, which is said by some to be a little shallow in rib detail.
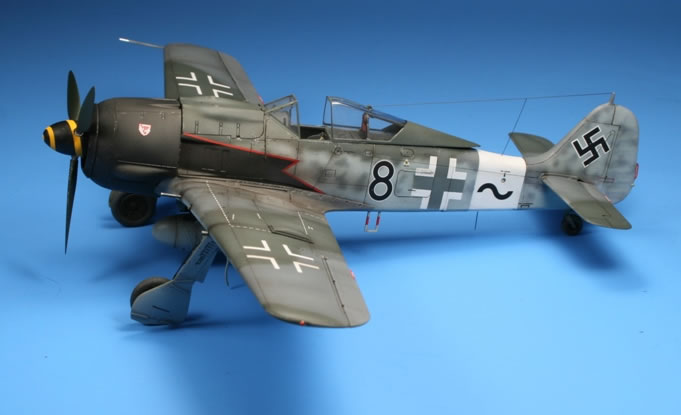
After a final coat of flat, the navigation lights were painted with Testors silver, followed by a coat of Tamiya acrylic transparent Red & Green. Then they received a drop of Future / Pledge acrylic floor polish, applied with a brush.
Will I build more Luftwaffe aircraft models now that I have done one? Yes, definitely. I will add them to my current list of models I want to build, along with all the other future projects… along with shopping for a good double action airbrush too!
I can’t wait to try this in 1/72 scale now!
Postscript: Many thanks to all those who responded to this build when this was posted
on “Plastic Pics” here on HyperScale in May, 2009.
Your generous encouragement affirmed that I was on the right track. Thank you, all.
Model,
Text Copyright © 2009 by Marty Sanford
Page Created 8 July, 2009
Last Updated
8 July, 2009
Back to HyperScale
Main Page |
 Home
| What's New |
Features |
Gallery |
Reviews |
Reference |
Forum |
Search
Home
| What's New |
Features |
Gallery |
Reviews |
Reference |
Forum |
Search