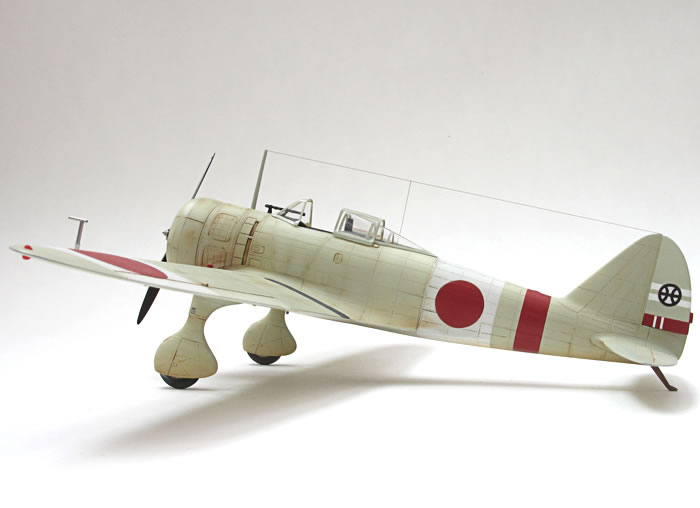
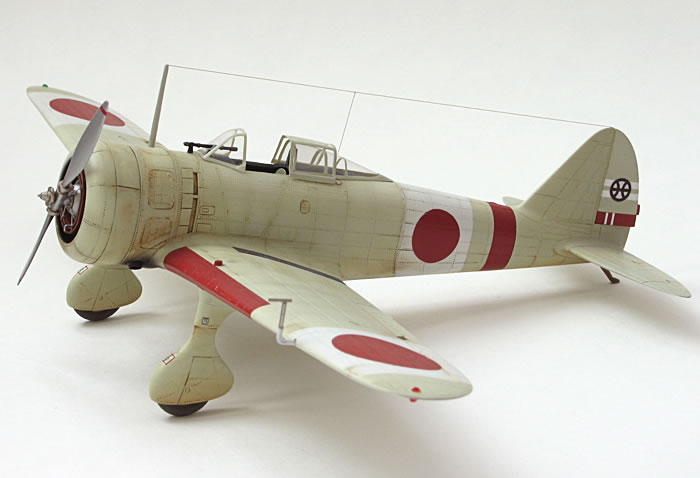
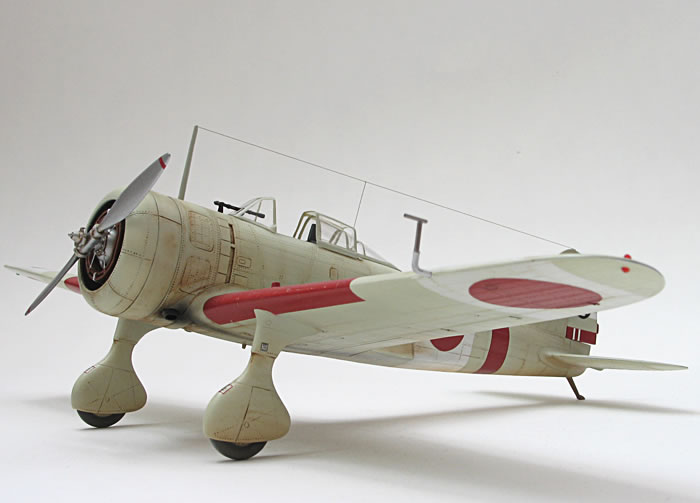
Hasegawa's 1/48 scale
Nakajima Ki-27B Nate
by Marcel Meres
|
Nakajima Ki-27B Nate |

Hasegawa's 1/48 scale Ki-27 is available online from Squadron.com
This is my 1/48 Scale Hasegawa # 09724, Ki-27b NATE.
Here are some notes and hints for those who will be building this beautiful plane:
Improvements I have made:
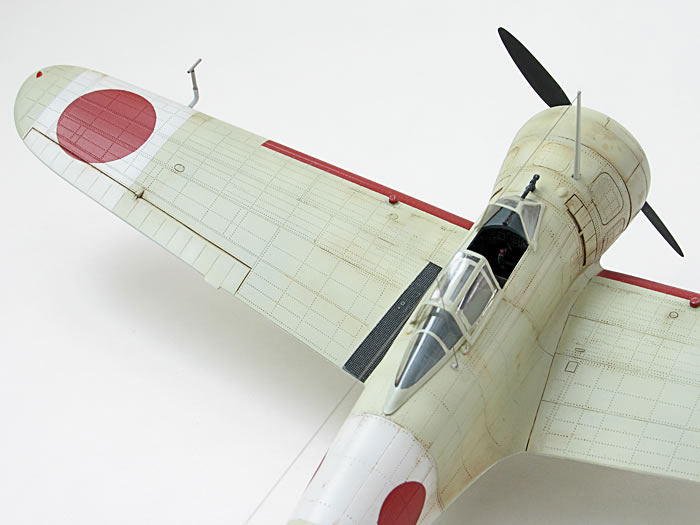
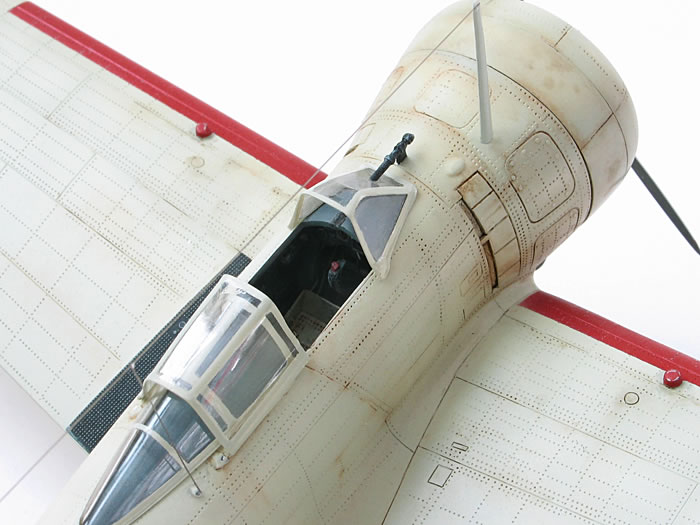
The Clear Parts
The original model canopy is single-pieced and really too thick. So if you are a cockpit lover it would be necessary to modify or replace it. Cutting the canopy into three pieces, then grinding to make it slim, sanding and polishing seemed too exhausting for me. An acetate canopy may be a better way – the only "dark side" is the necessity to drill an opening into the front window panel (for a tubular gun-sight) and the relatively complicated installation of the gun sight. I used the Squadron Products USA vac-u-form canopy. Rob Taurus makes also excellent ones, as far as I have heard. The original kit canopy has an insection (from its lower edge straight upwards), so you can cement the gun sight onto the model fuselage top and then simply cover it with the canopy. Gun sight will go through the insection. It is simple, but not realistic. According to photographs, the real airplane has the opening in the windscreen (not circular by the way). The tubular gun sight with the cover actuator (a thin rod aligned with the gun sight) goes through this opening. Considering the scale and the acetate material used, I decided to simplify the opening into a circular shape and omit the actuator.
PLEASE NOTE: The gun sight has two holders. One inside the canopy and another one outside of it. If you choose to use the acetate canopy and to drill a hole into it, you will have to remove one of the holders first and install the gun sight inserting it through the opening. Then, after positioning and gluing it in place, you will simply add the removed holder (I removed the outer holder first. After cementing the canopy in place, I inserted the gun sight from the inside of the canopy and added the outer holder). Take care to have the front canopy part aligned with the gun sight and also with the plane axis (both vertically and horizontally). I was sure I wasn’t going to make it correctly in one attempt, so I used a water soluble glue and tried several times. It looks complicated, but it is not.
The position lights are a CMK 010 set - the Clear Cast and brush colored by TAMIYA Clear Green resp. Clear Red.
The Pitot Tube
The one originally used within the kit looks a little inaccurate, if you look at the photographs. I decided to cut off the straight tubes (both horizontal and vertical ones). Then I used two thin metal pipes (injection needles) attached to the original incurved part of the probe instead of the original.
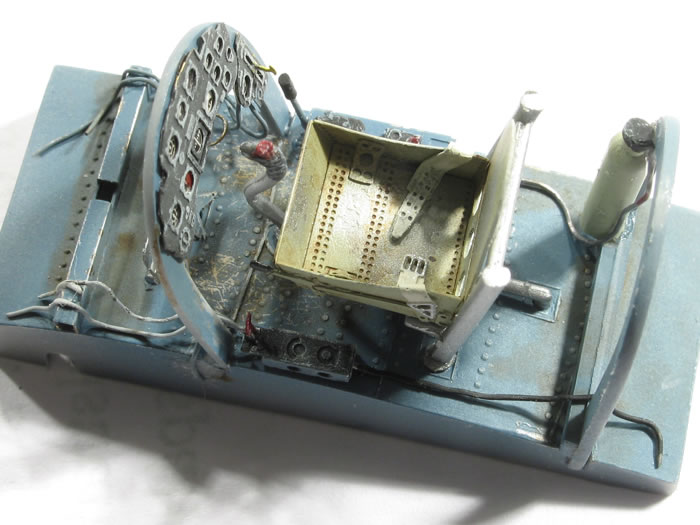
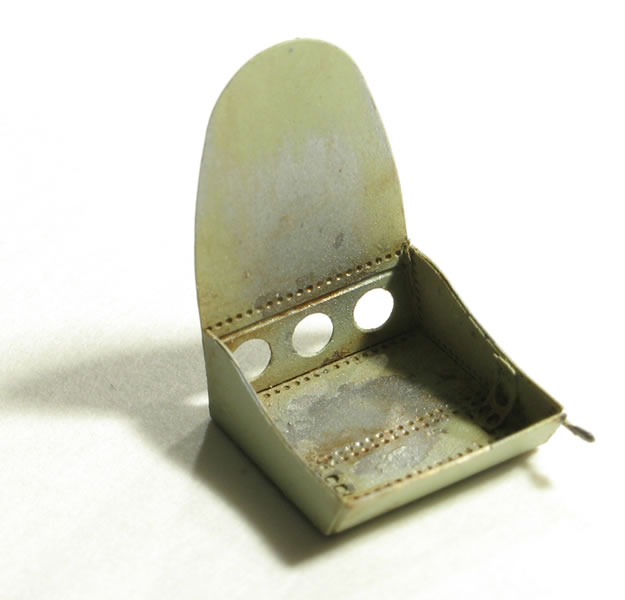
Interior
I used an EDUARD set for the cockpit interior.
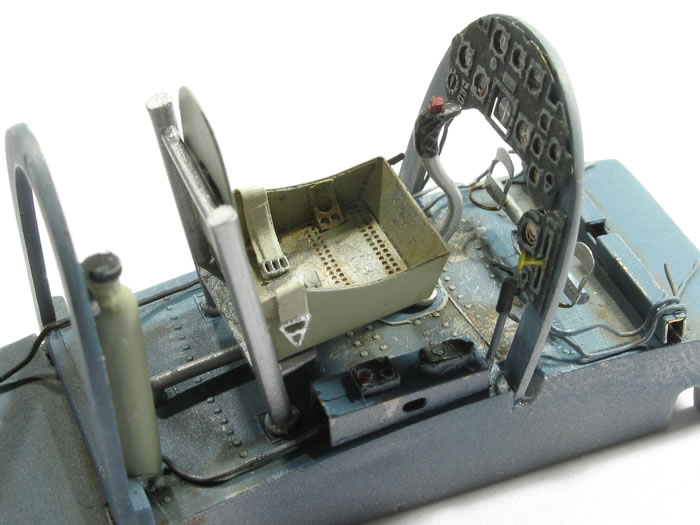
The side framing looked too flat to me so I got thin Evergreen strips under each rib (to tell the truth, almost no difference could be seen for the relatively small cockpit opening).

I also added some lead wires inside the canopy. I had no relevant interior reference materials, so I only had to guess estimate it.
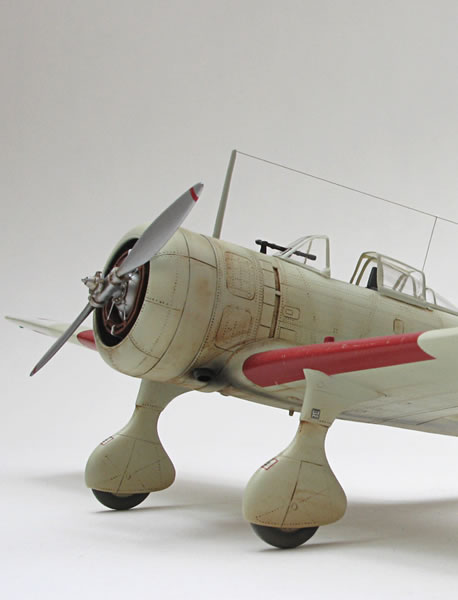
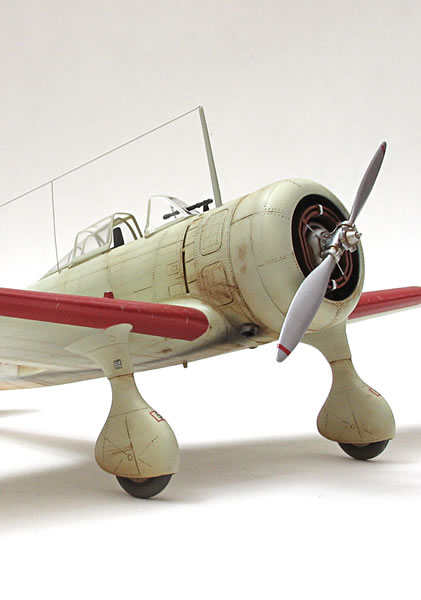
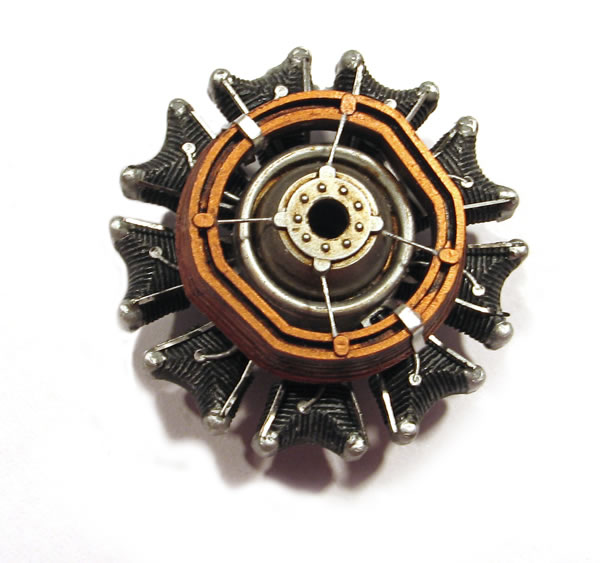
Engine and oil cooler assembly
The oil cooler is to be glued directly onto the engine front according to the kit instructions. Doing it this way results in the oil cooler looking to be set deeper in the cowling than the real one (which can be seen on photographs and diagrams) is.
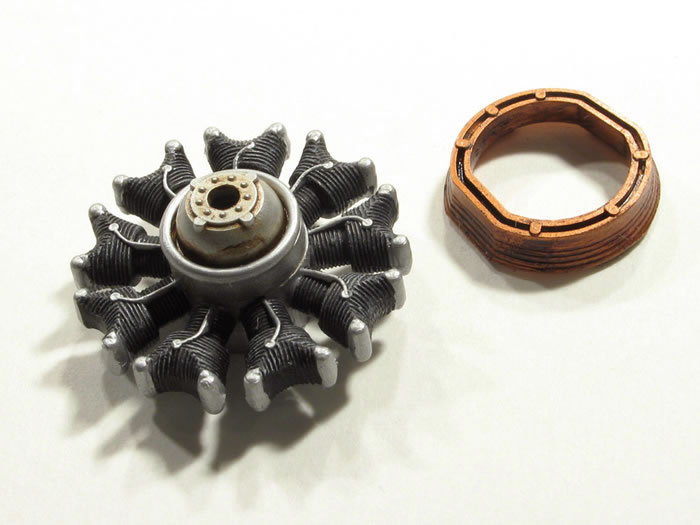
I believe that the front surfaces of both the oil cooler and the cowling are nearly aligned. I was not be able to determine whether the kit engine is well positioned or not, but I thought it could be so. So I inserted and cemented tiny bars of plastic between the engine body and the oil cooler – this moved the oil cooler bit forward.
 Painting Painting
I had several problems with determining and choosing the right colors.
The first problem for me was to estimate the interior color. It could be the Navy blue according to the original kit instructions. Some sources say this color could be dark gray, black or a very dark blue color. During several modeler discussions I was told that the ultimate consensus is somewhere near the USN Intermediate blue (according to the Federal Standard Reference color chart), slightly nearer to dark gray... Then I tried Gunze Intermediate blue and lightened it by adding several drops of white. The color looked much too bluish to me so I partly covered it by a thin and uneven coat of the matt Testor's Model Modelmaster Intermediate blue.
The second question was how the overall camouflage color looked like in reality. The Hasegawa kit marking instructions mention Mr. Color Gray green. Other sources are proposing more or less bluish or greenish Lt. gray, or Lt. bamboo green-gray (one of the most discussed colors I have read). You may find useful information concerning IJA Gray here (approx. in the middle of the article, links marked as Part 1, 2 .... Part 8): http://www.straggleresearch.com/2009/11/type-97-combo-fest.html
I tried to compare the original TAMIYA matt XF-14 J.A. Gray with Gunze Mr. Color Gray Green 128. The colors were very similar but both were darker and less bluish than some sources suggest. Seeing the photograph of the extant Ki-27 rudder, I finally used the TAMIYA color. I added white, without adding blue.
I always like to use paint rather than decals. So I threw the Hinomaru decal roundels away and started to search for how this red color looked like. After comparing several decals from various kits and manufacturers (which differ - more or less) I also looked up some information online. I have found this interesting Hinomaru red discussion: http://www.j-aircraft.com/faq/hinomaru_red.htm
Believing that the Hinomaru red color is very close to the FS 11136 I have bought some existing red colors (Humbrol, Testors, Gunze, Revell, ... etc.) which were declared to be FS 11136 color or very similar (according to the common conversion color charts). I tried them one by one and was surprised how different the "same" red can be! When comparing my airbrushed color swatches to the original "paper" Fed. Standard color chart, the closest one was the Mr. Color 11136 red. Then I tried different base colors - this red is translucent enough (when sprayed in a thin coat) to alter its tone by using various underlaying coats. The best result achieved was using ALCLAD II Dark Aluminium as the base. The additional advantage with ALCLAD under Gunze combination is that the tiny "weathering" scratches can easily be made within the red surface and the underlaying metallic color sits firmly and does not go off.
Decals
I used the original decals for stenciling only – avoid it if you can. The decals are too thick as I think of it now. Despite the fact that the stenciling is very small, you would see its thickness.
The 244th. Flight Regiment's emblem on the rudder looks slightly inaccurate within the original decal sheet. I decided not to use it and to make my own instead. I scanned a real plane photo, then traced it using Adobe Illustrator on my PC. My modeler-friend printed the home-made decal for me, using his laser printer and blank decal paper (only the black emblem is a decal - applied onto white airbrushed bars and circle).
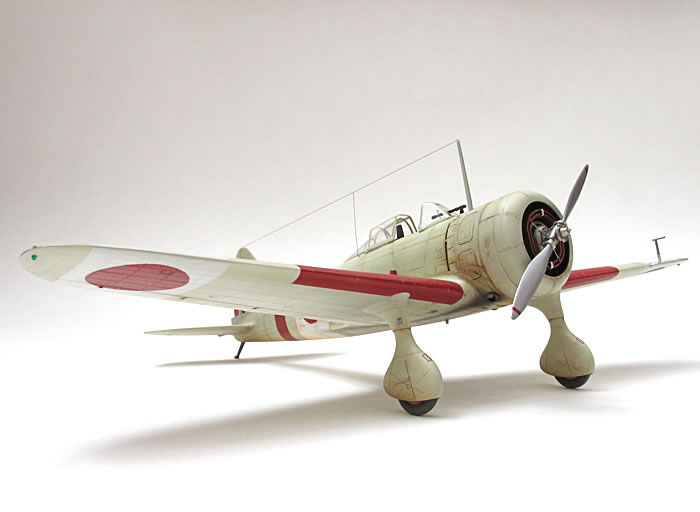
Weathering and Patina
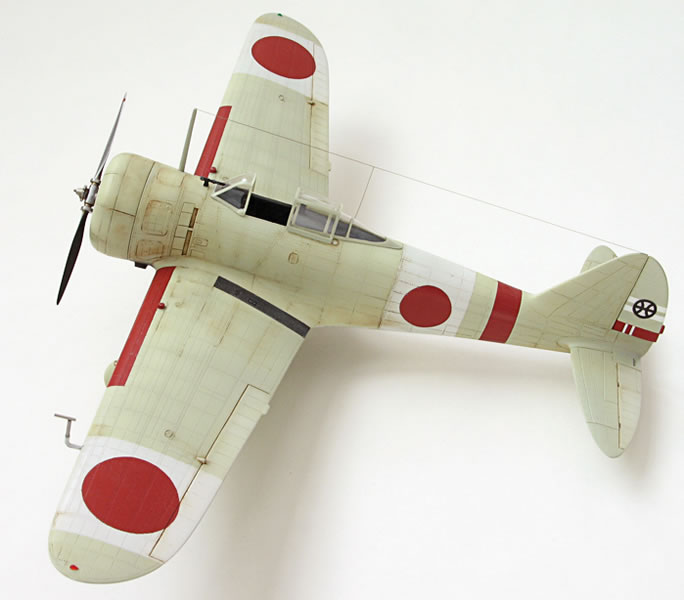
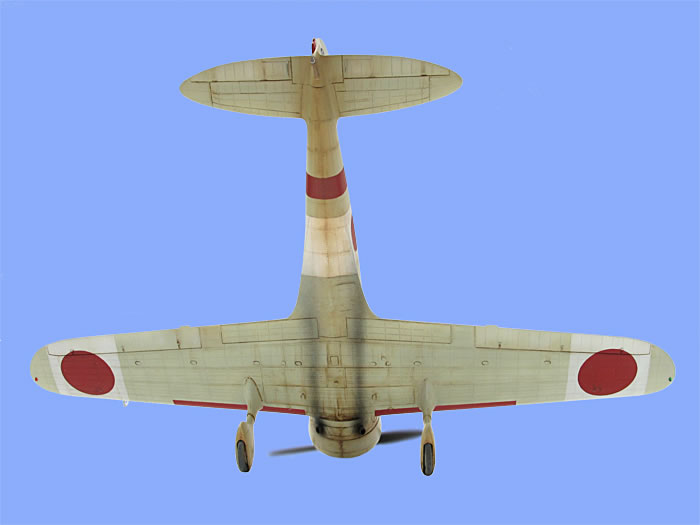
My experiments with the IJA Light Gray color lead me to applying the camouflage coat onto the white Surfacer # 1000 polished into high shine (I used a flannel scrap). I sprayed the camo. color in several thin layers, along the riveting and panel lines. I tried to simulate the sun fade-out - by applying the thicker (and so slightly darker and more saturated color) coat onto the bottom surfaces of the wings and fuselage. In contrary to this, the sun exposed surfaces are lighter.
Some panels or lines are darker than others – to simulate the weathering effect and also to obtain a slightly irregular finish. I did not use pre-shading because of very thin coat of camo color used.
I also sprayed the "moving" surfaces (fabric covered in reality) lighter then the metal surfaces to distinguish them.
All the white bars are the former White surfacer - masked while airbrushing camo color.
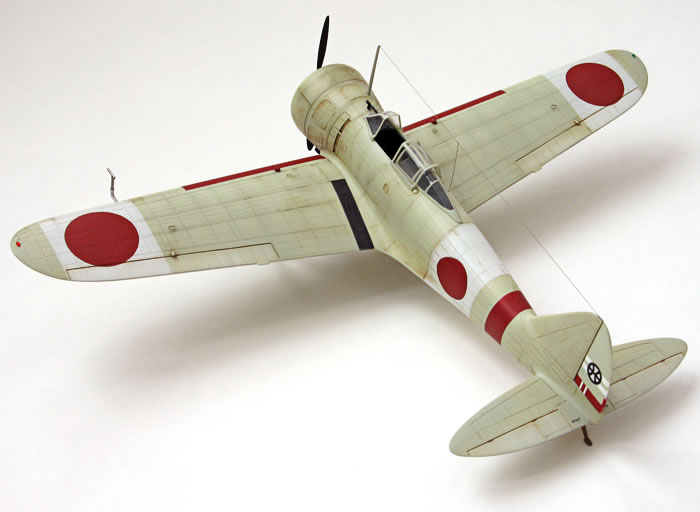
Every Hinomaru red, applied as the last color, has ALCLAD Dk. Alu. base.
All the surfaces were very gently water sanded, using 2000 sand paper - to achieve additional patina.
The kit required the Mr. Color Super Clear gloss coat as the unifying base for weathering mix of brown (Burnt Sienna) plus black oil color (in varying amounts for "rust", "oil stains" and "dirt") diluted in Mig's Thinner for washes.
The exhaust stains is airbrushed flat black.
The rear lower fuselage and vertical surfaces plus bottom part of the undercarriage is oversprayed with light coat of the matt Light earth brown - to imitate dust and/or dry mud from the airfield.
The pilot's walkway (EDUARD etched part) is airbrushed black, then matt Aluminium drybrushed.
Interior details are drybrushed (White, Lt. gray and Silver colors used, plus matt varnish coat). The Dk. brown wash is used for emphasizing the detail depth.
All the surfaces have the final coat of Mr. Color Super Clear Flat. The ”fabric" surfaces have the thickest layer.
The pros and cons of the kit (as I see it):
Pros:
-
excellent surface with delicate recessed panel lines, plus complete riveting
-
precise injected parts (minimum of sanding and filling needed), no molding flash, minimum of sink marks
-
Comprehensible instructions + simplicity of building
-
Relatively high overall quality / low price
Cons:
-
Canopy plastic is clear, but too thick and in one piece, so you merely see the interior
-
Minor problems with engine / oil cooler assembly
My special thanks to:
-
Mr. Marian Holly - who helped me with information concerning the interior colors
-
Mr. Maros Sedlak - who kindly made the Emblem decal for me
-
Mr. Ivan Visvader - great help with printed Federal Standard Reference Guide + advisory words
-
Mr. Miro Marias - for sending me the valuable reference links
Model and Text Copyright © 2010 by Marcel Meres
Page Created 1 September, 2010
Last Updated
3 September, 2010
Back to HyperScale
Main Page

|
 Home
| What's New |
Features |
Gallery |
Reviews |
Reference |
Forum |
Search
Home
| What's New |
Features |
Gallery |
Reviews |
Reference |
Forum |
Search