Monogram's 1/48 scale
PBY-5 Catalina
by Alex Tula
|
Consolidated PBY-5 Catalina |

Revell's 1/48 scale PBY/OA-10A Catalina is available online from Squadron.com
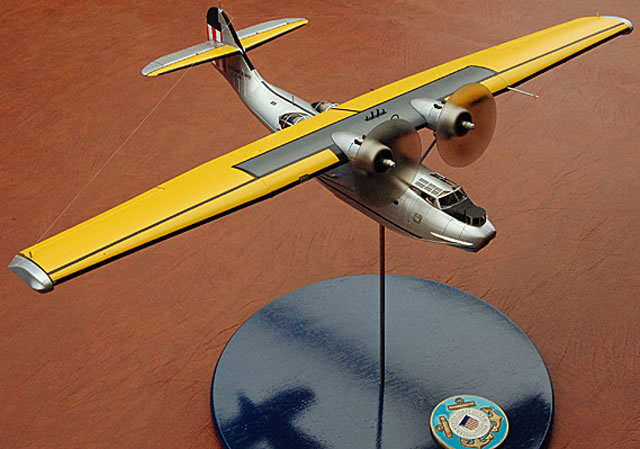
The Monogram/Revell PBYs have been around for quite a while, yet despite being one of modelers “most wished for” kits seems to rarely get built. It is a BIG model in 1/48th, with a wing span nearly the same as the B-17. My build is the PBY-5 “flying boat” version. I don’t think this has ever been rereleased like the PBY-5A amphibian has, but it’s still readily available at auctions and meets. I decided to do mine as a “yellow wing” to break up the monotony of blue and OD aircraft in my collection.
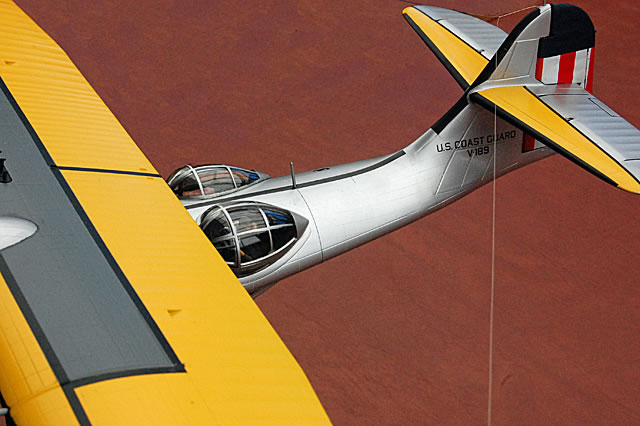
Once I got the Aeromaster decal sheet (Flying Cats III) the Coast Guard plane (V-189) caught my eye too, since I don’t have a CG plane anywhere in my collection. Doing some research, I became still more intrigued with this aircraft. Over the years, my profession has involved looking at a LOT of aerial photographs, and I’ve spent a fair amount of time in Alaska including many of V-189s haunts. V-189 was the first PBY in Coast Guard service, and the only PBY-5 ever used by the USCG, all later PBYs being the -5A version. V-189 was acquired from the U.S. Navy in 1940 (Bu No 2290) for the specific purpose of carrying the then new and state of the art nine lens aerial mapping camera which was mounted in a modified ventral gun position.
The cameras accuracy was enhanced through use of the Norden bombsight for accurate positioning. Initially assigned to CGAS San Francisco, early assignments for V-189 (by then nicknamed “Queen Bee”) included the first photomapping of the Alaska coastline during which time it was stationed at Sand Point, WA, and Kodiak and Dutch Harbor, AK. During the winter months, mapping assignments moved to the Gulf of Mexico and the eastern seaboard.
The camera was eventually transferred to a B-17 and continued in Coast and Geodetic Survey use until 1961. In 1943, V-189, by then in war paint and assigned administratively to PatRon 44, was transferred to the South Pacific where it was engaged in installation and testing of the then new and top secret LORAN (LOng RAnge Navigation) system.
At war’s end, V-189, like so many historic aircraft, was scrapped on a now unknown Pacific island. The aircraft identification plate however was removed and is reportedly on display at the Coast Guard Museum in New London, Connecticut.
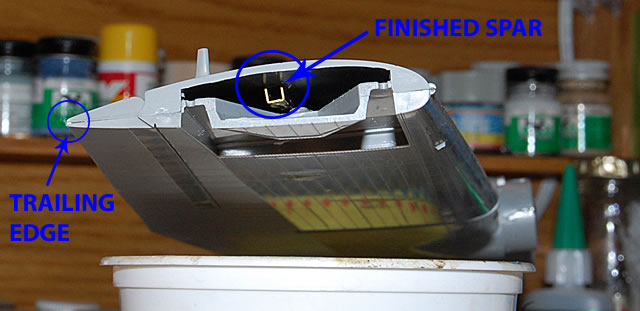
Construction began with …. THE WING! And it’s a BIG wing (apologies to Bomber Harris). Nearly 25 inches from float to float. Some builders have reported a tendency for this long span to droop with time, although others have contested this. Still, to be on the safe side I installed a spar in the wing consisting of telescoping square brass tubing.
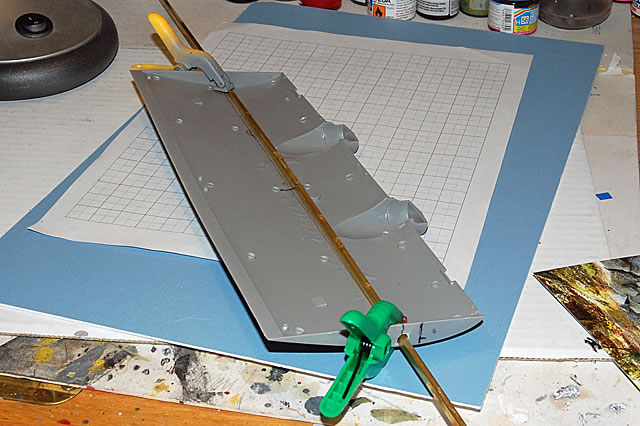
Since it’s sold in 12 inch lengths, I used three pieces (two 1/8 inch and one smaller to go inside). These I secured to the upper wing pieces with epoxy.
The wing trailing edge presents some problems due to thickness, and at least in mine the angle between the upper and lower mating surfaces seemed reverse, making a thin edge difficult although I’m sure those more patient than I could achieve better results.
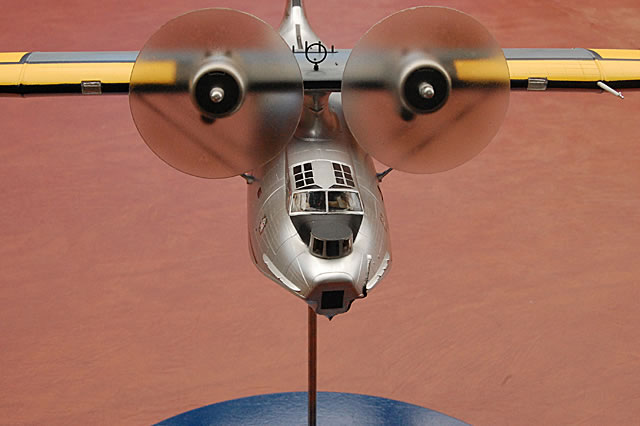
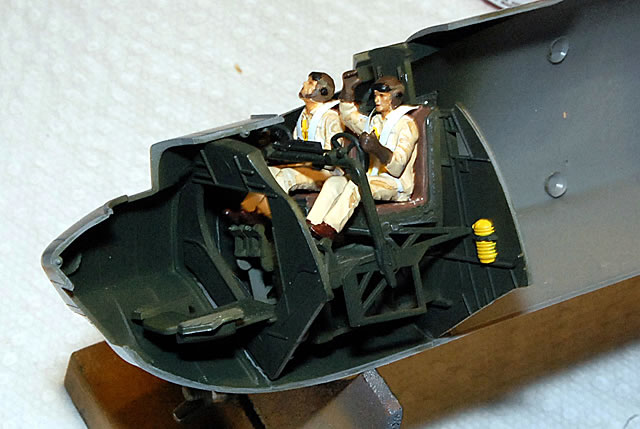
Moving on to the fuselage, the cockpit was box stock, although I added a crew from the ProModeler 5A kit. Little will be visible through the framed canopy in any case.
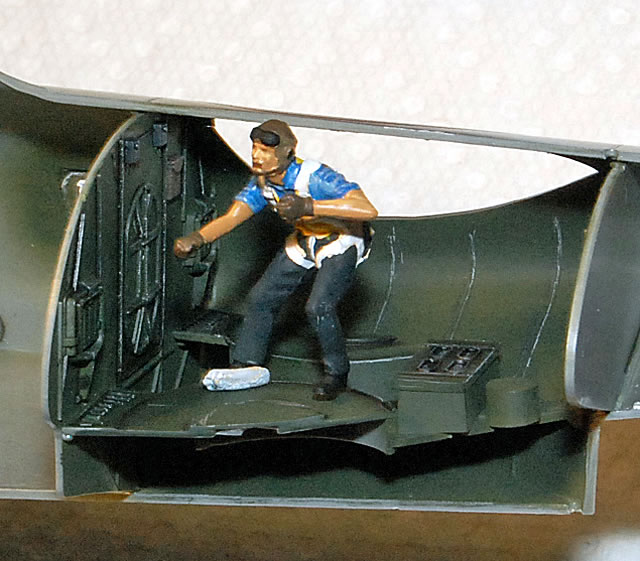
In the waist position, I needed to “DeMil” the plane, since I can’t believe a peacetime photomapper would still carry the machine gun mounts I removed them and the ammo trays. Not having any references to what the actual aircraft waist position looked like, I left it at that. For all I know there was a Lazy Boy recliner in there.
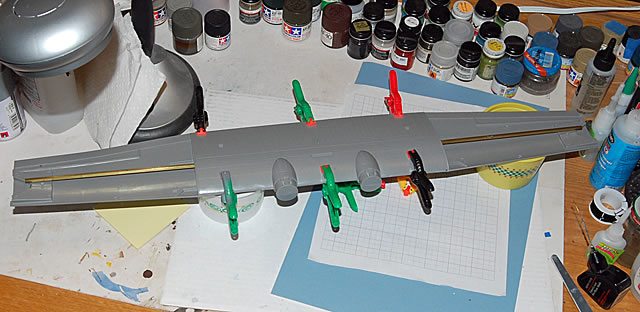
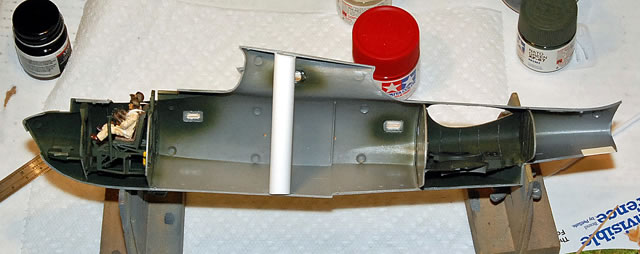
The “DeMil” work continued on the underside of the wing, where all the (very large) attachment sockets for the radar antennas and depth charges were filled in. Note in the pic the blue blob on the waist crewman’s foot is a piece of BluTac. He’ll be glued in later just before the blisters get added. I installed a tube from Evergreen stock in the center of the fuselage below the pylon to support the stand. You can also see the tail has been cut off for installation of the Belcher Bits replacement tail.
The Belcher Bits tail is a significant improvement in overall appearance compared to the overly fat Monogram tail.
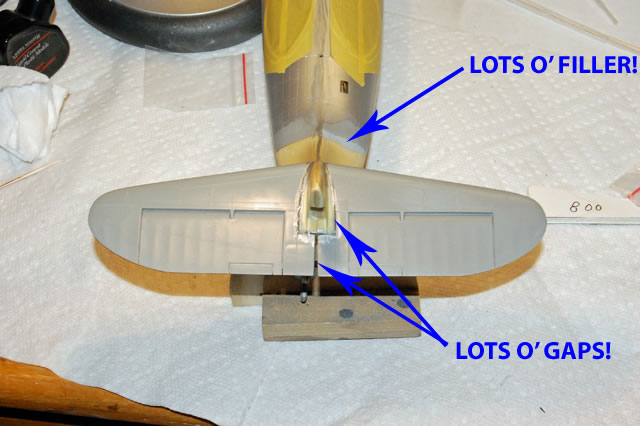
Others have had little difficulty with this conversion but it sure gave me a lot of trouble, likely due to my more-or-less pathetic modeling skills. Getting it faired in properly was made more difficult by the planned aluminum finish which was sure to show any flaws in my handiwork (and does). To do it right, I would suggest filling in Belcher’s “panel trenches” and rescribing them to match the far more petit panel lines of the kit, and then adding the eight zillion rivets which are so prominent on the kit (and the real aircraft) but absent on the Belcher tail.
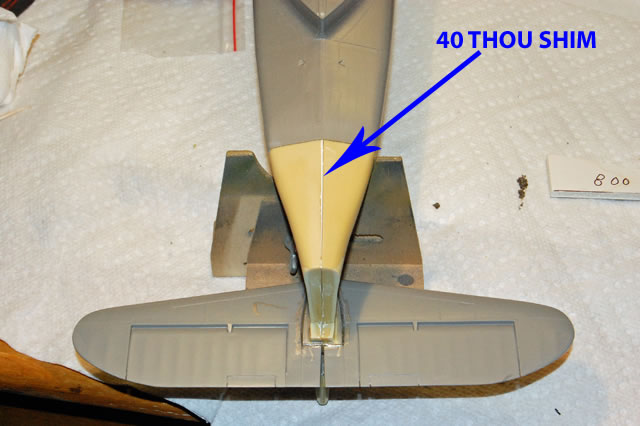
The only other area of the kit that gave me any trouble was the fit of the wing struts to the fuselage. This was a difficult area to fill and sand and again, the silver finish shows every flaw!
I actually painted the wing and the fuselage entirely separately and decaled them before joining, the fit of the wing to the pylon is that good! Yellow, silver, and gray colors were Tamiya rattle-can lacquers. Mostly these were applied by spraying them directly from the can, although for touch up I did decant some and airbrush it for better control. Most of the black striping are decals from the Aeromaster sheet. These had a tendency to break apart if not careful. The deicer boots were masked and airbrushed with Tamiya Nato Black. If I were to do this over again, I would airbrush the rudder rather than use the decal, which did not go down well over the complicated surface.
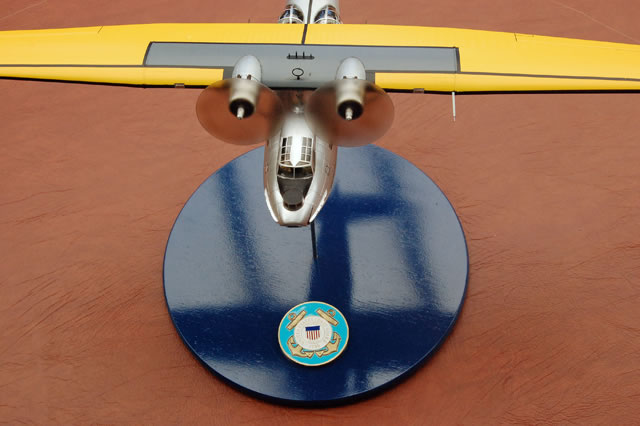
I have yet to settle on what I regard as an acceptable “spinning propeller” appearance, having spent several hundred hours staring through the genuine article I have a distinct bias. For this effort, I cut the prop blades off and sanded the spinner smooth, then cut the front and back of the spinner apart. I cut discs of clear Evergreen styrene which inevitably get scratched. I then airbrushed them with Tamiya Smoke to which a small amount of flat base was added.
Finally, since the antenna wires would be SOOOO long I opted to use actual fine (0.005 in dia.) stainless steel wire that I got from SmallParts.com. This is interesting stuff, it’s flexible as a hair but you can twist knot it like wire.
I like the end result and it adds some really striking colors to my collection. When I get to my -5A tho, I think I’ll stick with the kit tail!
Model and Text Copyright © 2010 by Alex Tula
Page Created 2 September, 2010
Last Updated
2 September, 2010
Back to HyperScale
Main Page

|
 Home
| What's New |
Features |
Gallery |
Reviews |
Reference |
Forum |
Search
Home
| What's New |
Features |
Gallery |
Reviews |
Reference |
Forum |
Search