|
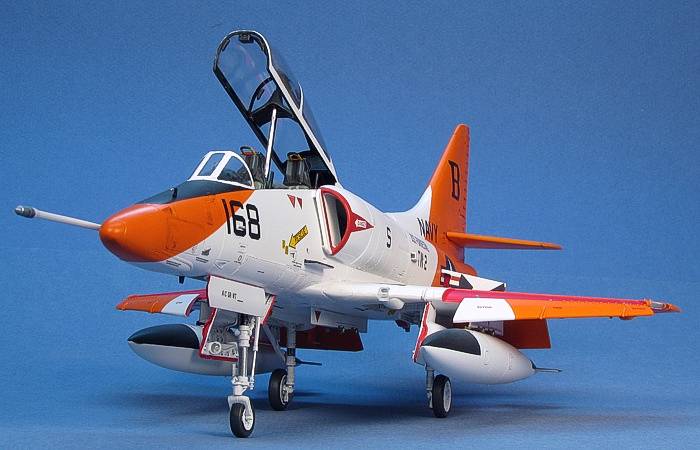
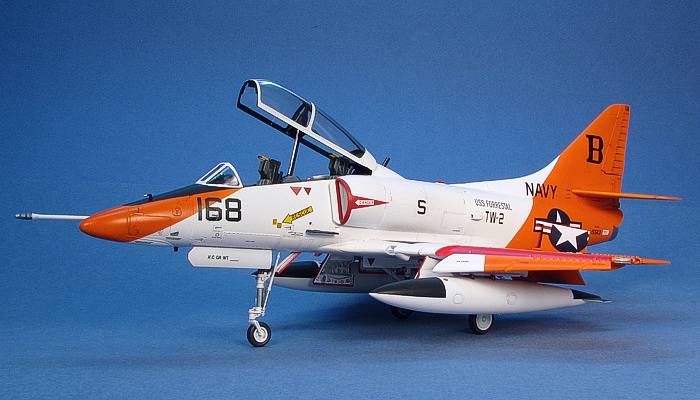
Hasegawa's 1/48 scale TA-4F/J
Orange Skyhawk
by David W. Aungst
|
TA-4J Skyhawk |

Hasegawa's 1/48 scale TA-4J Skyhawk is available online from Squadron.com
I was clamouring as much as everyone else for Hasegawa to release a 1/48 scale TA-4 Skyhawk kit to go in their already fabulous A-4 Skyhawk family of kits. The two-seat version was about the only Skyhawk they had yet to release. I surprised myself a little when I did not start building it as soon as it arrived. I guess part of the problem was I had just finished the "One Man Group-Build" and built no less than eight Hasegawa 1/48 scale Skyhawks in the prior year. Building another at that time just seemed so ... redundant.
Almost a year later, I started getting itchy to build more Skyhawks. The time had come to take this TA-4 kit out for a test drive.
The Kit
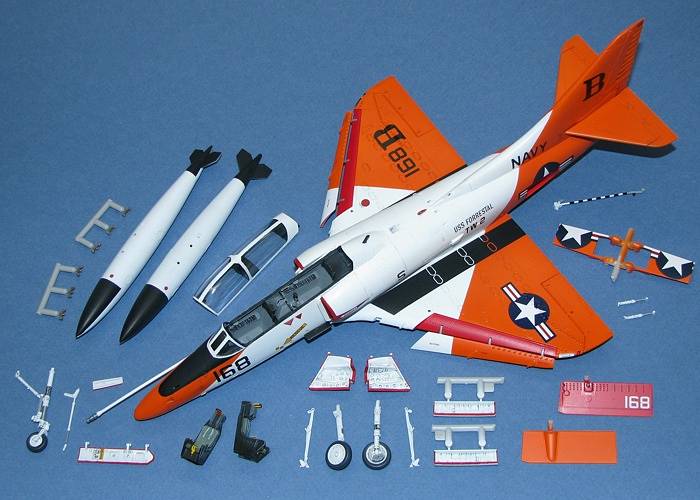
Anyone who has seen one of the single-seat Hasegawa 1/48 scale Skyhawk kits has already pretty much seen the two-seat TA-4 Skyhawk kit. They kept most of the same sprues in the two-seat kit, substituted new fuselage halves with the two-seat configuration, and added one new sprue with all the parts specific to the two-seat version. This was good news since the single-seat kits are very nice with great fit. How could the two-seat kit be any different if they preserved all the sprues?
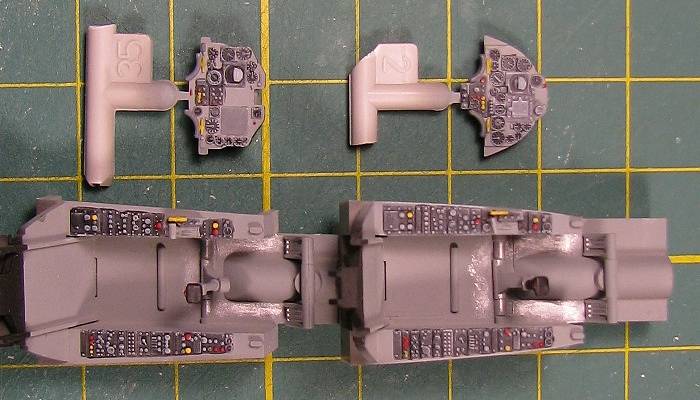
I had decided ahead of time that I wanted to maintain a totally out-of-the-box build, so I built the kit cockpit as directed, including using the Hasegawa ejection seats. A little careful painting popped up the details nicely and I was ready to seal up the fuselage after only a few hours of work.
The wings assembled easily and attached to the fuselage without the need for any filler. I quickly added a bunch of assorted airframe details and I was nearly ready to paint.

Oops! I knew I forgot something.
 In my excitement, I sealed up the fuselage without putting weight in the nose. The kit calls for 8g in the nose. I briefly considered stuffing the front ends of the fuel tanks with lead shot, but that would put a lot of stress on the fuel tank attachment points of the weapons pylons. The only right way was to stuff the fuselage nose with lead shot. In my excitement, I sealed up the fuselage without putting weight in the nose. The kit calls for 8g in the nose. I briefly considered stuffing the front ends of the fuel tanks with lead shot, but that would put a lot of stress on the fuel tank attachment points of the weapons pylons. The only right way was to stuff the fuselage nose with lead shot.
I drilled a hole in the flat area of the lower nose, just slightly larger than the lead shot. I then fed 10g of lead (wanted to be sure it was enough) through the hole. This was followed by a heavy squirt of super glue. Lastly, I squirted a little accelerator into the hole to help cure the super glue more quickly. After hanging the model by its tail for a couple hours, the super glue was cured and I have no rattles in the fuselage from loose shot.
While on the topic of construction, there are a couple errors in the Hasegawa instruction sheet to watch out for.
-
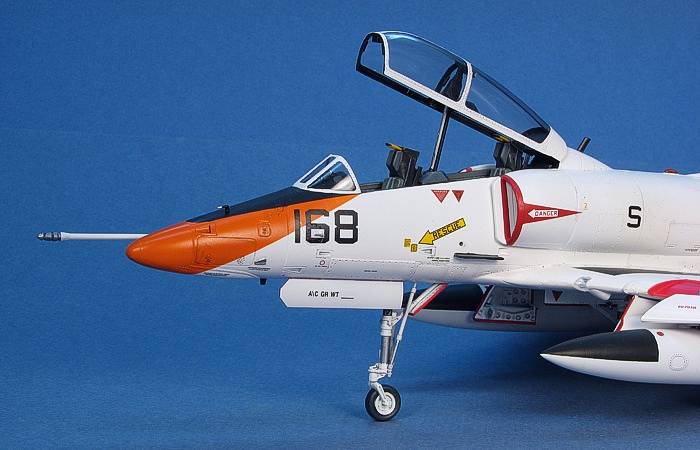
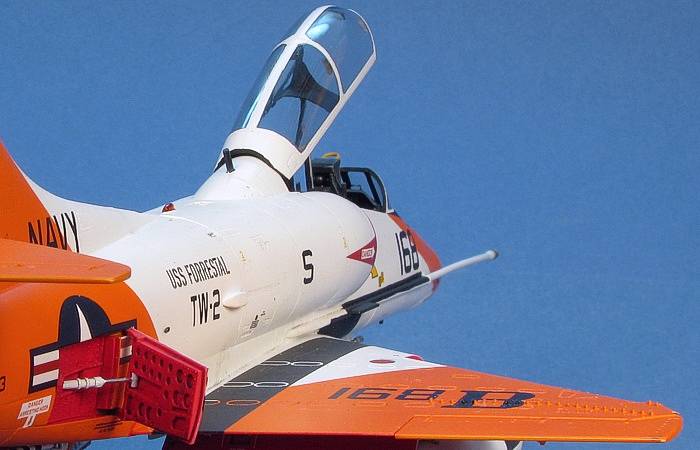
The first is on the upper fuselage. There is a hole in the spine behind the cockpit turtle-deck. The instructions tell you to put a blanking plate over the hole to make a smooth finish. This is wrong. Instead, there is a vent in this location of the real aircraft. Hasegawa provides the vent piece in the kit, but tells you to ignore it. Use kit part A11 to fill the hole with the vent ramp leading down toward the front of the aircraft.
-
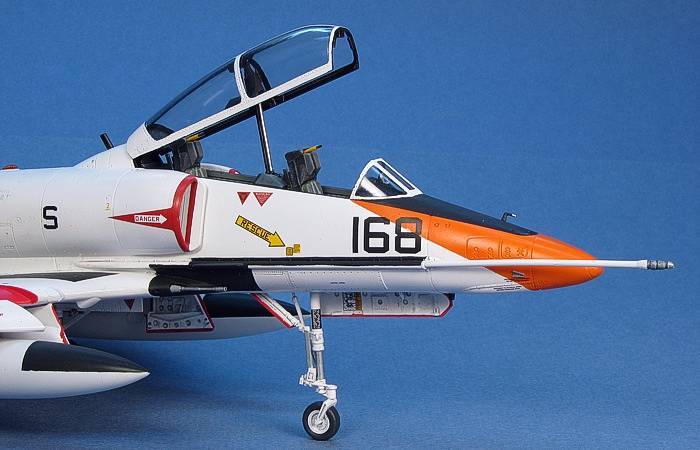
The second error is with the aerial refueling probe. Most TA-4s got the straight one, so they are correct on that, but the way the kit molds the straight probe allows you to cut it off to make shorter probes on the aircraft that need shorter probes. The instructions tell you to cut off a small section of the rear of the probe pipe to shorten it. I do not think the probe is shorter on the TA-4s, though. I left the probe at full length and just removed the alternate mounting pins on the probe piping. This looks to be right on the completed model.
On to painting, now, really...
Paint
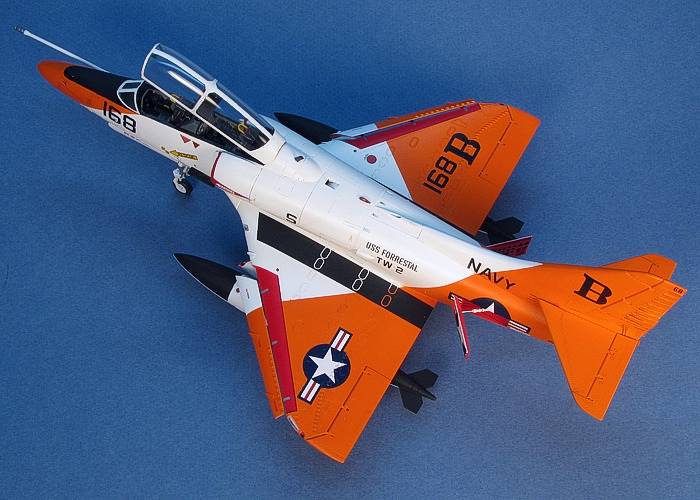
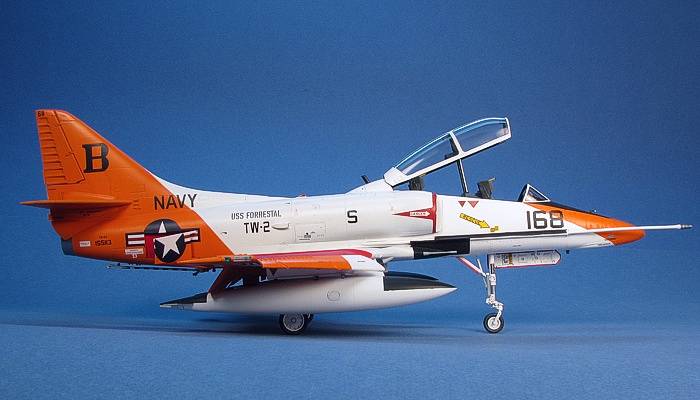
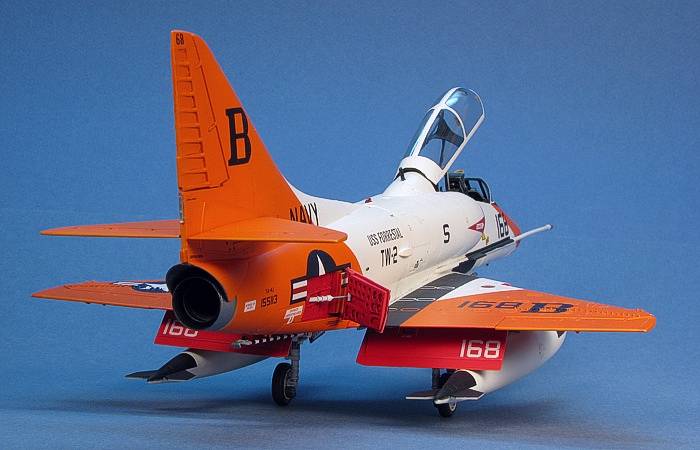
 I have about a dozen two-seat Skyhawks I want to build. So, I had to work a little to narrow the list down to only one. I finally arrived (with a little help from my friend Jeff) at doing a Training Command TA-4J. But, I already had the typical white and orange high-visibility scheme applied to one of my single-seat Skyhawks, so I decided to do this varied high-visibility scheme. I have about a dozen two-seat Skyhawks I want to build. So, I had to work a little to narrow the list down to only one. I finally arrived (with a little help from my friend Jeff) at doing a Training Command TA-4J. But, I already had the typical white and orange high-visibility scheme applied to one of my single-seat Skyhawks, so I decided to do this varied high-visibility scheme.
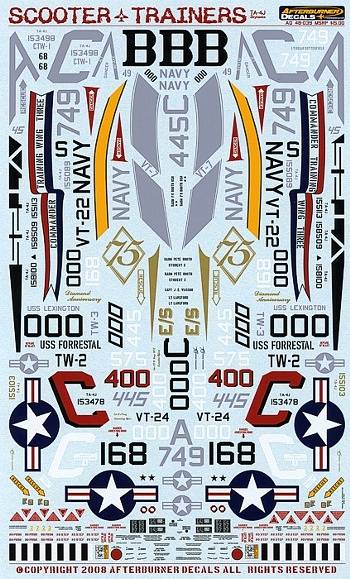
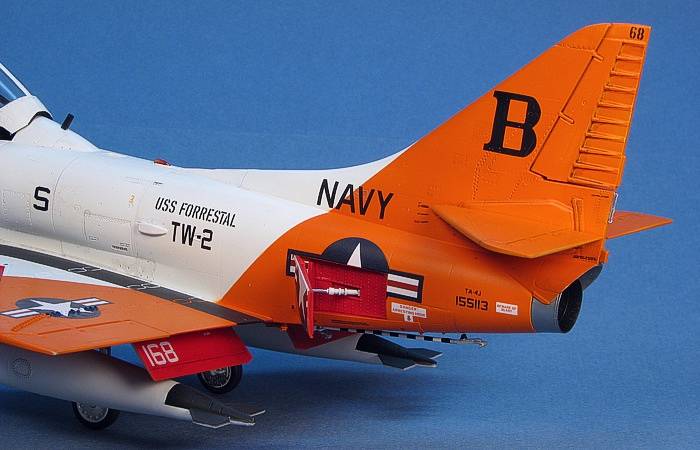
This was an attempt by the US Navy in the early 1990s to improve the visibility of training aircraft. They tested a form of this scheme on most of the training command aircraft. I assume the tests for the Skyhawk were inconclusive because they did not start re-painting the entire TA-4J fleet into this scheme. Decals are available (from Afterburner Decals on sheet 48-039) for this aircraft from TW-2.
|
|
Decals |
Decals Instructions |
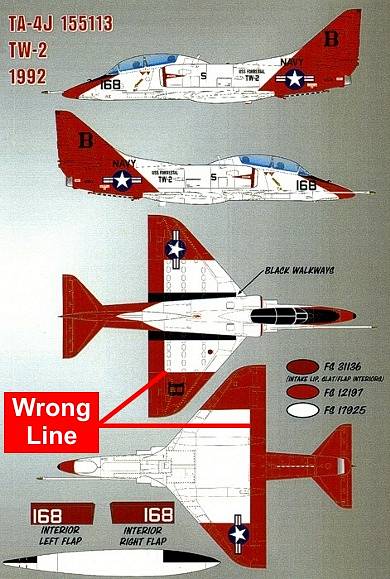
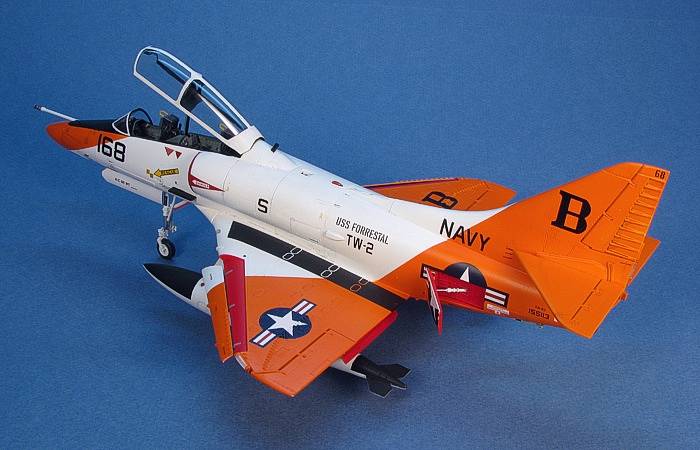
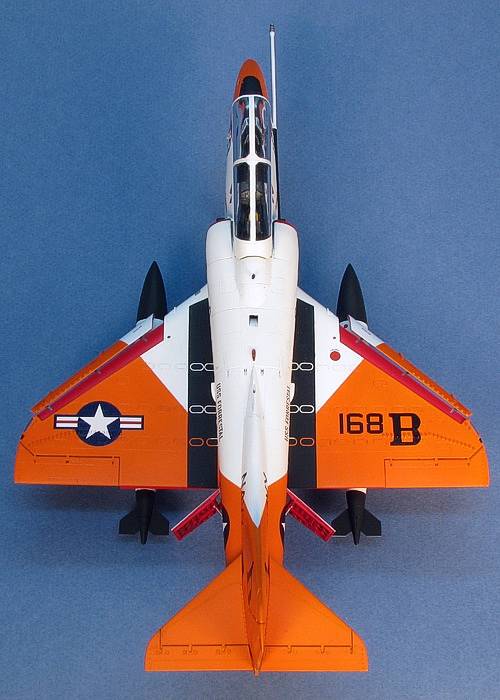
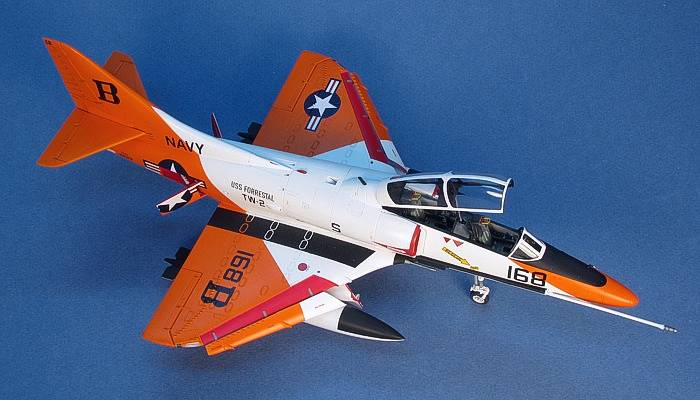
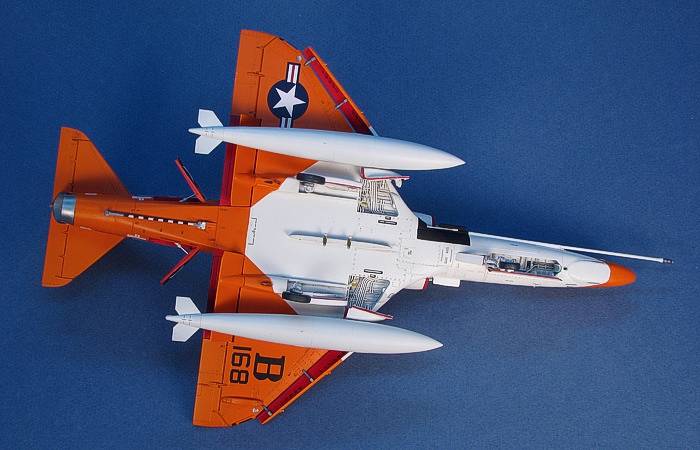
Note, there is an error on the Afterburner instructions concerning this aircraft's orange markings. They show the wing markings as being the same as the normal white and orange scheme, only with the wing flaps, spoilers, and ailerons painted orange. This is not correct. There should be a diagonal line across the wing like I painted my model.
As you can see from the decal sheet image, the markings are crammed pretty tight on the sheet and jumbled together. I had to search a bit to find all the markings I needed on the sheet. As tight as they are printed, I also needed to use my opti-visor when cutting them off the paper so as not to damage any of the surrounding decals on the sheet. It is a picky point, but I prefer sheets that group the markings for each aircraft together in the same section of the decal sheet and leave just a little more space between the printed markings.
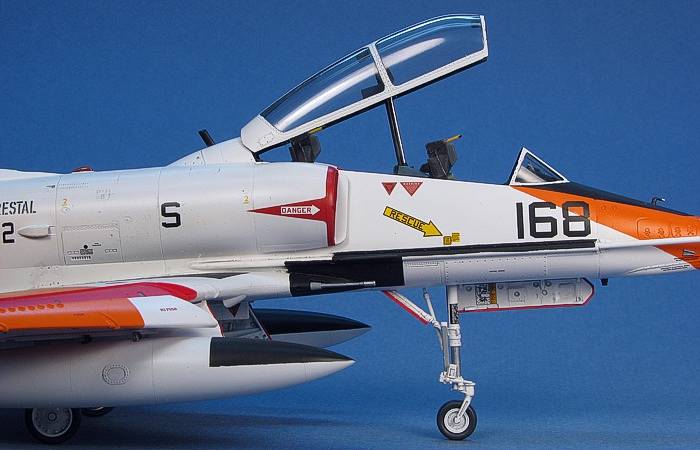
I did have some minor issue with the opacity of the white decals. The decals would have been fine on any aircraft that itself did not have white painted sections. But, as this aircraft is 50% white, I had a ready comparison point for the white decals. All the white decals (applied over the orange sections) came up with a slight orange tint. Fortunately, I had two decal sheets and could just apply two decals on top of each other for each white decal, thus making the decal a more opaque white. This effected all four national insignia as well as the "Danger Arresting Hook" and "Beware of Blast" markings on the tail.
While the unit markings all come from the Afterburner Decals sheet 48-039, the data markings come from various sources. Some are on the the Afterburner Decals sheet 48-039. The intake red stripes and RESCUE arrows come from a different Afterburner Decals sheet (48-057). The ejection seat triangles and some of the smaller text data come from the kit decals. I custom printed my own wing walkways. I had made wing walkways for my "One Man Group Build" last year that had the "cut-outs" for the wing fuel cell access plates. This is not an uncommon thing to see, and I like the added interest the walkways make with them.
For weathering, I used my typical style of thinned down enamel paint washes and air brush shading. I finished the weathering with some dry brushing to pop out the surface details. For a more complete discussion of what I do to weather my models, see my posting on "Weathering Aircraft".
By this time, most everything was painted, so all I had to do was the final assembly.
I tackled the wing tip lights differently on this build than all my previous Hasegawa Skyhawks. Instead of painting the model, then attaching the wing tip lights, then having to paint their frames, I attached the wing tip lights before painting and masked them just like I would mask the canopy. The results were great and the frames now precisely match the surrounding airframe. I will take this approach on the wing tip lights from now on.
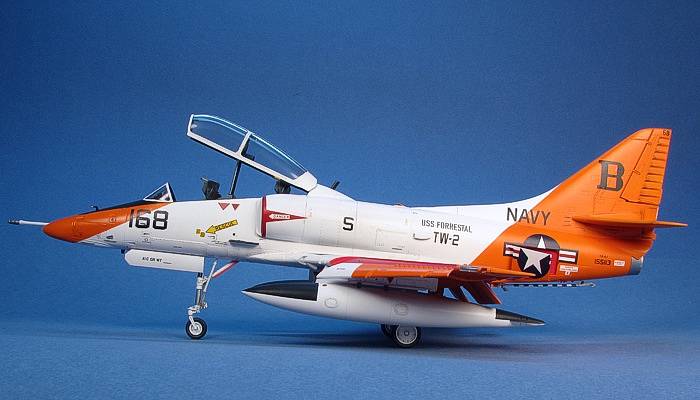
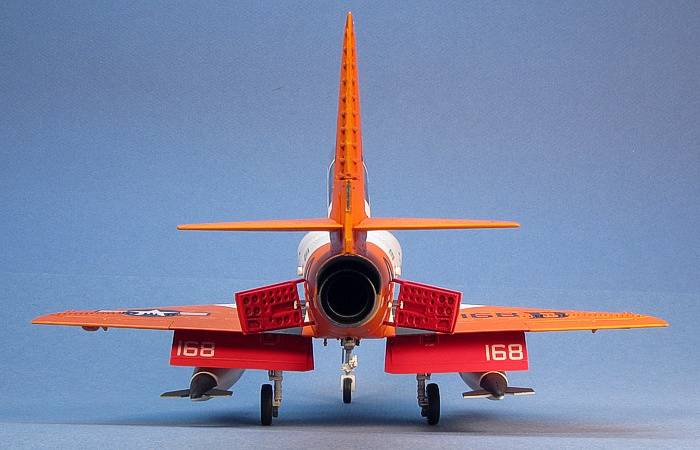
Landing gear on the Hasegawa kit is attached firmly with positive alignment holes. All I did was add super glue to make them permanent. Same goes for the speed brakes. It is actually more common for the speed brakes to be closed on the ground, but I kept them open on this build to contrast the inner red areas with the orange airframe.
The fuel tanks are the kit-provided 300 US gallon tanks. I am unsure how often the training units may have used the 400 US gallon tanks. In any event, I did not feel like whipping up a pair of Monogram tanks to use on this kit (Monogram's Skyhawk wing tanks are 400 US gallon sized).
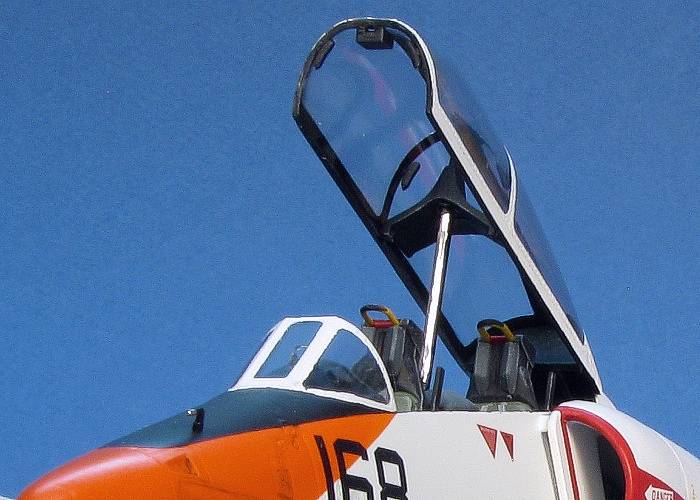
Final task, as usual was the cockpit. I popped off the masked canopy and unmasked it. A little clean up around the cockpit sills with Interior Black fixed any white that had leaked under the canopy edges. The kit provides lots of tiny details for inside the canopy. There are four rear view mirrors and two auxiliary instrument clusters. Add to these two frame structures and you have a busy canopy area. Too bad no one has released canopy etchings to add the latching points to the canopy. Oh well...
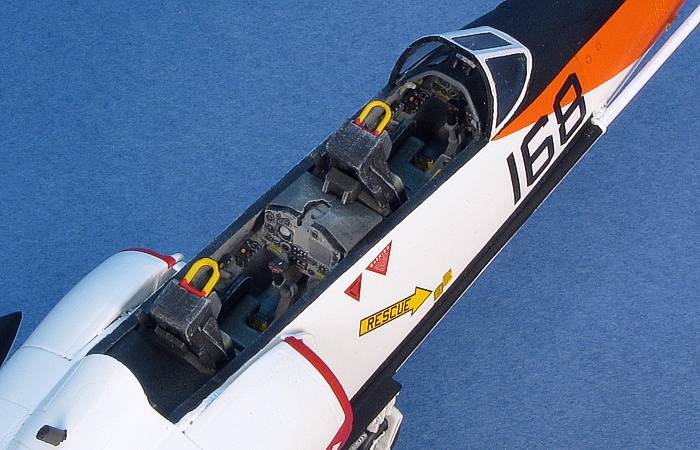
I dropped the already painted ejection seats into the cockpit. They are just the kit-provided seats, carefully painted. I wanted to maintain a totally out-of-the-box build on this kit. The canopy actuator plugs firmly into both the canopy and the upper rear instrument area. I glued the actuator to the canopy, but left the rest un-glued so the canopy can be removed in the future when I am cleaning the model.
Completion Date: |
4 January, 2010 |
Total Building Time: |
27.8 |
Research: |
0.5 |
Construction: |
10.2 |
Painting: |
12.0 |
Decals / Markings: |
4.9 |
Extra Detailing / Conversion: |
0.2 |
I can't really fault much with this kit. Hasegawa had a winner as soon as the first single-seat kits hit the market.
They have not done anything in this kit to mess up the original kit.
I have a few more in the stash and will be building more of them in the very near future.
Models, Description and Images Copyright © 2010 by David Aungst
Page Created 2 May, 2010
Last Updated
2 May, 2010
Back to HyperScale
Main Page

|
 Home
| What's New |
Features |
Gallery |
Reviews |
Reference |
Forum |
Search
Home
| What's New |
Features |
Gallery |
Reviews |
Reference |
Forum |
Search