|
Hasegawa's 1/32 scale Messerschmitt Bf 109 G-2/R6 Gunboat
The Good, The Bad and The Ugly
by Bruce Salmon
|
|
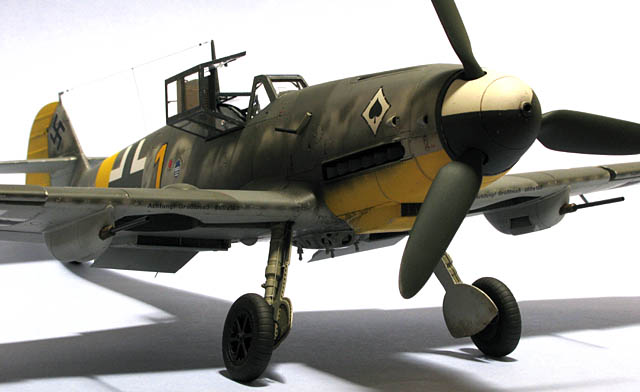
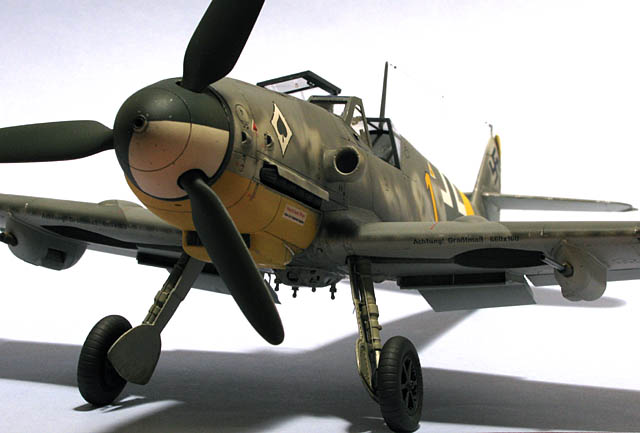
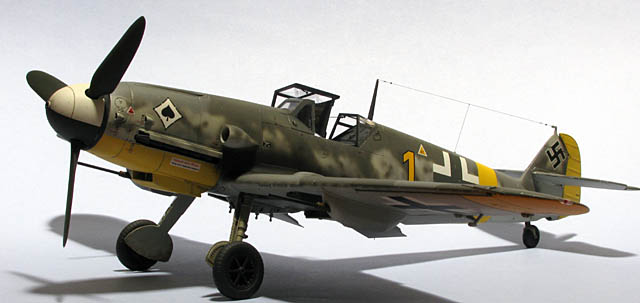
Messerschmitt Bf 109 G-2/R6 Gunboat |

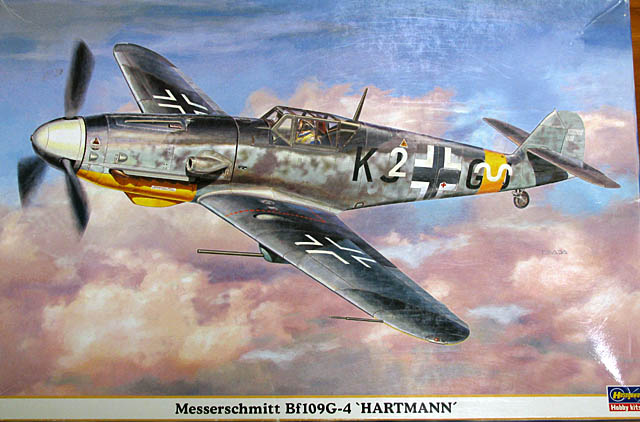
Hasegawa's 1/32 scale Messerschmitt Bf 109 G-4 is available online from Squadron
This is actually the 109 G-4 "Hartmann" kit backdated to a G-2. The choice of building a G-2 came from wanting to build a quintessential 109 in two-tone grey with a yellow tail. Photos of G-4s are not all that common so I opted to build an accurate representation of a G-2 without having any photo evidence to back up its actual existence. My model is a late G-2 with the G-4 wing bulges and a non retractable tail wheel without the fairing over the well (the kit wing bulges in the wheel wells would be difficult to fill without losing a lot of detail).
The Gustav represented is from JG53 "Pik As" in late 1942 on the Russian front.
Aftermarket Products Used:
-
Eduard PE set (32 164) Bf 109 G-6 exterior
-
MDC (CV32012) Bf 109 ETC Drop tank rack
-
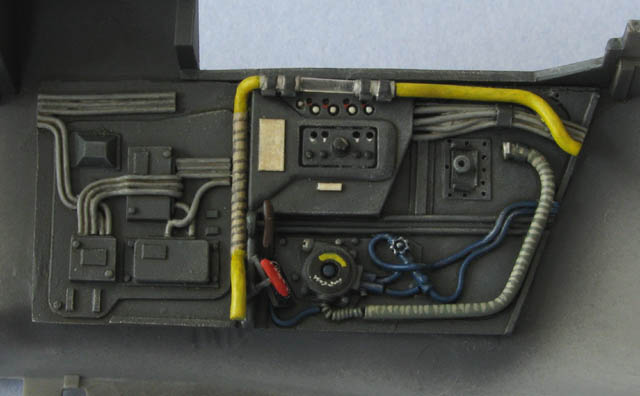
MDC (CV32008) Me 109 G-2/G-4 Cockpit set
-
MDC (CV32029) Me 109 F-K Corrected spinner
-
Quickboost QB 32 024 Bf 109 G/K Exhausts
-
CMK Q32 083Bf 109E Wheels
-
EagleCals (EC#48) Messerschmitt Bf 109 G-4s
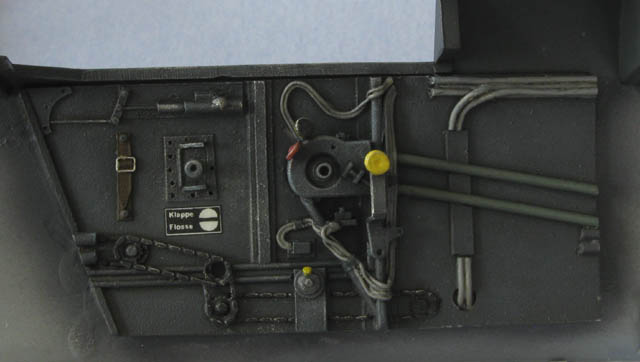
Cockpit
The MDC resin cockpit fits well although the instructions are a tad confusing. This is the limit of my compliments about MDC! All my MDC resin was poorly cast (see "the ugly" commentary at the end of this article). Some parts were missing and I even had a sidewall from a different 109 cockpit. I managed to find enough parts between 2 sets to make one cockpit (with some scratch building also necessary).
Make sure you dry-fit your instrument panel and be sure of where it should line up so that the gunsight fits to the right of the fuselage centreline. It would also be easier to cut off the Flap/Trim wheels and instead attach them to the sidewall.
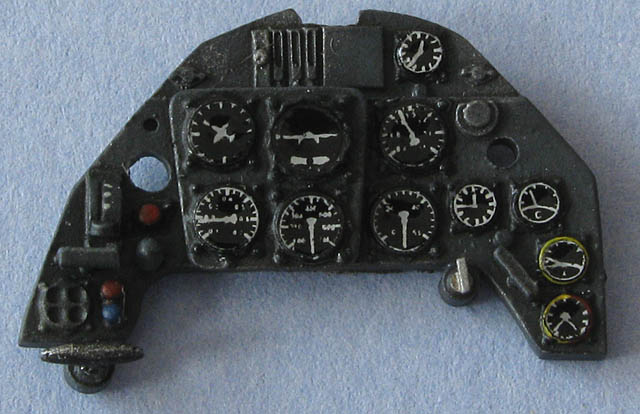
The MDC instrument decals proved to be ill-fitting and in the end I had to punch them out with a punch and die set.
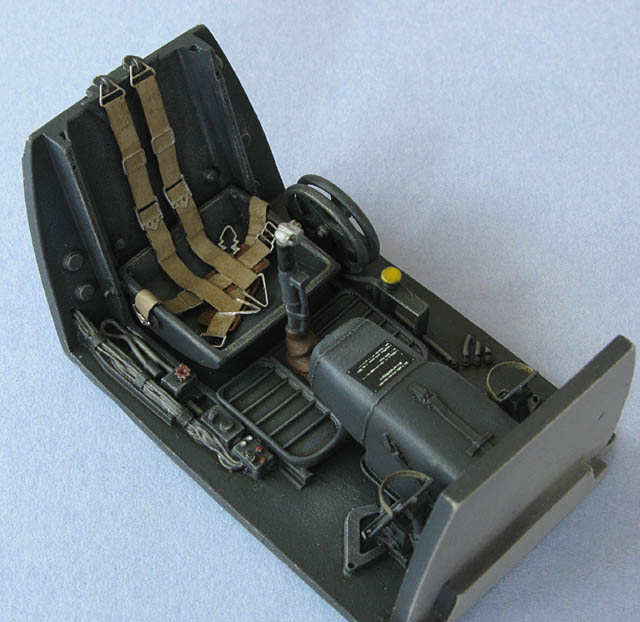
The interior was painted, given an oil wash and drybrushed to help pop out the details.
Fuselage
I glued the two fuselage halves together then assembled and attached the fuselage rear insert as advertised. It fitted well with only a small amount of filler necessary to even out the join. On the insert I had carved out the tailwheel hole and added some ribbing to the interior and some bracing to fit the new tailwheel leg. I made the new leg from brass tube and added a leather cover to it using tissue paper soaked in white glue. Lastly I attached the central wing root insert under the cockpit floor.
Cowling
The one annoying thing wrong with the cowl and MG setup is the big gaping hole you can see under the gun barrels when everything is fitted into place. There should be blast tubes which fit snugly against the holes in the cowl and these had to be scratch built. This was done by hollowing out some plastic tubes and then gluing them to the underside of the cowl.
The join was filled and sanded and later on, after painting, the MG barrels would be cut to the appropriate length and fitted into the tubes.
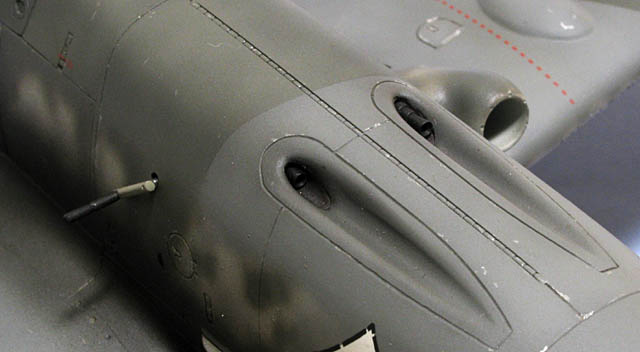
Supercharger
The inlet fairing for the supercharger is overly wide on the inside and because of its large size in 32nd scale is very noticeable. To fix this problem I bent a piece of plastic tube using the flame from a candle and glued it to the inside. This was filled and sanded many times before I was satisfied with the fit.
Wings
Firstly I cut out the holes in the curved section of the wheel wells where the retracted legs would lay and added scratch built hydraulic actuators on the inside.
The fit of the forward radiator PE parts was problematic as they didn't sit as shown in the instructions (the actuator rod holes are also in the wrong place). A few choice words and some bashing got it back under "man"trol.
The wings go together easily although the strengthening beams cause sink marks on the upper surface. The wings were then slotted onto the protruding fuselage spars fitting perfectly without the need for any filler.
Note:
The Undercarriage legs will be wobbly due to how Hasegawa has engineered the lower central wing insert (A6). You need to make sure that the outer circular half of the leg studs on part A6 are glued to the lower wing halves so that undercarriage is solid. Mine had quite a gap so I used loads of super glue to fill it.
The elevators were cut out and repositioned and the rudder offset – making sure that they match the controls in the cockpit.
Undercarriage
I decided to strengthen the undercarriage legs by drilling out the pegs and gluing in brass tube for extra strength. Interestingly each leg had a large air bubble on the inside just below the square peg.
To these I added brake lines, thinned out the doors and bludgeoned on the Eduard PE which didn't fit very well at all. I then dry fitted the CMK wheels which I would glue on later. I was originally going to use Aires 109E wheels but they have a much more angled flat bottom that will not work on the more upright G models, unless you don't mind having very flat looking tyres.
Radiator Flaps
On first appearance the rear Eduard flaps look very nice when built up, but they are noticeably 2-dimensional. This is no good in 32nd scale and looks very obvious. Not only that but Eduard would have you attach them using only the thin edge of the PE (an impossibility). I made some tabs for them to attach to but you can see these easily and I almost tore them off in frustration. I began to scratch build new radiator flaps using the kit parts but in the end decided against it as I had lost my will to care by that stage.
Note:
The flaps should open evenly in relation to the outer flap (the top and bottom radiator flap being equidistant from the centre of the outer flap's position).
ETC Rack
This MDC rack is probably the most accurate out there but is very fiddly as you have 4 separate arms to glue on and then the fairing to fit over them. I would advise you to use a slow setting glue to allow enough time to line everything up properly. This was the second one I received and it still needed a lot of trimming, filling and sanding to get it to look anywhere near what it should have been.
Propeller
The MDC spinner I received was quite oval around its circumference so I thought about getting an Eagle Editions spinner as a replacement. On second thought I decided against this option as the Eagle spinner was also just a solid chunk of resin and you cannot see through the propeller holes like you can in real spinners. So what I did was to dremel out the MDC spinner to just above the propeller holes then heat it and force it down over the kit spinner (I had cut the top off the kit one) to make it circular. I then sanded it to fit the kit backing plate and what you get is a more realistic spinner than any aftermarket one out there.
Canopy
I added sliding window handles fashioned from clear sprue and attached them with white glue. The armour plate headrest was thinned out and braces added.
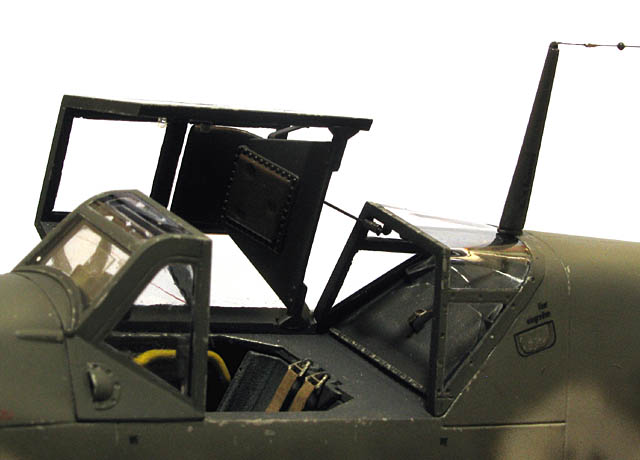
I made a handle/strap for the baggage compartment and added handholds and map-reading lights to the windshield frame. Bungee cord attachment lugs and canopy release lever completed the fit out.
Other Modifications
-
New tail aerial mast constructed – mine eventually broke off after catching on things one too many times.
-
Wing cannon barrels made from brass tubes and the dust covers made from tissue paper soaked in white glue.
-
Pitot tube from brass tube and wire.
-
Starter handle.
-
IFF aerial.
Paint
Firstly I sprayed a coat of primer to check for any issues with the build and to make sure the paint sticks well. I needed two goes at the fuselage mottling before I was happy enough with it.
Paints used are as follows (all enamels):
-
Fuselage: Xtracolor X206 RLM 74 Graugrun / X207 RLM 75 Grauviolett / X208 RLM 76 Lichtblau. Cut with Tamiya XF3 Yellow and/or XF 2 White to lighten
-
Topsides Wings: X206 RLM 74 Graugrun / X207 RLM 75 Grauviolett
-
Undersides Wings: X208 RLM 76 Lichtblau. Wheel wells X201 RLM 02 Grau
-
Cockpit: XF63 German Grey
-
Spinner and blades: XF27 Black Green. Backing Plate: XF1 Black
-
German Brown Tyres: XF1 Black 3 / H62 Leather 2 / XF2 White 1
-
Guns: Humbrol 27004 Gun Metal (buffing metalizer)
-
Exhaust stains: XF1 black 3 / XF51 khaki drab 1 / X19 smoke 8
Decals
Next I sprayed some gloss varnish only where the decals were to go. The decals went on very nicely except for the wing crosses which shattered. I ended up having to mask and spray them. I then gave the model a coat of satin varnish before weathering commenced.
Weathering
The model was given an overall wash with raw umber oil mixed 50/50 with burnt sienna. Some panel lines were darkened with further darker washes and oil stains added with a black wash and drybrushing. Finally some restrained chipping was achieved using Tamiya XF16 Flat Aluminium applied with a fine brush.
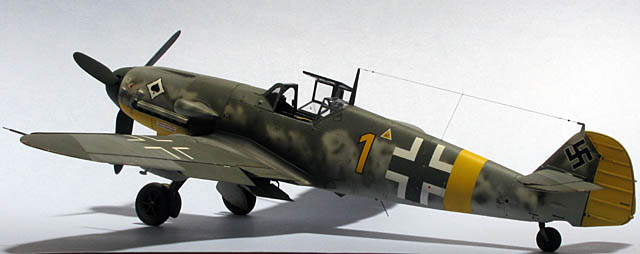
Exhaust/Gun smoke staining was then applied with a well thinned black/brown mix as noted above adding a streak of XF55 Deck Tan to simulate the lead–oxide residue. The exhaust pipes also had a drybrushing of white oil paint on the openings.
The Built-In Disaster
Every build process usually has one or more built-in disasters. Mine came when I had the painting almost finished and was applying the exhaust stains. I had just completed the last stroke of the airbrush and when holding the model at arm's length noticed that I had up-ended the airbrush paint reservoir all over the tailplane and rudder (it was almost completely black). Luckily I had already varnished so it wiped off without taking any of the paint job with it.
A matt-ish varnish was then sprayed to finish the job.
Final Assembly
Last on are all the breakables:
Undercarriage legs and wheels (the angle of the wheels was set with the aid of slow setting epoxy glue), radiator flaps, propeller, canopy, aerial mast and antenna wire.
Every good science experiment needs a conclusion and the only relevant one I can come up with is that I am getting a bit sick and tired of poor quality aftermarket stuff that I have paid an arm and leg for.
The Good:
The kit was the best part of the whole build. The parts fit very well and it is mostly accurate except for one or two things that are easy enough to fix. I would not hesitate to recommend it.
The Bad:
The Eduard PE set is disappointing and the parts mostly redundant. It does not represent the parts it is replacing very well so in my opinion you are better off just thinning down the kit parts and doing a little bit of scratch building.
The Ugly:
Although my experience with MDC resin in the past has been good, this time round it was almost worse than useless.
Every casting I ordered (6 originally) was very poorly cast with chunks of green stuff in it, fault line cracking and an incredibly rough finish much like 100 grit sandpaper. The quality control too was practically non-existent. I complained and another batch was sent out immediately, unfortunately this had the same problems so I complained again.
I was assured that new sets would be cast but 6 months has now gone by and I get no replies to any of my e-mails. Needless to say I won't be ordering any MDC products in the future. I would even suggest to anyone who stocks MDC products to check the quality of your items before you have to endure the wrath of your customers.
Model and Text Copyright ©
2011 by Bruce Salmon
Page Created 14 January, 2011
Last Updated
14 January, 2011
Back to
HyperScale Main Page

|
 Home
| What's New |
Features |
Gallery |
Reviews |
Reference |
Forum |
Search
Home
| What's New |
Features |
Gallery |
Reviews |
Reference |
Forum |
Search