|
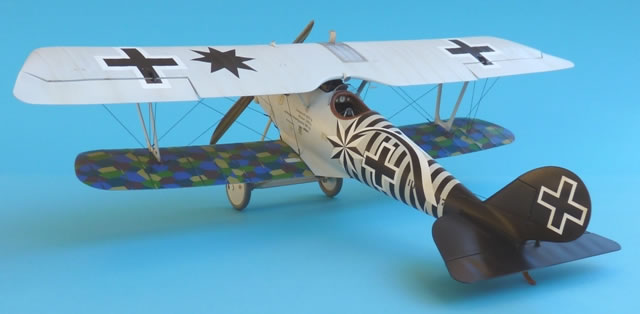
Wingnut Wings 1/32 scale
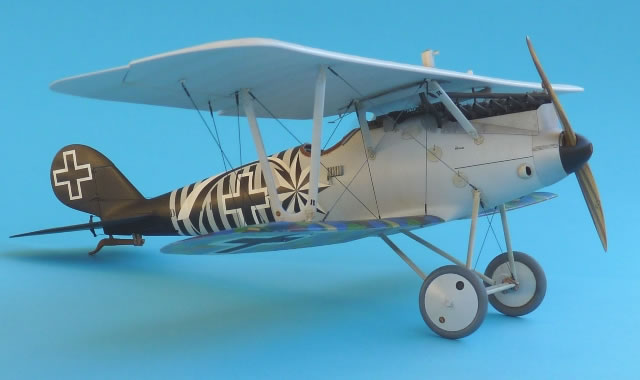
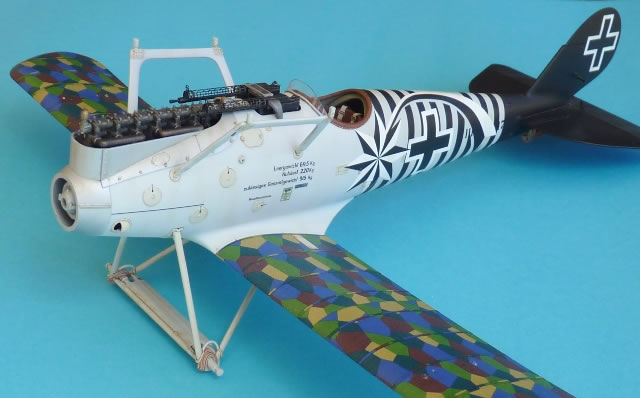
Pfalz D.IIIa
by Rob Baumgartner
|
|
Pfalz D.IIIa |

HyperScale is proudly supported by Squadron
There are a number of ways that you can approach building your next aircraft model.
Sometimes it can be fun researching the subject, buying the appropriate kit, correcting the manufacturer’s mistakes, and even enhancing the detail to extreme levels. On other occasions a modeller just likes to sit down and build a subject “out-of-the-box”.
I chose the latter approach as I needed a relaxing project to make sure I actually finished a model. This means trusting the manufacturer implicitly. After all, no one wants to invest time and effort in a kit that’s not going to translate into an accurate representation of the original.
Fortunately the research put in by WNW is first-class. Everything went as planned with only a little tweaking needed along the way.
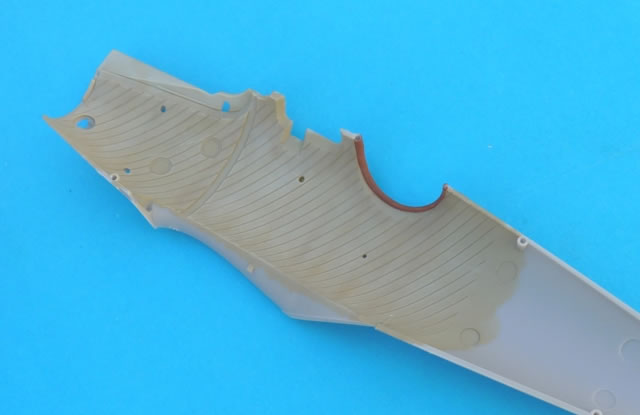
A quick inspection of the parts revealed a very high standard of moulding with sharp, crisp detail. Dry-fitting the interior showed that any ejection pin marks should be hidden from all but the most prying eyes.
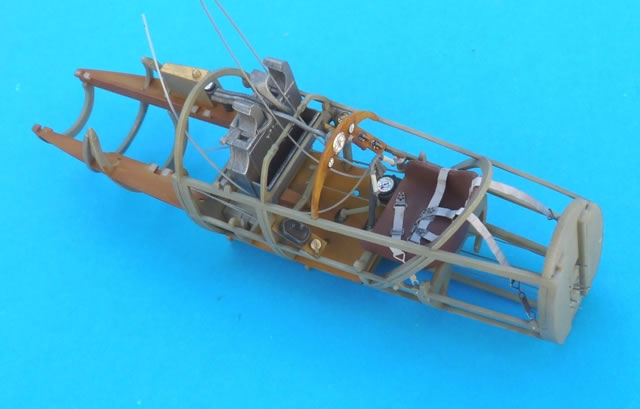
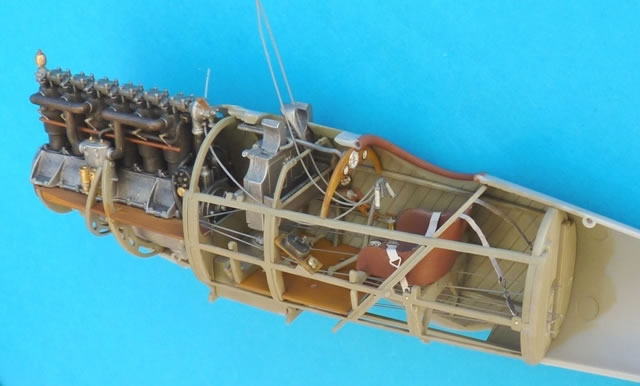
There were no problems at all with the assembly of the internal framework or the cockpit items that were attached to it. The only enhancements added were the cables coming from the pilots hand grip. Two of these led to the activation of the machine guns while the third was used as a throttle. Others are indicated in the instructions and these were duly attached to the rudder bar and control column.
One obvious item that has been missed in the kit is the handle that served as an emergency throttle linkage, which is found upper most of the on the port side. I forgot to fabricate one at the time and had to add it after the fuselage halves were joined together. WNW includes photo-etched seatbelts in this release and these were used after a bit of annealing to make them more malleable.
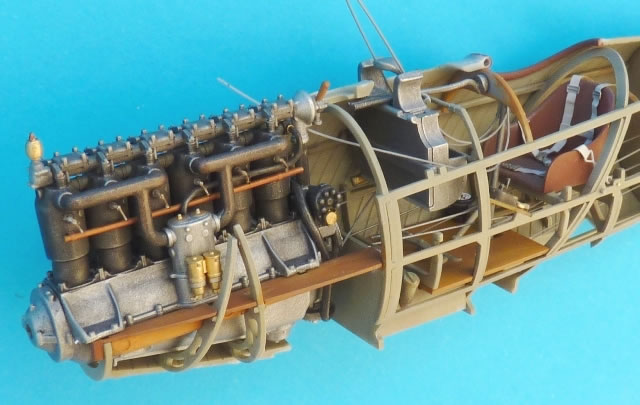
The engine also went together smoothly and I decided early on that my first WNW Pfalz build was going to have a “typical” look, that is, with the engine cowlings on.
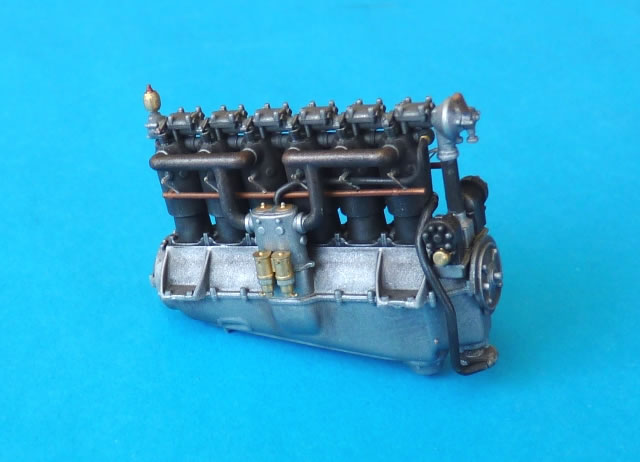
Thus only a modest amount of detail was added to the engine, this being in the form of sparkplugs and their associated leads.
So far, so good. Knowing the quality of research from the manufacturer, the painting guide was followed to the letter.
However, I came across a problem when I tried to encase the interior between the two fuselage halves. There was a gap just behind the lower wing attachment point as well as at the top, close to where the machine guns are installed. At first I thought it was due to excess paint on the mating surfaces but after scrapping this away, the problem remained. A little filing of the rear bulkhead sides on parts A34 and A36, as well as the forward bulkhead A42, soon fixed this. As an extra measure of surety I used a drill to slightly increase the holes that receive the fuselage location pins.
The clever way in which the lower wing attaches, means that when putty is applied to the lower join, no damage at all is done to the fillets. This is because the seam is inboard a couple of millimetres from these razor sharp fairings.
While you have the putty available, there is also little needed for the attachment of the tailplane.
The cabane struts were added next, followed by the undercarriage. Neither of these presented a problem as the location pins were positive and tight fitting. I like to put together as much as I can before painting so that I don’t mar the finish when adding these items later. It also means I get a strong plastic to plastic join without having to scrape away any paint and potentially damaging the surface.
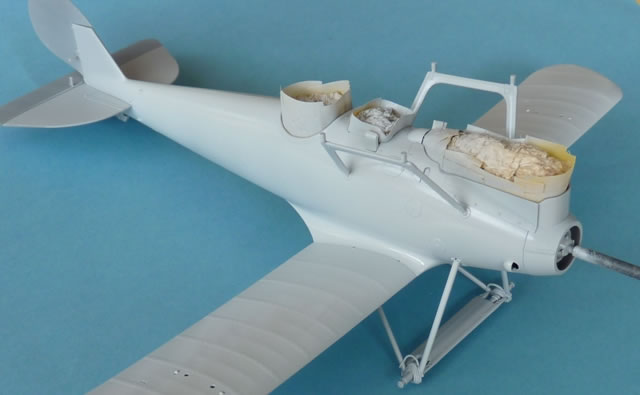
In an effort to make the all important engine cowlings fit as perfectly as possible, I deviated from the instructions and glued them on before doing anything else with the fuselage halves. Of course this created problems with attaching the radiator pipe that needs to be fed through the starboard cowl’s pre-cut opening. The pipe was therefore cut into two parts with the lower section glued to the engine during assembly and the upper half added after the attachment of the top wing.
As there was going to be some tension in the rigging, I chose to pin the ailerons to the wings for extra strength. Before doing so, it was important to drill a deeper hole into the curved “actuator” to allow the rigging material to be connected now for use later on.
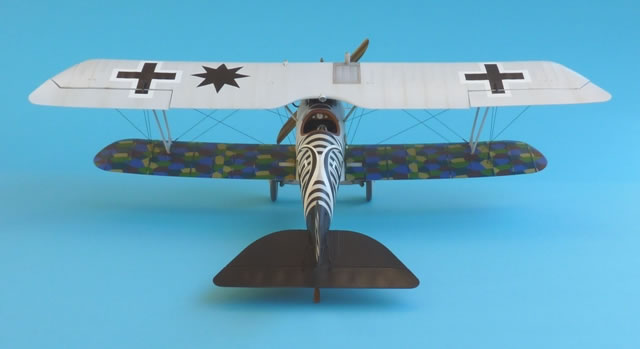
Finishing started with pre shading with Tamiya's black acrylic paint. For the camouflage scheme RLM76, RLM75, RLM81 and RLM83 of X-Tra colors have been used.
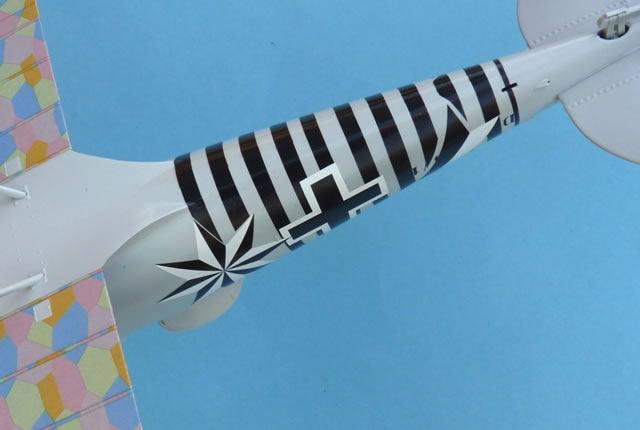
A coat of “silbergrau” was concocted from tins of gloss white and silver Xtracolor paints. This was mixed with lacquer thinner and sprayed directly onto the bare plastic. The option chosen was the aircraft of Max Holtzem. Although I already had an example of his machine in 1:48 scale, I was curious to find out how WNW would handle the complicated markings.
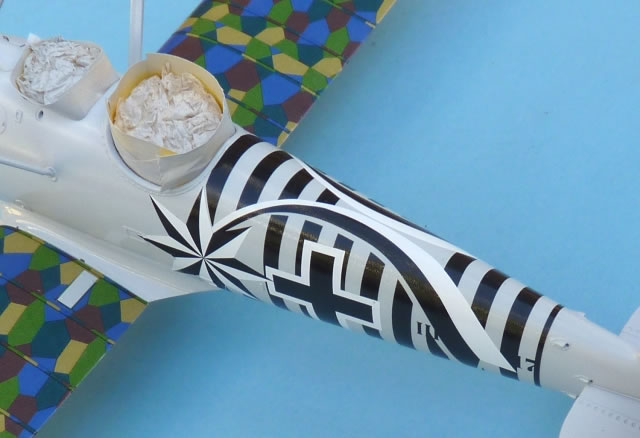
I need not have worried. There were no issues at all, thanks to the clever way in which the design has been executed. It’s divided up into 3 separate parts, and as per the instructions the top section was applied first, followed by the two side pieces. To ensure that there was plenty of time to slide each item into position, a drop of dishwashing liquid was added to the water before the decal was immersed. After a little adjustment, the black stripes overlapped themselves perfectly where they meet at the bottom of the fuselage.
Although not recommended, I did brush on a thin coat of Micro Sol. This was to make sure that the decals really hugged the surface, which they did superbly. Any trapped air bubbles were pricked with a pin and eliminated with a second coat of decal softening solution.
Most of the final details were now added to the fuselage before gluing on the top wing. This included the wheels and fretted machine gun jackets where I managed to run into a couple of small problems. Regarding the former, the covers should be a press fit onto the wheels. Despite the removal of all paint on the mating surfaces, I still had to shave a little plastic off the inner faces.
Due to their scale-like appearance, the aforementioned “Spandau” jackets are very delicate. The builder must be especially gentle when rolling the p-e so that the linkages between the perforations are not broken. Thanks to some “ham-fisted” modelling, I managed to break mine in a few places. Fortunately the p-e submitted after some careful re-rolling around a suitably sized piece of plastic rod. With the correct shape restored, the guns were carefully slotted into position and final adjustments made.
The upper wing slotted onto the struts perfectly. The alignment was excellent with no adjustment needed whatsoever. Once again, all paint has to be removed from the holes and locating pins to achieve this.

Usually I model in either 1:48 or 1:72 scales, where my favourite rigging method is to use “invisible” nylon thread. It is passed through the upper and lower wings and after the usual cleaning up of the exit points, a redeeming coat of paint is applied.
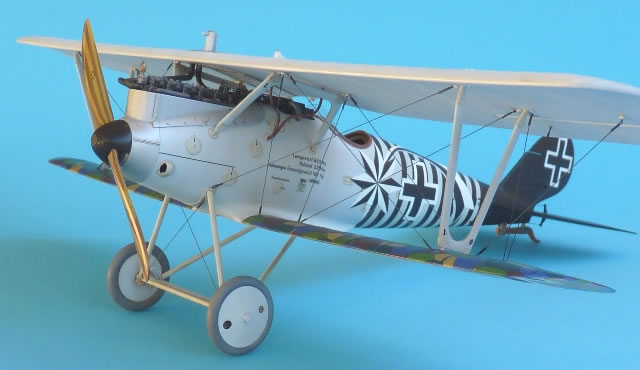
Due to the larger scale of the WNW kit, a representation of the turnbuckles is almost mandatory so a different approach was taken. Although the following is not an exact copy of what is seen on the original, it is a reasonable representation that allows the modeller to rig and tension the cables without damaging the painted surfaces.
The process is to glue a tiny metal loop into the rigging hole. A length of 0.14 mm nylon fishing line (my favourite “invisible thread” being under scale) is passed through a pre-cut length of tube before entering the affixed ring and doubling it back through the sleeve. After carefully pushing the tube down towards the loop, a drop of “super glue” is placed on the outermost end to seal the opening. Excess thread is of course snipped off.
The above sleeves are made by stretching plastic tubing over a flame in the same way that one stretches sprue. It results in a mixed bag of diameters that can be cut and sorted into piles suitable for either 1:32 or 1:48 scales.
The included flare rack for Holtzem’s aircraft is not quite what’s shown in the period photographs. A new one was fabricated out of plastic rod that better represented the number and shape of the pockets.
Weathering and Final Finish |
Weathering was kept to a minimum, with the judicious use of pastel chalks helping to break up the large areas of single colour that covered the wings and fuselage.
My personal preference is to finish a model with a more or less satin sheen. For this I use a heavily thinned coat of Wattle Estapol, again using enamel thinners as the preferred spraying medium. It dries fast and provides a tough and durable finish.
This was one of the most satisfying aircraft kits I have had the pleasure to complete.
There are two ways that one can approach a model like this. One is to take advantage of the existing superb detail and “go to town” with scratch-building. The other is to enjoy the kit for what it is, namely an excellent fitting model with enough features to get a fine result straight out of the box.
I took the latter path and experienced a hassle free build that left me wanting more.
Now where is that R.E.8 hiding?
Thanks to Wingnut Wings for the sample
Wingnut Wings models are available online from their website
Model, Text and Images Copyright ©
2011 by Rob Baumgartner
Page Created 31 March, 2011
Last Updated
1 April, 2011
Back to
HyperScale Main Page

|
 Home
| What's New |
Features |
Gallery |
Reviews |
Reference |
Forum |
Search
Home
| What's New |
Features |
Gallery |
Reviews |
Reference |
Forum |
Search