Eduard's 1/48 scale
Heinkel He 280 V3
by Brett Green
|
|
Heinkel He 280 V3 |

Trumpeter's 1/48 scale MiG-3 is available online from Squadron
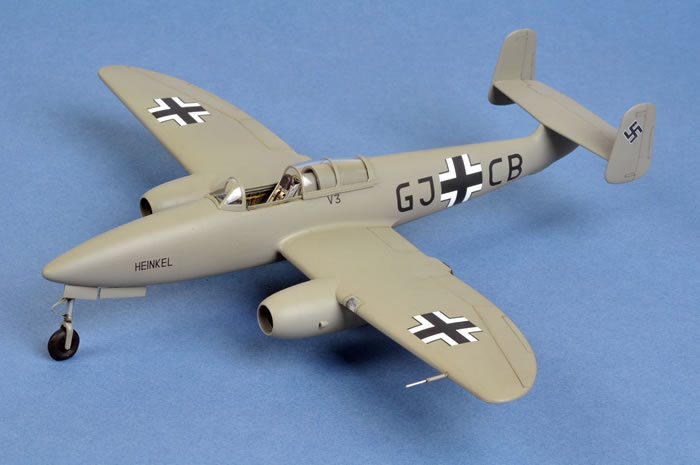
Here is my last finished model of 2011 - the Profipack boxing of Eduard's 1/48 scale Heinkel He 280 released around 2000
The kit featured very fine surface detail and the option of HeS 8a or JUMO 004 engines.
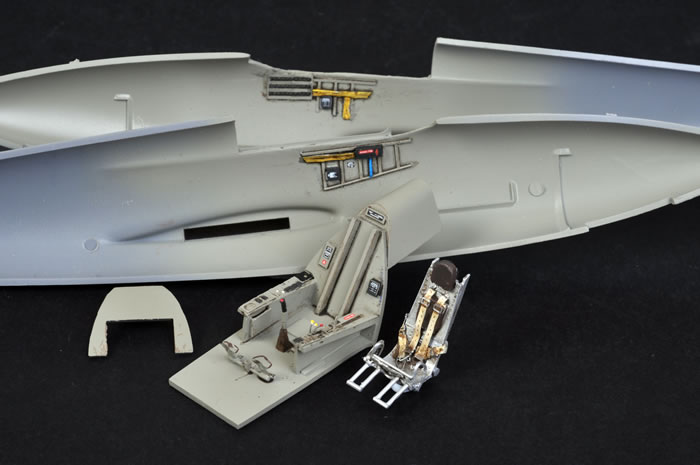
The Profipack includes a resin seat and wheels plus a photo-etched fret, self-adhesive masks and even a shaped nose weight to ensure that this model won't be a tail-sitter.

I broke off one of the seat handles when cleaning up the resin part. This was replaced with bent wire. In retrospect, I should have replaced both handles as the new part is significantly thinner than the original.
The port side console benefits from a photo-etched top plate, but the starboard side does not. I inadvertantly sanded off the raised detail from the starboard side console before I realised this. I pilfered a side console from an old Eduard photo-etched fret for the Fujimi Messerschmitt Bf 110 to restore detail in this area.
I decided to add a little more structural detail to the bare upper sidewalls too.
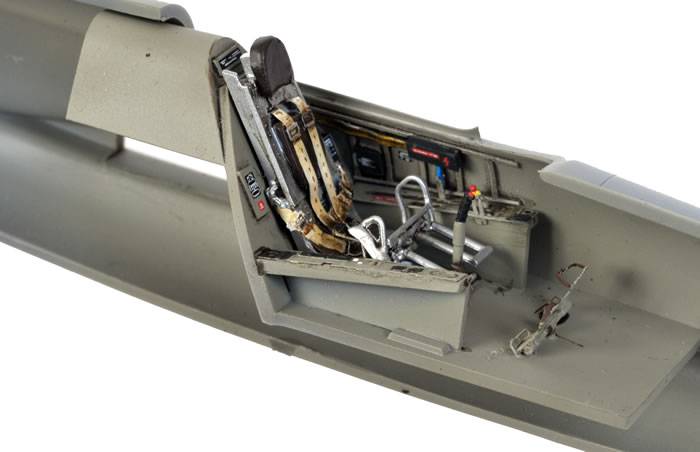
Fine wire was used to reproduce the cockpit cabling. A number of boxes and a map case were fashioned from plastic strip and glued in place. With the relative scarcity of Heinkel He 280 cockpit photos, most of this was imagineering on my part, but it does look busier!
Airscale cockpit placard decals were also applied to good effect.
The balance of the build was pleasant with fit being quite good. I chose to build V3, which was equipped with the Henschel engines.
A few steps and minor gaps remained after construction, most notably along the bottom fuselage join. There was also a bit of misalignment around the back of the jet nacelles. These were all dealt with using Milliput White putty.
Eduard provides a very nice set of photo-etched canopy rails and suggests that they should be installed as the penultimate step before the canopy is installed. I chose to ignore this advice and glued them in place quite early. During construction and handling I managed to mangle both of these delicate photo-etched rails, so I removed them and replaced them with chunkier parts cut from plastic strip instead. Next time I will heed Eduard's advice on canopy rails!
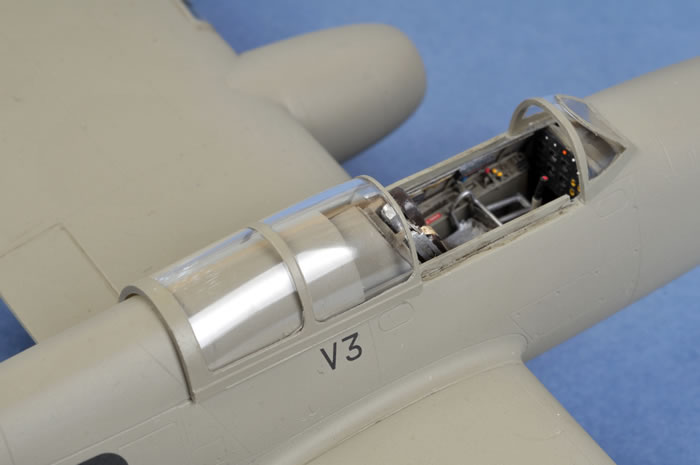
Around this time I was about to mask up the canopy when I realised that it was not actually in the box. I checked the photos of the kit contents that I had taken when the model arrived and sure enough, they weren't there then either. Rather than completely stall construction, I carved a leading edge landing light from clear sprue and fitted it in the front of the wing. This was then sanded to the same profile as the leading edge.
I posted a request for either a spare canopy or a full kit of this long out-of-production model on HyperScale's Plane Trading Forum, and my pleas were answered by Tim Both. I bought his full Profipack kit, which included two full canopies - one open and one closed - so that I would also be able to build the second model in due course.
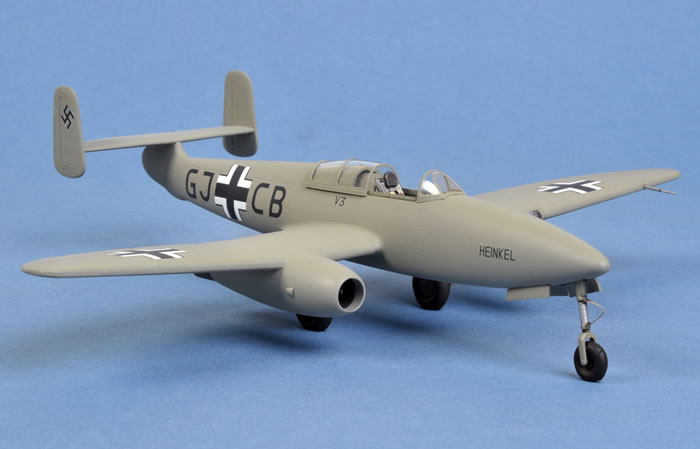
After this enforced intermission, painting commenced. Gunze-Sangyo acrylic H70 RLM 02 was used for what was probably the simplest model paint job that I have ever done.
Kit decals were used. They were brittle and needed plenty of water to allow for adjustment after they were applied to the surface, but they were very thin and looked great once they were in place. The white of the balkenkruez markings was a bit translucent though, so I doubled up the wing crosses, applying a second set over the first, and replaced the fuselage crosses with decals from Eagle Editions.
While I was in Auckland recently I bought a couple of bottles of Tamiya's new XF-86 Flat Clear at the Modelair hobby shop, so I thought I would try it out here. The results were impressive. Tamiya's Flat Clear produces a tough, flat finish even over the high-gloss Future of my Heinkel.
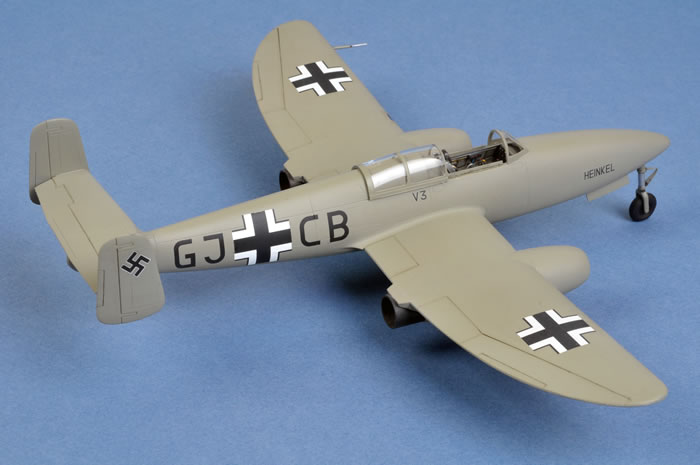
I assumed that these prototype aircraft would have been well maintained so I resisted the temptation to add the usual heavy weathering. Instead, I restricted myself to a dark thin wash in the control surface hinge lines and a little grime around the canopy rails.
Eduard's 1/48 scale Heinkel He 280 is very nice considering the kit is more than a decade old and a product of their earlier limited-run technology. Surface features (notably the recessed panel lines) stand up well in comparison to the latest long-run kits, detail is good and the nose weight is a nice touch.
Anyone with a couple of limited run model projects under their belt won't have any trouble coping with the few alignment and filling challenges that this kit throws up.

If you can find one, grab it!
Model, Images and Text Copyright ©
2012 by Brett Green
Page Created 1 January, 2012
Last Updated
2 January, 2012
Back to
HyperScale Main Page

|
 Home
| What's New | Features | Gallery | Reviews | Reference | Resource Guides | Forum |
Home
| What's New | Features | Gallery | Reviews | Reference | Resource Guides | Forum |