Super Hornet Upgrade Set
Afterburner Decals, 1/48 scale
Summary |
Catalogue Number: |
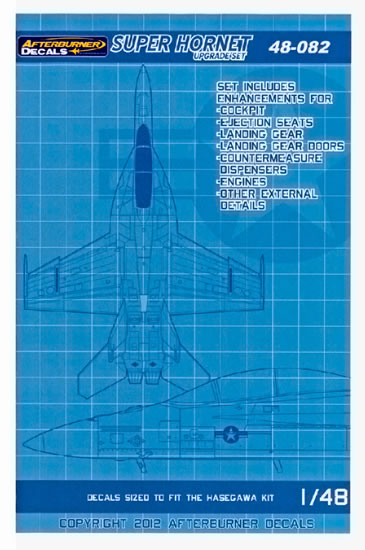
Afterburner Decals 48-082 - Super Hornet Upgrade Set |
Scale: |
1/48 |
Contents and Media: |
Waterslide decals plus instructions and notes |
Price: |
USD$15.00
available online from Afterburner Decals |
Review Type: |
FirstLook |
Advantages: |
Perfect register, thinly printed and have an absolute minimum of carrier film surrounding each subject. |
Disadvantages: |
|
Conclusion: |
This is an excellent sheet from Afterburner Decals that combines high quality decals with first rate and complete supporting information. |
Reviewed by Rodger Kelly

HyperScale is proudly supported by Squadron
Here’s something new.
A well-detailed cockpit goes a long way in the presentation of a model. Of course, high level of detail is dependant on the detail cast into the kit in the first place but you need to be able to paint that detail neatly to give an overall “crisp” effect. Sadly most of us just don’t have skill (or the patience) to do justice to the cast-in detail of contemporary kits and obtain that “crisp” effect. Printed etched metal sets do go a long way toward detailing a cockpit and do look striking at first glance but a closer examination reveals that them for what they are – flat, and the colours used for some of the sets that I have used don’t seem to match the colour of the one-to-one-scale cockpits that they are meant to represent.

Ever with their corporate finger on the modelling pulse Afterburner Decals have recognised and addressed this with the release a new genre within the decal world to cater for us who are challenged in producing well detailed cockpits.
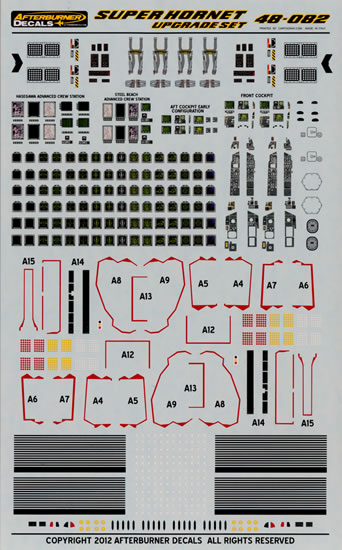
This sheet, 48-082 caters for the 1/48 scale series of Hasegawa Boeing F/A-18 E/F/G “Superhornets”. The sheet not only caters for the cockpit, it also carries decals for various details on the airframe including those pesky red edges to the undercarriage doors, a simulation of the grilles on the nose gear doors, the afterburner cans, nav lights, countermeasure (flare) bucket loads, the ejection seats and undercarriage legs, wing pylons (which Afterburner Decal sheets always carried anyway), control sticks, bard stacks (these are the exhausts for the environmental control systems (ECS) which support cabin air quality. Also included are various decals to replace some of the incorrectly (and updated) scribed airframe details on the Hasegawa Superhornet kits as well as a set of seat belts and other airframe details.
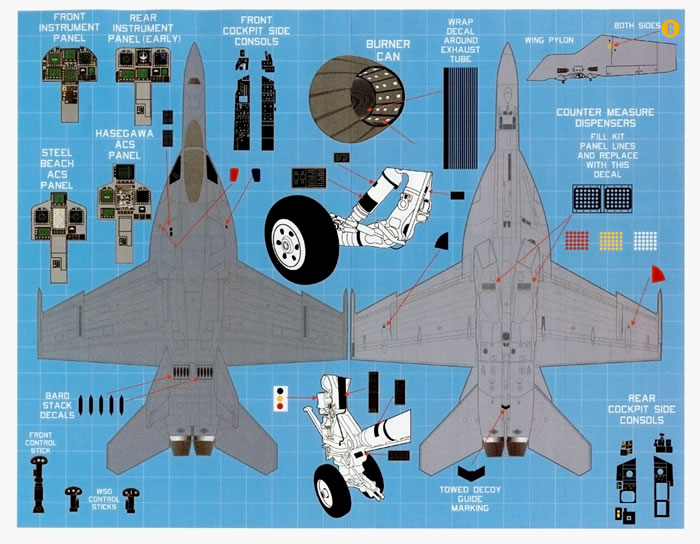
The advanced crew station decals have been sized to fit the Hasegawa instrument panels as well as the Steel Beach aftermarket ones. The instrument screens are provided as both “powered up” and “powered down” options.
Will they go over the cast-in detail on the kit parts without too much trouble? A very close examination under high magnification reveals that the carrier film is missing over where the switches will be. This was always the issue with the Hasegawa kit decals and having used their A-4 Skyhawk instrument panel and side console decals quite a few times I always found myself spending a few hours wearing the loupe and wielding a scalpel removing the carrier film to make them settle over the cast detail (not to mention repetitively applying settling solution) but the end result was always worth it as far as I am concerned. Given that Afterburner Decals have already removed the carrier film for you it will make the task a whole lot easier.
I am also sold on the red edging to the undercarriage doors. The amount of carrier film around these is so small that you are flat out even seeing it. This is good news as applying them will be easy as you don’t have to mess around allowing for carrier film whilst poking and prodding them into position. Foe me this has got to be a blessing as messing around with thinned red paint or using sharpie markers always leads to disaster on my modelling bench!
The supporting information and details that come with the decals is well up to the high standards set by Afterburner Decals. The placement guide comes in the form of an A-4 sized pages that is printed (in colour) on both sides. The decals have been printed by Cartograf.
The placement guides and the three decal sheets come packed in a clear plastic zip lock bag.
Some of the items on the sheet may be a “bridge too far” for some modellers, the seat belts for one and some of them may be the (arguably) too minuscule to be of any use – the stick tops but in the main the sheet looks to be worth the entry price as far as I am concerned.
Thanks to Afterburner Decals for the sample
Review Copyright © 2012 by Rodger Kelly
This Page Created on 21 June, 2012
Last updated
21 June, 2012
Back to HyperScale
Main Page
Back to Reviews
Page

|
 Home
| What's New |
Features |
Gallery |
Reviews |
Reference |
Forum |
Search
Home
| What's New |
Features |
Gallery |
Reviews |
Reference |
Forum |
Search