Eduard's 1/48 scale
Hellcat F.Mk.I
by Fernando Rolandelli
|
|
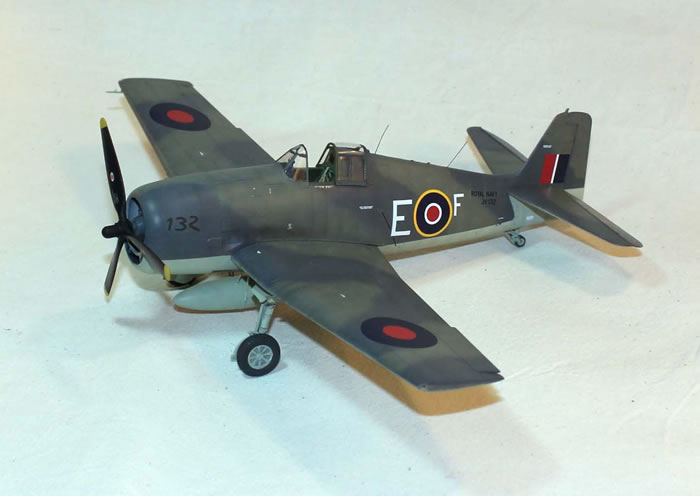
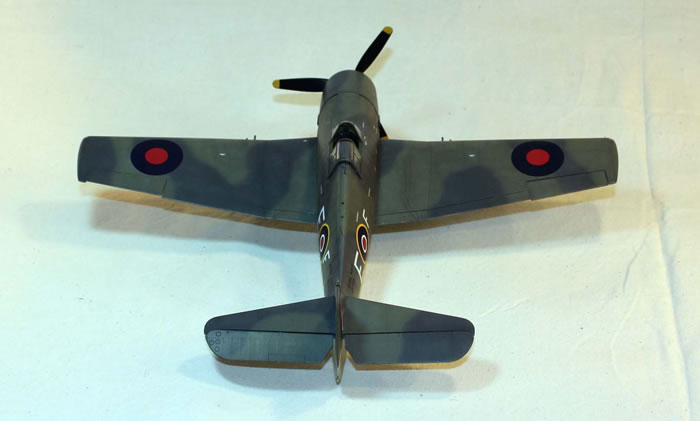
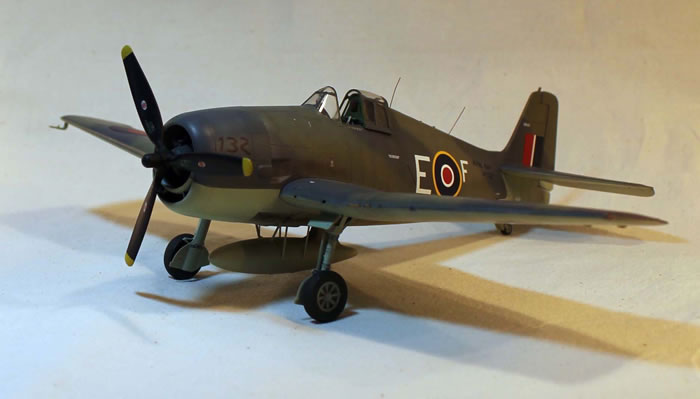
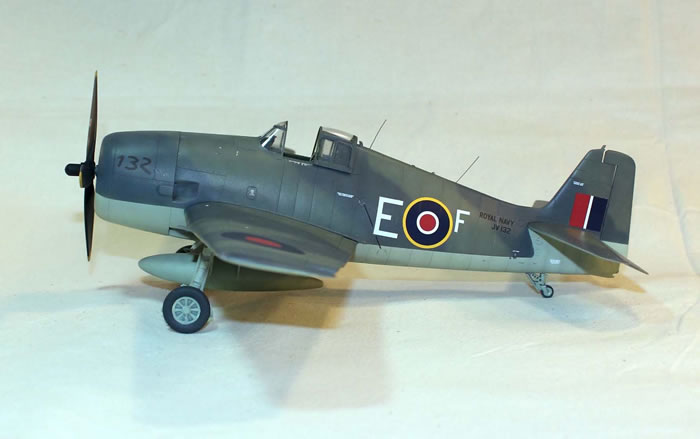
Grumman Hellcat F. Mk I,
JV132, “F”, 800 Sqn., HMS Emperor, Fleet Air Arm; North Sea, May 1944 |

Eduard's 1/48 scale Hellcat Mk.I / Mk.II is available online from Squadron.com
Background
The plane that probably most contributed to attaining air superiority in the Pacific was the Hellcat, having an astounding kill ratio. The FAA, eager to get any fighter she could, started accepting deliveries in 1943. Originally called Gannet (FAA fighters are traditionally called after marine birds of prey), it was decided to adopt the American name in 1943 (Martlets and Tarpons were the other famous planes affected). All in all 1182 machines were accepted, among those 252 F6F-3, or Hellcat F. Mk Is. They made their debut in service with the Home Fleet, in the course of the various operations along the Norwegian coast intended to sink or incapacitate the battleship Tirpitz and to harass shipping in general.
800 Sqn, FAA, of Konigsberg sinking fame, was the first one equipped with the type. It provided fighter escort to the operations off the Norwegian coast, and, on 8th May, 1944, they clashed with German fighters, claiming one Fw 190 and two Bf 109G against the loss of one of their own; Sub. Lt. Ritchie claimed the Focke when flying JV132. After these operations, the squadron was active on D-Day, on Operation “Dragoon” and later transferred to the East Indies Fleet, along with HMS Emperor.
The Kit
Well, this is a good one. If you are licking your wounds after tackling one of those Eduard 190s and want to make peace with the Czechs, this is the one to get. It is a big, simple kit, accurate and accessible. It has a couple of pitfalls, but nothing really worrisome, unless you cannot live with the simple closed wheel wells. Wheels have been reported to be too thin, but a central extension should not be impossible; the CMK resin wheels I bought are not noticeable wider. The gear legs are also reported to be too long, as if in full oleo extension; however, it is really simple to take out a section.
Mine is the Weekend edition, for a US Navy F6F-3 in standard tricolor scheme; I chose one of the options in the FAA Hellcat combo, kit n° 8223. The decals look accurate, though in the third Mk I options, FN430 from 1844 Sqn FAA, East India Fleet, I think that the underwing roundels should be the standard Type C roundel suitably modified instead of a “small size” two colour (the Techmod decal sheet shows it that way). The first one, JV131 from 800 Sqn, in resplendent “D-Day Stripes” (actually from Operation “Dragoon”) has also been depicted in an old Aeromaster sheet.
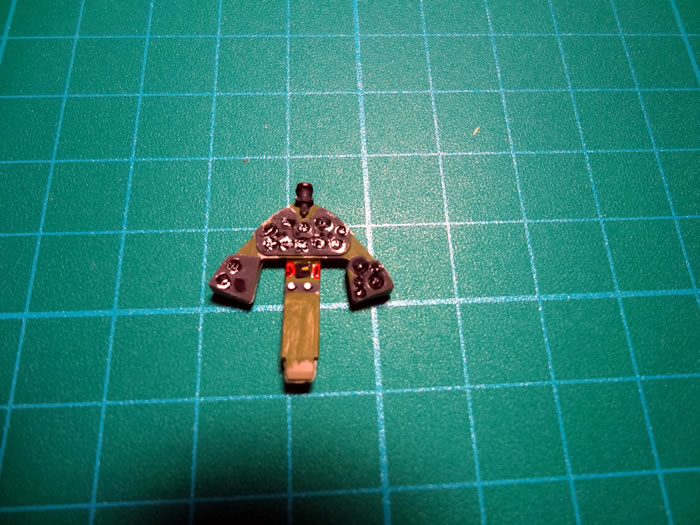
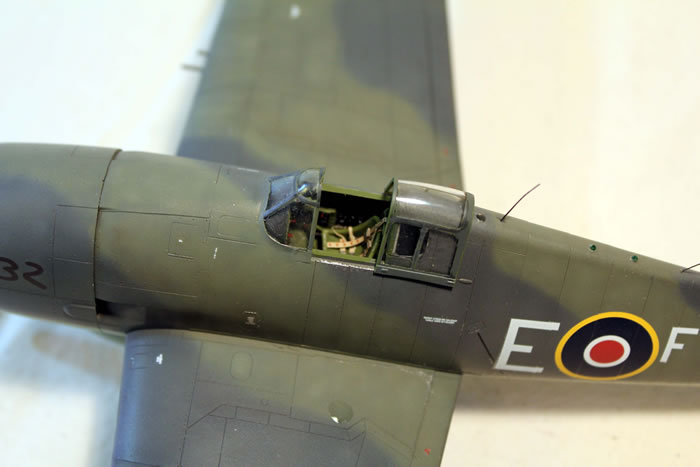
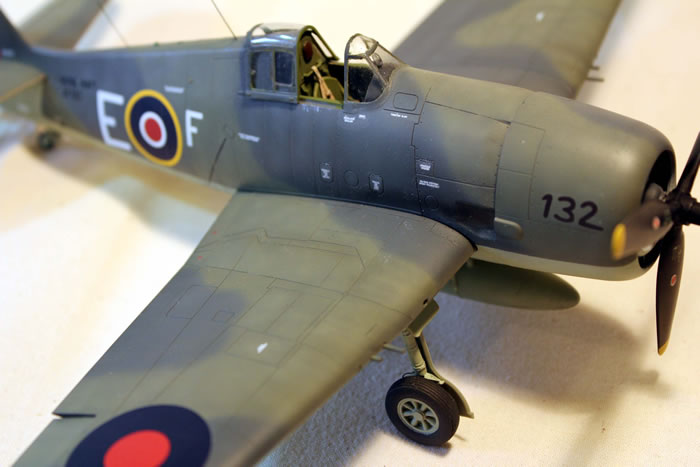
Cockpit was build without any fuss; lacking any PE exception made of the Sutton harness from a generic Eduard set, I scratchbuilt a couple of things (mainly the throttle levers and some in the dashboard and console) and painted the instruments with White paint and a draftsman pen. The seat looks a bit chunky and should be better replaced (it's the same in the Profi edition) while the lumbar plate, being a PE part, should be scratchbuilt.
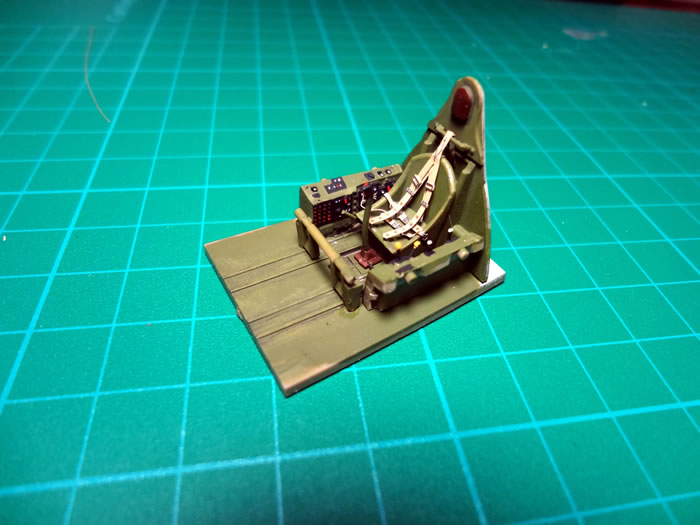
The cockpit I painted in an approximation to US Interior Green, as could get at my usual source of general colours, a supermaket at Nairobi; I used Humbrol xxx mixed with a little light Grey. The central console is not a separate pedestal as it should be, but fixed to the dashboard (hey, this people have not read the old Detail & Scale!); it shouldn't be difficult to cut and reshape it if you so wish; I didn't.
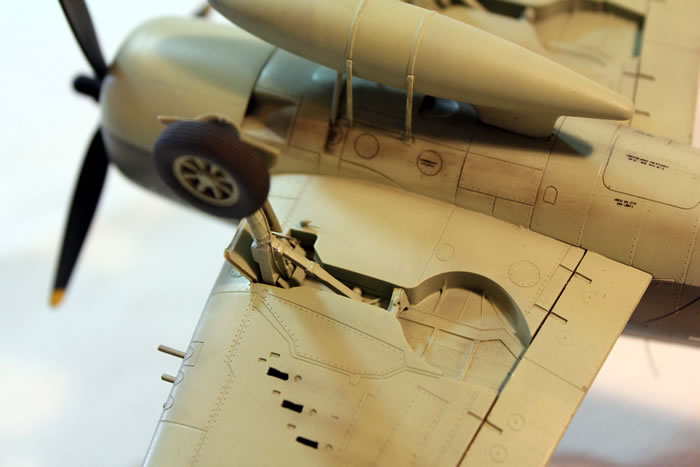
Hellcats had a very noticeable negative angle to the datum line, not reflected properly by any kit; I tilted the engine downwards to show it better. I had the very bad idea of fitting the underfuselage fuel tank; for which a wide slot should be opened in the belly, from where you cannot retire. The tank itself is a messy three piece affair which shows some of the poorest design you could find; moreover, the Wiki edition lacks the retaining straps, being PE in the Profi one. Piece G2, the outlet in the belly just in front of the tank, is also embarrassing: if assembled as per the instructions, it leaves an unsightly step all around.
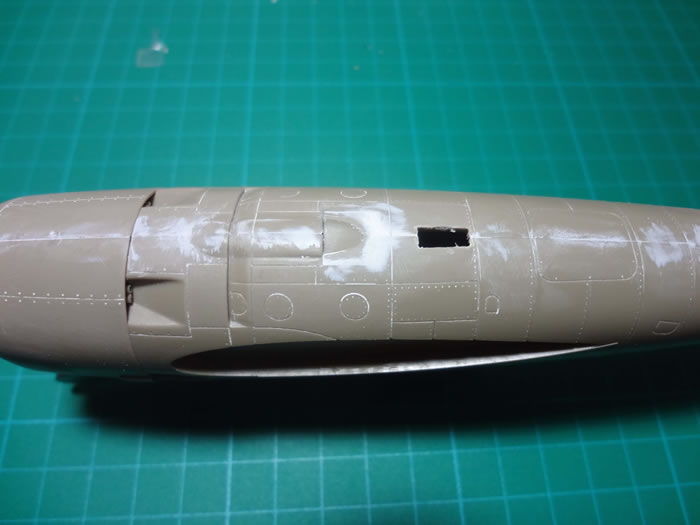
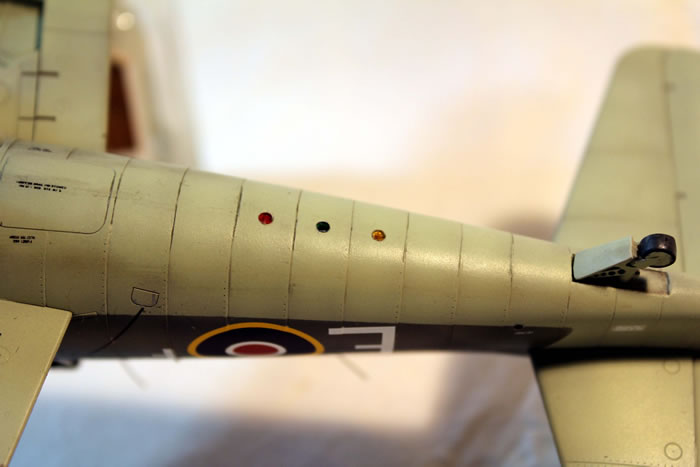
I disregarded them and glued it flush to the belly; the outlet shows enough clearance anyway. The diagonal bars reinforcing the headrest are also PE, thus, absent in this edition; it would be easy enough to add a couple of short rods if you, unlike me, remember to do so. The gill in front of the oil coolers (in the central part of the “grin”) is also PE; I put a blanking plate to avoid a ”see through” effect. Clear parts fit OK, including the windscreen. The “wider” canopy rides correctly on the rear deck. The landing attitude lights are a tight fit, and they have some small flash which prevents them from going in easily; I sanded them lightly before detaching them from the sprues; afterwards, it would have been impossible due for their small size.
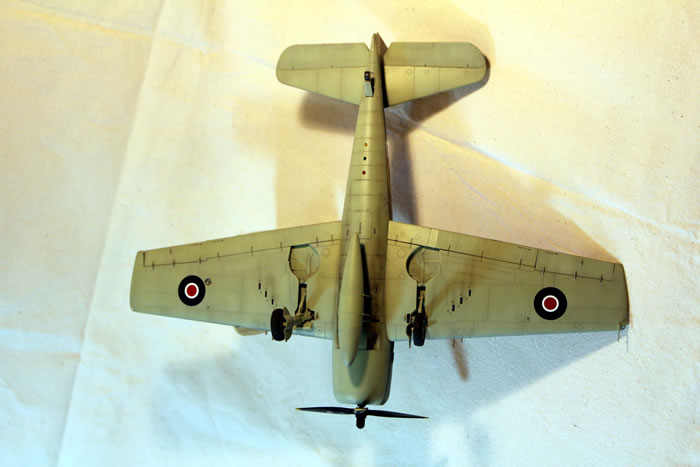
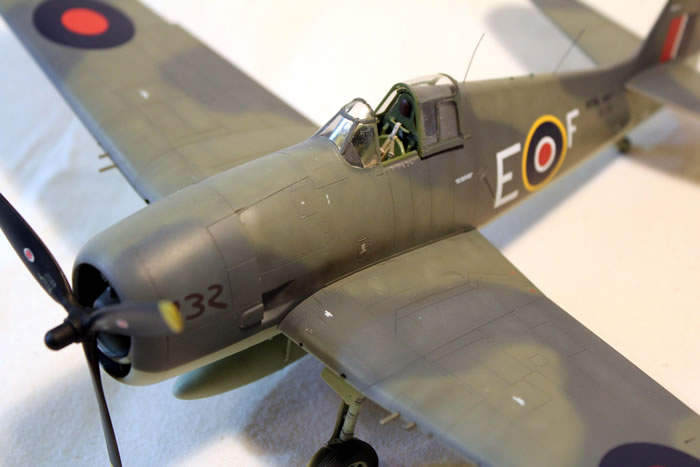
Wings have separate flying surfaces, including flaps (which would be a chore to pose open anyway!); but you can build it simple by gluing all those in neutral position (I chose to slightly deflect ailerons). The guns are shown as muzzle tubes, when they should be blast tubes; replacing them with bronze tubing is an option, though I simply cut the muzzles and filled up the few cooling jacket holes visible.
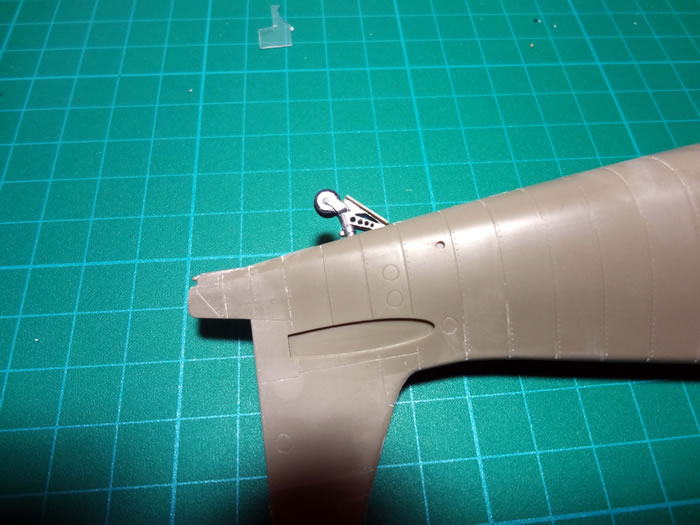
The undercarriage is rather complex and purports to show the original one as accurate as possible. As I have already said, I cut a section of about 1 mm to each undercarriage strut, in the understanding that it would produce a better sit. I left out bombs and rockets (which anyway lack the PE fins! There is an Airwaves set which could be handy for this).
A Grumman built plane should have been painted in colours which are a reasonably approximation to the original British MAP ones, according to the specialized knowledge. I used WEM's colour throughout to get the Temperate Sea Scheme right; over a good deal of preshading. I painted the Sky first, then the EDSG, then the DSG, profiting of the darker colour underneath to give a dirty look, accentuated by painting “mottle-style” and reinforced by a general mottling in lighter tones of the same colour. The DSG was painted free hand with a Paasche Talon airbrush.
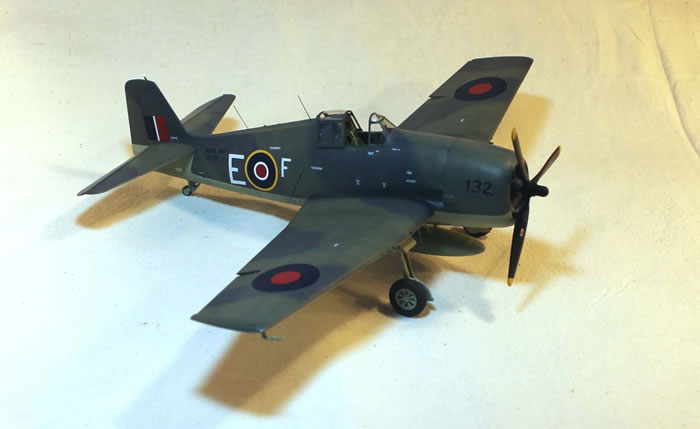
Decals were extremely good and went well over a moderately gloss surface (Testors Glosscote) I used the stencils from the Wiki edition (they are the same as in the Combo, even having the same designation letters) and the main decals from the Combo. The roundels and lettering look to be a bit big, but in the end they fall square on.
This is a good, fair-priced, kit, which allows for a moderately relaxed build and a big model to add to the collection. It leaves you willing to build a couple more, and there are enough different styles of schemes and insignia to provide you with proper incentives.
Compared to the Hasegawa offering, it has the great advantage of its price, a cockpit that can be fine with relatively few additions, a better captured “grin”in the front cowling and probably decals of better quality.
Highly recommended.
Reference Sources
-
“F6F Hellcat in Detail and Scale”, Bert Kinzey, Squadron Signal Publications
-
“F6F in Action”, Squadron Signal Publications
-
“Fleet Air Arm Archive”, internet based.
-
“Fleet Air Arm – British Carrier Aviation 1939-1945”, Ron Mackay, Squadron Signal Publications
-
“Britain’s Fleet Air Arm in World War Two”, Ron Mackay, Schiffer Publications.
Images and Text Copyright ©
2013 by Fernando Rolandelli
Page Created 10 September, 2013
Last Updated
1 October, 2013
Back to
HyperScale Main Page

|
 Home
| What's New |
Features |
Gallery |
Reviews |
Reference |
Forum |
Search
Home
| What's New |
Features |
Gallery |
Reviews |
Reference |
Forum |
Search