Revell 1/32 scale conversion
Dassault Mirage IIIO
by Mick Evans
|
|
Dassault Mirage IIIO |

Eduard's 1/48 Supermarine Spitfire Mk.IXc Late will be
available online from Squadron
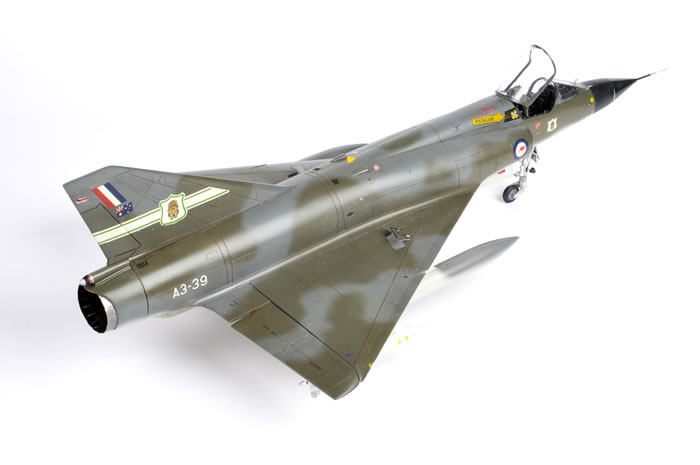
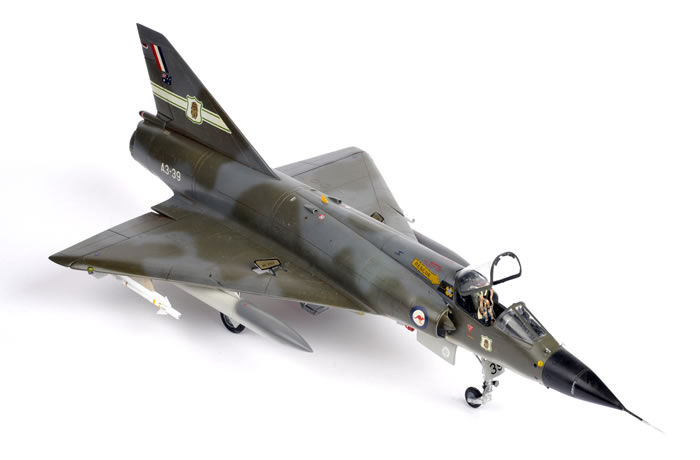
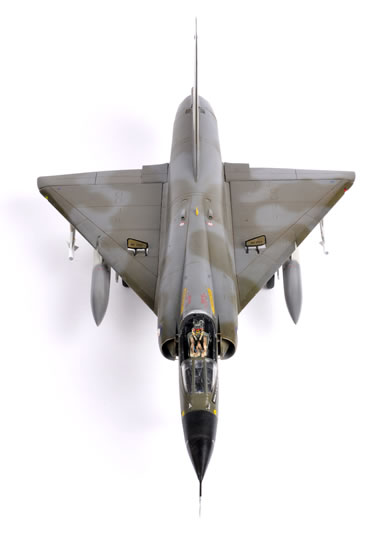
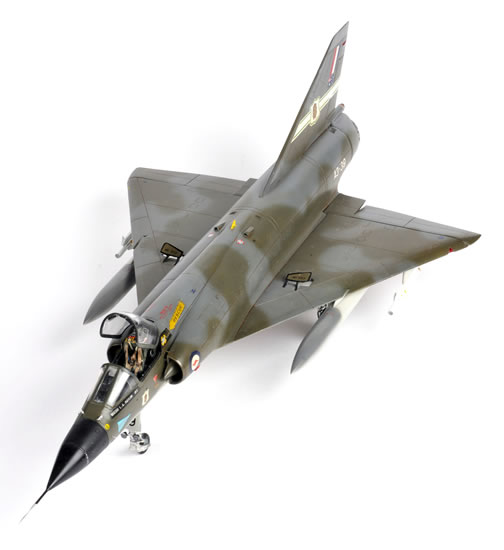
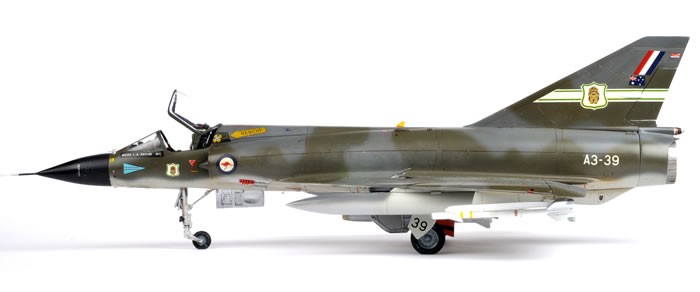
This is my build of the now old 1/32 Revell Mirage IIIE built as a Mirage IIIO.
The original Revell kit is now over 35 years old having built my first one of these kits in 1978. The basis of my build was the very old kit circa early 1980s in the original olive green styrene. I say the basis of the kit was the Revell kit but only nine parts of the original kit were used for the build, these being the 2 fuselages halves, 2 fin halves, 3 main wing parts and the 2 transparencies.
The remaining parts of the model being was sourced from after market manufacturers.
After Market
The following after-market products were used:
-
E-Resin – Nose radar, intakes with shock cones, 110gallon French supersonic tanks, exhaust tail cone, nose and main wheel bays, dropped elevon actuator covers, Matra 530 air to air missile, centre line Matra 530 pylon, Aero 3B missile rails, Aim 9B air to air missiles.
-
Scale Aircraft Conversions – Nose and main under carriage and wheels
-
Master Models – metal Pitot probe
-
Matterhorn Circle – detail engine exhaust nozzle
-
Fisher - Cockpit and seat
-
Roodecal Australian Mirage decals
These after-market parts really enhance the key areas of the model that Revell left very bland in their original kit. I will start with the E-Resin parts. The resin nose radar is superb and extremely accurate. It includes the key engraving that is a standout on the Mirage Cyrano radar radome. The extra weight of the resin also comes in handy to prevent a tail sitter but with all of the resin I installed forward of the main gear this was never going to be a problem.
A minor amount of surgery was required to remove the kit mounting plug for the kit radar parts, once this was done the resin part was a simple drop in. The intakes and shock cones (called mice because of their profile) were superbly cast and once again a vast improvement and most importantly they incorporated some of the intake trunking. To install these once again required minor surgery to remove the blanked area on the kit and once this was done the parts were a simple fit.
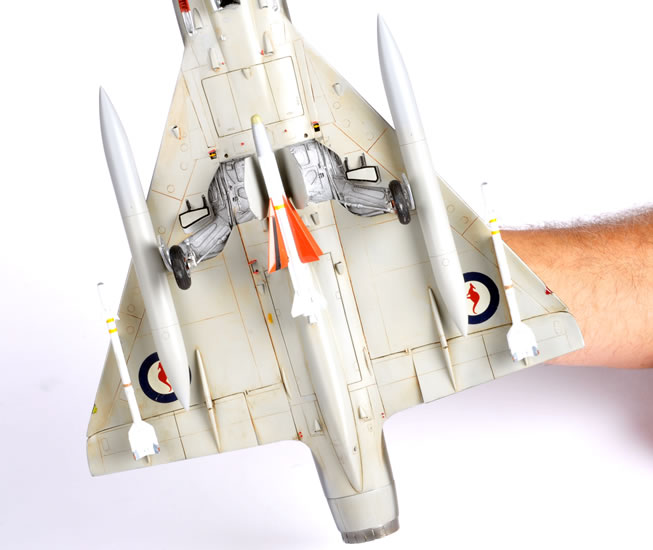
The wheel wells required quite significant surgery to install and needed to be continually trial fitted until they could be installed correctly and snugly fitted. When installed these were simply stunning and almost perfectly accurate, brought back many memories of having my head stuck in these areas doing maintenance in what now seems a lifetime ago.
The kit elevon actuator covers are too thin and the resin replacements are superb and very accurate. I purchased the drooped version as the elevons are always drooped when the engine or emergency hydraulic pump are not operating. This also meant the elevons had to be cut from the wing and slightly reworked.
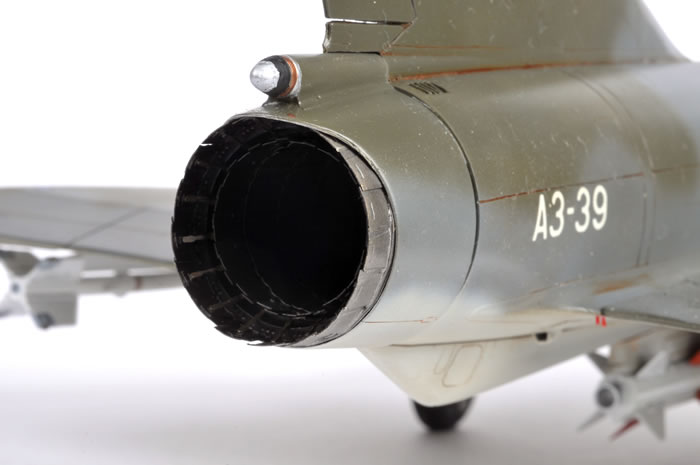
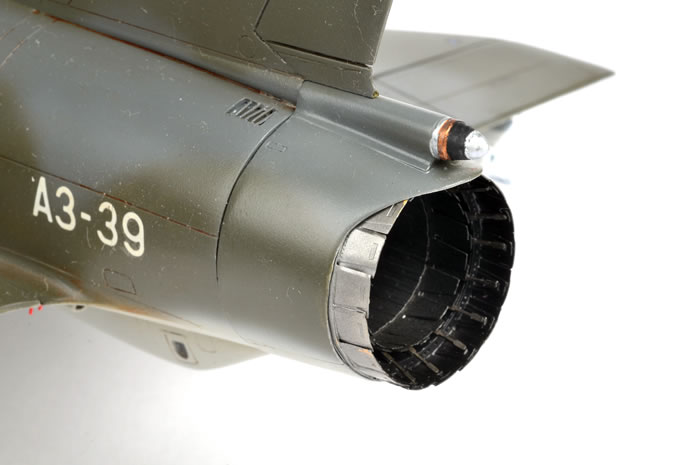
Next came the tail cone. This replacement corrects the undernourished brake chute housing and requires minor surgery to remove the lip on the kit to mount the kit tail cone, the resin part then just drops in. Finally we get onto the under wing stores. The kit comes with some very poor renditions of a centreline bomb beam, 286 gallon ferry tanks, 110 gallon RPK10, 4 station bomb carrying tanks and AIM 9B Sidewinder air to air missiles and launcher rails. All are completely awful by today’s standards. Thankfully the E-resin outer elevon pylons come with the missile launch adapter pylon integrated into the moulding and is simply brilliant. The Aero 9B launch rails are almost perfect miniatures of the full size part, including most of the rail detail just in case you did not want fit an AIM 9B to them. Then the E-Resin AIM 9Bs are superbly detailed and very accurate. My missiles were a bit bent as often happens with resin when it cures but some hot water quickly sorted these out and they were easy to straighten. The AIM 9Bs have excellent detail and just required the builder to add the opaque seeker glazing to the nose.
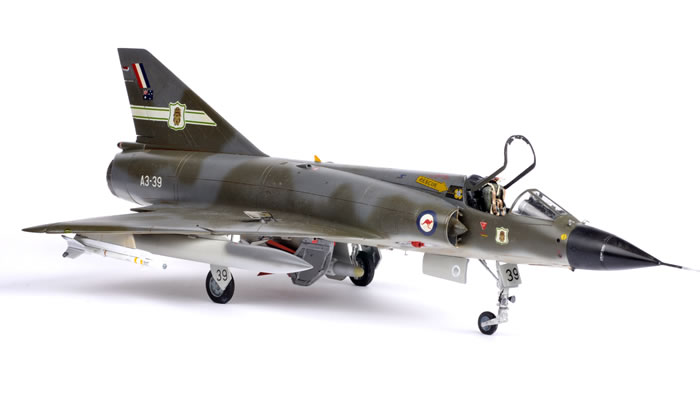
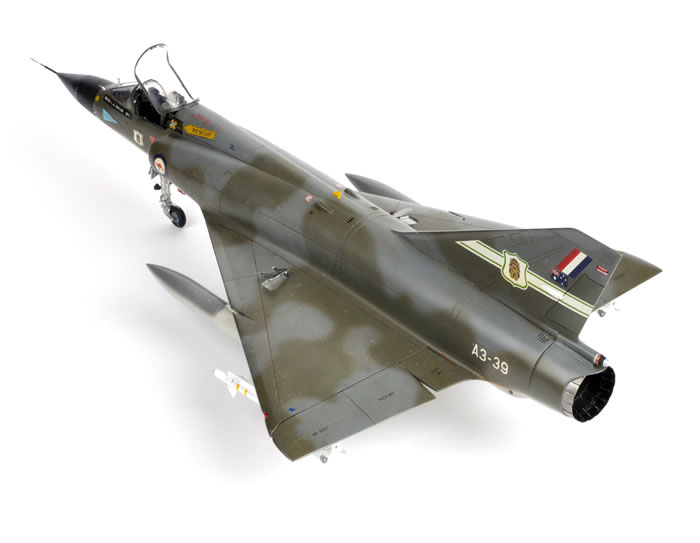
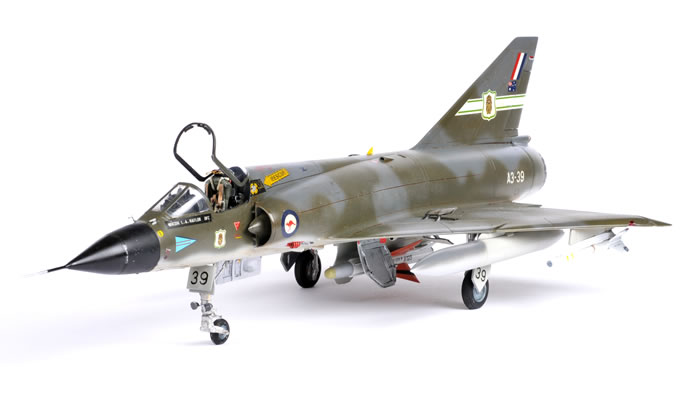
The E resin 110 gallon supersonic tanks solved a major problem for me as I wanted to do an aircraft in an interceptor configuration and a Mirage would never carry RPK10s as supplied in the kit for an interceptor mission as these are a dirty tank with the bomb steady braces creating extra unnecessary drag. The RPK10 were only used during a bombing program and general flying of the Mirage was confined to the 110G French or Israeli supersonic tanks. When longer flight duration was required mostly the sub sonic 286 gallon or 374 gallon tanks were fitted. The E-resin 110 gallon French tanks are accurate and solved my problem perfectly.
The icing on the cake was the Matra 530 air to air missile and its associated centreline pylon. The missile is a real work of art and incredibly accurate and is the focal point for my model. At this point I must acknowledge Eric at E-Resin for his superb modelling skills in producing the excellent masters for these products and casting these to produce a much improved Mirage.

Scale Aircraft Conversions provide an excellent and accurate version of the nose and main under carriage. The Revell kit parts were a little weak and very poor in detail in particular the nose leg but this product solves that problem and they are an easy fit into the E-resin undercarriage bays. The metal wheels were very good and included excellent brake detail that was missing in the original kit. The SAC wheels are wider than the original Revell wheels and represent the low pressure tyres more accurately.
Master Models produce an excellent version of the pitot probe in metal. This solves the issue of shape that was inaccurate in the kit and is very strong and won’t be easily broken when bumped.
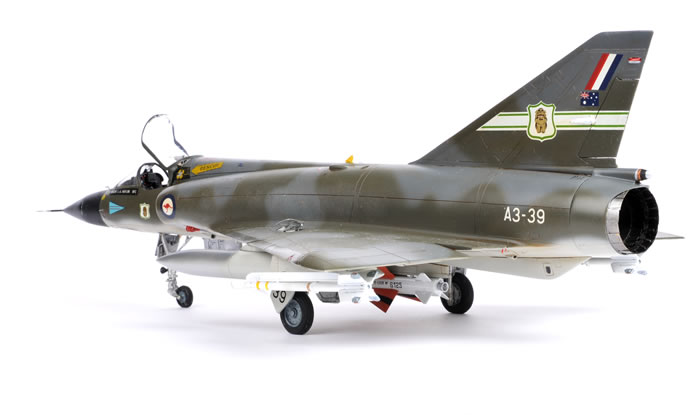
Matterhorn Circle, what can I say? “Masterful” with a detailed engine exhaust nozzle that captures the intricate detail of the aperture on the real aircraft. This set contains approximately 50 parts and looks so realistic, brilliant.
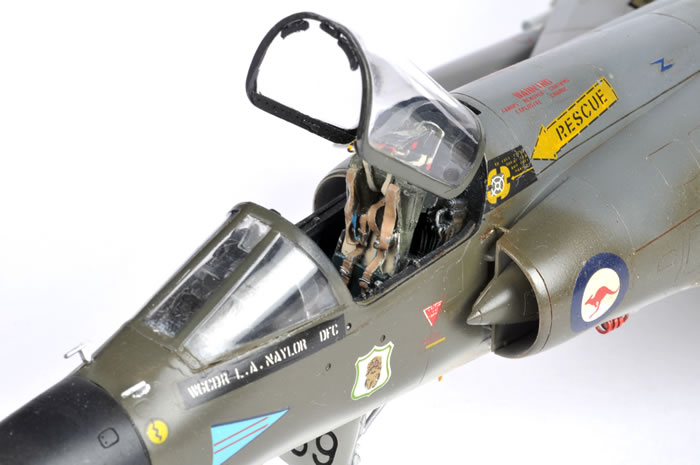
Fisher Models - once again Paul Fisher has a done brilliant job with the cockpit and seats for this kit.
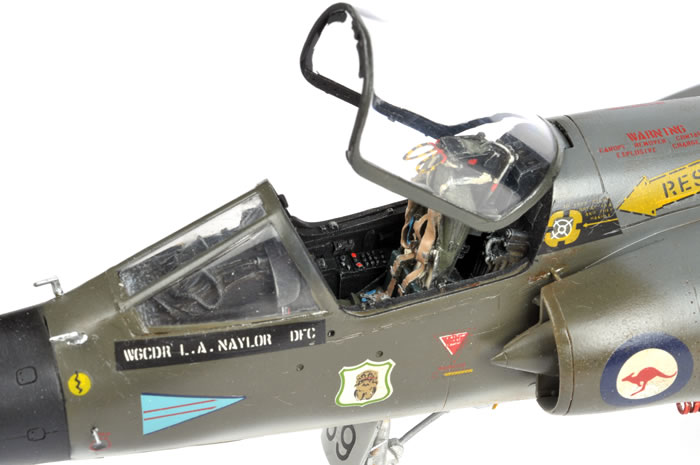
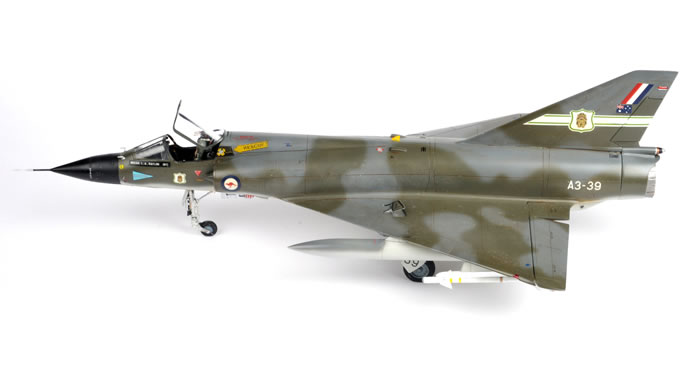
I spent many hours sitting in this area as an instrument fitter back in the RAAF and wow, there is very little detail missing. The two obvious missing details were the rubber tube fitted to the radar scope to eliminate sun glare and the prominent radar control stick that sits just behind the engine throttle and these were easily added, but the rest is almost perfect, including the photo instrument panel and the etched metal overlay. Both a Martin Baker Mk4 and the rocket powered Mk6 are included. Both of these are extremely accurate. I had to think hard and do some research as to which seat to fit as I really wanted the busier Mk6 but these were being fitted during the period when the aircraft were being modified to carry the Matra 550 Magic air to air missile. There was a period in 1980 to 1983 when some Mk6 equipped aircraft still carried AIM 9Bs but the question of did A3-39 with Wing Commander Naylor’s name on it have a Mk6 seat fitted and still carry AIM 9Bs exist? Highly possible but I cannot recall or confirm with references. Naylor was the Commanding Officer of number 77 Squadron when I was first posted there as a fresh face 18 year old straight from RAAF apprentice school.
Main Construction
That covers the after-market material but what about the remainder of the kit?
The IIIO has a flat Doppler panel totally different to that of French IIIE aircraft. This was scratch-built from scale planes using multiple layers of plastic card. The kit heat exchanger vents are simply missing and these were scratch-built along with the rear upper engine bay vents and side fuselage afterburner turbine vent. nose, leg and main gear doors came from a very awful Plane Bits detail set of which these parts were the only salvageable parts.
The IIIE/O and some late IIICs had distinct bulged main gear doors to cover the later and wider low pressure wheels. The original IIIC had a flatter concaved door to cover the thinner low pressure tyre and these are what Revell supplied in the original kit and are simply wrong for a IIIE/O. Unfortunately Plane Bits just used the kit parts added the wrong version of internal structure to the plastic parts and cast them in resin. But thanks to the properties of resin these could be simply dipped in boiling water and reshaped to the correct bulged shape after removing the inner door minor detail. There are two versions of internal detail for the door and unfortunately Plane Bits selected the wrong version to master. So the minor internal detail was carefully removed and the correct detail refitted. The remaining doors were fine after some clean-up work.
The gun troughs and baffles were totally scratch built but during the photo session I realised that I had not fitted the reinforcing bar along the baffles so this will be retrofitted later. The generator cooling vent, door release handles, impact temp probe, incident probe, speed brakes, centreline pylon forward mount, elevons, bulged radio hatches under the rear tail and various bits and pieces were all scratch built along the way. But most importantly prior to starting the build the kit received a total re-scribe with some missing panels scribed in as well.
A lot of time filling and refilling, gluing and regluing, lots of superglue as the plastic had gone brittle and did not want to weld.
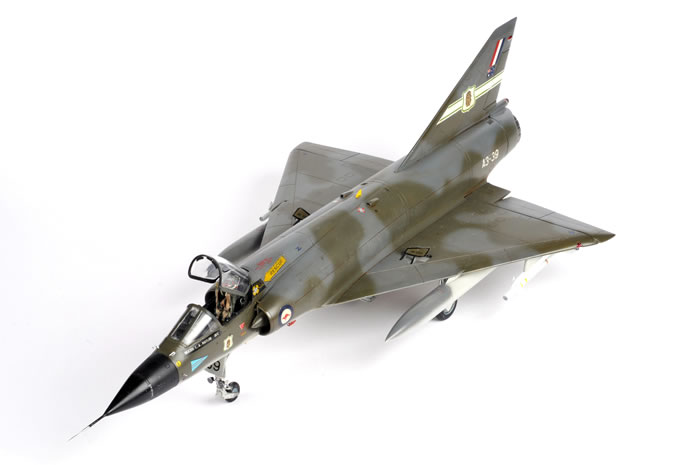
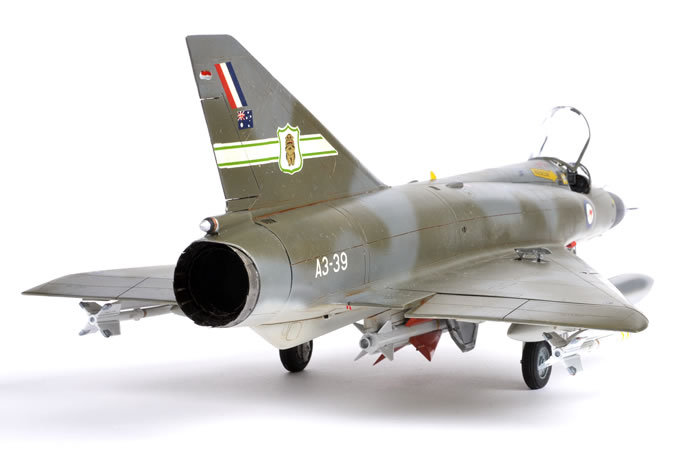
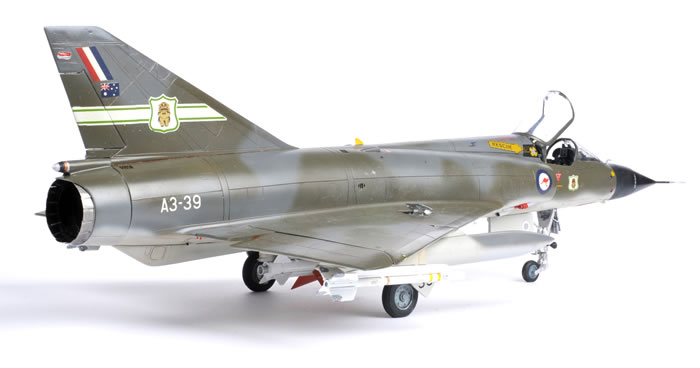
The kit was undercoated in a light grey to highlight any faults prior to painting in the Tri Colour scheme of Dark Sea Grey, Dark Green/Olive and light Aircraft Grey all from the Xtra Color BSC range. There is a period where the IIIO/D s were painted in BSC colours with a transition to an FS grey for the under surface and a more olive green for the upper surface but after six months in the Australian summer sun both upper surface colours changed significantly. The leading edges were painted gloss prior to being masked and the entire kit being painted a semi matt clear. The exhaust was painted in various shades of Alclad.
The Roodecal decals were purchased some 28 years ago and due to their age some started to break up and required gentle handling but in the end went down onto the surface well.
In sumamry, the build was a bit frustrating and challenging but overall it was well worth the effort. I was going to put the ground safety harness into the cockpit and onto the seat but this would have meant covering the pitot, incident and impact temp probes as they were all removed at the same time prior to flight and stored in the rear panel for the navigation system alignment gyro (made redundant in the early 70s), I did not want to cover the beautiful pitot probe.
With all the resin and metal the kit weighs a ton.
I hope everyone enjoys the finished kit as much as I do and it will take pride of place in my collection and as usual after I have added almost every bit of after-market detail to a kit some main stream manufacturer will deliver us with a main stream state of the art kit, one can only hope.
Model and Text
Copyright ©
2013 by Mick Evans
Images Copyright ©
2013 by Brett Green
Page Created 23 May, 2013
Last Updated
23 May, 2013
Back to HyperScale Main Page
|
 Home
| What's New | Features | Gallery | Reviews | Reference | Resource Guides | Forum |
Home
| What's New | Features | Gallery | Reviews | Reference | Resource Guides | Forum |