|
Junkers Ju 52
Eduard, 1/44 scale
S u m m a r y : |
Catalogue Number: |
Eduard Kit No. 4424 – Junkers Ju 52 |
Scale: |
1/44 |
Contents & Media: |
47 olive plastic parts (7 unused); 11clear plastic parts (3 unused); 1 decal sheet with markings for 4 aircraft; 2 page full colour instruction booklet. |
Price: |
USD$19.51 plus shipping available online from Eduard’s website |
Review Type: |
First Look |
Advantages: |
Good mouldings; interesting marking choices; canopy and wheel masks very welcome in this scale |
Disadvantages: |
|
Conclusions: |
An excellent repackaging of one of Eduard’s earlier kits |
Reviewed by
Brad Fallen

Eduard's 1/44 scale Ju 52 is available online from Squadron.com
Now marketed under the ‘Super44’ label, Eduard’s range of 1/144 kits continues to grow. The well received Me 262 kits of five or so years ago were joined in 2011-12 by an equally popular MiG-21 family. A Spitfire Mk IX series has just been launched (more on this in the near future) as well as new editions of Eduard’s 1/144 Ju 52 kits, which were first released a decade ago.
Eduard’s original Ju 52 lineup included minesweeper, float and ski-equipped aircraft. So far only an airliner version and the ‘standard’ military Ju 52/3m kit being reviewed here have been released this time around, although with the promise of more to come.
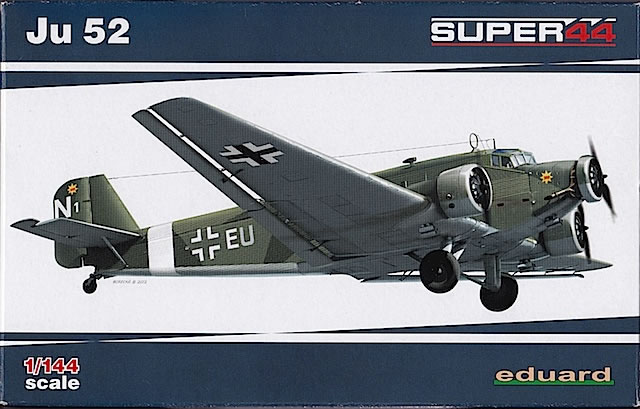
Eduard’s 1/144 Ju 52 kit comes in a small (but not tiny) end-opening box, with Weekend Edition-style artwork on the front and starboard profiles of the kit’s marking options on the back. Inside are three sprues of coloured and one of clear plastic, one sheet of pre-cut canopy and window masks, and a 12-page instruction booklet with a full colour painting and marking guide. Overall, the feel is closer to a Profipack than Weekend Edition boxing – minus the photo-etched details, which Eduard has decided to sell separately for these kits.
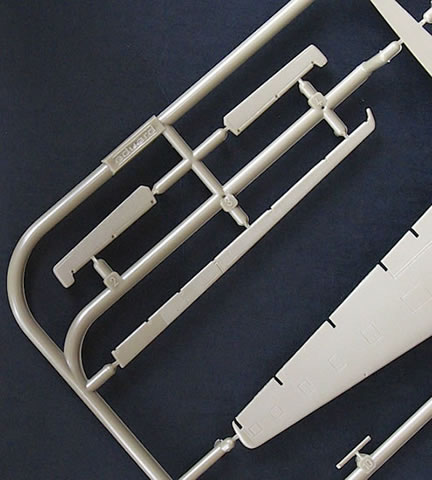
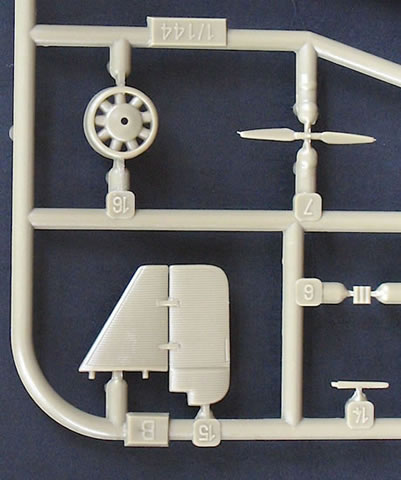
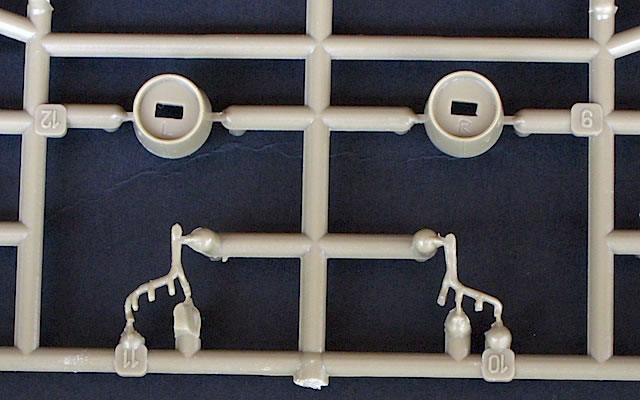
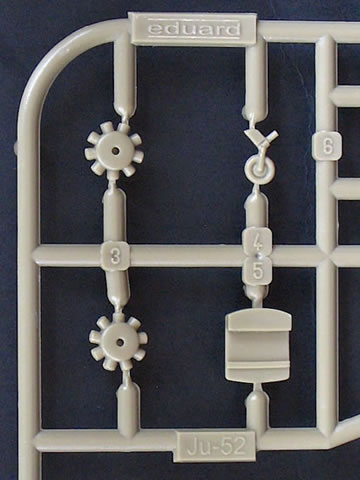
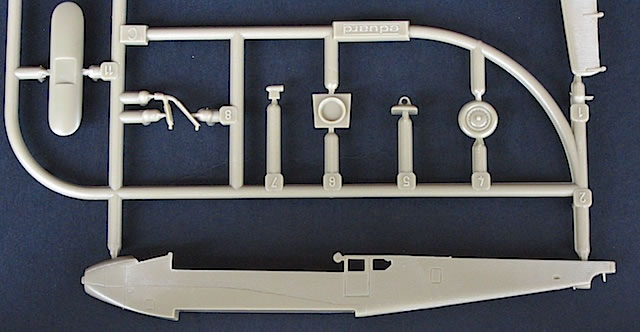
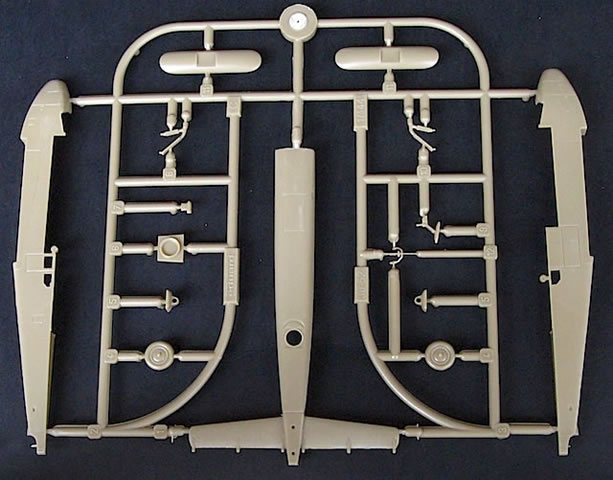
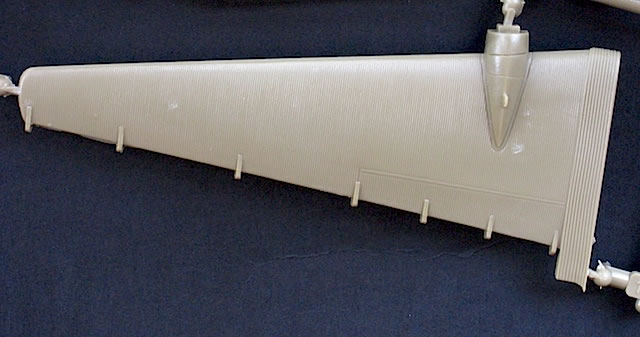
The plastic parts look very good. There are a few clues that hint towards ten-year old moulds – a little flash, and a slight chunkiness to some of the smaller parts – but overall quality is excellent. The distinctive Junkers ‘corrugations’ on the fuselage and wings are beautifully captured. Eduard has made a decent attempt at an interior, including an instrument panel decal, pilots’ seats, bulkheads and an internal fuselage floor. This is enough to give viewers the impression that something’s there, while providing a good platform for anyone wanting to add further detail. And for those who do, Eduard is releasing dedicated photo-etched sets for both military and civilian versions of the kit.
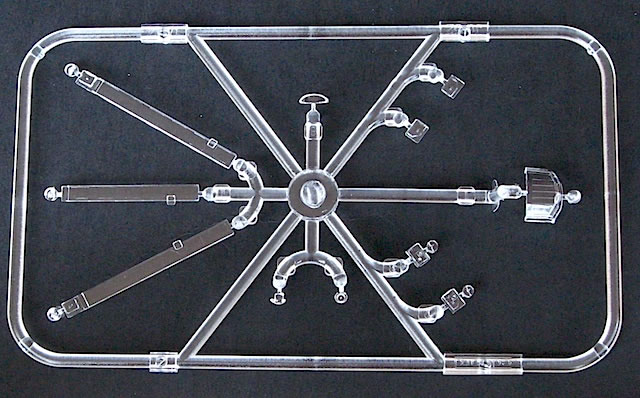
The clear parts also look good, although I haven’t tested their fit. The pre-cut masks will make painting much easier, but you will need tweezers, a steady hand and lots of patience to get them all in the correct location. Fortunately, Eduard’s placement guide is very clear.
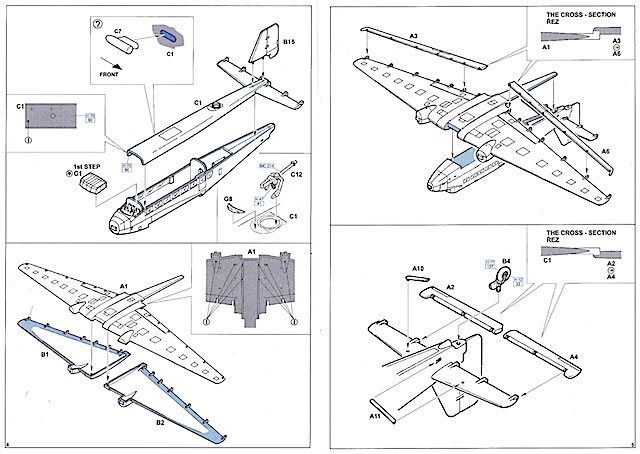
Kit assembly is also clearly explained, with eight well-illustrated steps leaving little room for misinterpretation. Again, patience will be required because a couple of steps look slightly fiddly: care will be needed in aligning the fuselage spine and attaching the control surfaces, and test fitting is recommended.
Marking Options
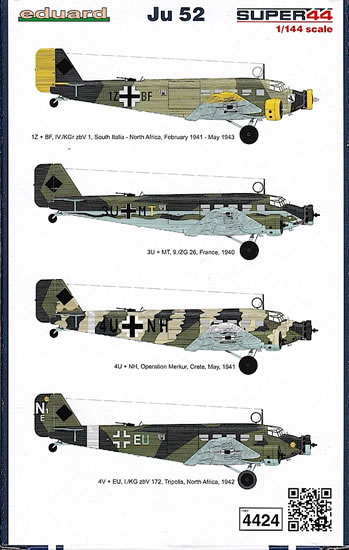
Luftwaffe Ju 52s were finished in a diverse range of camouflage schemes, and Eduard has chosen a representative selection of aircraft for the kit’s marking options.
These are as follows:
A. ‘4V+EU’ of I./KG z.b.V.172, based at Tripoli, north Africa in 1942. This aircraft was finished in standard RLM 70 Black Green and RLM 71 Dark Green over RLM 65 Light Blue, with a white theatre identification band on the rear fuselage.
B. ‘4U+NH’, Operation Merkur, Crete, May 1941. ‘4U+NH’ sported the same 70/71/65 finish as option A, but with a dramatic twist: the original camouflage was overpainted with thick stripes of dark yellow or sand. Look at Ian Robertson’s build of the 1/48 Revell-Monogram Ju 52/3m kit to see how attractive this scheme is. http://www.hyperscale.com/features/2001/ju52ir_1.htm
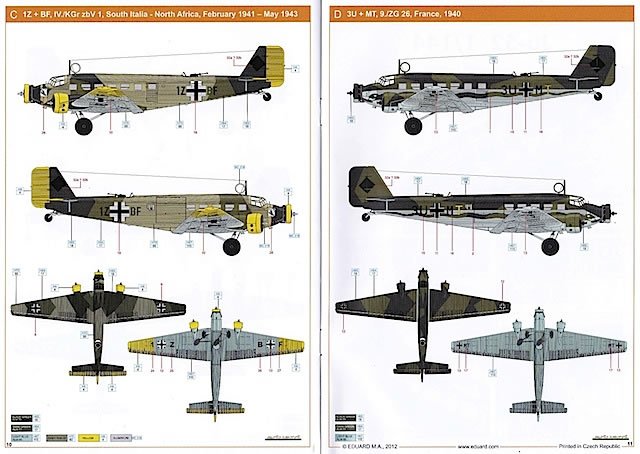
C. ‘1Z+BF’ of IV./KG z.b.V.1, based in north Africa and southern Italy, February 1941 – May 1943. ‘1Z+BF’ was also finished in a variation of 70/71/65: this time the upper surface greens were overpainted with large splinters of RLM 02 Grey. Additional colour is provided by the RLM 04 Yellow rudder, engine cowlings and underwing tips. This aircraft also featured on a recent 1/48 AIMS decal sheet, the instructions for which pointed out that, due to a lack of definitive photographs, the upper surface colour delineations can’t be known with any precision. Nonetheless, a model finished in this scheme would be very striking.
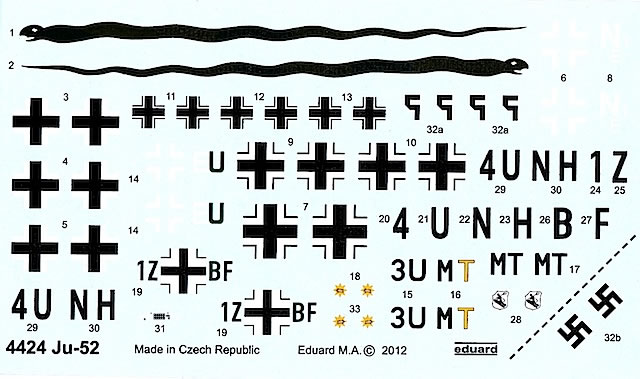
D. ‘3U+MT’ of 9.ZG 26, based in France, 1940. We return to a straight 70/71/65 aircraft here, but again there is a twist: a snake runs the length of each fuselage side. I haven’t got any reference photos of this aircraft, so can’t say if the snake has been painted over a high demarcation RLM 65 finish, or if the RLM 65 has been painted or stenciled around the original upper surface greens, leaving the snake pattern behind. Either way, Eduard has represented the snake as finished in a continuation of the 70/71 splinter pattern, so if you model this aircraft you’ll need to match the colour of your paint with that of the decals. (I should point out that while the snake decals appear very dark in the scanned picture accompanying this review, they are actually a reasonable match for the two German greens.)
Speaking of the decals, they have been produced by Eduard and look very good on the sheet, with crisp printing, good colours and no obvious flaws.
This appears to be a very good little kit – although even in 1/144, the Ju 52 isn’t a tiny aircraft. The original moulds have held up well, and Eduard’s reboxing is an appealing overall package that encourages you to start building right away. I’m holding out for now, but I’m pretty sure I’ll be building this one before I touch my 1/48 Revell kit.
Highly recommended.
Thanks to Eduard for the sample and for the images.
Review Text Copyright © 2013 by Brad Fallen
Page Created 13 February, 2013
Last updated
13 February, 2013
Back to HyperScale Main Page
Back to Reviews Page

|
 Home
| What's New |
Features |
Gallery |
Reviews |
Reference |
Forum |
Home
| What's New |
Features |
Gallery |
Reviews |
Reference |
Forum |