Wingnut Wings' 1/32 scale
LVG C.VI
by Leo Stevenson

Airfix's 1/72 scale Hurricane Mk.I is available online from Squadron
This kit has been listed as ‘sold out’ on the Wingnut Wings website for some time now. I was very lucky to buy it when it first came out, so I'm sorry if this article frustrates some people! The kit does come up on Ebay fairly often, so if you can lay your hands on one then I’d say you’re in for a good time because it has all the quality and careful research that you’d expect from this manufacturer, but it’s an early kit in their range and there are a few minor flaws and omissions, such as a missing flare gun (for option G) and a missing camera for the floor of gunner/observer’s position. They rarely make such mistakes in their more recent kits.
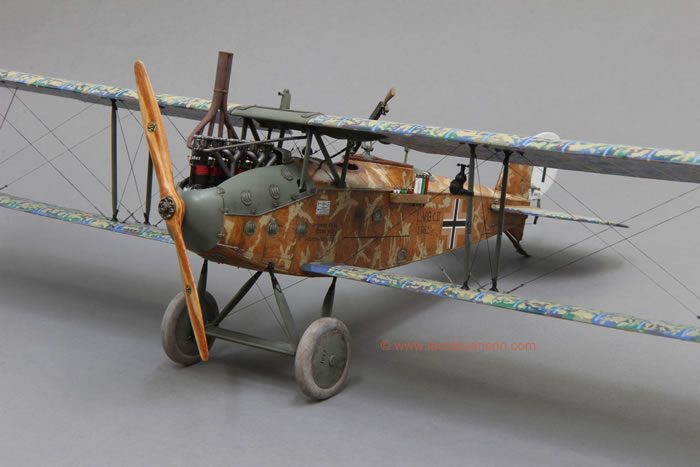
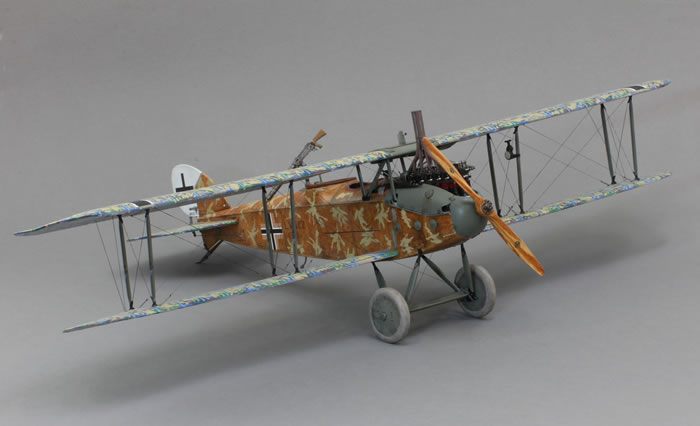
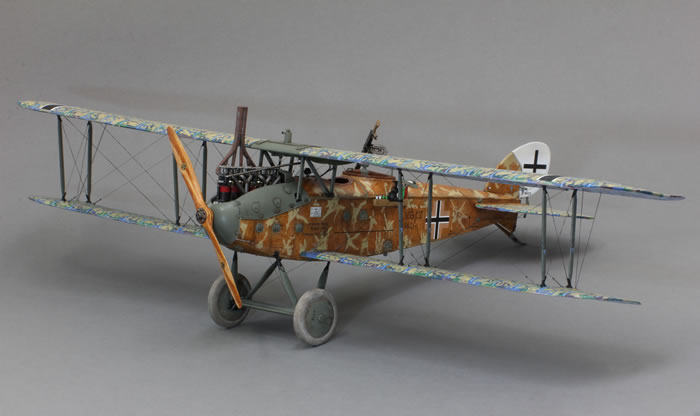
This kit offers some very interesting options amongst the seven aircraft that can be depicted. I chose aircraft w/n 4012 flown by Uffz Friedemeyer and Lt Kuchenthal, who pose with their aircraft in two of the many fascinating period photos in the instruction book. These photos intrigued but also puzzled me. The paint colour scheme in the instructions describe this aircraft as bearing a winter camouflage, and at first glance this seems a reasonable interpretation of these black and white photos. However, a second glance shows that the light coloured splotches on the wings and fuselage are in fact darker than the rudder which know would have definitely been white. Cold-blooded logic tells me that if it’s winter camouflage then why would these splotches be any colour other than white?
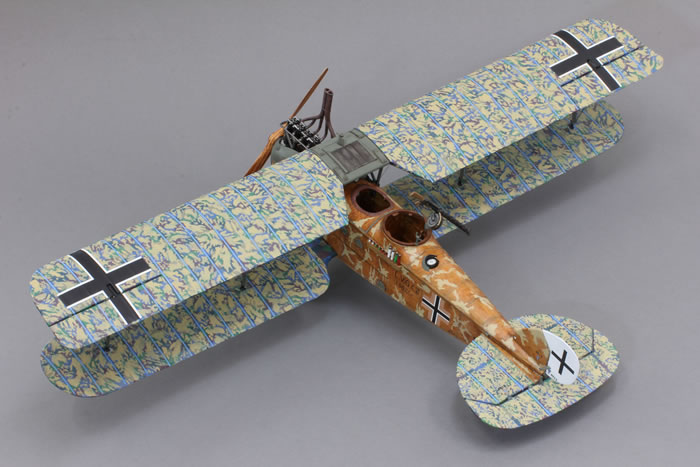
So, with respect to Ronnie Barr who did the illustrations and everyone else at Wingnut Wings, I decided that their interpretation was wrong, but what colour was used for these splotches? The application of more logic seemed to dictate that a green was used, and so my model bears what I think is actually correct – splotches of a light yellowy sage green.
I could be wrong, but here’s my justification; the photos were probably taken for a reason, and given the relatively new and un-battered appearance of the aircraft I think that the incentive for the photos was this new and unusual camouflage scheme itself. Since the likely date of these photos is after the middle May 1918 (because of the modified thinner Balkenkreuz to fit in with new regulations), I don’t think that this tallies with expected cold weather! Furthermore, the crew members aren’t dressed as if it’s cold. I rest my case m’lud.
This kit had a few embellishments and improvements made to it. I used ‘after-market’ photo-etched part for the Parabellum LMG14 and Spandau LMG 08/15 guns, both made by ‘Master’ (www.master-model.pl), which were necessary because the only options for these guns in the kit were solid injection-moulded plastic ones. Later Wingnut Wings kits always include photo-etched ‘high-detail’ options for the guns. Other improvements I added included sparkplugs and leads for the Benz Bz.IV engine, and a little scratch-built horn thing for the little tower on the radiator (an expansion device, I presume).
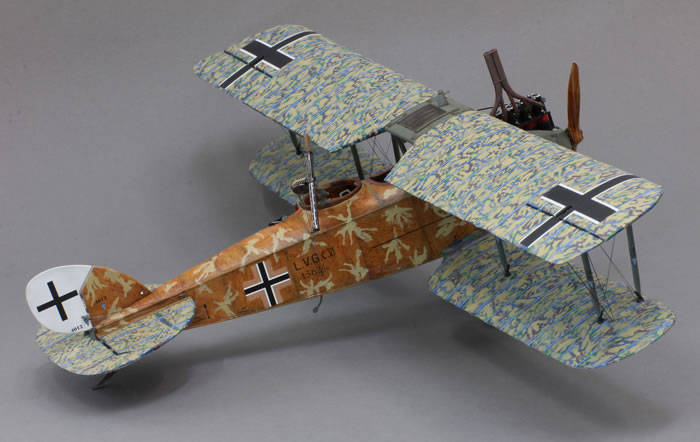
The rigging was done with ‘EZ-line’ (from Wingnut Wings themselves) and a mixture of eyelets from Bob’s Buckles and 1/32 and 1/48 scale turnbuckles from Gaspatch Models. The 1/32 ones are acceptable for the bulk of the rigging (though arguably a bit too long in scale) and the 1/48 are better for use on the control horns on the empennage.
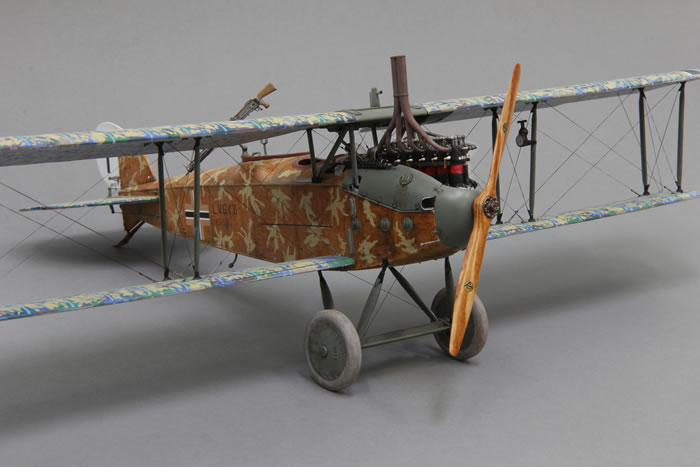
The kit’s decals are excellent, but if you buy this kit and make your model represent the same aircraft as I have beware - a few of these decal placement instructions are wrong when compared to the photos of the original aircraft. I didn’t notice this until it was too late. Another mistake that I was responsible for myself, but that was correctly shown in these instructions, was that I added the wrong weight table to the fuselage. I didn’t notice this until I photographed the model. Whoops.
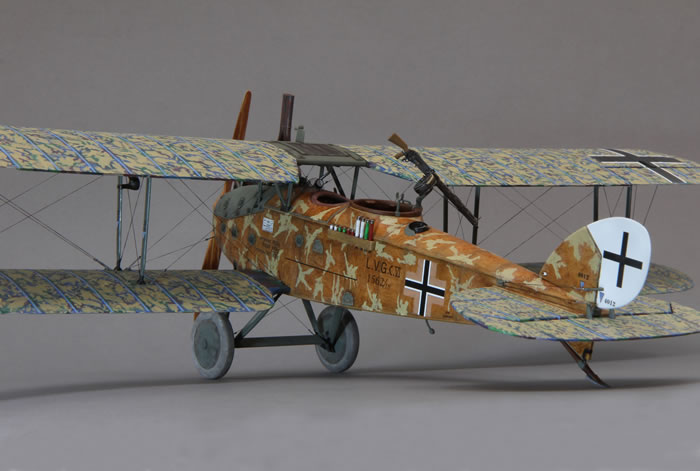
The original photos of this particular aircraft show a flare rack on the port side with a bent-metal holster for a flare gun screwed to the outside of the fuselage next to it. I gave my model a full flare rack because it looked plausible and pretty (!), but when I looked for a spare flare pistol from my spares draw the only one I found (from another 1/32 Wingnut Wings kit) was too small to be in scale with the flares…but no, hang on, I looked again and saw that the flare gun was ok but the flares themselves were too big! By then I had glued the rack onto the fuselage and it just seemed too much hassle to remove the rack and scratch build replacement flares. Go on, be honest, until you read this, did you notice that they were too big?
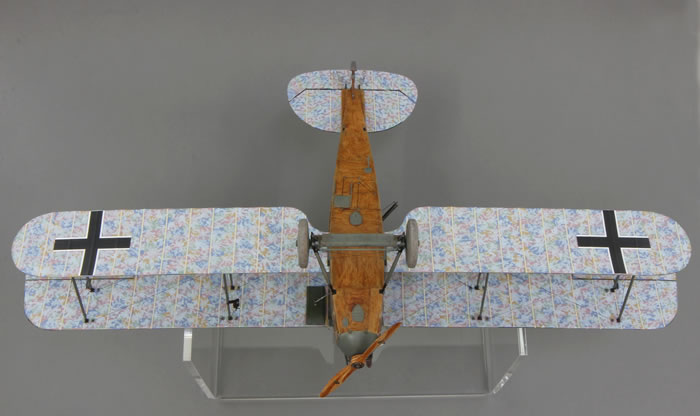
After the fuselage was painted and ‘wood-grained’ to look like orangey stained plywood, the wings were covered with the lozenge fabric decals, and then the rib tapes (separate in this kit) were applied over them.
The splotches on both the top and bottom of the wings that were applied over the lozenge fabric decals were done using good quality artist’s oil paint. I used oil paint rather than using any other kind of paint because of course I'm used to using oil paints in my work as an artist but more importantly because the slow drying properties of oil paint also gave me the control over their disposition and quality. As these splotches also appear on the undersides it’s logical to assume that these wouldn’t have been green, so I painted them using a pale blue mixture because I imagined that the crew weren’t happy with the overall pinkish tones of the standard lozenge fabric and they wanted a more realistic sky colour as they might have seen on Albatros’s (I used Cremnitz white & Titanium white + real cobalt blue).
The light yellowy sage green splotches on the upper surfaces were made from a mixture of Cremnitz white & Titanium white + ‘Oxide of Chromium’ + real Naples yellow. The oil paints I used are made by Michael Harding (www.michaelharding.co.uk ) .I think these are the best oil paints in the world, not least because he uses real named pigments, not substitutes as so many other manufacturers do. These paints are expensive, so if you can’t afford these there must be other paints out there are that would also work to achieve this camouflage effect, not just oil paints.
I didn’t try to make an incredibly exact replica of the aircraft shown in those period photos, but I think I got close enough to satisfy and ‘prove’ my theory about the original colouring of the camouflage. Overall, I'm pleased with the result and the balance I achieved between effort and reward.
Model, Images and Text
Copyright ©
2014 by Leo Stevenson
Page Created 24 April, 2014
Last Updated
24 April, 2014
Back to HyperScale Main Page
|
 Home
| What's New | Features | Gallery | Reviews | Reference | Resource Guides | Forum |
Home
| What's New | Features | Gallery | Reviews | Reference | Resource Guides | Forum |