Tamiya's 1/32 scale
Spitfire Mk.IXe Conversion
by Bruce Salmon
|
|
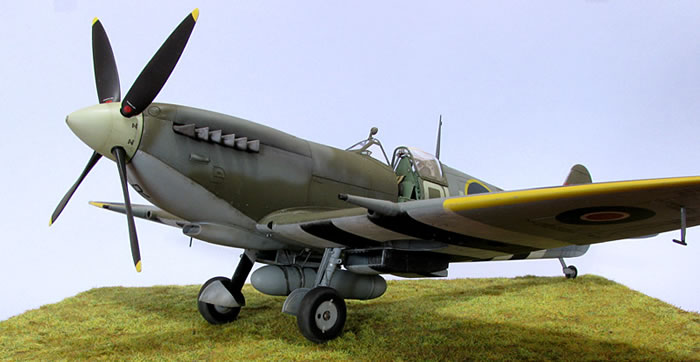
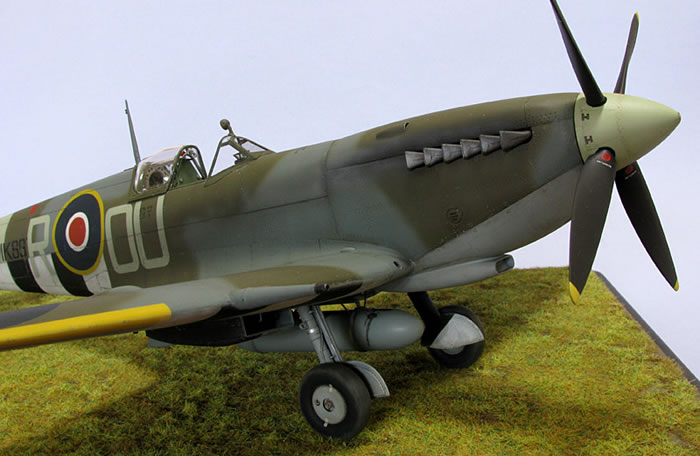
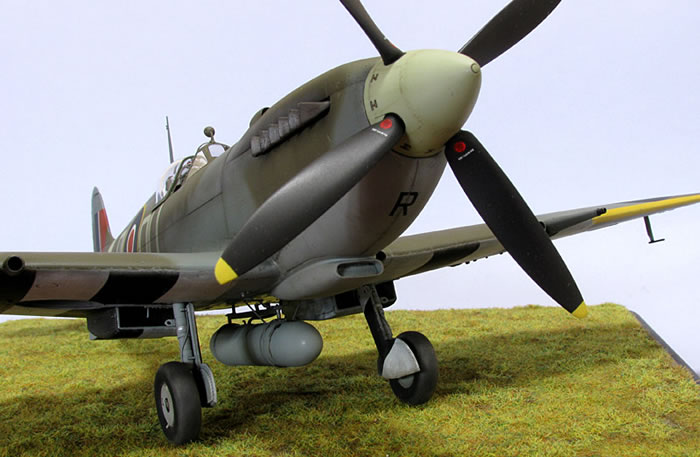
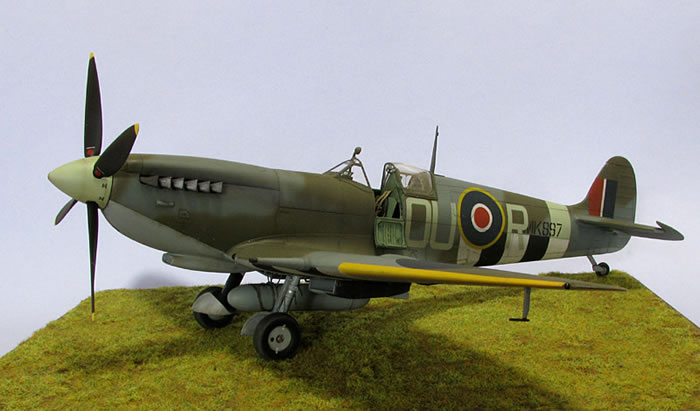
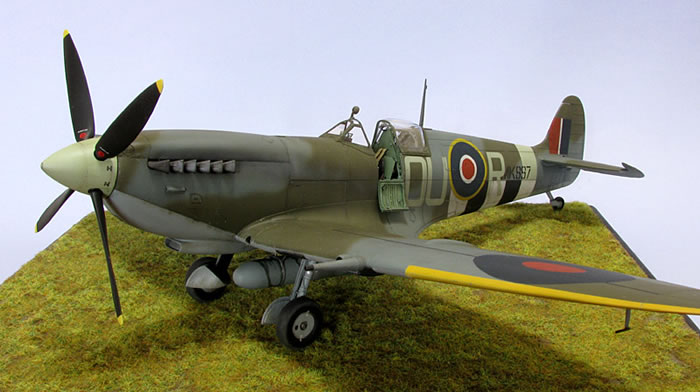
Supermarine Spitfire Mk. IXe of
485 (N.Z.) Squadron, 2nd TAF, RAF.
Based at Funtington, Sussex, July 1944 |

Tamiya's 1/32 scale Tamiya P-51D Mustang is available online from Squadron.com
MK897 OU-R had a relatively short lived career. Taken on charge 25th April 1944. Many of 485 Squadron’s Mk. IXe Spitfires were converted Mk. IXc’s but MK897 was delivered new with an “e” wing. On D-Day it was flown by F.O. Maurice G. “Red” Mayston who shared a ¼ kill on a Ju-88. Later on the 7th of October 1944 F/Lt. J. Norby King was strafing infantry when he was struck by flak. The subsequent forced landing executed just behind Allied lines concluded MK897’s flying days. The pilot returned safely to the squadron two days later.
Aftermarket Products Used
- BarracudaCals (BC32001) Spitfire Seat with Leather Backpad
- BarracudaCast (BR32002) Spitfire Door with Separate Crowbar
- BarracudaCast (BR32003) Spitfire Cockpit Upgrade Set
- BarracudaCast (BR32005) Spitfire 5 Slot Main wheels
- BarracudaCast (BR32008) Spitfire Starboard Cockpit Sidewall
- BarracudaCast (BR32011) Spitfire Cockpit Upgrade Part II
- Master (AM-32-019) Spitfire E wing – Early Hispano Cannons
- Eduard (33 064) Spitfire Mk. IX Late Interior
- HGW Models (232001) Spitfire Mk.IX Wet Transfer Stencils
Wings
After deciding on modelling a Kiwi Spitfire I began construction with the wings. The main issue here being the need to convert the “c” wing configuration into an “e” wing.
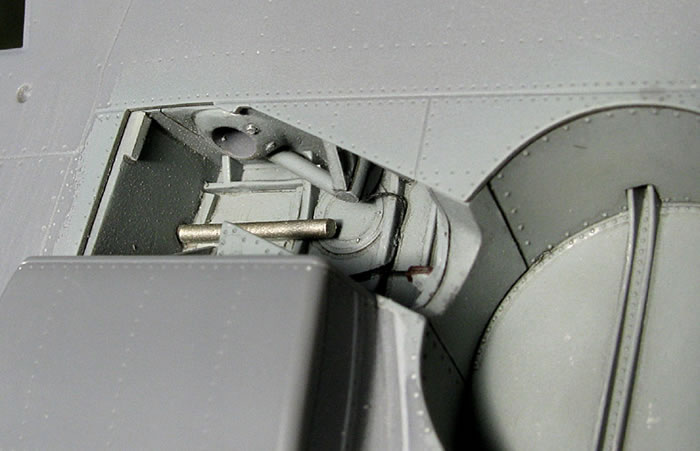
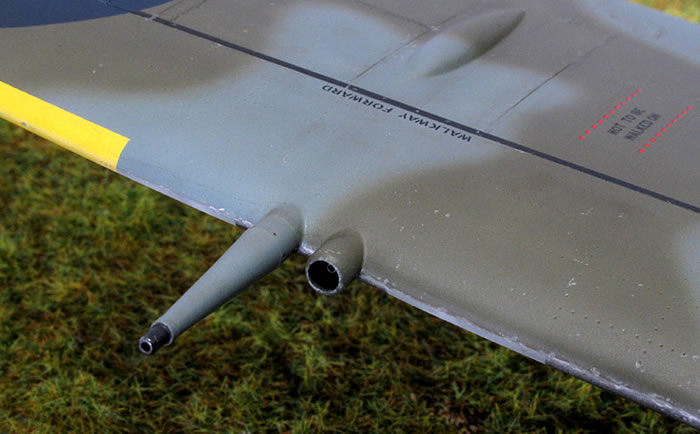
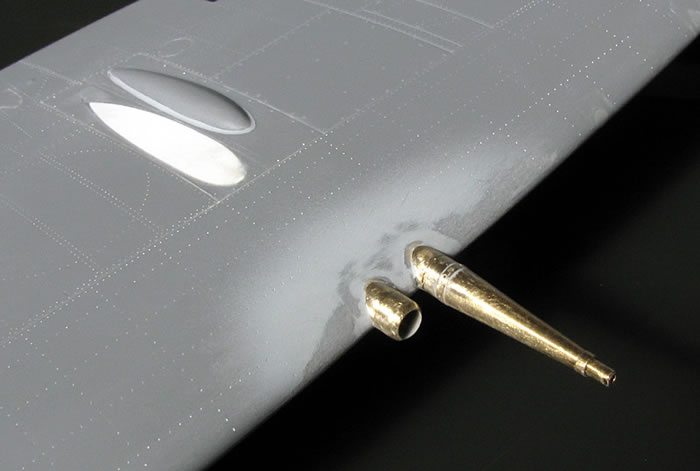
Firstly the canon blisters were shifted outboard before the wing halves were joined. I cut around their edges with the back of a blade so as not to damage the rest of the panelwork and filled the resulting hole with plastic card. Next the blisters were sanded to shape and glued into their new positions. The wing root leading edge holes for the gun camera and fuel cooler air intake were also given some much needed scratchbuilding attention otherwise they would just be yawning mouths to the cavernous wing interior.
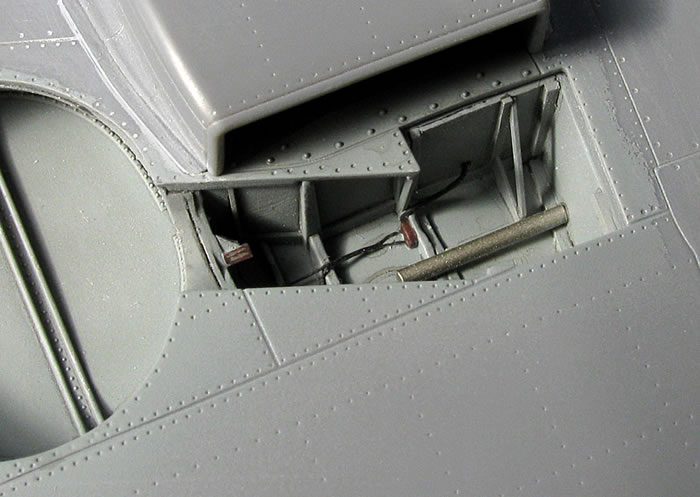
Next I had to fix the problem with the wheel wells. And by that I mean the inaccurate root area harbouring the bogus Tamiya alternate undercarriage shenanigans. This area was totally renovated to better resemble the actual structure. At this stage I should point out that you need to make sure you use the correct undercarriage legs and doors to match the wells. Ask me how I know this.
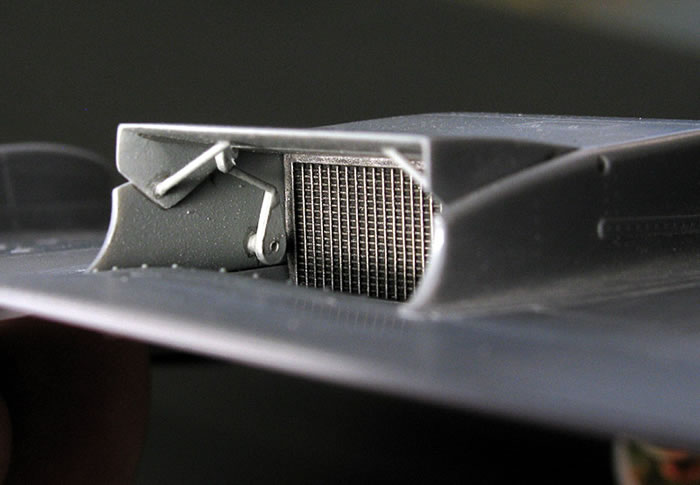
After gluing the wing halves together my attention turned to filling the outer two machine gun ports and their associated spent shell chutes in the gun bay panels. Next I drilled holes in the leading edge and inserted the Master brass cannons and 50 cal. fairings. I used 5- minute epoxy glue to achieve this as I needed time to make sure everything lined up straight. Any gaps were filled with super glue and sanded to shape. Once this was done the ailerons were attached. I had earlier removed the internal plastic anchor teeth corresponding to the metal tabs on all the moveable control surfaces so that they could be inserted and then pulled out again if there were any fit problems. Better safe than sorry. The radiator flaps were then given bracing wires and actuating levers/rods and the wings were complete.
Variations in Spitfires are complex and long story short; I made several conversion blunders which consequently meant only being able to accurately portray one N.Z. aircraft with D-Day credentials. A lack of photos of this particular aircraft helps to conceal other minor liberties.
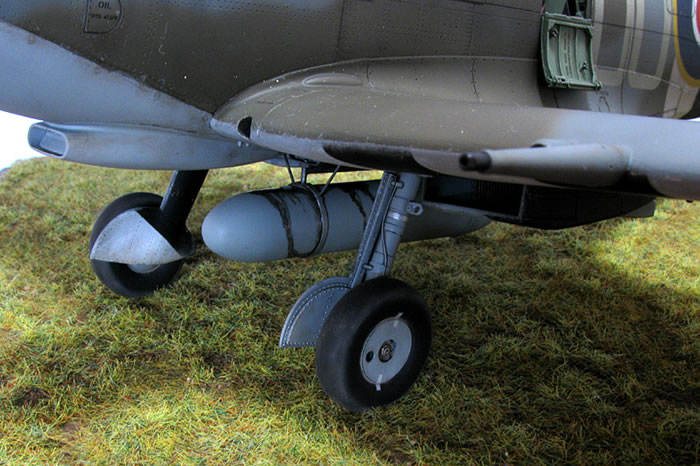
Undercarriage
I upgraded the brake lines with wire that was more to scale. Be careful to use the correct doors for your legs as one set is for the spline legs and the other for the scissor link legs – did I mention that already?! I used the Barracuda resin wheels as I just don’t like rubber ones. After painting they were weathered using the Tamiya Weathering Master set (Mud) applied to the wheel sidewalls and tread. The tailwheel leg was cut at its castoring point and reattached in a more dynamic pose.
Propeller
The components were painted separately then glued together later. When painting the yellow tips of the blades I find that if you first spray a light coat of grey primer over the black base then the yellow top coat can be much thinner and yet still achieve good coverage. It was weathered with an oil wash and some drybrushing.
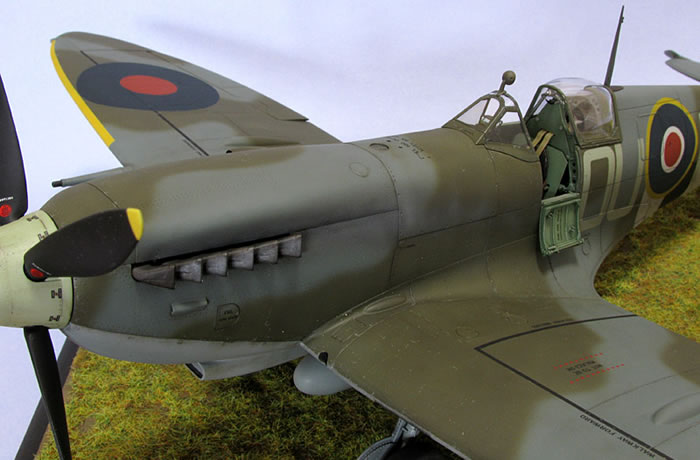
The exhaust stubs were first painted a blackish rust colour. Then they were weathered with the Tamiya Weathering Master set – first (Rust) and then (Snow).
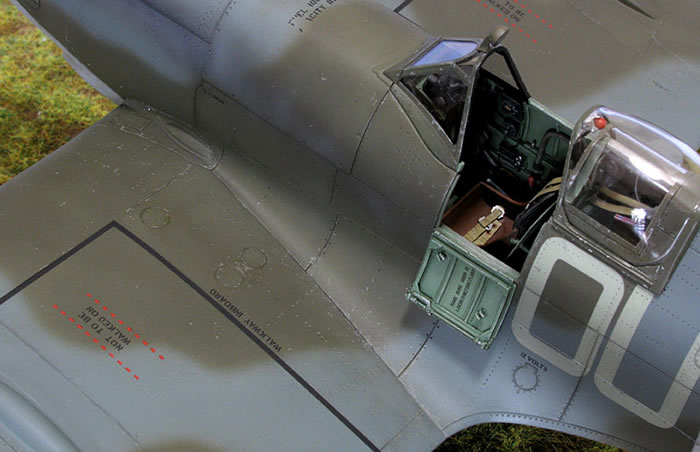
Cockpit
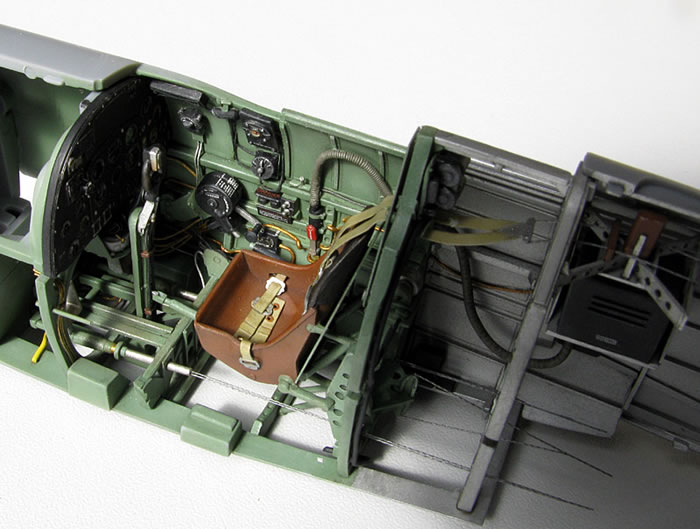
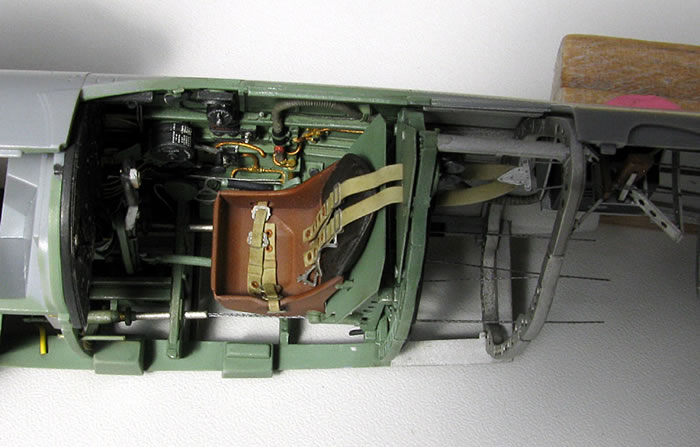
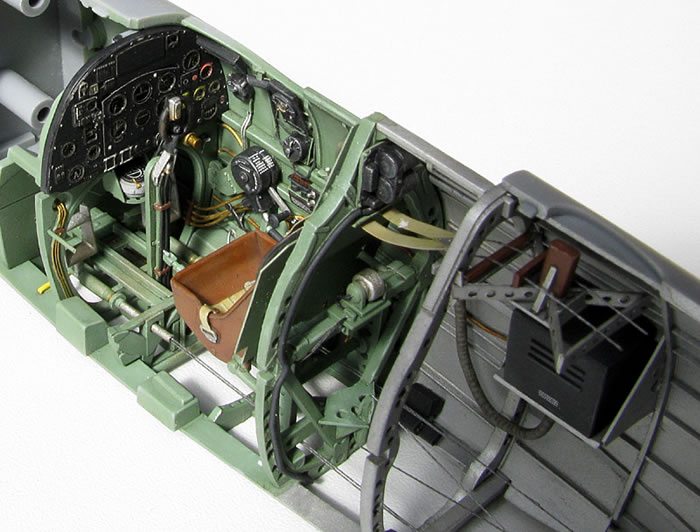
Barracuda offer a plethora of resin cockpit upgrades which add a high level of realism to the cockpit. It is very nice resin and fits without any headaches (You can always visit their website if you need further help). The only niggles I had about it were the lack of a gun camera footage indicator for the port sidewall and the tubular seat frame which has in reality, round tubes, not square as cast. Having purchased all that Barracuda had to offer I still found the need to scratchbuild further details.
These included...
- Primer knob reconstruction
- Gun camera footage indicator
- Cockpit floodlights
- Pneumatic system air bottle regulators
- Elevator control forward lever and associated control cables
- Voltage regulator cables
- Oxygen hose
- Radio mast structure
- Harness cables
- IFF box and rack
- Radio and rack
I also cut up the rudder controls and offset them so that they would match the rudder position I wanted. The pedals fit into huge locating lugs which are simply unnecessary in this scale. The lugs were trimmed down to look like the real attachment.

The Spitfire has a very 3-dimensional cockpit and by that I mean scratchbuilt wiring had to connect from one sidewall to the central section which in turn had to connect with other wiring on the opposite sidewall. My mind boggled at how to replicate these pieces in a way that could be both painted and assembled without too much hair pulling and screaming. The cockpit was painted with Humbrol 78 UK Cockpit Green followed by a standard wash and drybrushing procedure to help pop out the details.
Construction Continues
From here I closed up the fuselage halves making damn sure that all my scratchbuilt wiring lined up perfectly. Shortly thereafter the wings went on then the tailplane and rudder. Suddenly it was looking like an aeroplane!
Cowlings
I initially started out to display the whole engine - then only one side - then gave up altogether and decided it would look better with the cowls on. I attached the top and bottom cowls first making sure their rear edges lined up with the firewall end. The two side cowls were a bit gappy near the wing root and had to be shimmed to get a better fit. Lastly all the panel fasteners were sanded down a bit as they stick up way too much.
While working on this area I also added the two holes just south of the fuselage main fuel tank filler cap which are mysteriously missing from the kit.
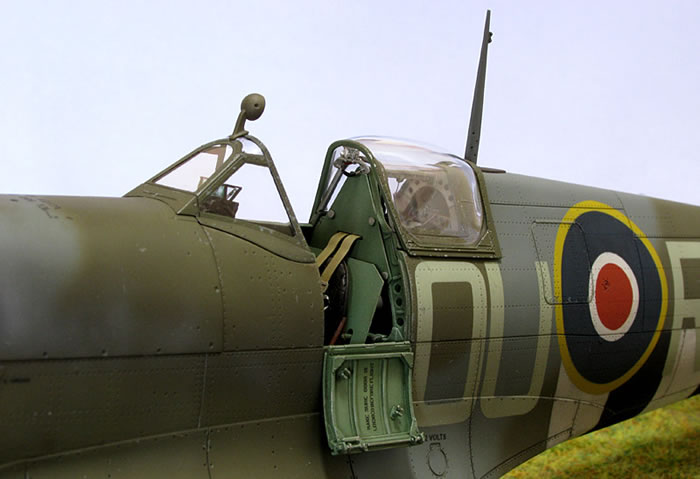
Canopy
The first thing to do with the sliding part of the canopy is to remove the seam line. I did this with a very fine grit sanding stick then proceeded to an even finer stick finishing up with Tamiya Polishing Compound (Fine) and then (Finish). This yielded a very clear and shiny canopy. I tend to stay away from using Future now days as there is too much chance of muck sticking to it while it is drying.
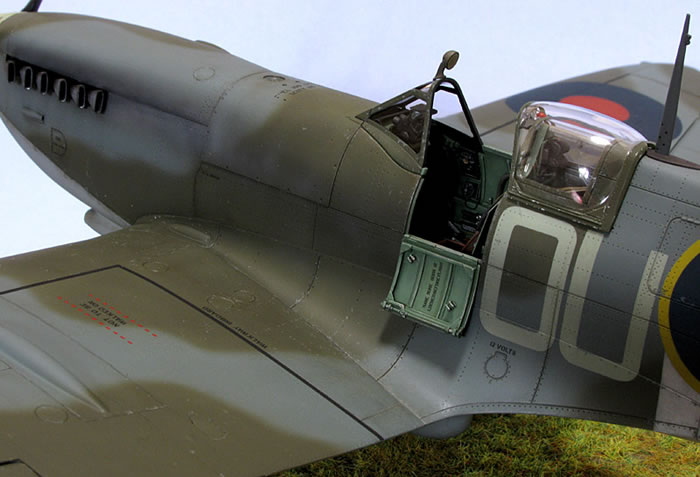
The canopy was masked using those provided in the kit; they do have to be cut out but this is no real problem. The interior colour was painted first; black for the windscreen, UK interior green for the sliding section and aluminium for the rear section. Once dry this was followed by a top coat of RAF Dark Green. Some restrained chipping using a fine brush and aluminium paint followed, then a matt varnish to finish.
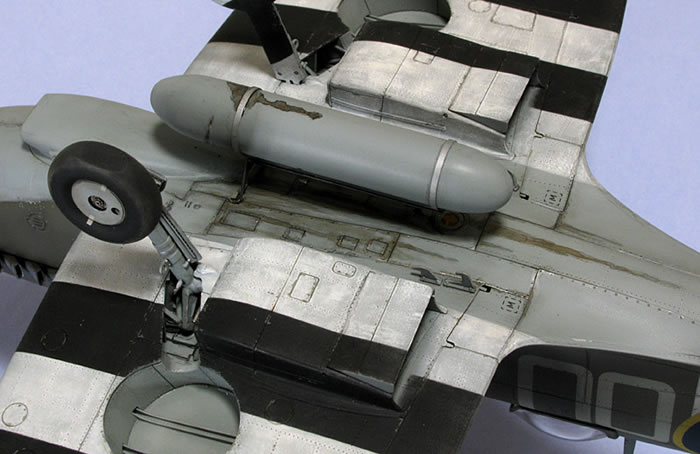
Drop Tank
I decided to forego the supplied slipper tank and instead scratchbuild a 50 gal. Hawker Hurricane style drop tank. This was fashioned from a 1/48 scale Su-22 Fitter drop tank, which is almost the perfect diameter and length, and using the Eduard Brassin 1/48 scale tank as a guide.
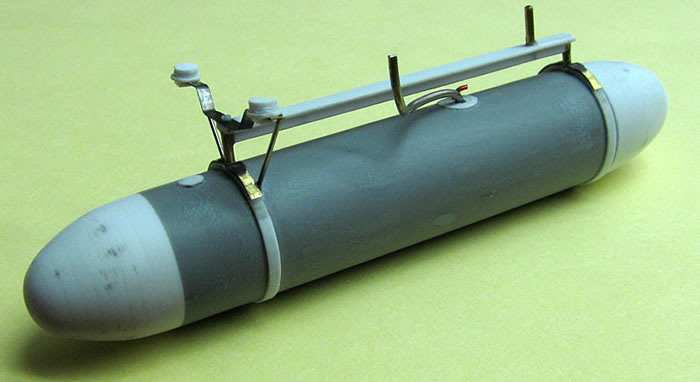
It would be nice if you could get an aftermarket one in this scale – hint, hint. Not to mention a centreline bomb and rack.
Painting
Firstly I sprayed a coat of Alclad lacquer primer to check for any issues with the build and to make sure the paint sticks well. After a light sanding I then applied the underside colour and post shaded it. Once dry I masked the bottom and sprayed the top two colours which were also post shaded respectively. The glossy paints were difficult to post shade as you can’t tell what you have just painted and what is reflected light.
Wings
Topsides: Xtracolor X6 RAF Ocean Grey and X1 RAF Dark Green
Undersides: X3 RAF Medium Sea Grey
Spinner and Fuselage band: Tamiya XF-21 Sky
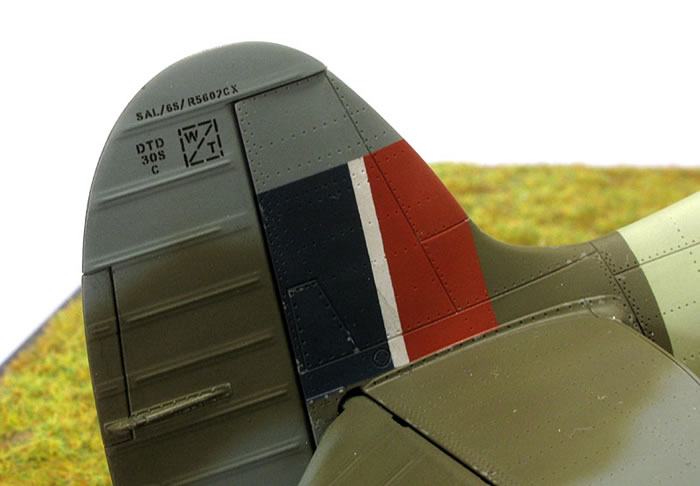
Roundels / Fin Flash:
- Red: 6 – Tamiya XF-7 Flat Red / 2 – XF-10 Flat Brown / 1 – XF-2 Flat White
- Blue: 3 – XF-8 Flat Blue / 1 – XF-7 Flat Red
- Yellow: Xtracolor X106 Insignia Yellow
Invasion Stripes: Firstly their positions were masked then for the white I sprayed a random pattern with an off white colour. Once dry I followed up by drybrushing on a 50/50 mix of Tamiya XF-2 white and white oil paint. The addition of oil paint is so that it won’t dry too quickly. A similar technique was carried out for the black stripes.
Markings
No decals were harmed during the making of this model. Instead I used masks provided by Mal Mayfield of Miracle Masks for everything except the small stencils. The masks are quite easy to apply and the extensive instructions make the process easy to follow. Try to get them in the right place first go as repositioning them is very tricky. Luckily you are given ample spares if you muck things up.
The most trouble I had was picking the middle pieces out with the point of a knife as this does lead to the odd scratch in the paintwork. You also have to be careful not to build up the paint too much otherwise the edges will not be precise. The downside with enamels was that I spent weeks waiting for paint to dry sufficiently before I could add the next mask in the sequence.
Once the painting was done I gave the model a protective clear coat using Tamiya Acrylic X-22 Clear to give a nice smooth surface. I used Tamiya’s X-20A Acrylic Paint Thinner at a ratio of 1 part clear coat to 2 parts thinner.
The next task is to apply the stencils which came from the new HGW Models Wet Transfer Stencils set. These are applied just like a decal although they won’t settle down into panel lines and may have trouble conforming to complex curves. Once dry you remove the top film layer and only the lettering remains. Aside from one that didn’t adhere properly, they performed flawlessly. If you ever need to remove a stencil then IPA will do the job – turpentine or white spirits won’t budge them. Lastly a coat of Tamiya Acrylic satin varnish sealed everything ready for weathering.I started on the underside beginning with the gear legs. After my modifications in the wells they actually seem to be strong enough to support the model with only the front spar as the attachment point. It would appear that the axles toe in too much so they required a bit of sanding rectifying the problem. The resin wheels are great but need a bit of attention to align correctly and this was achieved with 5-minute epoxy glue. Next the drop tank was attached without any fuss.
On the topside I started with the gun sight which was quite tricky as it had to be glued in place then wired up to the throttle lever not to mention painting said wires. The canopy followed with the front section proving ill-fitting and in need of some delicate trimming. The mirror face was created by using a circular mask which was first painted gloss black then Alclad Polished Aluminium followed by a light coat of X-19 Smoke. I then moved on to the exhaust stubs which proved quite fiddly to attach as they don’t have a very positive connection.
Last on are all the breakables: Cockpit door, Radio mast, Pitot tube and IFF aerial.
Time to stick a fork in it and call this one - done!
Weathering
This was kept to a minimum as the aircraft represented was only 2 months in service.
The model was given an overall filter wash with Windsor & Newton water mixable raw umber oil paint. This was dissolved in water with a drop of dishwashing detergent added as a surfactant. Some panel lines were darkened with further darker washes and oil stains added with a heavier black wash and some drybrushing. Oil streaks on the belly were made with AK Interactive (AK 025) Fuel Stains.
Next some restrained chipping was applied with a fine brush and gray paint.
Lastly the gun smoke and exhaust staining was sprayed using Tamiya X-19 Smoke. The white lead deposit in the exhaust stains was made with (1 – Tamiya X-19 Smoke / 1 – Humbrol 28 Camouflage Gray) heavily thinned.
For the final clear coat I sprayed Estapol Polyurethane varnish which gives a nice flat finish. Once this was done the oil streaks were given a coat or six of Future to make them look wet.
I started on the underside beginning with the gear legs. After my modifications in the wells they actually seem to be strong enough to support the model with only the front spar as the attachment point. It would appear that the axles toe in too much so they required a bit of sanding rectifying the problem. The resin wheels are great but need a bit of attention to align correctly and this was achieved with 5-minute epoxy glue. Next the drop tank was attached without any fuss.
On the topside I started with the gun sight which was quite tricky as it had to be glued in place then wired up to the throttle lever not to mention painting said wires. The canopy followed with the front section proving ill-fitting and in need of some delicate trimming. The mirror face was created by using a circular mask which was first painted gloss black then Alclad Polished Aluminium followed by a light coat of X-19 Smoke. I then moved on to the exhaust stubs which proved quite fiddly to attach as they don’t have a very positive connection.
Last on are all the breakables: Cockpit door, Radio mast, Pitot tube and IFF aerial.
Time to stick a fork in it and call this one - done!
Model and Text Copyright ©
2014 by Bruce Salmon
Page Created 13 August, 2014
Last Updated
13 August, 2014
Back to
HyperScale Main Page

|
 Home
| What's New |
Features |
Gallery |
Reviews |
Reference |
Forum |
Search
Home
| What's New |
Features |
Gallery |
Reviews |
Reference |
Forum |
Search