Airfix's 1/72 scale
de Havilland Vampire T.11
by Roger Hardy
 |
de Havilland Vampire T.11 |

Airfix's 1/72 scale Vampire T.11 is available online from Squadron
S
u m m a r y |
| Catalogue Number: |
Airfix Kit No. A02058 - de Havilland Vampire T.11 |
| Scale: |
1/72 |
| Contents and Media: |
55 parts of grey styrene, 1 sprue of transparencies and decals for two subjects. |
| Price: |
Purchased online from Hannants for £7.99 plus shipping |
| Review Type: |
Build Review |
| Advantages: |
Crisp surface detail, accurate, outstanding fit.. |
| Disadvantages: |
None noted. |
| Conclusion: |
This is a really nice model, accurate and well thought-out. . |
 History History
The de Havilland DH.100 Vampire the second British jet fighter after the Gloster Meteor and its first to be powered by a single jet engine. The Vampire first flew in 1943 and entered service with the Royal Air Force in 1945. The RAF used the Vampire as a front line fighter until 1953 before it assumed secondary roles such as pilot training. It was retired by the RAF in 1966, replaced by the Hawker Hunter and Gloster Javelin. It achieved several aviation firsts and records, including being the first jet aircraft to cross the Atlantic Ocean. The Vampire had many export sales and was operated by various air forces. It participated in subsequent conflicts such as the 1948 Arab–Israeli War, the Malayan emergency and the Rhodesian Bush War.
Almost 3,300 Vampires were manufactured, a quarter of them built under licence in other countries. The Royal Navy's first jet fighter was the Sea Vampire, a navalised variant which was operated from its aircraft carriers. The Vampire was developed into the DH.115 dual-seat trainer and the more advanced DH.112 Venom ground-attack and night fighter. The two-seater cockpit and nose was modelled on the Mosquito and utilised a wooden front fuselage, just like the Mosquito.
The final Vampire was the T Mk 11 trainer model. First flown from the old Airspeed Ltd factory at Christchurch, Hampshire on 15 November 1950, production deliveries of the trainer began in January 1952. Powered by a Goblin 35 turbojet engine, 731 were built by DH at Hatfield and Chester and by Fairey Aviation at Manchester Airport, in both air force and naval models. The trainer models remained in service with the RAF until 1966 but there was a Vampire trainer in service at CFS RAF Little Rissington until at least January 1972.
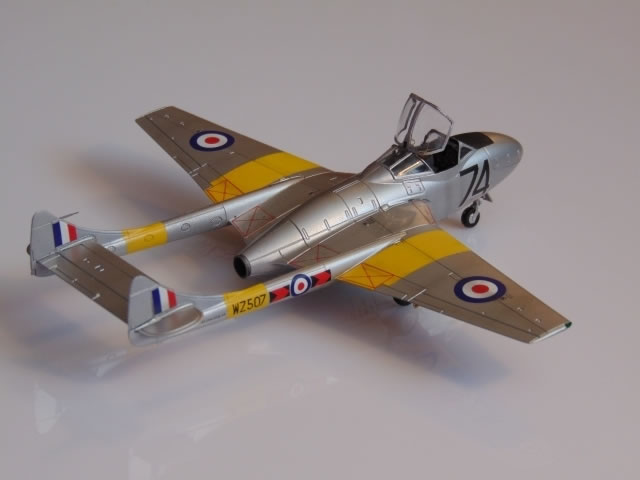
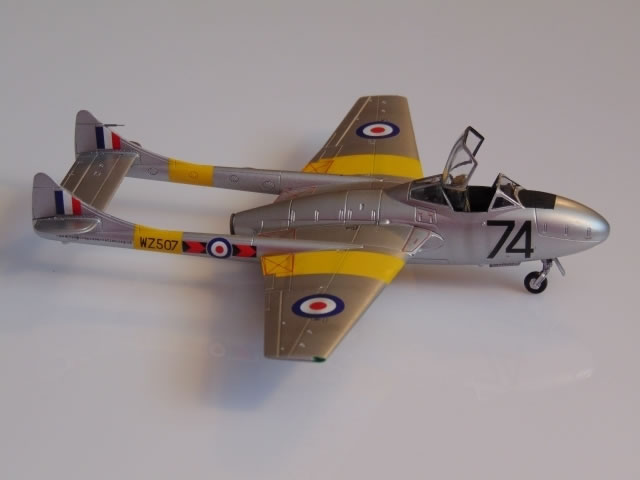
The Vampire Preservation Company keep one example, WZ507, in flying condition and it regularly displays at air shows around the UK. This option is provided on the decal sheet.
The Kit
This is a new tooling by New Airfix and is moulded in India. Like all the recent releases, it has finely engraved detail which some may find a little unsubtle but is very much state-of-the-art and at a pocket money price. Personally, I like the panel lines; they are certainly more prominent than on a real aircraft but we accept all kinds of conventions on models. On real aircraft, the individual panels are normally butt-jointed and only prominent because of reflections and weathering. We have accepted raised lines and engraved lines to represent this and most agree that the engraved lines do it better. In addition, they allow for some realistic weathering and generally look neat and tidy.
Back to the kit. It has 55 parts moulded in soft grey plastic and a three-part cockpit which can be posed open. Decals for two RAF aircraft are provided, including WZ507. The decal sheet is very detailed with all of the wing walk and maintenance markings which will look good on an all-silver aircraft. An in-box review was published by Britmodeller at so I won’t repeat it here.
The cockpit is very neat and everything fits into place with precision. The seats are a little basic and I added generic Eduard seatbelts and made some black-and-yellow handles at the top.
The interior is a coal-hole; all black, so I painted everything panzer grey and picked out depths with black and highlights with drybrushed white.

The instrument panel is a decal and looks good. For those who want something really authentic, there’s CMK’s resin cockpit set, but both are future releases from Hannants as of September 2014. However, they are available right now from CMK directly. Don’t forget the nose weight (7g) though you can still get some in before the gun bay cover is glued into place.
There is a full intake assembly and impeller face, none of which can be seen.
By the time the upper wing goes on it seems that this model will probably need no filler as the fit of the parts is so precise.
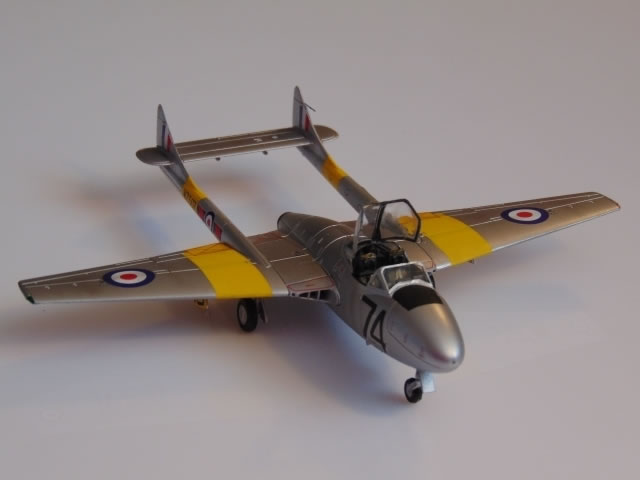
The upper wing also has the lower wing flaps and ailerons moulded into it (like the Spitfire 22 and Gnat, unlike the Hurricane Mk I) so the trailing edge is very thin.
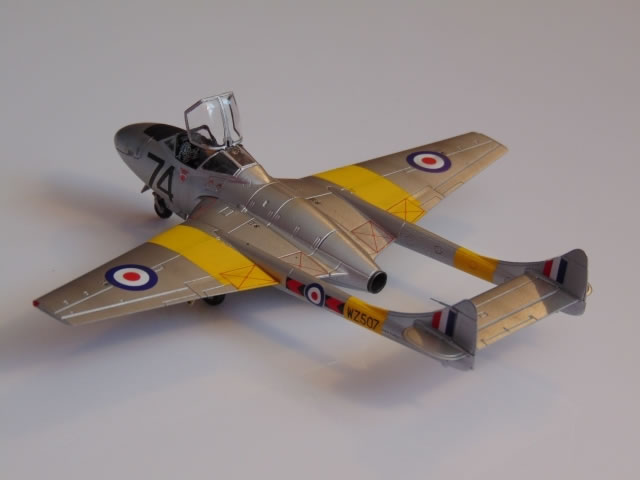
The tail booms go together next but remove the ejector pin marks from the insides of the fins. The main undercarriage legs are mounted on the tail booms. I drilled out the gun ports but not the holes for the drop tank as RAF trainers rarely carried them.
The tailbooms are nested into the upper wing, then the lower wings are glued into place. The fit of all the parts was very precise.
At this stage, I clicked the intakes into place and could locate them accurately so that they blended to the upper and lower wing surfaces.
Finally, the nose undercarriage and all undercarriage doors are added (the main undercarriage D doors have their actuators moulded with them – nice touch) and it’s ready for spraying. Amazing. No filler anywhere and the entire construction in two paragraphs! The only fault I could see was slight sink marks over the flaps but decided to live with it. These would be easy to skim fill for the pedantic.
Painting, Markings and Finishing Touches |
Paint was applied with my Testor Aztek A470 airbrush.
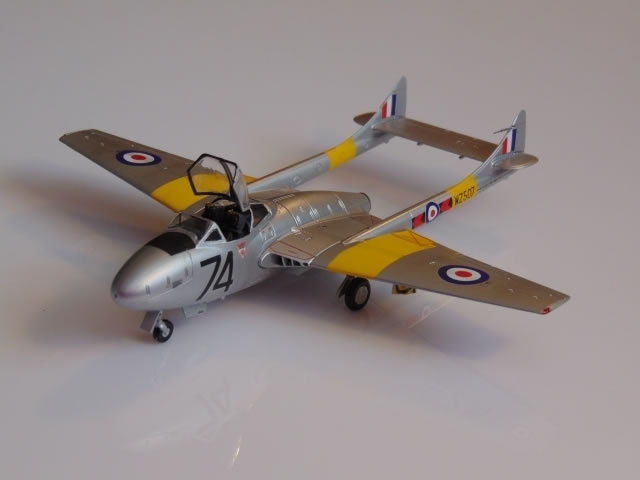
I decided to glue the front and rear cockpit parts then mask all three parts in situ. I then applied gloss varnish around the masking (to stop paint bleed through to the glazing), then sprayed black for the internal framing. I then sprayed Alclad grey primer to check for faults, then Alclad White Aluminium mixed with some Duraluminium to darken it a bit.
Whoever designed the yellow-striped RAF training colour scheme was clearly not a modeller; the masking was difficult and tedious and I still got bleed along the panel lines so had to tidy up the silver. This has to be done by airbrush (more masking) as Alclad cannot be brushed.
The wheel wells and undercarriage were brush painted as they were now yellow. In retrospect, it would have been easier to spray the yellow stripes first, then mask them and spray the silver.
The decals are first class. I forgot to add the anti-dazzle panel but managed to mask and brush-paint it later without messing up the decals.
Final Bits
I finished off the undercarriage and added the ejection seat handles from fuse wire before posing the canopy open. A little subtle weathering using a Tamiya weathering set , et voilà, it’s done. It took me less than a day.
This is a really nice model, accurate and well thought-out.
There were no problems in the construction and no filler was required. There is really nothing to fault about this kit and I recommend it without reservation.
My congratulations to Airfix who have upped their game so well and made truly excellent kits available at pocket-money prices.
Can we expect more Vampires and Venoms?
Model, Images and Text
Copyright ©
2014 by Roger Hardy
Page Created 16 October, 2014
Last Updated
22 October, 2014
Back to HyperScale Main Page
|
 Home
| What's New | Features | Gallery | Reviews | Reference | Resource Guides | Forum |
Home
| What's New | Features | Gallery | Reviews | Reference | Resource Guides | Forum |