Revell's 1/32 scale
Pacific Island Corsair 883 The Real Black Sheep
by Suresh Nathan
|
|
F4U-1A Corsair |

Tamiya's 1/32 F-4C/D Phantom II available online from Squadron.com for only $100.98!
Most modelers of my generation grew up with a few well-known television war serials. One of the best known of these was Baa Baa Black Sheep that ran from 1976 to 1978.
This of course chronicled the life of Major Gregory “Pappy” Boyington who was the CO of the Black Sheep (there were three outfits that bore the name but this was the most famous one). Pappy Boyington is often associated with Lullabelle but that was not an operational Corsair and existed only stateside for propaganda purposes. In fact it is something of a mystery which Corsair actually belonged to Pappy Boyington. He generally would take the most beat-up Corsair on the airstrip and give the best one to the younger pilots.
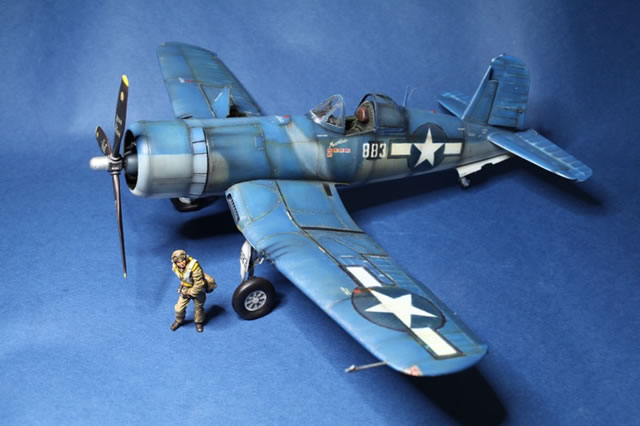
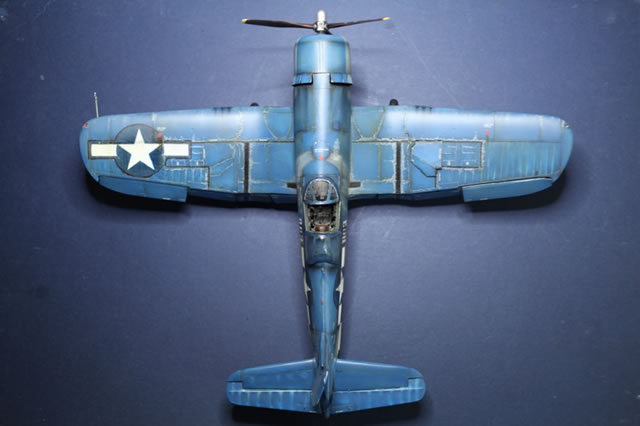
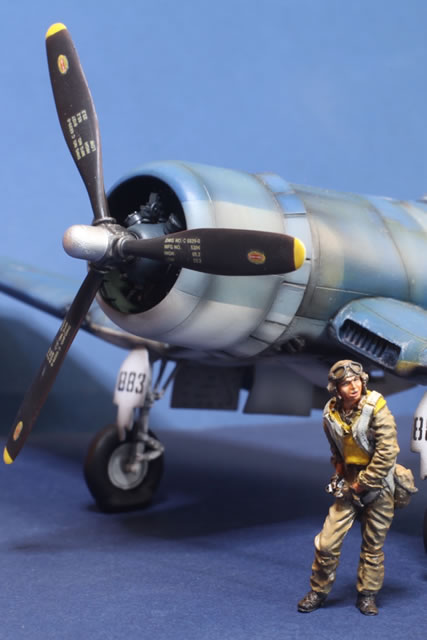
The most celebrated of these Corsairs that he flew in was the 883 (Figure 1).
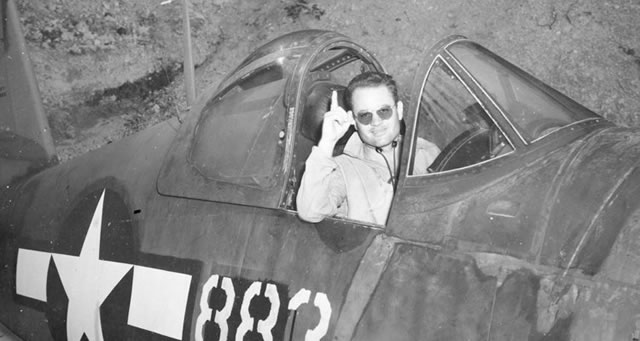
It was a beat up old lady and was made up of spare parts. The numbers were painted over and it appears (though there is some debate about this) the earlier red outlines of the roundels were painted over (presumably) in black. That was the look I decided on in any event.
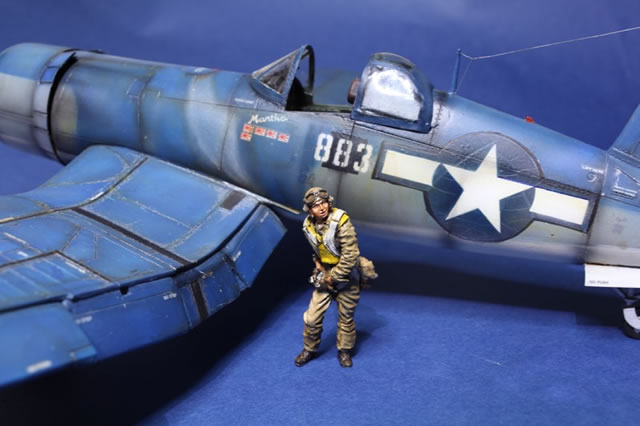
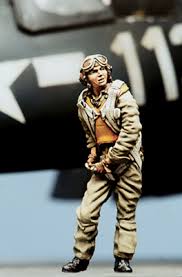
In addition, the project is an homage to Sheperd Paine whose book ‘How to build dioramas’ gave most of us a start in advanced modeling techniques more than 30 years ago. He features a Valiant US Navy Pilot in front of a Revell/Monogram F4U Corsair (Figure 2).
I decided to put all these elements together in one project.
The Model
The Revell Corsair is from the early seventies and has been re-issued a number of times. It is (probably) an F4U-1A though the version I had states it’s a 1D. It’s a real classic and holds up well in general shape to the latest offerings from Trumpeter and (even) Tamiya.
The cockpit was re-worked with the Black Box set and the placards and dials were from Waldron. I also used the photo-etched upgrade kit from Eduard. The PW R2800 engine was from Technics. The pilot figure was from Valiant. All other parts were built from scratch.
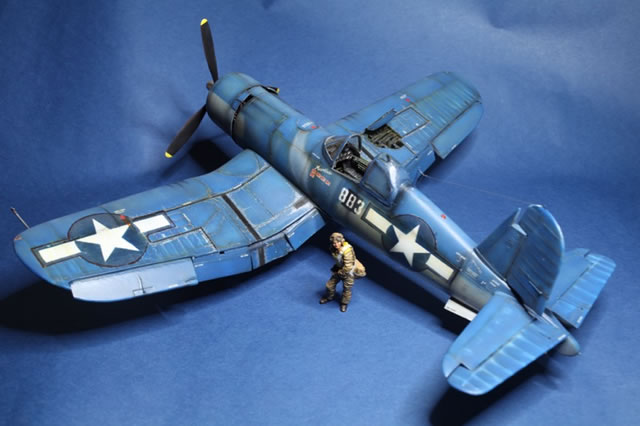
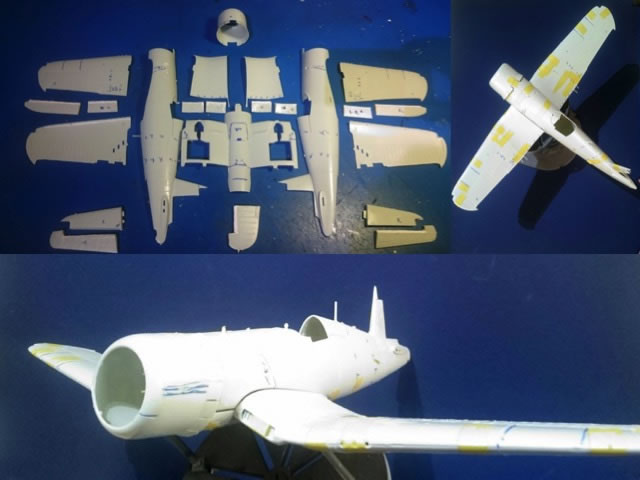
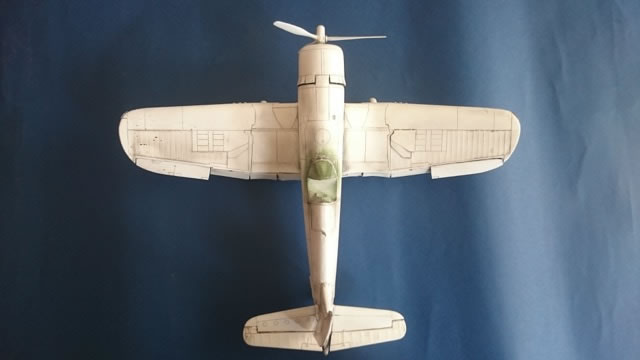
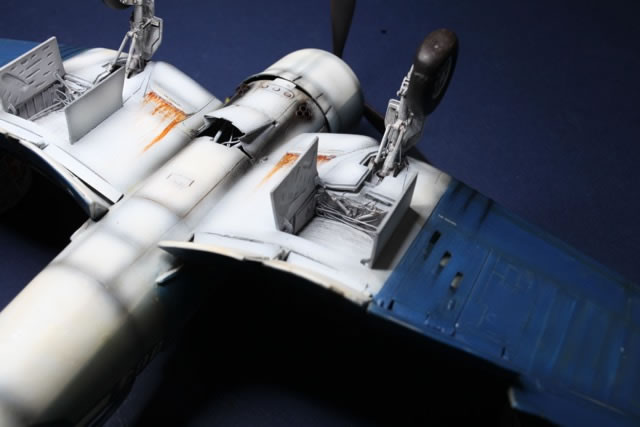
I decided to build the model with all ailerons and flaps dropped (Figure 3).
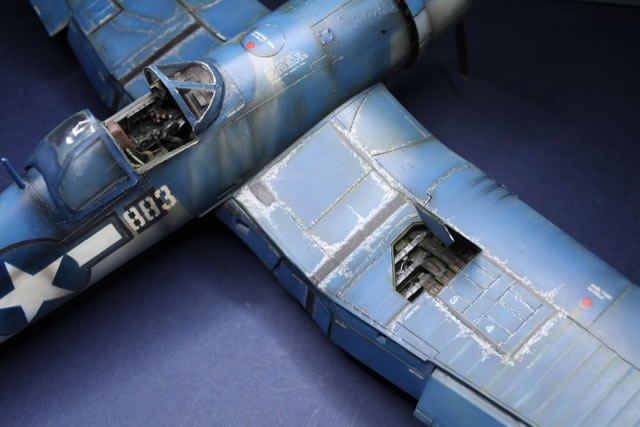
Apparently there is a law against keeping flaps neutral on a Corsair. The drop flaps are the hardest of these to do and there are upgrade sets available but I decided to use the kit parts. This requires a lot of shimming to get the upper concave and lower convex surfaces to not only fit each other but also look symmetrical. Not impossible, but not fun. A lot of trial fitting is required which I tend to do with Revell kits anyway. The cockpit set from Black Box is comprehensive (Figure 4).

The reference I had suggested the layout on the dashboard was wrong and sanded it down and drilled new place holders for the Waldron dials. It turns out that the version given in the kit may be right after all and mine might have been a post-war modification. Still the Waldron dials are much nicer. The Black Box kit requires a lot of trial and error to fit it right. This was further improved using the Waldron placard set.
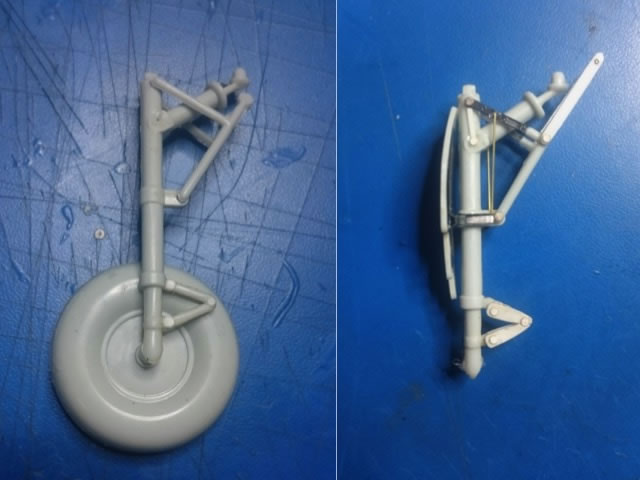
The tail landing gear was extensively modified according to references (Figure 5).
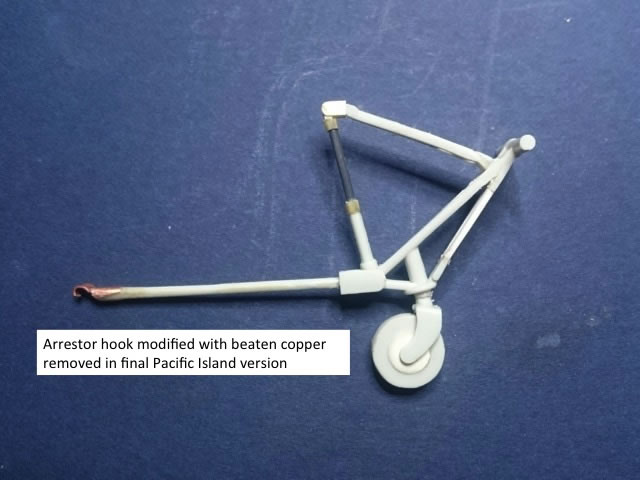
I really wanted to leave the arrestor hook on even if it was a Pacific Island version I was to end up with but in the end I removed it. Pity, because the beaten copper hook I fashioned was nice. Many modelers berate the Revell undercarriage. Honestly, it isn’t that bad and requires just a few parts to make it look right. Nevertheless it is weak and mine broke a number of times during construction. If it breaks in future I’ll likely have to make a brass main strut, which I’ve done for other Revell kits (Figure 6).
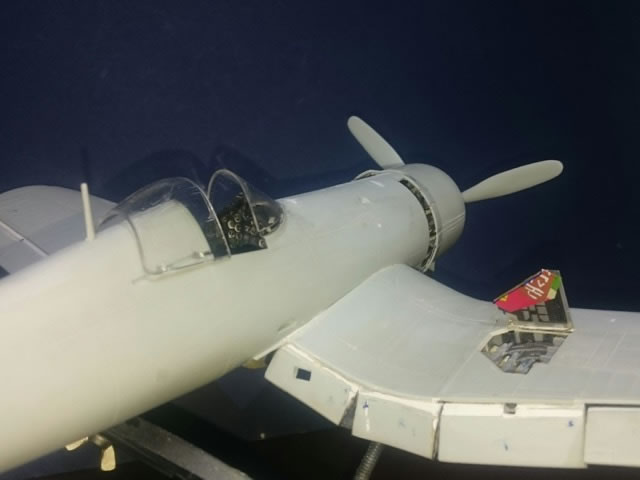
The cowling is wrong but salvageable. All you have to do is cut out strips from adjacent flaps and transfer to an intervening flap (Figure 7).
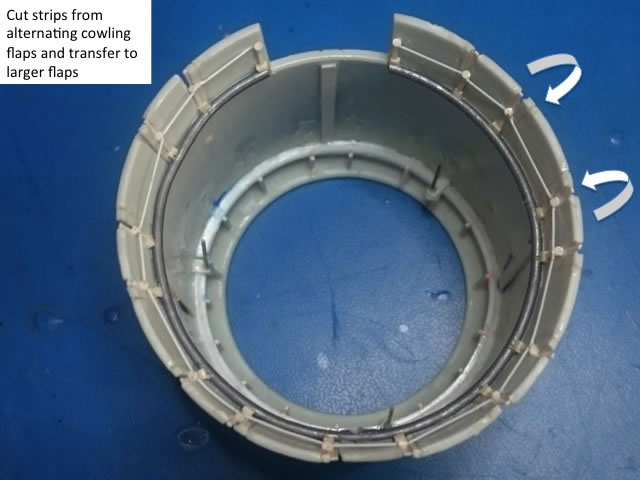
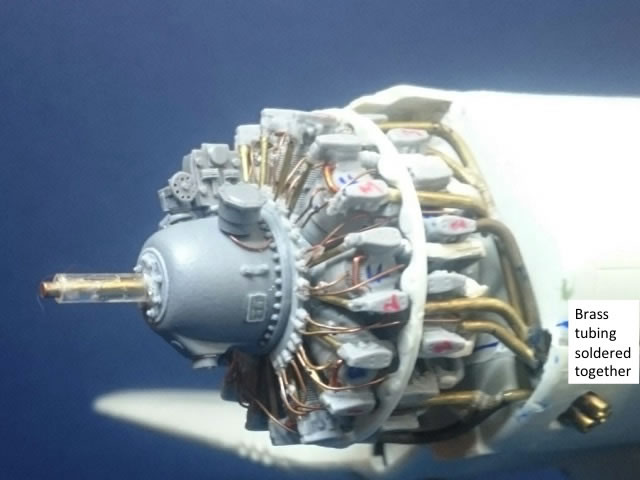
This results in the authentic alternating wide/narrow flap pattern. It is clear from the construction manual that Revell actually recognizes the wide/narrow pattern and so the drawings are adequate for scribing. The engine was reworked with wire and tubing soldered together. The pattern of the exhaust was obtained from references (Figure 8).
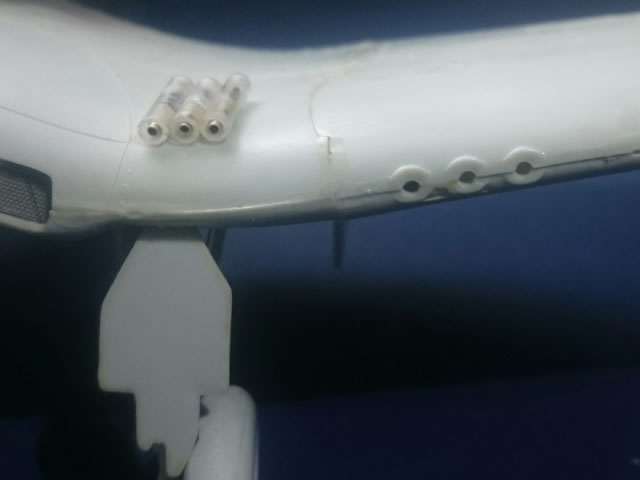
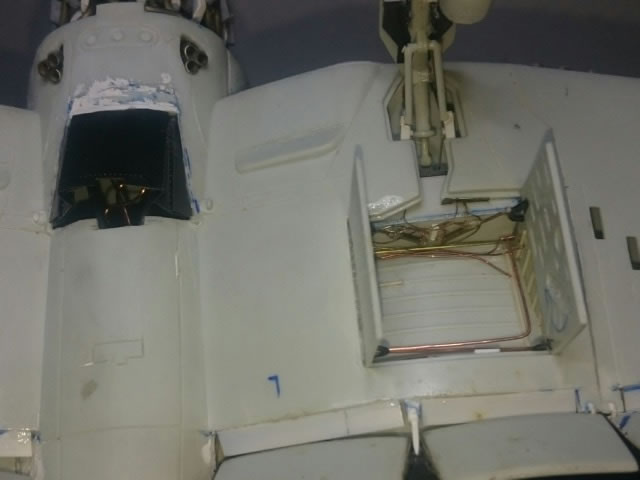
The machine guns were reworked with telescopic tubing (Figure 9) ...
...and the gun bay was from the spares box (Figure 10).
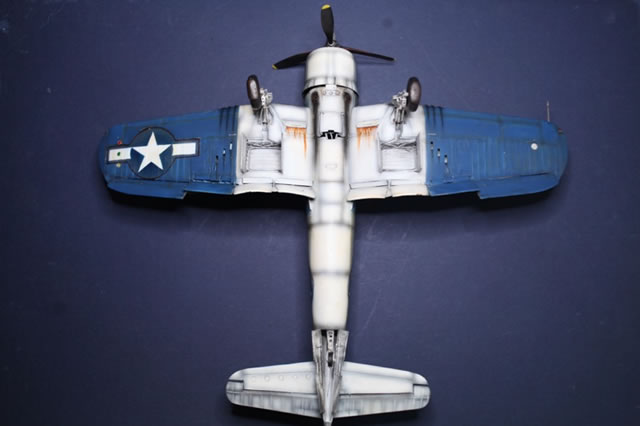
The gun flaps actually work and are made from beer can (well cider actually) aluminium. The wheel-bay hydraulics are accurately depicted from references (Figure 11).
The canopy provided is not quite right. The general shape doesn’t bulge right and the thickness of the plastic makes it look quite odd. I therefore decided to vacuum form a new one (Figure 12).

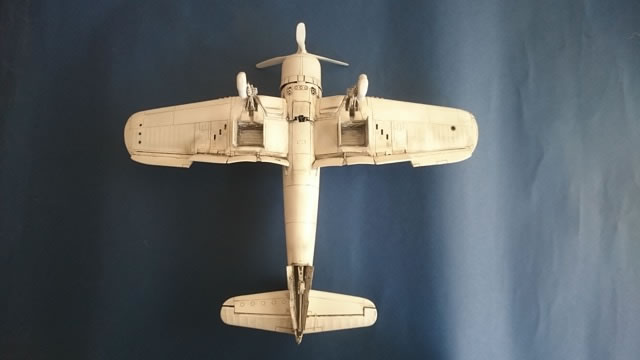
All panel lines were rescribed (Figure 13 and 14).
I use Gunze White primer, which evens all the scratch-work out. I then apply washes and do a clean up to look for missing panel lines. When all this is in order I proceed to paint.
I always knew this was going to be the best part of this project. Pacific Island Corsairs were the most weathered – they had the best operational life and so were very worn. They had repaired battle damage and replaced panels. This called for heavy weathering. All panel lines were marked with washes as above.
They were pre-shaded and then painted with Tamiya flat blue (Figure 15-18).

Next the model was coated in a few layers of future floor wax. The kit-provided decals were very comprehensive but suffered badly from silvering. You’d think I would have invested in an aftermarket decal set but I have a morbid fascination with these old decals. The decals did not work well with the Microset setting solution but worked better with the Humbrol setting solution. The big roundels had cracked and had to be painted over. I outline the roundels first with red and then patchily with black to give that rough field applied look without getting carried away. All other markings were painted by hand.
The whole thing was coated again in Future and weathering done with multiple shades of Rowney artist’s oil paints. A Prisma silver color pencil was used for chipping. My model features a curious metal patch (Figure 19).
This represents field repair of battle damage. In the TV show the Gunnery Sergeant improvised with beer cans and I wanted that in there somehow. I haven’t been able to validate the practice through my historical research. The engine was mostly done in shades of Alclad (Figure 20).

The figure was painted using oils on Acrylic (Figure 21).
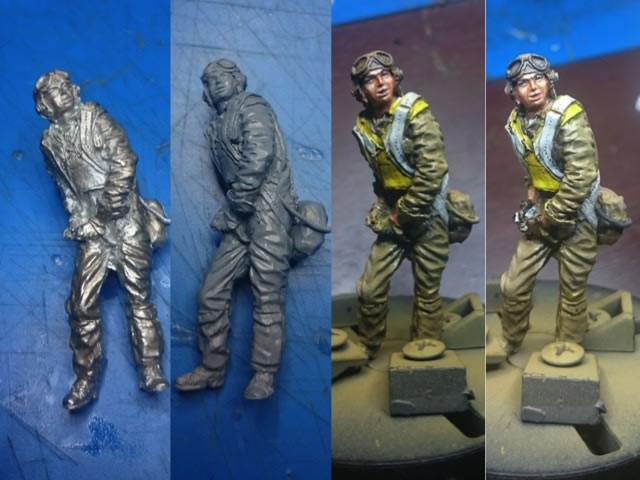
This gives a nice little complement to the model (Figure 22).
I hope you enjoy the build. The Corsair has always been a special model for me.
The fact that this was an old Revell somehow makes it all the more satisfying.
Text and Images Copyright ©
2015 by Suresh Nathan
Page Created 6 October, 2015
Last Updated
6 October, 2015
Back to
HyperScale Main Page

|
 Home
| What's New |
Features |
Gallery |
Reviews |
Reference |
Forum |
Search
Home
| What's New |
Features |
Gallery |
Reviews |
Reference |
Forum |
Search