|
Junkers J.I
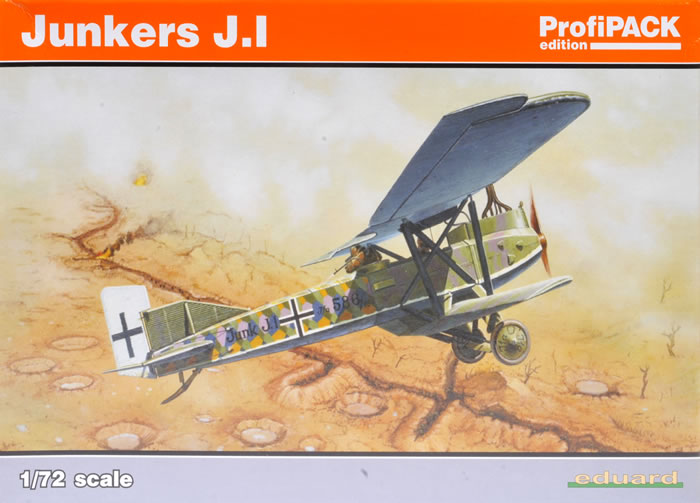
Eduard ProfiPACK, 1/72 scale
S
u m m a r y |
| Catalogue Number: |
Eduard Kit No.7046 – Junkers J.I (Profipack Edition) |
| Scale: |
1/72 |
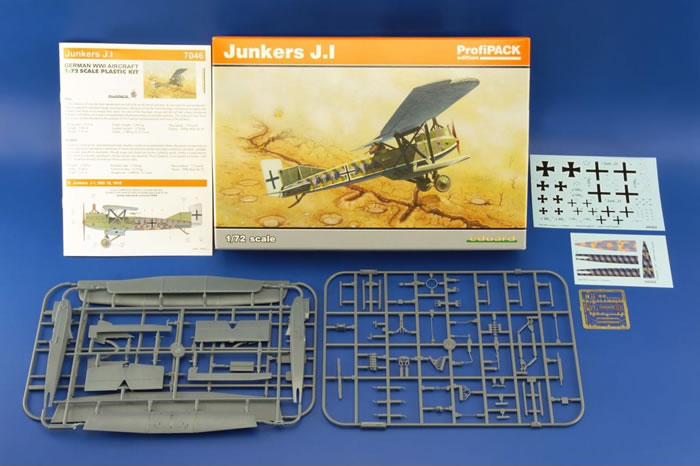
| Contents and Media: |
63 grey styrene parts; PE fret; plus decal for four subjects. |
| Price: |
Available online from:
Click for currency conversion. |
| Review Type: |
FirstLook |
| Advantages: |
Nice detail, readily available, and reasonably priced. |
| Disadvantages: |
The upper wing’s top surface probably tapers down to the tips too much. Purported to have some fit issues, and some decal brittleness (in the past at least). |
| Conclusion: |
On first appearances the kit may look a bit more promising than others have found it to be upon building. Building issues aside, the level of detail and general appearance are essentially good. A fair amount of the PE detail is unnecessary as it fails to improve upon moulded detail, or could easily be scratch-built where it does. This is the first time I have had doubts about the added value of a Profipack Edition over the base kit (which is no longer produced).
None of the criticisms are in the least catastrophic, but it is not a shake and bake proposition that experience of more recent Eduard kits would perhaps lead you to expect. Despite the above concerns and gripes, the kit is at least readily available and attractively priced. It can undoubtedly build into a fine looking model with some care in assembly, and I remain happy to recommend it. |
Reviewed by Mark Davies

Eduard's 1/72 Junkers J.I Profipack Edition is available online from Squadron.com
The Junkers J.I (manufacturer's designation J 4) was a German "J-class" armoured sesquiplane of World War I, developed for low-level ground attack, observation and Army cooperation. It is especially noteworthy as being the first all-metal aircraft to enter mass production; the aircraft's metal construction and heavy armour was an effective shield against small arms fire over the battlefield.
The J.I was well liked by its crews, although its ponderous handling earned it the nickname "furniture van". The aircraft first entered front service in August 1917. They were used on the Western Front during the German Spring Offensive (Kaiserschlacht, "Kaiser's Battle") of March 1918.
The aircraft could be fitted with two downward firing machine guns for ground attack, but they were found to be of limited use due to the difficulty of aiming them. The J-I’s were mainly used for army co-operation and low-level reconnaissance. They were also used for dropping ammunition and rations on isolated or cut-off outposts that could not be easily re-supplied by other means.
The production at Junkers works was quite slow due to poor organization. There were only 227 J.Is manufactured until the production ceased in January 1919 (production continued until just after the end of the war). At least one was lost to ground fire; shot down by a French anti-aircraft machine gun that was firing armour-piercing rounds. Although this was apparently an isolated event as some sources state none were lost in combat. A few were lost in landing accidents, and other mishaps.
Source: Wikipedia
Previous 1/72 J.1 Kits
I am aware of one previous limited run kit by Merlin Models, and two resin kits by CMR and Classic Plane. The Merlin kit was one of their better efforts but still a bit crude, with rough white-metal parts. CMR’s kit was nicely done, but not a tour de force like their more recent releases. I have only seen a listing for the Classic Plane kit and cannot comment further about it. Eduard’s kit was first released around 2003, and has appeared in a number of boxings since then. It is the best injected kit of the subject to date in the One True Scale, and very similar in general appearance to CMR’s resin kit.
Contents
The contents come in a top-opening box with the three sprues, decals, and PE frets enclosed in resealable cellophane bags The instructions consist of twelve glossy colour printed A5 pages, which include a three and a bit page colours & markings guide.
The instructions are nicely printed and clear and generally easy to follow. They use English and Czech text, with colour call-outs cross-referenced to the Gunze Aqueous (acrylic) and Mr. Color (lacquer) paint ranges. They can be viewed or downloaded as a PDF here).
The Kit
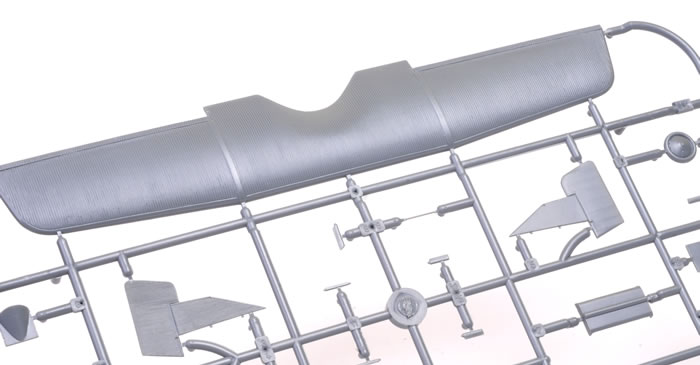
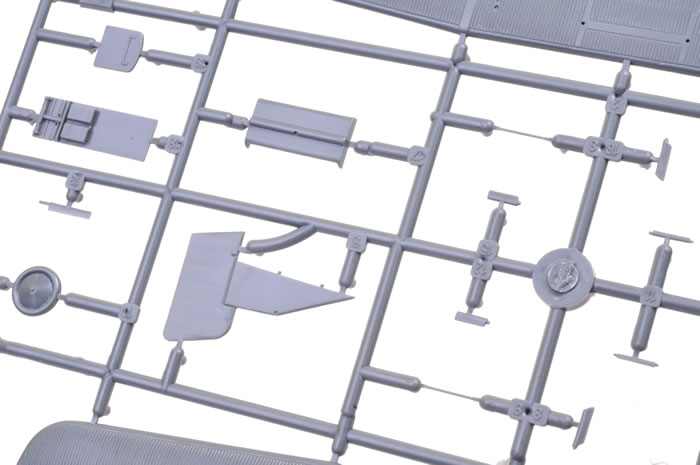
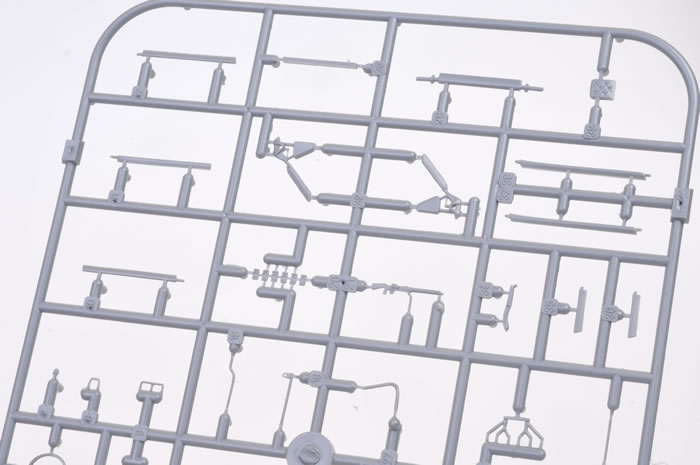
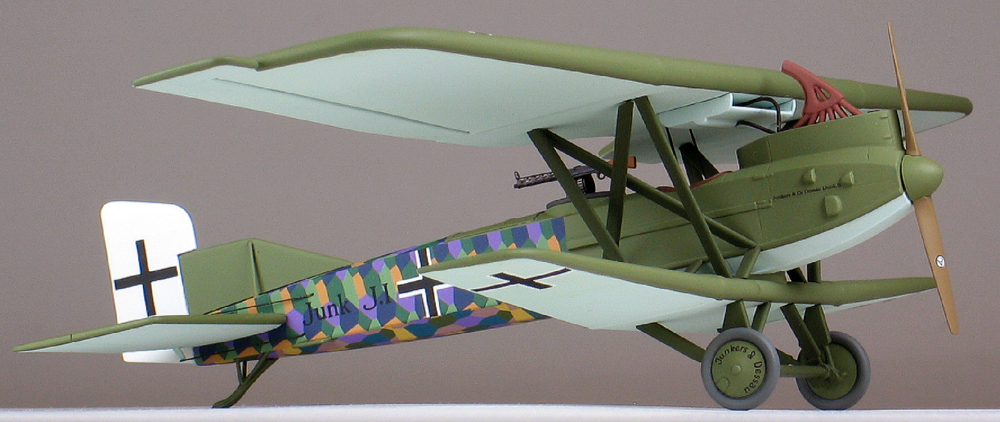
The moulding of the airframe parts is mostly very clean with just the tiniest hint of lash on some of the smallest parts. Sprue gates are quite narrow and ejector pins thoughtfully placed. The small details are finely done, and the surface detail nicely rendered. The tooling as held up well over 12 years or so; I could see no obvious deterioration in the quality of moulding when compared to an original early issue I own.
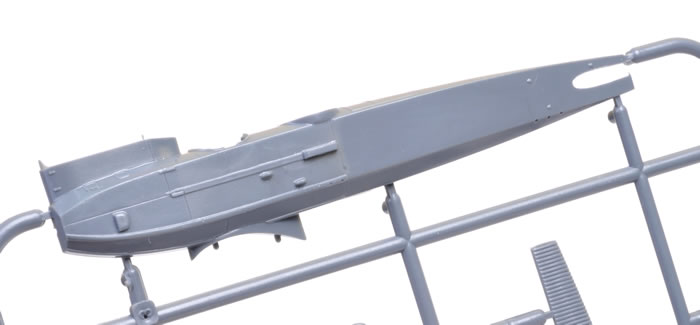
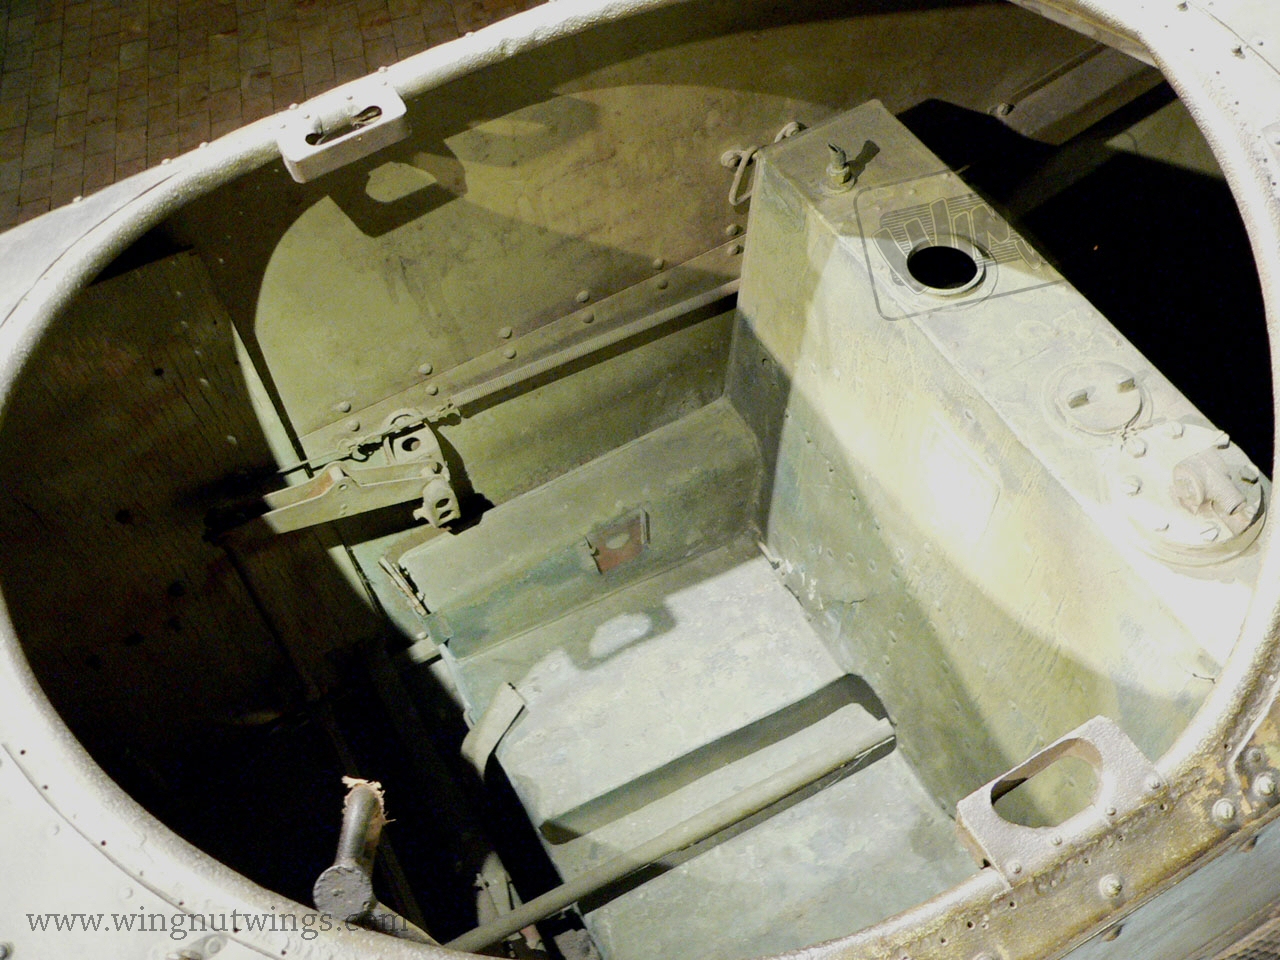
Cockpit detail is quite good, and captures the essentials of the original; although, perhaps surprisingly, PE only makes a small contribution to this. The pilot’s seat looks OK from the top, but should taper towards the floor; although this moulding compromise is understandable (it was actually formed as part of the fuel tank made of brass sheet). Small decals provide for the few instrument faces both in and outside of the cockpit. There is a PE control column to replace the styrene example, but if used it will need a bit of “beefing-up” by dipping in Mr. Surfacer, PVA or other medium to lend some 3D effect to its otherwise flat appearance. Frankly, the moulded styrene column looks more like the original to me.
The exposed engine looks the part, includes a choice of two exhaust manifold styles, and includes the piping between the engine and wing-mounted radiator. Both can be improved by careful drilling out at the ends. I have read build reviews that mention the engine being a tight fit, and these suggest thinning the fuselage walls in this area a little to improve things.
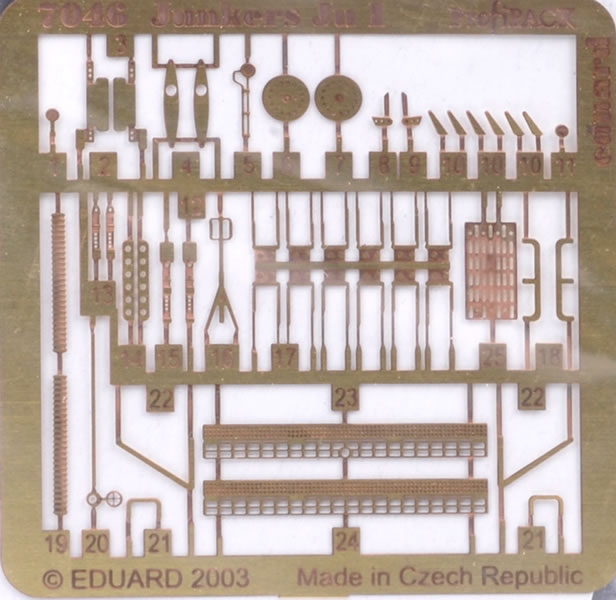
There is a nicely moulded machine gun for the rear gunner that can be “improved” with PE parts. These include a replacement perforated barrel jacket for those with the PE rolling skills to make it, faces for the drum magazine, plus the magazine brace that leads to the gun muzzle with ring-sight incorporated. There is also a length of PE representing the ammo-belt that the instructions show surrounding the edge of the drum magazine. The real belt was only exposed for a quarter of the drum’s circumference and then fits straight into the feed slot in the gun’s receiver. The PE ammo-belt should therefore be shortened; but I have my doubts about the benefit of the PE belt anyway as it does not really look that convincing. I also think the PE faces for the drum area waste of time as the moulded detail is more representative of the original’s appearance. The perforated jacket will look good, although the styrene gun is quite nice for the scale (but not as good as Roden manages with its guns). The drum brace and sight are worthwhile however.
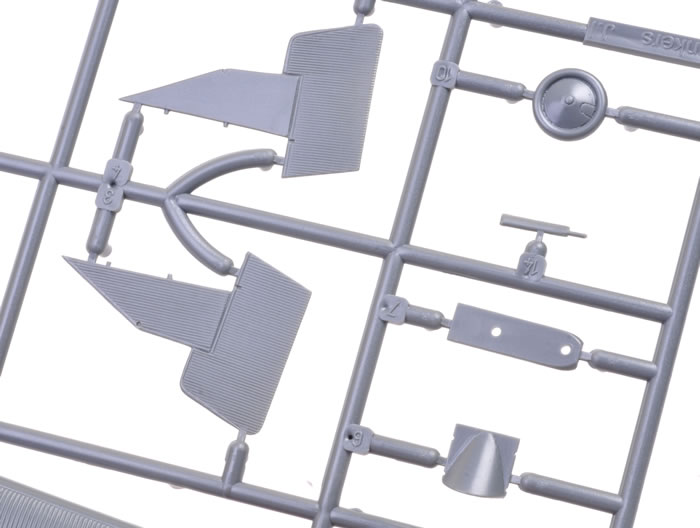
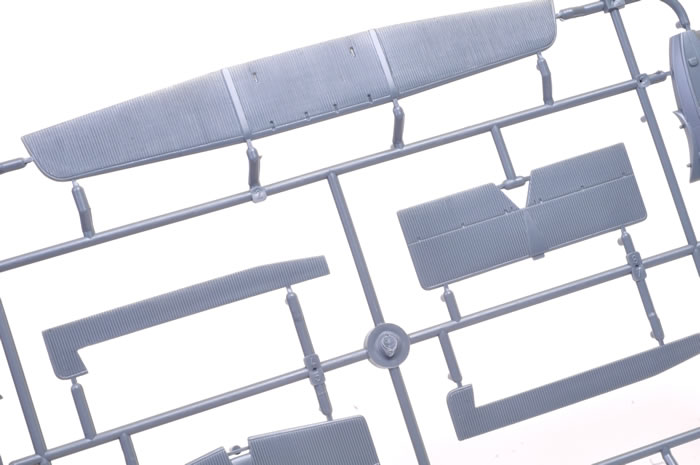
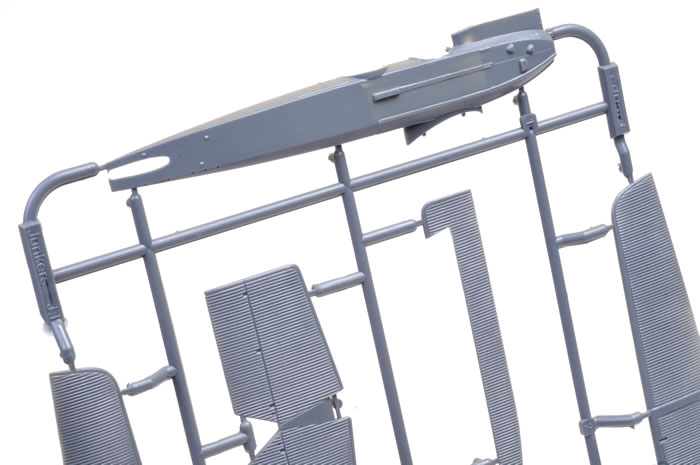
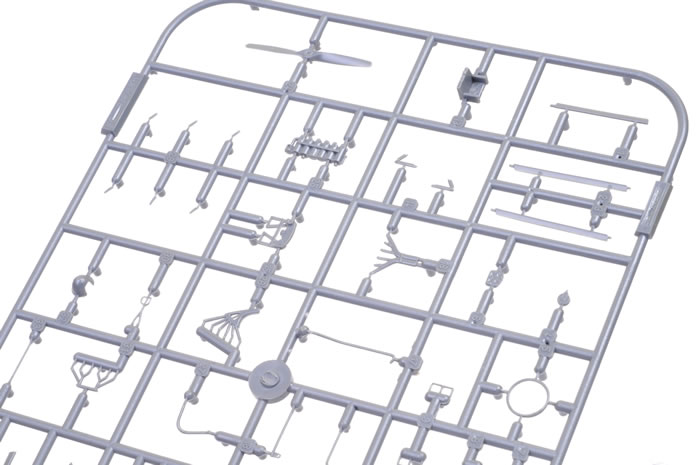
The thick Junkers wings are each in two halves with separate ailerons for the upper one. A radiator fits to the underside of the upper wing, and has PE inserts to represent the matrix of each. These PE parts are about twice the depth of the styrene matrix they replace, so I am unsure of how well these will fit. Two choices of single-piece tailplane are provided with fixed elevators set at neutral displacement. Three styles of fin and rudder are provided, again all fixed as single pieces.
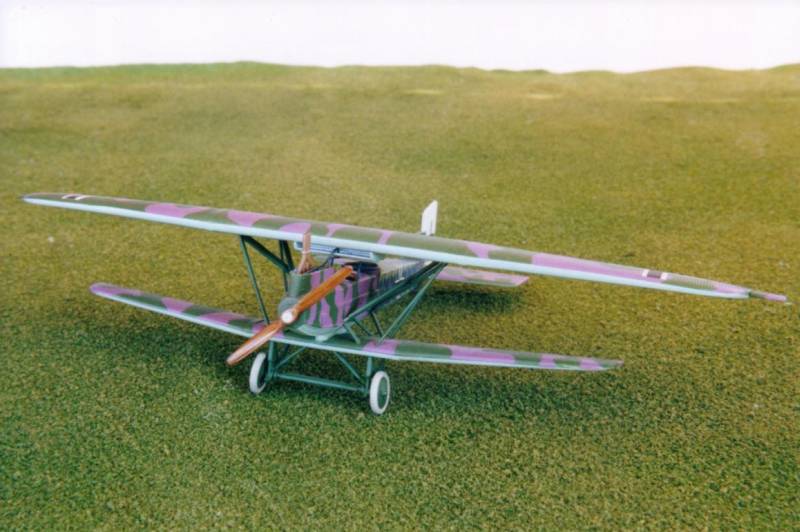
I have read a couple build articles where it the the top surface of the kit’s upper wing was considered to be not flat enough on its upper surfaces across from the centre to outboard sections; instead tapering down to the tip too much, and that the taper should be on the kit’s otherwise very flat wing under-surface (a brief review comment on Eduard’s own website even mentions this). I think there could be some truth in this, but it is mainly apparent when comparing to Windsock’s plans, as head-on photos showing full-span are hard to find (although rear-view full-span images are not, and tend to support the criticism). I have high respect for the Windsock series, but would not treat any plans as being the gospel truth. However, from looking at images of finished Wingnut Wings 1/32-scale examples, it seems their kit has a flatter appearance to the upper wing than Eduard does. This is enough to convince me.
The wing-fix, if tempted, involves making a razor saw cut on the about edge of the flat strips covering the two assembly joints where the outboard wings fit the centre-section. You then tape join the wing upper-surfaces with the corrugated surfaces down-most taped to glass or other flat surface. Once dry, the lower wing surfaces can be joined to the no straighter upper wing half. By clicking on the underlined links you can see a finished and unmodified model (by Michael Kendix), and a corrected example (by Paul Gaertner). It seems a worthwhile fix for relatively little effort to me.
This appears to be a fairly simple kit to build given its limited number of struts and lack of rigging; but do take care. I have read build reviews that indicate fitting the upper wing is quite tricky. The instructions require the builder to drill holes for the struts in the fuselage, and I suggest careful attention be paid to the instructions (see below):
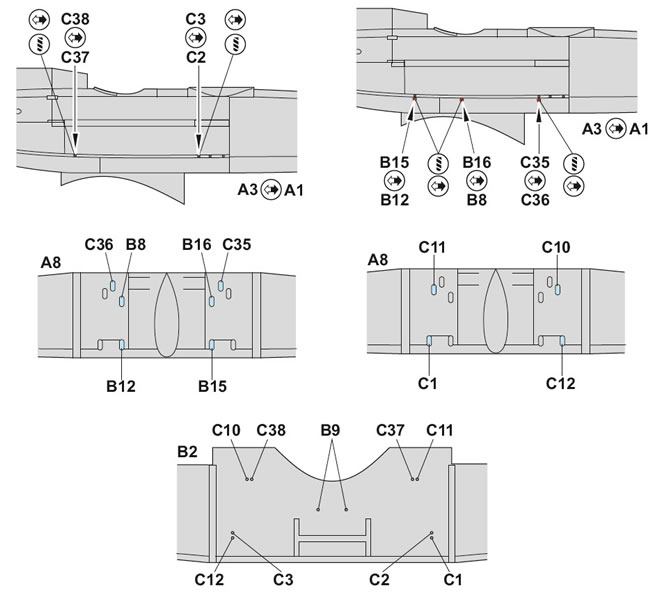
Remember, most of the struts are fixed to main airframe by rods protruding some distance from the streamlined sheath, and quite of a bit of the rod should remain exposed (although this varies for different struts). I liked the way some of the struts capture the crimped or flattened trailing edge to the strut’s streamlined sheathing, as per the original.
The PE fret provides for a number of small details including boarding steps, ground handling rails, control actuators, small braces for the tail skid, and what look to be possibly friction-damper linkages within the fork of the undercarriage legs just above the axle. I all cases these PE parts replace thicker styrene alternatives, so there is an option for those that dislike working with very small PE parts.
A couple of on-line build articles I am aware of both mention poor fit, with one specifically mentioning difficulties with the wing halves, matching aileron alignment and real difficulties closing the fuselage without gaps. I should emphasise that neither article condemned the kit overall, but forewarned is forearmed. It must be remembered that this kit is one of Eduard’s early forays into injection moulding and dates from around 12 years ago. It is not as good as the brand’s latest products, which are among the industry’s best, but it still has the essential ingredients for a nice model and rewarding build.
Useful References
Wingnut Wings’ website has a superb colour walkaround of an original condition Junkers J.1 in the Canada Aviation Museum, as well as excellent archival images. The downloadable brochure for the superb 1/32-scale Wingnut Wings kit is also a most handy reference for Eduard’s smaller scale kit. I would also recommend Windsock Datafile 39 as a superb reference on this aircraft.
Markings
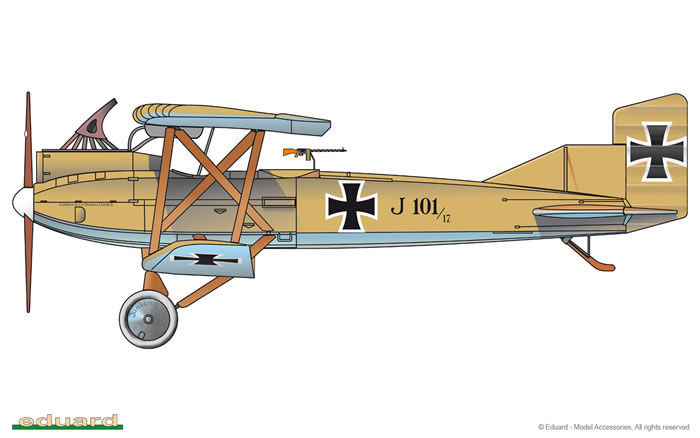
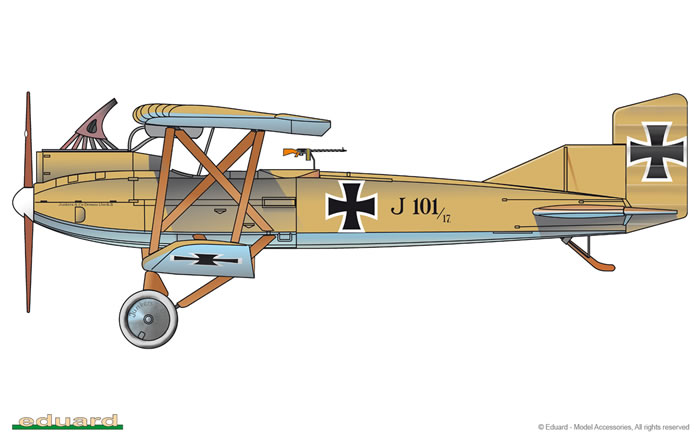
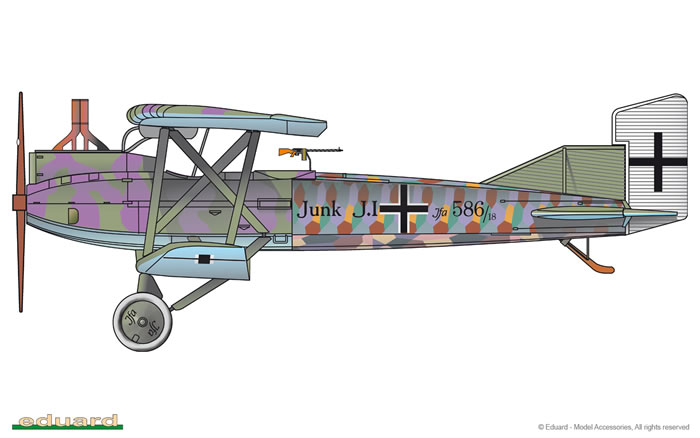
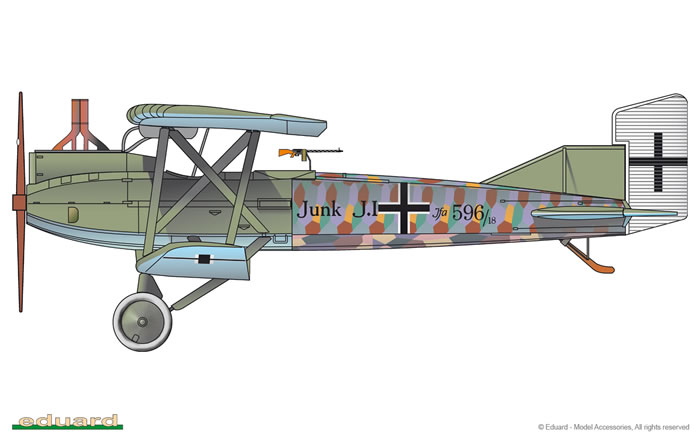
The colours and markings guide is nicely done in full colour and covers four markings options:
-
101/17, Flieger Abteilung (A) 250, Autumn 1917;
-
134/ 17 "A", Flieger Abteilung (A) 263;
-
586/ 18, Villers la Chevres, September 1918; and
-
596/ 18, 1918.
The decals are printed by Eduard and appear to be of excellent quality. However, I have read in a couple of reviews that the lozenge decals were somewhat brittle, with some chipping at their edges. Of course, these reviews may now be a bit dated, and Eduard may well have corrected the problem.
Two of the schemes are very similar indeed, with only the airframe serial numbers differing. It is a pity Eduard did not include either of the schemes from their original non-Profipack boxing (from before the days of Profipack and Weekend Editions), as these are both different an appealing.
Eduard used to make paint masks to compliment this kit, but are now out of production. There were two sets; National Insignia Early & Late (X5556 & X5557 respectively). It is pity these did not get included with the Profipack Edition.
On first appearances the kit may look a bit more promising than others have found it to be upon building. It seems despite the good appearance of the moulding that builder scan expect some issues as a legacy of Eduard’s learning curve; this is after all one of their earlier injected kits. There is also the apparent issue of the upper surfaces of the wing tapering downwards to the tips too much. Many will ignore this, but the surgical fix is seems simple enough. These building issues aside, the level of detail and general appearance are essentially good.
A fair amount of the PE detail is unnecessary as it fails to improve upon moulded detail, or could easily be scratch-built where it does. Whilst some certainly remains beneficial, the amount is small. This, and the fact that the decals only cater for three colour schemes (despite covering four different aircraft), means the Profipack Edition does not offer all much over the standard edition sans PE with two decal options. This is the first time I have had doubts about the added value of a Profipack Edition over the base kit (which is no longer produced).
None of the criticisms are in the least catastrophic, but it is by no means a shake and bake proposition that experience of more recent Eduard kits would perhaps lead you to expect. Despite the above concerns and gripes, the kit is at least readily available and attractively priced. It can undoubtedly build into a fine looking model with some care in assembly, and I remain happy to recommend it.
Thanks to Eduard for the sample
Review Text Copyright © 2015 by Mark Davies
Page Created 22 June, 2015
Last updated
30 June, 2015
Back to HyperScale Main Page
Back to Reviews Page |
 Home
| What's New |
Features |
Gallery |
Reviews |
Reference |
Forum |
Home
| What's New |
Features |
Gallery |
Reviews |
Reference |
Forum |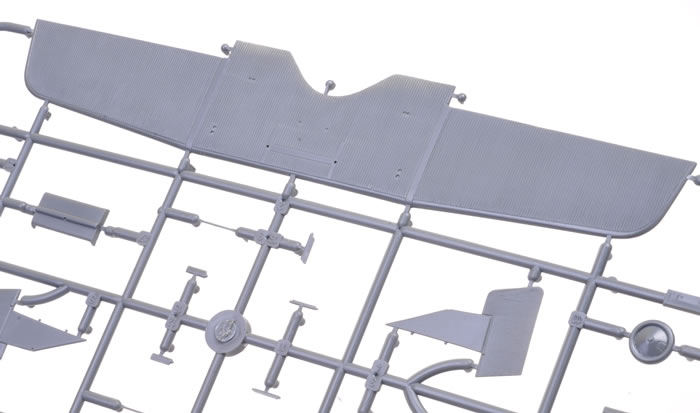

.jpg)
.jpg)