Building Tamiya's 1/48 scale
F-14A Tomcat Test Shot
Part One - Cockpit and Nose Section
|
|
Grumman F-14A Tomcat |

Tamiya's 1/48 scale F-14A Tomcat will be available online from Squadron
This week I started building the test shot of Tamiya’s forthcoming 1/48 scale F-14A Tomcat, as reviewed earlier on HyperScale.
In this first instalment, I build the cockpit and the nose section.
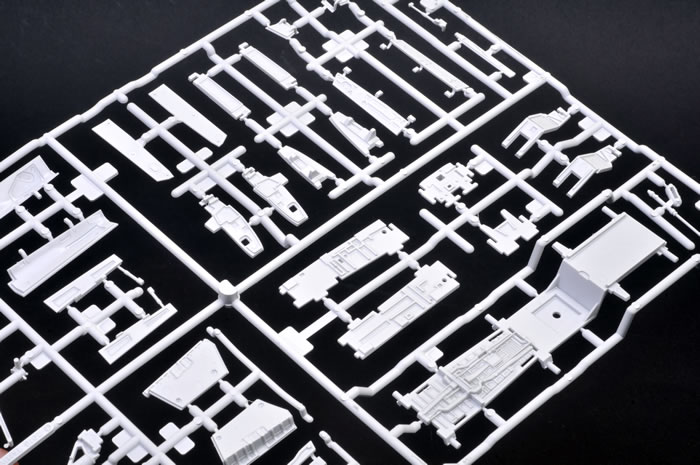
So far the model has been built straight from the sprues with no additions or modifications, and strictly in accordance with the instructions.
Tamiya Extra Thin Liquid Cement was used for the larger assemblies, while smaller pieces were secured with Revell Contacta cement. Tamiya masking tape and/or plastic clamps were used to hold some of the major sub-assemblies while the cement dried.
As always, familiarise yourself thoroughly with the instructions before you start cutting parts from the sprues.
Cockpit and Nose Step-by-Step |
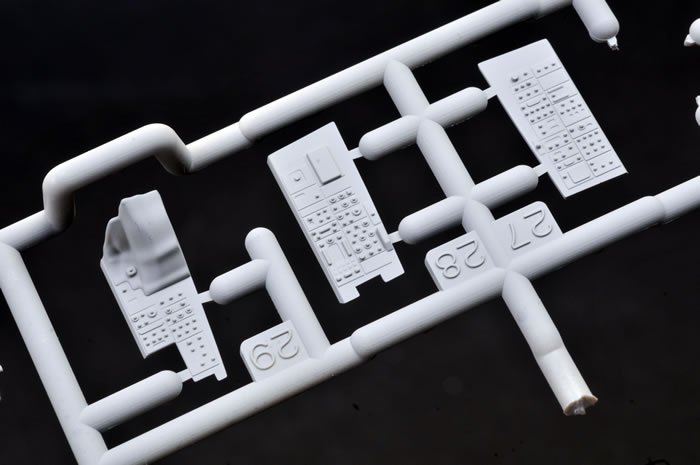
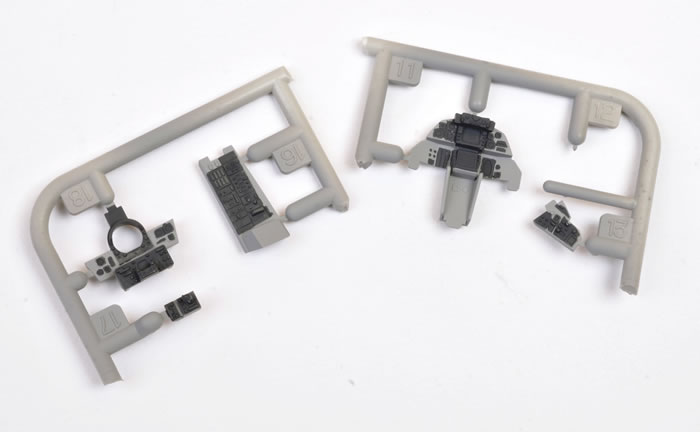
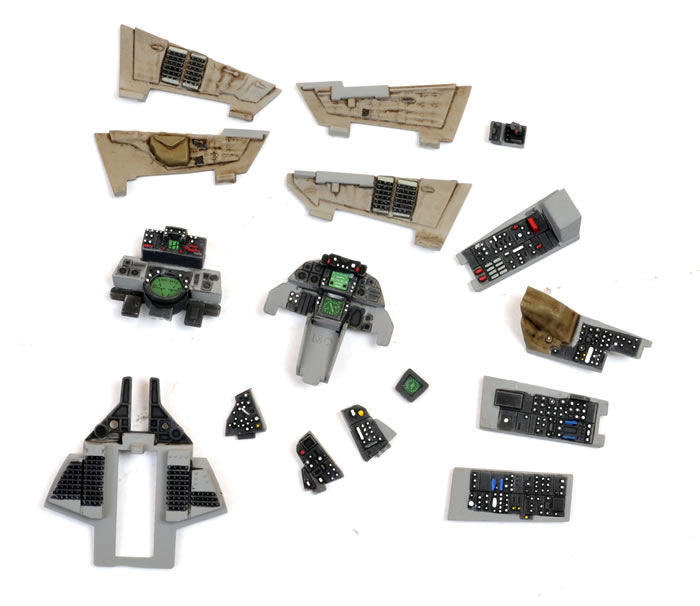
In preparing the cockpit for assembly, almost all of the parts may be painted while they are still on the sprues. This makes handling and painting parts much easier, especially smaller details.
Some of the sprues were cut into smaller sections prior to painting. The sprues act as handles for the smaller parts.
Only a few smaller pieces were cut off and glued in place before painting got underway.
The base coat of Tamiya XF-19 Sky Grey has been applied to the cockit tub and consoles while they are still on the sprues.
It's amazing the difference a coat of paint can make. The raised console detail just leaps out after the base coat has been applied.
Next, black panels are picked out with a fine brush. I actually used Vallejo Model Color acrylic 70995 German Grey for this step.
Once the panels were painted black, they were lightly dry-brushed with a medium grey shade. Things look pretty rough at the moment, but the cockpit will look sharper after the next few steps.
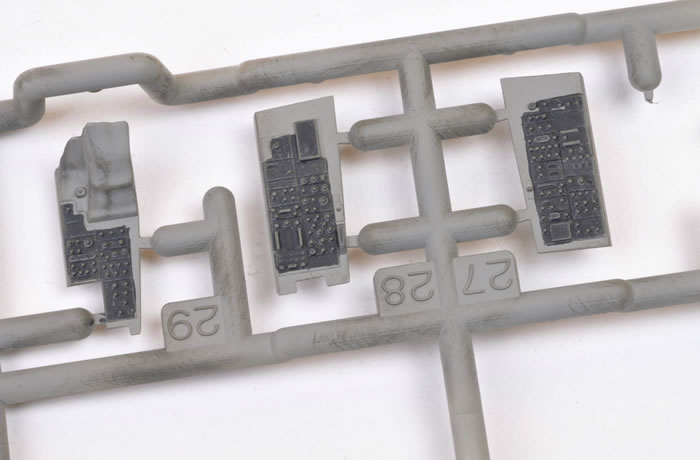
I mixed up a wash of Tamiya XF1 Flat Black, Future Floor Polish and water. The wash was brush painted onto all the black panels. The wash flowed into the panel lines and low-lying areas creating some welcome contrast.
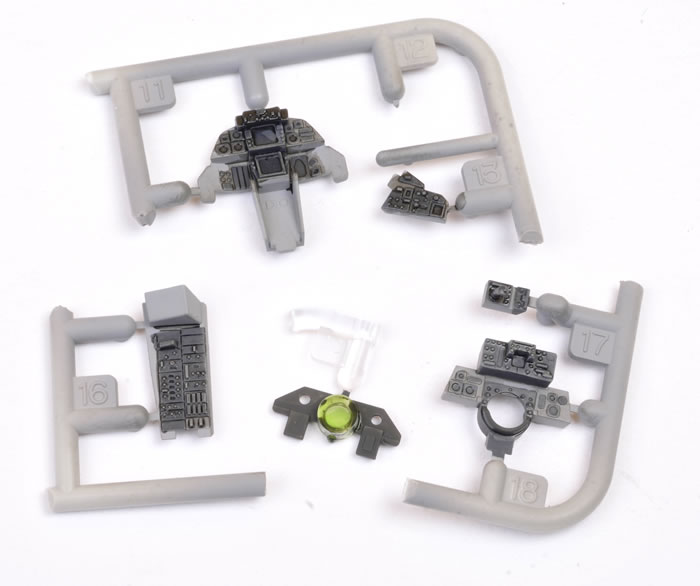
Now, switch, circuit breaker and button detail was picked out with Vallejo acrylic Foundation White using the tip of a toothpick.
The upper sidewalls received an oil wash.
The single white cockpit part was sprayed, weathered and set to one side.
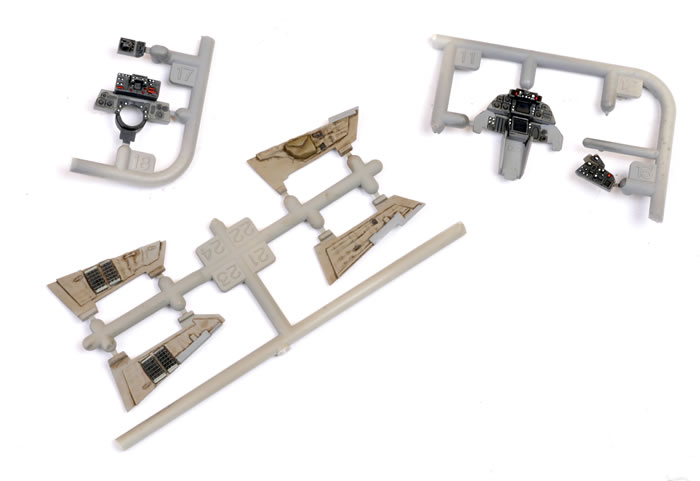
Tamiya's decal sheet includes screens for the various displays. Note the decal harness straps too. Note that this is a pre-productiond decal sheet. Hopefully the production example will not feature the dot-screen effect seen here.
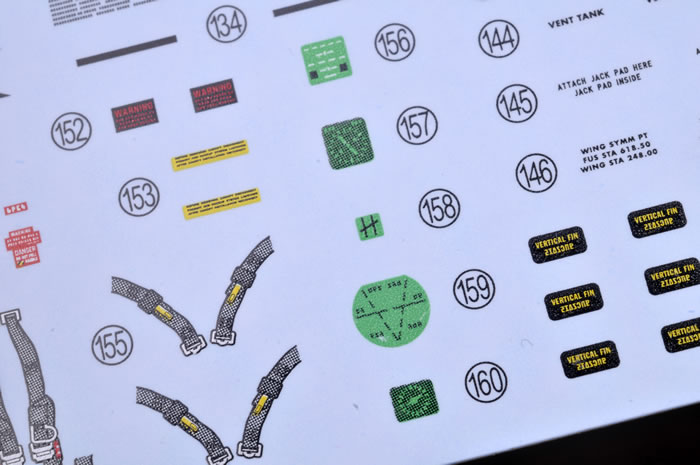
Decals are supplied for the top sides of the rear circuit breaker panel.
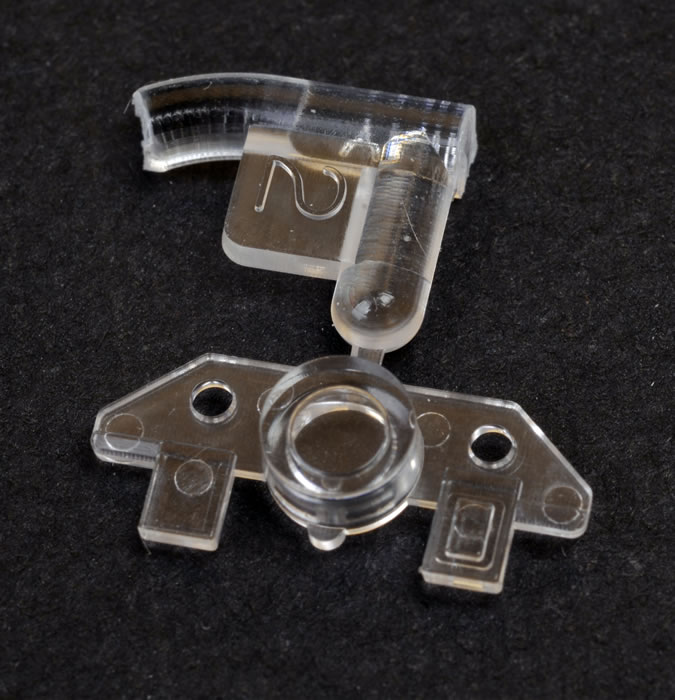
The main radar screen and its mount are moulded in clear plastic.
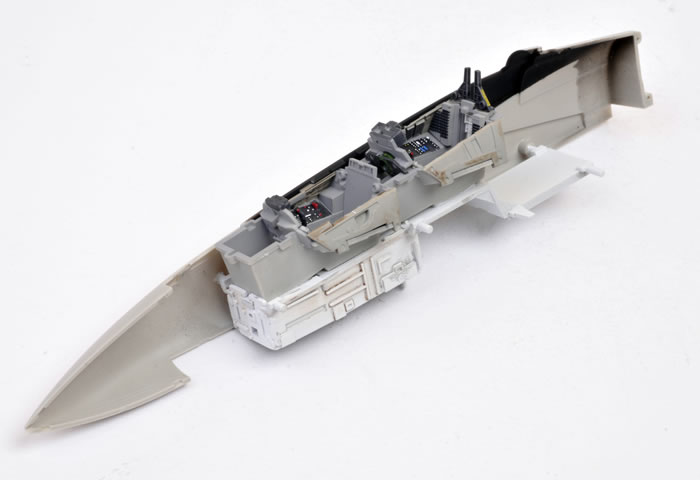
After being painted and weathered, all the individual consoles, panels and bulkheads have been cut off the sprue in preparation for assembly.
Note that the messy edges of some of the black panels have been tidied up with acrylic paint and a fine brush.
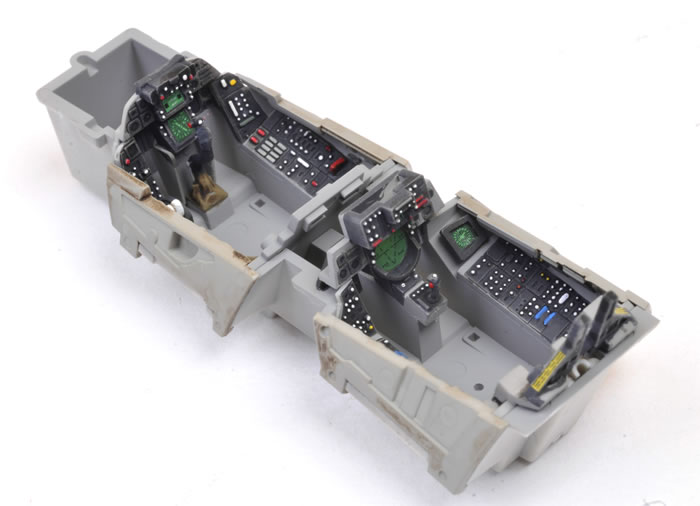
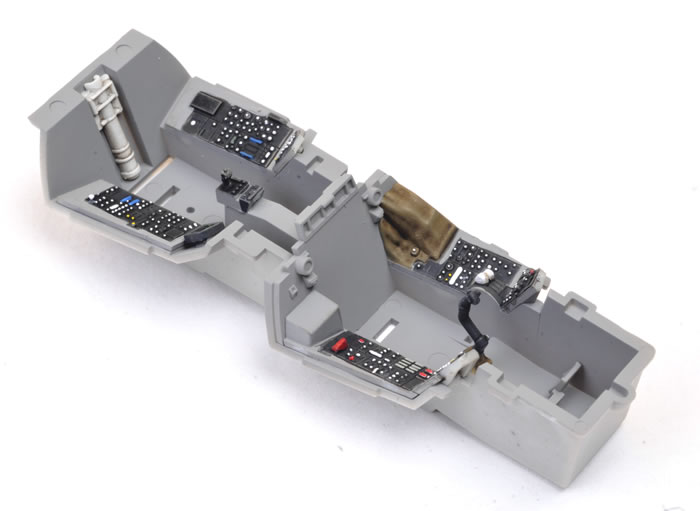
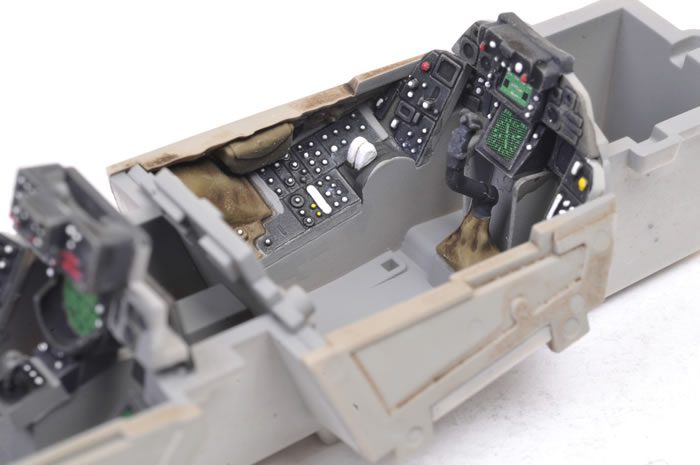
The (almost) bare cockpit tub...
...now dressed with the side consoles.
The pilot's and RIO's panels, painted, decaled and flat coated awaiting installation.

A close-up view of the pilot's cockpit...
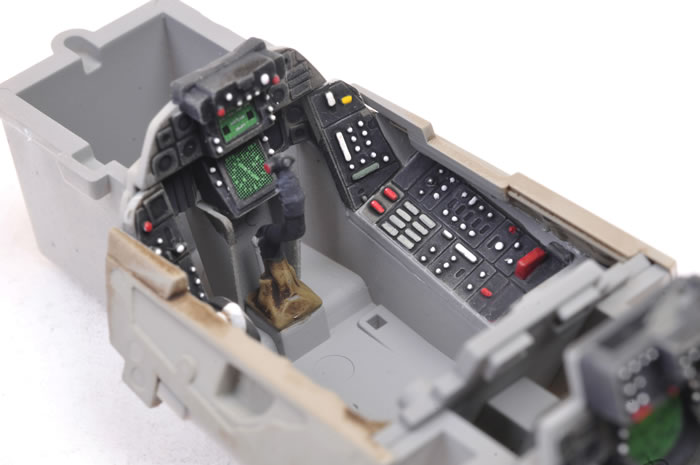
...and the port side.
Just to prove that not even Tamiya can make a kit foolproof from a truly determined fool, I managed to apply the right side RIO's screen decal to the back of the part! I glued the part back-to-front so that the decal would be visible.
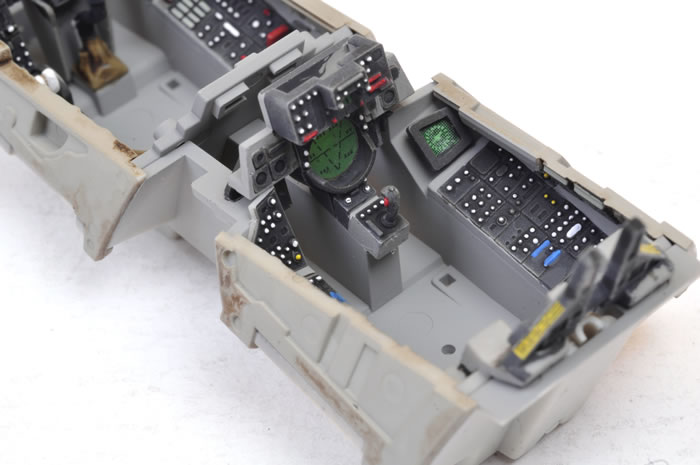
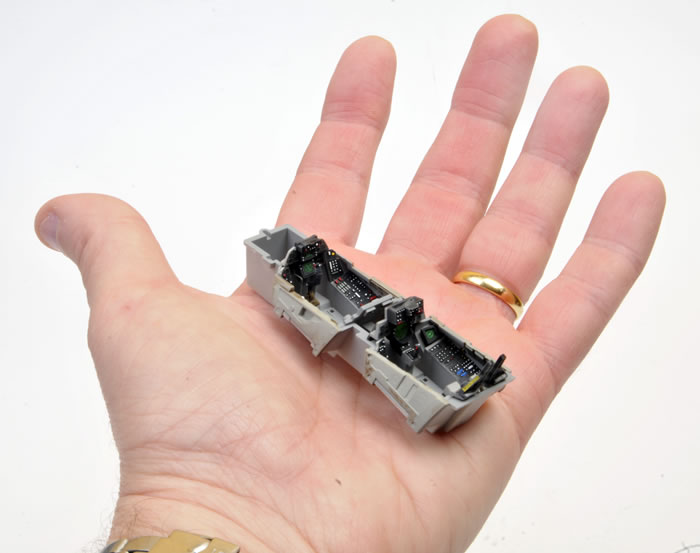
This gives a better impression of the size of the 1/48 scale cockpit.
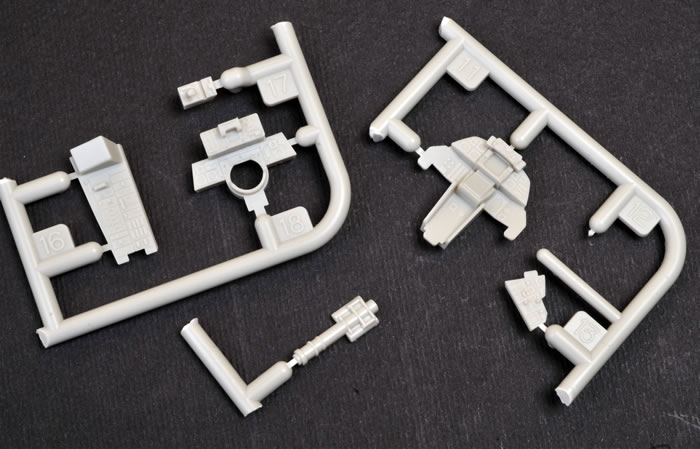
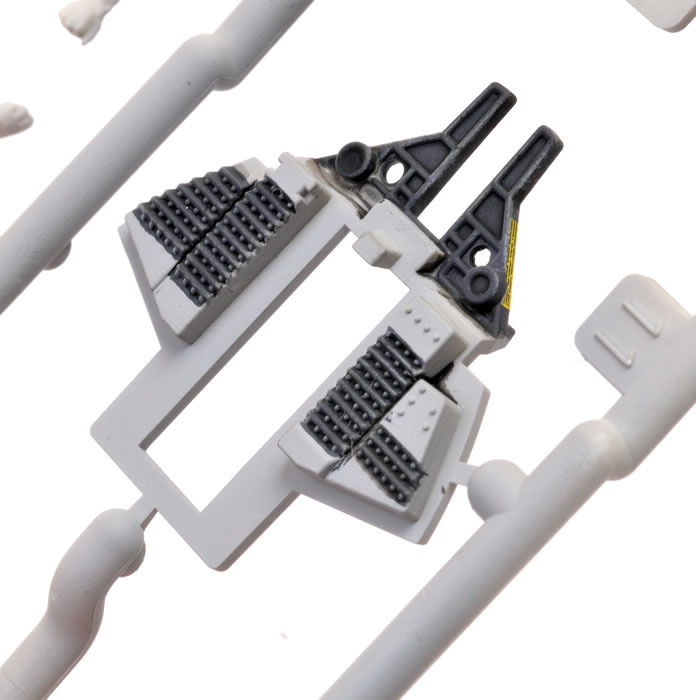
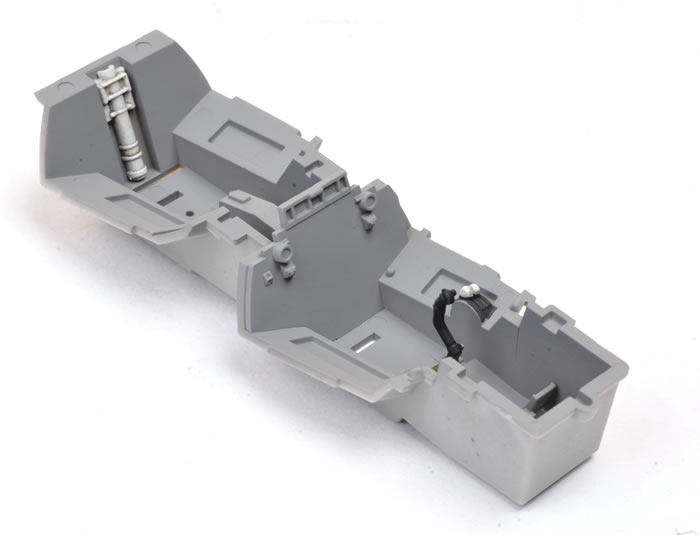
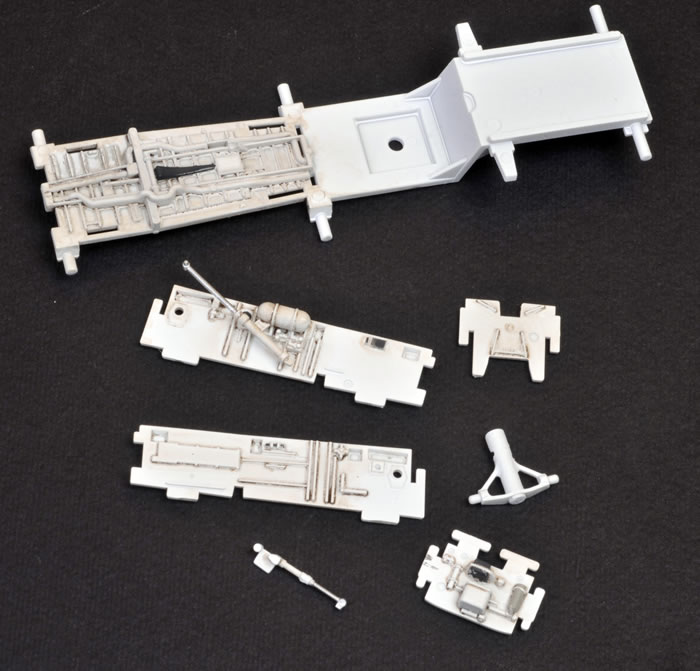
Moving right along, we now start work on the front landing gear. Once again, parts may be painted on the sprue. In fact, Sprue G may be sprayed white in its entirety as it exclusively contains intake, undercarriage bay, door and leg parts. I hit this sprue with Tamiya White Primer straight from the spray can.
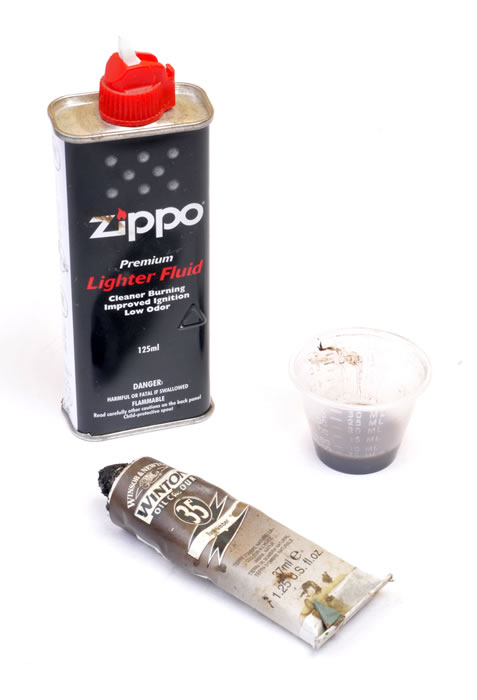
The white parts were treated to a wash of Zippo lighter fluid mixed with Raw Umber oil paint. The lighter fluid dries very quickly.
I wasn't particularly happy with the wash effect on the nose gear bay ceiling. Next time I'll spend a bit more time with a Future, water and paint mix.
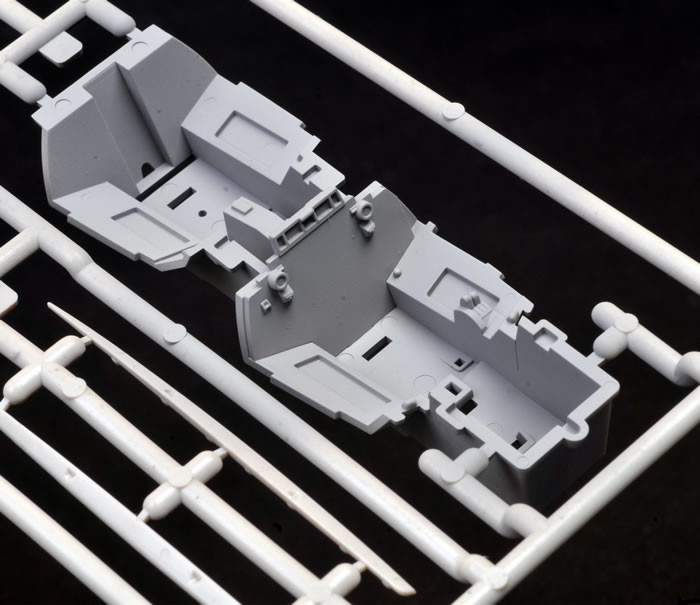
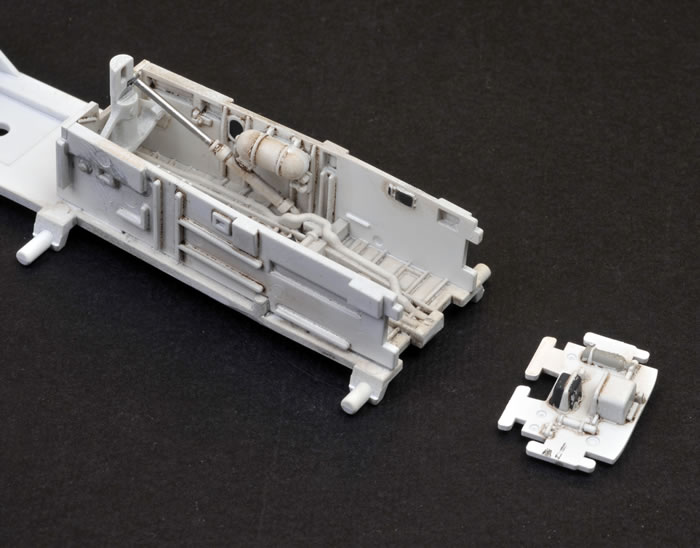
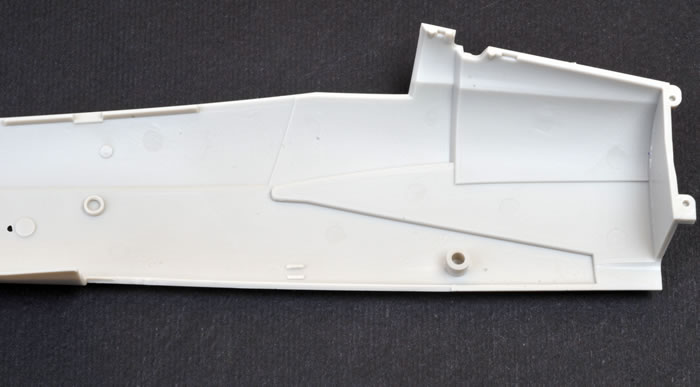
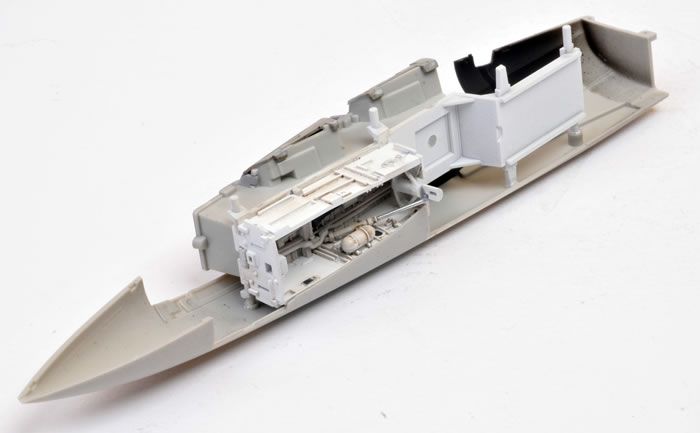
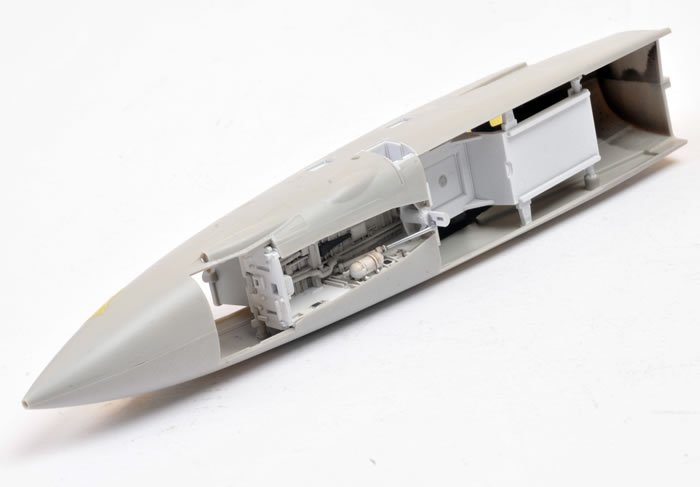
These are the components of the nose wheel bay, which also serves as a sturdy mount for the cockpit tub.
The nose gear bay is made up from separate panels glued to the ceiling and to each other.
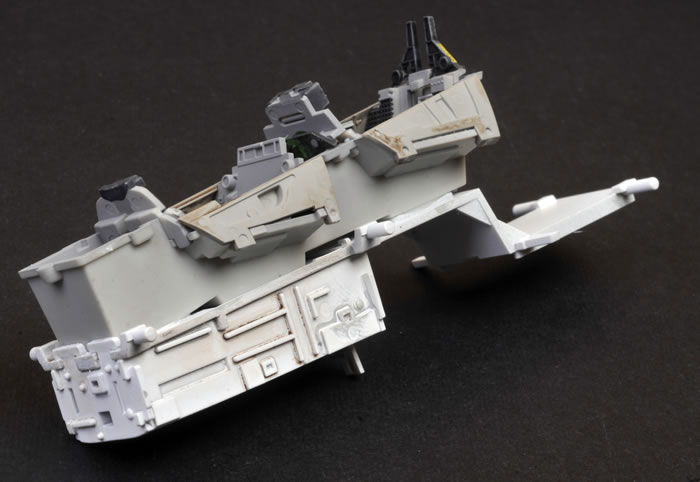
The cockpit glued in place.
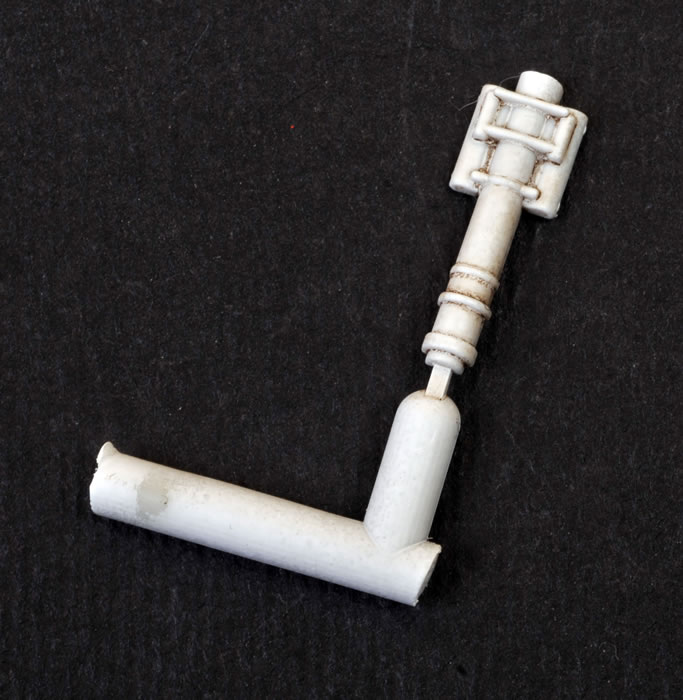
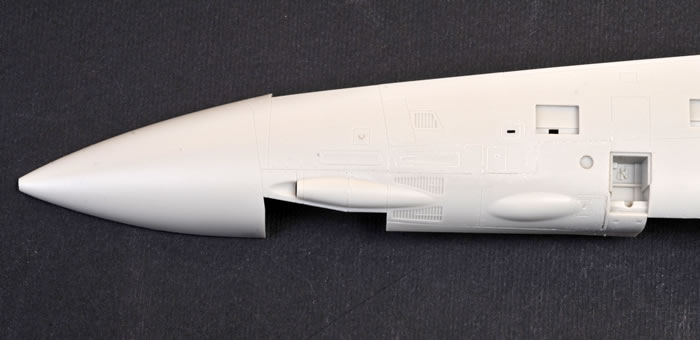
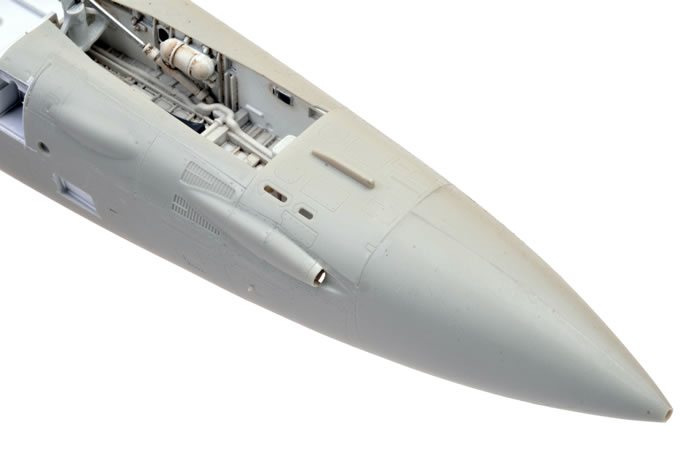
Tamiya offers the option of an open or closed refuelling probe. I chose to close mine.
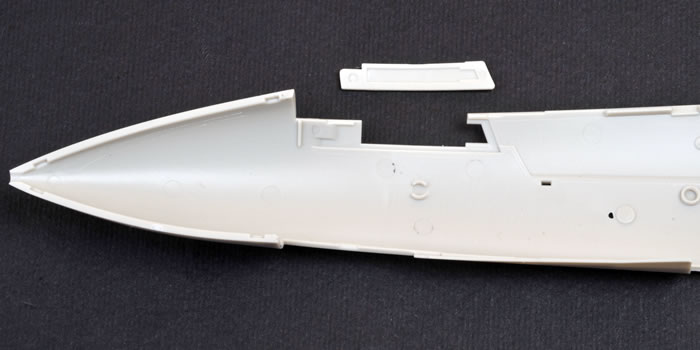
The cockpit and nose wheel bay is held in precise position with a series of stout circular locating points on both sides of the nose.
The gun and vent panel is supplied as a separate piece...
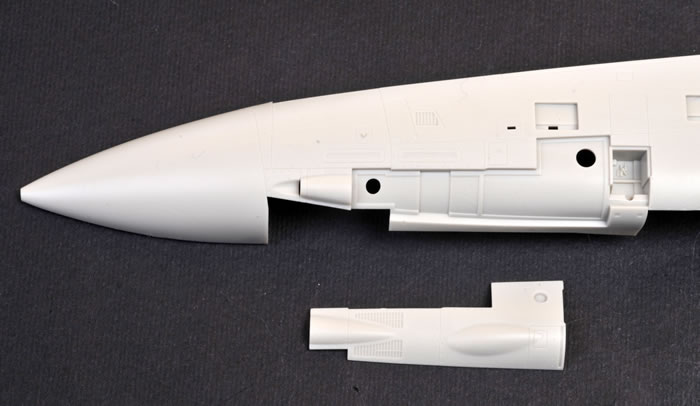
...which, naturally, fits perfectly!
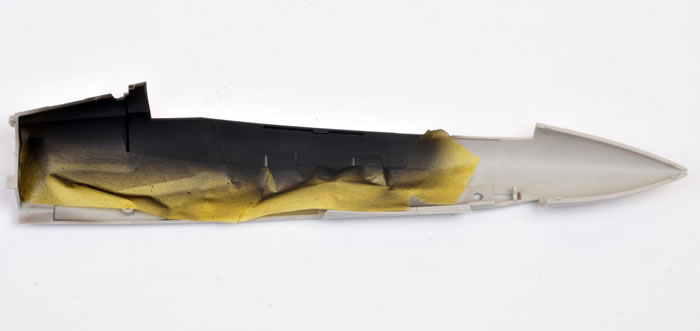
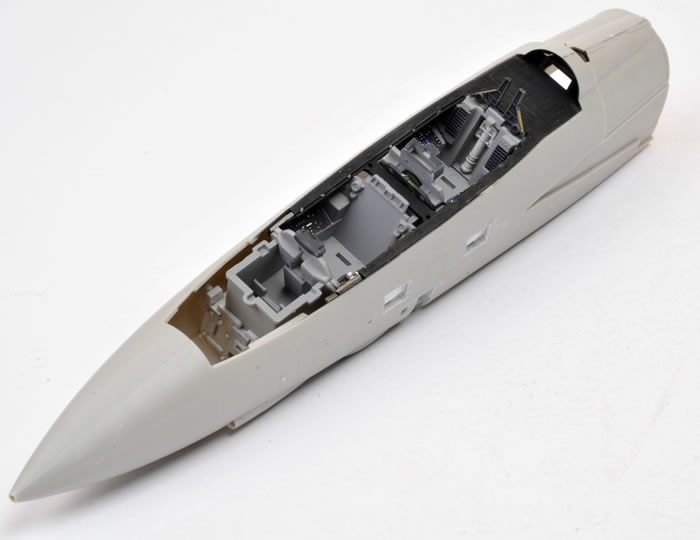
The upper fuselage sidewalls were masked and painted black.
The cockpit / nose gear bay assembly was glued to the starboard nose half.
A view from below.
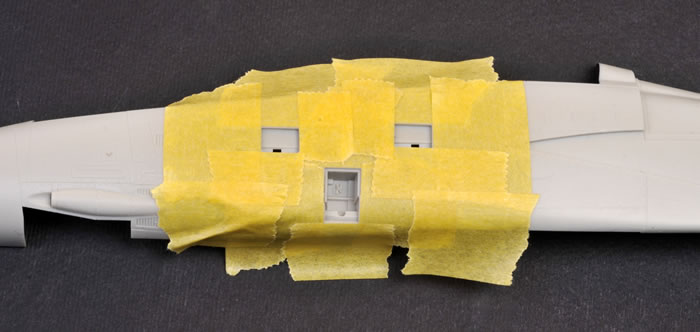
Before attaching the port nose half, I masked the areas around the pilot's steps and sprayed them white. This reduced the risk of overspray if I had painted it after assembly.
The port nose half has now been glued in place.
Check out the fit of the nose halves and of the panel forward of the undercarriage bay - perfect!
Cockpit coaming has been sprayed black and glued in place.
It has taken less than two day's work to get the model to this stage, and more than a day of that was spent painting details.
Parts breakdown is just brilliant - optimising the opportunities to paint parts prior to assembly yet always ensuring perfect fit.
I am very happy with the final appearance of the cockpit. It will look even better with the seats in place, but these come later in the suggested construction sequence. I will be replacing those decal harness straps though.
In summary so far - great detail, perfect fit, sensible options. This kit is a practical lesson in the art of Tamiya's design virtuosity.
I can't wait to get to work on the Tomcat again tomorrow! |
 Home
| What's New | Features | Gallery | Reviews | Reference | Resource Guides | Forum |
Home
| What's New | Features | Gallery | Reviews | Reference | Resource Guides | Forum |