AMK's 1/48 scale
L-29 Delphin x 2
by Jon Bryon
|
|
L-29 Delphin |

Revell's 1/48 scale Tornado GR.4 is available online from Squadron.com
After the trials and tribulations of Revell’s Tornado, I was going to get back to building MiGs, but a very pleasant email from AMK put the series of MiGs once again on hold. Would I build them an L-29? Since I wanted to build this kit anyway, I said yes, and they promptly sent me two: one for me, and one for them.
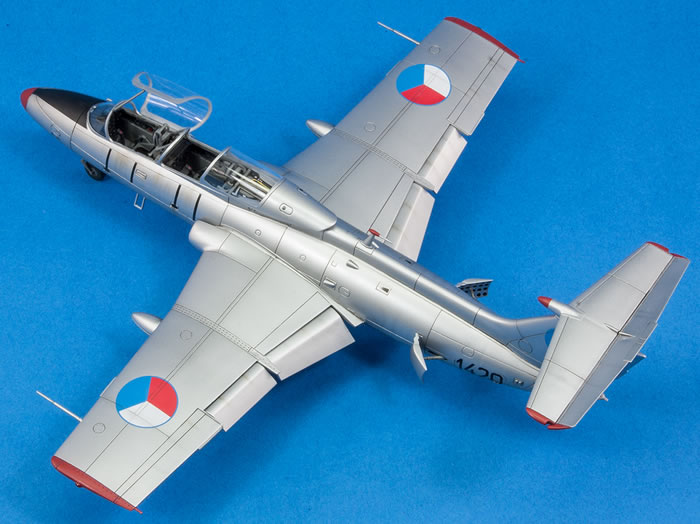
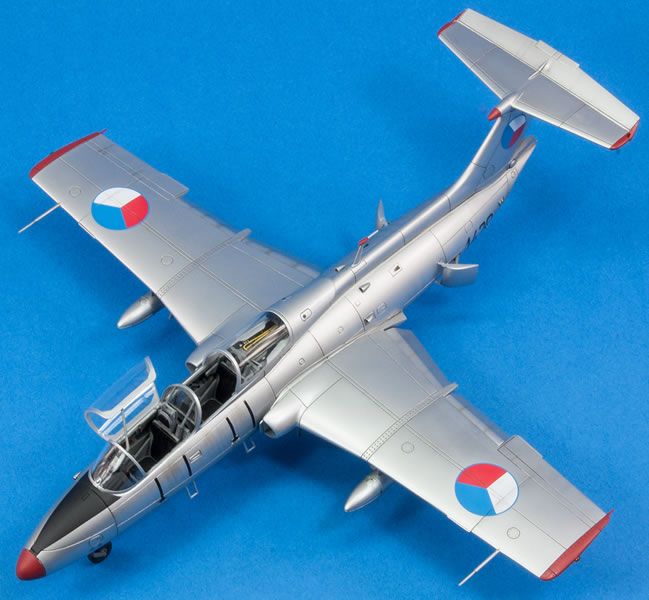
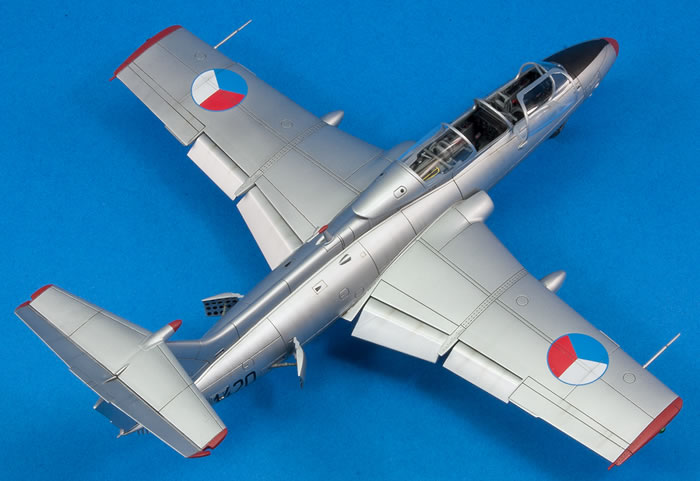
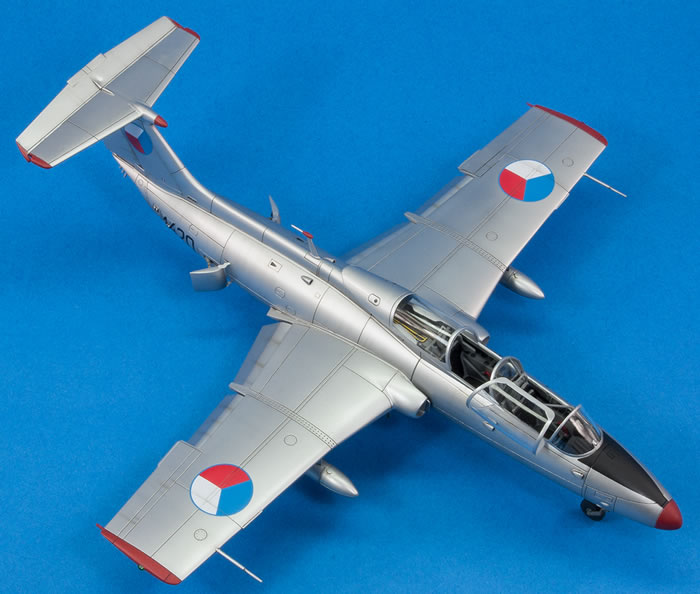
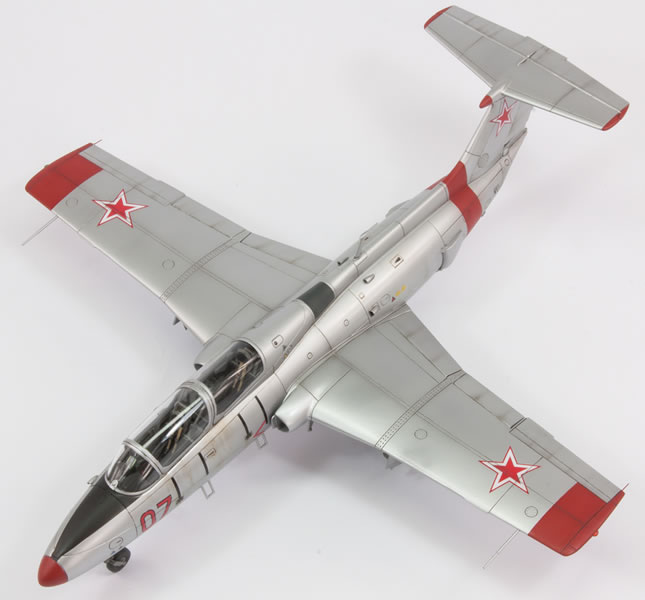
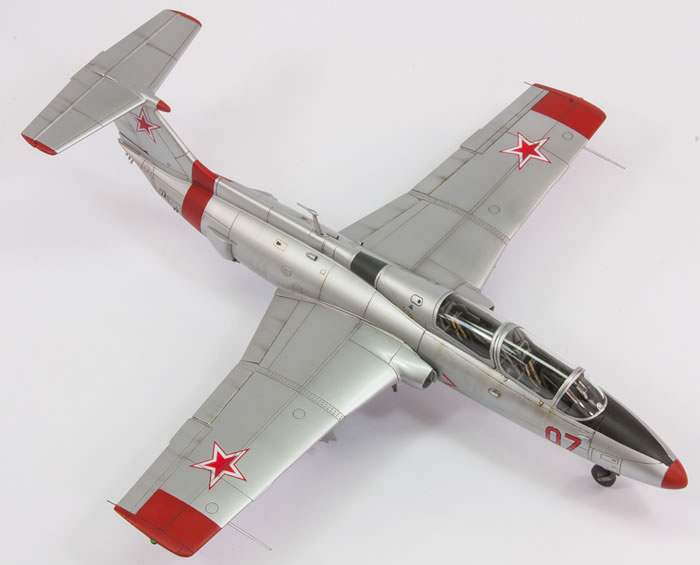
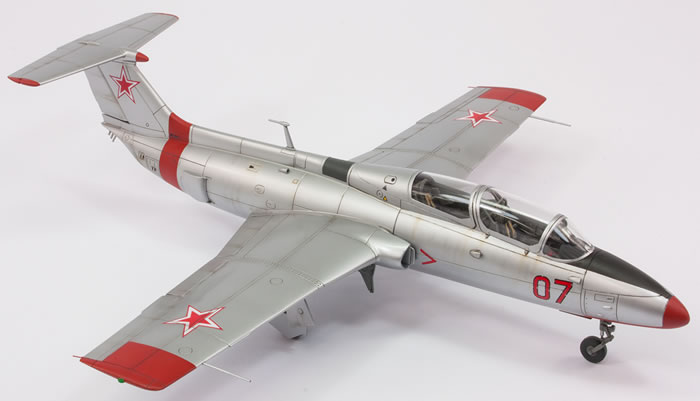
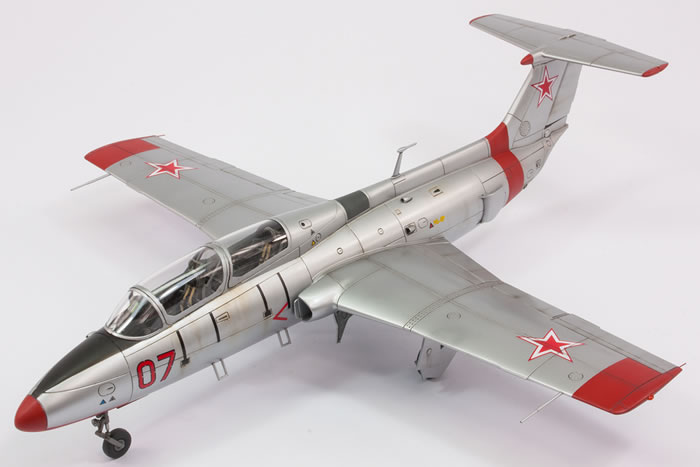
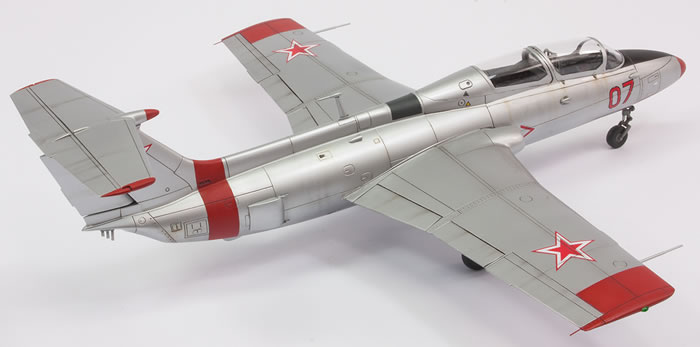
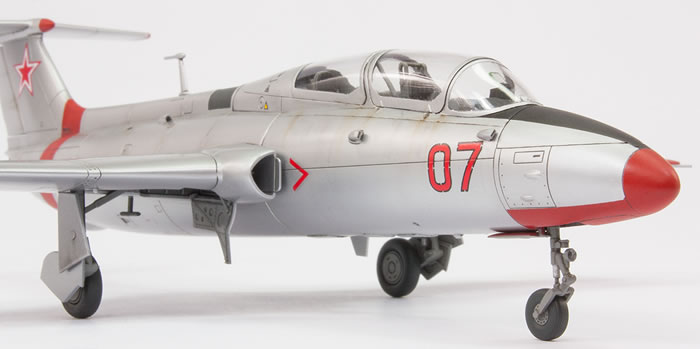
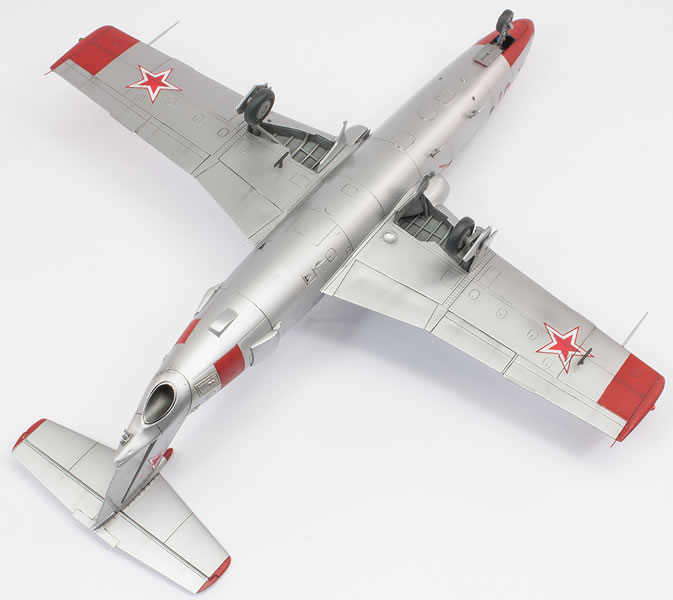
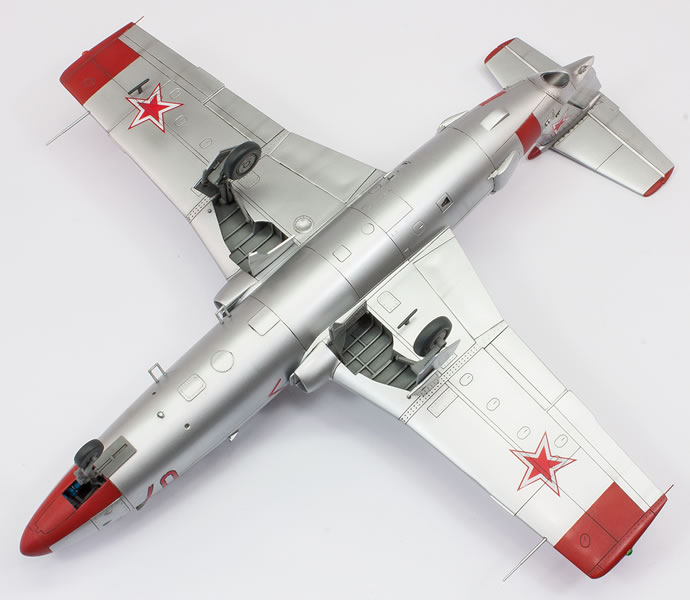
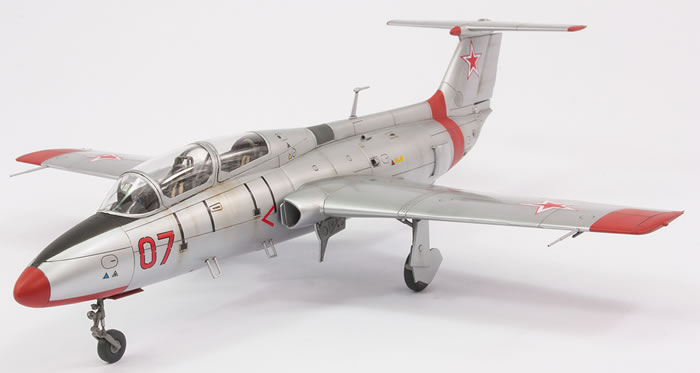
AMK wanted theirs done in Czech(oslovakian?) markings with everything open: open canopies, airbrakes, deflected rudder and elevator, dropped flaps and underwing tanks. I, on the other hand, wanted to build a Soviet ‘Maya’ with everything buttoned up. In April I started to build both concurrently.
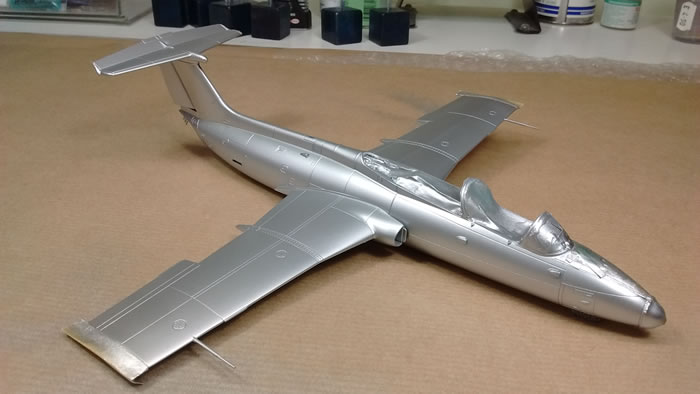
These are nice kits. Very nice. After the mess that was Revell’s ‘modern-up-to-date-tooling’ it was a breath of fresh air to have a kit that was exceptionally well moulded and fitted together beautifully. However, I believe this is AMK’s second kit, so it’s not perfect. Some of the plastic is a little rough on the wings. Nothing of note for camouflaged machines, but for a silver airframe, the plastic will need a little polishing. The design of the mid-canopy arch is weak – surely it would have been better as a separate part? – and when closed the canopies don’t fit against it very well. And the most serious problem is the nose gear assembly: it’s just too fragile. But these three minor problems aside, these two models were a joy to build.
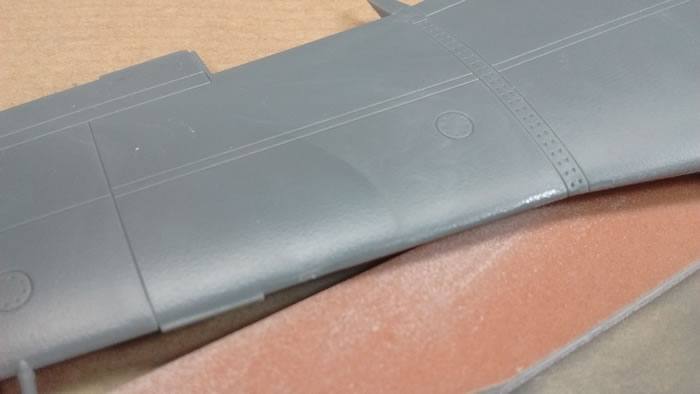
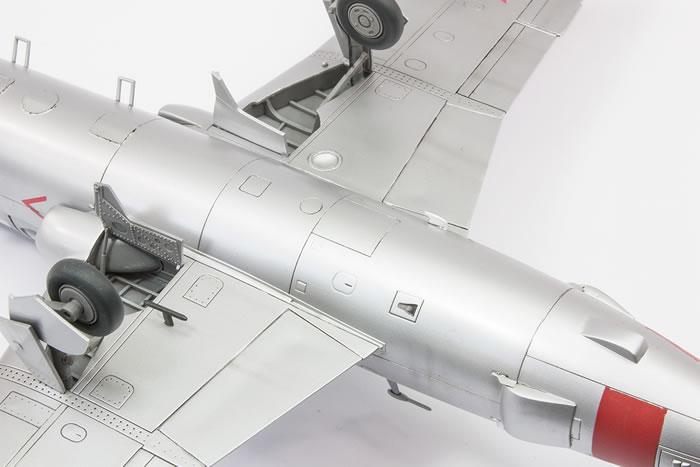
On close inspection, the plastic on the wings is a little rough. For the fastidious, this needs rubbing out for a really good silver finish.
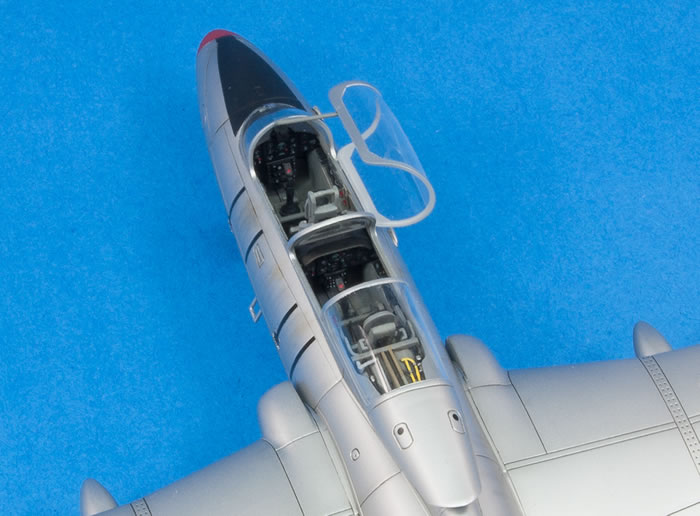
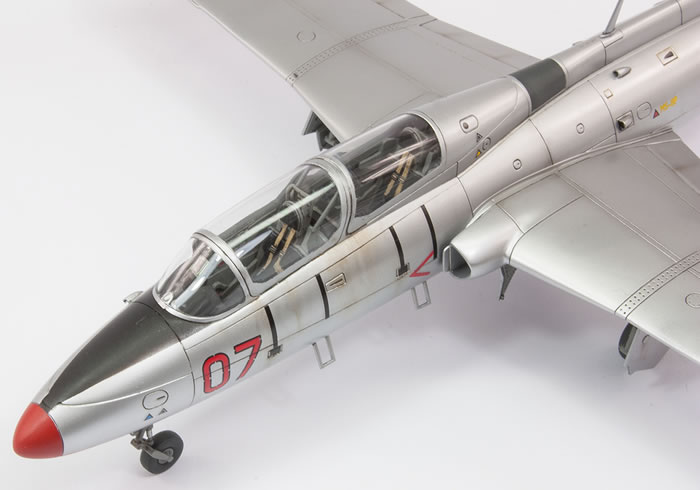
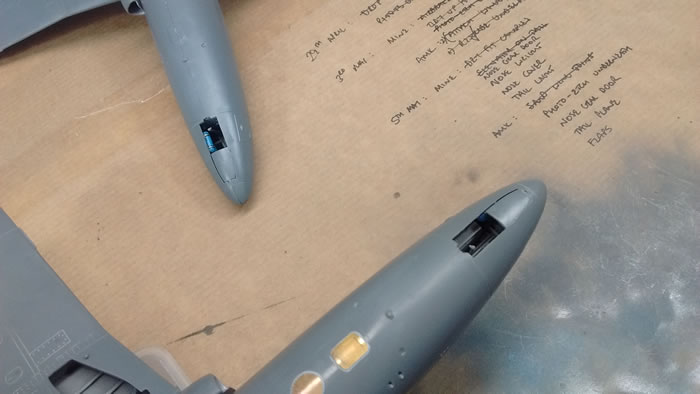
The cockpit is well appointed and aside from the addition of some masking tape seatbelts with photo-etched buckles in my Soviet example, they were both built straight from the box. There are some ejector pin marks that need removing from the seat sides (parts C18 & 19), but everything just clicks perfectly into place. Following photos online I painted the instrument panels black rather than grey, but used the suggested Mr Color 317 for the rest of the cockpit, as well as the undercarriage bays and legs.
The undercarriage cleaned up nicely and for the first time I used my new Hobby Elements ‘molding flash sanders’. These are bits you chuck into a motor tool that are designed to remove the moulding lines that run down items like the landing gear legs. I found them very easy to use and, whilst not necessarily quicker than using a scalpel, they did in my opinion facilitate a neater result.
The great fit continued as the cockpit tub , nose gear bay and exhaust where all fitted inside the fuselage before the main halves were joined together. There were a couple of places where the surface detail was a bit indistinct and so a couple of lines were rescribed using my new Mr Scriber tool from Mr Paint. I bought this by accident, but it’s pretty good. It produces an extremely fine and deep line, but it is a little light.
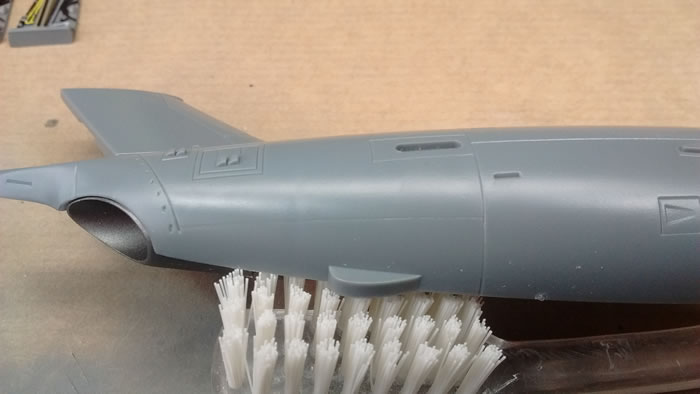
This panel line is a little indistinct.
I used HIQ’s ‘Carving Tape’ as a guide and the Mr Scriber tool to reinstate the panel line.
After a light sanding the line is looking much clearer.
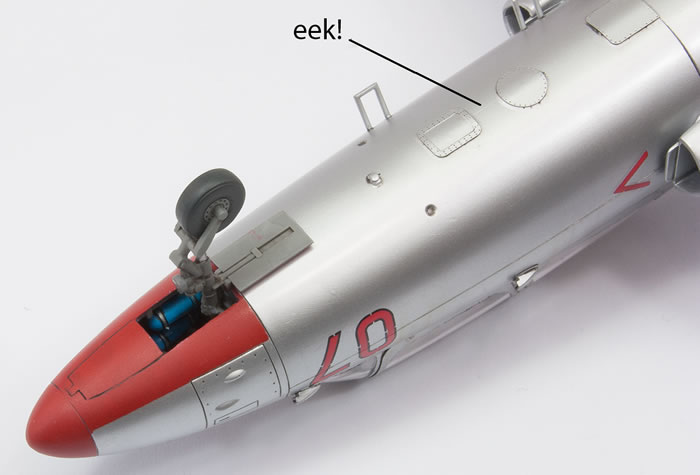
The fuselage halves were joined in the main with super glue, although some areas were attached with liquid cement around the nose. This is because a small mismatch was introduced on my Soviet example by badly placed noseweight. I had squashed some fishing weights and superglued them into the nose electronics bay and under the cockpit. These interfered slightly with the fit of the fuselage under the cockpit and I resorted to applying pressure and Tamiya Extra Thin. This would come back to bite me with a ghost seam (see the photo with an ‘eek!’). The Czech version didn’t suffer from this as I’d learned my lesson and placed the nose weight far more carefully; it was assembled entirely with super glue, which avoids the problem of ghost seams.
The wings fitted together fine. For the Czech aircraft I had to glue in all the little photo etched pieces. A couple of these were slightly too tall and needed a little trimming, but the fit overall was very positive and strong. The curved intakes (parts A23 & 24) are handed and there is definitely a front and back; this can only be identified by trial fitting. I followed the instructions exactly, and attached these and the wingtip lights before the wing halves were cemented together.
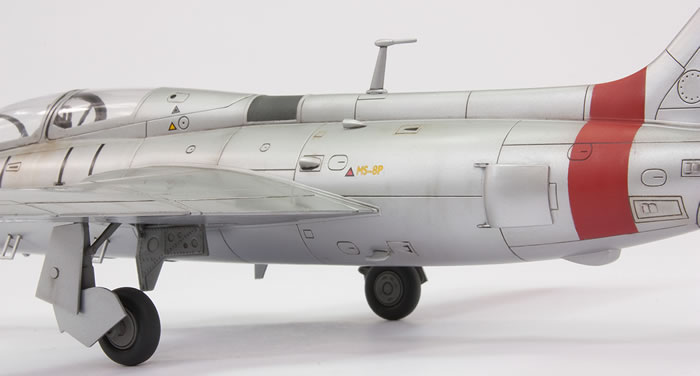
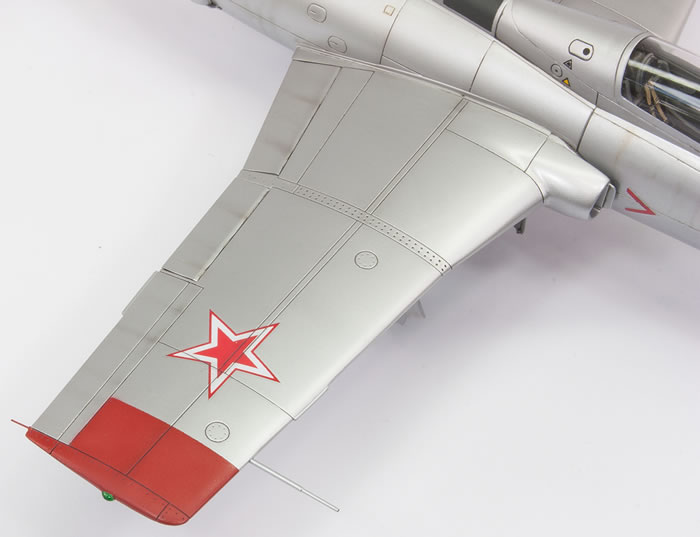
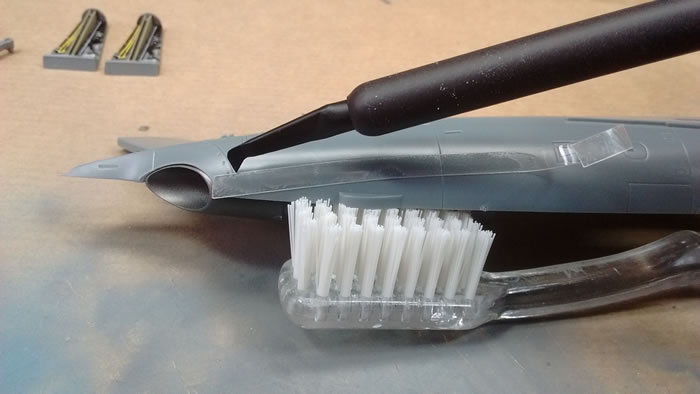
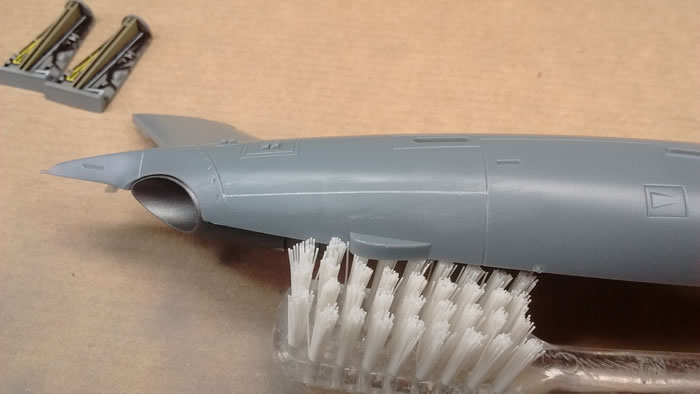
The wings come with moulded in pitot tubes and static wick dischargers. These are nice, but fragile. I decided that on my Soviet aircraft I’d replace these with Albion Alloys tubing. Since I figured that AMK’s Czech model was meant to be built out of the box, I didn’t have this option and had to work hard to avoid snapping these fine parts off the wings. I almost succeeded, and snapped off a static discharger only when applying the decals. Fortunately I didn’t lose it and it was easy enough to reattach at the end. On the other aircraft I drilled holes to accept my brass tube pitots and the static wicks, the last being 0.3mm, so quite fine. These were attached right at the end.
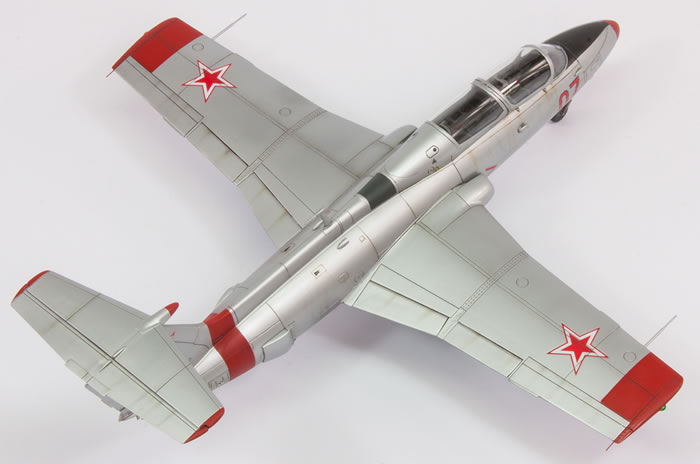
AMK supply some photo-etched panels for under the fuselage. I can see why these are attractive, because preserving detail whilst removing the fuselage seam is difficult. But PE has its own problems: getting exactly the right curve to match the fuselage. Eventually I did manage something acceptable and sealed the edges with Mr Surfacer, but it’s not perfect. The front nose undercarriage doors are also to be fitted closed, but I found them slightly too narrow. The gap was filled with superglue and then gently rescribed with a pin.
Caption: The front nose wheel doors don’t fit very well. I used super glue to fill the join and then gently rescribed it back again using a needle in a pin vise and Tamiya’s new white vinyl masking tape as a guide.
All the other parts fitted beautifully to the airframe: rudder, elevator, flaps. The wings were a great fit to the fuselage and just needed a little neatening with fine sanding sticks. The airbrakes are fragile if open, but I attached them much later, and when closed they fitted well. On my Soviet example I plugged the holes for the fuel tanks under the wing with bits of slightly stretched sprue superglued in place and sanded them so they were invisible under paint.
One area that has attracted attention in build reviews is the nose bay cover. I, however, found the fit to be fine and had no trouble fairing it into the nose. Similarly, the windscreen fitted very well, BUT it is easy to fit out of alignment. Both of mine are not quite square with the fuselage; it’s easy to miss this in test fitting and I only realised later.
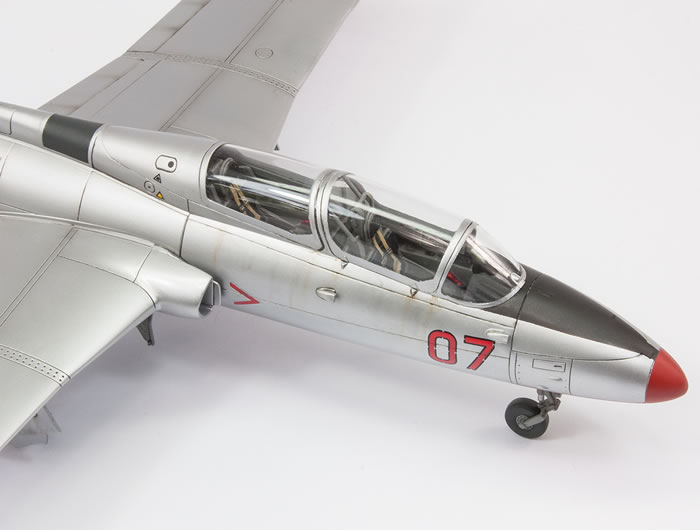
For the model on which I installed the canopies closed, I found the fit to be so-so. I sanded the lower lip of the rear canopy down so that it sat flush against the rear fuselage, but the front end did not butt up well against the middle arch. The front canopy fitted far better. The end result was that the central arch sat quite a bit lower than the two canopies. I pondered fixing this for a while, but in the end left it. The central arch is fragile and I hate messing about with the clear plastic. In the end, I think it looks passable from a distance.
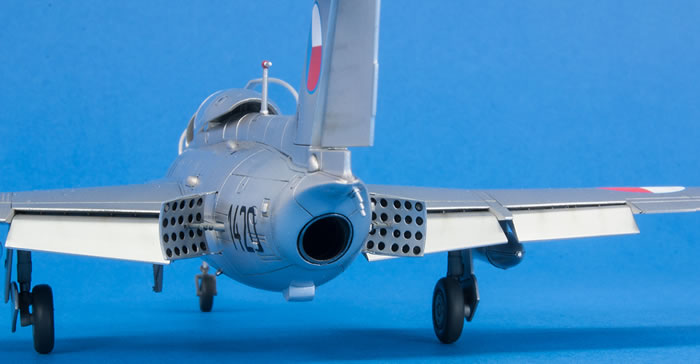
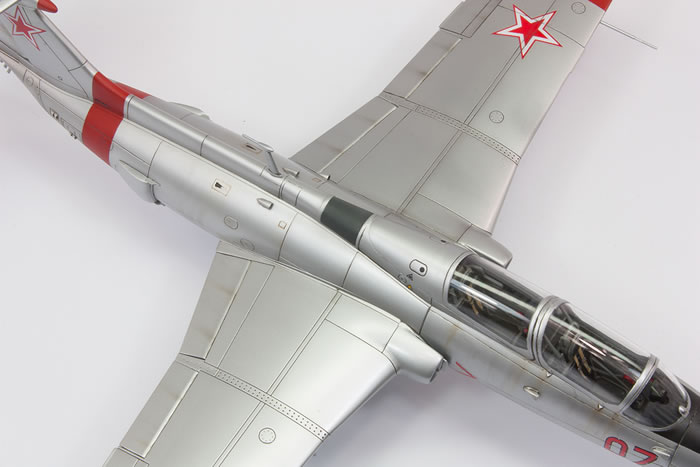
The last items to fit before painting commenced were the plethora of small intakes around the fuselage. One of these pinged off into the outer reaches of my work room, never to be seen again, which necessitated the purchase of Quickboost’s resin intakes set. This is very nice, especially the little vents on the fuselage under the canopies, as they were drilled out. Four NACA style intakes for the fuselage behind the wings were also provided in the set as those moulded on the kit are far too shallow, but given both models were to be finished in silver, I decided fitting them was more trouble than it’s worth. On the Czech example, all the vents are as provided in the kit.
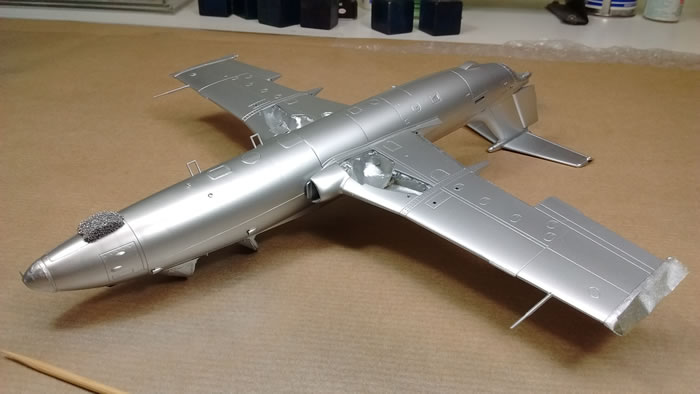
In short order, time for painting arrived! I’ve had such trouble with Mr Surfacer (which I use as a primer) lifting after masking, that I managed to get some 100% Isopropyl Alcohol through Amazon and gave the model a good wipe down with this solvent. The wheel bays and canopies were all masked, the latter using some elements from Maketar’s ‘Canopy Survival Kit’, which is pretty useful. Highly thinned Mr Surfacer 1000 was then airbrushed over the entire model using my Iwata RG-3L, leaving a very smooth coat.
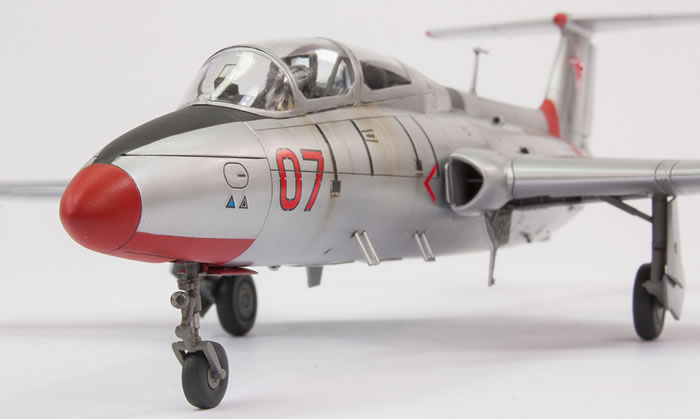
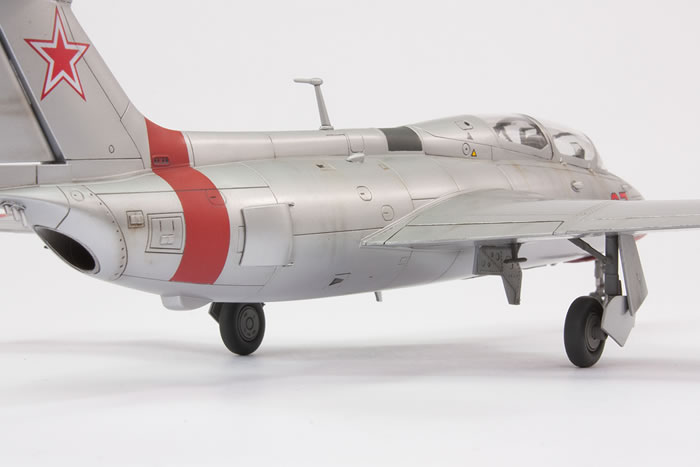
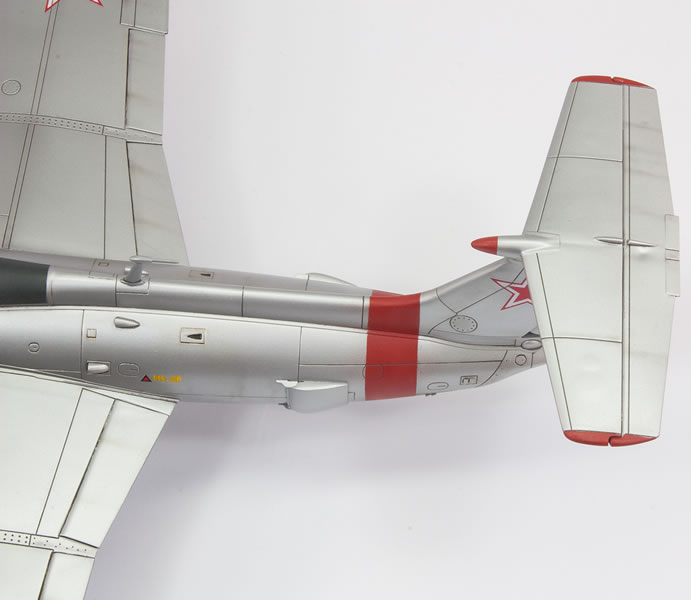
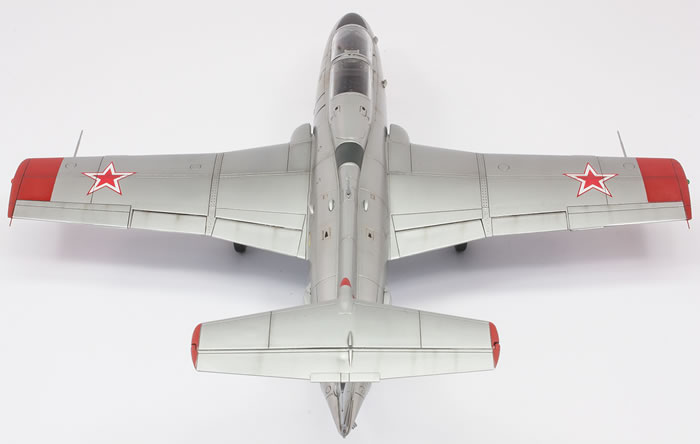
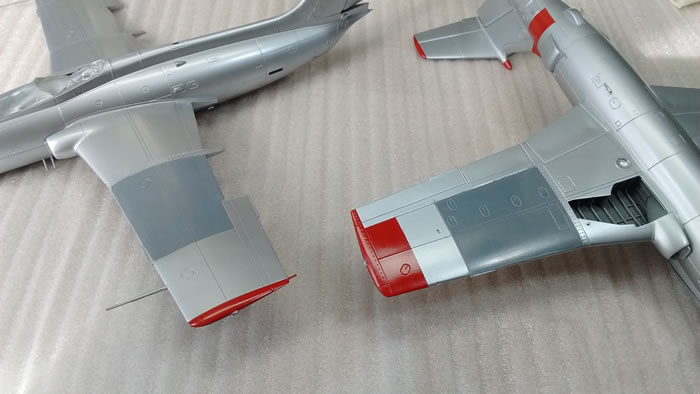
I identified some problem areas where seams remained visible, mainly along the intakes and the leading edge of the wings. Once fixed, I airbrushed the red trim areas of both aircraft using Mr Color 327. The paint instructions for the Soviet L-29 conflicted with all photos I could find; there are some great shots on airliners.net of rows and rows of dilapidated Soviet Mayas awaiting (I presume) scrapping. These (along with the box art) all showed a black panel behind the cockpit and that the ailerons were not painted red at the wing tips. I painted the black panel using Mr Color 137 and the anti-glare panels gloss black.
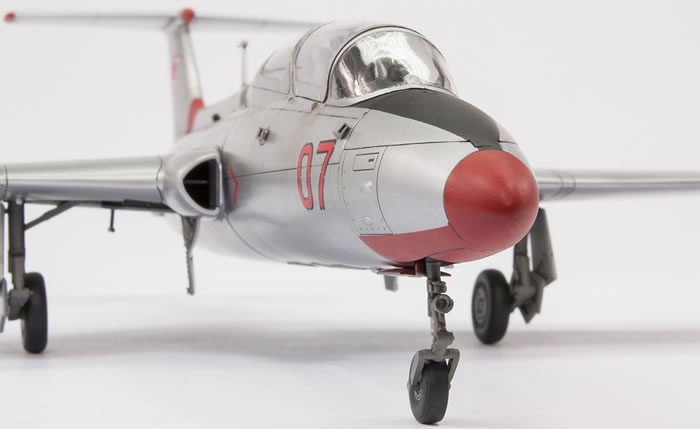
Masking of the red parts required a lot of care, especially the red band around the rear fuselage, the red nose cone and the red bullet on the tail. The overall finish is Mr Color 8, which I love, but as usual I ended up with all kinds of bits of rubbish in the paint, mainly tiny fibres. This only got worse once I sprayed a generous coat of Tamiya X-22 Gloss Clear over the top. Removing these was problematic, as I couldn’t get the gloss or paint to feather smoothly, and upon retouching it looked awful. In the end I decided to use IPA and strip the paint all the way back to the plastic. I did this by masking off the affected panels to ensure any discrepancy between the new coats of paint fell along panel lines. In the end the final result was passable, but I am still very unhappy with the number of imperfections in the final finish.
The initial coat of Mr Color 8 Silver is on.
I have a major problem with little fibres getting in my finishes. Nothing I do seems to eliminate this problem, although I am hoping that when funds allow and I can get a spray booth that this issue will improve. Here you see the results of my impatience of trying to deal with a couple of fibres before the Tamiya X-22 has dried properly. In the end I stripped the paint back to bare plastic using Mr Leveling Thinner and Isopropyl Alcohol. The panels were then masked and resprayed to ensure a sharp demarcation with adjacent panels.
Aftermarket decals for Soviet L-29s seem to be non-existent so I was forced the use those in the kit. The kit provides seven markings options, which is generous, but I was looking for aftermarket as those in the kit don’t look the best. One kit’s sheets was better than the others (one was a little off register and a little blurry), but between them I found enough acceptable decals. Furthermore, there are not quite enough stencils to do what is instructed on the markings diagrams; my Czech model is missing a few decals for this reason. The black stripes down to the cockpit steps are also too short and I made up the correct lengths using black stripes from the Indonesian option.
Whilst they didn’t look great, the decals actually performed very well. Using my method of simply floating the decal in a pool of Mr Setter, I found them all to settle into the surface detail beautifully. I even found the rear numbers ‘1420’ for the Czech aircraft conformed very well around the sizeable protrusions towards the aft end.
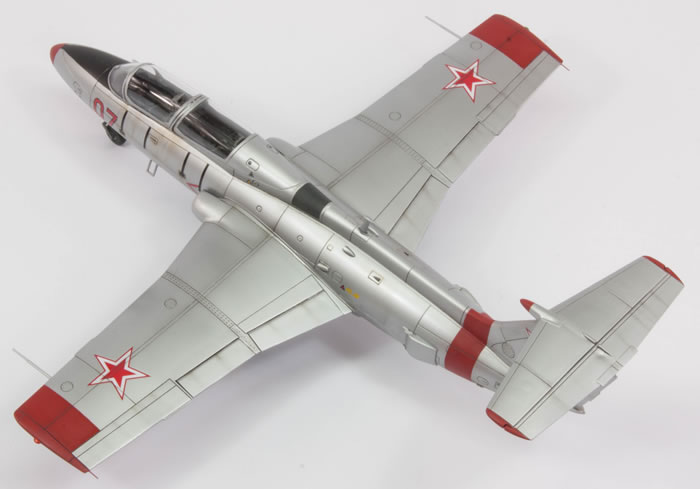
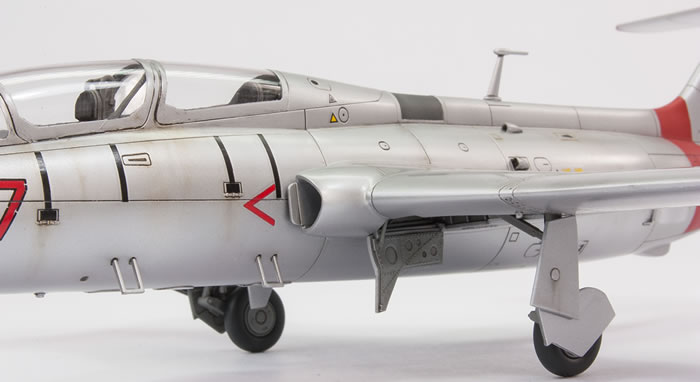
For the panel line wash I used thinned oil paints, a mix of black and grey to make a dark grey. I find this ‘grabs’ the surface detail better than pre-mixed washes on silver aircraft. Over the markings I used Ammo’s pre-mixed products. Once the excess was removed, I used a little of AK Interactive’s ‘Streaking Grime’ around the forward fuselage; I painted it on in thin streaks and then blended it out with a dry brush about 10 minutes later. The effect is a little strong, but this is the first time I’ve used this product and I liked it! Further weathering was applied using highly thinned Mr Hobby Color Smoke through my new Iwata CM-B. What an airbrush! Astonishing; incredibly fine lines can be airbrushed. The main problem now is my wobbly hand. The streaks on the flaps, ailerons. rudder and elevator were all airbrushed in this way. Some panel lines were also highlighted using this mix. Photos of Soviet L-29s showed they didn’t weather much, but I wanted to add some interest and was quite pleased with the final result.
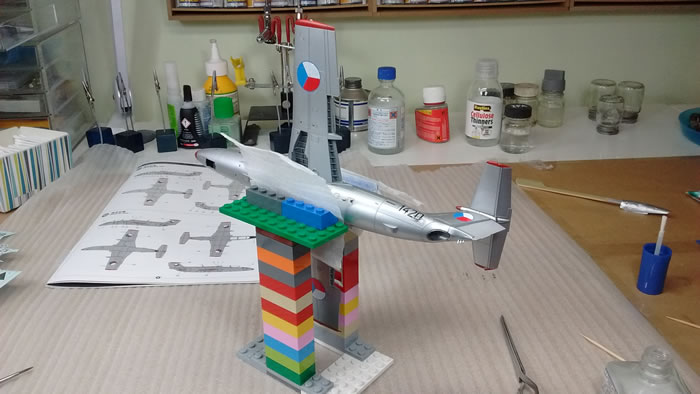
I’ve found decals on vertical surfaces tend to silver more and settle less well that those on horizontal surfaces. To counteract this I used a Lego jig to hold the model whilst decaling the fuselage sides. It actually worked!
The final finish is Pollyscale Satin, which didn’t tie the overall appearance together as much as I’d like, but didn’t kill the gloss too much. Final construction consisted of putting all the fragile bits on. The open airbrakes were ‘fun’ to attach, as was the open front canopy. Small blobs of super glue gel were used for these.
The main undercarriage fits basically okay, but as mentioned earlier, the nose leg is a nightmare. The attachment points were almost non-existent; the main thing is to realise that you can superglue the leg to the open nose gear door and this adds some strength.
Overall I am quite pleased with these. The main problem is the rubbish in the paint finish and the fragility of the nose gear. But this is an excellent kit and I cannot wait to build the MiG-31 in my ‘MiG series’. My next aircraft really will be a MiG!
To see more model build articles like this, please visit my website: www.jonbryon.com/model_index.html
Text and Images Copyright ©
2016 by Jon Bryon
Page Created 8 Augustl, 2016
Last Updated
9 August, 2016
Back to
HyperScale Main Page

|
 Home
| What's New |
Features |
Gallery |
Reviews |
Reference |
Forum |
Search
Home
| What's New |
Features |
Gallery |
Reviews |
Reference |
Forum |
Search