Trumpeter's 1/48 scale
MiG-21F-13 'Fishbed-C'
With Eduard Brassin Wheels and Begemot Decals
by Jon Bryon
|
|
MiG-21F-13 'Fishbed-C' |

Trumpeter's 1/48 MiG-21F-13 is available online from Squadron.com for only $26.39!
Our tastes are often set early in life. My ideas of what constitutes an attractive aircraft were fixed in childhood as I poured over every book on aeroplanes I could get my hands on. Some aircraft fascinated me and drew me in: the F-14, the F-111, the Su-15, and so on. And others, for no reason I can fathom today, seemed pathetically ugly. The MiG-21 found itself in this category, and the early F-13 version was the ugliest of them all. I didn't build ugly aircraft and so as a kid I never built a MiG-21 (nor, for the same reason, an F-16).
But tastes also change, and no model collection attempting to represent post-WWII combat aircraft can ignore the MiG-21 (or the F-16). Some time ago I built Academy's MiG-21PF, which was well received back in the day, but is now hopelessly outclassed by Eduard's later MiG-21s. Sadly, Eduard have not yet decided to mould the early 'Fishbed-C', which was a huge gap in the 1/48 kit market until filled by Trumpeter in 2012. I was very happy to find it in my LHS in China for little more than £13, crammed into a tiny box.
The kit is fairly complete, with a little photo-etched fret for some details, markings for six aircraft and nicely moulded parts, except for the rough surface texture on places like the upper fuselage and undercarriage doors, the latter very common with the Trumpeter kits I have built thus far. Initial excitement at finally adding this kit to my collection was dented a little once the experts went to work: the shape of the rear fuselage is off, as are quite a few other details. You can search the forums for the full low-down.
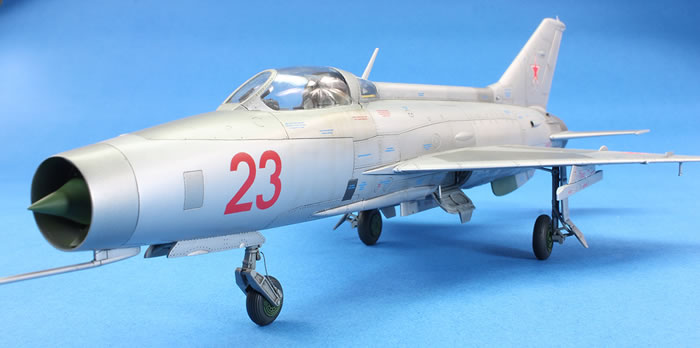
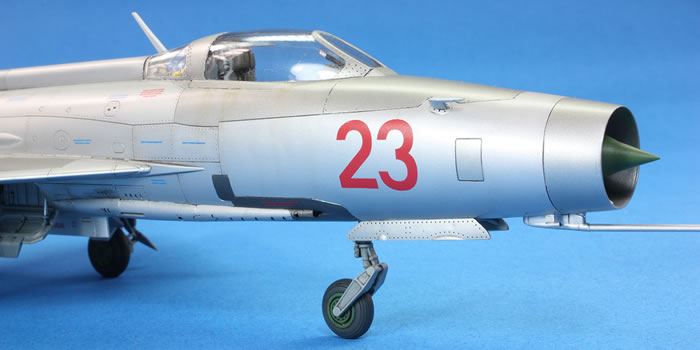
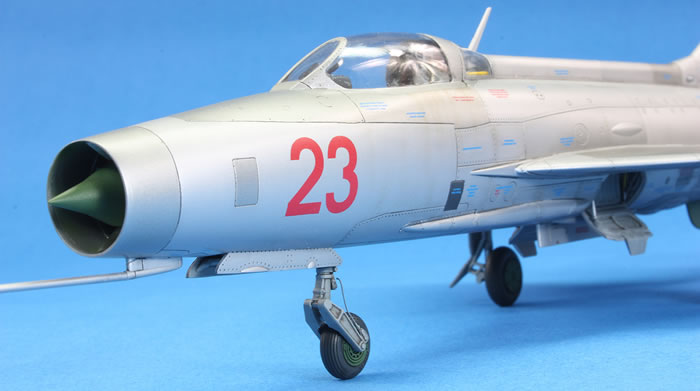
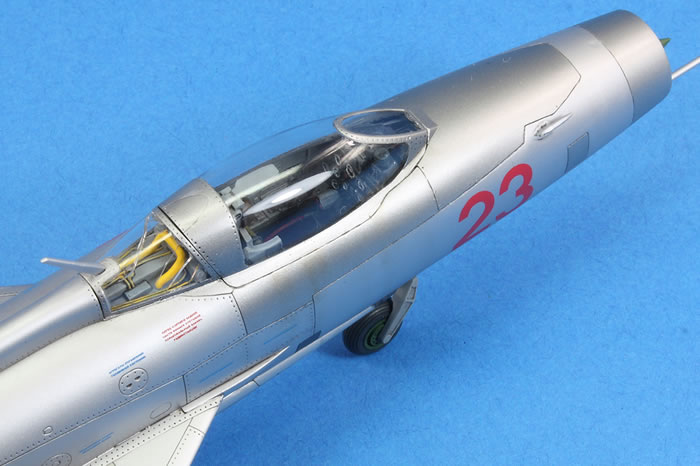
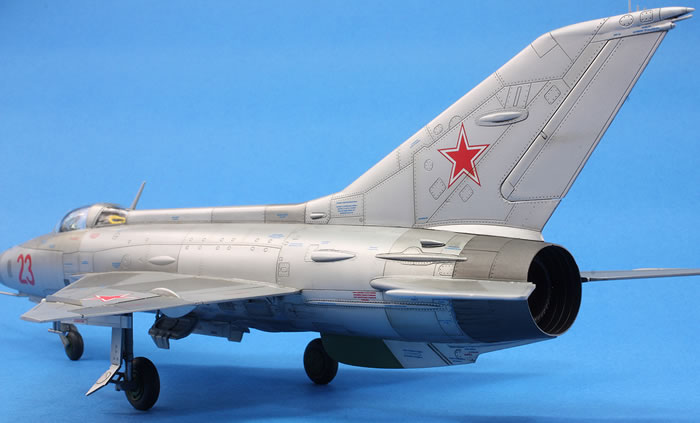
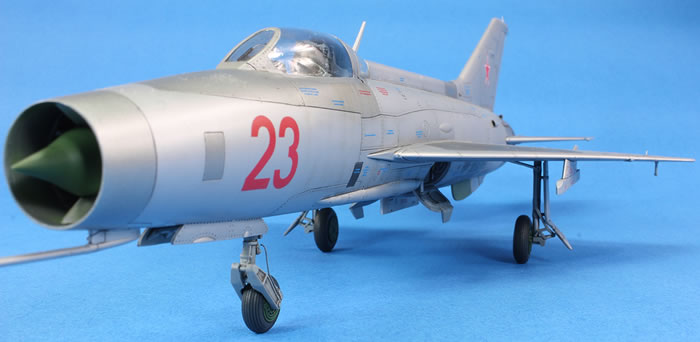
Looking at photos of completed kits, it seemed to me one problem was the shape of the nose. They usually showed a concave line between the windscreen and the front of the intake, whereas the real thing is straight. Initially I thought this was a problem with the kit, but actually I think it stems from builders over-sanding the joint between the intake ring and the fuselage, resulting in a dip. I made a big effort to avoid this and I think the finished article is the better for it; the line is straight.
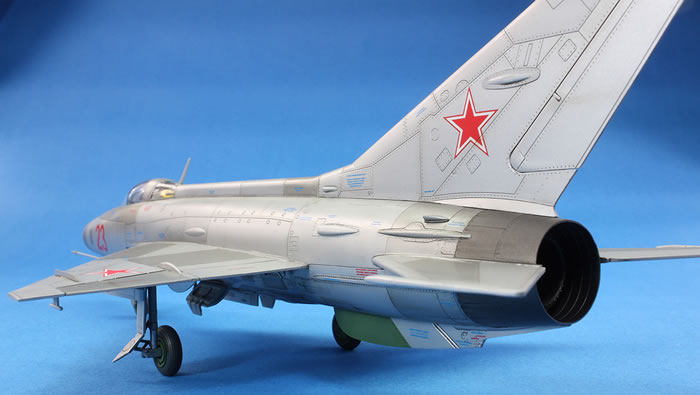
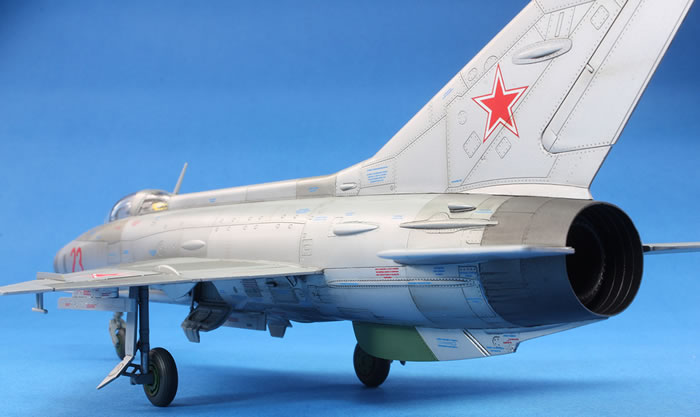
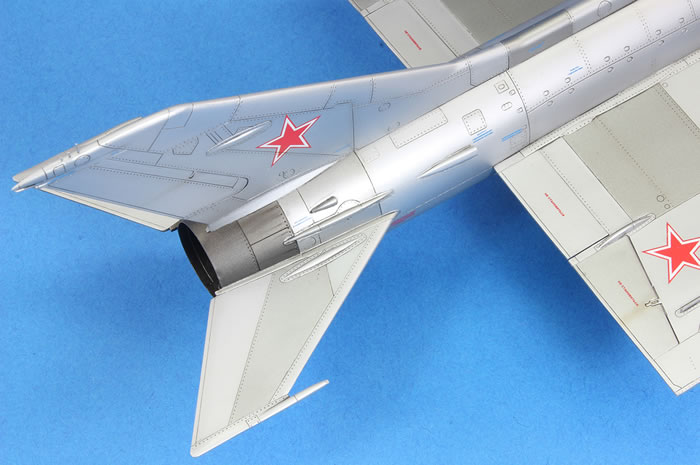
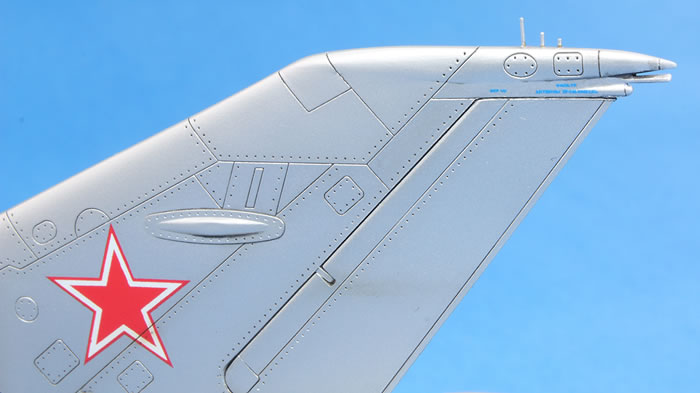
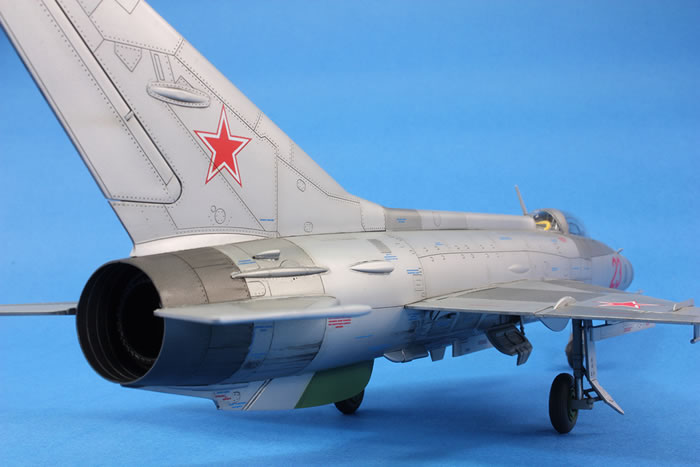
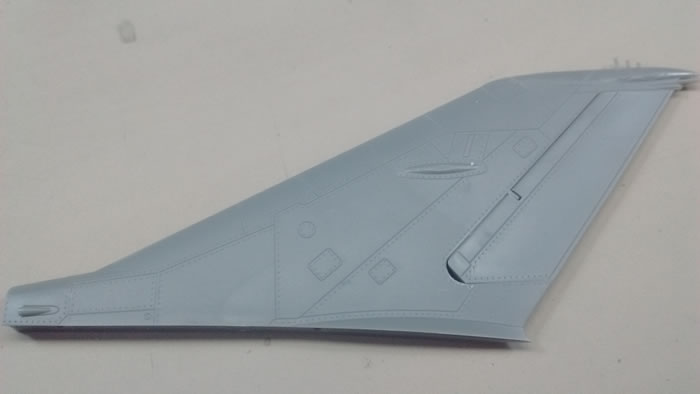
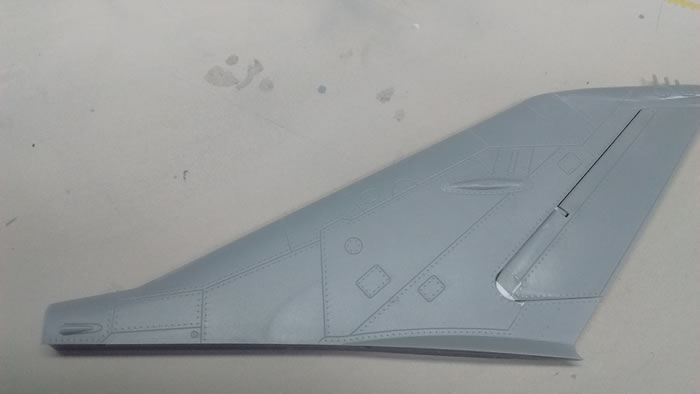
The other problem I was happy to sort out is the shape of the rudder. At its lower leading edge, it should be a smooth curve, but Trumpeter moulded it as a straight line. Since the rudder is separate, I used a small round file to adjust the shape of the tail and added plastic card to the leading edge to reshape. It's a small change, but one I can see. The rudder is still not right (too short), but it is better. For all its faults, I left everything else alone, except the wheels. These would be fine, but they're rubber (which I dislike), so I bought some Eduard resin replacements.
The kit is very straightforward to put together, although Trumpeter have a bizarre assembly sequence you'd best avoid. Adding the main undercarriage *before* attaching the wings to the fuselage is never a good idea! As is my wont, I constructed all the main components where seams needed to be addressed with super glue (in my experience, it makes for much more reliable seam removal) with no nasty surprises.
You would do well to modify the nose leg assembly. I don't like installing the nose gear early on in the build, and Trumpeter have it as step 1. If you cut the top of the locating holes away you can safely slot the leg in right at the end; this is what I did.
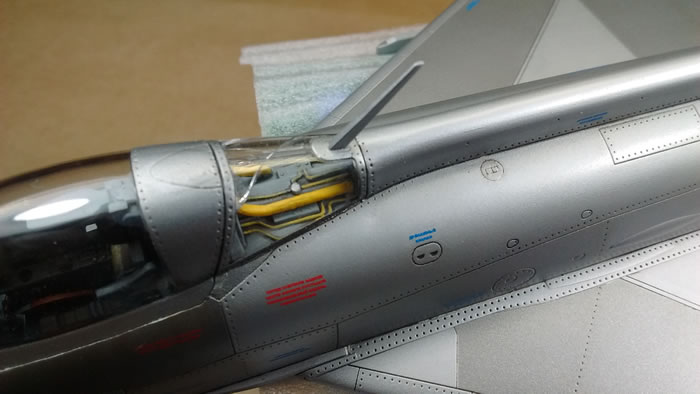
The cockpit is quite nicely detailed - good enough for a closed canopy - but the control stick looks hopelessly overscale and the details do not match very well with the various photos you can find on the internet. The armoured windscreen plating (clear part Y1) neither fitted very well nor looked much like the real thing. I simply omitted it. PE seat belts are included and I used them, but they are far too narrow.
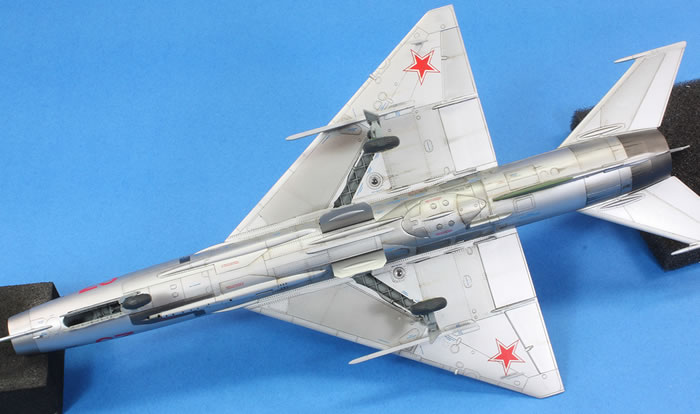
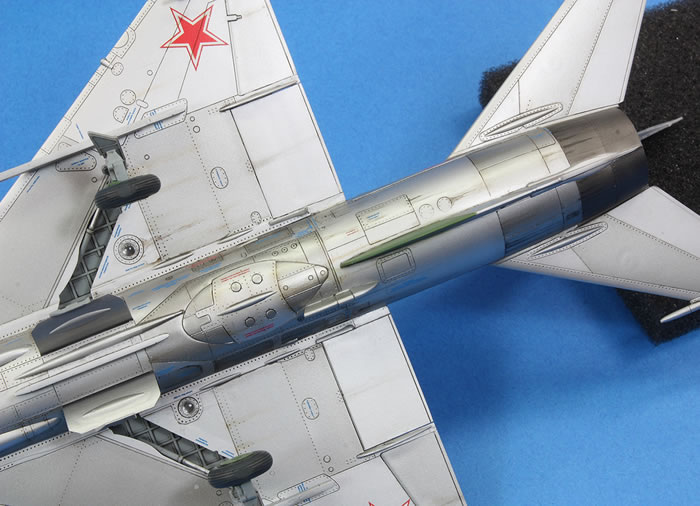
I ignored Trumpeter's recommendations to paint the cockpit and undercarriage light blue and instead used Mr Color 337. The Eduard wheels are nice and I painted the hubs a 50/50 mix of Mr Color 340 and 319 (this mix was also used later for the ventral fin and the nose cone). The pegs on the main gear legs to which the wheels attach needed to be cut down to fit the resin wheels. It's also worth noting that Trumpeter got their left and right mixed up in labelling the main undercarriage legs; this initially caused me a lot of confusion when I came to attach them at the end.
Don't forget to open up the locating holes in the wings for the PE wing fences and pylons, and under the fuselage nose for the pitot. Unfortunately this latter hole is far too big. I would have added the entire pitot at the very end, but because of the oversized hole, I had to fit it before painting and then fill the gap with Superfine White Milliput. The pitot itself was never going to survive if left alone, so I chopped it off and used brass to create a pin. Sadly this was less neat than I would have liked it to be, and I couldn't reattach it at quite the right angle. I noted that when, at the very end, I came to reattach the pitot, Trumpeter's instructions have the orientation of the little vanes wrong by 90 degrees. Because I'd already removed the part, I don't know if only the instructions are wrong or if the part is too; it's worth a check if you care.
Others have noted the lack of locating pegs for the tailplanes and that those for the wings are tiny. It made no difference to me and I didn't bother reinforcing anything. The fit was beautiful and the attachment strong; I used Tamiya Extra Thin for these joins.
The tail cone is separate and comes in two halves. As I usually do I attached each half to the corresponding fuselage half before bringing the complete halves together...which is fine, except that the plastic gets extremely thin right at the tail end and the gap inside the exhaust area is very difficult to clean up. This might be an example of where joining the parts (in this case K1 and K2) before attaching them to the main fuselage might help.
There are lots of fuselage inserts. On the whole they fit quite well. I closed all the airbrakes and was pleasantly surprised by the good fit. The bulge between the main wheel wells (part V2) is seriously undernourished compared to the real thing.
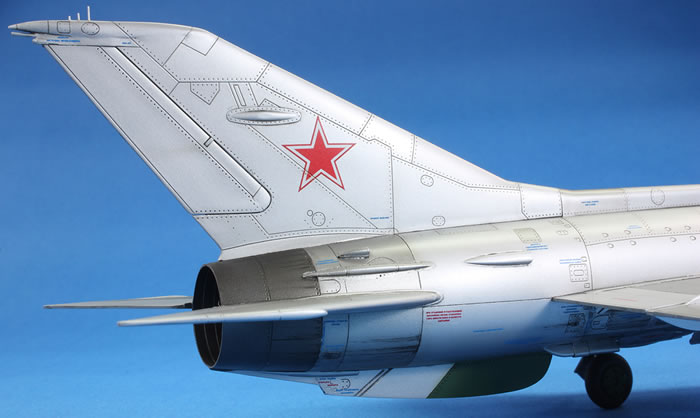
Like the pitot, the three rods antennae on the top of the tail were never going to survive painting, so I removed them and drilled 0.3mm holes to accept some brass rod at the end. The T-shaped antenna under the wings don't look much like those I've seen on good photos but I left them. When picking up the small pitot that goes under the nose (part F3) with tweezers, I launched it into never-never land. I scratchbuilt a replacement with plastic card and Albion Alloys brass tubing, which I was quite pleased with.
Because the fit was so good, I rapidly arrived at the painting stage. To remove some of the rough plastic along the fuselage I used Tamiya polishing compounds and a buffing wheel in my cheap cordless hand tool from Lidl. I hate polishing, and to be honest didn't try too hard.
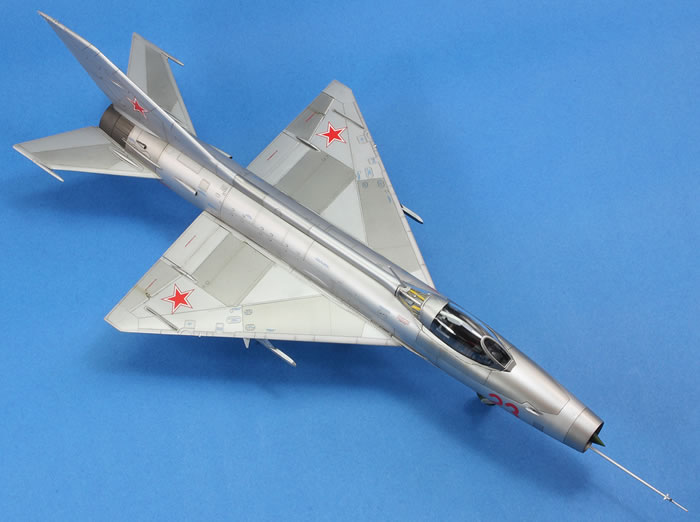
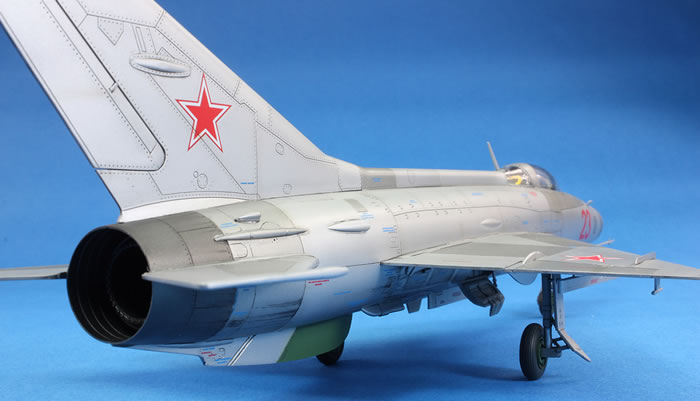
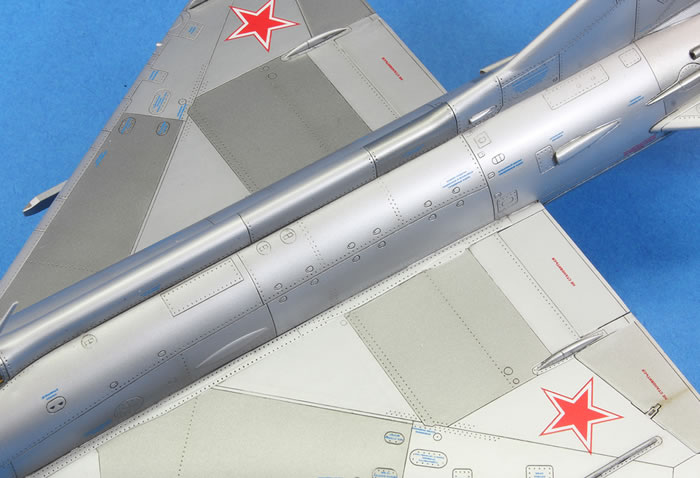
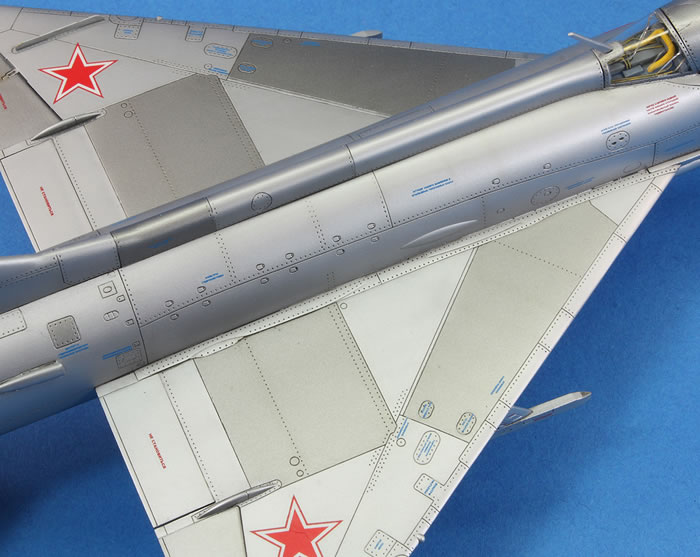
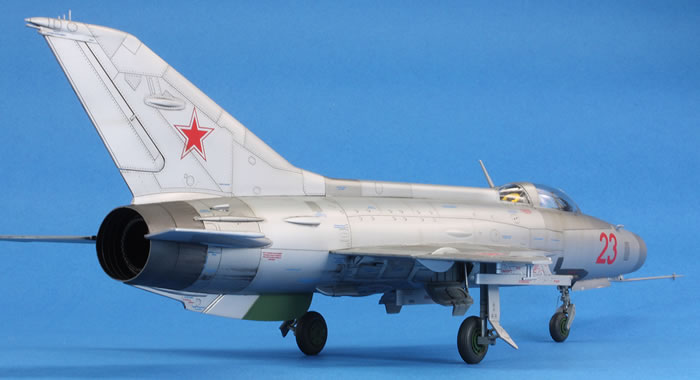
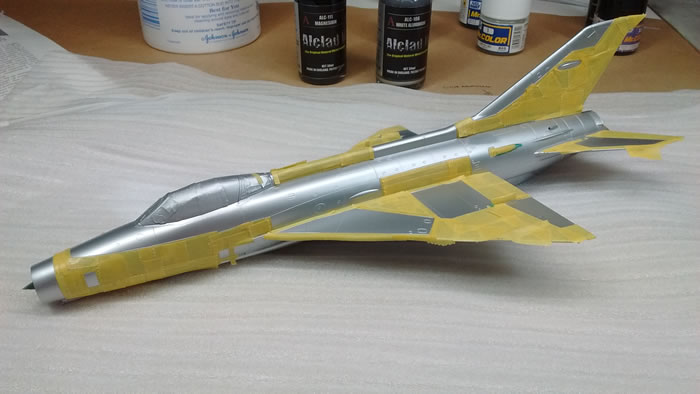
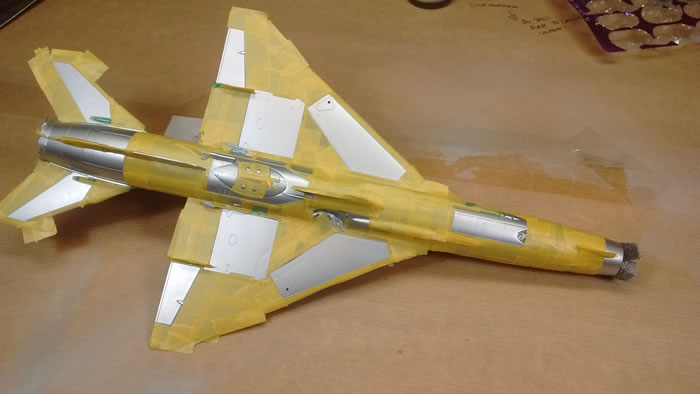
For the first time I primed with Mr Primer Surfacer 1000. This seemed thinner in the bottle than regular Mr Surfacer 1000, so I thinned it less, but clearly I still didn't quite thin it enough; the finish was less smooth that I am used too. I found three excellent, large colour photos of aluminium Finnish MiG-21F-13s in an old Take Off magazine and used these to mark out various panel colours. The main finish was Mr Color Silver 8, with darker areas done in Mr Color Gun Chrome 104 with a little Steel 28 added, and the paler areas with a little Mr Color White 1 added to the Silver. Masking took forever since the panels are complex in shape.

Painted with Mr Color Silver 8
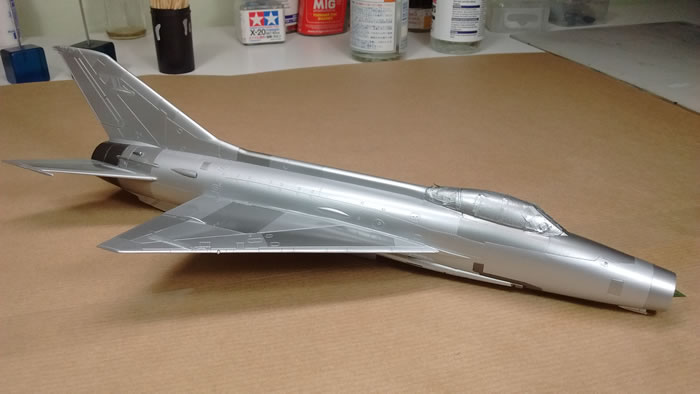
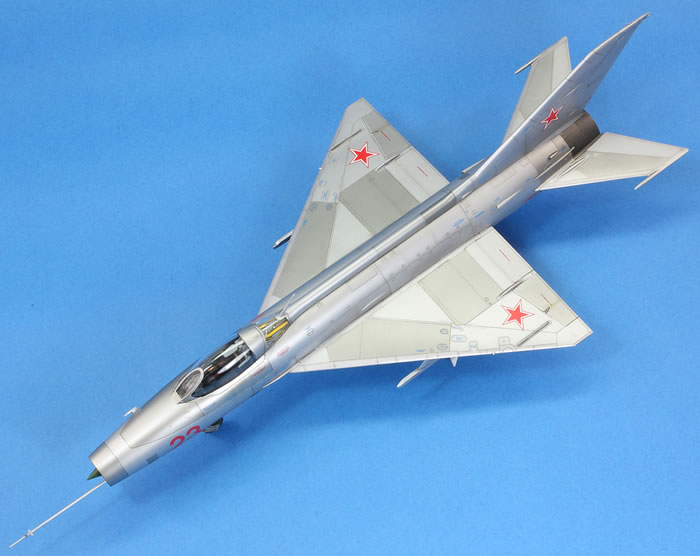
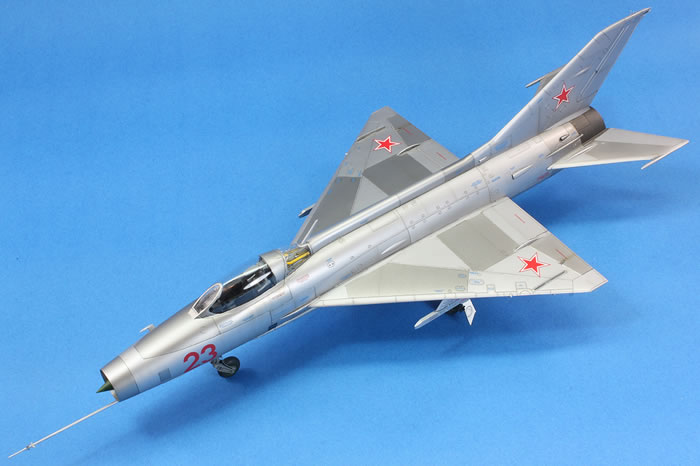
The result following a gloss coat of Mr Color GX100
The effort wasn't particularly well spent. Despite testing on an old 1/72 Tornado, the tones didn't come out quite as I'd hoped. The dark was a little too dark (although, like the real thing, it changes a lot depending on viewing angle) and the pale wasn't nearly white enough. The tail cone was Alclad Steel and Magnesium (which are barely distinguishable); I also used these shades for some darker panels up front and around the gun.
Following a generous coat of Mr Color GX100 clear gloss, I started my favourite part of the process: panel line washes. I used a dark grey mix of Abteilung oil paints and was very happy with the results.
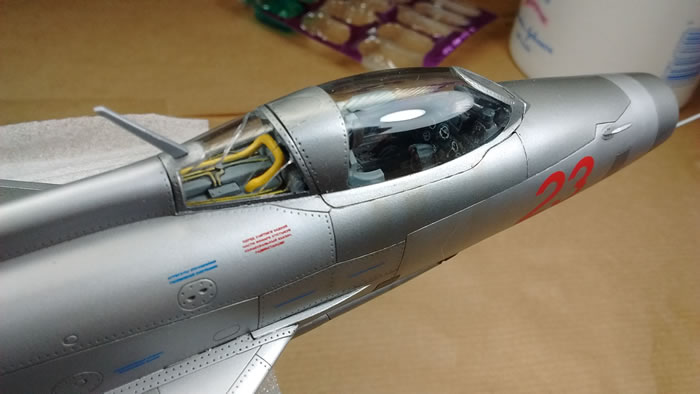
I wanted my Fishbed (and the next three that are going to be built) in Soviet aluminium markings. One of these is provided in the kit, but Begemot make a really nice set with good provenance and markings that I can also use on my MiG-21SM and MiG-21bis. The scheme is extremely simple - only 8 decals were used from the set - but once I found out they did a stencil set, I couldn't resist. The stencils were numerous and nicely printed. Most of them come in blue and black versions; Begemot recommended the blue for an early Soviet Fishbed-C, and I appreciate the little splashes of colour. They bedded down okay with Mr Setter, but there was some wrinkling on a few of the stars that never disappeared. I also don't fully trust the instructions - there were not enough of a couple of decals, and a few too many of a few others, and the surface detail between the plans and the plastic didn't match in a few places, but the overall effect is very nice.
Weathering consisted of streaking and blending with a few different products: oil paints, Tamiya black panel line wash, Ammo deep grey panel line wash, AK Interactive streaking grime, Lifecolor Tensochrom (horrible to use!). I mainly messed around between the wheel wells and the exhaust. Photos showed very clear streaking around the tail cone, which I attempted to replicate. Some streaking grime was also used around the canopy area and I airbrushed a very thin mix of Tamiya black and red-brown in thin lines over the airframe - so thin the effect is rather too subtle.
In short order the airframe was ready for a final coat of Tamiya Semi-Gloss. This left it at a nice level of shininess and Ammo Satin varnish (which is actually really matt) was airbrushed over the green areas and the exhaust.
After removing the canopy masking I was disappointed to find cracks all through the rear canopy. I've no idea where they came from. They weren't there when I was masking!
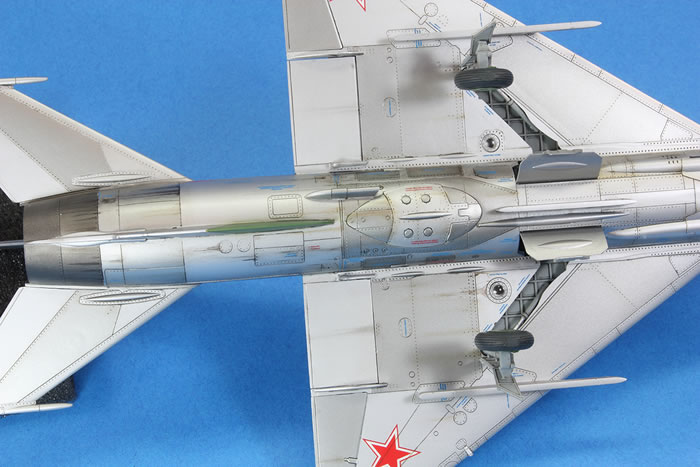
The undercarriage caused the usual stress. It took forever to get lined up and attached properly; the main legs flop all over the place in their locating holes. I would recommend attaching actuating rods V35 and V36 very early; they are extremely tough to get in later (as I discovered!). Somehow, with various glues and a Lego jig, I managed to get everything sort of level and aligned. The pylons fitted beautifully into the wings, and then she was done!
As I was writing this I had cause to look something up, and discovered that Trumpeter screws all who make this kit on the main undercarriage leg doors. I have yet to build a Trumpeter kit where they provide correct undercarriage doors, and the frustrating thing is, it's so obvious when you look. I neglected to look. The long thin doors attached to the leg are not meant to align parallel to the direction of flight, but perpendicular to the length of the wheel bay. As moulded by Trumpeter, this is not possible and requires modification. Mine are well and truly superglued on, so too late to change mine, but if you're building this kit, you might want to take note. If you can't see what I mean, look at how Eduard do it, or for that matter Academy (they both do it right).
If Eduard ever release an early Fishbed it will be better than this. Until then, we'll have to make do and at least it's cheap. This is a well-fitting kit with some silly inaccuracies, but it's nice to have it on the shelf as I model my way through the MiG series in numerical order.

To see more model build articles like this, please visit my website: www.jonbryon.com/model_index.html
Text and Images Copyright ©
2016 by Jon Bryon
Page Created 21 October, 2016
Last Updated
21 October, 2016
Back to
HyperScale Main Page

|
 Home
| What's New |
Features |
Gallery |
Reviews |
Reference |
Forum |
Search
Home
| What's New |
Features |
Gallery |
Reviews |
Reference |
Forum |
Search