Eduard's 1/48 scale Weekend Edition
MiG-21PF
by Fernado Rolandelli
 |
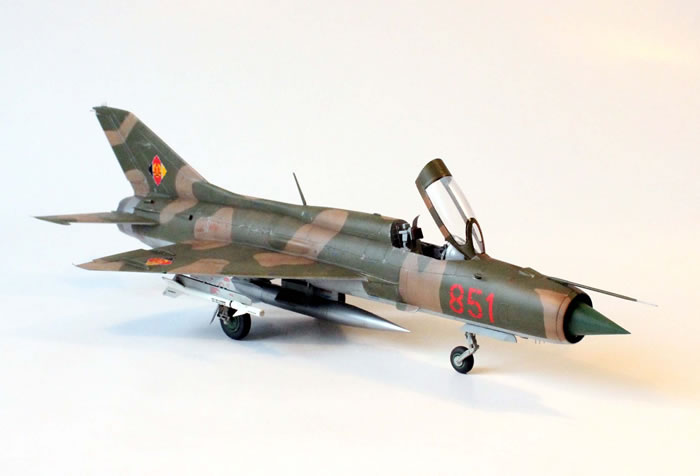
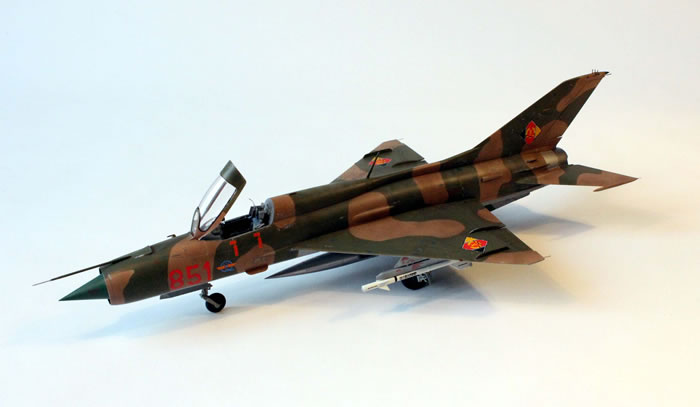
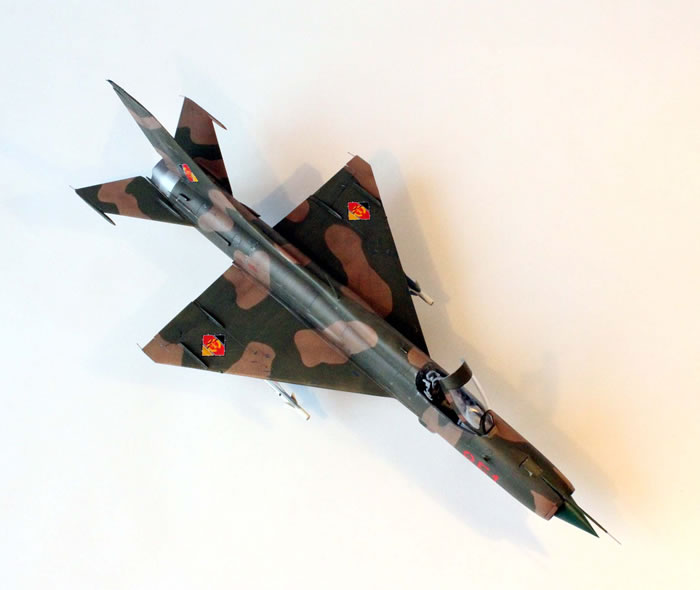
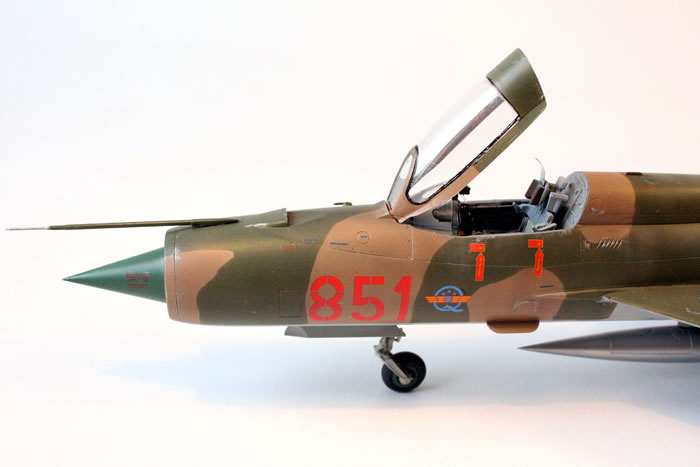
Mikoyan Gurevich MiG-21PF, LSK, 9th JG, DDR, 1980 |

Eduard's 1/48 scale MiG-21PF is available online from Squadron for only USD$31.99
The Luftstreitkräfte der Nationalen Volksarmee - LSK, the Air Force of the People’s National Army (the air force of the German Democratic Republic) followed necessarily a different path from the Bundesluftwaffe.
Shunning the terminology used by the former Luftwaffe, it picked her traditions from the Imperial Germany’s Air Force, also called Luftstreitkräfte. Even its uniforms were Field Gray, like the latter, instead of an “aeronautical” bluish grey.
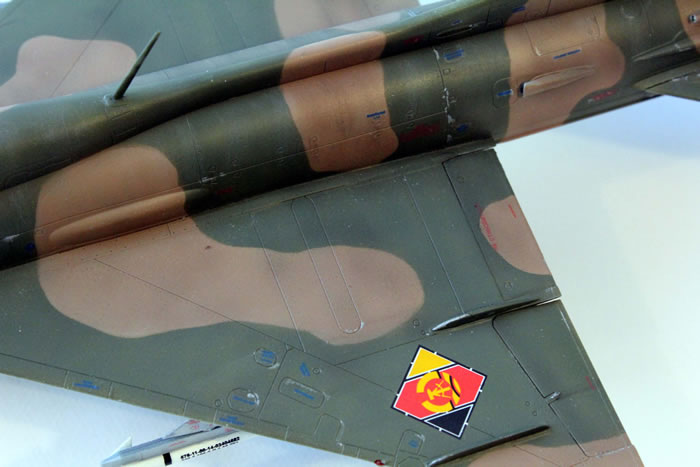
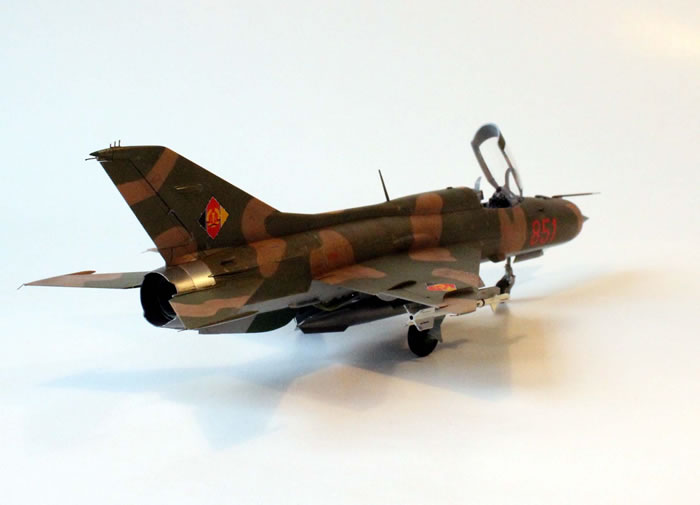
It was established in 1956 with two Air and an AA divisions; HQ was in Cottbus. Insignia was taken from the DDR flag colours; it got her Coat of Arms (a hammer, a compass and a twin sheaf of wheat, symbolizing the “Republic of Workers and Farmers”) a bit later.
The PF was the starting point of the “Second Generation” MiG-21s, when a serious effort was made to turn the thing into an all-weather (night and rain) fighter. It sported better radar and electronics, being able to launch the radar-homing, beam-riding (and I suspect impact-fuzed) R-2S missile, a most unreliable weapon, and losing its single remaining cannon in the process. The result was not good; reliance on those first-generation missiles was not a good idea. Furthermore, they kept the extremely unreliable escape system centered in the SK-1 ejection seat.
The plane was all in all probably too small for being really useful as a tactical fighter. They were thought as point defense interceptors, operating under strict control from ground radar operators, in a “grid” pattern quite similar to that used by WWII German night air defense organization. That said, the NVAF used it with some success (at least they managed to keep a presence in the air!) against much more sophisticated US aircraft. It is remarkable that Warsaw Pact air forces, including the LSK, continued with such tactics even to their demise, as discovered by Bundesluftwaffe personnel when incorporating JG3’s MiG-29s and personnel after the reunification.
This is the excellent Eduard 1/48 MiG, in its extended "Weekend" configuration (I called the “new” Weekend like that because they come with posable fabric harness and decal sheets for two versions.
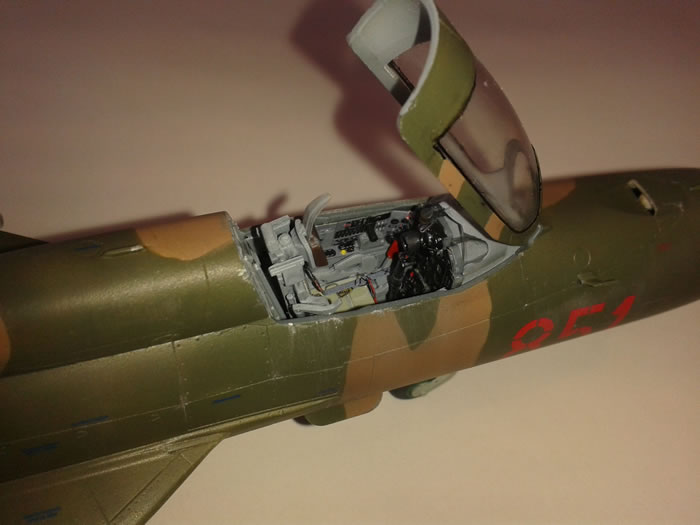
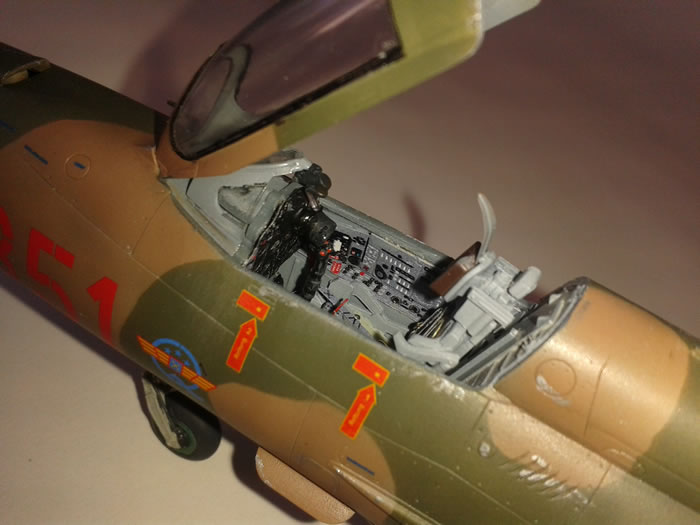
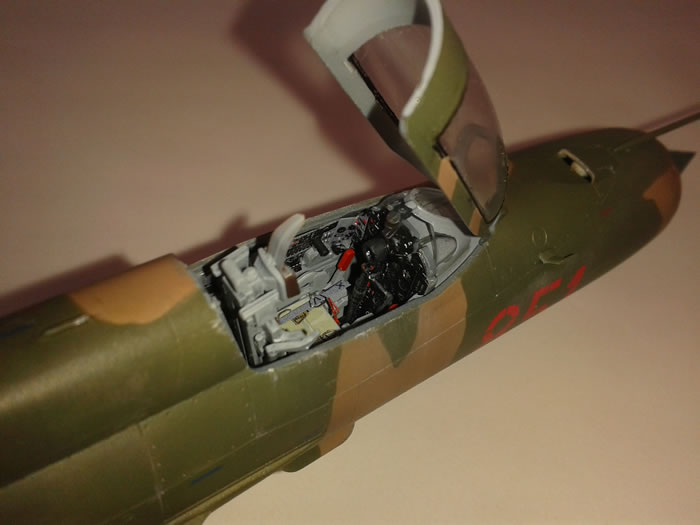
This one is very convenient in that it comes with a full stencils sheet) However, a PE set I deemed necessary to furnish the cockpit; I purchased a cheap “Overtree” edition directly from Eduard. Having the choice, I selected a “Gray” over the one in the infamous “Bright cockpit Turquoise Green”. Coming with no instructions, and being the set in the Profi Pack kit, I downloaded those for such a kit to aid in the construction.
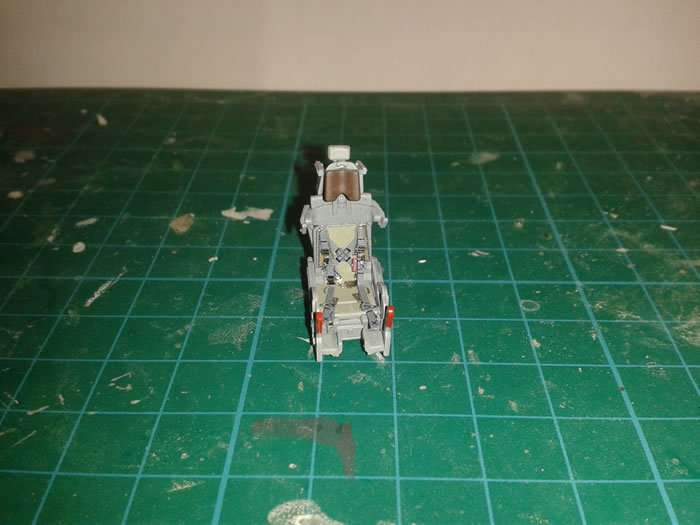
Well, I started by the exhaust, for a change. Soviets used to paint this thing in that bright Green they used for priming just about everything. After looking at a lot of pictures, I painted the interior of the petals, tube and fan in a Green concoction (basically US Interior Green mixed with dark blue); then, I overpainted the tube in a dark Exhaust colour, and the petals in chalky White; the end result looks the part. I then moved into the cockpit/front wheel bay assembly. Everything looks relatively complex, but the overall engineering and fit of the parts is exemplary.

The cockpit I painted FS36320, that colour matching the pre-painted PE parts quite well. I used the plastic part as a backing for the PE instrument panel. The seat is a piece of art; I mean, the original looks like a transformer robot, and the plastic model captures that look; it is also very well fitting, along with the complex harness. I set it aside, together to the armour glass, and once the fuselage was assembled I sealed the cockpit using the spare canopy provided (though I thoroughly masked it for good measure).
Next was the main wheel well, which I detailed with some wiring using my references, which usually include the downloaded instructions for any Eduard PE set available. The bays I painted RLM02, the colour suggested in the instructions, as at least some of the pictures in my references show a very similar colour. I also detailed the section of the bays in the wings. Radome was painted in the same “Bright Green” as the exhaust, dielectric surfaces and wheel centers; obviously the Soviets loved that colour, though the actual paint should have been different for all those parts! As I painted them at different moments, with paint mixed on the spot, there is no two parts with exactly the same hue in the model.
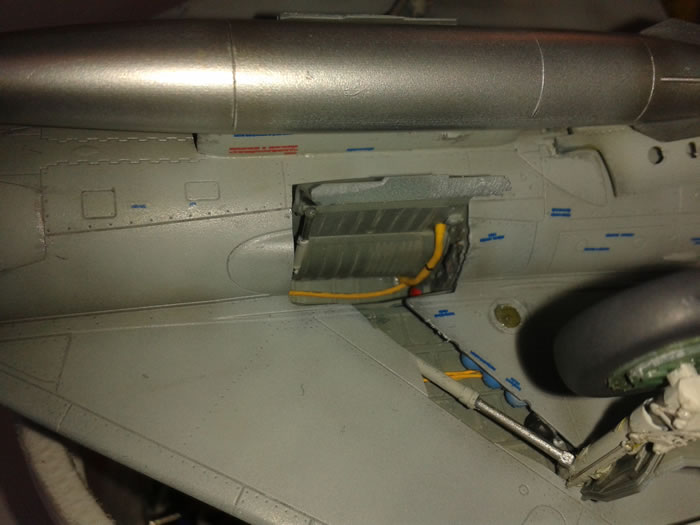
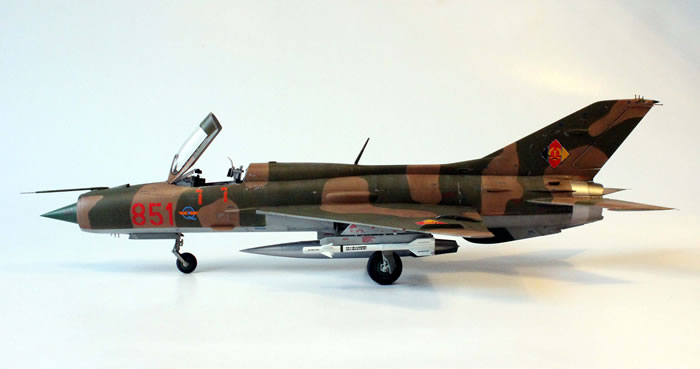
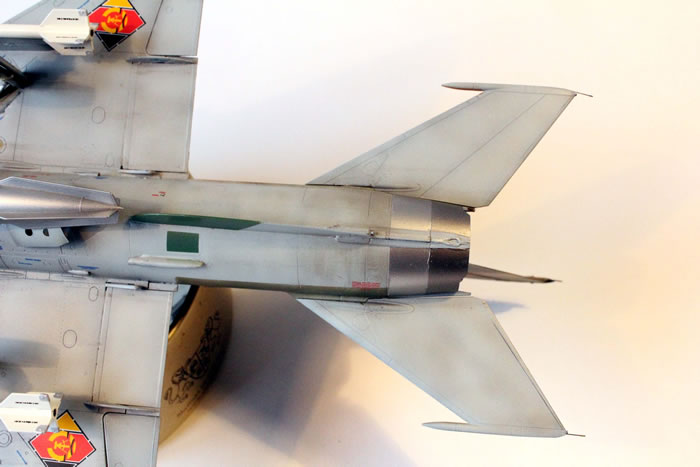
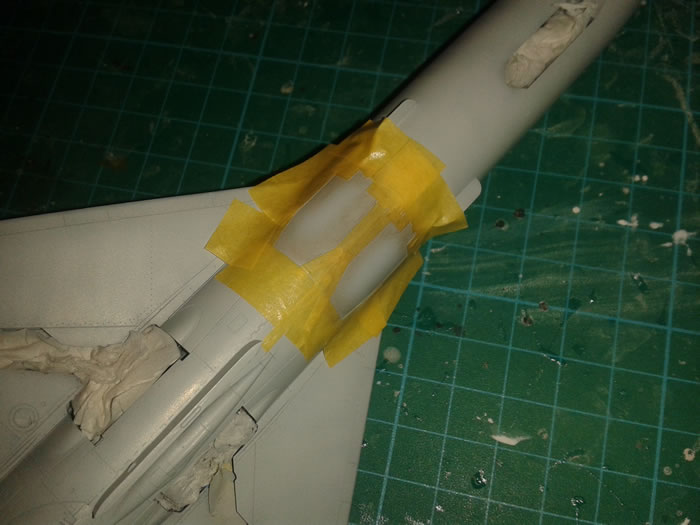
Closing the fuselage posed no problems; weight (steel shot balls) was added to the cone. The nose ring deserved a separate story: I had not even realized of its existence (it potentially creates an awkward join around the fuselage) and had already disposed of the sprues when I did. I rescued it and added it to the already finished model! It certainly fits perfectly. I declined cutting the forward airbrakes open to simplify things, but foolishly went for a open back airbrake (it is not worth the effort; the ventral tank blocks its deployment almost completely).
The wing went smoothly, though I had a step at the back. Again, I posed the flaps shut, but the ailerons (and the rudder) I gave a little, “casual looking”, deflection (with a corresponding movement of stick and pedals)
Armament
This thing was almost unarmed; a good disarmament policy would have been agreeing in building lots of them.
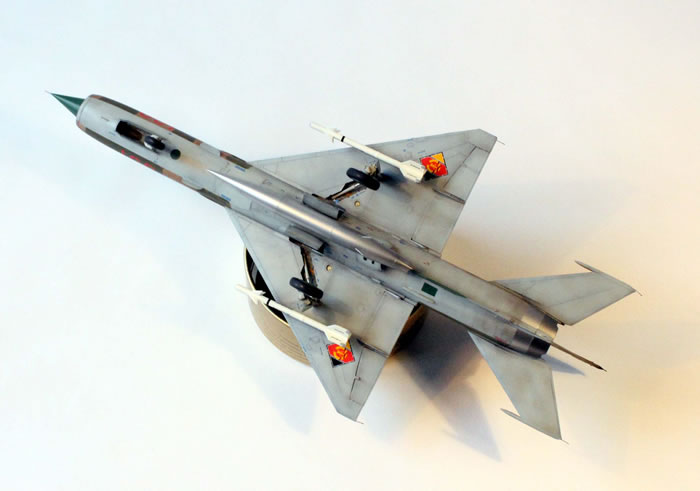
I selected the mandatory ventral tank (which, for a contrast, I chose to paint in NMF) and pondered about the underwing armament. R-2US and R-3S looked interesting, but I wondered if the former would have been in use in 1980, and the second is only seen on early MFs. The very promising R-13 is also never seen on PFs, I cannot believe that by 80 they had not upgraded the machines to carry it, but found no evidence whatsoever; besides, the sprues (apparently –but actually not so- generous in weapons) do not provide the forward fins for them!
Therefore, I fell back to plain vanilla R-3s. It must be said that once painted and decaled they look the part.
Painting, Markings and Weathering |
Painting
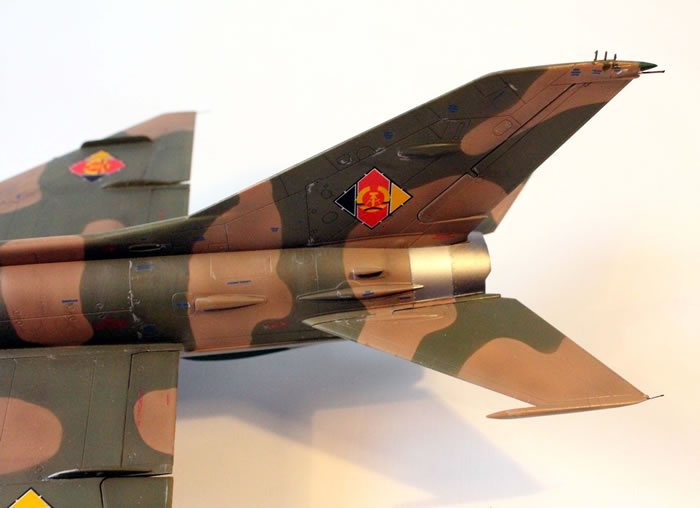
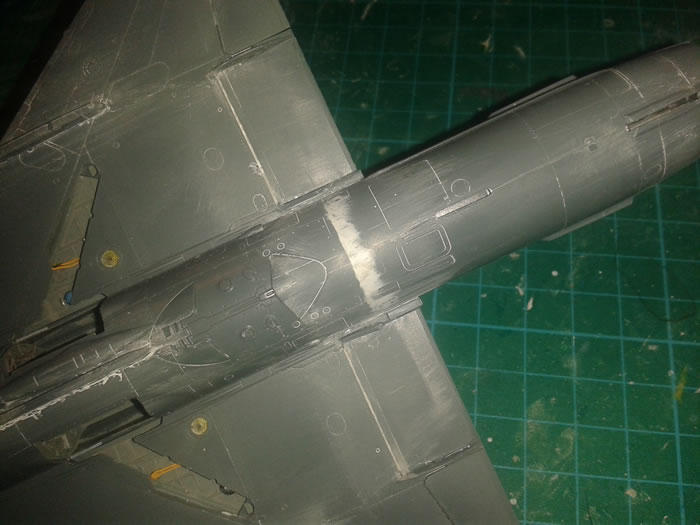
I chose the camouflaged LSK version. Colours are relative, as everything Soviet or similar. I followed the suggestions in the instruction sheet (FS30219 and 34102 over RLM76) altering just a bit the colours to make them a little different from the plain ones; I used Xtracrylixs paints. I made a strong preshade over the grey Alclad primer and painted the light blue and the Earth lightly, in mottle fashion, to achieve an uneven look.
The airbrakes I masked and painted a lighter tone.
For the camouflage I used Blue Tack worms. The exhaust covers I painted in tones of Alclad. The small circular dialectric panel in the lower forward fuselage, I masked with a Montex RAF roundels mask, being unable to cut a circular piece of tape clean (hey, I shall get some of those mask sheets, they are great!). I use to handbrush my gloss coats, using an Xtracrylixs varnish, and polishing in between coats by lightly sanding with a totally worn out piece of Tamiya sandpaper.
Decals
They were outstanding, if one can restrain himself from hating them for the quantity of stencils (most of them in Russian; left me wondering if they were appropriate at all). Most stenciling is in Blue and Red, appropriate for a camouflaged machine (they should be Black and Red in a NMF one). The big Red Bort numbers posed no problem and look great.
Weathering
I guess German conscripts kept these peacetime machines reasonably clean to the end. The “mottle-fashion” painting had already given an interesting look to the surfaces; I reinforced it with some random strokes and mottling in a much diluted Burnt Umber, some paint chipping via a Silver pencil, some oil leaks made by wet pastels, and a general dusting with dry ones. I use to keep the weathering very discreet.
Final Assembly
It included undercarriage legs (complex, but well fitting; the front leg has absolutely no secure attachment at all –I relied on the brute force of cyanoacrylate glue, reinforcing it with a blob hidden somewhere inside the well); seat, windscreen and gunsight; canopy; armament; and the remaining antennae and pitot (I had a metal one, but the idea of cutting the tube from the base made me shudder; the plastic one looks good enough). The ventral airbrake I just attached with White Glue and let it fall on the ventral tank.
I am not used to 1/48 jet models and even this one, the model of a relatively small aircraft, seems enormous to me. Look at those missiles!
The assembly was fun, a bit complex and challenging just to the right degree. The model certainly looks the part. But for the size, I would build a score of them. A 1/72nd scaled-down kit would sell like hot cakes.
References
-
Various Eduard instruction sheets downloaded from their own site;
-
“MiG-21 Part I Walkaround” Squadron Signaal
-
“MiG-21”, Air Vanguard Series, Osprey Publishing
Model, Images and Text
Copyright ©
2016 by Fernado Rolandelli
Page Created 13 July, 2016
Last Updated
13 July, 2016
Back to HyperScale Main Page
|
 Home
| What's New | Features | Gallery | Reviews | Reference | Resource Guides | Forum |
Home
| What's New | Features | Gallery | Reviews | Reference | Resource Guides | Forum |