Alley Cat 1/32 scale
Gloster Gamecock
by Leo Stevenson
|
Gloster Gamecock |

Tamiya's 1/48 scale A-1J Skyraider is available online from Squadron for only US$27.92!
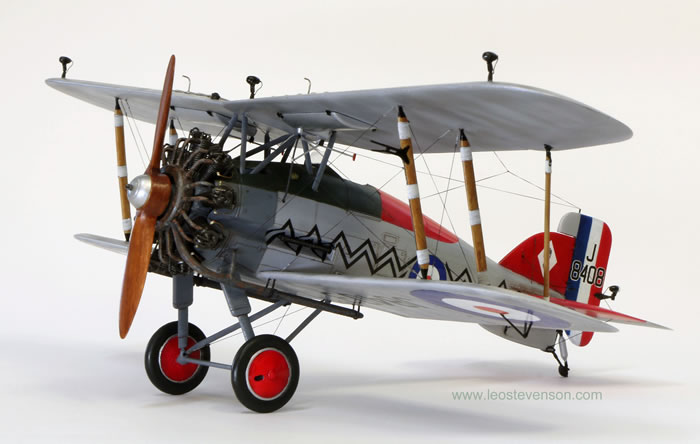
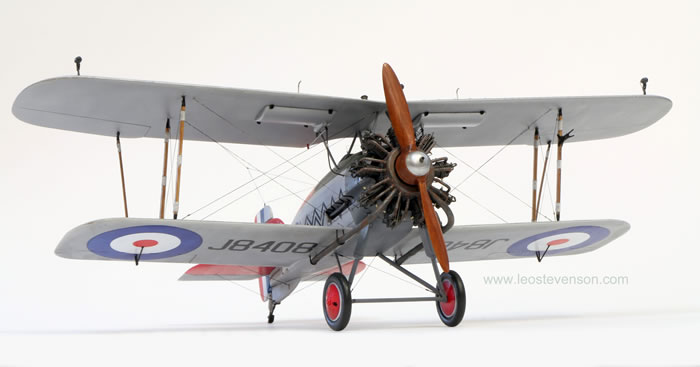
This is my Gloster Gamecock made up from the 1/32 Alley Cat resin kit (see http://www.alleycatmodels.co.uk/). This kit was originally released under the Montex brand name. I am pleased to see the growth of models representing the inter-war years, an area that has been neglected for far too long because this period is fascinating as much for the technological success stories as it is for the brave experiments in aircraft design that didn’t work as well and led nowhere.
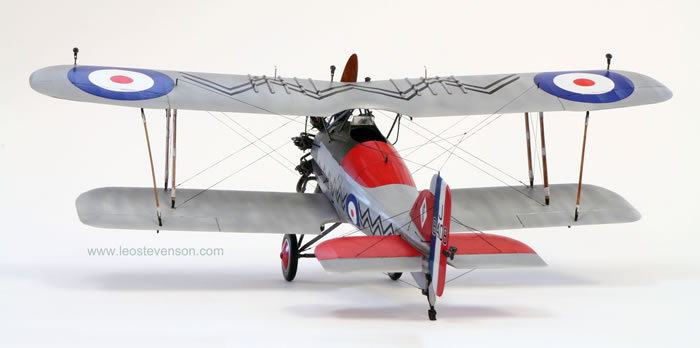
I like this aircraft. It has a resolute, handsome and rugged appearance, just like me (in my dreams!).
My model represents a Gloster Gamecock flown in 1928 by Squadron Leader AR Arnold in 17 Squadron, Royal Air Force, as part of the UK Air Defence Network. This squadron was based in RAF Upavon, in Wiltshire at this time. This is one of two marking options possible with this kit, the other being one from 23 Squadron of the RAF, but there are two other options available from Alley Cat in a separate gamecock kit which represent 3 or 43 Squadrons of the RAF.
What you see here is not actually how I intended the model to look when I started it. This is because not long after I started to build it I lost the front cowling cover that normally hides most of the plumbing around the exhaust manifold and that made the aircraft more streamlined. I don’t know where this component went to, possibly snatched away by the evil demon that has taken many other model parts over the years, but anyway after I had calmed down, and having stopped swearing, I decided to replicate this exhaust manifold and its plumbing by ‘scratch-building’ it, which turned out to be a very time-consuming task. Luckily historic photos show us that this aircraft flew as often with as without this front cowling.

Strangely, although the illustrations on the box and colour instructions show this aircraft without the front cowling, with the ring manifold exposed, the actual kit only gives the option of using the cowling supplied and it does not supply the manifold and its associated components to build it as I eventually had to. However, in the end fate gave me a more interesting model. That huge Bristol Jupiter radial engine is, to use a cliché you’ve heard before, a kit-within-a-kit with a lot of very small fiddly components, and so this engine took me longer to build than all the time spent on the rest of the kit (even if you do not make the exhaust manifold as I did), but because this engine is so exposed it does make every bit of effort spent on it worthwhile.
Here is a list of the changes or additions I made to the kit:
-
I changed the supplied push-rods for the engine with fine brass rod and tubing because the brass parts are straighter and more rigid that the incredibly delicate push-rods supplied with the kit.
-
I added sparkplug wiring.
-
I made the exhaust manifold ring as described, and lengthened the supplied pipework and exhuasts to meet it (they were only made to meet the front cowling component that I had lost).
-
I added the brackets to the fuel tanks.
-
I extended the bracketed rods that are attached the fuel lines that descends from each wing fuel tank, and also added handles to these rods (these are fuel stopcocks that the pilot can control in-flight).
-
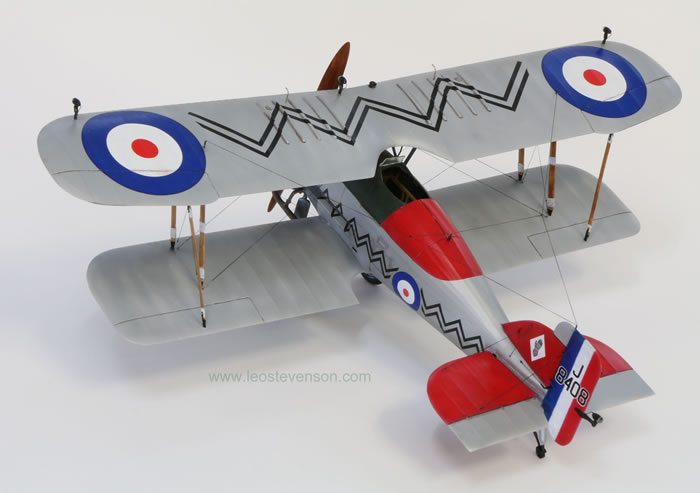
I added the curved ‘breather’ pipes for the fuel tanks to the top wing. I made these from silver tube.
-
I swapped the supplied fixtures for the aerial wires with ones that I made myself, attaching them to the top wing, fuselage and tail fin.
-
I added wiring to the running light on the rudder and the landing lights on the top wing.
-
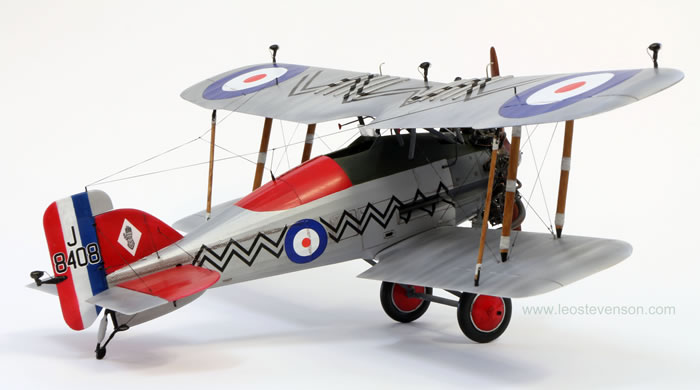
I wrapped very thin tape made from Artool’s ‘Ultra Mask’ sheet around part of the interwing struts, and then painted these taped areas off-white.
-
I made gunsights and fixed them in front of the windscreen. It was only after I fixed them in place that I noticed that most old photos show that Gloster Gamecocks usually had an Aldis sight fitted, but at least a few had a double-bead sight similar to what I had made!
-
I made my own Hucks Starter socket on the front of the propeller out of a stub of brass rod (the kit’s propeller as supplied only had a blank featurless stub of resin on it’s nose).
-
The rigging of the model was done with a mixture of ‘EZ line’ for the running rigging going to the rudder and for the aerial wires, and for the rest I used the stretchy flat RAF rigging supplied by Wing Nut Wings, which I then painted. The turnbuckles are actually 1/48 scale ones supplied by Gaspatch Models, which although not - strictly speaking - authentic or accurate for this aircraft they looked better on this model than those little lengths of brass tubing that many people use for rigging and that doesn’t always visually work on aicraft of this period in my view.
The overal silver colour was Alclad’s semi-matt aluminium. The green I used was a mixture I made in order to simulate the ‘NIVO’ colour used at this time, but now, in retrospect, I think I got this wrong because what I made was a green that’s too rich and dark in colour, and also too warm too; it should have been lighter, greyer and cooler in colour to be correct. No one is perfect.
The quality of the decals supplied with the kit are superb; they worked perfectly without any problems. Overall, I am very pleased with this model. This kit is also extremely good value considering the hand-made nature of the individual components. Although this model ended up pushing my skill to the limit it was, nevertheless, a highly satisfying build, but I have to warn inexperienced modellers to find an easier resin kit if you haven’t tried one before because this kit is a challenge, but if you’re up to it the reward is really worth the effort.
Model and Text Copyright ©
2016 by Leo Stevenson
Page Created 3 October, 2016
Last Updated
3 October, 2016
Back to
HyperScale Main Page

|
 Home
| What's New |
Features |
Gallery |
Reviews |
Reference |
Forum |
Search
Home
| What's New |
Features |
Gallery |
Reviews |
Reference |
Forum |
Search