|
Fairey Barracuda Mk.II
“Home Fleet”
Special Hobby, 1/72 scale
S u m m a r y : |
Catalogue Number: |
Special Hobby Kit No. SH72306 – Fairey Barracuda Mk.II “Home Fleet” |
Scale: |
1/72 |
Contents & Media |
133 grey and 14 clear styrene parts and two decal options. |
Price: |
Available on-line from these stockists:
Click here for currency conversion |
Review Type: |
First Look. |
Advantages: |
Accurate, very well detailed, crisp moulding, great value. |
Disadvantages: |
Main wheels seem to be undersized. |
Conclusion: |
This is a really excellent kit that is a worthy successor to the previous MPM/Special Hobby Barracuda kit, and is the best in 1/72 scale by far.
The only real weakness I can see is the seemingly undersize main wheels.
This is a terrific kit of a significant Fleet Air Arm type, which also saw service with the navies of France and The Netherlands. I think it is great value and highly recommend it. |
Reviewed by Mark Davies

Special Hobby’s Mirage F.1B/BE is available online from Squadron.com
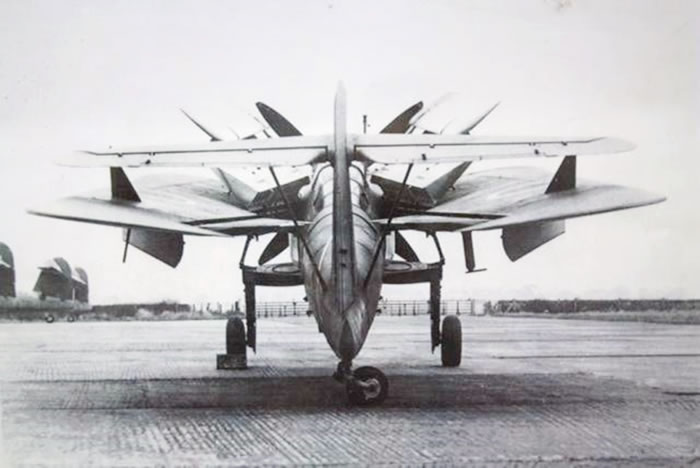
The Fairey Barracuda was a British carrier-borne torpedo and dive bomber used during the Second World War. It was introduced as a replacement for the Fairey Swordfish and Fairey Albacore biplanes. It is notable for its role in attacking the German battleship Tirpitz, and known for its ungainly appearance which only its mother could love!
The Barracuda was originally intended to use the Rolls-Royce X-block, sleeve valve engine, but production of this power-plant was abandoned, which delayed the prototype's trials. The prototypes eventually flew with the lower-powered 12-cylinder V-type Rolls-Royce Merlin 30 engine (1,260 hp) and a three-bladed de Havilland propeller.
urther experience with the prototypes and the first production machines (Barracuda Mk.I) revealed the aircraft to be underpowered as a result of the weight of extra equipment that had been added since the initial design. Only 30 Mk.Is were built (including five by Westland Aircraft), and used only for trials and conversion training. Replacing the Merlin 30 with the more powerful Merlin 32 (1,640 hp) and a four-bladed propeller resulted in the definitive Barracuda Mk.II variant of which 1,688 were manufactured; by Fairey (at Stockport and Ringway) (675), Blackburn Aircraft (700), Boulton Paul (300), and Westland (13). The Mk.II carried metric wavelength ASV II (Air to Surface Vessel) radar, with the Yagi-Uda antennae carried above the wings.
The Barracuda Mk.III was the Mk.II optimised for anti-submarine work, with the metric wavelength ASV set replaced by a centimetric variant, the scanner for which was housed in a blister under the rear fuselage. 852 Mk.IIIs were eventually produced (406 by Fairey, 392 by Boulton Paul). A total of 2,607 of all marks of Barracuda were built.
The Barracuda Mk.IV never left the drawing board; the next and final variant was the Barracuda Mk.V, in which the Merlin power plant was replaced with the Rolls-Royce Griffon. The increased power and torque of the Griffon required various aerodynamic changes; the vertical stabiliser was enlarged and the wing span was increased with the tips clipped. The Mk.V, converted from a Mk.II, did not take to the air until 16 November 1944, and Fairey built only 37 before the war in Europe was over.
Source: Wikipedia
Previous 1/72 Scale Barracuda kits
The Barracuda has not been widely represented in “The One True Scale”, but since the mid-1960’s there have at least been kits available that were all quite good for their time; these being a:
-
Mk.II by Frog in 1964 (re-boxed by Air Lines, Ark Models, Donetsk Toys Factory, Eastern Express, Hasegawa, Modellhobby, Novo, UPC, ZTS Plastyk, and no doubt others). A really quite reasonable kit for its time, and although lacking in some detail, it can still be made into a nice replica with a bit of extra work.
-
Mk.V by Magna Models around 1996 as a resin kit. A SAM build review from March 1996 was uncritical of the kit, but I have yet to see a really decent kit by Magna. So whilst this kit probably has its advocates, I would steer clear of it based on what I have seen of the brand.
-
MK.II by MPM in 1999, and subsequently released under Special Hobby branding with a radome to make a Mk.III. This limited run kit was a welcome advance on the old Frog kit, with finely engraved panel lines and resin and PE detail parts for those items that exceeded the finesse possible with the epoxy tooling used. SAMI build reviews from April 2000 and December 2004 both reported a trouble-free build after allowance for typical limited run kit cleanup etc. The kit will benefit from replacement Barracudacast wheels (reviewed by me here on HyperScale in January 2014).
-
Mk.V by Planet Models in 2006, this resin kit used the clear parts from the MPM/Special Hobby kit (being part of the same brand stable). The kit is good quality for its time and typical of Planet, unspectacular but worthy enough, although it lack any weapons. As with the earlier MPM/Special Hobby kits, I own a copy of this kit, so have seen it firsthand.
Now we have a new tooling from Special Hobby, initially released as a Mk.II, but there are bound to be other releases in due course. Let us see how much of an advance this new kit is on their previous tooling...
Contents
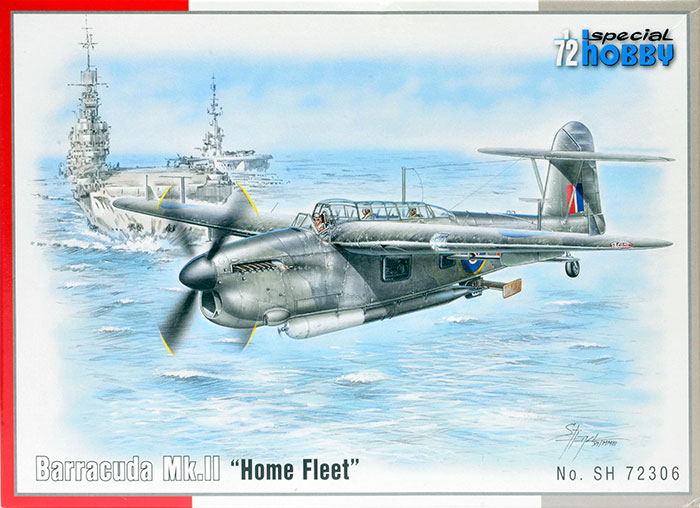
The kit comes packed in a top-opening box with attractive art-work and no wasted volume. The three main sprues are in a re-sealable polythene bag, with the clear sprue and decals further enclosed in their own bags.
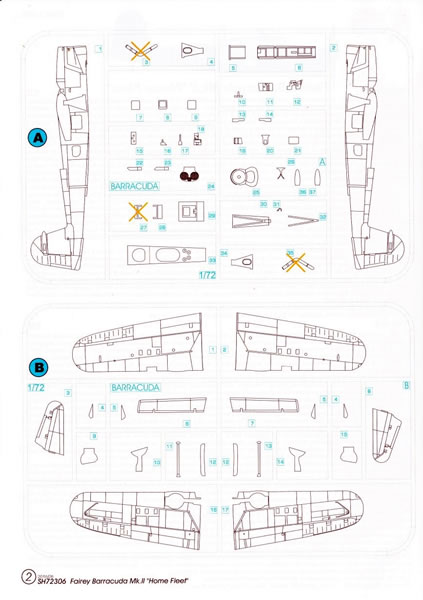
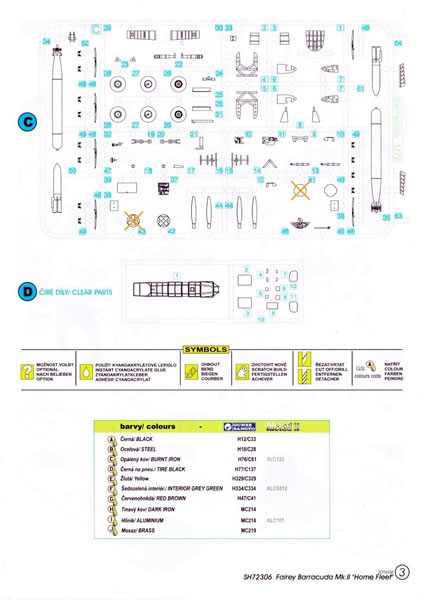
The instructions are an A5-sized stapled booklet printed in colour on gloss paper with a brief aircraft history in Czech and English. The instructions include a parts map that identifies a few surplus parts and use diagrammatic assembly stages. The instructions are nicely produced and generally look clear enough to follow easily.
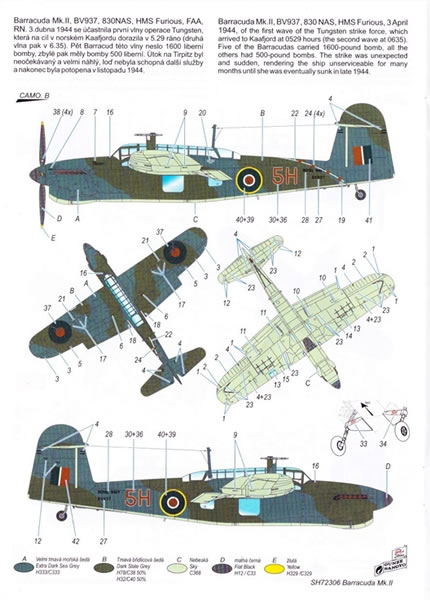
Detail colour call-outs are indicated by letters keyed to a table of colours with Gunze Aqueous, Mr. Color, and some Alclad II paint-codes. Four-view colours and markings diagrams are also provided within the instructions. These are nicely done and printed in colour, with generic colour names plus Gunze codes.
Special Hobby was initially associated with limited run kits using epoxy tooling; however, recent Special Hobby releases indicate that metal-coated epoxy or all-metal tooling is now being used. I have read that this kit is from all-metal moulds, and it certainly appears to be given the finesse of the parts.
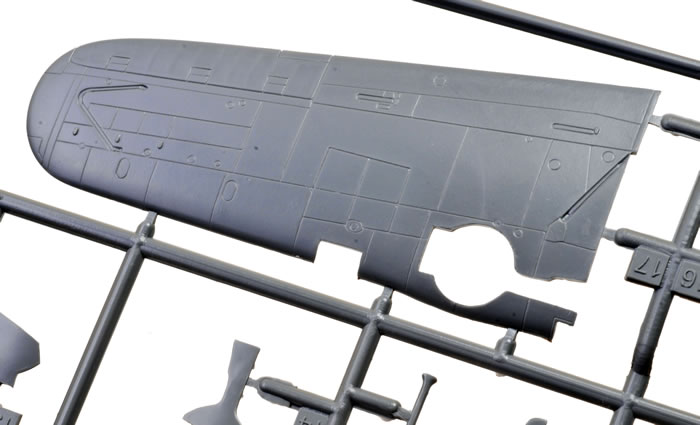
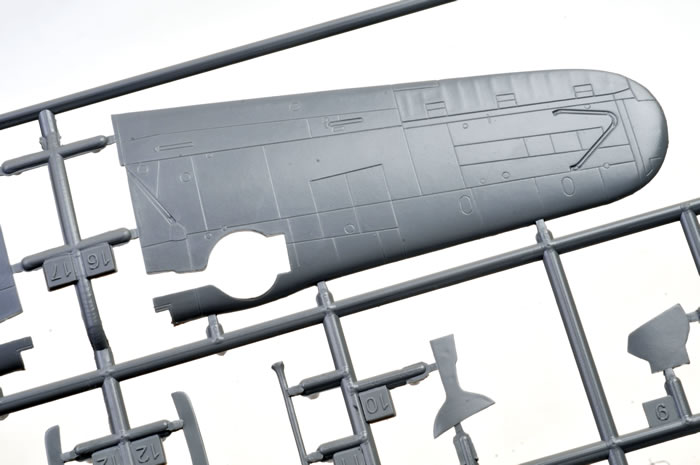
The old kit was a good one for its type, but this new tooling is a distinct improvement, despite any initial similarities. The difference is not so much in the surface detail as the refinement of the parts, which are considerably crisper, virtually flash free, and with shallower angled edges for withdrawal from the mould.
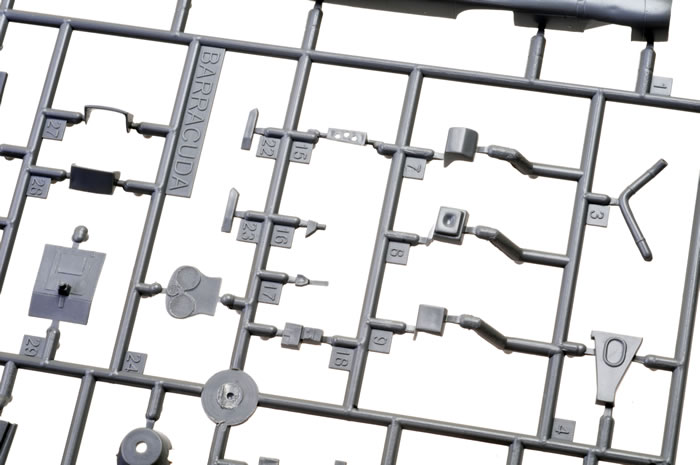
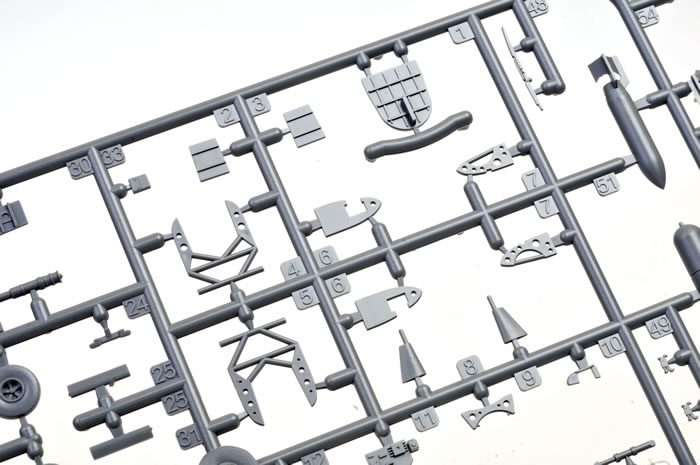
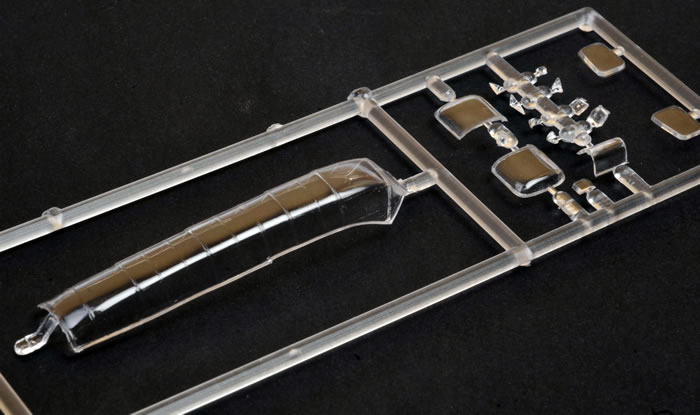
The sprue gates are fine enough, and the mouldings are very crisp and clean. The clear sprues are likewise crisp, with an acceptably thin canopy.
Some very finely moulded parts are evident, and unlike the 1999 tooling, no use is made of PE or resin for these (although later I will mention a couple of instances of where PE would have been nice to have). The overall impression upon seeing the contents is very positive indeed.
The Kit
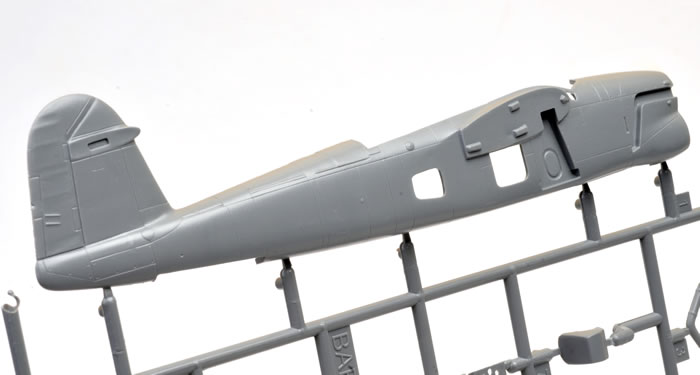
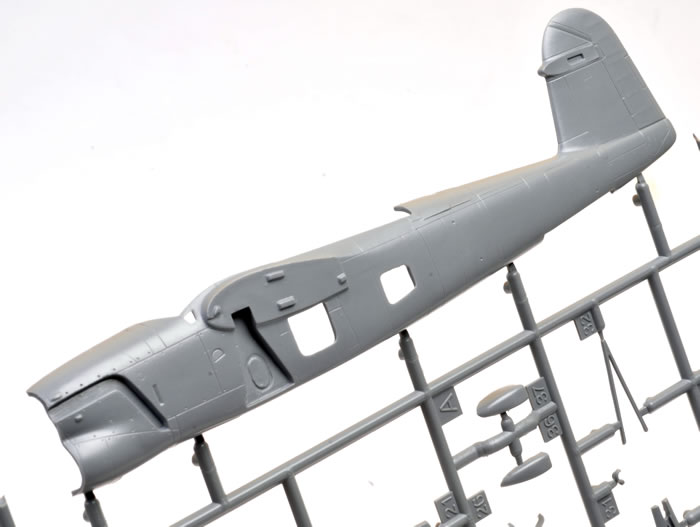
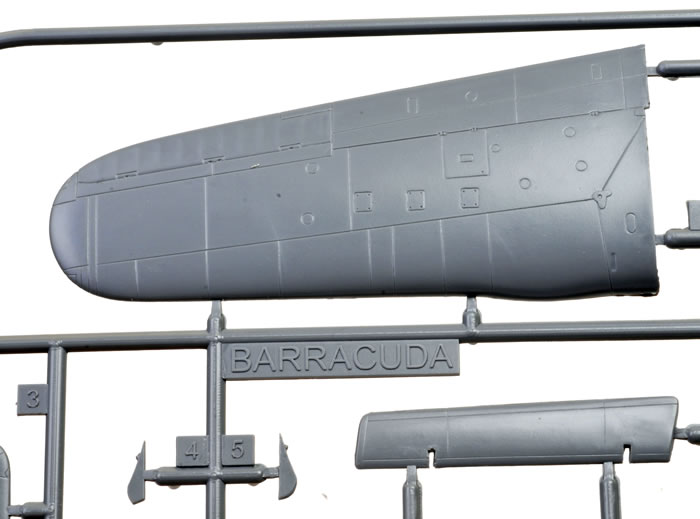
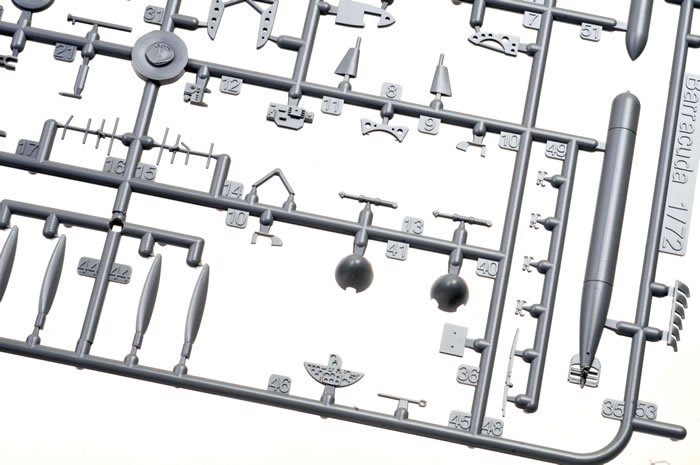
The airframe surface detail is very nicely done with the delicate recessed panel lines and convincing fabric covered control surfaces. Whilst the detail is more than acceptable, I could not but help feeling that the panel lines were just a smidgeon wider than some other Special Hobby and MPM releases; but certainly not enough to be of any concern. Small detail parts are all crisply moulded and refined as well, although to mould 1/72 ‘Yagi’ antennas is pushing beyond technological limits, and this is an instance where PE parts would have been preferable . Overall, this seems a very well engineered kit.
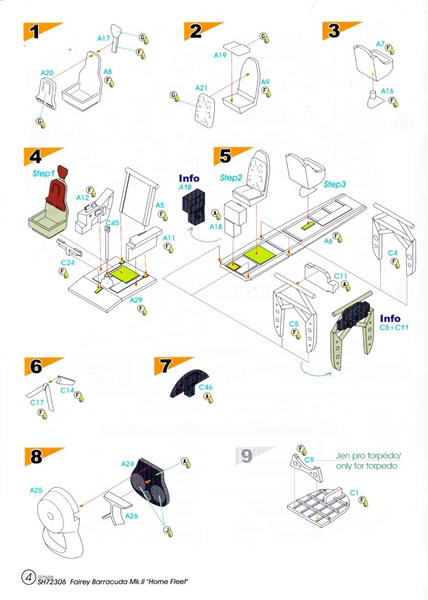
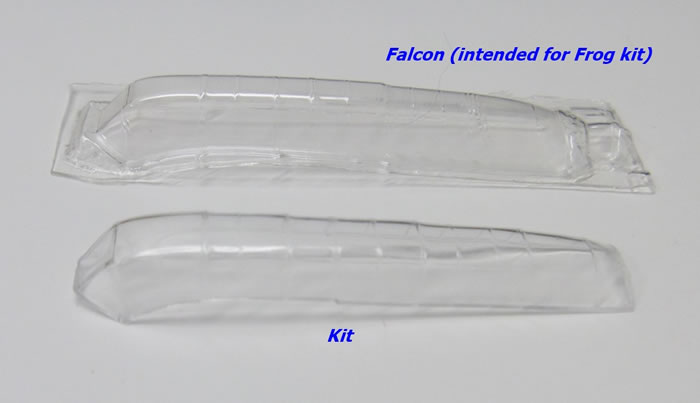
Cockpit detail is very good for the scale, being far more than adequate for a closed canopy model, although I think most will wish to at least add a seat harnesses (again PE would be nice here). The scans of the instruction in the gallery image section of this article give a good idea of the cockpit detail provided. Sadly, I suspect some of this very good detail will be unseen despite the crisp and clear canopy, as there is so much framing, whilst the observer’s large windows are tucked away under the wing-roots. I think that Falcon’s vac-canopy intended for the Frog kit might be adaptable to this kit if an open canopy model is desired ( I compared them and I am sure it is possible without too much trouble).
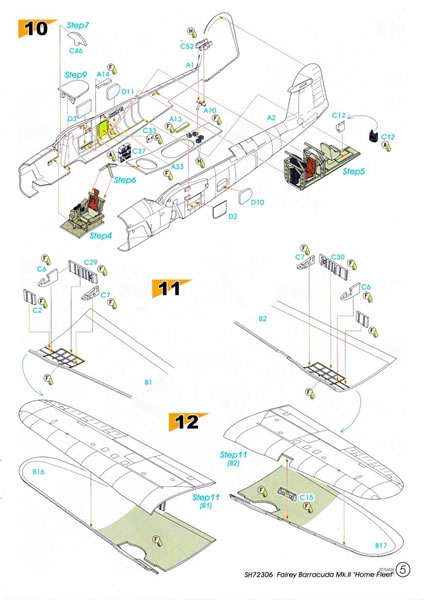
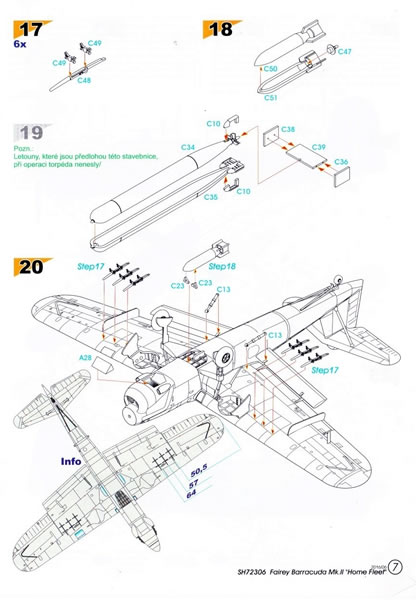
It is apparent that there is a fair amount by way of sub-assemblies and detail to fit between the fuselage halves; not just cockpits, but also the exposed structure where the torpedo/centre-bomb shackle fits, the instrument panel, top decking that runs under the canopy, and arrestor hook A-frame panel. Care with alignment of these and test-fitting is a must. The telegraphist air gunner’s side windows need to be fitted before the fuselage halves are joined or cockpits installed, but the bulged observer’s side windows can be fitted later, and some may wish to leave this until painting and decaling is completed.
The radiator mouth and front of the engine cowling is a separate part, into which a flat piece with the faces of the radiator/oil-cooler matrixes fits, along with their associated airflow splitter. There is also a separate radiator vent flap to fit to the fuselage underside, with another style on the sprues that is a surplus part that may well be associated with the Mk.I.
Conventional exhausts, similar to Lancaster/York daytime exhausts, were fitted to later Mk.II’s. These aircraft had blanking plates installed covering the lower portion of the dog’s leg trough in the engine cowl, which was a legacy of the early exhaust system. The blanking plates are provided as separate parts, along with the exhaust stacks, as the kit has the full dog’s leg troughs moulded in either side of the engine cowling, and their associated exhausts pipes are supplied unused parts on the sprue. This fact plus a surplus three-blade spinner spare make it clear that a Mk.I boxing is to follow, and presumably an early Mk.II is likely as well.
Whilst speculating on other boxings, a Mk.III is also easy for Special Hobby to realise, as they should still have the master for the resin radome used to change the old tool Mk.II to a Mk.III.
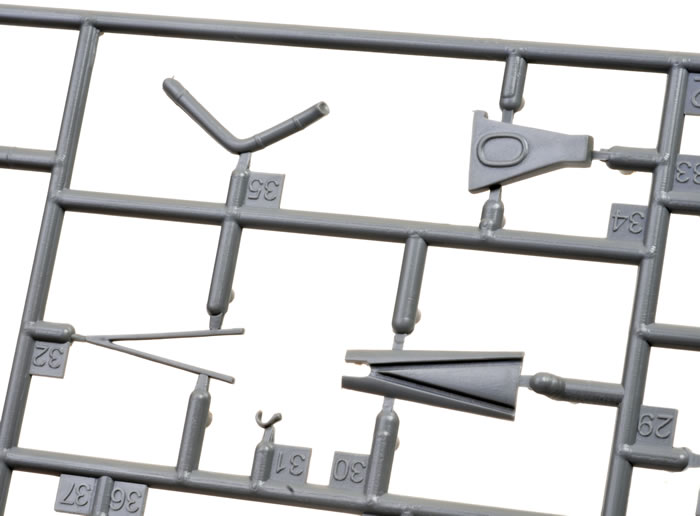
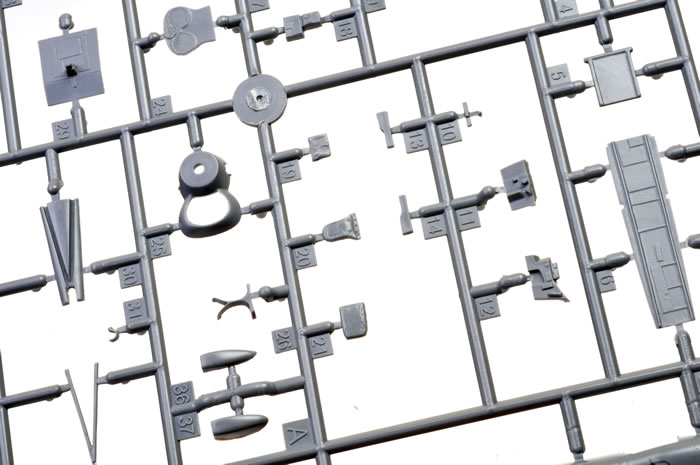
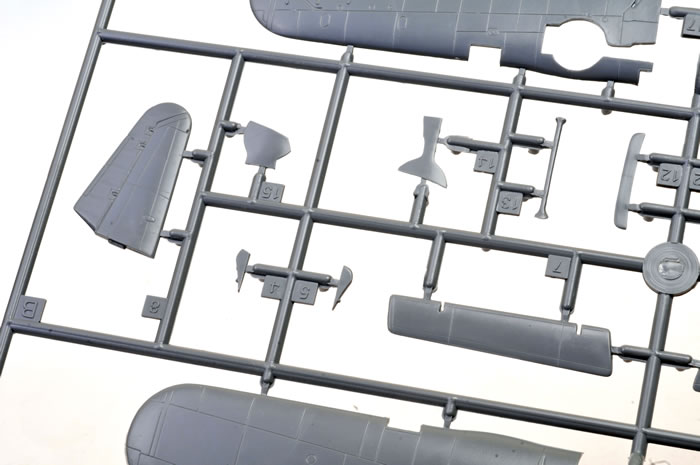
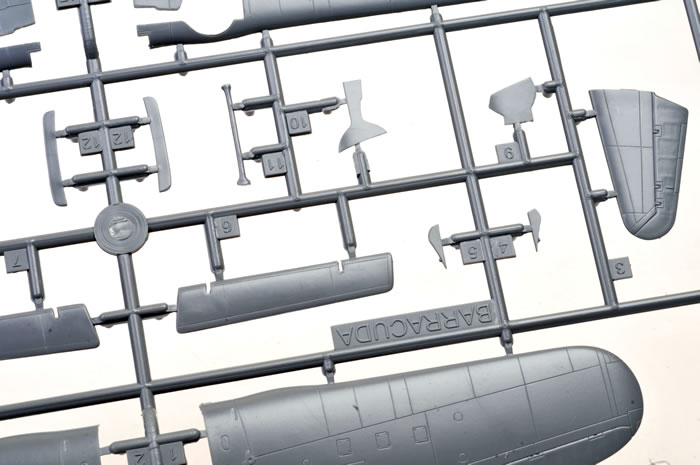
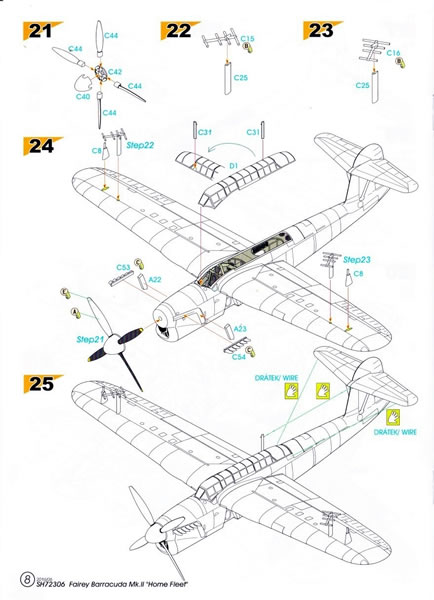
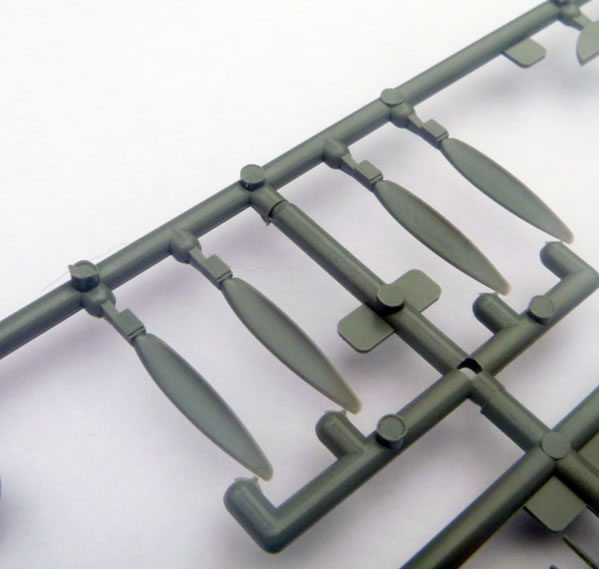
The propeller’s four blades are moulded individually, as are the spinner and its base plate. Each blade root has a flat section where it locates within the spinner to ensure equal pitch is achieved across all four. The blades have a noticeable convex trough running the length of each blade on its rear face. This may be a tooling concession for mould release, or an attempt to depict the trailing edge more finely. It is not apparent in photos of the original, but will be apparent on the model certain angles in the right light. This should be easy enough to eliminate with filler if it bothers you.
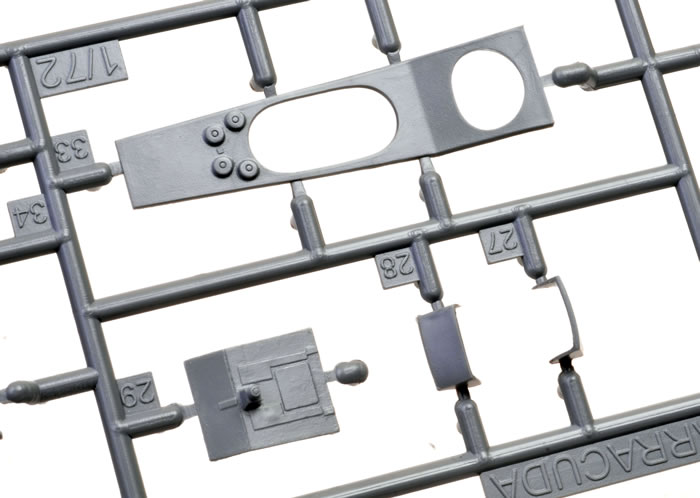
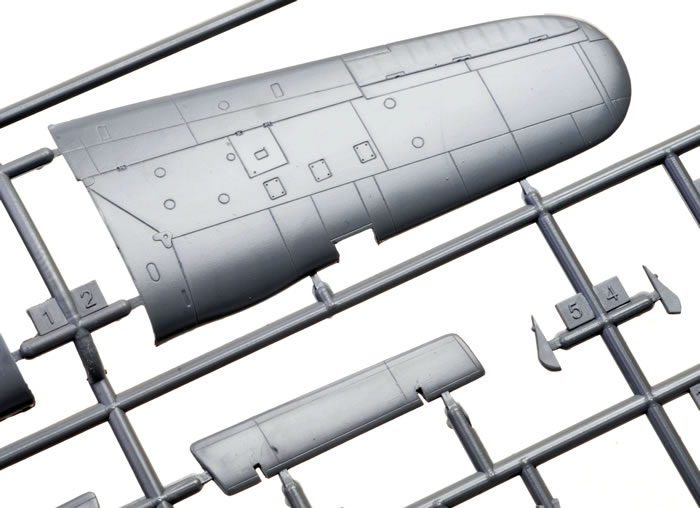
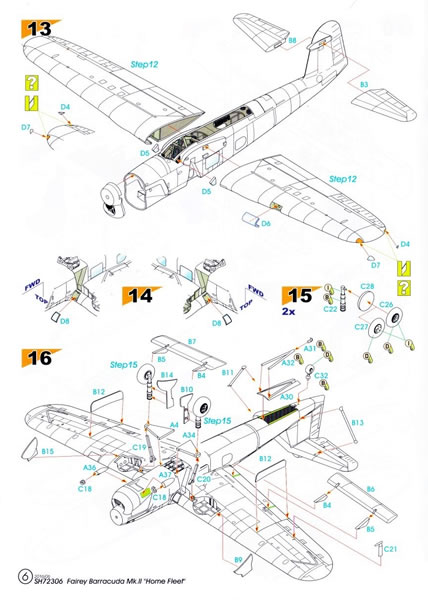
The wings are simple enough, being split in upper and lower halves. The wheel wells include some integrally moulded wing structure plus other panels to box them in and represent the exposed wing spar and ribs. There are several transparent parts to fit to the wings, the tiny pilot’s downward viewing windows in the lower leading edge of each wing root, a landing light cover in the port wing’s leading edge, and two navigation lights for each wing tip. The Barracuda had large wing fences, or leeboards, under the wings to shield the ailerons from airflow disturbed by carriage of underwing ordnance; and these plus the barn door-like Fairey-Youngman flaps must also be fitted to the wings. I think most will choose to just fit the fences and flap mounts initially, and mount the flaps after painting and decaling etc is completed.
Regarding the flaps, make sure to differentiate between the outrigger mounts as despite appearances, they differ slightly (part B4 is inboard and B5 outboard). The mounts are by necessity simplified where they join the flaps and do not quite capture the hinged connection between the flap and its mount.

Check your references for different flaps positions and the relationship between the outrigger mounts and the slots in the flaps. The points at which the outrigger fit to the wing are not immediately obvious from looking at the kit’s lower wing surfaces; however, the instructions provide a plan view and drawings that show which panel lines the fix-points align with.
The wings are a butt-fit to the fuselage, which has slightly protruding wing roots. I have always found this system to give more than adequate strength with similar kits, and have no concerns about it, despite some reviews speculating that this is a potential problem area.
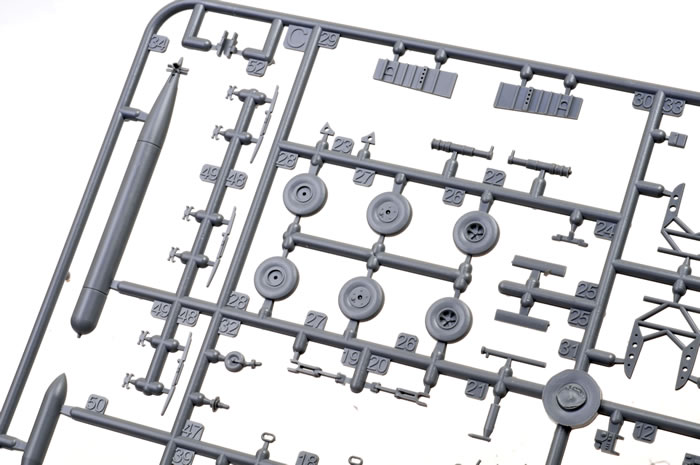
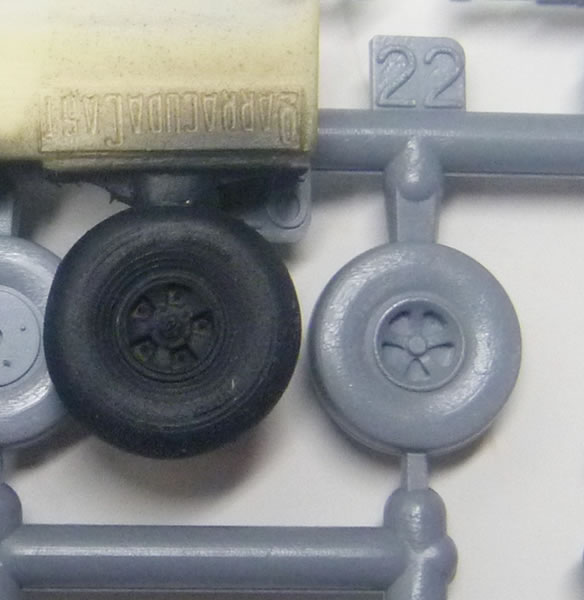
The Barracuda’s simple but sturdy undercarriage arrangement is well captured, although I wondered about the main wheel size. I had a set of Barracudacast (how appropriate!) from the review mentioned earlier. I have a lot of faith in the thoroughness Roy Sutherland of Barracuda Studios invests in his wheel research, as wheels are a particular modelling focus of his. The kit’s wheels (rims & tyres) are significantly smaller than those by Barracudacast, and unsurprisingly, somewhat less detailed. It seems from looking at photos of the real thing, where the wheel size can be related to the undercarriage door, that the kit’s wheels are indeed undersized. One thing the kit does provide however; is a choice of spoked or covered hub faces.
Six bomb-racks are provided, each consisting of three parts, that mount outboard of the wheel wells, although no ordnance for these racks is provided. The kit does supply a choice for the centre line of an AN-Mk.I 1600lb armour piercing bomb or 18” Mk.XIIB torpedo with optional air-tail. The instructions include a promotional mention of three CMK weapon sets suitable for this kit:

Not much remains to mention. There is the A-frame arrestor hook which has a separate hook part to attach to the frame (presumably for tooling reasons), the raised tailplane and its struts, a rollover frame to go behind the pilot’s seat, the prominent outer-wing locking plungers, and just inboard of these the mounting poles and antennas for the ASV Mk.II “Yagi’ radar (which as I mentioned earlier are unavoidably moulded over-scale and best replaced by PE or scratch-built items). A couple of things worth adding are the torpedo suspension cable if your model is so armed, and the dinghy release lanyard that runs from the rear dorsal fuselage dinghy compartment down and to the rear of the port fuselage side.
Assembly appears to be quite straight forward and conventional for the type. I have read only one build review of this kit so far in Scale Aviation Modeller International, January 2017. Despite incorrectly stating that the kit’s parts are from the 1999 tooling, the article does indicate that a smooth and trouble free build can be expected.
Now, how about a building the kit with folded wings? After all, how hard can it be?
Markings
Two markings options for three aircraft are provided:
- LS550 or LS556 of 829 Naval Air Squadron, aboard HMS Victorious, May 1944 ; and

- BV937 of 830 Naval Air Squadron, aboard HMS Furious, 3 April 1944 (of the first wave of Operation Tungsten against Tirpitz).
The decals include quite a lot of stencilling and appear to be very good in all respects.
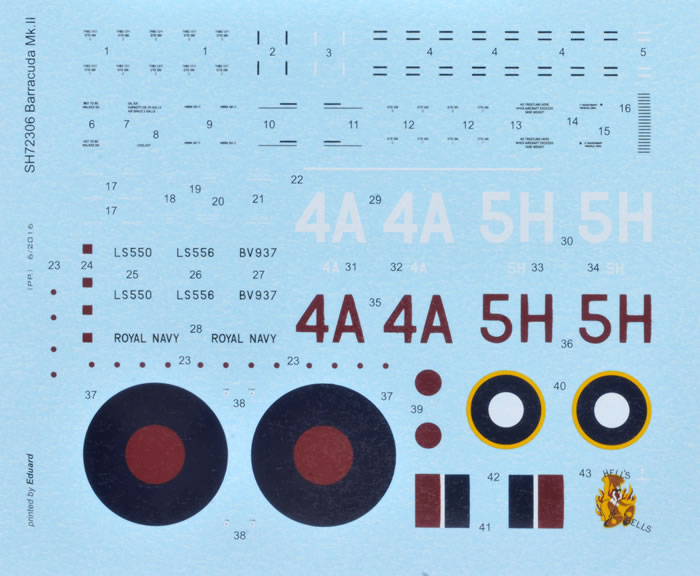
They are printed by Eduard.
This is a really excellent kit that is a worthy successor to the previous MPM/Special Hobby Barracuda kit, and is the best in 1/72 scale by far.
The only real weakness I can see is the seemingly undersize main wheels.
This is a terrific kit of a significant Fleet Air Arm type, which also saw service with the navies of France and The Netherlands. I think it is great value and highly recommend it.
Thanks to Special Hobby for the review sample.
Review Text Copyright © 2016 by Mark Davies
Page Created 30 December, 2016
Last updated
30 December, 2016
Back to HyperScale Main Page
Back to Reviews Page |
 Home
| What's New |
Features |
Gallery |
Reviews |
Reference |
Forum |
Home
| What's New |
Features |
Gallery |
Reviews |
Reference |
Forum |