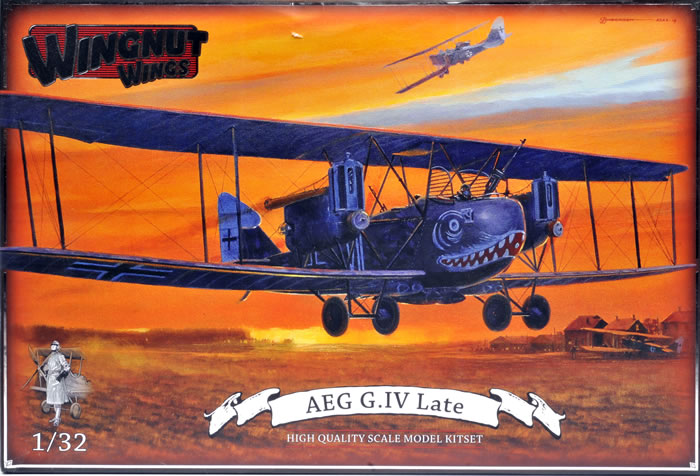
AEG G.IV Late
Wingnut Wings, 1/32 scale
| S u m m a r y |
Catalogue Number: |
Wingnut Wings Kit No. 32042: AEG G.IV Late |
Scale: |
1/32 |
Contents and Media: |
510 grey coloured plastic parts (67 unused); 5 clear plastic parts (1 unused); 5 decal sheets containing markings for 5 different aircraft; 28 page A4 instruction book with full colour painting and marking guide.ts; markings for five options on one decal sheet; instruction booklet. |
Price: |
USD$229.00 with free worldwide shipping available online from Wingnut Wing’s website. |
Review Type: |
First Look |
Advantages: |
Interesting subject; very high quality mouldings; comprehensive instructions and decals. |
Disadvantages: |
Absolutely none. |
Conclusion: |
Possibly Wingnut Wings’ best kit to date. It won't be a quick build, but when finished you’ll have a model that will draw an admiring crowd whenever displayed – and I know from my experience with other Wingnut Wings kits that the build process will be very enjoyable. Very highly recommended to anyone with a few kits under their belt that wants a stunning centrepiece for their collection. |
Reviewed by Brad Fallen

HyperScale is proudly supported by Squadron
The German electrical and manufacturing company Allgemeine Elektricitäts-Gesellschaft (AEG) existed for more than a century but only built aircraft between 1912 and 1918. Those it created during this brief window included some of Germany’s most effective Great War bombers.
The best AEG machine was the G.IV, which was used from mid-1917 to the end of the war and saw extensive service on the Western and Italian fronts. Unacceptable losses during early daylight operations led to G.IVs being used increasingly at night. This traded one set of risks for another, with many aircraft lost to the challenges of night flying.
G.IV camouflage evolved in step with these changes. At first the light finish of early production machines was toned down in the field with darker paint and varnish to make them less conspicuous at night. Soon the issue was being addressed at the factory, with dark, purpose-designed four and five colour lozenge fabric used on G.IVs from the fourth production block onwards.
One of the G.IV’s main shortcomings was its limited range, which saw it used mainly as a tactical rather than strategic bomber. AEG’s replacement, the G.V, addressed this problem.
Following the Armistice, a number of G.IVs fell into Allied hands but only one has survived: 574/18 ‘White IV’, which is restored and on display at the Canada Aviation and Space Museum in Ottawa. It is presumably this machine that Wingnut Wings studied when mastering its two 1/32 AEG G.IV kits – Early and Late – that were released in February this year. ‘White IV’ has been beautifully restored, although the engines are not the original 260hp Daimler-Mercedes D.IVas but replacement 180hp Daimler-Mercedes D.IIIas – a discrepancy that Wingnut Wings thankfully took into account!
Wingnut Wings releases fall into two categories: surprise announcements such as the recent Albatros B.II, and releases advertised in advance like the much-anticipated Sopwith Camel. The AEG kits fall into the second category, having been announced at the Shizuoka Hobby Show in May 2013. When they were released, Wingnuts’ price of US $229 – $90 more than I paid for the larger Gotha G.IV kit in early 2011 – caused a degree of online consternation.
At this point I should declare my hand: I am a Wingnut Wings kit junkie. Wingnuts has converted me from a modeller of 1/48 World War II aircraft to a modeller of 1/32 World War I aircraft. So far I’ve completed their Pfalz D.XII and Fe.2b Late and am well on my way with the Roland C.II. All have been wonderful to build, and I won’t be stopping at three.
From this viewpoint, I was delighted when Brett asked me if I wanted to review the AEG G.IV Late kit. I hadn’t succumbed to the G.IV kits when they were released but have since been drawn to them by several builds, particularly Spencer Pollard’s magnificent early AEG that featured in issues 120 and 121 of Model Airplane International.
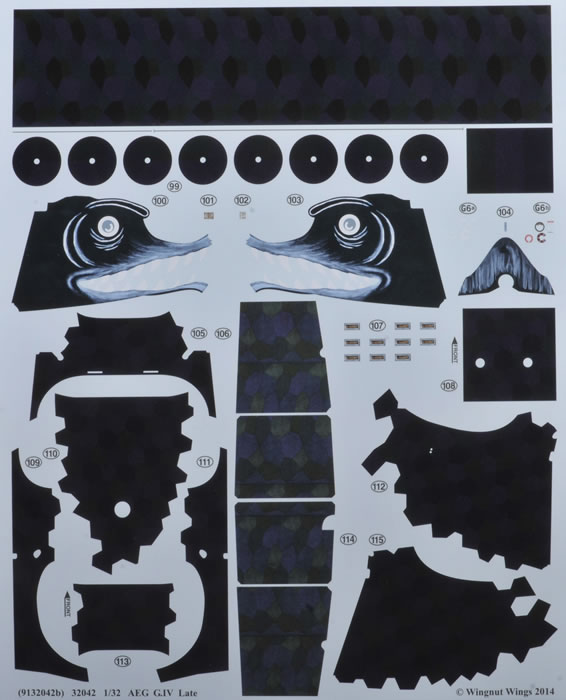
As always with Wingnut Wings kits, Steve Anderson’s box art makes an immediate impression. In this case Steve has painted two bombed-up AEG G.IVs taking off from their base at sunset, including marking option C, ‘White VII’, with its dramatic shark-mouth markings.
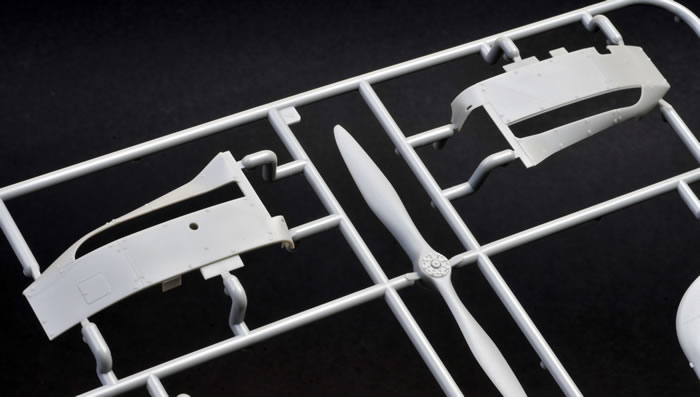
The box is large – 39 x 27 x 11cm (15 ½ x 10 ½ x 4 ¼ in) – and promisingly heavy. Lifting the lid it’s immediately clear why – almost all space is taken up by 14 sprues of grey plastic parts. A number of sprues are provided in duplicate, including those with parts for the engines, undercarriage and bombs. One even comes in triplicate – the small guns sprue ‘G’ – with the added bonus that most of these parts aren’t needed and so can go straight to the spares box.
With such a cornucopia of plastic in front of me I couldn’t resist immediately cutting some of the larger parts off their sprues to do some test fitting (to the extent this is possible with a biplane). A word of caution here: the delicacy of Wingnut Wings mouldings means a razor saw is preferable to side cutters when removing parts; any excess plastic can then be cleaned up with a scalpel, sandpaper and polishing pads.
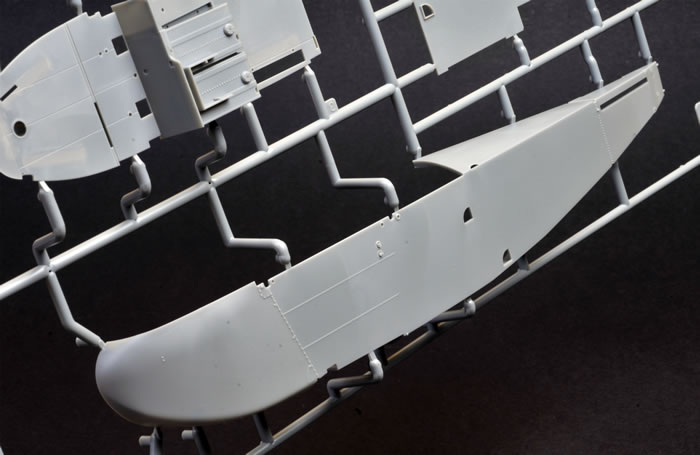
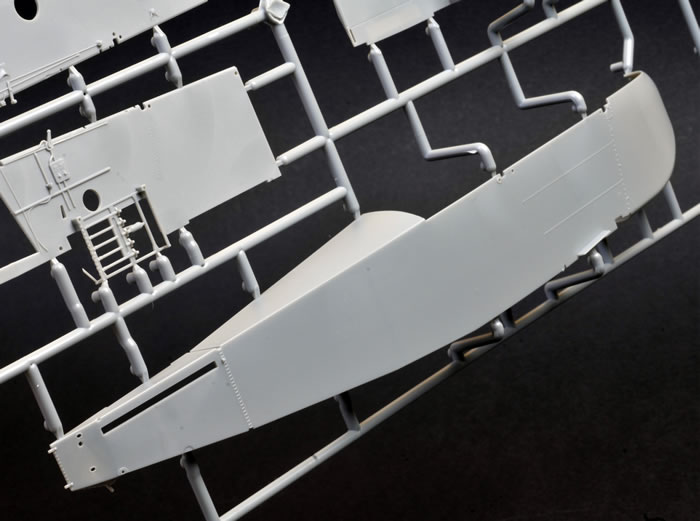
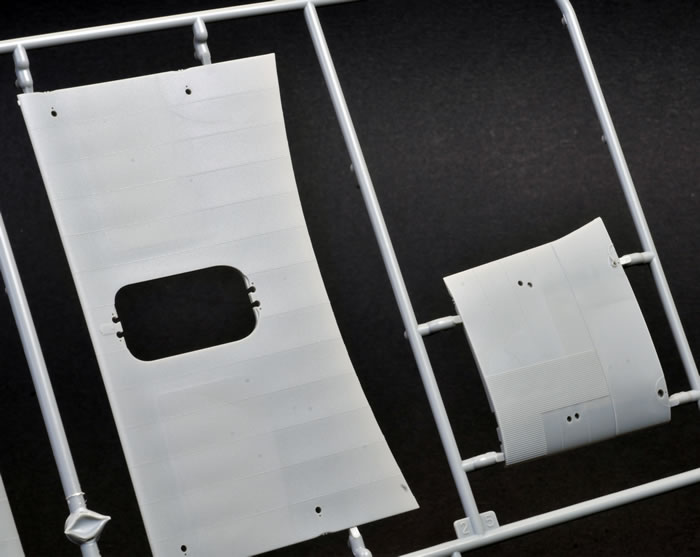
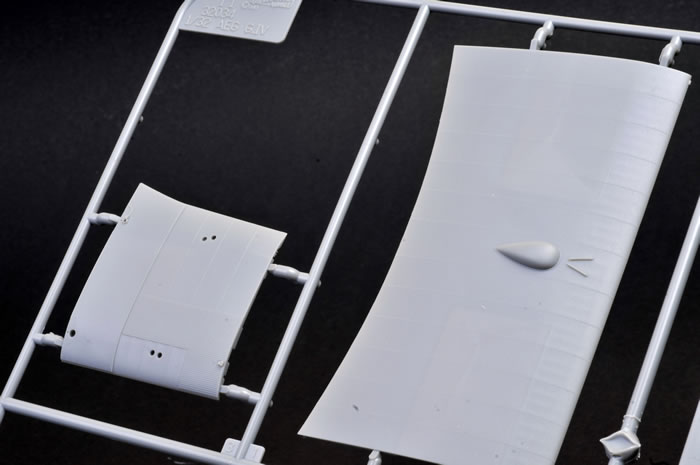
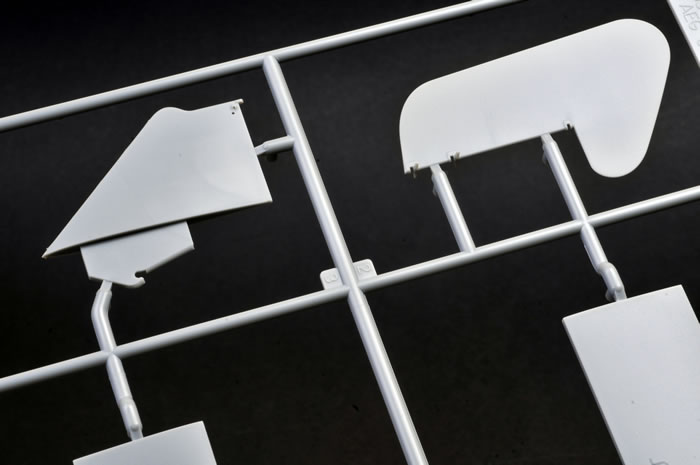
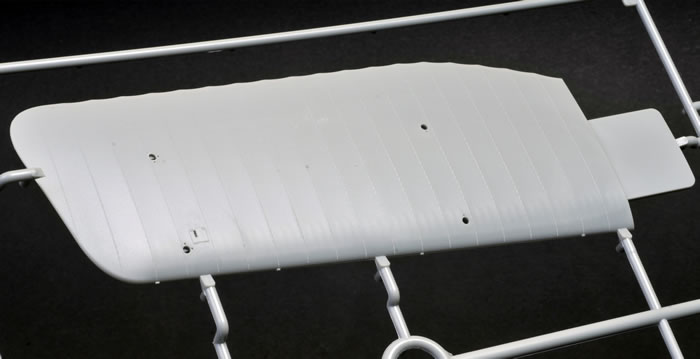
The large wing and fuselage sections combine sound engineering with consistent and fine surface detail. The fuselage halves flex when taped together for test fitting but will become much more rigid when the cockpit tub is inserted. Fit between the halves is perfect, as it is when the tabs of the two outer wing sections are slid into the taped-together central wing halves. All of the control surfaces are separately moulded and poseable, giving the potential to add some dynamism to the finished model.
It was at this stage it became clear how big the finished model will be: at 57cm (22 inches) its wingspan will command attention on the competition table but also make the model tricky to handle during the final stages of construction.
As good as these large parts are, the rest of the kit is just as impressive – here are my thoughts.
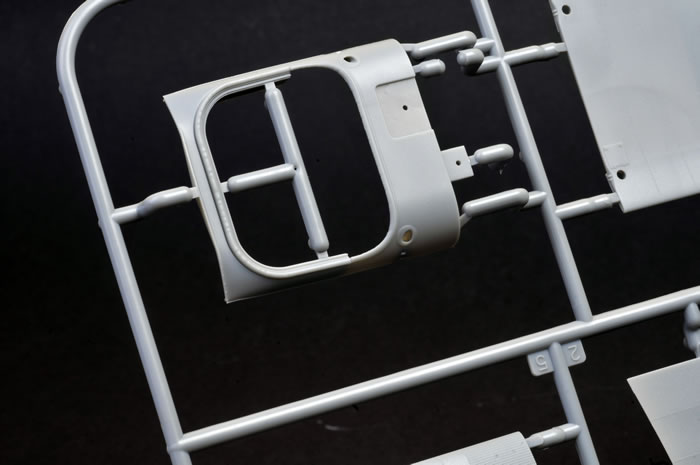
Cockpit
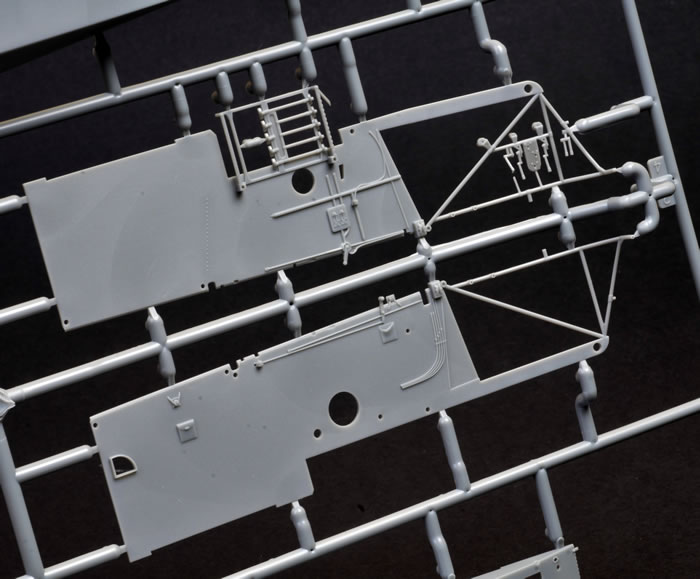
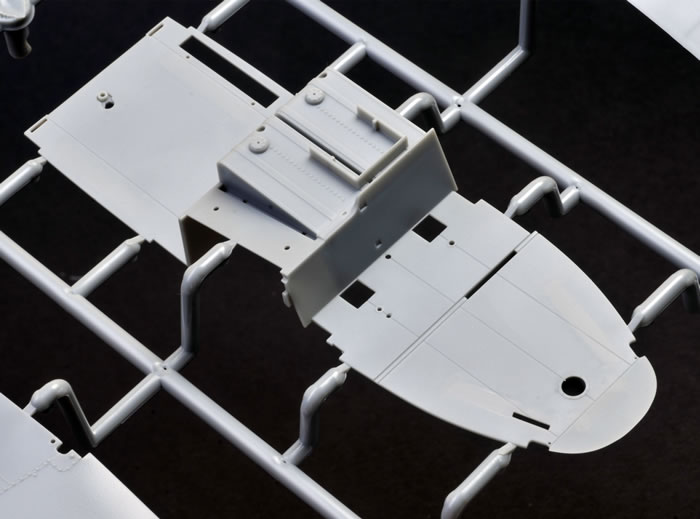
The cockpit is always a highlight of a Wingnut Wings kit, and the G.IV’s three separate crew stations – for the commander, pilot and gunner – are all beautifully rendered. Key parts here are the instrument panel, floor and two sidewalls, the latter with details that push the limit of what can be achieved through injection-moulded plastic. The delicately moulded leather padding on the seat cushions and cockpit sill will reward careful painting.
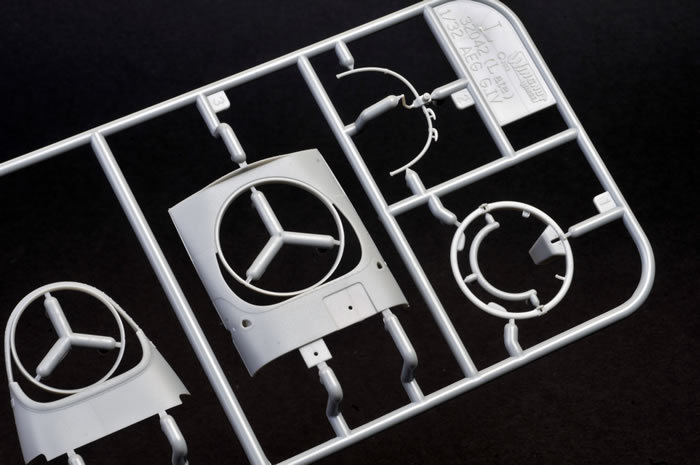
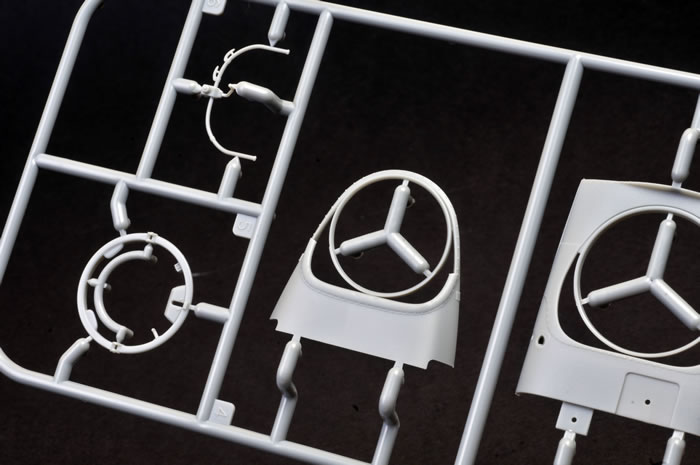
Engines
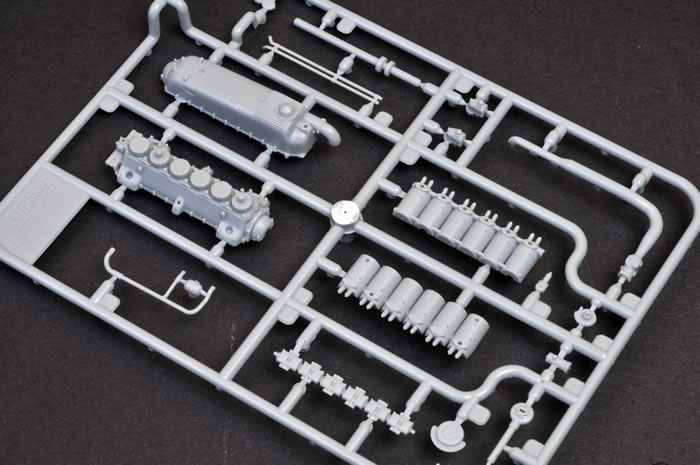
The Daimler-Mercedes D.IVa engines and their mountings are works of art that will look excellent built straight from the box. However in my experience it’s both easy and rewarding to add further details to Wingnut engines, both scratch-built and from aftermarket specialists like Taurus Models, and it’s definitely what I’ll be doing here. For variety, I’ll probably build one engine cowled and the other uncowled to show off all of the lovely details. These include the intricate and delicate mounting frames, which look like they will be a challenge to remove from their sprues without damage. Optional parts are included for several different nacelle configurations. Build reviews suggest care is required to ensure correct alignment of engines and airframe, so make sure you don’t rush this part of construction.
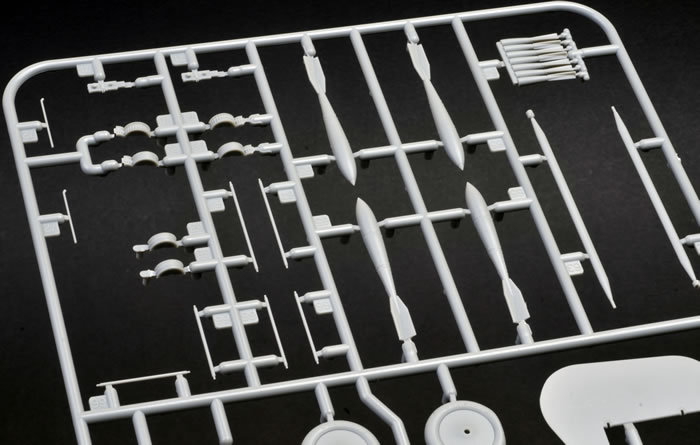
Propellers
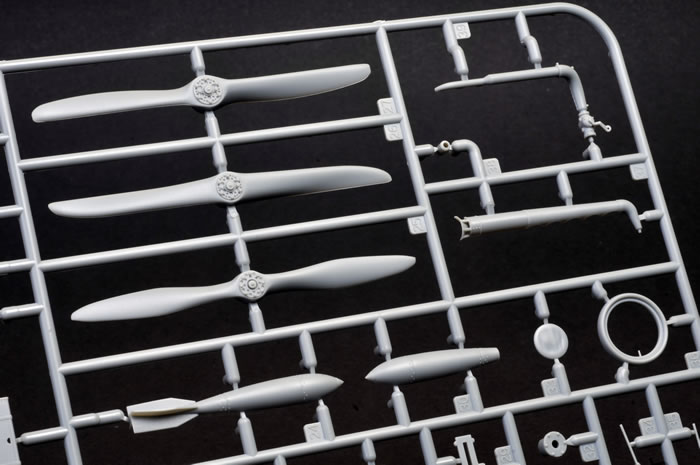
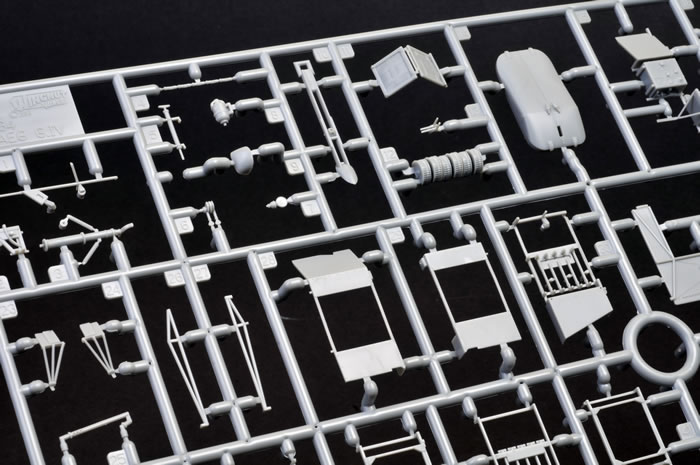
Three different propeller types were fitted to the kit subjects (Behrend, Wolff and Anker) – four if you include the counter-clockwise Wolff propeller provided for the starboard engine of marking option C. The props are one of the few parts of the model that require a wood grain finish; if you haven’t tried this before it isn’t hard to achieve but you do need to take your time.
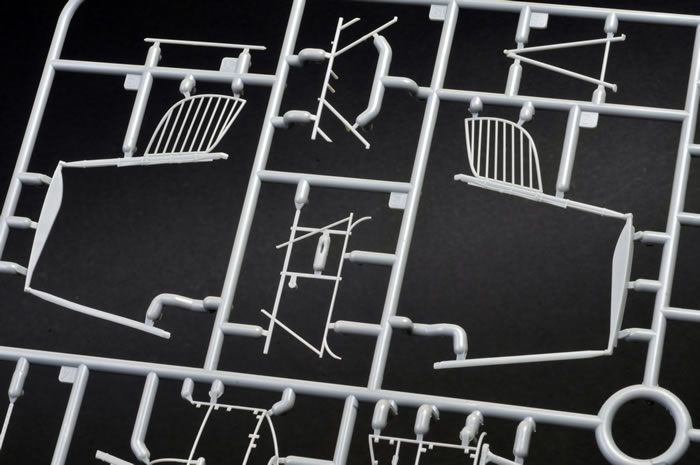
Bombs
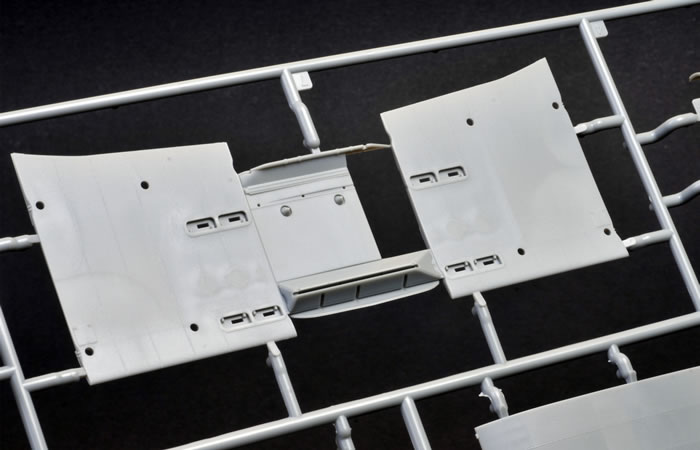
12.5kg, 50kg and 100kg PuW bombs are included. The 50 and 100kg bombs are supplied in two halves while the 12.5kg bombs are moulded both singly (for exterior mounting) and in racks of six (for internal stowage). There are several different combinations of external bomb load possible, some of which require minor modification of kit parts so study the instructions carefully here.
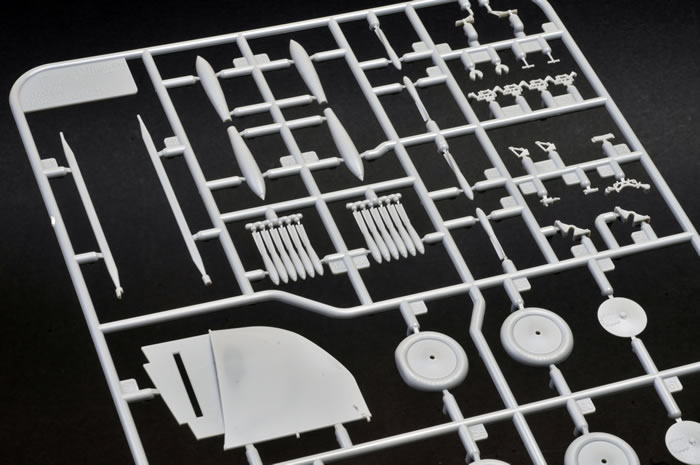
Undercarriage
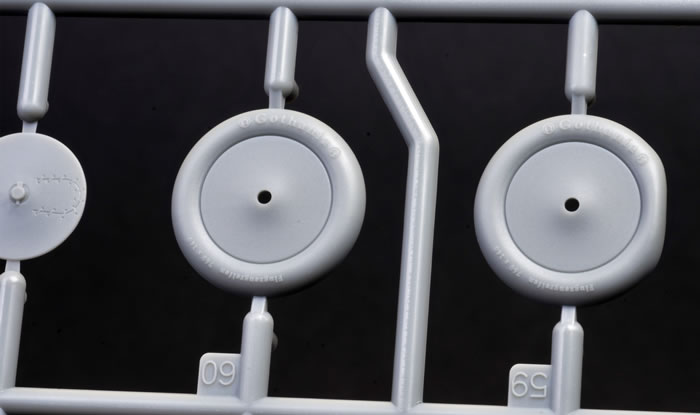
The G.IV’s spindly undercarriage has been well captured but (again) will require careful removal from the sprues, and gentle handling once assembled and installed, to avoid damage. Both of my completed Wingnut Wings models sway considerably on their undercarriage. I expect the AEG will be no different and I will probably use a structural rigging material, such as fishing line, rather than elastic thread to represent the cross bracing in each undercarriage unit. Both flattened and non-flattened tyres are included, with the former essential if you plan to finish your model ‘bombed up’ for a mission.
Clear Sprue
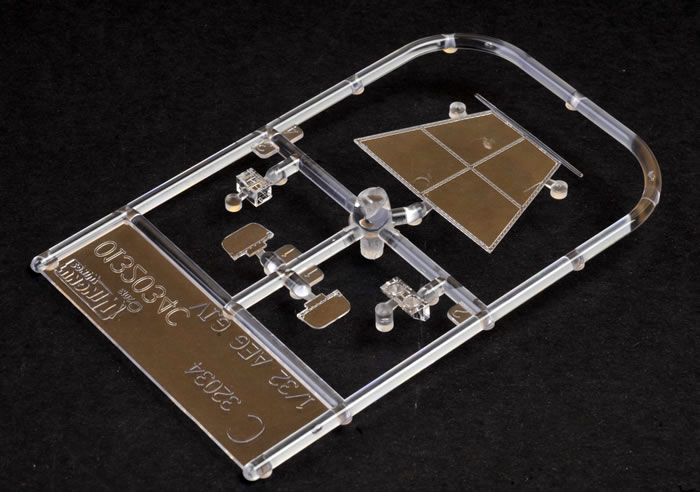
This has a comparatively high number of parts – five – for a Wingnuts kit, with the largest being the gunner’s trapdoor that fits beneath the central fuselage. The trapdoor in the review sample was slightly cracked, but this likely occurred during transportation and handling.
Photo-Etched Fret
In my experience Wingnut Wings photo-etch requires annealing but once this is done parts are easily reshaped and, in the case of seat belts, convincingly draped (in fact more so than the increasingly popular microfibre belts). Other items on the PE fret include foot steps, control column pulleys and machine gun cooling jackets; the latter aren't required for the LMG 14/17 Parabellums carried by the kit subjects so go straight to the spares bin.
Rigging
Rigging material isn’t included in the kit, but once sourced will be fairly straightforward to incorporate given the size of the subject – you’ll have plenty of room to install it (with a couple of exceptions around the engines). The upper-to-lower wing engineering of Wingnut Wing kits is robust enough to not require the additional strength of structural rigging, which is great if (like me) you prefer to use elastic rather than monofilament thread. My favourite method is to anchor as many rigging lines as possible to the upper wing or wings, using Bob's Buckles tubing and loops inserted into the attachment holes thoughtfully provided by Wingnut Wings. When the upper wings are attached to the model, the lines can be easily anchored into the corresponding holes on the lower wings. This method also works with elastic thread on its own, if you don't want to use turnbuckles, but the resulting attachment points won't be as strong.
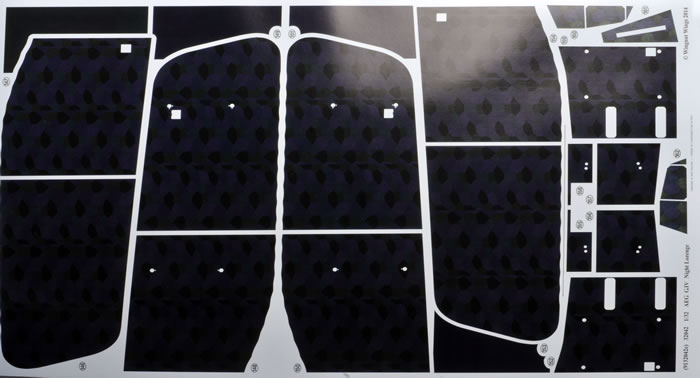
Decals
All of the kit subjects were camouflaged in the five-colour dark lozenge fabric that was applied to most AEG G.IVs "from the fourth production batch onwards", according to the instructions.
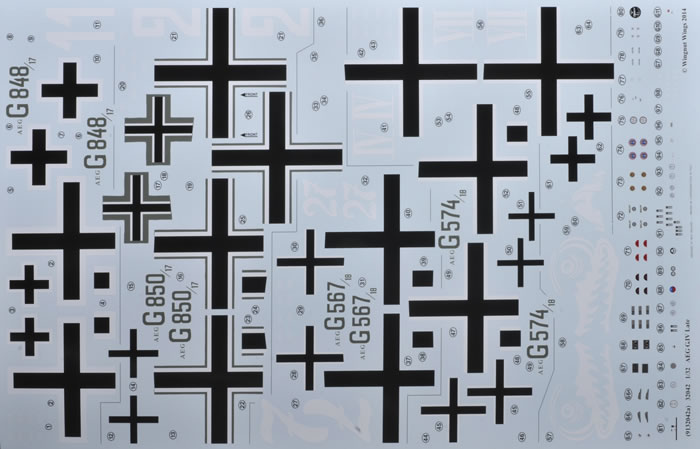
Wingnut Wings supplies this camouflage in the form of pre-cut decals – three large sheets and one smaller one – the application of which will be a major part of the build process.
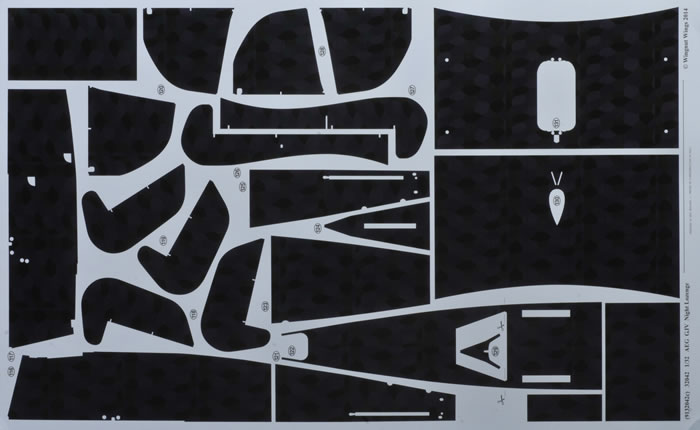

Online build logs suggest these decals fit well, and given they have been printed by Cartograf their quality is assured. However there's no escaping that there is a lot of model to decal and so you will need to plan ahead and take your time. Success will depend on applying the decals to as smooth and glossy a surface as possible and allowing them to dry at least overnight before attempting to remove air bubbles or repair mistakes. I have just had to strip the upper wing cross decals from my Roland C.II because the surface wasn’t smooth enough and they kept lifting – you have been warned!
The exact colours of German lozenge fabric remain contested and as the kit instructions note, “some will not find [Wingnut Wings’] choices to their liking”. The kit lozenge is very dark compared to, say, the night lozenge decals from aftermarket company Aviattic; I suspect this is because Wingnuts has attempted to represent the dark black/green varnish that was often applied over the lozenge fabric. At this stage I haven’t decided which option (Wingnut or Aviattic) I’ll go with for my model, but the lure of the pre-cut kit decals is strong.
Instructions
The 30-page booklet is extremely comprehensive and, as usual with Wingnuts instructions, doubles as a reference guide with numerous high-quality photographs. Many are period shots from World War I, while others are more recent photos of 574/18 in Ottawa.
The ubiquity of G.IV camouflage means that four-view drawings are not required for each marking option, with port, starboard, overhead and undersurface views shared across the five subjects. However this doesn’t mean Wingnuts has skimped on detail about each option: differences are highlighted throughout the instructions and scrap drawings are used to point out (for example) marking variations between the machines.
If you feel the need for more information than is included in the instruction booklet there is plenty available, from Windsock Datafiles and Ray Rimmell’s excellent Building the Wingnut Wings AEG G.IVto inspirational online builds. I can also highly recommend Spencer Pollard’s two-part Model Airplane International build that I mentioned earlier.
Marking Options
As previously mentioned, all of the kit subjects appear to have been camouflaged in dark five-colour lozenge, with details (to the extent these are known) as follows:
-
848/17 ‘White 1’ of Bogohl 8b, May 1918. This and the following machine appear to have been from the fourth G.IV production block, with photos suggesting the lozenge fabric had been overpainted with a dark varnish.
-
850/17 ‘White 2’ of Bogohl 8b, June 1918.
-
‘White VII’, mid-to-late 1918. This is the most spectacular of the markings on offer, and will probably be the option chosen by most modellers (myself included). The parent unit and many other details of this machine are unknown; Wingnut Wings has supplied several variations of the nose-art to cater for possible different colour interpretations.
-
567/18 ‘White 7’ of Bogohl 8b, mid-to-late 1918. Another comparatively anonymous aircraft from Bogohl 8b, ‘White 7’ is nonetheless an interesting modelling subject because of its plain black upper wing crosses and identification numbers on both the fuselage and vertical stabiliser.
-
574/18 ‘White IV’, November 1918. Wingnut Wings has depicted ‘White IV’ as it is believed to have appeared at the end of the war, which differs slightly from its current finish.
This kit has gone straight to the front of my build queue.
The AEG G.IV was an effective tactical bomber for Germany and its broad bat-like wings and squat fuselage impart plenty of character and modelling appeal, particularly in 1/32 from Wingnut Wings.
I have bought most Wingnut kits since the brand was launched in 2009, and after making some comparisons believe the AEG mouldings could be the company’s best effort yet; in this regard, I believe the retail price of $US 229 is justified. Beyond this, it’s possibly the best injection-moulded kit I have seen – a big call but the moulding and engineering is, I think, close if not equal to that of Tamiya's 1/32 scale kits.
Add to this Wingnuts’ outstanding instructions and decals, and you have a kit that when built will draw an admiring crowd whenever displayed.
It won't be a quick build, but I know from my experience with other Wingnut Wings kits that it will be enjoyable.
Very highly recommended to anyone with a few kits under their belt that wants a stunning centrepiece for their collection.
Thanks to Wingnut Wings for the sample kit.
Review Text Copyright © 2015 by Brad Fallen
Images Copyright © 2015 by Brett Green
Page Created 1 January, 2016
Last updated
3 January, 2016
Back to HyperScale Main Page

|
 Home | What's
New | Features
| Gallery |
Reviews | Reference
| Forum
| Search
Home | What's
New | Features
| Gallery |
Reviews | Reference
| Forum
| Search