Academy 1/72 scale
CF-18A Hornet
by John Chung

Academy's 1/72 F/A-18C Hornet is available online from Squadron for only $23.99!
On February 23, 1909, Canada entered the era of powered flight when the AEA Silver Dart leaped into the air in Nova Scotia.
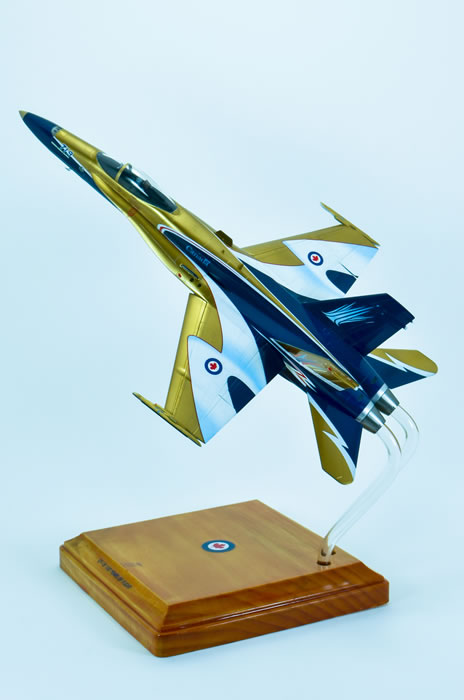
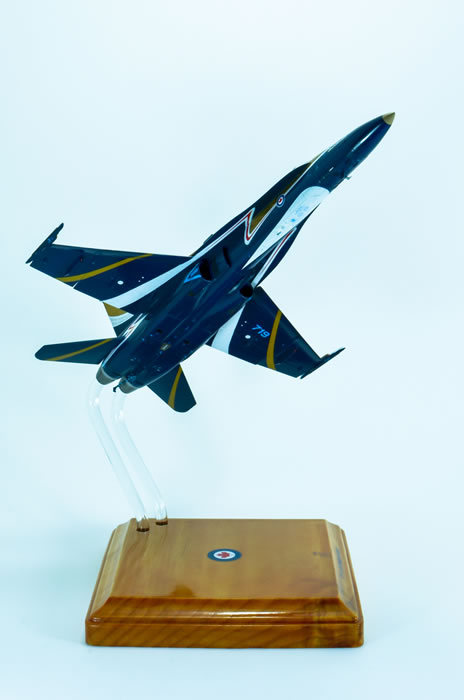
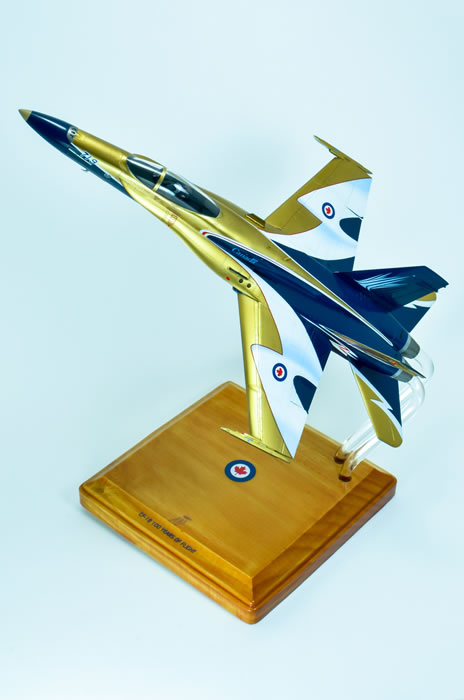
To mark its centennial, the Canadian Air Force adorned one of its CF-18s with a unique commemorate scheme for the 2009 airshow season. The CF-18A, No. 188719, was from 410 Squadron based in Coldlake, Alberta, and its pilot for the year was Capt. Tim "Donor" Woods.
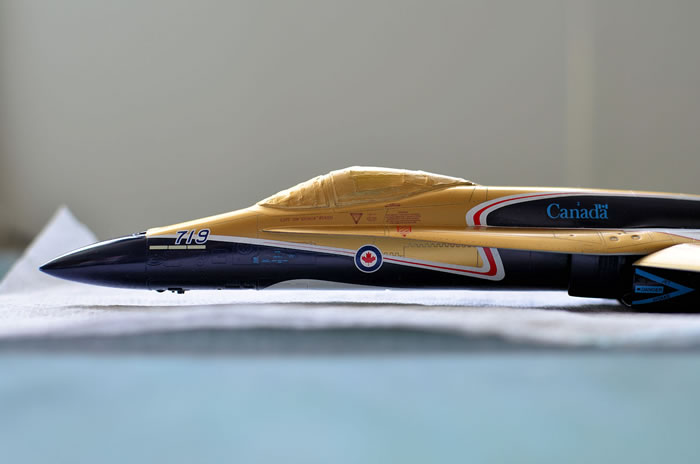
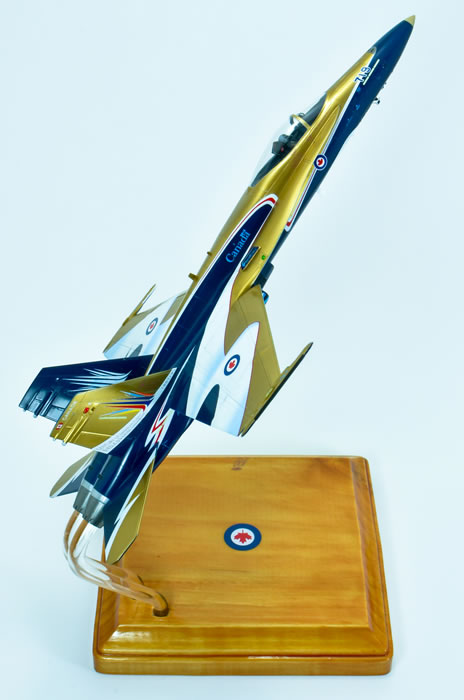
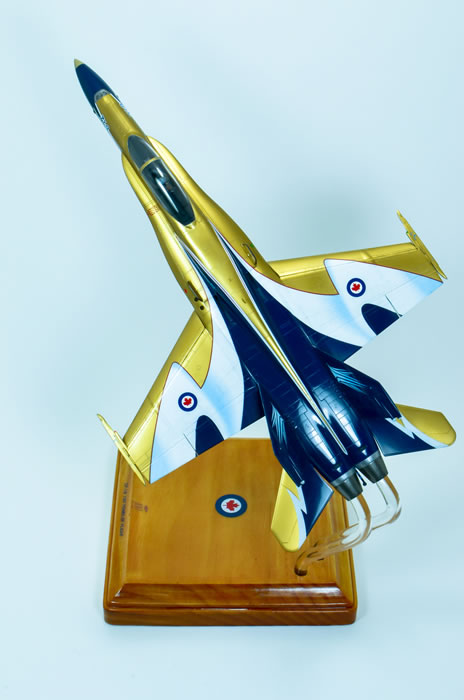
The colour scheme consisted of a striking gold upper and forward fuselage symbolizing the centennial of flight. Airforce blue dominated the lower and aft fuselage. The large stylized white on the wing upper surfaces represent the Aurora Borealis, and the red and white cheat lines pay homage to those applied to the Royal Canadian Airforce aircraft over the years. As a final touch, names of 100 greats in Canadian aviation history are applied across the airframe. This was one eye candy I knew I wanted to built, and when the Leading Edge Model's decal came out, I dived in with both feet.
The basis of the model is Academy's 1/72 F/A-18C kit. The model was first issued in 2008, and was warmly welcomed as a worthy successor to the somewhat long in the tooth Hasegawa kit, hitherto considered the benchmark in the gentleman's scale. Several other boxings of the model were subsequently released, including an F/A-18A variant suitable for a CF-18A. But since I already had the -C kit it's what I used.
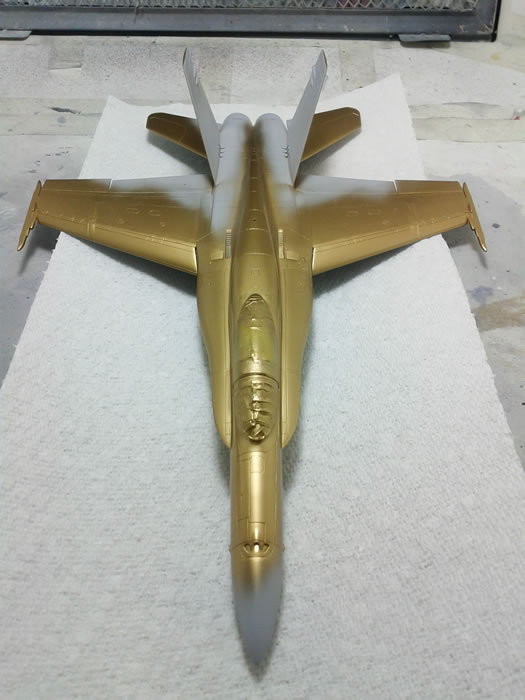
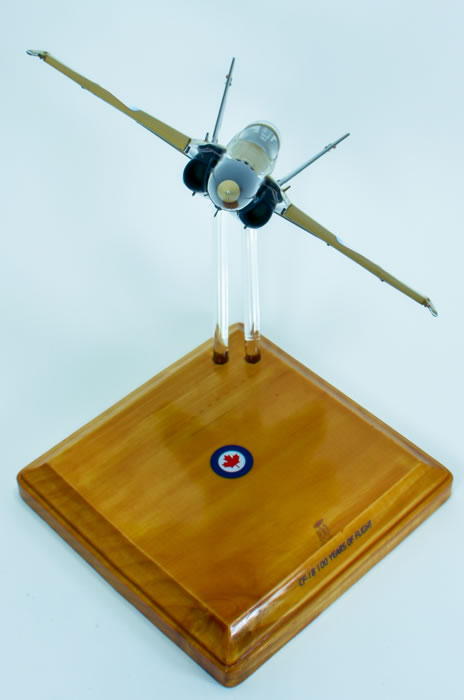
I decided from early on that the model was to be displayed in-flight. I wanted to show the clean lines of the jet and the unique colors on the bottom of the aircraft. This necessitated removing the molded-in nose and main landing gear wells from their fuselage parts, as well as the airbrake well from the upper fuselage half.
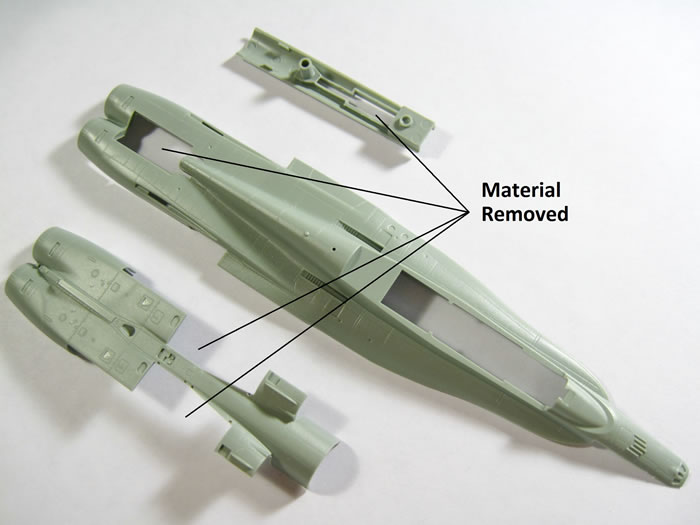
This helped during the installation of the gear doors and airbrake by allowing adjustments from the inside. Plastic strips were also added on the inside of the gear doors to reinforce the joints.
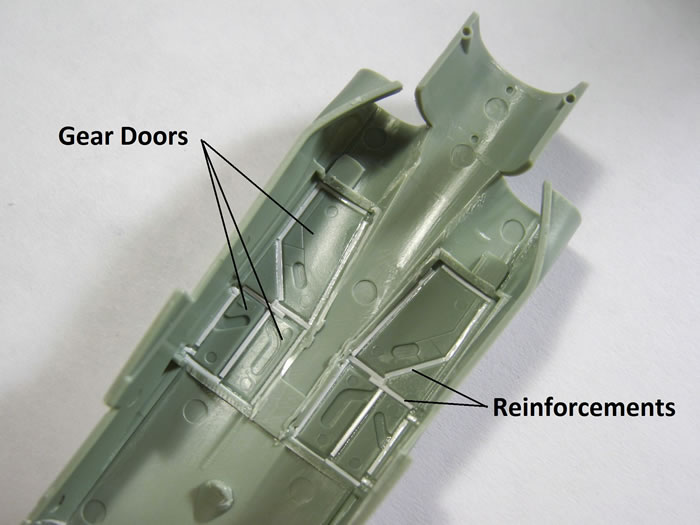
The result was a relative smooth exterior that required little to no clean up I was impressed.
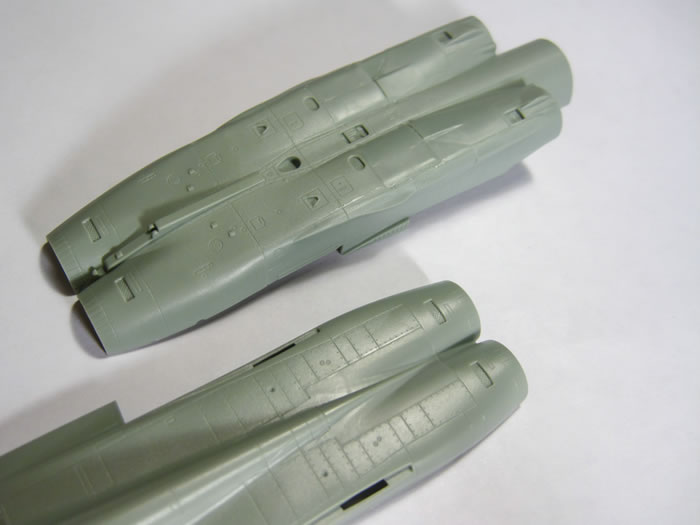
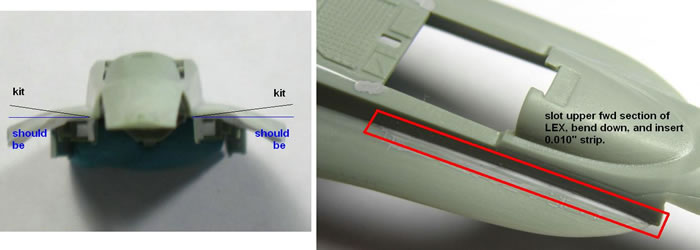
Academy's hornet is a good kit, but like every kit it's not perfect if one wishes to nit-pick. The very forward portion of the leading edge extensions (LEX) were found to warp up too much, akin to having too much dihedral if they were wings. This is a carry-over issue from their 1/32 kit. To mend this, I simply scribed the upper LEX-fuselage joint from the forward tip to the rear of the cockpit opening, and inserted in a thin plastic spacer to force the dihedral down.
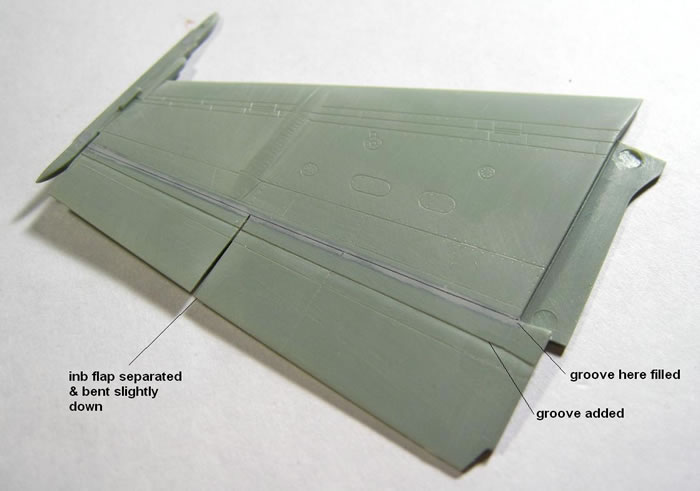
The main wing also received some minor fix. The hornet's trailing edge flap assembly consists of the wing, a transition panel, and then the large fowler flap itself. The kit's wing is molded with a deep grove that seems to incorporate the transition panel into the main flap. This was filled and moved aft.
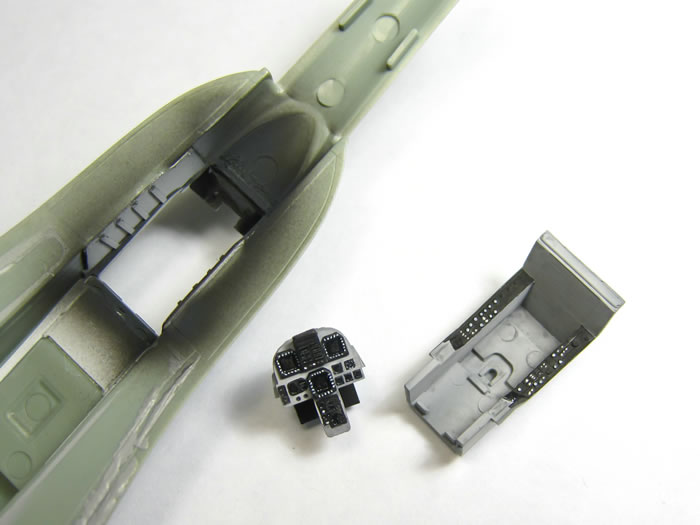
Prior to joining the fuselage halves, the cockpit was given some minor details including plastic strips to simulate side wall stiffeners. The parts were then airbrushed grey, weathered with oils, and dry-brushed to bring out the details. Out of the box, the kit cockpit is more than adequate for a closed cockpit.
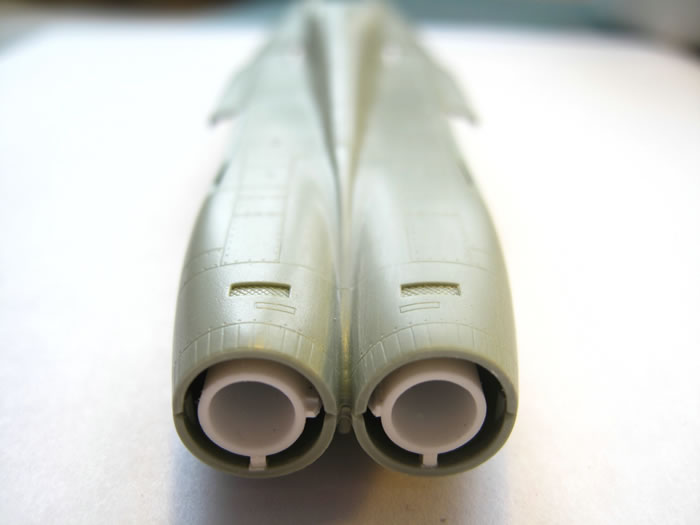
Lastly, a couple plastic tubes were affixed inside the tail pipes to accept the eventual acrylic rod to support the inflight model.
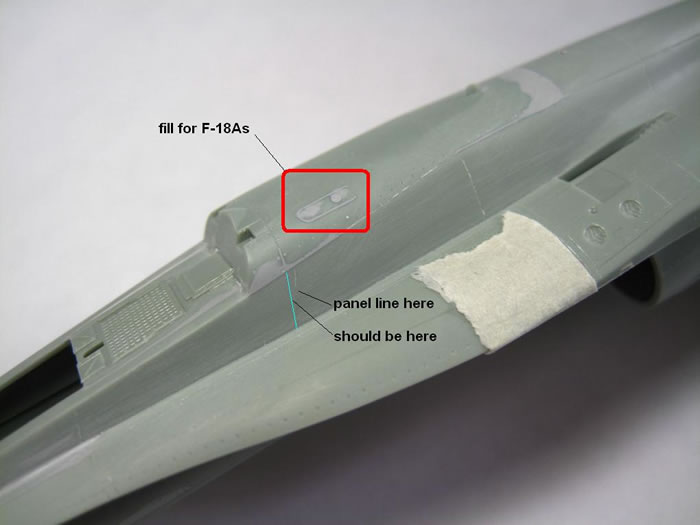
It was soon after the body came together that I found a rather perplexing set of error with the kit. It was discovered that the horizontal tail pins are molded too far forward by 3.5mm. The pin was removed and replaced on the horizontal stabilizer and the corresponding holes in the aft fuselage fulled and new holes drilled.

In addition, a number of prominent panel lines around the corresponding area on the aft fuselage are also erroneous or missing altogether. These were rectified by filling in misplaced details and scribing in new panel lines and rivet details.
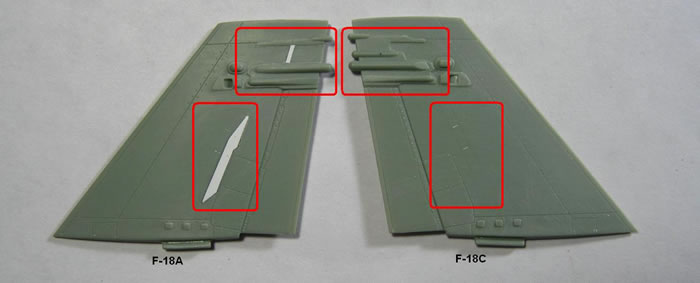
Lastly, a number of modifications were necessary to back date the model from F/A-18C to CF-18A standards. This included removing the five IFF 'bird slicer' antenna on the nose fore of the windscreen, filling in antenna mounts on the spine aft of the canopy…
…and modifying the vertical stabilizers by removing extra antenna details and adding structural stiffeners using sheet plastic
Painting
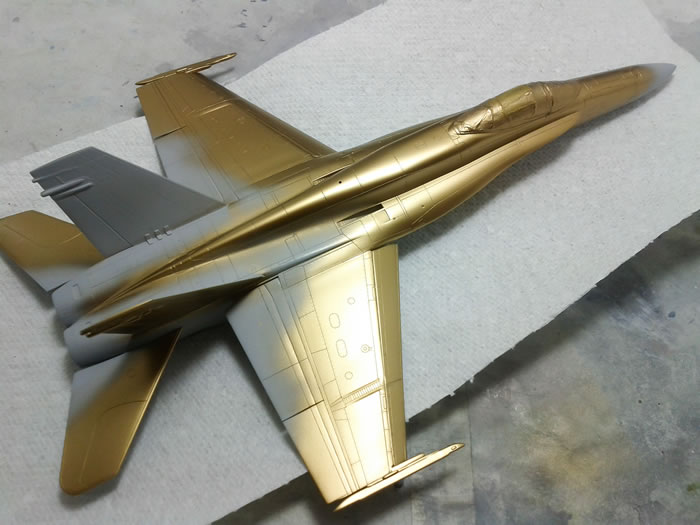
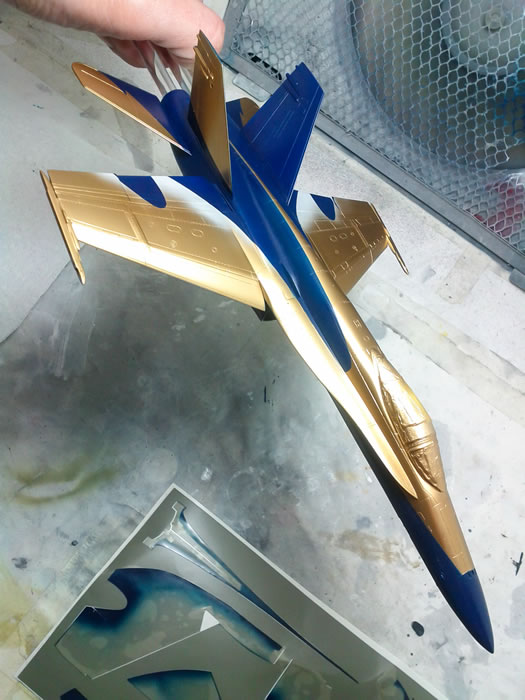
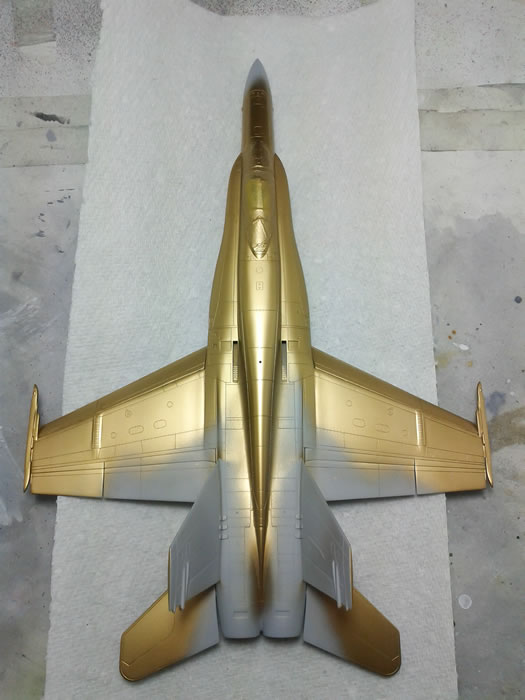
Prior to paint, the model was thoroughly primed with Mr. Surfacer 1500. As the model will have a high-gloss finish, surface imperfections are to be minimized. The Surfacer helps with identifying and fixing poorly defined details, panel line inconsistencies, and surface roughness. Once that's done, a final coat of Surface was applied and polished to 2400 grit to allow for a smooth and uniform grey onto which to lay the paint. Alclad II gold was applied first over the forward and upper fuselages and over the tops of the wings, horizontal, and vertical tails.
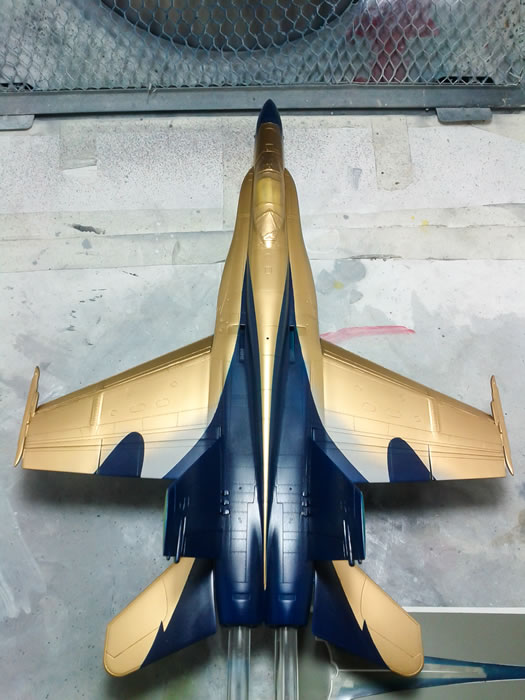
Following this, the Leading Edge-supplied self-adhesive masks were used to help when applying Tamiya's acrylic royal blue (X-3)
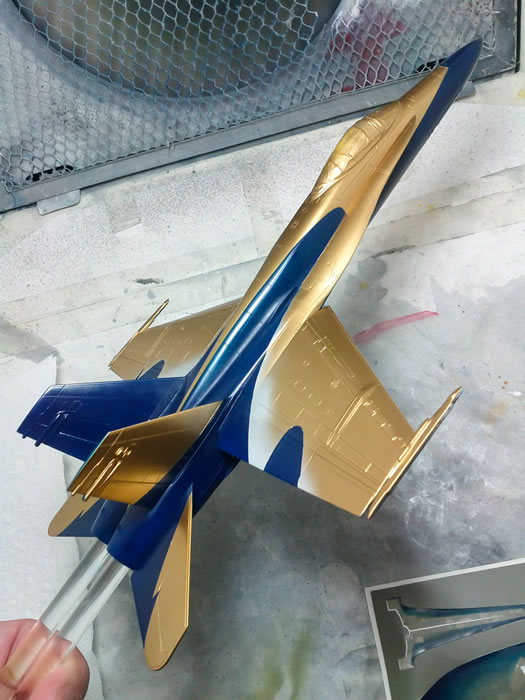
I was apprehensive about the adhesive lifting the gold off the primer, but it worked surprisingly well with care.
Decals
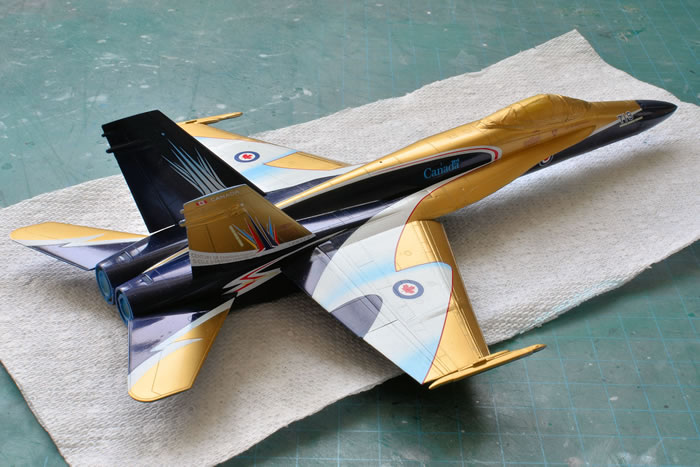
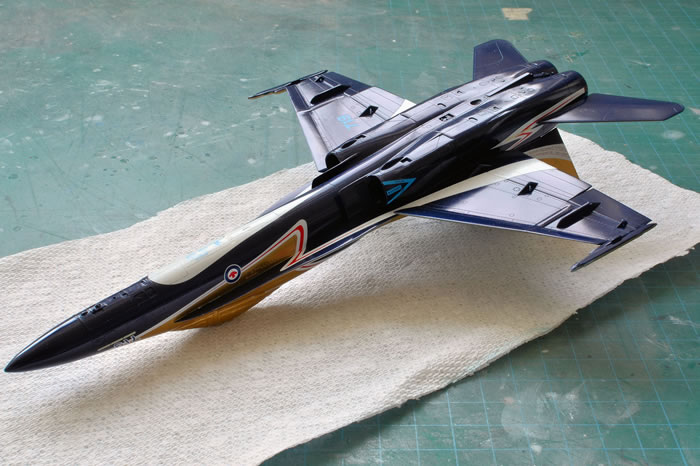
The application of decals was by far the most daunting task of the build. In addition to the standard set of markings, Leading Edge further supplied all white area as decals, including the lower fuselage lope, the white and red cheat lines, and the large over-wing aurora as a magnificent piece of silkscreen magic. Applications of the decals spanned several days, with the aforementioned decals requiring copious amount of patience and care. To encourage the decals to take surface details and snug into panel lines, a sewing needle in a pin vice was used to lightly press the decals into the model where appropriate. To achieve a super-smooth finish, I experimented with clear coating the model with successive applications of Mr. Hobby GX100 Super Clear with fine sanding in between using 2500-3200 grit micromesh. One final polishing was done using Tamiya polishing compound applied with an old t-shirt. I must say, the results turn out better than I expected.
Display
To display the model, a simple piece of wood was sourced from the local craft store and varnished. Spare decals were used for the wording and Canadian roundel on the base to give it a simple, reserved, and clean look. 1/4" diameter acrylic stock were used to make the support rods and were heated and fashioned over the stove. The finished model, now fitted with antenna and pitot tubes at the end of the build, was carefully inserted onto the base.
And there you have it, the beautiful CF-18A Centennial of Canadian Flight in 1/72. The model was definitely a bit more work than I had anticipated, in particular for an in-flight model, but mostly due to my own desire to iron out most of the kit's minor inaccuracies. The painting process was laborious and often incited choiced words from yours truly, but I've also learned a thing or two about tricky, high-gloss finished at such a small scale. It has been a fun build and I'm already looking forward to more hornets in the future.
Model, Images and Text
Copyright ©
2017 by John Chung
Page Created 8 May, 2017
Last Updated
8 May, 2017
Back to HyperScale Main Page
|
 Home
| What's New | Features | Gallery | Reviews | Reference | Resource Guides | Forum |
Home
| What's New | Features | Gallery | Reviews | Reference | Resource Guides | Forum |