Tamiya's 1/32 scale
F-16CJ Block 50
by Steve Pritchard
|
|
F-16CJ Block 50 |

Tamiya's 1/32 F-16CJ is available online from Squadron.com
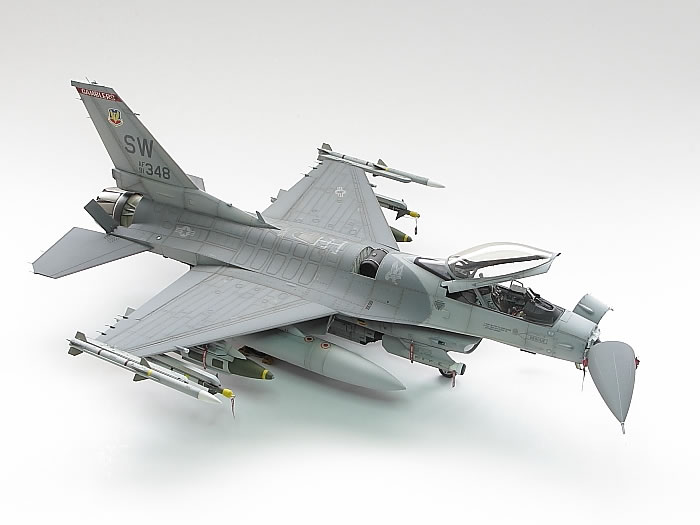
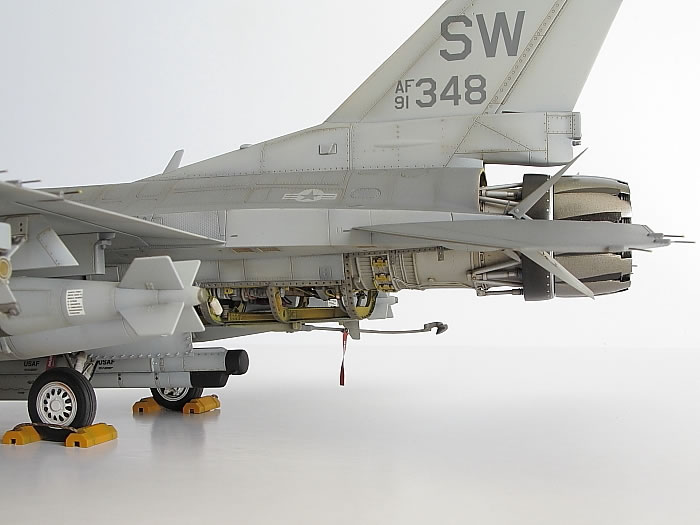
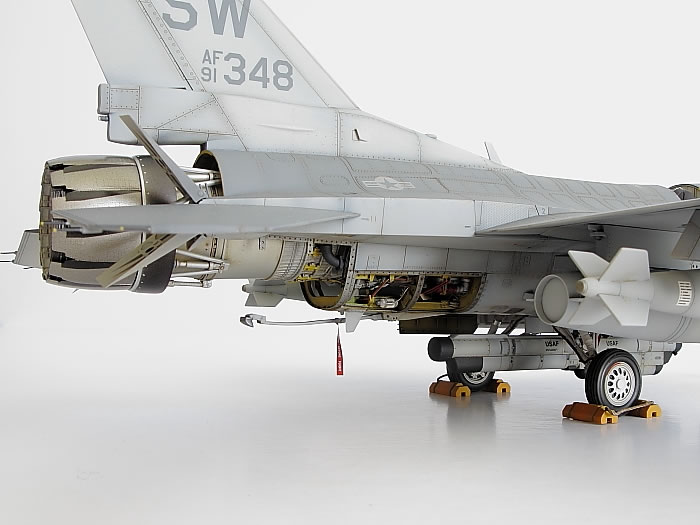
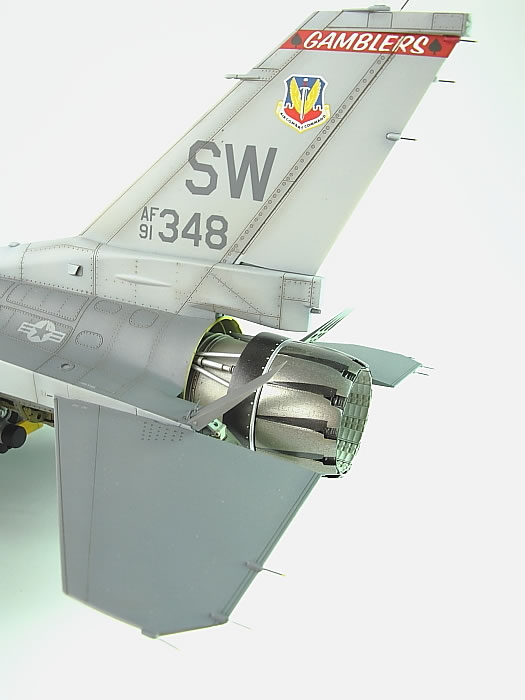
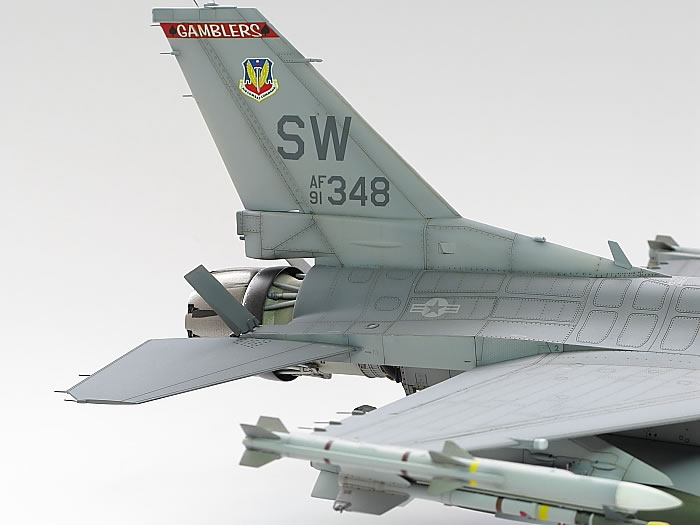
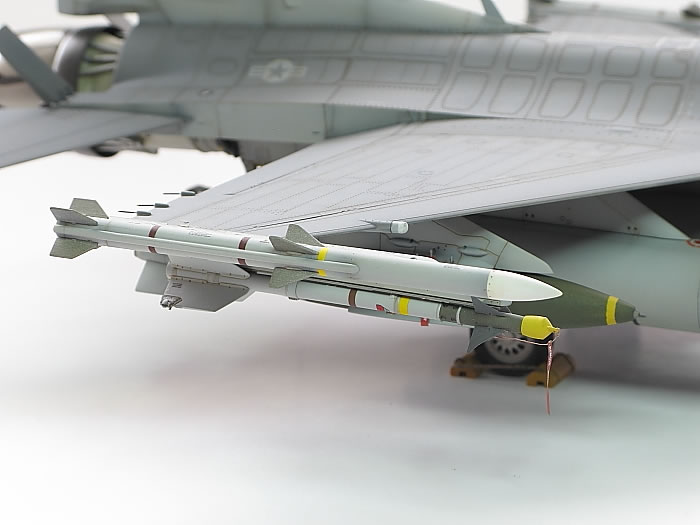
Tamiya 1/32 scale F-16CJ Block 50 (Kit No.60315) painted in out of the box markings of the 77th Fighter Squadron, 20th Fighter Wing, USAF, during Operation Iraqi Freedom in 2003.
Aftermarket Accessories:
-
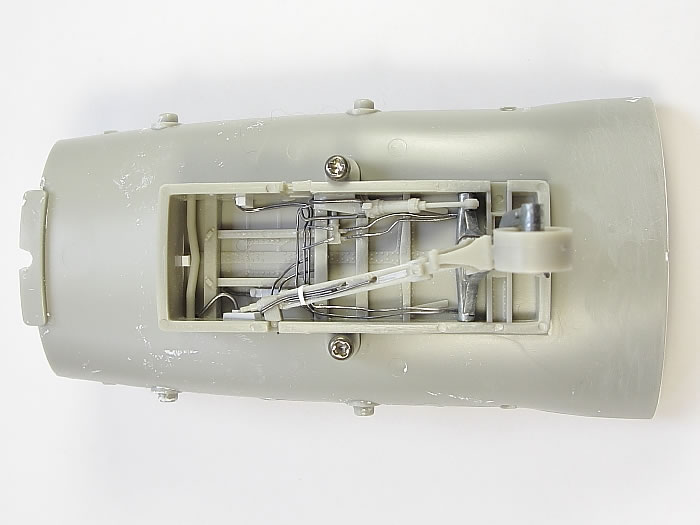
Aires F-16C Block 30/40/50/60 exhaust nozzle (2095)
-
Eduard F-16CJ Fighting Falcon ejection seat (32 546)
-
Eduard F-16CJ Fighting Falcon interior (32 523)
-
CMK F-16CJ armament set for Tamiya kit (5007)
Paints Used:
-
Humbrol enamels 125 for the dark grey,128 for the medium and 127 for the light.
-
Pale yellow 81 to represent the yellow zinc chromate engine bay interior.
-
All detail painting was also with Humbrol, as well as the gloss coat - Clear Poly 35 applied prior to decaling.
-
Various Alclad shades including Jet Exhaust and Steel for the engine and nozzle.
-
Winsor & Newton ‘Winton’ oil colours ‘Raw Umber’ and ‘Burnt Sienna’ were used for the panel line and general washes.
A lot has been written about this superb kit since it was first released about 10 years ago, and many inspirational builds have appeared in print and on the web. All I can add is that in terms of ease of assembly, level of detail out of the box, options provided and enjoyment in constructing it is quite simply the best 1/32 jet kit I have ever built. Typical Tamiya, in other words.
My initial intention was to build straight out of the box as a sort of relief from the effort I had recently taken with an Academy 1/32 F-18 Hornet -I had scratch built some components including an engine bay and avionics bays for that kit and had also hand painted some of the markings. As it had been quite a lengthy build I was now looking for something which would be quick to put together so I could get on with the most enjoyable part of modeling for me, which is painting.
However, after a little thought, I couldn’t resist adding some extra detail as I thought it would be a fairly straightforward exercise given so much is already provided in the kit.
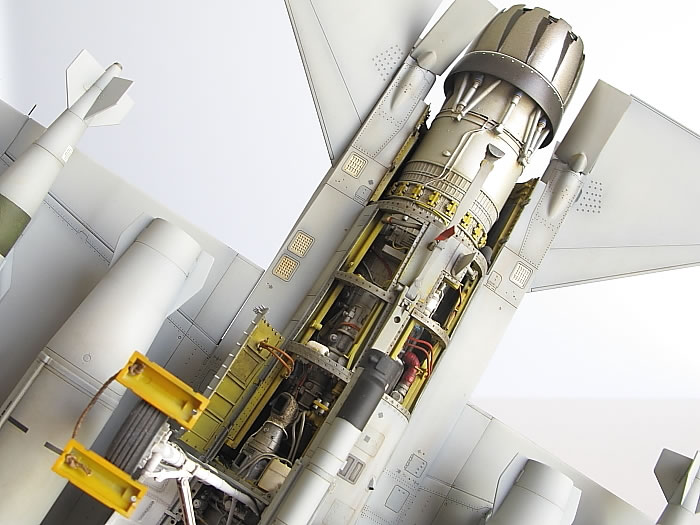
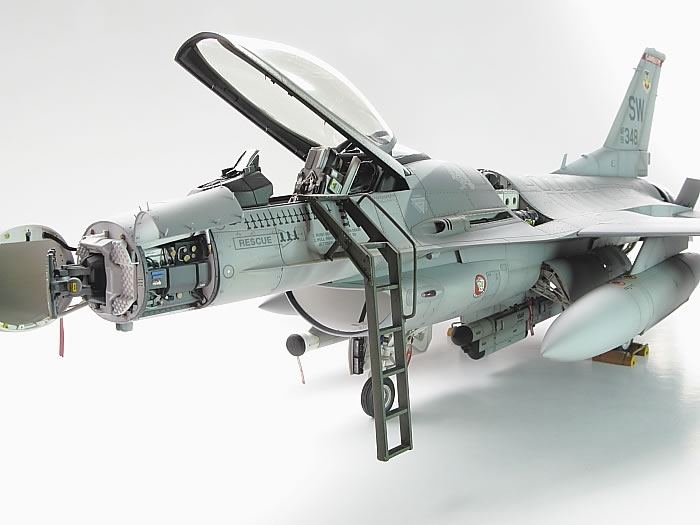
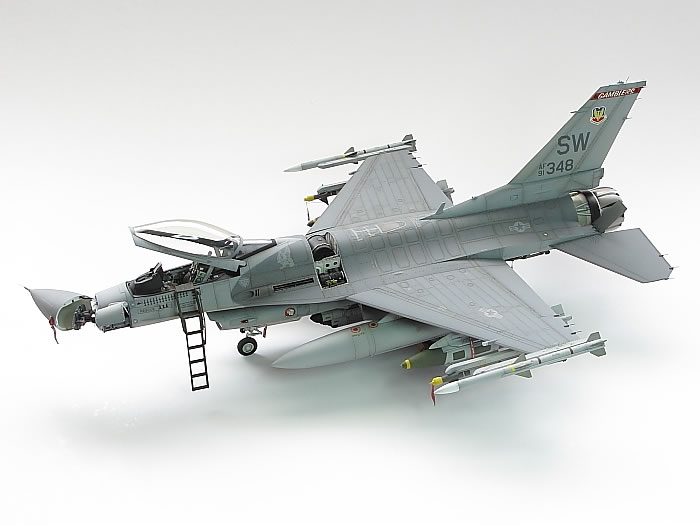
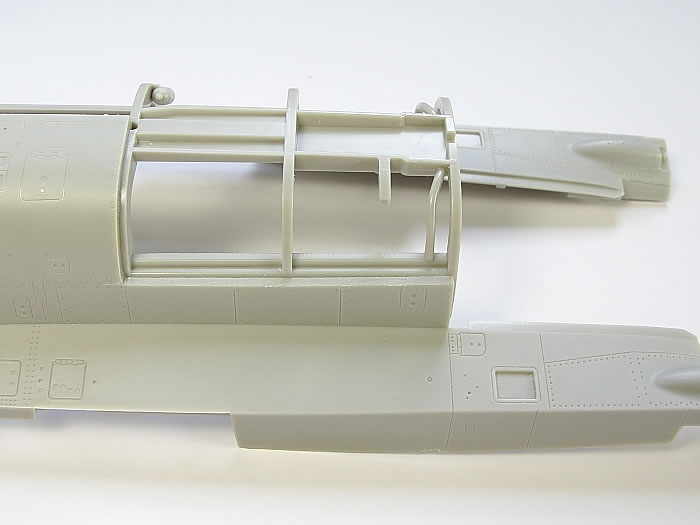
I decided to show a little more of the complexity of the modern fighter by opening up some of the engine access panels to display the already beautifully detailed General Electric F110-PW-129 in place, rather than separately from the aircraft on its supplied dolly.(I had also used several parts from the dolly already to display the engine from my F-18 build)
Also, the forward avionics bay houses some fairly simply shaped radar related avionic boxes and Tamiya provide a separate door already for this bay, so I decided to detail this as well. Because of the variety and quality of the weapons included in the kit I then decided I wanted to show a representative weapons load as well, which clearly would be at odds with an aircraft undergoing engine maintenance with various engine bay panels removed. Oh well, who will know? “Modelers’ licence”, one of my favourite tools.
For reference, I had the excellent ‘The Modern Viper Guide – The F-16C/D Exposed’ by Jake Melampy, as well as the Haynes ‘Owners Workshop Manual General Dynamics F-16’. The latter, while very interesting reading, is perhaps of less value to the modeler due to the lack of close up detail photographs. Of course, there is a huge amount of information available on the net – not least the outstanding dedicated site ‘f-16.net’ I also had issues 111 and 112 of Tamiya Model Magazine which features a large construction article and a terrific build of the model in the same markings, by Marcus Nicholls
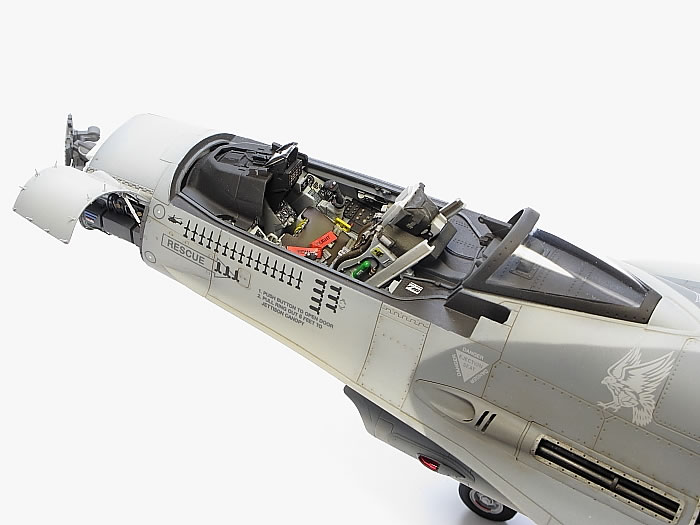
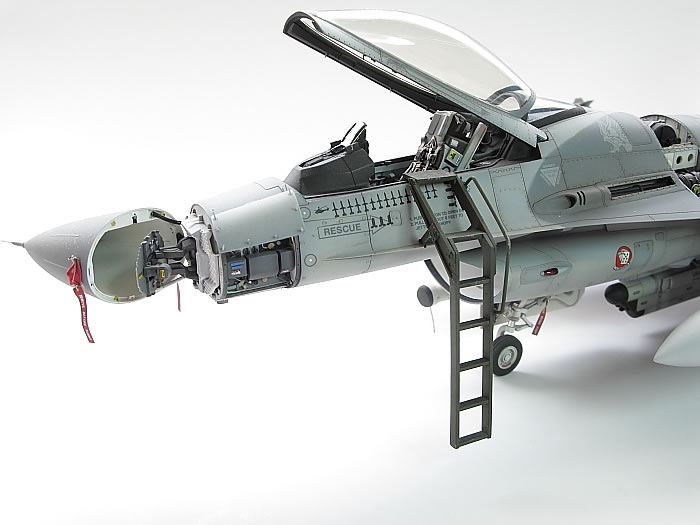
I started the extra detailing with the avionics bay - the Haynes book has an excellent photo of the port side bay. It was straight forward to create a plastic card structure and add some avionic shaped components from Evergreen stock, with lead wire and small discs of plastic to represent electrical connectors. The large nose weight supplied in the kit also needs to be adjusted – again a simple matter to hacksaw lengthwise along its centre to clear the newly created bay. A half sized weight is still plenty enough to avoid a tail-sitter The kit supplied bay door just needs thinning, a bit of interior detail added, and a few ‘fasteners’ to look convincing. The panel fasteners where made from stretched sprue and dropped into holes drilled in the door, then cut to length once the glue had set. Much easier than cutting to length then trying to get them to sit at the same height.
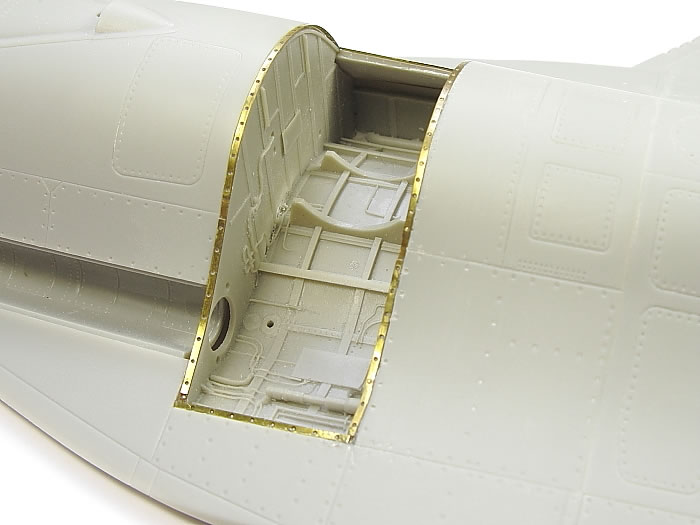
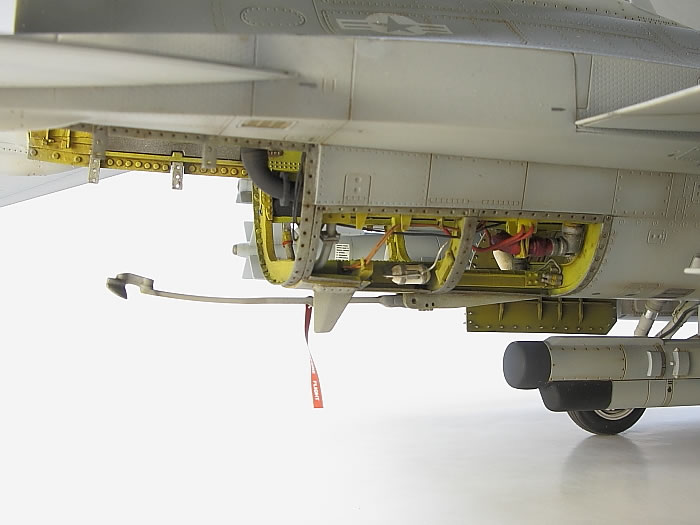
I then moved on to cutting out the engine access bay doors – rather enthusiastically I removed the panel representing the large, hinged door on the port side just aft of the main landing gear. This door covers the jet fuel starter and associated equipment. Tamiya provide a representative shape only for the JFS, but there are photos on the web which show the complete unit, including some showing it removed from the aircraft. Unfortunately, I had underestimated what would be needed to accurately show the equipment in this area – for a start, I had to move the bulkhead on which the JFS is mounted further forward to avoid a gap between it and the landing gear bay bulkhead. I also discovered that I didn’t really have a good photo of the actual interior of this access door, so my effort in this area is a bit speculative.
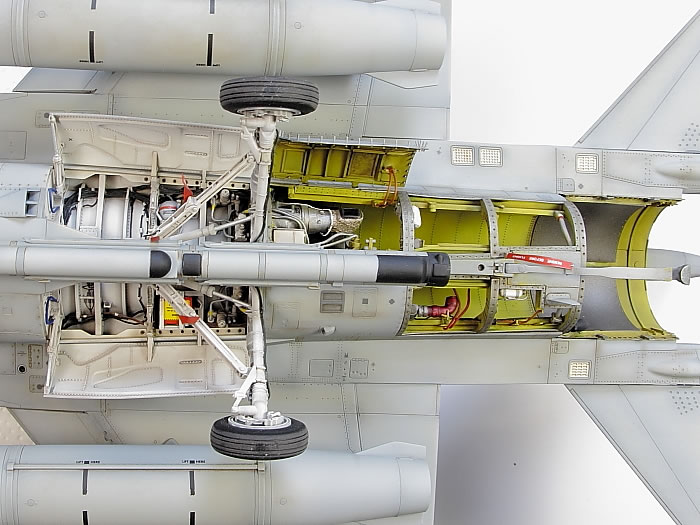
Other than that, detailing the engine bay was fairly straightforward – various piece of plastic card, the odd wire and tube - Tamiya already provide plenty of detail that is sufficiently accurate for me, and, after all, the engine itself will fill most of the space.
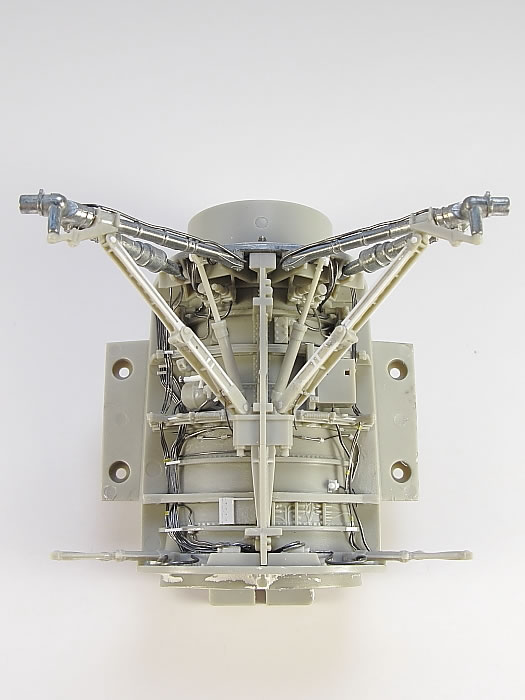
I added a little extra wiring detail to the undercarriage bays and legs – lead wire is ideal for this as it bends easily and is easily secured with just a little superglue. This wire can be sourced from fishing tackle shops and comes in several useful thicknesses – I use sizes from .010 to .030. The undercarriage was painted with Humbrol matt white, then washed with oils, then over sprayed again to blend everything in but still leaving some, hopefully, subtle enhancement of detail from the wash.
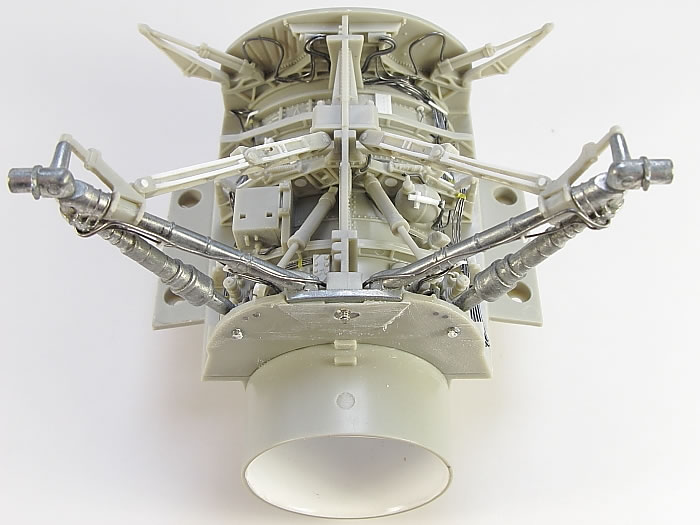
Wiring details were picked out with a fine brush. I followed the Tamiya instructions closely here as there are a lot of parts to assemble and the additional wiring runs over and under various components The whole bay was completed and then masked off for construction of the fuselage to continue. It is solid enough not to worry about taking the odd knock while work proceeded on the rest of the fuselage.
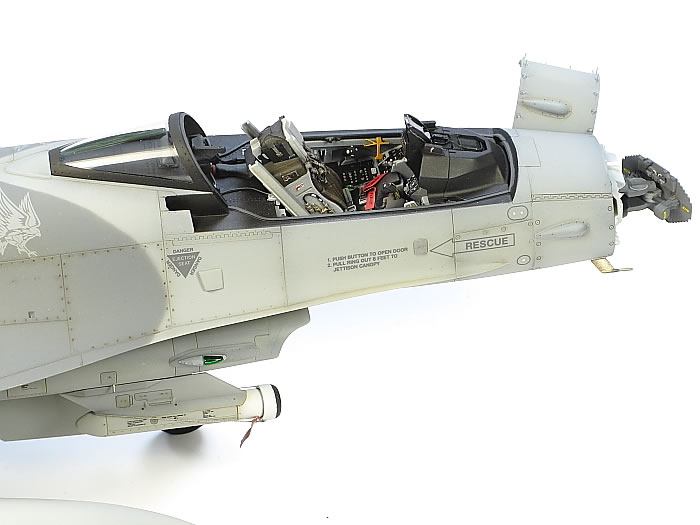
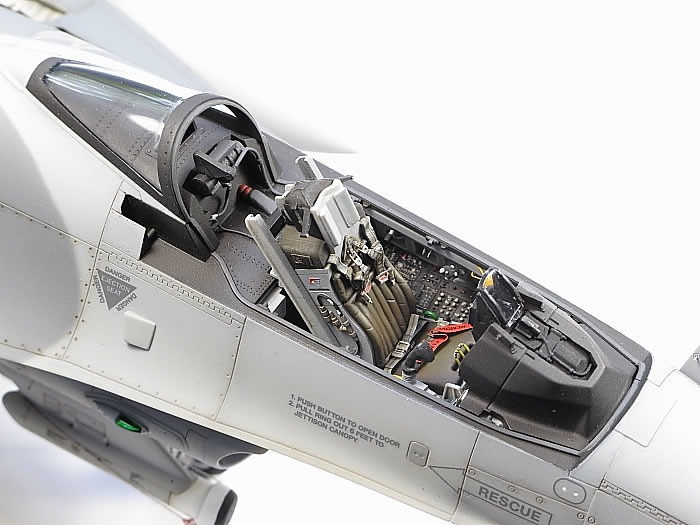
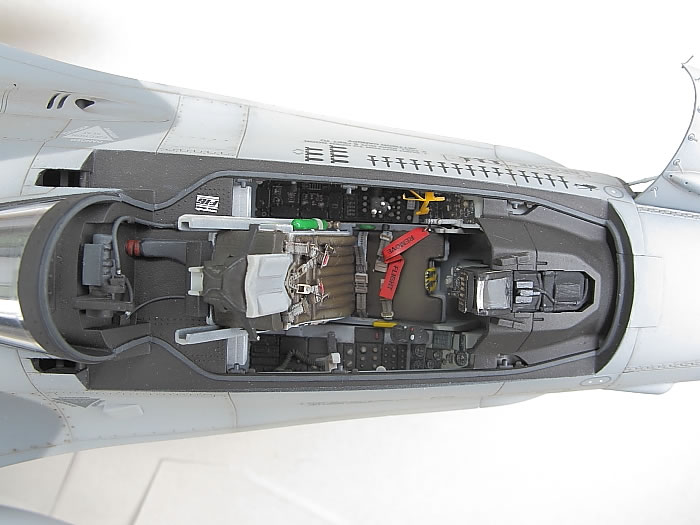
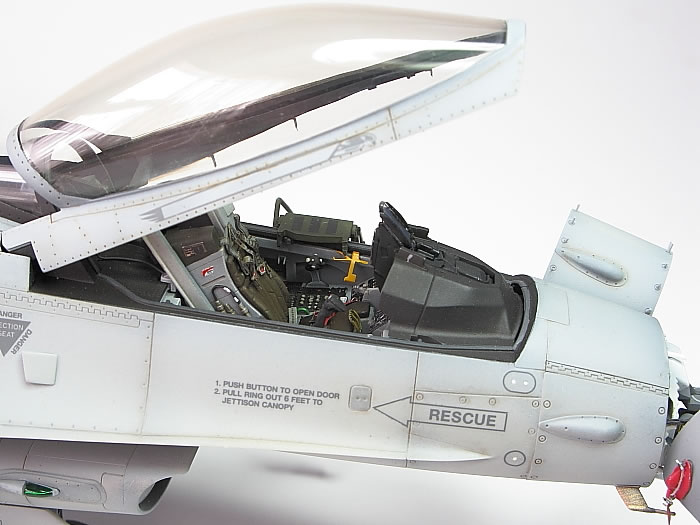
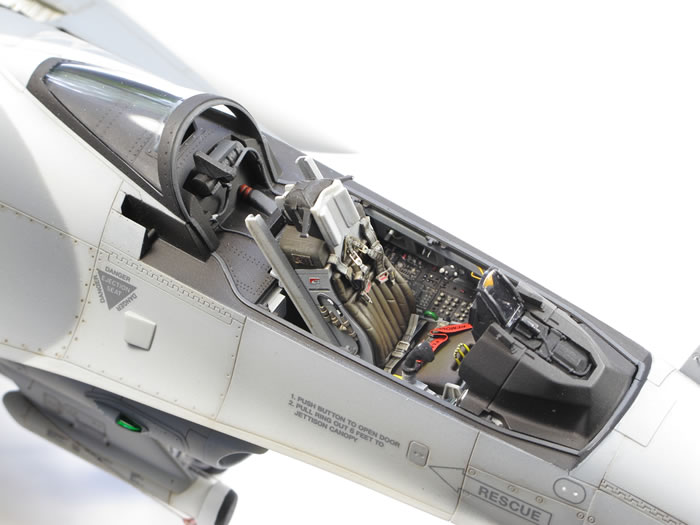
I added most of the Eduard cockpit set though I don’t think it achieved a great deal more than careful painting of the Tamiya parts would have.
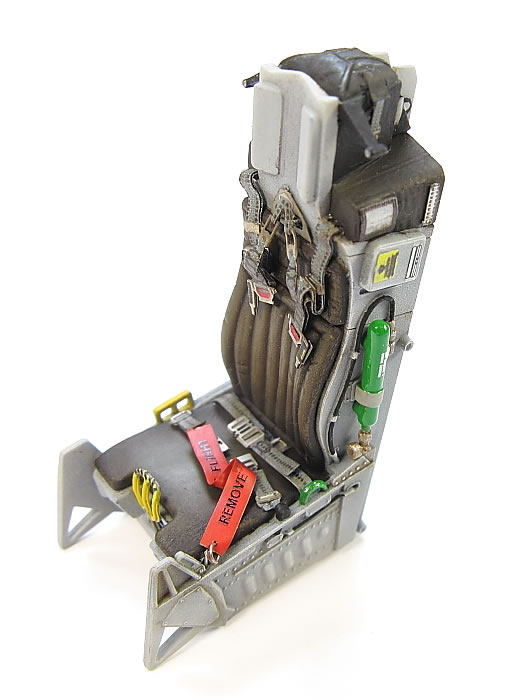
The instrument panel shows the instruments with data displayed which does add interest, if not necessarily accuracy.
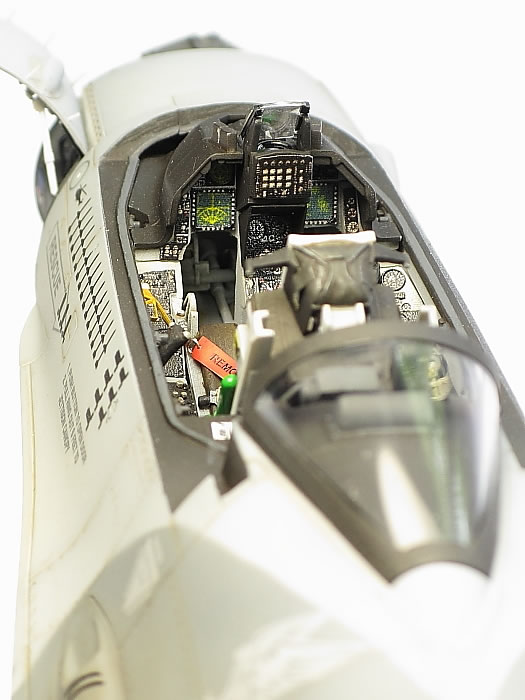
I added a few knobs punched from plastic card to the more two dimensional Eduard pieces and also some smaller details using blobs of white glue. Overall a quite pleasing result.
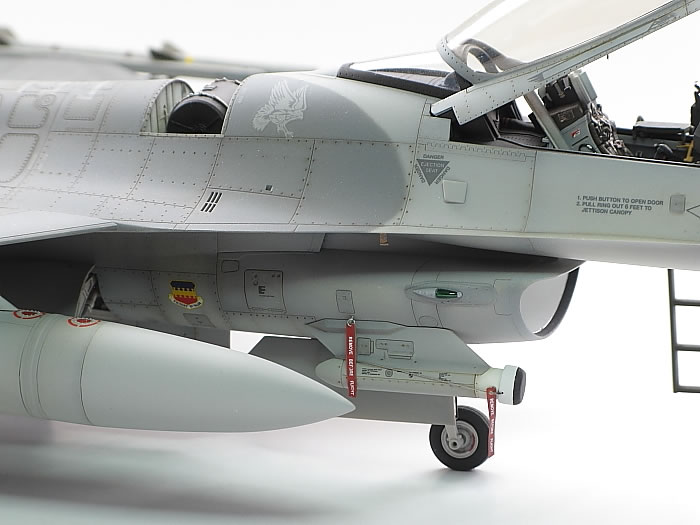
The CMK set for the Vulcan gun and ammunition drum was a good fit, it is finely detailed and consequently quite fragile, so care is needed separating from the casting blocks. There is a lack of some detail on the starboard side of the drum – namely the ammunition feed mechanism. I did not add anything here as clear photographic reference was hard to locate.
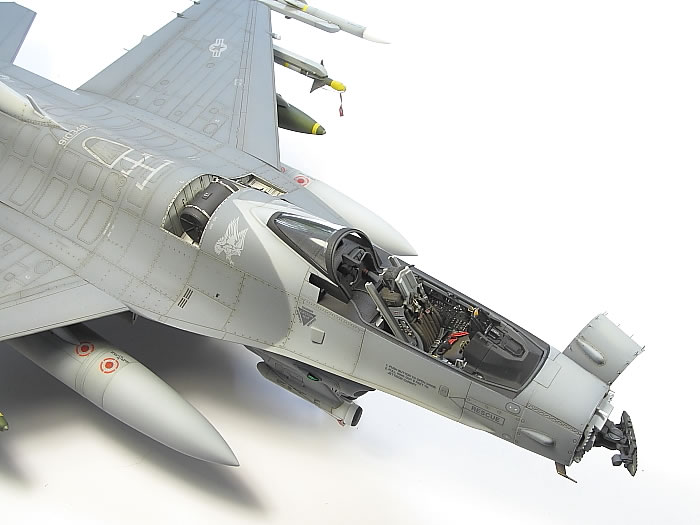
The Aires exhaust nozzle is an improvement on the Tamiya parts – there are fewer parts to assemble to start with. The only issue perhaps is the overly prominent surface detail on the nozzle petals – easily reduced with a light sand prior to painting with the Alclad jet exhaust and steel shades. I left the nozzle with quite a glossy finish, similar to one on the only actual F-16 I have seen, admittedly an immaculately prepared display aircraft at the Australian International Air Show at Avalon in 2013
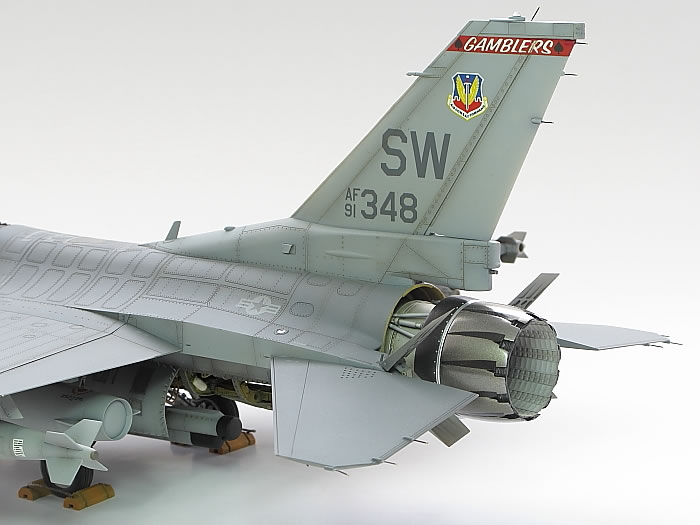
I replaced the supplied metal static discharge wicks with black stretched sprue - just a little thinner than the metal rods supplied in the kit, but also a lot less sturdy of course.
One was also added to the fin top. I also glued the fin directly to the fuselage – poly-caps are provided to attach this (and various pylons and weaponry) to allow removal for storage, but I chose to glue to ensure best fit.
The model was painted with various Humbrol shades, 125, 128 and 127 for the greys, over a pre shading with matt black, and 81 for the yellow engine bay interior. Some matt white was added to the darkest grey and a very light overspray to fade the top surface paintwork was attempted.
Interestingly the dark grey adopts an asymmetric pattern, extending further forward on the port side – I masked the demarcation with Blu-Tack. The nose radome was painted with a mix of the two darker greys ( a wide variety of shades are present in the real aircraft due to exposure to the elements). Incidentally, there are a couple of erroneous panel lines surrounding the AOA probes on the radome – in reality the darker area often seen surrounding the probes is just a less faded area usually covered by protective covers when the aircraft is on the ground. I left them in place but scratch built a couple of covers to fit over the probes – the panel lines provided a useful template.
Humbrol gloss polyurethane varnish was applied prior to decaling and then a final flat coat. I normally use Humbrol 49 Matt Varnish to finish, but recent tins have seemed to contain a different formulation which hasn’t sprayed well for me. Instead, I finished with Wattyl Estapol Matt Polyurethane, bought from the local hardware store. I was impressed with the result, and the price – 14 times as much as in a Humbrol tin at only 4 times the cost. Should do several more kits as well.
Decals went on quite well- I often have trouble with Tamiya decals as they tend to be a little thick and don’t always settle down into the typical fine surface detail present on a Tamiya kit. This time there was just a little silvering on some of the stencils, easily remedied with a paint touch up. The final step was a panel line wash with the Windsor and Newton oil paints - Raw Umber for the darker shades and Burnt Sienna for the lightest grey, with some extra applied aft of the main undercarriage bay to represent various staining and leaks.
Overall, this was a very enjoyable build and the resulting model looks great alongside the F-18.
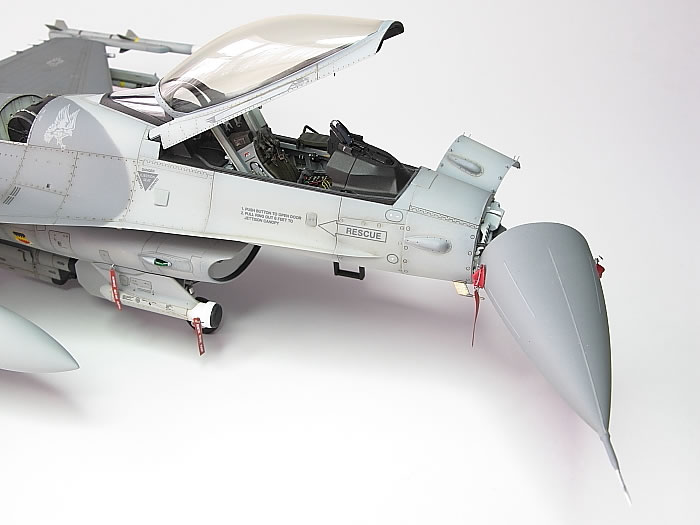
Perhaps the one thing I am not completely happy with is the aft, fixed portion of the canopy – the lower frame appears too wide in comparison with photos of the actual aircraft. I didn’t notice at the time I removed the molding seam from the centerline, but it is something that I might return to and remove, replace and repolish.
Model and Text Copyright ©
2017 by Steve Pritchard
Page Created 15 May, 2017
Last Updated
15 May, 2017
Back to
HyperScale Main Page

|
 Home
| What's New |
Features |
Gallery |
Reviews |
Reference |
Forum |
Search
Home
| What's New |
Features |
Gallery |
Reviews |
Reference |
Forum |
Search