Me 262B-1/U1 Nightfighter
Revell, 1/32 scale
S
u m m a r y |
| Catalogue Number: |
Revell Kit No. 04995 - Messerschmitt Me 262B-1/U-1 Nightfighter |
| Scale: |
1/32 |
| Contents and Media: |
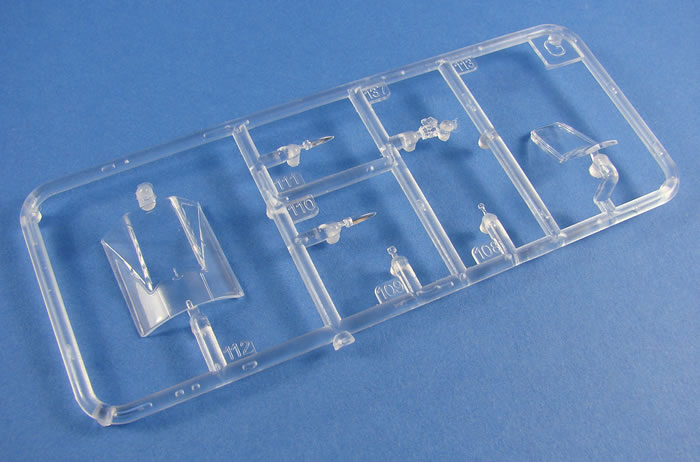
214 parts across 10 sprues, moulded in pale grey/blue styrene. 8 parts on two sprues, moulded in clear styrene. Single decal sheet with markings for two aircraft. |
| Price: |
£36.99 EU price (£30.83 Export Price) plus shipping available from Hannants |
| Review Type: |
FirstLook |
| Advantages: |
Superbly engineered, newly tooled release with finely engraved surface detail, including panel lines and fasteners. Beautifully detailed cockpit, gun bay, wheel wells, including both Jumo004 engines. |
| Disadvantages: |
Flimsy Revell box and sprues not individually bagged. Unweighted wheels. |
| Recommendation: |
A package loaded with detail and possibilities, and for a very reasonable price. Without a doubt, the finest Me 262 kit on the market. |
Reviewed by
James Hatch

Revell's 1/32 scale Me 262 B-1/U1 Nightfighter will be available online from Squadron.com
Whilst there was a rush to not just develop a viable jet engine, by both Britain and Germany, with various airframe prototypes being constructed by both sides, the final accolade must go to Germany for being the first country to introduce the world’s first operational jet fighter.
The Me 262 seemed to be beset with problems from the very outset, stemming from logistical issues with raw materials and engine supply, to there not being an appetite to use new technologies to forge Germany’s military destiny. The initial prototype flew in April 1942, under piston power, with Junkers’ Jumo004 engines eventually being available for the Me 262 to fly for the first time using this revolutionary new technology, in July 1942. By now, the gestation period of this project was already 3 years, and for Germany, military fortunes were now changing. A lack of suitable materials with high melting points, was a severe drawback for the jet engine, with running time being quite short before overhaul was required.
Nonetheless, the Me 262 entered service in April 1944, with Hitler’s initial insistence on the aircraft being utilised as a bomber, fully missing the main strength of the design. Sturmvogel (Stormbird) was the nickname given to the fighter-bomber version of the Me 262, whilst the fighter version was generally referred to as the Schwalbe (Swallow).
It was March 1945 by the time that the Me 262 was to see its first full-scale assault on Allied bomber formations. However, the bell was tolling on the Third Reich, and by early May 1945, it was all over. The Nazi’s had much planned for the Me 262, with various prototypes and sub-versions either test flown, in service or under construction.
Thankfully, a lack of foresight, materials, planning and numbers, prevented the 262 being a bigger problem than it could’ve been.
1/32 scale Me 262s
Of course, Revell’s new Me 262 isn’t the first kit to have been released in 1:32. We have had everything from 1970s Frog and Revell kits, to several incarnations of the Hasegawa release, encompassing both single seat and two seat versions.
Probably the best kit up until now has been the Trumpeter series of Me 262 kits (single and two-seat). These have been amongst the best from this manufacturer, and I have built a couple of these myself, so can testify to their standard. They are generally known to be accurate in both shape and detail, with plenty of the latter abound.
Trumpeter’s Me 262B kit does suffer from a different rendering of its panel lines and rivets on the later-tooled fuselage, in comparison with the common wing of the fighter, that is shares.
So how will Revell’s newly tooled Stormbird fare against the now harder to find, and more expensive Trumpeter kit?
Revell state this about their new kit:
-
A choice of lowered flaps
-
Replica Jumo004 engines
-
Moveable ailerons and rudder
-
Radar antennae
-
Machine guns
-
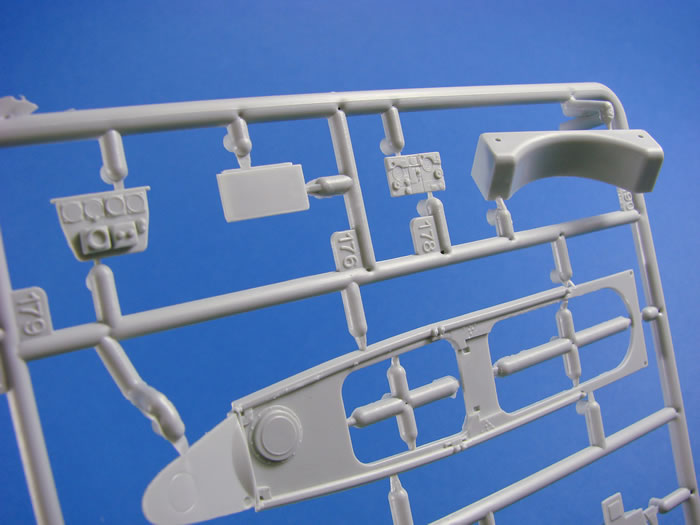
Detailed cockpit with side consoles
-
Detailed Cockpit well in the under-carriage bay
-
Detailed undercarriage
-
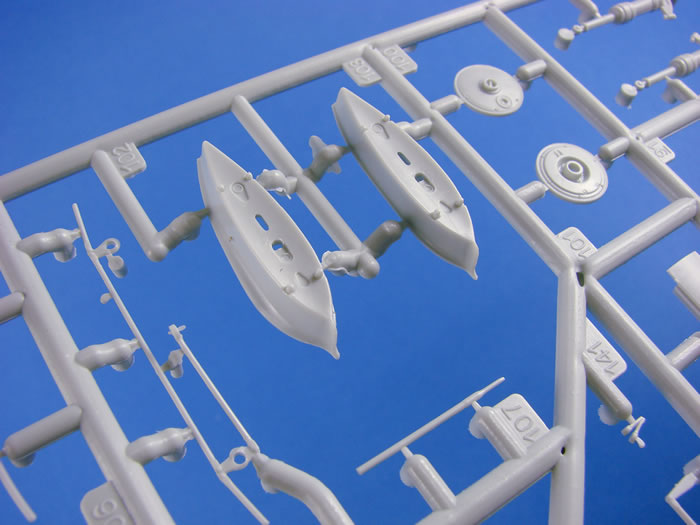
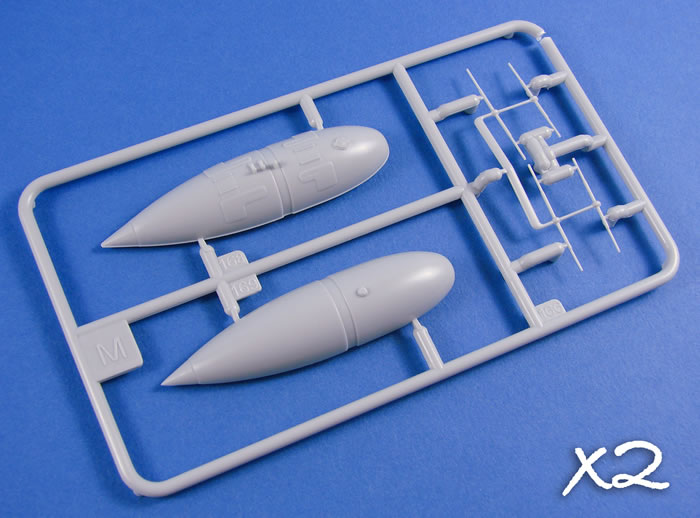
2 auxiliary fuel tanks
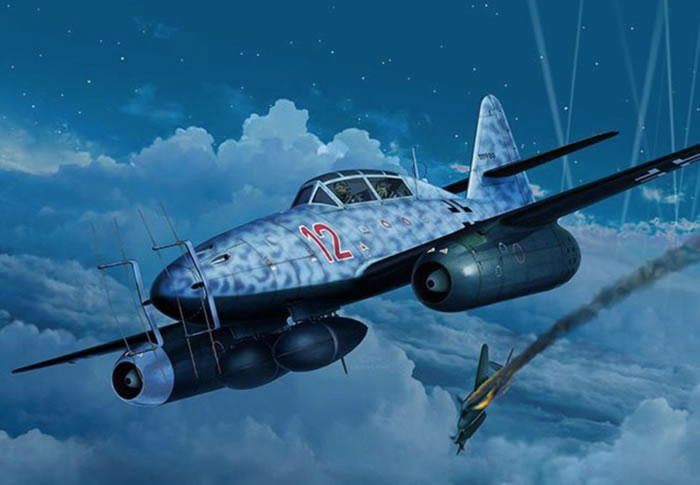
Whilst Revell seems to improve with each new release, the same can’t be said for their box with its new livery. This more attractive looking package suffers from the same flimsiness and end-opening design as before. As with previous box designs, some nice images of the prototype model adorn the edges, and in all, it will certainly look attractive on the shelf, with its atmospheric artwork of the 262 in a late dusk combat with a Mosquito. Inside the box, it can be seen that Revell still insist on packaging multiple sprues in the same bag, with the ever-present risk of part breakage and scuffing. My sample does suffer from a few scuffs here and there, but nothing to be concerned about.
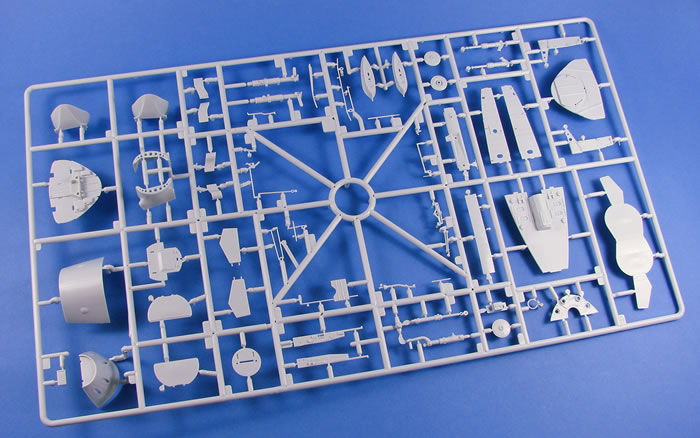
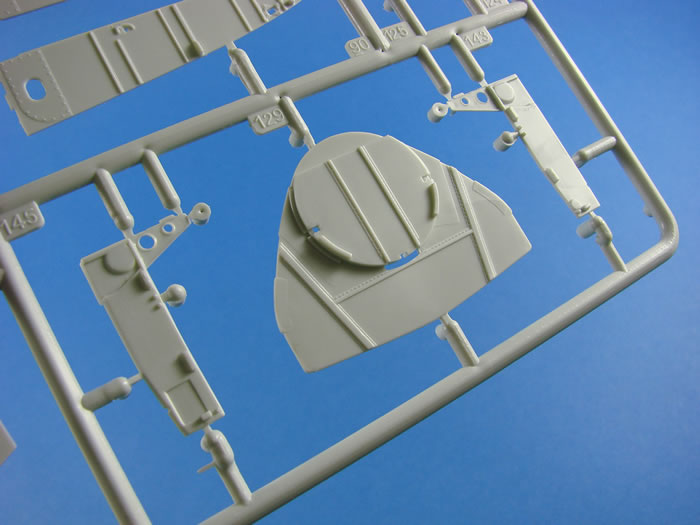
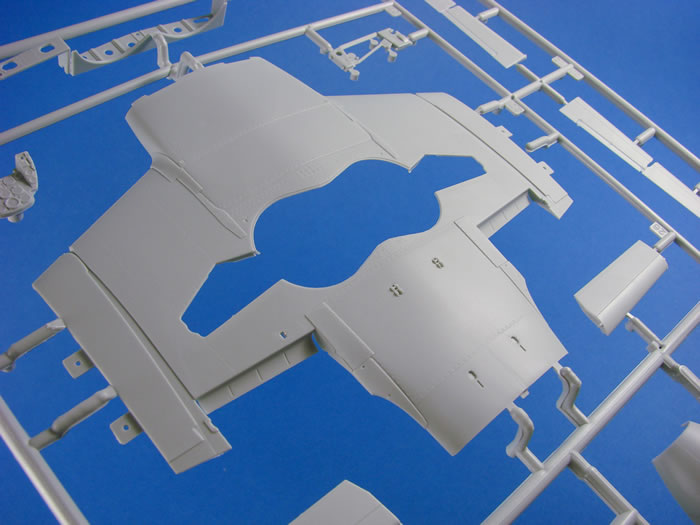
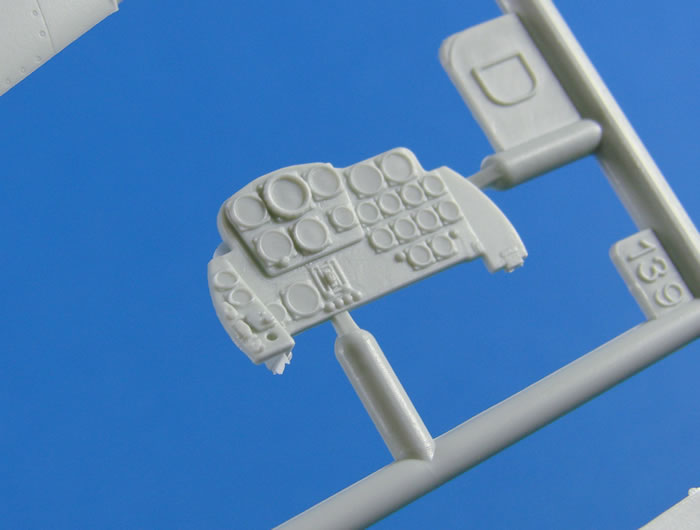
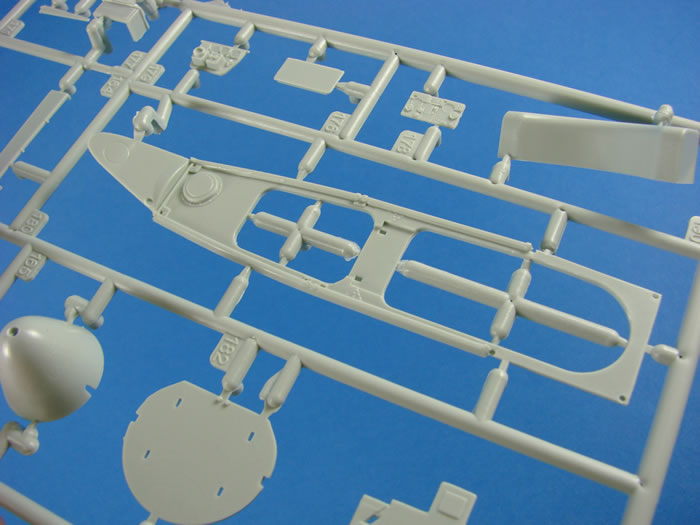
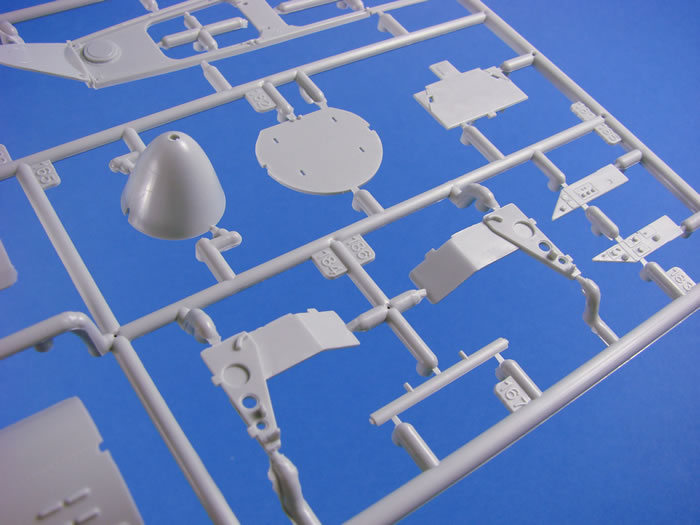
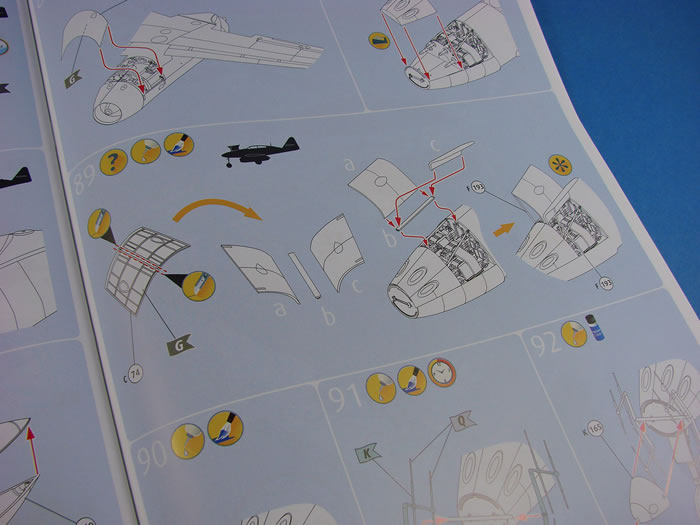
A decent cockpit is always the centre of my project, and that appears to be exactly what Revell has delivered with this release. Of course, we now have two crew positions to consider, and both forward and rear cockpits are well-appointed with a wealth of both instrument and side console details, interspersed with levers, radio set details etc. Construction is quite different to the Trumpeter release, with a single forward cockpit being constructed first, and then fastened to the forward bulkhead. Onto this is then bolted the rear cockpit and bulkhead, before the lower tub is fitted around this, as two parts. Of course, this allows Revell to adapt this nicely for a future single seat fighter or fighter-bomber version. I hope the seam that will run along the underside centre of this assembly will be easy enough to remove, as it would be clearly seen in the main gear wells.
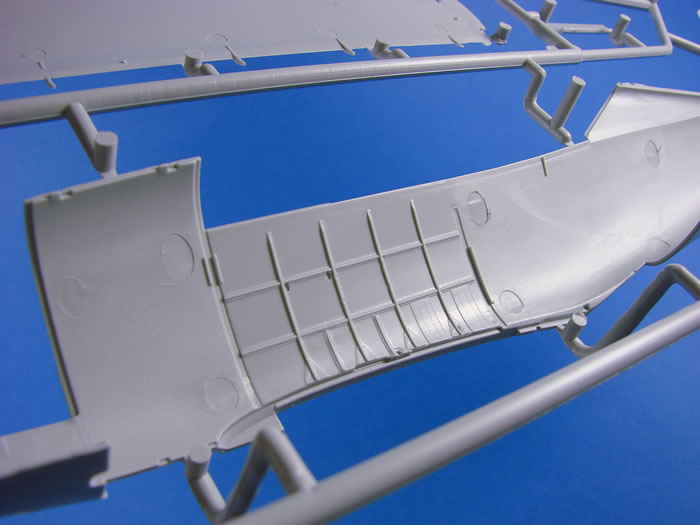
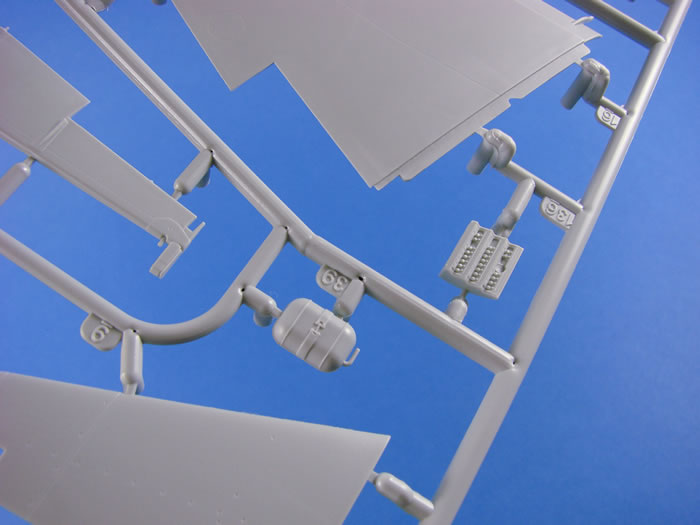
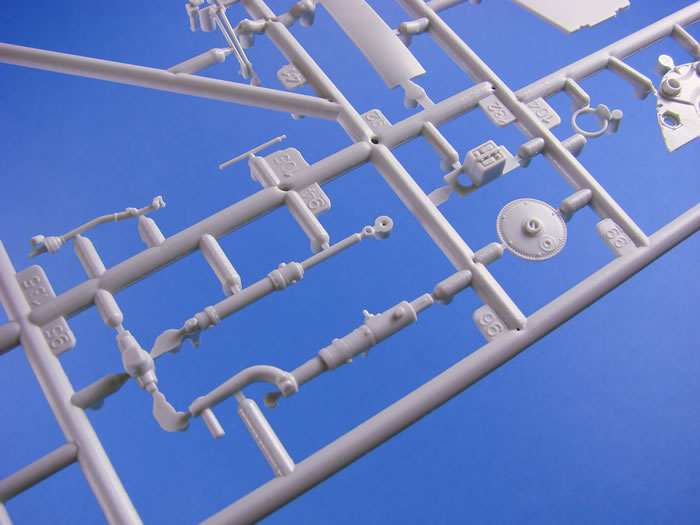
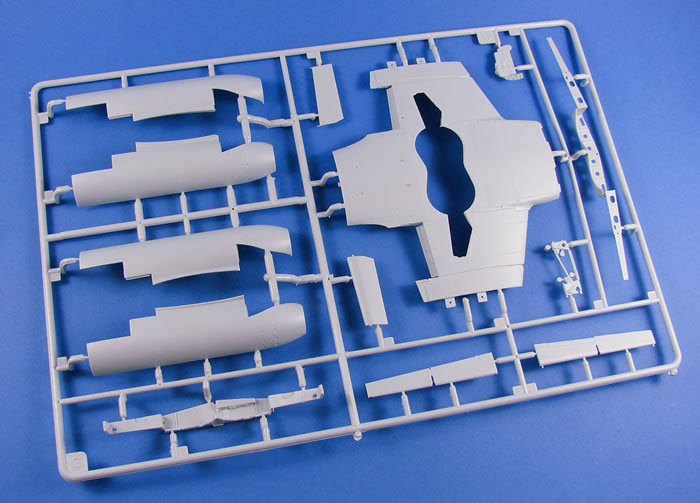
The forward and main gear wells are exceptional in terms of detail, with only a little wire needed here and there. A key component of the main gear bay is the underside of the cockpit tub, and there is nothing to complain about here. This, along with the moulded internal fuselage wall detail, is further detailed with various linkages that related to the pilot’s control column. Further details adorn the internal walls, including parts associated with the hydraulics, electrical junction boxes etc. The latter would benefit from wiring up to the main cockpit tub. A single framework of spars is then assembled and fastened to the lower wing. Incidentally, the lower wing is made up from a centre section and two outboard panels. The spare box also provides a little extra rigidity that extends onto the outboard panels.
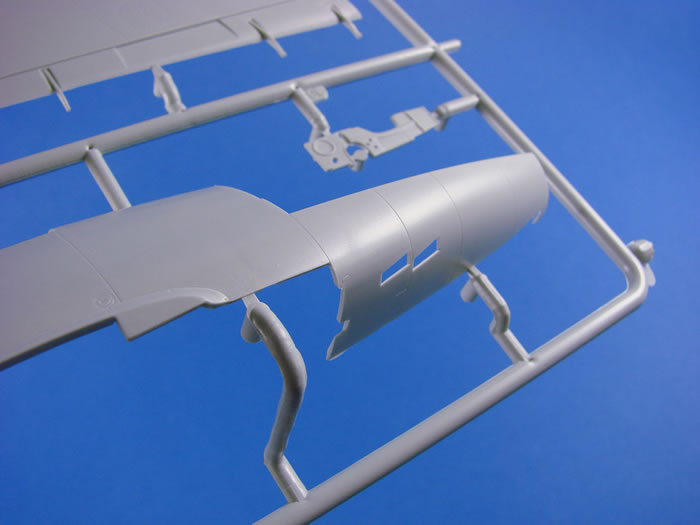
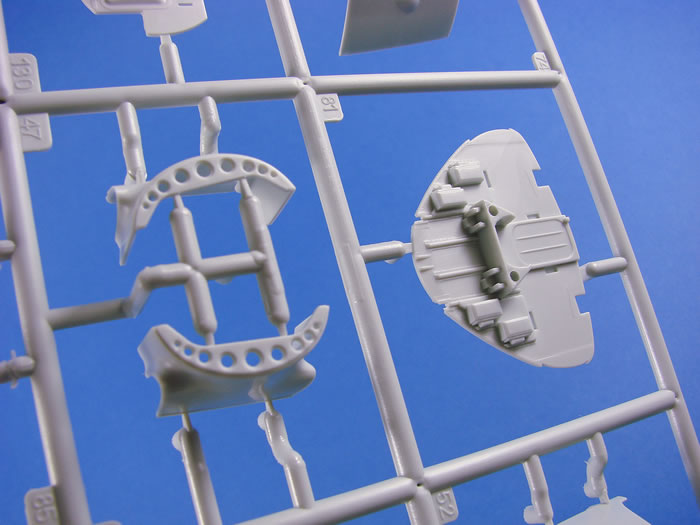
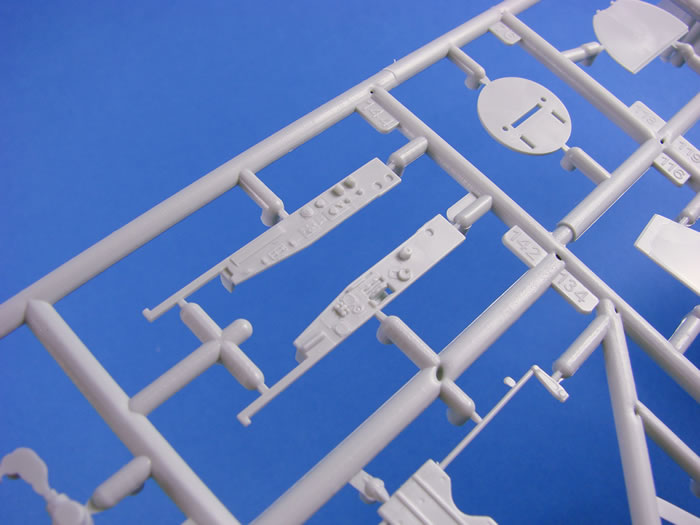
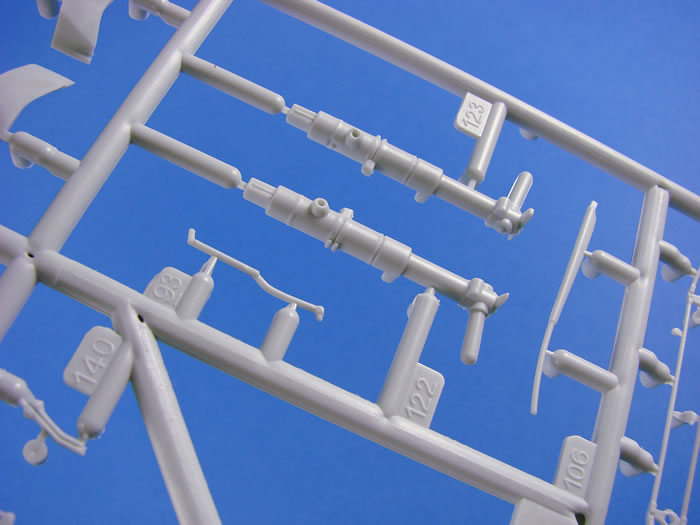
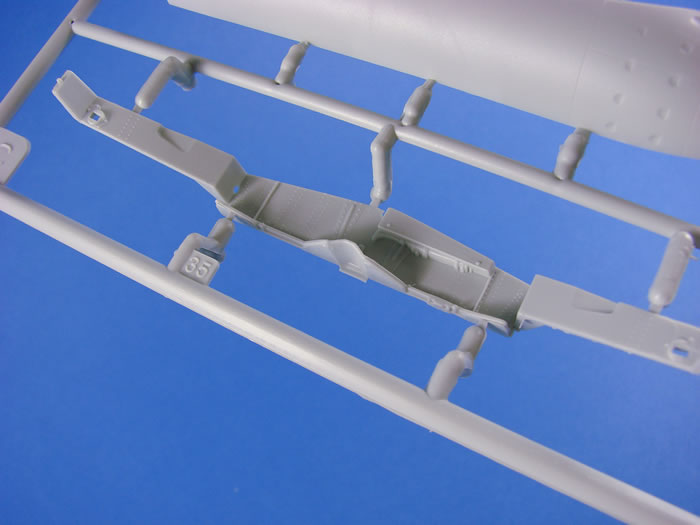
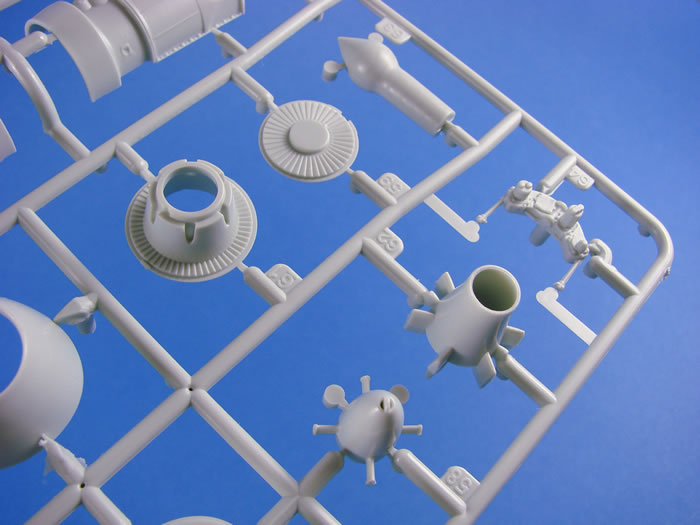
Revell’s representation of the gun bay looks excellent, with a set of very detailed MK108 cannon, complete with feed and ejection chutes and detailed forward and rear bulkheads. Again, the only thing you need to add here is a little wiring on the rear bulkhead, and the cables for the cannon’s electrical firing circuit. The design of the 262 necessitates that the gun bay construction be tackled at the same time as the nose gear well. On the real aircraft, the nose was constructed as a pod, thus the modular construction of this does follow that trend. Of course, the fuselage itself has the associated gun bay cowls moulded separately. Of particular note is the single-piece forward gun cowl, with its slide-moulded muzzle troughs. If you wish to pose the gun bay doors in the open position, you will need to carefully score the inside of the single piece gun bay cover, and separate the three components.
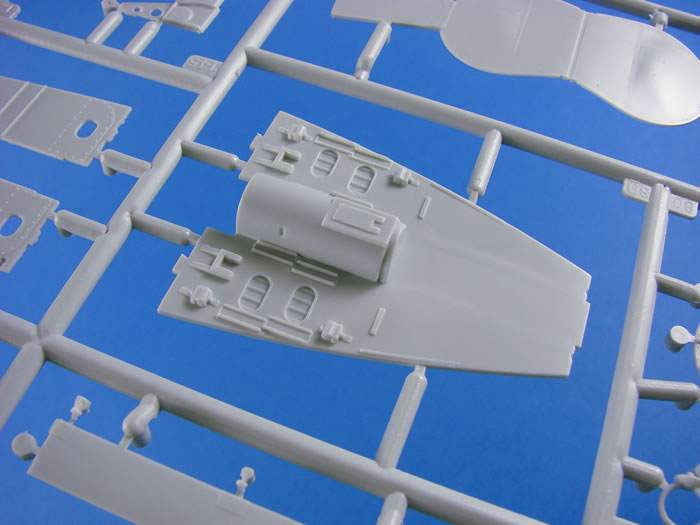
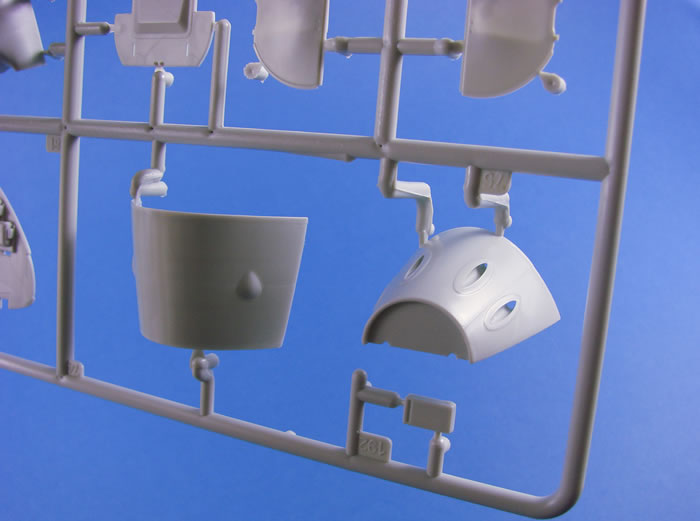
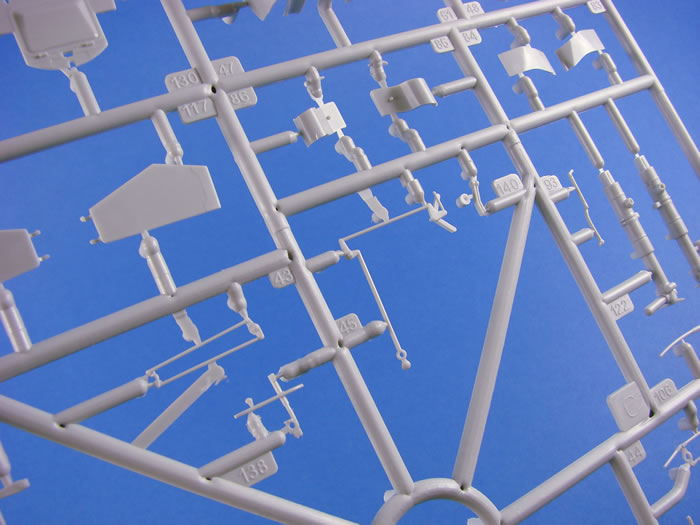
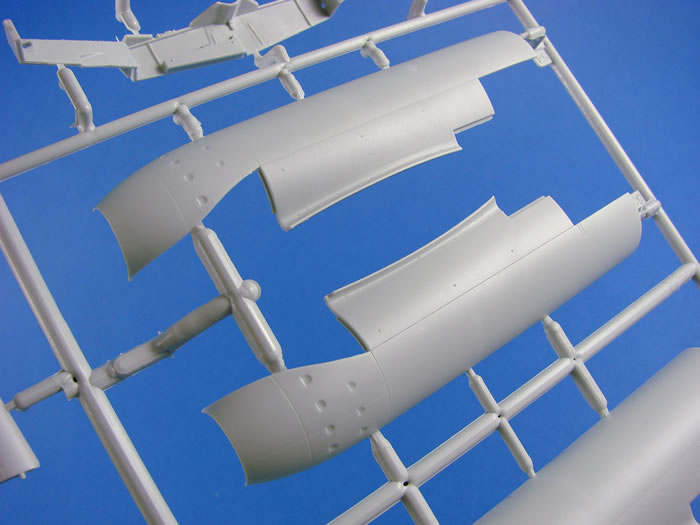
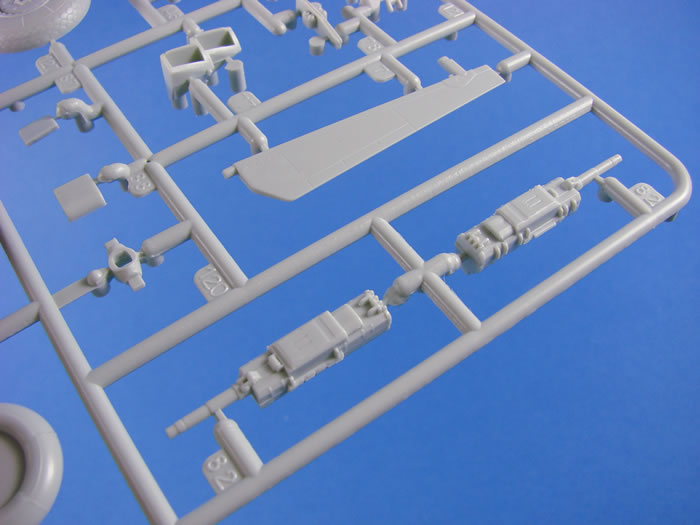
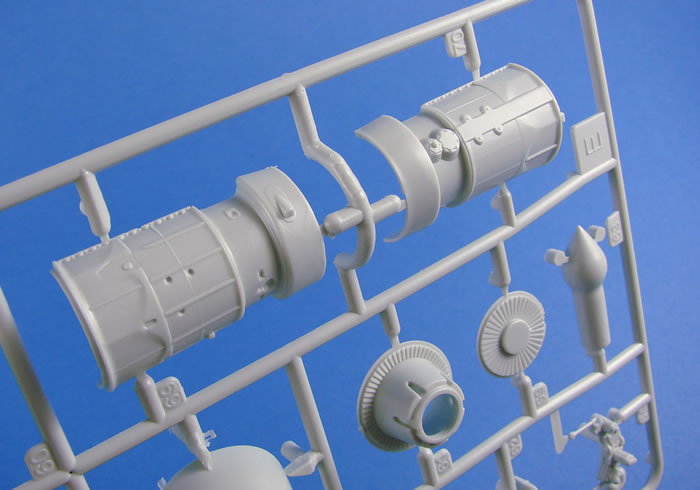
Although Trumpeter include two Jumo004 engines in their releases, there is no real option to display them, whatsoever, unless you use the clear nacelle halves. Not ideal. Now, whilst Revell’s release doesn’t feature separate main engine panels, the forward, upper nacelle cowl is indeed a separate part, and if you remove this, nacelle frame detail can be seen in situ, as well as the engine’s gearbox and pumps. The upper, rear cowl is also a separate part, allowing the engine’s exhaust pipe to be seen if left off. I would have liked to see the ability to display the whole engine beneath the wing, with lugs to mount it directly to the wing, but that’s no criticism as no kit has yet supplied this possibility. If you do want to display the engine, and even through the limited kit possibilities, then you will need to add some plumbing to it. Zoukei-mura made an excellent job in their Ho 229 kit, so if you have this, or check photos of it online, you should be able to get some good reference for simple plumbing.
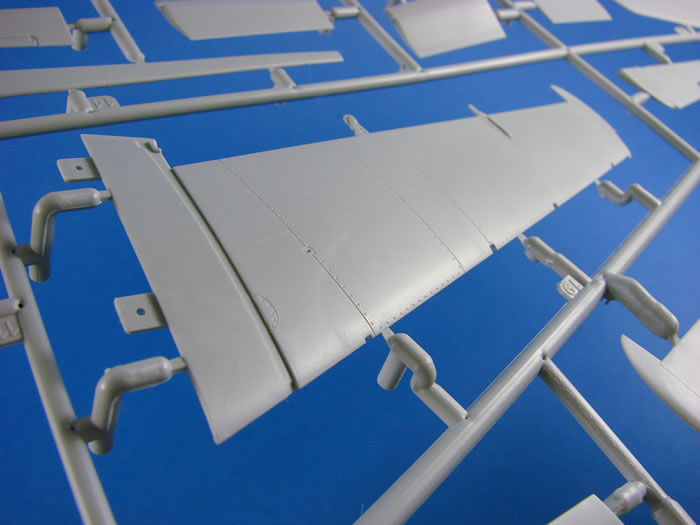
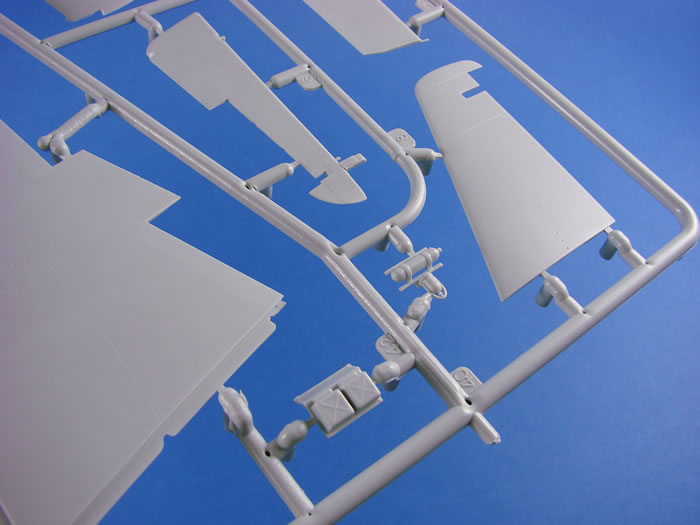
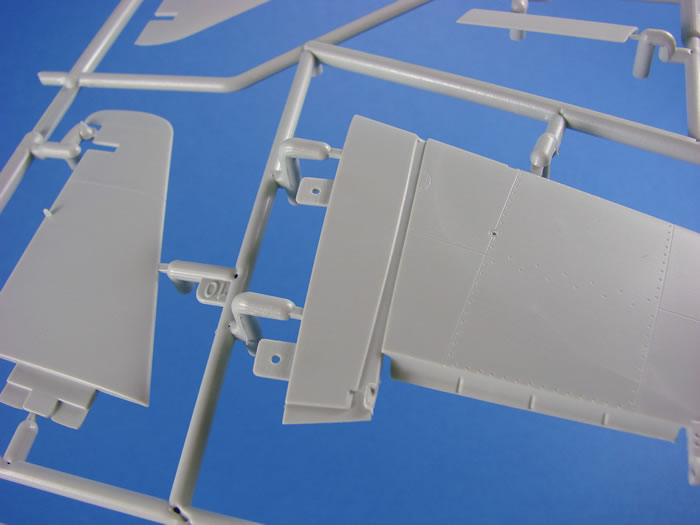
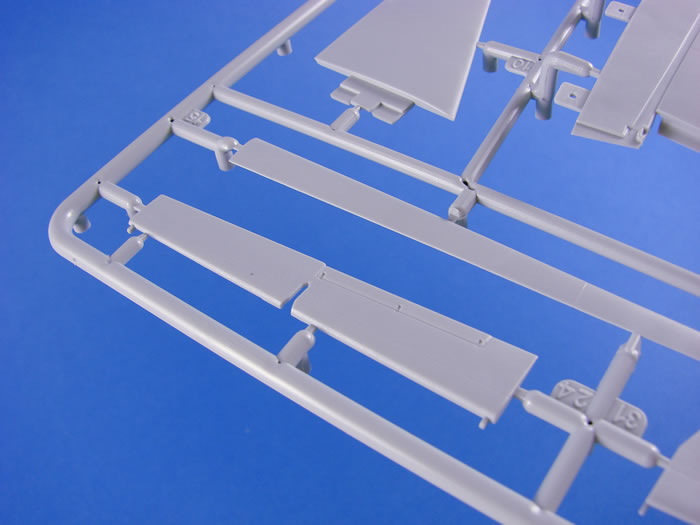
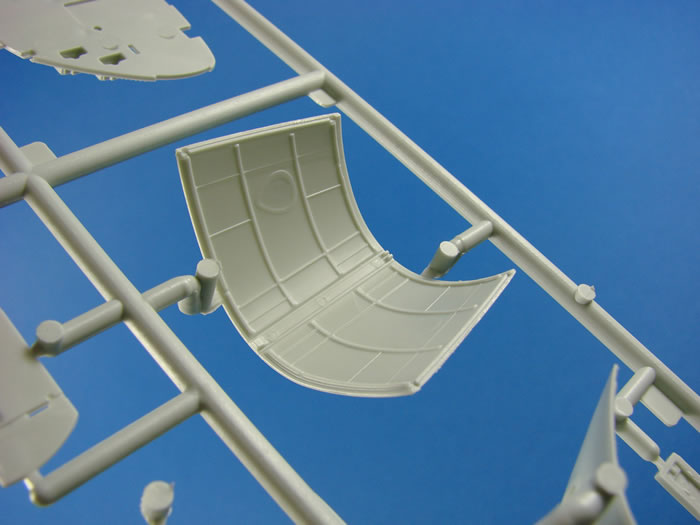
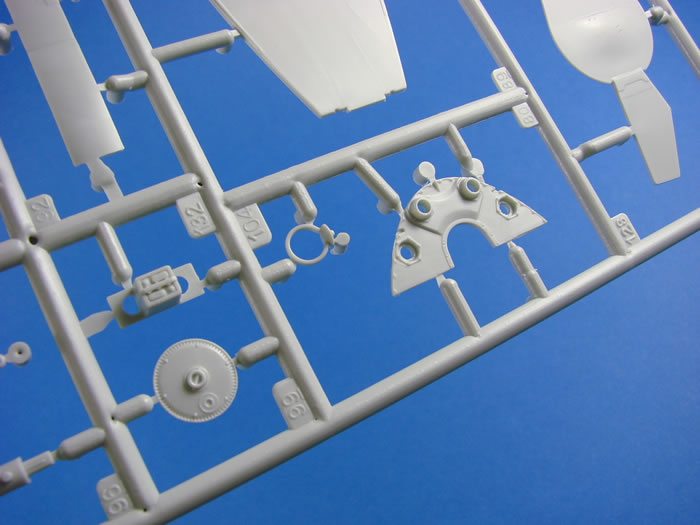
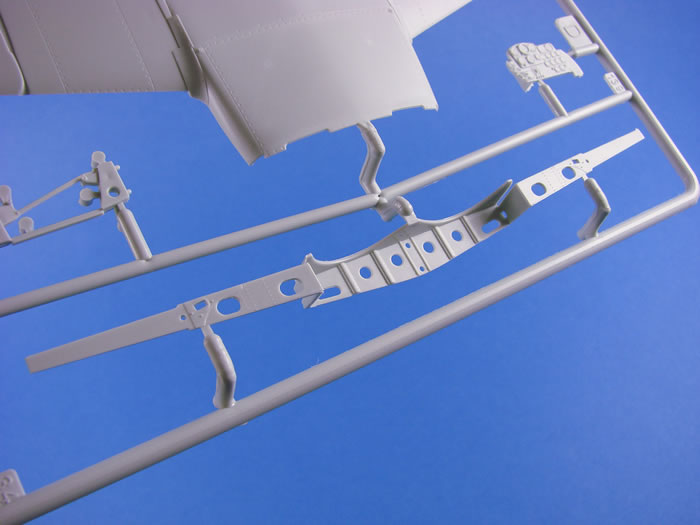
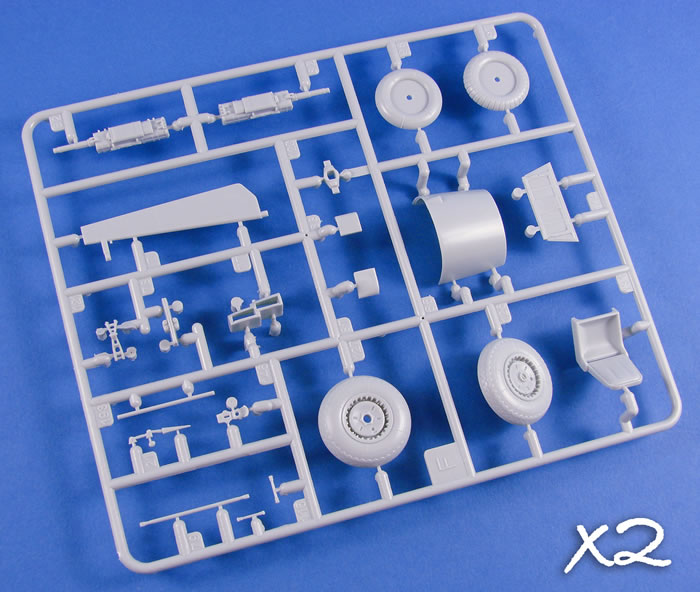
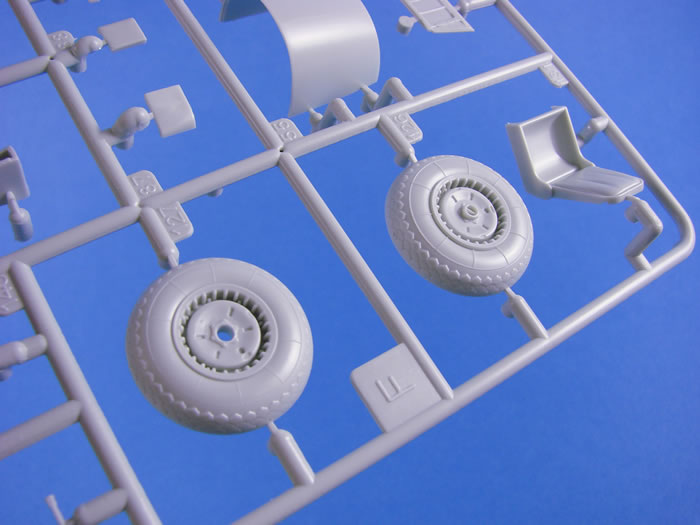
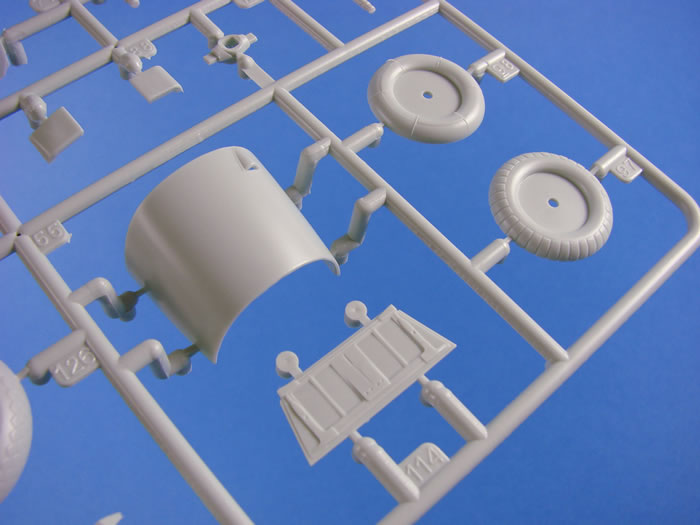
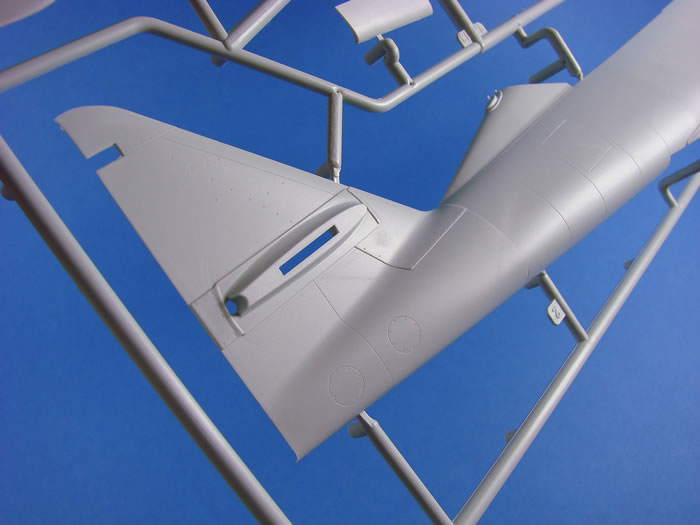
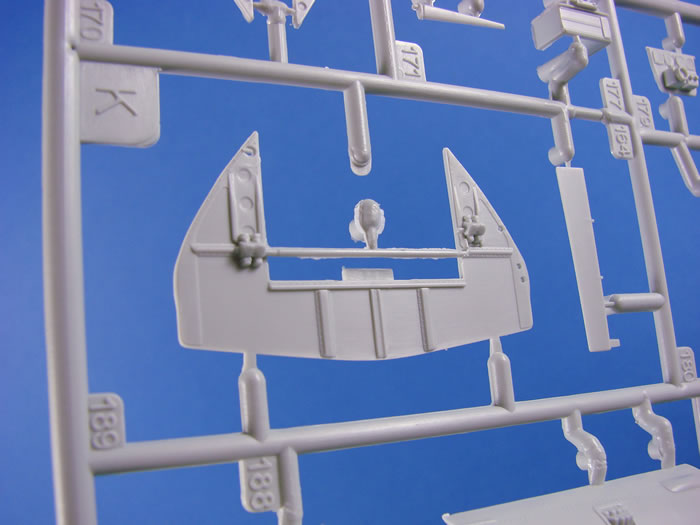
There are a lot of nice touches with this kit, such as the leading-edge slats that can be posed in retracted or deployed positions (some surgery required for retracted), separate ailerons, elevators and rudder with separate trim tab. The forward wheel is moulded with separate hub inserts, but unfortunately, the wheels themselves aren’t weighted. There are two styles of forward nose wheel supplied (smooth and treaded).
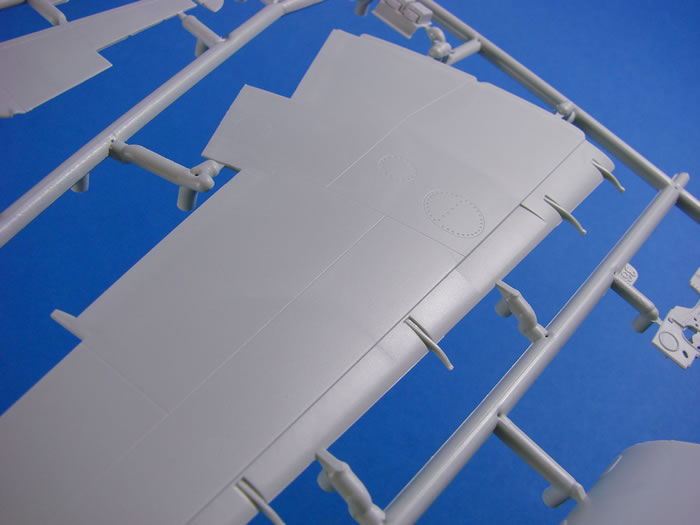
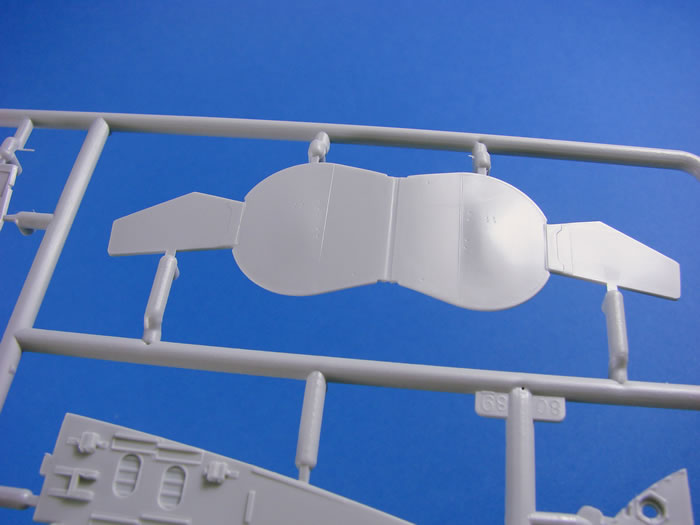
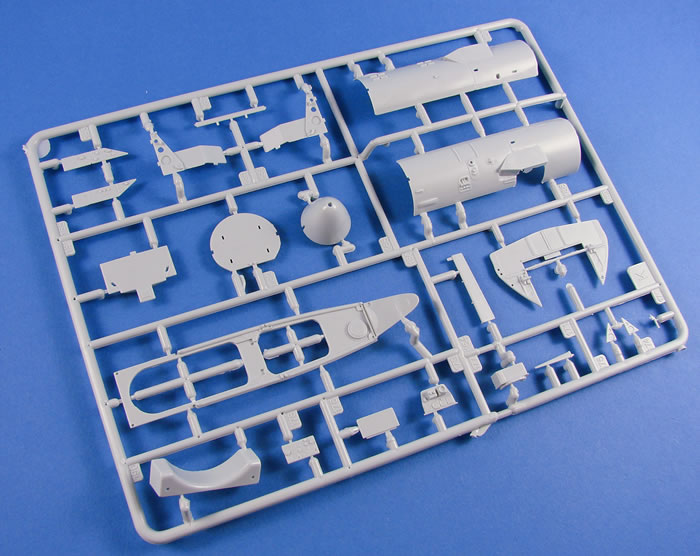
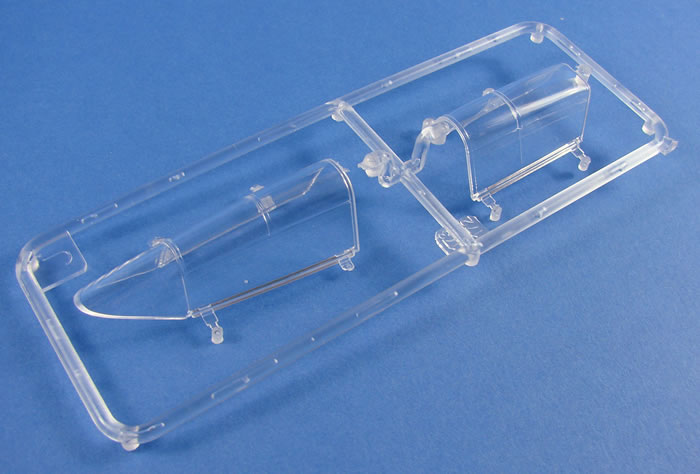
I was a little undecided when I saw the test sprues, with things perhaps looking a little soft in places, but seeing the production kit has allayed any fears about that. With the plastic looking as refined as the best of Revell’s recent releases. Panel lines and ports are refined and whilst the model isn’t riveted, there are a number of fasteners represented in various locations. A very clean-looking exterior that will appeal to most, and still allow modellers like myself to add a little flush-rivet detail, maybe. Moulding quality is also commensurate with new Revell releases, with minimal flash and negligible mould seams. The transparent parts are also crystal clear, albeit with one of my canopy parts detached from the sprue on arrival.
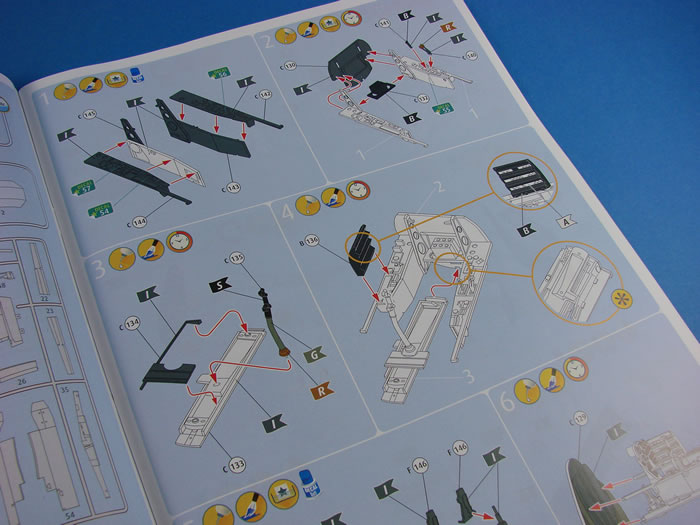
You should have no problem with ejector pin marks as those that exist appear to be tucked out of view and away from detail areas. I’m also very impressed with the new style instruction manual.
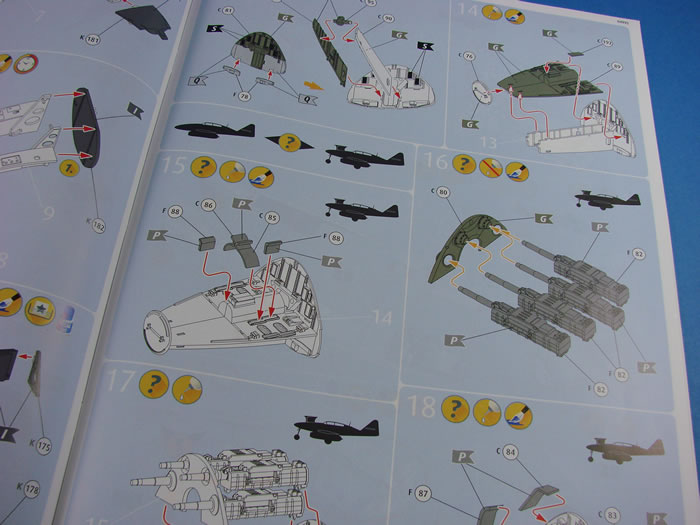
Gone are the busy looking line drawing images, replaced with much clearer images against a pale blue background. I find the appearance of these very akin to the manuals that HpH supply for their resin its, and it gets full marks from me. A colour reference chart and parts map is supplied (Revell paints), and the last four pages are taken up by the colour profiles for the schemes.
Markings
A single decal sheet is supplied, printed by Cartograf, and containing markings for just two schemes:
-
Messerschmitt Me 262 B-1a/U1 Red 12, 10./NJG 11, Schleswig, May 1945
-
Messerschmitt Me 262 B-1a/U1 Red 8, 10./NJG 11. Schleswig, May 1945
Being a RoG kit, you would be correct to assume that no swastikas are supplied, even as halves, so you will need to root through your decal stash to come up with something suitable for these specific machines.
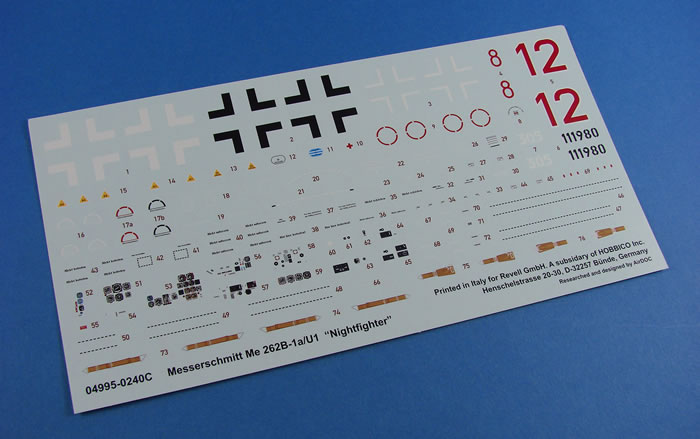
As well as markings, you will also find comprehensive stencil data, as well as instrument decals that are printed in one piece. You might want to consider punching them from the paper and applying them individually. Revell has also supplied some reasonable-looking seatbelts, but using decals for such doesn’t provide a very convincing finish. Consider aftermarket for these.
Printing is clear, solid, thin, and with a relatively small amount of carrier film. Everything is also in register.
I have to say that this is a superb kit, full of detail and clever engineering, and could be built straight from the box with no additional parts. On the other hand, if you wanted to really go to town, then those extra details would make the result absolutely magical. I’m a fan of Revell’s price-point on their 1/32 kits, with this one coming in at an average of only £35. I consider that to be a steal. I’m not going to start looking at shape accuracy, as I know that the designer of this particular release is impeccable with his approach to getting things right, and he worked with a team of extremely knowledgeable people who have intimate knowledge of the subject. Revell really has a winner with their new Me 262B-1/U-1 Nightfighter.
Highly Recommended.
Revell model kits are available from all good toy and model retailers. For details visit www.revell.de/en, @RevellGermany or facebook.com/Revell
Review Text and Images Copyright © 2016 by James Hatch
Page Created 31 January, 2017
Last updated
31 January, 2017
Back to HyperScale Main Page
Back to Reviews Page |
 Home
| What's New |
Features |
Gallery |
Reviews |
Reference |
Forum |
Home
| What's New |
Features |
Gallery |
Reviews |
Reference |
Forum |